Do you want to send an email to all registered users in WordPress?
Sometimes you may need to send a mass email to everyone who has an account on your website. This may include customers, members, subscribers, and even other WordPress users.
In this article, we will show you how to send an email to all registered users in WordPress.
Why and When You Need to Send Email to All Registered Users in WordPress?
If you allow user registration on your WordPress site, then there are a few different reasons why you may need to email all registered users. For example, you might want to let your site’s Authors and Editors know about a new plugin you’ve added to help them write great posts.
If you run an online store, then you may be launching a giveaway or contest in WordPress, exclusively for people who have the ‘Customer’ role.
Depending on how you’ve set up user registration, you may not add all users to your email list automatically. This can make it difficult to contact everyone who uses your site.
Thankfully, there are other ways to bulk message everyone who has an account with your WordPress website.
Now, let’s see how you can easily email all registered users on your website.
How to Make Sure Your Emails Are Delivered Safely
Before we start, you want to make sure that users will receive the emails you send.
Sometimes, your WordPress hosting server may not be properly configured or email providers such as Gmail might use filters and tools that wrongly flag your emails as spam.
With that in mind, we recommend using an SMTP service provider to improve your email deliverability and make sure all registered users receive their messages safely.
WP Mail SMTP is the best WordPress SMTP plugin on the market. It allows you to connect your WordPress site with a mailer service. This means your emails always end up in the user’s inbox, and not in the spam folder.
We recommend buying the paid version called WP Mail SMTP Pro as it allows you to send emails in WordPress using Gmail SMTP, SendLayer, Sendinblue, and more. You can also see the open and click-through rates for your emails, so you can monitor the success of your different email campaigns.
Upon activation, you need to visit the Settings » WP Mail SMTP page.
Here, enter your license into the ‘License Key’ field.
Sending Email to All Registered Users in WordPress
The best way to email all your registered users, is by using Send Users Email. This simple plugin lets you send bulk messages based on the user’s role.
Before you get started with this plugin, you may want to check your user roles. You can then make any changes so that your users are properly organized by role.
When you’re happy with how your roles are set up, the next step is installing and activating the Send Users Email plugin. For more details, please see our step-by-step guide on how to install a WordPress plugin.
Upon activation, go to Email to users » Email Roles in your WordPress dashboard.
Here, you can choose which users will receive the email based on their role on your WordPress blog.
For example, in the following image, we’re messaging everyone who has the ‘Subscriber’ role.
You can now type the email that you want to send to all registered users. The Send Users Email plugin also has a few placeholder tags that you can use to add user information to the message.
For example, you can address the user by name using the {{user_first_name}} placeholder. When Send Users Email creates each email, it will replace the placeholder with the recipient’s first name.
By using a combination of plain text and placeholders, you can send a personalized email to all registered users.
When you’re happy with the information you’ve entered, click on the ‘Send Message’ button.
WordPress will now email everyone who has the selected user role.
How to Email Specific Registered Users in WordPress
The the Send Users Email plugin also lets you send an email to a small group of registered users, or even to a specific user. For example, you may want to send a follow-up email to a particular Subscriber, after sending a bulk email.
To message individual users, simply go to Email to users »Email Users. This shows a list of all your registered users.
To message a user, simply check the box next to their username.
After selecting all the people you want to email, you can go ahead and create your message.
When you’re happy with the message, simply scroll to the bottom of the screen and then click on Send Message.
If you liked this article, then please subscribe to our YouTube Channel for WordPress video tutorials. You can also find us on Twitter and Facebook.
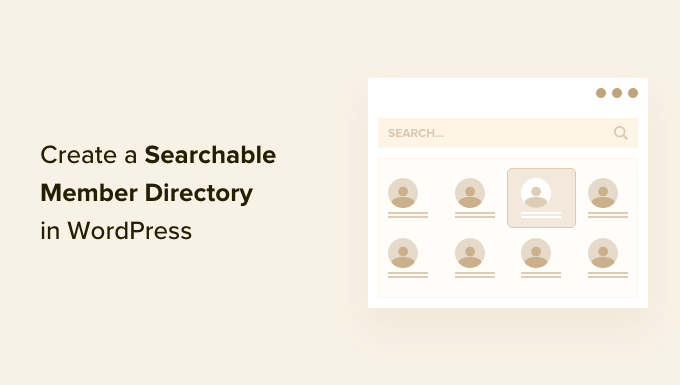
Are you looking to add a member directory to your WordPress website?
Adding a directory to your membership site can help boost your community engagement. It encourages new members to join and make it easy for them to reach out to each other.
In this article, we will show you how to create a searchable member directory in WordPress.
Why Create a Searchable Member Directory in WordPress?
A membership site often brings together users who share common interests. You can create a sense of community on your WordPress website by making it easy for your members to communicate with one another about their shared interests.
You can do this by creating a membership directory. This is a searchable list of the members on your site. It allows your members to see other members’ profiles and contact details.
This will boost your website’s credibility and make it more valuable to your members. It may even help your members feel important and recognized.
However, to protect their privacy, you may want to require each member to opt in before their personal information is displayed in the directory.
While you can use any method to create a membership site, we recommend the MemberPress plugin. It offers advanced membership features and integrates well with the Formidable Forms Directory addon used in this tutorial.
How to Create a Searchable Member Directory in WordPress
The best way to create a member directory is by using the Formidable Forms plugin. It comes with advanced features that let you format, filter, and display user-submitted data on the front end of your website, including your members’ profile information.
It is one of the best user registration plugins for WordPress on the market and can help you easily create a member directory using an addon. Plus, it integrates with MemberPress to give you complete control over your directory’s appearance and functionality.
You can use Formidable Forms to create a profile form where members can enter their information and opt in to the directory. You can also use it to display the searchable member directory itself.
Besides that, you will also be able to use Formidable Forms for all sorts of other purposes on your website, such as creating a booking form or web directory, allowing your clients to request a quote, and more.
With that in mind, let’s see how to create a searchable member directory using the Formidable Forms plugin.
1. Installing Formidable Forms on Your Membership Site
The first thing you need to do is install and activate Formidable Forms Lite, which is the free version of the plugin. Formidable Forms Lite acts as the base for the advanced features of the Pro version.
Next, you will need to visit the Formidable Directory page and click the ‘Get Formidable Directory’ button. You will then be prompted to purchase the Elite plan, which includes the Directory addon.
Before leaving the Formidable website, you will need to copy your license key. You can find it by clicking ‘Account’ at the top of the page.
Now return to your website and navigate to Formidable » Global Settings. Once there, simply click the link that says ‘Click to enter a license key manually’ to paste your license key and then click the ‘Save License’ button.
You are now ready to create a member directory in WordPress.
2. Creating the Formidable Member Directory Application
Next, you must navigate to Formidable » Applications from the WordPress admin sidebar. This page will show you the available application templates.
Once there, you need to find the Member Directory application and click the ‘+ Add’ button to install it.
This will open a popup that describes the Member Directory application.
Simply click the ‘Install Application’ button to continue.
Next, you will be asked to give the application a name.
For this tutorial, we will leave the default name, ‘Member Directory’, and then click the ‘Install Application’ button to continue.
Formidable Forms will now create the pages, forms, and views needed for your member directory. The pages are saved as drafts, so you can customize them before they go live.
Now you need to click the ‘Open Application’ button. This will open the Member Directory application page, where you can customize and publish your directory.
You have now created a ‘User Directory Profile’ form that your members can fill out on the ‘Add a Member’ page.
There is also a ‘Member Directory’ page where you can view the directory in a table view or grid view.
3. Customizing the Member Profile Form and ‘Add a Member’ Page
Next, you may wish to add or remove some fields from the ‘User Directory Profile’ form. This is the form that your members must fill in to be included in the directory.
You may also want to add some instructions to the page where the profile form is displayed before you publish it.
Customizing the ‘User Directory Profile’ Form
The ‘User Directory Profile’ form contains all of the fields needed for most member profiles. You can customize it by clicking the ‘User Directory Profile’ link or hovering your mouse over it and then clicking on ‘Edit’.
This will open the form editor. You will see a preview of the form on the right and the available fields on the left.
The form includes contact details, social links, and more. Some of the fields will be filled in automatically using information from the member’s WordPress user profile. This includes their name, email address, and bio.
To add new fields, simply drag them onto the form from the ‘Add Fields’ column on the left.
You can change the options of a field by clicking on it. This will open the ‘Field Options’ tab on the left, where you can customize the field by changing its settings.
You will find options for the field’s default value in the ‘Advanced’ section. Here you can choose the default value from a list of smart tags. This will take information that the user has already added to their WordPress profile so that it doesn’t have to be entered twice.
When you scroll to the bottom of the form, you will notice it already includes fields for social links and an option where the member can choose to be included in the directory.
Once you have finished customizing the form, simply click the ‘Save Profile’ button to store your changes.
Customizing the ‘Add a Member’ Page
Next, you will need to customize and publish the ‘Add a Member’ page that will display the profile form on your website.
You may need to navigate back to Formidable » Applications » Member Directory to see the page. Then, simply click the ‘Add a Member’ link, or hover over it and click ‘Edit.’
This will open the ‘Add a Member’ page in the WordPress content editor. It simply contains the page title and the Formidable form that you were just looking at.
If you like, you can give the page a different title, such as ‘Join Our Member Directory’.
If you would like to add some instructions before the form, then you should click on the page title and press the Enter key. This will create a new block where you can type those instructions.
When you are happy with the page, then simply click the ‘Publish’ button at the top of the screen to push the page live on your website.
4. Customizing the ‘Member Directory’ Page
Now you can customize and publish the member directory itself. You will need to choose whether to display the members in a grid or table. Then, you must also publish the page so that it is visible on your website.
Customizing the ‘Member Directory’ Page
First, just go back to Formidable » Applications and click on your member directory application.
You will need to publish the draft ‘Member Directory’ page. However, before doing that, you can decide whether that page should display the directory in a grid or table format.
Simply click on the ‘Member Directory’ page to open it in the WordPress editor.
The page contains just the title and the following shortcode that displays the directory:
[display-frm-data id=dir-two-col-grid]
By default, the shortcode will display the directory in a two-column grid.
You can preview the page to see how it will look.
Alternatively, you can display your member directory in a table format.
To do that, you will need to use this shortcode instead:
[display-frm-data id=dir-table-listing-view]
You can preview the page again to see the changes.
This time each member will be displayed on a single line with their information in columns.
Whichever shortcode you choose, clicking on ‘View Profile’ will show you more detailed information about that member.
If you like, you can add additional content to the page. Just make sure to click the ‘Publish’ button to push your member directory live on your website when you are finished.
Adding the Member Directory Pages to Your Navigation Menu
You can make it easier for your members to find or join the directory by adding the ‘Add a Member’ and ‘Member Directory’ pages to your website’s navigation menu.
Also, depending on the type of membership site you have, you may want only your logged-in members to be able to see the ‘Add a Member’ and ‘Member Directory’ pages.
If so, then you will need to create a rule so that only members get access to the pages.
We show you how to do that step by step in our ultimate guide on creating a WordPress membership site. You will just need to scroll down and read Step 6 to learn how to create a MemberPress rule and Step 7 to learn how to add members-only content.
5. Deleting the Sample Data in Your Member Directory
Your member directory contains the sample data that you can see in the screenshots used in this tutorial. This is helpful when setting up your member directory because it lets you see how the profiles will look.
But once you have finished setting up the directory, you will need to delete the sample data.
You need to navigate back to Formidable » Applications » Member Directory and click on the ‘User Directory Profile’ form.
Once the Formidable editor opens, click on the ‘Entries’ tab at the top of the screen to view the sample entries.
Most likely, the only entries listed will be the four sample members. In that case, simply click the ‘Delete All Entries’ button at the top of the screen. All members listed will be deleted.
However, if some of your real members have already created profiles, you must select the sample entries manually.
To do this, you will need to click the checkbox next to each sample member. Next, click the ‘Bulk Actions’ button at the top of the list and select ‘Delete’ from the drop-down menu.
Finally, click the ‘Apply’ button to delete the sample data. Your member directory will now only contain profiles from your real members.
If you liked this article, then please subscribe to our YouTube Channel for WordPress video tutorials. You can also find us on Twitter and Facebook.
Are you looking for WordPress typography plugins to improve your website design?
Your font choice plays an essential role in your web design. Improving your website typography makes your site easier to read and offers visitors a better experience.
In this article, we’ll show you some of the best WordPress typography plugins you can use with your WordPress site.
Why is Typography Important for Your WordPress Site?
Your website typography is a very important part of your overall design. Choosing beautiful and easy to read fonts will increase your website engagement and boost the time your users spend on your site.
Many of the best WordPress themes come with access to Google Fonts and allow you to tweak the typography to suit your needs.
There are built-in settings within the post and page editor that give you more control over your fonts and layouts.
However, there’s a lot more you can do with your typography, like add subtitles, use drop caps, include footnotes, let users resize fonts, and much more.
By choosing the right WordPress plugins, you can improve the typography on your WordPress website without writing any code.
Having said that, let’s take a look at some of the best WordPress typography plugins that you can try on your website.
Google Fonts for WordPress has a library of over 1,455 stylish fonts that you can use on your WordPress site. It comes with a live preview for each font to help you select the font for your headings and content.
The plugin has Adobe Fonts integration and also supports thousands of Google Fonts. You can also upload custom fonts and change font size, color, weight, and line height in the plugin settings.
wp-Typography is a free WordPress typography plugin. It gives you more control over special characters like hyphens, ellipses, trademark symbols, fractions, and more.
The plugin supports over 70 different languages and can help to provide an improved reading experience for your visitors.
Zeno Font Resizer gives your visitors the option to change the font size on your website with a couple of clicks. This can improve your user experience for those who prefer larger text.
The plugin makes it easy to add a font resize option to your WordPress sidebar. It also uses jQuery, so your visitors can adjust the font without the page reloading.
Page Title Splitter is a unique plugin that lets you split longer post titles into two lines. This lets you use longer and more descriptive post titles while making sure they’re still readable.
This works for all posts, pages, and custom post type titles. It gives you complete control over the layout of your title on desktop and mobile devices.
Secondary Title is a simple plugin that lets you add subtitles to your posts and pages. This is common with popular websites like Buzzfeed, Medium, Mashable, and more.
Adding secondary titles, or subtitles, lets you explain your title and gives you a better chance to hook your readers and encourage them to read your content.
Toolkit for Block Theme is a WordPress block editor plugin to customize your theme design and styles. It lets you change fonts, integrate Google Fonts, and use additional global styles to make a perfect website for your business.
It gives you the option to host Google Fonts locally, so you can import any font family and use it on your website. The plugin has several other options for WordPress block themes.
Editor Plus is an advanced WordPress customization plugin. It comes with typography controls and a panel to manage your font properties.
The plugin lets you change the font weight, font style, font size, letter spacing, line height, and color. You can also control the font display on different screen sizes and devices easily.
Text Hover is a plugin that lets you add a text hover box to your content and make your site more interactive.
This can be helpful when displaying phrases, definitions, explanations, acronyms, and more. It helps to give your readers more context when reading your articles.
Font Awesome lets you add icon fonts to your website. Icon fonts are simple pictograms you can use to improve your buttons, feature boxes, navigation menus, and more.
OMGF is a plugin that will optimize your Google Fonts. It lets you host your fonts locally to speed up loading times.
The plugin helps to minimize DNS requests, reduces layout shifts, and leverages browser caching to improve performance. It’s very beginner friendly and runs quietly in the background.
SeedProd is the best WordPress theme and website builder on the market. It comes with ready-made template kits that you can use to launch your website in just a few clicks.
You can even use the dynamic text feature to create animated headlines to attract your visitors. Plus, you get access to the entire Google Fonts library to use on your website.
Thrive Themes has a popular WordPress website builder and offers a powerful suite of tools to grow your online business. It’s a 1-stop solution for beginners to set up a business website and add growth tools all at once.
Thrive Builder lets you customize font styling, font size, and font color within the website builder settings. You can also integrate any custom font plugin with Thrive Themes to add more fonts to your WordPress site.
Thrive Builder lets you change the default source to import fonts, and you can add new fonts of your choice easily.
There’s a unique caching option that will optimize your Google Fonts with a single click. If you run a website speed test, this is one of the most common speed issues users report.
If you liked this article, then please subscribe to our YouTube Channel for WordPress video tutorials. You can also find us on Twitter and Facebook.
If you’re comparing different website builders, then you may have come across the sentiment that WordPress is hard to use.
WordPress is the world’s most popular website builder powering over 43% of all websites on the internet. However, some people complain that WordPress is more difficult to use than solutions like Squarespace and Wix.
In this article, we’ll address the myth of why WordPress is so hard, and share the tricks, tools, and techniques you can use to harness the full power of WordPress without any difficulties.
Why is WordPress So Hard?
Over 43% of all websites on the internet are built on WordPress. This might make you wonder:
Why are so many people using a difficult platform?
Unlike website builders such as Squarespace, WordPress is completely open source, customizable, and flexible. You can use WordPress in any way you want, which might sound confusing for new users.
This is particularly true if you’ve previously used a website builder like Wix.com. These platforms typically have limited features and control exactly how you use their tools. This might make it seem like that they’re easy to use, but they are also very restrictive.
With the right techniques, tools, and information, WordPress is just as easy as any website builder, but without any of the restrictions.
By choosing WordPress, you’ll get the freedom to use any web host and domain provider, so you can update, customize, and extend your WordPress website in exactly the way you want.
In the official WordPress repository alone, you’ll find over 60,000 free plugins that can add all sorts of features to your website. Think of plugins like apps in your iPhone except they’re for your websites.
When it comes to designing your site, you can use any free or premium theme, or even use drag & drop page builders to create a completely unique design.
There are no provider terms and conditions to follow, and you own all the content on your site.
With that in mind, let’s take a look at why nearly half of all website owners in the world ignore the myth that WordPress is hard to use and choose WordPress as their platform.
WordPress Isn’t Hard (But Here’s How to Make it Even Easier)
At WPBeginner we don’t believe that WordPress is hard. However, if you don’t have the right tools, tricks, and know-how, then WordPress can feel more complex than it actually is.
With that in mind, let’s see how you can make WordPress easier. You can use the links below to jump to any section of the post.
By choosing the best WordPress hosting, you can set your site up for success. The right host will provide exactly the features you need to build and run a successful WordPress website, even if you have no previous experience.
Some hosts even perform crucial WordPress maintenance tasks such as creating backups, adding security plugins, and installing updates. This will make WordPress feel effortless.
For example, Bluehost is a well-known WordPress hosting provider that automatically installs and set up WordPress for you when you sign up.
From time to time, you may encounter problems or have questions.
A good host will offer support over email, phone, live chat, and other channels so you’ll have no problems getting your site back on track.
As the world’s most popular CMS, there are lots of companies that offer WordPress hosting. For that reason, we’ve done the research and created a list of the best web hosting companies to help you find the provider that’s right for you.
Here are the top WordPress hosting companies that we recommend:
Bluehost – great for beginners – includes free domain.
Hostinger – growing fast in popularity due to affordable prices, fast speed, includes free domain.
The best part about WordPress is that you can easily add any feature to your site using plugins, without hiring a developer.
There are eCommerce plugins to help you create an online store, plugins that turn WordPress into a membership site so you can sell courses, add smart lead generation forms to grow your business, improve your SEO rankings, and much more.
In fact, there are over 60,000 free plugins in the official WordPress repository alone, so you’ll have no problems finding a plugin that meets your exact needs.
Just like plugins, there are countless free themes to choose from. In fact, there are over 10,500 free themes in the official WordPress repository alone.
It’s important to choose a theme that looks good, has the features you need, and is also high quality. To help you make the right decision, see our guide on how to select the perfect WordPress theme.
When building your site, you’ll create posts and pages using the WordPress block editor.
If you’re using a block-enabled theme such as Divi or Astra, then you can also add content using the full-site editor.
This editor allows you to completely change the theme layout and add new sections to your website without writing any code.
This is a great start, but it can be very basic and has a limited number of features.
We still recommend using a page builder plugin such as SeedProd. SeedProd allows you to create completely custom page designs and comes with ready-made blocks that you can drag and drop anywhere on your site.
This includes advanced blocks like countdown timers, contact forms, Google Maps, payment fields, and much more.
After adding a block to your site, you can customize it using the settings in the left-hand SeedProd menu.
Most visitors will find your site through search engines like Google. To help search engines show your content to the right people, you’ll need to work on your WordPress SEO.
SEO is a huge topic that often includes technical tasks such as adding rich snippets schema markup to your site.
Thankfully, there’s a WordPress plugin for everything and SEO is no exception. There are lots of different WordPress SEO plugins and tools you can use for individual tasks, but we recommend AIOSEO as it’s the complete SEO toolkit for WordPress.
AIOSEO comes with powerful features including breadcrumb navigation, advanced eCommerce SEO support for WooCommerce, local SEO, an internal link assistant, and much more. This means you don’t have to set up and learn multiple SEO plugins.
AIOSEO also scans your pages and posts as you’re writing them and creates a checklist of ways to improve its SEO.
To provide a good experience, your website needs to load quickly.
WordPress is already optimized for speed and performance, but there are lots of tricks and tools that can make it run even faster. With that in mind, we’ve created the ultimate guide to boost WordPress speed and performance that has everything you need to know.
Set up an Automated Security Plugin
WordPress is secure software, but hackers are always coming up with new ways to break into sites and steal data. To help new WordPress users keep their sites safe, we’ve created an ultimate WordPress security guide.
Sucuri tracks everything that happens on your site, including failed login attempts and any changes to the WordPress files.
It also scans for malware and monitors whether your site appears on any blocklists, as this may mean there’s a problem with your site’s security.
If it finds an issue, then Sucuri will notify you automatically. In this way, you can protect your site without having to perform any manual checks, or learn complicated security tools.
As a website owner, your goal is to get people to your site and keep them engaged. That’s where Google Analytics comes in.
Analytics allow you to make decisions based on real data. For example, you can track website visitors and see the content that gets the most engagement. You can then create more of this popular content.
You can also see how long visitors stay on your site and the bounce rate, which is the percentage of users who exit your site on the first visit. You can use this information to increase pageviews and reduce bounce rate in WordPress.
Google Analytics is an important tool, but it can be complicated to set up. For that reason, we recommend using MonsterInsights.
Spambots and malicious third parties can easily flood a site’s comment section with links to malware and low-quality pages. This can hurt your website’s reputation and may even affect its SEO.
You can moderate comments in WordPress directly from the dashboard, including manually approving and blocking comments, or even deleting them completely.
However, moderating every single comment can be time-consuming, especially as your site grows and attracts more visitors.
WordPress is open-source software so anyone can see and edit its code, or even add their own PHP, JavaScript, CSS, and HTML. It may sound complicated, but there are lots of reasons to add custom code to WordPress.
WPCode is the best code snippets plugin for WordPress and allows you to add custom PHP, JavaScript, CSS, and HTML without editing any theme files.
WPCode also has a built-in library of snippets that you can add to a site with just a few clicks. Even if you’re a beginner with no coding experience, WPCode makes it easy to add custom code in WordPress in a safe way.
Keep Your WordPress Site Up-To-Date
It’s important to keep your themes, plugins, and core WordPress software up-to-date. Hackers try to exploit known errors and vulnerabilities in outdated software, so if you fall behind then your site could become an easy target.
Some updates even add features that make WordPress easier to use. For this reason, it’s important to update WordPress core, update your WordPress plugins, and install the latest version of your theme.
Some web hosts will install these updates for you automatically, especially if you’re using a managed hosting provider.
WordPress is secure and reliable software, but it’s still a good idea to create regular backups.
Accidents and mistakes happen, such as deleting important content or editing the wrong page. Malicious third parties may also try to break into your site and delete your content.
By creating regular backups, you can always recover a working and error-free version of your website. Even if the worst happens and you lose all your data, you can simply restore your WordPress website from its latest backup.
They may be important, but many website owners overlook backups until it’s too late.
The good news is there are many free and paid WordPress backup plugins that can do the hard work for you. We recommend using a premium plugin like Duplicator Pro as it can create backups automatically.
For added security, Duplicator Pro will save your backups to popular online storage solutions like Dropbox, OneDrive, or Amazon S3. This means you can log into these services from any location, and get access to a working copy of your website.
For this reason, many website owners don’t take the time to learn more about WordPress. We think this is a big mistake.
By continuing to learn you can often make WordPress even easier to use. With that in mind, here are just some of the free resources you’ll find on WPBeginner:
WPBeginner Blog. This is where we publish our WordPress tutorials, how-tos, and step-by-step guides. We have a huge library of free content, and we’re publishing new information all the time.
WPBeginner Dictionary. Complicated terms and technical jargon can make WordPress seem a lot harder than it is. For that reason, we’ve created a directory that covers all the WordPress lingo.
WPBeginner Videos. Our step-by-step WordPress 101 video tutorials have everything you need to get started with WordPress.
WPBeginner on YouTube. Enjoyed our WordPress 101 series and want to learn more? You’ll find over 900 more videos on our YouTube channel covering everything from SEO, to common WordPress errors and how to fix them, how to embed dynamic social media feeds on your site, and much more.
WPBeginner Engage Group. The largest and fastest-growing WordPress group for non-techies and beginners on Facebook. Here, you can connect with over 91,000 WordPress users, ask questions, and get support from the community.
Consider Hiring a WordPress Maintenance Service
The tips and tricks in this guide will make WordPress feel effortless, even if you’ve never created a website before.
However, if you’re looking for the ultimate hassle-free experience then you can always hire a maintenance service to take care of WordPress for you. This includes creating backups, installing updates, performing SEO audits, upgrading your site’s security, finding and fixing broken links, and more.
These services are perfect for first-time WordPress users or anyone who finds that day-to-day website maintenance takes too much time. If you want to hire a WordPress expert, then see our pick of the best WordPress website maintenance services.
If you liked this article, then please subscribe to our YouTube Channel for WordPress video tutorials. You can also find us on Twitter and Facebook.
Do you want to add interactive 360 degree images to your WordPress site?
You can use interactive 360 degree images to create virtual tours or give shoppers a way to see products from every angle. As Virtual Reality (VR) gets more popular, you can also use these images to create fun and engaging experiences for your visitors.
In this article, we’ll show you how to easily add interactive 360 degree images in WordPress.
Why Use Interactive 360 Degree Images in WordPress?
If you run an online store, then high-quality product images are an important way to get more sales.
Some large brands take this to the next level by creating an interactive 360 degree image that allows shoppers to explore a product from every angle.
This is much more engaging than asking customers to scroll through multiple photos showing the item from different angles.
If you have a real estate website, then you can use 360 images to create virtual tours, so potential buyers can explore the property. This can help convince people to book appointments and viewings.
You can also use 360 degree images to create new and engaging experiences. For example, if you have a travel blog then readers can use interactive images to explore different locations.
With that being said, let’s see how you can add an interactive 360 degree image to your WordPress blog or website.
Method 1. How to Add a 360 Degree Interactive Image in WordPress
The easiest way to add 360 degree rotating images to WordPress is by using Algori 360 Image. This free WordPress plugin simply adds a new block to the block editor, which makes the plugin very easy to use.
First, you need to install and activate the Algori 360 plugin. For more details, see our step-by-step guide on how to install a WordPress plugin.
Upon activation, there are no settings for you to configure so you can start using the plugin straight away.
However, the plugin doesn’t help you create a 360 degree image, only display it. So you’ll need to use a smartphone app or web design software to create the image.
Once you have a 360 degree image, simply go to the post or page where you want to show that interactive image.
Here, click on the ‘+’ button and start typing ‘360 Image.’ When the right block appears, give it a click to add it to the page.
You can now click on ‘Media Library.’
Next, either choose the 360 degree image from the library or upload a new file from your computer.
Depending on the size of the 360 degree image, you may need to wait for WordPress to process it. After a few moments, you’ll see the 360 degree image in the post editor.
You can then simply click the ‘Update’ or ‘Publish’ button to make the image live.
Now, if you visit your WordPress website you can drag to rotate the 360 degree image.
If you have a VR headset, then you can click on the ‘VR’ button to explore the 360 image in virtual reality.
Method 2. How to Add a 360 Degree Product Image to Your WooCommerce Store
Interactive images allow shoppers to see a product from every angle, so they’re particularly useful for online marketplaces and stores.
If you have a WooCommerce store, then SR Product 360° View allows you to create a 360 degree rotating product image for every item in your store.
Simply take a photo of the product from every angle, and then upload the pictures in the order you want to show them.
The plugin will then combine these images into a 360 degree rotating animation that shoppers can see on your WooCommerce product page.
First, you’ll need to install and activate the SR Product 360 view plugin. If you need help, then please see our guide on how to install a WordPress plugin.
Then, go to Products »All Products and open the product where you want to add a 360 degree image.
In the product editor, scroll to the new Product 360 Degree View section. Here, click on the ‘Add 360 images’ button.
You can now select all the images you want to include in the 360 degree animation.
Make sure you select the images in the order they should appear in the animation.
SR Product 360° View will now show all these files in the Product 360 Degree View section. You can change the order of the images by using drag and drop.
When you’re happy with these images, either click on the ‘Update’ or ‘Publish’ button to make the 360 degree animation live.
Bonus: Want to take your WooCommerce store to the next level? Try using FunnelKit funnel builder and automation platform that lets you add dynamic upsells, cross-sells, order bumps, and full sales funnel in WooCommerce.
If you liked this article, then please subscribe to our YouTube Channel for WordPress video tutorials. You can also find us on Twitter and Facebook.
Note: YouTube Feed also has a free version. However, it does not support the Live Stream feature.
Once the plugin has been activated, you need to visit the Youtube Feed » Settings page from the admin sidebar. Here, you need to enter the license key and click on the ‘Activate’ button.
You can get the license key from your Accounts page on the Smash Balloon website.
Next, you need to visit the YouTube Feeds » All Feeds page from the WordPress admin sidebar.
From here, simply click on the ‘Add New’ button at the top.
This will open up the ‘Select Feed Type’ prompt.
Now, you need to choose the ‘Live Streams’ option and then click on the ‘Next’ button to continue.
On the next step, you need to connect YouTube Feed Pro with your Youtube account. You will be asked to provide your YouTube API key.
If you already have an API key, simply copy and paste it into the ‘Enter API Key’ box and click on the ‘Add’ button.
Create a YouTube API Key
If you don’t have an API key yet, then you need to go to the Google Cloud Console and sign in using your Google account.
Once you are logged in, click on the ‘Select a project’ button at the top.
This will open a popup window that will display all the projects that you have created.
Next, simply click on the ‘New Project’ button at the top.
This will take you to the ‘New Project’ page, where you can start by typing in a name for your project. This can be anything that will help you easily identify it.
Next, you must also select an ‘Organization’ and its location from the dropdown menu. You can select ‘No Organization’ and click the ‘Create’ button to continue.
Once the project has been created, you will be taken to the project dashboard.
From here, you need to click on the ‘+ Enable APIs And Services’ button in the top menu.
This will take you to the API Library page. It shows the different Google services that you can create APIs for and use in your projects.
Now go ahead and search for ‘YouTube Data API v3’ in the search box.
Once the ‘YouTube Data API v3’ result shows up, just click on it.
This will take you to a new page where you need to click on the ‘Enable’ button to activate the YouTube API key.
You’ll now be taken to the ‘API/Service Details’ page.
From here, simply click on the ‘Create Credentials’ button at the top.
Next, you’ll be directed to a new page where you must check the box next to the ‘Public Data’ option.
After that, click on the ‘Next’ button to create your API.
Your API Key will now be created and displayed on the page.
Simply copy the API key and click on the ‘Done’ button.
Next, it is time to head back to the WordPress dashboard.
Go ahead and paste the API key into the API Key Required box. Then, click on the ‘Add’ button to continue.
Add the YouTube Live Stream to Your WordPress Website
Once you’ve added your YouTube API key, you will be redirected to the ‘Select Feed Type’ page.
From here, you need to click on the ‘Live Stream’ option again, followed by the ‘Next’ button.
This will open the ‘Add Channel ID For Live Stream’ page.
Now, you need to visit the YouTube channel that contains your live-stream videos.
From here, go ahead and copy the text that comes after ‘/channel/’ or ‘/user/’ in the URL at the top.
Next, switch back to the WordPress dashboard and paste the code into the ‘Add Channel ID for Livestream’ box.
After that, click on the ‘Connect’ button to connect your YouTube channel with WordPress.
Once the channel is connected, you need to click on the ‘Next’ button to continue.
Customize Your YouTube Feed
Now that your YouTube live stream feed has been created, you can customize it. Smash Balloon’s YouTube Feed Pro offers many different display options.
First, you will need to choose a template on the ‘Start with a template’ page. You can choose from Default, Carousel, Cards, List, Gallery, and Grid layouts.
Once you have made your choice, simply click on the ‘Next’ button.
After you have chosen a template, an editing screen will open up that displays a preview of your YouTube feed to the right and customization settings in the left menu column.
Here, you can start by expanding the ‘Feed Layout’ panel.
On this screen, you can switch between the layouts.
You may also be able to configure additional settings depending on your chosen layout.
Next, you need to click on the ‘Color Scheme’ panel.
By default, YouTube Feed Pro uses the same color scheme as your WordPress theme. However, you can also use a ‘Light’ or ‘Dark’ color scheme for the video feed.
You can also design your own color scheme by clicking on the ‘Custom’ option and then using controls to change the background, text, and link colors.
To add a header to your YouTube feed, you need to visit the ‘Header’ panel. From here, simply toggle the ‘Enable’ switch to activate the header.
You can also use the controls to switch between standard and text header styles. Choosing the ‘Text’ option will allow you to change the text size and color.
You can also customize the appearance of the video player by going to the ‘Videos’ panel.
Here, you will see a list of options.
To customize the video layout and individual properties, you need to visit the ‘Video Style’ settings panel.
Here, you can select the video layout, background color, and border.
After that, open the ‘Edit Individual Elements’ panel. Here, simply check the boxes next to the elements you want to display along with the YouTube live stream videos.
You can show or hide the Play icon, video title, live stream countdown, descriptions, and more.
Next, you need to head over to the ‘Hover State’ setting. Here, you can choose the individual elements that will display when the user hovers their mouse over the YouTube video.
You can pick many elements, including video title, description, date, views, and more.
After that, you need to visit the ‘Video Player Experience’ panel.
From here, you can change the video player’s aspect ratio. You can also choose whether the video will start playing automatically or wait until the visitor clicks the play button.
After customizing the individual video elements, switch to the ‘Load More Button’ panel.
Here, under the ‘Load More Button’ setting, you can switch the toggle to ‘Enable.’ This will display more video suggestions after the live stream.
You can also choose the background color, hover state, and text from the settings in the left panel.
After that, switch to the ‘Subscribe Button’ panel and toggle the switch to ‘Enable’ if you want to activate the YouTube subscribe button.
You can also change the button’s color, text, and hover state in the settings.
Once you have customized the YouTube live feed, you can preview how it will look on desktop computers, tablets, and smartphones. Simply click on the different buttons in the upper-right corner to preview the feed on different devices.
Finally, don’t forget to click the ‘Save’ button at the top to save your changes.
Embed the YouTube Live Stream on a WordPress Page
The next step is to embed your YouTube live feed on a WordPress page. To do this, you must first click on the ‘Embed’ button at the top.
This will open up the ‘Embed Feed’ prompt. Here, click on the ‘Add to a Page’ button to continue.
The popup will now show a list of all the WordPress pages on your website.
Simply choose the page where you want to embed the YouTube live stream and click the ‘Add’ button.
The page you selected will now open up in the block editor.
From here, you need to click the ‘Add Block’ (+) button in the top left corner and search for the ‘Feeds for YouTube’ block.
Once you have found it, add the block to your page by clicking on it.
Don’t forget to click on the ‘Update’ or ‘Publish’ button to save your changes or make them live.
This is how the YouTube live feed looks on our demo website.
Add a YouTube Live Feed as a Widget
You can also add a YouTube live feed to the WordPress sidebar as a widget.
First, you will need to visit the Appearance » Widgets page from the admin sidebar.
From here, click on the ‘Add Block’ (+) button in the top left corner of the screen and locate the ‘Feeds for YouTube’ block.
Next, click on the block to add it to the widget area.
Don’t forget to click on the ‘Update’ button to save your changes.
This is how the YouTube live feed looks in the sidebar on our demo website.
First, go to the Appearance » Editor page from the admin sidebar to launch the site editor.
From here, click on the ‘Add Block (+)’ button at the top and look for the ‘Feeds for YouTube’ block.
Next, you can drag and drop the block to wherever you want to display the YouTube feed on your page.
Once you are done, don’t forget to click on the ‘Save’ button to apply the changes.
Here is a preview of the live streams on our demo website.
We hope this article helped you learn how to embed YouTube live streams in WordPress. You may also want to read our ultimate WordPress SEO guide or check out our top picks for the best social media plugins to grow your site.
If you liked this article, then please subscribe to our YouTube Channel for WordPress video tutorials. You can also find us on Twitter and Facebook.
Are you looking for a way to display featured comments on your WordPress website and hide other comments?
Featuring comments that are encouraging and exciting at the top of the WordPress comments section can increase user engagement. You can also easily discourage offensive or irrelevant comments by burying them.
In this article, we will show you how to easily set up featured comments in WordPress.
Why Feature/Bury Comments in WordPress?
WordPress comments are an excellent way to increase user engagement on your website.
However, fostering a large community can be a challenge as your WordPress blog grows.
You want to make sure that you are rewarding users who are adding the most value to the discussion while at the same time politely discouraging other users from leaving unhelpful comments.
For instance, a user may have posted a self-promotional comment that contains a link to their blog. Or multiple users might have posted comments that do not add value to the discussion.
To improve comments quality on your website, you can feature the comments that add value to the topic at the top of the discussion and bury irrelevant comments at the bottom.
You can also add an upvote/downvote feature to your comments section, similar to popular social media platforms like YouTube, to increase user engagement.
That being said, let’s see how you can easily feature/bury comments in WordPress.
Method 1: Feature/Bury Comments Using the Thrive Comments Plugin (Recommended)
In this method, we will show how to bury/feature comments using the Thrive Comments plugin.
It is the best WordPress comments plugin on the market that helps you build an engaged and interactive community on your WordPress website. It also enables you to feature/bury comments in your discussion section.
To get started, you will need to visit the Thrive Comments website and sign up for an account. Then, head to your member dashboard.
From here, go ahead and click on the ‘Download and install the Thrive Product Manager plugin’ link.
Next, you have to visit your WordPress website dashboard to install and activate the Thrive Product Manager plugin. For more instructions, please see our beginner’s guide on how to install a WordPress plugin.
Upon activation, head over to the Product Manager tab from the WordPress admin dashboard. From here, simply click on the ‘Log into my account’ button.
After entering your login credentials, you will be able to see your Thrive Product Manager Dashboard.
Now, you can choose which products you want to install and license on your site. Simply click on the ‘Thrive Comments’ plugin and then click the ‘Install selected products’ button.
When the Thrive Comments plugin is ready to use, you will see a success message displayed on the screen.
To feature/bury comments, head over to the Comments » Thrive Comments Moderation page from the WordPress admin sidebar.
Once you are there, you will see a number of options under each comment. Simply hover your mouse over the ‘More’ option to open a dropdown menu.
From here, you can select the ‘Feature’ option to feature a comment at the top of your feed.
By using the ‘Feature’ setting for some comments, the irrelevant comments will automatically get buried at the bottom of the discussion section.
You can also approve, edit, or trash a comment as needed.
Now, visit your WordPress website to see the featured comments at the top of the discussion section.
You will also notice that all the featured comments have a badge in the top left corner to signify their importance.
You can also add an upvote/downvote down feature to your comments sections using Thrive Comments. This way, users will be able to vote on comments to push them up or down the discussion section.
To do this, you will have to visit the Thrive Dashboard » Thrive Comments page from the WordPress admin sidebar.
Then, click on the ‘Voting and Badges’ tab to expand it. Next, you have to simply choose the ‘Up and down’ option under the ‘Comment Voting’ section.
After that, you can also toggle the ‘Users must be registered and logged in to vote’ switch to ‘On’ if you only want logged-in users to be able to vote on comments.
Once your changes are saved automatically, visit your website to check out the upvote/downvote system in action.
This is what it looked like on our demo website.
Method 2: Feature/Bury Comments Using the Comments-wpDiscuz Plugin (Free)
If you are looking for a free solution, then this method is for you.
Note: With Comments-wpDiscuz, you can only feature or bury comments in your comments section using the upvote/downvote system. This means that users can upvote a comment that they feel adds to the discussion and downvote offensive or irrelevant comments.
Upon activation, visit the wpDiscuz » Settings page from the WordPress admin sidebar.
From here, go ahead and click on the ‘Comment Thread Features’ option.
This will direct you to a new screen, where you have to scroll down to the ‘Comment Voting Buttons’ section. Once you are there, simply toggle the switch next to the ‘Show Voting Buttons’ option.
After that, you can also choose the icons that will represent the upvote/downvote feature for your comments using the ‘Voting Button Icon’ option.
Next, simply toggle the ‘Enable down vote button (dislike)’ switch.
Finally, click on the ‘Save Changes’ button to store your settings.
Now, you can visit your WordPress website to check out the upvote/downvote system in action.
Here, you will see a dropdown menu at the top of the comments section. Users can now select the ‘Most Voted’ option from the dropdown menu to see the most-reacted comments on your website.
We hope this article helped you learn how to feature/bury comments in WordPress. You may also want to see our beginner’s guide on how to moderate comments in WordPress and our top picks for the best WordPress plugins to help grow your website.
If you liked this article, then please subscribe to our YouTube Channel for WordPress video tutorials. You can also find us on Twitter and Facebook.
Are you looking for a WordPress plugin to show WooCommerce products in a grid?
Showing your products in a grid view provides a better user experience for customers. With the right plugin, you can easily customize and style your product category grid.
In this article, we will show you the best product grid plugins for WooCommerce.
Why Use a Product Grid Plugin for WooCommerce?
When you’re creating an online store, it is important to showcase your best products and make it easier for customers to view them.
With the right WooCommerce plugin, you can easily display multiple products or features from a single product in a grid view. This provides a better user experience and makes it easy for customers to interact with your products.
Besides that, a product grid plugin also offers more flexibility for customization. You can easily adjust the grid, choose the number of rows and columns, change the color, and more.
Some plugins will also let you add category filters. This way, users can simply search for a product and view them in a grid rather than explore each product in your WooCommerce store. It helps boost conversions and increase sales.
That said, let’s look at the best product category grid plugins for WooCommerce.
SeedProd is the best WordPress website builder and landing page plugin. It is used by over 1 million professionals.
The plugin offers a drag-and-drop builder that lets you create custom themes and page layouts. You get prebuilt templates and lots of customization options.
In the page builder, SeedProd offers exclusive WooCommerce blocks to customize your product page. You simply drag and drop the products grid block on your template.
The plugin lets you choose the number of columns in the grid. It also offers options to filter products and show all products, best-selling products, top-rated products, and more. Besides that, you can select the order of the products based on date, title, rating, ID, and more.
Other than that, SeedProd offers other blocks for customization. For instance, you can add images, optin forms, countdown timers, contact forms, and more to your product pages.
It also easily integrates with email marketing tools to help you collect leads and grow your email list.
Pricing: SeedProd prices start from $39.50 per year. There is also a free SeedProd Lite version you use to get started.
MonsterInsights offers a Popular Posts feature that lets you show your best-selling products in a grid view. You get to choose from prebuilt themes for your product grid.
The plugin also shows a preview of your theme. Besides that, you get plenty of customization options.
For instance, you can change the color and size of the title, prices, and ratings. It also gives you the option to select a layout for your grid, choose product count to display, and more.
Other than that, you can also exclude certain products or product categories from appearing in the MonsterInsights popular post widget on the page.
ProductX is another popular product grid plugin for WooCommerce. It lets you create WooCommerce stores using the drag-and-drop builder.
There are different blocks you can use to customize your store. Plus, the plugin offers a template toolkit, so you can quickly select a design and edit it according to your requirements.
ProductX offers different product category grid blocks. You can choose from 3 different variations to display products in a grid view. Besides that, there are multiple settings to edit the design of the product grid.
Other features offered by ProductX include advanced product filters, a progress bar, product comparison, whitelist items, and much more.
Pricing: ProductX is a paid WordPress plugin with prices starting from $49 per year for 1 site.
YITH WooCommerce Best Sellers is a great plugin to have on your online store and display top-selling products in a grid layout.
The plugin is easy to use and offers different options to customize your product category grid. For example, you can change the text, ratings, colors, and other details of any product in the grid. Plus, you can choose the number of rows and columns to display.
Using YITH WooCommerce Best Sellers, you can show your most popular products or top-selling product category. There is also a best-seller badge you can use to highlight a product and get more conversions.
Pricing: YITH WooCommerce Best Sellers will cost you $59.99 per year.
If you’re using Instagram shopping to sell products online, then you can easily display items on your WordPress website using Smash Balloon’s Instagram Feeds plugin.
You can simply connect your Instagram account with the WooCommerce store. After that, display product feeds as grids, carousels, masonry, and other layouts.
The plugin also lets you link each Instagram post to a page on your WooCommere website. This way, users will land on the product page and easily make a purchase.
With Smash Balloon, you get full control over the appearance of your social media feeds. There are options to change the width, height, number of images, and more for your Instagram shoppable feed.
Pricing: You can get Smash Balloon Instagram Feed plugin for $49 per year.
The plugin offers built-in themes for carousels and grids. Plus, it lets you customize the grid by choosing the number of products to display per page, showing a header title, and controlling the image sizes. The plugin also gives you settings for selecting columns and rows and enabling pagination.
You can then choose which products to show in the grid. There are multiple options to choose from, like the latest products, older products, and featured products. After creating the product grid, you can easily add them anywhere on your WooCommerce store using shortcodes.
Besides that, there are options to show different badges on products. For instance, you display a sales badge, featured badge, discount badge, and sold-out badge in your product grid. You can also edit the style settings and change the product title font, color, ratings, and more.
Pricing: You can use the Product Carousel Slider & Grid Ultimate for WooCommerce plugin for free.
Grid/List View for WooCommerce is the next product category grid plugin on our list. The plugin is a great free solution for business owners looking to create simple product grids and lists.
You get to choose from 2 default styles, which include a grid or list layout. Besides that, there are basic options to customize your product grid. You can choose how many products to display and where to position the product count.
Sadly, there is no drag-and-drop customization option as you’d get in SeedProd. However, the plugin offers a wide variety of buttons to choose from for your WooCommerce product grid.
Pricing: Grid/List View for WooCommerce is a free-to-use plugin.
If you have different product categories on your WooCommerce store, then all you have to do is install the plugin and use shortcodes to display the products.
There are no customization options or additional settings that you’ll find in your WordPress dashboard. Everything is controlled through shortcodes. You can use different shortcodes for choosing the number of columns, order of product categories, design of the product grid, and more.
However, if you’re looking for more customization features and ease of use, then you can use any other plugin on our list, like SeedProd or MonsterInsights.
Pricing: You can get started with Product Categories Designs for WooCommerce for free.
Which is the Best Product Grid Plugin for WooCommerce?
In our experience, SeedProd is the best product grid plugin for WooCommerce. It is super easy to use because it offers a drag-and-drop builder with lots of template customization for your site and pages.
You can create stunning WooCommmerce pages with customized product grids that will help boost conversions. The plugin also offers tons of options to edit and change the appearance of your product category grids.
That’s not all, SeedProd also integrates with popular email marketing services, which helps grow your email list.
Bonus: If you’re looking to grow your WooCommerce store, then we also recommend that you try FunnelKit. It’s one of the best WooCommerce plugins to grow your store revenue.
If you liked this article, then please subscribe to our YouTube Channel for WordPress video tutorials. You can also find us on Twitter and Facebook.
Do you want to prevent clients from accidentally deactivating WordPress plugins?
If you build websites for other people, then you probably have a few important plugins that you install on every client site. If a client accidentally deactivates one of these essential plugins, then it could break their site completely.
In this article, we’ll show you how to stop clients from deactivating WordPress plugins.
Why Prevent Clients from Deactivating WordPress Plugins?
If you create websites for other people, then you may have a list of must-have WordPress plugins that you install on every site. These might be security plugins that protect the client against hackers and malicious code.
If the client accidentally deactivates one of these plugins then it could make their website vulnerable to attack, or affect how it works. In the worst-case scenario, it might even break their website completely.
Even though this isn’t your fault, it’s still a bad client experience and could damage your reputation. With that being said, let’s see how you can stop clients from accidentally deactivating plugins in WordPress.
Simply use the quick links below to jump straight to the method you want to use.
By default, only the Administrator has permission to manage plugins, which includes deactivating plugins.
With that in mind, we recommend creating a single admin account for your clients so they have a way to manage their sites. You can then create non-admin accounts for anyone else who needs access but doesn’t require admin privileges.
Without admin rights, this means the majority of your clients won’t be able to deactivate plugins.
You can use any role for the non-administrator accounts. However, we recommend using Editor as it allows users to create, edit, publish, and delete content, including content created by other people. They just won’t have access to the higher-level WordPress features.
It’s also a good idea to give the Admin account to someone who has experience with WordPress and understands how to manage a WordPress website.
To create an account for one or more clients, go to Users » Add New in the WordPress dashboard. You can then type in some information about the person including their name and email address.
With that done, open the Role dropdown and choose the role you want to assign this user, such as Admin or Editor.
When you’re happy with the information you’ve entered, click on ‘Add New User.’
Method 2. Using the Members Plugin (Create a Custom Client Role)
Sometimes you may need to stop clients from deactivating plugins without restricting their access to other areas.
With that being said, the built-in user roles may not be right for your website. For example, Editors can’t deactivate plugins, but they also can’t add new users or install WordPress themes, which may be a problem for your clients.
If the default user roles aren’t quite right for your client, then you can create a custom role. This role can have exactly the permissions and capabilities the client needs. You can even create different roles for different teams, or even individual employees.
The easiest way to create custom roles is by using the free Members plugin. This plugin allows you to create new roles and then add and remove capabilities to those user roles, including the ability to activate and deactivate WordPress plugins.
This permission removes the Plugins setting from the left-hand menu, as you can see in the following image.
The first thing you need to do is install and activate the Members plugin. For more details, see our step-by-step guide on how toinstall a WordPress plugin.
Upon activation, go to Members » Add NewRole.
In the ‘Enter role name’ field, type in the name you want to use. This will be visible to anyone who has access to the WordPress dashboard.
After that, it’s time to grant and deny permissions.
The left column shows all the different types of content such as reusable blocks and WooCommerce products. Simply click on a tab and you’ll see all the permissions for that content type.
You can then go ahead and check the ‘Grant’ or ‘Deny’ box for each permission. For more detailed instructions, please see our guide on how to add or remove user capabilities.
To stop clients from deactivating plugins, click on the ‘Plugins’ tab on the left.
On this screen, check the ‘Deny’ box on the line that says ‘Activate Plugins.’
When you’re happy with how the user role is set up, click on ‘Add Role.’
You can now assign this role to any user, following the same process described in Method 1.
Method 3. Using Custom PHP (Prevent Clients From Deactivating Specific Plugins)
If you want to stop clients from deactivating all plugins, then you can use one of the methods mentioned above.
However, sometimes you may want to protect essential plugins only, while still giving clients the freedom to deactivate and delete non-essential software.
The best way to protect specific plugins is by adding custom code in WordPress. This allows you to remove the ‘Deactivate’ link for specific plugins.
This is an advanced method, so we don’t recommend it for beginners.
Note: Just be aware that clients can still deactivate any plugin using the Bulk Actions dropdown menu, or with an advanced tool like FTP or phpMyAdmin. However, removing the ‘Deactivate’ link makes it much more difficult for clients to accidentally deactivate an essential plugin.
To start, you’ll need to know the plugin’s file name and where it lives on your server. Typically, these files use the plugin’s name followed by .php, and live inside a folder named after the plugin. For example, the WooCommerce file is named ‘woocommerce.php’ and lives inside a ‘woocommerce’ folder.
However, it’s still worth checking, especially if the plugin has a long, complicated name or multiple words. For example, if you’re using the SR Product 360° View plugin to add interactive 360-degree images in WordPress, then its file is named ‘sr.php.’
You can check the file name and location by connecting to the site’s server using an FTP client such as FileZilla, or you can use the file manager of your WordPress hosting cPanel.
After that, go to /wp-content/plugins/. Here, you’ll see all the different plugins on your site.
Simply find the plugin that you want to protect, and open its folder.
After that, find the .php file.
Now, make a note of the folder name and .php file, as you’ll be using this information in your code. Simply repeat this process for every plugin you want to protect.
With that done, it’s time to add a code snippet to your site. Often, you’ll find guides asking you to add code to the site’s functions.php file.
However, this isn’t recommended as simple errors can cause countless common WordPress errors. You’ll also lose the custom code when you update your WordPress theme.
This snippet disables deactivation for WPForms and WooCommerce. To protect other plugins, simply replace ‘wpforms/wpforms.php’ and ‘woocommerce/woocommerce.php’ with the folders and file names you got in the previous step.
To disable deactivation for more plugins, simply add them to the code. For example:
After that, scroll to the ‘Insertion’ section. WPCode can add your code to different locations, such as after every post, frontend only, or admin only.
We only need to use the PHP code in the WordPress admin area, so click on ‘Auto Insert’ if it isn’t already selected. Then, open the ‘Location’ dropdown menu and choose ‘Admin only.’
After that, you’re ready to scroll to the top of the screen and click on the ‘Inactive’ toggle, so it changes to ‘Active.’
Finally, click on ‘Save Snippet’ to make the PHP snippet live.
Now, if you select Plugins from the left-hand menu, you’ll see the ‘Deactivate’ link has been removed for those plugins.
If you need to restore the ‘deactivate’ links at any point, then you can disable the code snippet. Simply go to Code Snippets »Code Snippet and click the switch next to your snippet to turn it from blue (enabled) to grey (disabled).
You can now deactivate these plugins by heading over to the Plugins menu.
You can also deactivate protected plugins using phpMyAdmin or an FTP client. This may be a good solution if you want to remove a specific plugin, but don’t want to completely disable the code snippet and leave all your protected plugins vulnerable.
If you liked this article, then please subscribe to our YouTube Channel for WordPress video tutorials. You can also find us on Twitter and Facebook.
Do you want to change block height and width in WordPress?
By default, WordPress makes it easy to create beautiful content layouts for your posts and pages using blocks. However, sometimes you may want to resize blocks to make them look better.
In this article, we will show you how to easily change block height and width in WordPress.
Why Change Block Height and Width in WordPress?
The block editor enables you to add content to your WordPress website using different blocks, including headings, paragraphs, images, videos, audio, and more.
However, sometimes you may want to change the width or height of a specific block to improve its appearance or the layout of the overall content.
Adjusting block sizes can also ensure that your content is responsive and displays properly on all devices, including phones, tablets, and laptops.
For example, you may have uploaded an image in the content editor, but it is too large and makes the page look unappealing.
Or, you might want to change the size of the heading block to align it better with the content.
By adjusting the width and height of the blocks, you can make your posts and pages look more aesthetically pleasing.
That being said, let’s see how you can easily change block height and width in WordPress.
Method 1: Change the Block Height and Width Using Block Settings
For this method, we will show you how to change a block’s height and width using the default settings offered by WordPress.
Currently, WordPress does not offer the same resizing options for all of the blocks. However, the block editor provides many ways to resize the height and width of different blocks.
Let’s start with the Image block in WordPress.
First, you can change the alignment of the Image block by clicking on the ‘Align’ button in the toolbar above the block.
Here, choosing the ‘Wide Width’ option will make the block the same width as the container.
Or, the ‘Full Width’ alignment option will make the block the entire width of the page.
You can also resize a block by going to the ‘Block Settings’ panel on the right and scrolling down to the ‘Settings’ section. From here, you can resize a block from the ‘Image Size’ dropdown menu.
You can also adjust the block’s width and height by typing the preferred pixel size into the ‘Width’ and ‘Height’ boxes in the ‘Image dimensions’ section.
Below that, you can also adjust the block’s size by percentage.
Another way to resize an Image block is by clicking on the image itself to bring up a blue border with circular anchors.
Then, simply drag these anchors to change the height and width of the image block.
Once you are done, click on the ‘Update’ or ‘Publish’ button to store your settings.
Method 2: Change the Block Height and Width Using the Columns Block
If the block you want to resize does not come with alignment buttons or resize settings, then this method is for you.
For this method, we will place our block inside the Columns block. It acts as a container where you can add blocks in each column. Then, you can resize those blocks by adjusting the height and width of the columns.
First, you will need to click on the ‘Add Block’ (+) button in the top left corner of the screen.
From here, simply locate and add the Columns block to the content editor. Then, you will be asked to choose a variation.
After that, the column layout will be displayed on the screen, and you can now add the block you want by clicking on the ‘Add Block (+)’ button inside a column.
Once the block has been added, you can resize it by using the ‘Column settings’ located in the right panel.
Once you are done, simply click the ‘Publish’ button to store your changes.
This is how the content looked on our demo website after resizing and aligning two paragraph blocks inside a two-column block.
Method 3: Change the Block Height and Width Using the Group Block
You can also adjust the width and height of blocks using the Group block. It allows you to group different blocks and style them together.
First, you will need to click on the ‘Add Block’ (+) button at the top. Next, you must locate and add the Group block to the content editor.
Once you do that, the Group block will display three different layout options that you can choose from. For this tutorial, we will use the ‘Group’ layout.
After that, the ‘Add Block’ button will be displayed on the screen. You can now add any block you want.
In this tutorial, we will be adding and resizing a Heading block, a Paragraph block, and an Image block.
To add multiple blocks to the Group, you must click on the ‘Select Group’ button from the block toolbar.
Once the Group is selected, simply click on the ‘Add Block’ button (+) at the bottom.
Clicking on the ‘Select Group’ button also opens up the block settings in the right column. From here, you can easily adjust the layout, justification, and orientation of all the blocks.
Changing the layout will also change the different block sizes. You can configure these settings until you are happy with the result.
Once you are done, click on the ‘Update’ or ‘Publish’ button to store your settings.
This is how the Group block looked on our demo website.
Method 4: Change the Block Height Using the Cover Block
This resizing method is for you if you want to use the Cover block. It enables you to display text and other content on top of an image or video.
First, you will need to click on the ‘Add Block’ (+) button at the top and find the Cover block.
Once you have done that, you will be asked to choose a color or upload an image from the WordPress media library. This image or color will be used as the background for the Cover block.
Next, simply drag and drop any block you want into the Cover block.
After that, you need to click on the Cover block to open up its block settings in the right column.
From here, scroll down to the ‘Dimensions’ panel, where you can adjust the height of the Cover block using pixels.
Finally, don’t forget to click on the ‘Save Changes’ button to store your settings.
Bonus: Create Beautiful Pages Using Advanced Blocks in SeedProd
You can easily create beautiful and aesthetically-pleasing pages using the SeedProd plugin.
It is the best WordPress page builder on the market that allows you to create landing pages using blocks. These blocks are also super easy to customize and resize according to your needs.
If you liked this article, then please subscribe to our YouTube Channel for WordPress video tutorials. You can also find us on Twitter and Facebook.