EDITS.WS

Author: Rob Pugh

  • How to Plan & Execute a Social Media Strategy for Your Business

    Picture this: you’re a small business owner, and you’ve just opened a bakery. On the counter, you’ve got a tray of the most scrumptious, mouth-watering, perfectly-glazed donuts. You want to share this marvelous creation with the masses, but how?

    Enter social media, the digital megaphone that can turn your delectable donut into the talk of the town. But your social media efforts might fall flat without a well-crafted plan. 

    A social media strategy will help you connect with your audience, amplify your brand, and ultimately, boost your bottom line. The question is, how do you create a social media strategy that will help your business stand out from the competition?

    In this post, we’ll walk you through everything you need to know to build a social media plan that will have your brand soaring to new heights.

    What is a social media strategy?

    A social media strategy is a comprehensive plan for how your business will leverage social media channels to achieve its objectives. Think of it as the master recipe for your digital “donut shop.” It outlines the ingredients (audience, platforms, content, etc.), the cooking method (execution), and the desired outcome (results).

    What are the benefits of creating a social media strategy?

    Creating a social media strategy offers a number of benefits for businesses, including:

    1. Streamlined efforts. A well-crafted strategy will ensure that your social media efforts are targeted, organized, and efficient, saving you time and resources. 
    2. Improved consistency. A strategy helps you maintain a consistent brand presence across all platforms, increasing brand recognition and trust. 
    3. Clearer goals. Having specific objectives for your social media efforts ensures that your actions are aligned with your overall business goals, allowing you to better measure success and make data-driven decisions.
    4. Increased engagement. By understanding your target audience and creating content that resonates with them, a social media strategy will help you build stronger relationships with your customers, turning them into loyal fans and advocates.
    5. Better ROI. A well-executed social media strategy will ultimately improve your return on investment (ROI), making your marketing efforts more profitable.

    How to create a social media strategy and put it into motion

    Creating, planning, and executing a social media strategy for your business is like embarking on a voyage through the vast digital ocean. You need a sturdy ship, a skilled crew, and a charted course to reach your destination. Let’s dive into the key components of a successful social media strategy.

    1. Define your social media objectives

    First, it’s essential to know what you’re aiming for. Here are some areas you may choose to focus on:

    • Brand awareness. If your goal is to make your brand famous, you’ll want to focus on creating content that showcases your unique brand identity and reaches a wider audience.
    • Leads or sales. Do you want to increase leads or sales? In that case, your social media strategy should focus on enticing content that drives followers to take action.
    • Customer engagement. Engaging with your customers requires regular, meaningful interactions that build long-lasting relationships. If your goal is to increase customer engagement, create content that encourages interaction, such as polls, quizzes, or open-ended questions.
    • Customer support. Social media is not only about promotion; it’s also a powerful customer support tool. If your goal is to provide top-notch customer support, consider creating a dedicated social media channel for support and sharing helpful tips, tricks, and tutorials.
    illustrations of buyer personas

    2. Identify your target audience

    To create a successful social media strategy, you need to know who you’re talking to. Identifying your target audience involves understanding:

    • Demographics. Dive deep into the age, gender, location, and income level of your ideal customers. This will help you craft content that resonates with them and ultimately increases engagement.
    • Psychographics. Understanding your audience’s interests, values, and lifestyle is crucial. The more you know about what makes them tick, the more effective your social media strategy will be.
    • Buyer personas. Create buyer personas — fictional characters that represent your ideal customers. This exercise helps you get inside their heads, understand their needs, and tailor your content accordingly.

    3. Select the right social media platforms

    It’s not about being everywhere; it’s about being where your audience is. To find success, be sure to: 

    • Align platforms with audience preferences. Research which platforms your target audience uses most and focus your efforts there. For instance, if you’re targeting a younger audience, you might prioritize Instagram and TikTok over Facebook and LinkedIn.
    • Assess platform-specific functionality. Different platforms offer unique features and functionalities. Evaluate which ones align with your objectives and can help you reach your goals more effectively.

    Learn more: how to select the right social media platforms for your business

    4. Establish a social media branding strategy

    Align brand positioning and audience preferences

    Your brand needs to align with your target audience’s preferences. Research your audience’s demographics, interests, and needs to ensure your brand’s positioning speaks to them. This means tailoring your messaging, visuals, and overall style to create a bond that will have them coming back for more.

    Establish a clearly identifiable brand voice and tone

    Define your brand’s personality — whether it’s witty, professional, or inspiring â€” and let that voice permeate all your social media content. This consistent tone will make your brand instantly recognizable.

    Be consistent with your messaging and content themes

    Consistency, though predictable, actually helps make your brand memorable. Stick to your core messaging and content themes to build a strong brand identity. Remember, social media is like a giant jigsaw puzzle, and each piece of content should fit together seamlessly to create a coherent and captivating picture.

    5. Build a social media content strategy

    Define your core messaging and content themes

    You wouldn’t bake a cake without a recipe, so why create content without a clear plan? Define your core messaging and content themes to ensure that every piece of content serves a purpose, whether it’s educating, entertaining, or inspiring your followers. This way, you’ll create content that resonates with your audience and helps build lasting connections.

    Conduct a competitor analysis to see what’s working for them

    Keeping tabs on the competition is essential for building a successful social media strategy. Analyze your competitors’ content to uncover what’s working, what’s not, and where you can fill in the gaps. 

    looking at a calendar on a tablet

    6. Develop a social media content calendar

    A content calendar brings structure and consistency to your social media efforts. 

    Define content types

    Like a master baker, you’ll want a variety of flavors in your content mix. Here are some of the types of content you should consider utilizing:

    • Blog posts. Share your expertise and tell stories that resonate with your audience. If your site’s built on WordPress, you’re already set up for publishing great blog content.
    • Images. Captivate followers with eye-catching visuals, whether it’s product shots or behind-the-scenes looks.
    • Videos. Engage viewers with entertaining or educational content.
    • Polls and surveys. Involve your audience and gather valuable insights.
    • User-generated content (UGC). Feature content created by your customers or fans.
    • Testimonials and reviews. Showcase social proof to build trust and credibility.

    Frequency and scheduling

    Consistency is key when it comes to social media. But it’s not about churning out content — it’s about finding the sweet spot between quality and quantity. Consider the following factors when determining your posting schedule:

    • Platform. Each platform has its own optimal posting frequency. Research and follow best practices for each.
    • Audience. Cater to your target audience’s preferences, adjusting your schedule to align with their online habits.
    • Resources. Be realistic about your capacity to produce high-quality content on a consistent basis.

    Seasonal and event-based planning

    Stay ahead of the game by planning content around holidays, seasons, and special events. It’s like baking seasonal treats: everyone loves pumpkin spice in the fall, but they’ll probably pass on it in the summer.

    Repurpose content across platforms

    Don’t let your content go stale. Give it a new lease on life by repurposing it for different platforms. Turn a blog post into an infographic, or a video into bite-sized clips. 

    Learn more: How to create a social media content calendar.

    7. Leverage automation to scale your social media strategy

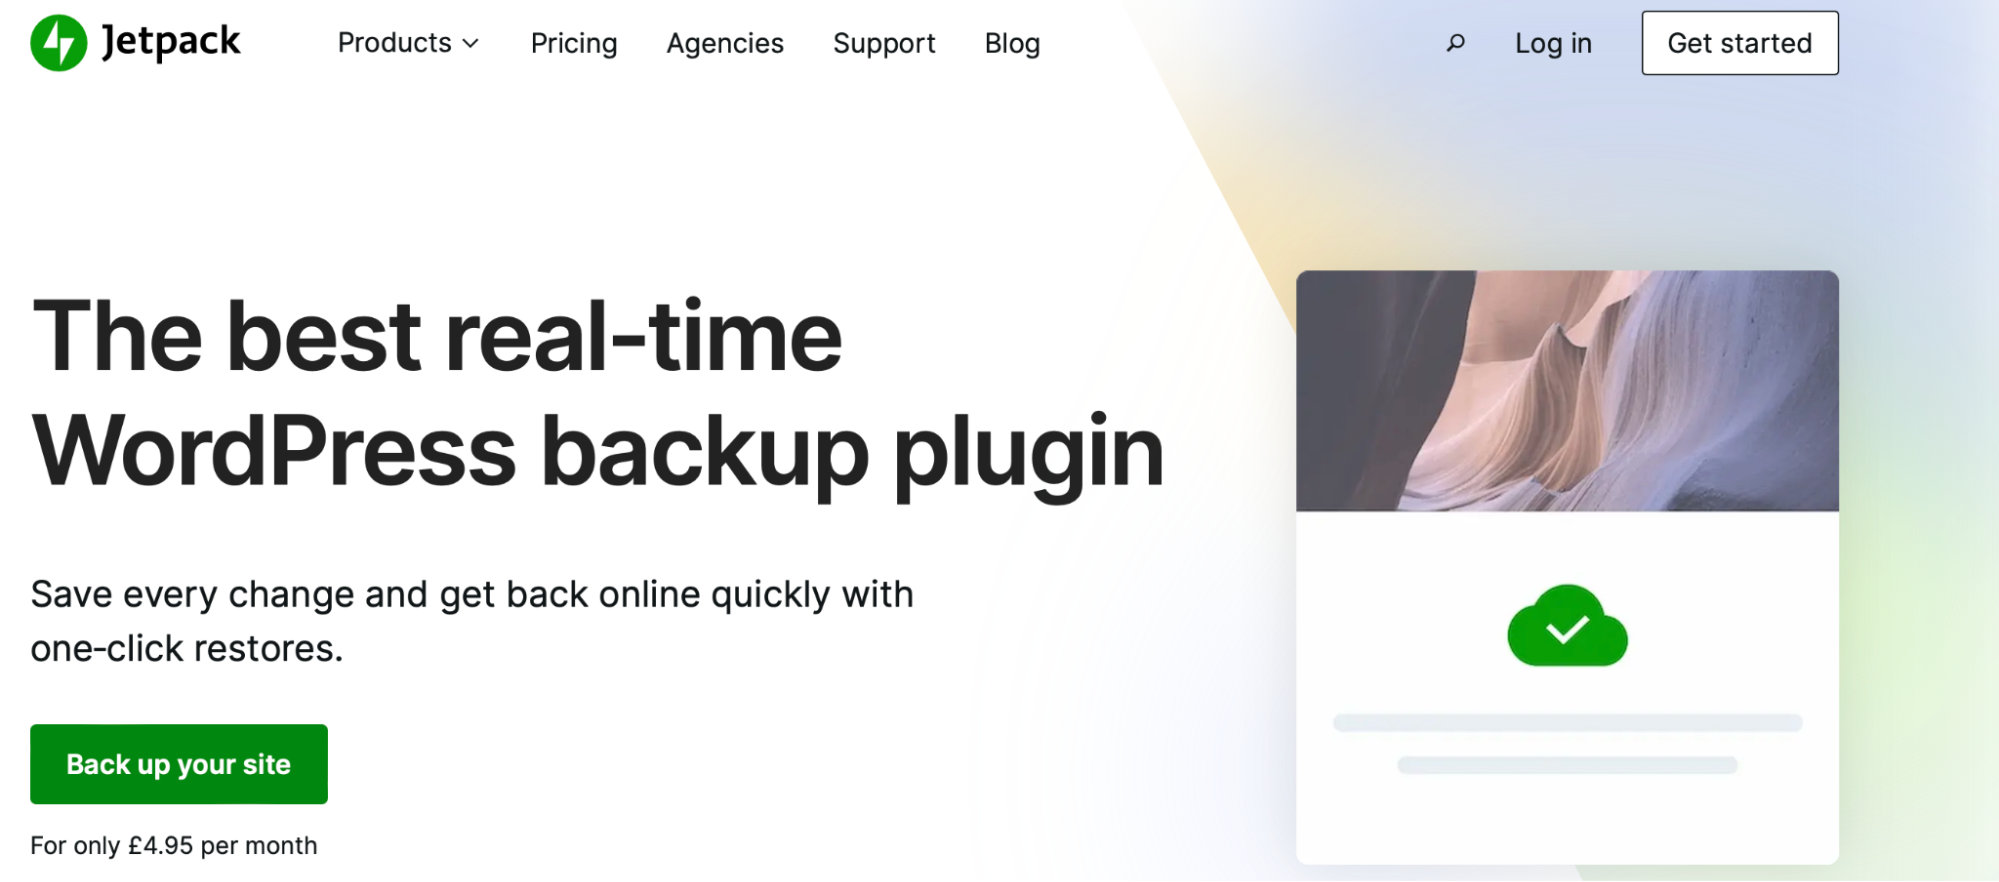
    Automation is the secret sauce that helps you scale your social media efforts without losing your sanity. By leveraging automation, you can save time and improve efficiency. This is where a WordPress social media automation tool like Jetpack Social can really help.

    Jetpack Social homepage

    Auto-share and schedule your posts with Jetpack Social.

    Jetpack Social is the Alfred to your Batman, the R2-D2 to your Luke Skywalker. It’s an all-in-one social media sharing plugin for WordPress sites that helps you automate your social media tasks. With Jetpack Social, you can:

    • Automatically share new blog posts on multiple platforms.
    • Schedule social media posts in advance.
    • Customize your post previews.
    • Recycle content to get more fruit from your labor.

    8. Build collaborations and partnerships

    Influencer marketing

    By partnering with influencers in your niche, you can reach new audiences, boost your credibility, and increase your brand visibility.

    To find the right influencers:

    • Research your target audience and identify relevant influencers
    • Analyze their engagement rate, audience demographics, and content quality
    • Reach out with a personalized collaboration proposal

    Brand partnerships

    When done right, brand partnerships are a harmonious, mutually beneficial relationship. Partner with brands that share your values and target audience, and together, you can create co-branded content, run giveaways, or host events.

    Cross-promotions

    With cross-promotions, both of you get to enjoy something new, but it doesn’t cost a dime. Reach out to businesses in your niche or complementary industries and propose a cross-promotion where you share each other’s content, offer discounts, or exchange shout outs.

    Learn more about influencer marketing.

    Facebook post from WooCommerce
    Caption: WooCommerce shares recent blog posts on their Facebook account, a perfect example of using social media in combination with website content

    9. Integrate social media with other marketing channels

    Your social media strategy shouldn’t be created in isolation. Integrating it with your other marketing channels creates powerful marketing synergy to cover more ground and reach more potential customers. Consider tools like:

    • Email marketing. Include social media icons in your email newsletters and promote your social accounts in your email signature. Encourage subscribers to share your content on social media, and use social media to build your email list by promoting lead magnets, exclusive offers, and other newsletter signup calls to action.
    • Content marketing. Use social media to amplify your content’s reach and visibility. Share your blog posts, infographics, videos, and other content assets across your social channels. Don’t forget to repurpose and reshare evergreen content to keep it top-of-mind.
    • Search engine optimization (SEO). By optimizing your social media profiles and content for search engines, you’ll increase your visibility and attract more organic traffic. Incorporate relevant keywords in your social media bios, post captions, and hashtags to boost your search engine rankings.

    10. Leverage paid social media advertising

    Social media platforms offer a variety of advertising options that can help you reach a wider audience, target specific demographics, and boost your brand’s visibility. 

    Understand advertising options and bidding strategies

    Each platform has its unique set of rules, and understanding these rules is key to your success. Facebook, Instagram, LinkedIn, and Pinterest all offer various ad formats and bidding strategies designed to meet your business objectives.

    advertising options on Facebook

    From carousel ads to sponsored posts and video ads, choose the format that best showcases your products or services. When it comes to bidding, you can opt for cost-per-click (CPC), cost-per-impression (CPM), or cost-per-action (CPA), depending on your goals. 

    Establish a clear budget and target ROAS

    Establish a clear budget for your social media advertising campaigns. Determine your monthly or quarterly budget, and allocate it across your chosen platforms based on your goals and target audience.

    When setting your budget, consider your ideal return on ad spend (ROAS). This metric helps you evaluate the effectiveness of your advertising campaigns and ensures you’re getting the most bang for your buck. Remember, it’s not just about spending money, it’s about investing in your business’s growth.

    Design creatives and constantly A/B test

    The world of social media is a visual smorgasbord, and standing out from the crowd requires an eye-catching creative that causes your audience to pause their scroll. Collaborate with your design team or freelance designers to create visually compelling ads that showcase your brand’s personality and value proposition.

    To ensure your ads hit the mark, embrace the power of A/B testing. Experiment with different headlines, images, ad copy, and calls to action (CTAs) to determine which combinations drive the best results. 

    11. Measure, analyze, and refine your strategy

    The world of social media can be unpredictable. But by taking the following steps, you can stay on the right path and take advantage of valuable opportunities.

    Clearly identify platform-specific key performance indicators (KPIs)

    Just as the captain must know the characteristics of each ship in their fleet, you must understand the intricacies of each social media platform. Each one has its own unique features, and identifying platform-specific KPIs will help you chart your course effectively.

    For example, Facebook might focus on reach, while LinkedIn might prioritize comments and engagement. Learn the strengths and weaknesses of each platform and make decisions accordingly.

    Align these KPIs with your business objectives

    It’s essential to align your KPIs with your broader business objectives. After all, what’s the point of sailing if you’re not heading in the right direction?

    Whether you’re seeking to increase brand awareness, drive website traffic, or generate leads, your social media KPIs should support your overarching goals. By aligning your KPIs with your objectives, you’ll have a clearer understanding of your journey’s progress and can adjust your course if needed.

    reviewing analytics and data on a laptop

    Automate reporting and dashboards

    Captains rely on their navigational tools to stay on course. Today, you can harness the power of automation to create custom reporting and dashboards that monitor your social media strategy’s performance. With this digital compass in hand, you can ensure you’re sailing towards your goals with confidence.

    Automated reporting saves you time, reduces human error, and provides you with real-time data, empowering you to make informed decisions and quickly respond to changes in the digital seascape.

    Leverage data-driven decision-making to optimize your strategy

    A skilled captain uses their knowledge and experience to adapt to ever-changing ocean conditions. Similarly, using data-driven decision-making allows you to optimize your social media strategy based on the insights gleaned from your analytics.

    Whether it’s adjusting the type of content you share, the time of day you post, or even the platforms you focus on, data-driven decision-making can help you refine your strategy and find success.

    Frequently asked questions about planning a social media strategy

    Why is it important to create a social media strategy?

    Imagine you’re driving on a road trip without a map or GPS. You know your final destination, but you have no idea how to get there. Your journey would be long, winding, and probably filled with dead ends. That’s what marketing on social media without a well-defined strategy is like.

    A social media strategy is crucial for businesses of all sizes because it provides a roadmap to success. It outlines the goals you want to achieve, identifies the platforms and tactics that will help you reach those goals, and provides a plan to measure your success along the way.

    Without a strategy, your social media efforts can be scattered, inconsistent, and ultimately ineffective. But with a solid strategy in place, you can make informed decisions, allocate resources efficiently, and maximize your return on investment.

    What is a social media content strategy?

    A social media content strategy is a carefully-crafted plan that outlines the types of content you’ll create and share on social media, as well as when and how you’ll share it.

    Your content strategy should be informed by your overall social media strategy, which in turn should be driven by your broader marketing strategy and business goals. For example, if your primary goal is to increase brand awareness, your content strategy might focus on creating and sharing visually engaging and memorable content that reflects your brand’s personality and values.

    A well-thought-out content strategy should also take into consideration your target audience, your brand’s unique selling points, and the platforms you’ll be using. It’s important to strike a balance between promoting your products and services, providing value to your audience, and fostering a sense of community and connection.

    What is a social media branding strategy?

    A social media branding strategy is the way your brand presents itself and communicates with your audience — it should be consistent across all platforms.

    Your branding strategy encompasses everything from the tone of voice you use in your posts to the visual elements like colors, fonts, and graphics. It’s what sets you apart from the competition and helps you create a recognizable and memorable presence online.

    Instagram feed from WordPress.com
    Caption: All the images in WordPress.com’s Instagram feed have the same cohesive feel and feature their logo 

    A strong social media branding strategy starts with a clear understanding of your brand’s values, personality, and target audience. It’s about finding the right balance between showcasing your products or services and engaging with your audience in a way that feels authentic and genuine.

    Remember, people don’t connect with companies — they connect with other people. So, your branding strategy should be designed to humanize your brand and make it relatable, approachable, and memorable.

    What is a social media engagement strategy?

    A social media engagement strategy is like a well-crafted dish at your favorite restaurant. It’s a delightful concoction of ingredients, prepared with skill and care, that aims to delight your customers and keep them coming back for more. In the world of social media, it’s the plan you put in place to interact with your audience, grow your reach, and ultimately boost your business’s bottom line.

    To whip up a successful social media engagement strategy, you’ll need to carefully blend a few key ingredients like:

    1. Clear objectives. Like a chef, you need to know what you’re cooking before you start. Do you want to increase brand awareness? Drive website traffic? Engage with existing customers? Identify your goals to give your strategy a clear direction.
    2. Target audience. It’s important to know who you’re cooking for. Define your target audience by considering demographics, interests, and behaviors.
    3. Content mix. Now that you know your goals and audience, it’s time to craft a menu that tantalizes their taste buds. Determine the types of content you’ll share (e.g., blog posts, videos, images), and ensure they align with your audience’s interests.
    4. Channels. Choose the right platforms to serve your delectable creations. Consider where your target audience spends their time and focus your efforts there.
    5. Metrics. Measure the success of your social media engagement strategy like a master sommelier evaluating a fine wine. Track your progress by analyzing key performance indicators (KPIs) such as likes, shares, comments, and click-through rates.

    Jetpack Social: turbocharge your social media strategy and efficiency

    By now, you’ve learned the ins and outs of creating, planning, and executing a social media strategy for your business. But now you need to pull it all together to find success.

    And to do that, you’ll need the right tools. And the best place to start is with Jetpack Social. It’s the special ingredient that helps you get more done in less time and so you can leave everyone wondering how you possibly do it all. 

    settings for Jetpack Social

    So, what can Jetpack Social do for you?

    1. Automate social media sharing. With Jetpack Social, your content is automatically shared across all your connected social media platforms the moment you hit “Publish.” No more copy/pasting, no more manual posting — just pure efficiency.
    2. Centralize social media management. With Jetpack Social’s user-friendly dashboard, you can manage all your social media accounts in one place, making it easier than ever to keep your strategy on course.
    3. Schedule social media posts. Timing is everything, and Jetpack Social knows it. That’s why it offers a scheduling feature that allows you to plan and schedule your social media posts in advance, ensuring your content reaches your audience at the right time (even if you’re asleep). 

    Jetpack Social takes the hard work out of sharing your content across multiple platforms, allowing you to focus on what really matters — creating and nurturing relationships with your audience.

    Learn more about Jetpack Social or download Jetpack Social for free, right now, to start your journey to success.

  • Why Social Media is Important for Your Business (27 Benefits)

    The world we live in has a heartbeat, and it’s the rhythmic tapping of keys, the swiping of screens, and the posting of emojis. Yes, we’re talking about social media, the digital megaphone that amplifies our voices and connects us to the rest of the world.

    For a business owner, social media offers a treasure trove of opportunities to grow, thrive, and outshine the competition.

    In today’s post, we’ll unveil 27 benefits of embracing this digital revolution for your business. And, because we’re all about helping WordPress site owners find success, we’ll introduce you to Jetpack Social, the plugin that helps you ride the social media wave with ease and finesse.

    Social media benefits for brand visibility and awareness

    1. Expand your reach to a wider audience

    Think of social media as your business’s virtual megaphone, shouting your message to the masses. It helps you tap into the vast pool of potential customers who are out there, just waiting to discover your brand. With a well-crafted social media strategy, your company will attract more attention, turning those casual scrollers into loyal followers.

    2. Connect with your target audience on a personal level

    On social media, people aren’t looking for cold, corporate messages. They’re seeking connections with real, authentic brands. Social media platforms offer the opportunity to create a genuine bond with your audience, allowing you to showcase your brand’s personality and tell your story in an engaging way. Make your audience feel like they’re a part of your journey, and they’ll become your biggest cheerleaders.

    3. Boost brand perception

    By fine-tuning your social media presence, you can create a cohesive and memorable brand image that makes your business stand out. Remember, consistency is key — from your profile picture to your bio, ensure that your brand message is clear and consistent across all platforms, including your website and any print materials you use.

    4. Tie your brand to influential personalities

    For their followers, the opinions and recommendations of influencers are incredibly powerful. By partnering with influencers who resonate with your brand, you can amplify your message and gain the trust of their audience. Moreover, don’t underestimate the value of your existing customers — anyone now has the potential to become a brand advocate and share their experiences.

    5. Build brand partnerships and run cross-promotions

    In the business world, collaboration is the secret sauce for success. Social media provides a unique opportunity to forge strategic partnerships with complementary brands and run cross promotions to expand your reach and share resources. 

    Social media benefits for traffic, sales, and revenue

    6. Easily create and share existing content

    Thankfully, you don’t need a million dollar production budget to create and share valuable, engaging content. You can quickly try many different kinds of content and see what ideas are engaging enough to entice your audience to click, like, comment, and share. When ideas succeed, they can not only drive traffic to your website, but also help to establish your brand as a thought leader.

    7. Auto-share content from your website

    As much work as you’ve put into your website, you want to ensure as many people as possible see it. Often, the hardest part of sharing site content on social media is remembering to work it into your content calendar.   

    But imagine a world where your site content is automatically posted on your social media channels, without any extra effort on your part. It sounds awesome, right?

    Jetpack Social homepage with information about features

    With Jetpack Social, you can easily auto-share your blog posts and other website content to your social media platforms, saving you time and ensuring that your audience never misses an update.

    8. Run more short-term promotions and offers

    Social media provides an irresistible opportunity to run flash sales and marketing promotions that turn followers into customers. And you no longer need a big budget for signage and ad creative. You can quickly create deals for almost any holiday, special event, or temporary fad. 

    By running exclusive deals and offers on your social media channels, you can not only drive sales, but also encourage your followers to share these promotions with their networks, extending your reach even further. 

    9. Make the most of social commerce and shoppable posts

    The age of social commerce is upon us, where customers can shop directly from their social media feeds. By integrating shoppable posts and social commerce features into your social media strategy, you can create a seamless shopping experience that drives sales and keeps customers coming back for more.

    selling products on Pinterest

    10. Benefit from affordable advertising

    Organic reach is fantastic, but sometimes you need a little boost to get your message in front of the right people. Paid social media advertising offers the opportunity to target specific demographics and interests, ensuring that your ad budget is spent wisely and effectively. With the right targeting, your ads will reach your ideal customers, driving traffic and increasing sales. The best part is that, unlike traditional media advertising, you can start advertising for just a few dollars per day. 

    11. Efficiently follow up with potential customers

    Sometimes, customers need a gentle nudge to remind them of your brand and products. Retargeting ads on social media can help you re-engage potential customers who have shown interest in your brand but haven’t yet converted. By keeping your brand top-of-mind, you can increase the likelihood of turning those prospects into paying customers.

    Social media benefits for gaining customer insights

    12. Learn from detailed audience demographics and analytics

    Social media platforms are treasure troves of data, providing valuable insights into your audience’s demographics, interests, and preferences. By analyzing this data, you can better understand your target customers and create content and campaigns that resonate with them, ultimately driving more engagement and conversions.

    13. Track and measure customer engagement

    You can’t improve what you don’t measure. Regularly tracking and analyzing engagement metrics — such as likes, shares, comments, and click-through rates — will help you identify what’s working and what’s not. This valuable information enables you to fine-tune your social media strategy and focus on the content and tactics that generate the best results.

    14. Take advantage of social listening and sentiment analysis

    Social listening involves monitoring social media conversations and mentions to gain insights into what people are saying about your brand, products, and industry. Sentiment analysis takes it a step further by evaluating the tone and emotions behind these conversations. By leveraging these tools, you can stay ahead of the curve, identify potential issues before they escalate, and uncover valuable feedback to improve your offerings.

    15. Send out fast, reliable surveys and polls

    Want to know what your customers really think? Just ask them. In the past, you had to send out expensive paper surveys, ask for feedback at your physical locations, or hire an expensive firm to do market research. 

    Now, social media surveys and polls offer an easy and engaging way to gather feedback, opinions, and preferences from your audience. Get quick feedback on which SKUs to stock next, what pricing format your audience prefers, or nearly anything else. Use this valuable data to inform your business decisions and demonstrate that you value your customers’ input. 

    Social media benefits for strengthening customer relationships

    16. Provide real-time customer support

    More than ever, customers have an expectation of quick and efficient support. Social media allows you to offer real-time assistance, addressing concerns and inquiries promptly and publicly. You can solve issues before they turn into a bigger headache, and by demonstrating your commitment to customer satisfaction, you can strengthen relationships and build a loyal customer base.

    customer support on Facebook Messenger

    17. Gather more customer-generated content and testimonials

    There’s no better endorsement than a happy customer singing your praises. Through social media, you can easily encourage your customers to share their experiences with your brand through user-generated content and testimonials. By showcasing these authentic stories on your social media channels, you can build trust and credibility with your audience.

    18. Host more frequent events and contests

    Who doesn’t love a little friendly competition? Social media events and contests are a fantastic way to engage your audience, create buzz around your brand, and reward loyal customers. From photo contests to live Q&A sessions, get creative with your events and watch your customer relationships flourish.

    Social media benefits for brand reputation and authority

    19. Establish thought leadership through content curation

    Content curation is the art of collecting, organizing, and sharing the best content from various sources to provide value to your audience. By consistently curating and sharing high-quality, relevant content, you can establish your brand as a thought leader in your industry, earning the trust and respect of your audience.

    20. Collaborate with industry experts and influencers

    Aligning your brand with industry experts and influencers can significantly boost your credibility and authority. By collaborating on content, events, or campaigns, you can tap into their expertise and expand your reach to their audience, further solidifying your brand’s reputation.

    21. Participate in relevant online conversations and communities

    You no longer need to spend your days and nights driving to industry events and meet-and-greets that may or may not be worth your time. 

    In just a few spare minutes each day, you can join online conversations and communities relevant to your industry to showcase your expertise, provide value, and build relationships with potential customers. By engaging in these discussions, you can position your brand as an authoritative and helpful resource, earning the trust and respect of your audience.

    22. Showcase company culture and values

    Your brand is more than just your products or services; it’s the people behind it and the values they uphold. Social media allows you to highlight your company culture, values, and the faces behind your brand. This helps humanize your business and allows your audience to connect with you on a deeper level.

    Social media benefits for managing brand reputation

    23. Address negative feedback and reviews before they spiral

    Bad reviews can be a tough pill to swallow, but they’re also an opportunity to demonstrate your brand’s commitment to customer satisfaction. By addressing these concerns promptly and professionally on social media, you can turn a negative situation into a positive one and show your audience that you genuinely care about their experience.

    example of a customer testimonial on the WooCommerce Instagram

    24. Amplify positive customer experiences

    When a customer has a fantastic experience with your brand, make sure the world knows about it. Share positive reviews, testimonials, and customer-generated content on your social media channels to highlight the best of what your brand has to offer.

    25. Proactively engage with followers to maintain brand reputation

    Your brand’s reputation is built on the relationships you nurture with your customers. By proactively engaging with your followers on social media — responding to comments, asking for feedback, and sharing user-generated content — you can maintain a positive brand reputation and foster long-lasting customer loyalty.

    Social media benefits for competitive analysis

    26. Quickly identify competitor strategies and weaknesses

    Keeping an eye on your competition is crucial for staying ahead in the game. Social media platforms offer a wealth of information on your competitors’ strategies, successes, and weaknesses. By analyzing this data, you can identify opportunities for your brand to shine and stay one step ahead.

    27. Gather industry trends and insights

    Staying up-to-date on industry trends and insights is crucial for success. Social media platforms provide a real-time snapshot of what’s happening in your industry, allowing you to adapt your strategies efficiently.

    Frequently asked questions

    Below are some commonly asked questions about social media marketing, along with answers from industry experts:

    Where can I learn more about social media marketing?

    To expand your knowledge of social media marketing, consider exploring the following resources:

    • Online courses. Websites like Coursera, Udemy, and LinkedIn Learning offer comprehensive social media marketing courses, ranging from beginner to advanced levels, to help you develop your skills.
    • Blogs and websites. Follow industry-leading blogs and websites such as Social Media Examiner, Jetpack, WordPress, and WooCommerce for insights, tips, and case studies on social media marketing.
    • Webinars and workshops. Regularly attend webinars and workshops hosted by social media experts and influencers. These events often provide valuable insights and actionable tips.
    • eBooks and guides. Download free or paid eBooks and guides on social media marketing, which can offer in-depth information and step-by-step strategies for various platforms.
    • Podcasts. Subscribe to social media marketing podcasts to stay updated on the latest trends and insights.
    • Networking. Join online communities, forums, and social media groups where professionals discuss social media marketing strategies, challenges, and experiences.

    How can I plan a social media strategy for my business?

    Below is a step-by-step summary to help you plan a social media strategy for your business:

    • Set clear goals. Identify your social media objectives, such as brand awareness, customer engagement, lead generation, or sales conversions.
    • Define your target audience. Understand the demographics, interests, and online behavior of your ideal customers to create content that resonates with them.
    • Choose the right platforms. Select social media platforms that align with your audience and objectives. Focus on a few platforms where your target audience is most active.
    • Develop a content strategy. Create a mix of content types, such as promotional, educational, entertaining, and engaging posts, that will appeal to your audience.
    • Establish a posting schedule. Determine the optimal posting frequency and timing for each platform, based on your audience’s preferences and your resources.
    • Monitor and analyze performance. Regularly track your social media metrics to measure the effectiveness of your strategy and make data-driven adjustments as needed.

    What should I post on my social media pages?

    Post a mix of content that’s relevant, valuable, and engaging for your audience. This may include blog posts, industry news, behind-the-scenes looks, promotional offers, user-generated content, and more. Remember to maintain a balance between promotional and non-promotional content to keep your audience engaged.

    To keep your social media pages engaging and relevant, consider posting the following types of content:

    • Educational content. Share informative blog posts, how-to guides, infographics, and industry news to establish your brand as a valuable resource.
    • Entertaining content. Create fun and entertaining content, such as memes, GIFs, or quizzes, that align with your brand’s tone and voice.
    • Behind-the-scenes looks. Showcase your company culture and the people behind your brand with candid photos, videos, and stories.
    • Promotional offers. Share exclusive deals, discounts, and product launches to drive sales and reward your followers.
    • User-generated content. Encourage your customers to share their experiences and showcase their posts on your social media channels.
    • Inspirational content. Post motivational quotes, stories, or images that inspire and uplift your audience.
    • Interactive content. Engage your audience with polls, surveys, or Q&A sessions to encourage participation and gather feedback.

    For more like these, see our guide 23 Social Media Post Ideas for Businesses Looking to Stand Out.

    social media post from WordPress.com

    How can I build a social media content strategy?

    To create a successful social media content strategy, follow these steps:

    • Identify your goals and objectives. Determine what you want to achieve through your social media content, such as increased engagement, brand awareness, or lead generation.
    • Understand your audience. Research your target audience’s demographics, interests, and preferences to create content that resonates with them.
    • Choose content formats. Experiment with various content formats, such as images, videos, articles, and stories, to see what performs best on each platform
    • Develop content themes and categories. Create a mix of content categories, such as educational, entertaining, promotional, and user-generated content, to maintain variety and keep your audience engaged.
    • Plan a content distribution strategy. Determine the best times and days to post on each platform and establish a posting frequency that works for your audience and resources.
    • Monitor and analyze performance. Regularly track your social media metrics to measure the effectiveness of your content strategy and make data-driven adjustments as needed.

    For a detailed walkthrough on social media content strategies, see our guide How to Create a Social Media Content Strategy in 8 Steps.

    How can I create a social media content calendar?

    A social media content calendar is an essential tool for organizing, scheduling, and tracking your social media posts.

    To create one, begin by outlining your content categories, themes, and posting frequency. Then, map out your content for the coming weeks or months, ensuring that you maintain a balanced mix of content types.

    Here’s a summary of the steps to create a social media content calendar:

    • Outline content categories. Define the content themes and categories that you’ll be posting, such as educational, entertaining, or promotional content.
    • Determine posting frequency. Decide how often you’ll post on each platform, considering your audience’s preferences and your resources.
    • Plan content in advance. Map out your content for the coming weeks or months, ensuring that you maintain a balanced mix of content types.
    • Use a digital tool. Leverage tools like Google Calendar, Trello, or Asana to organize and schedule your content calendar, making it easily accessible to your team.
    • Schedule and automate posts. Use social media management tools like Jetpack Social to schedule and publish your content across multiple platforms.
    • Monitor and adjust. Regularly review your content calendar and make adjustments based on your performance metrics, audience feedback, or emerging trends.

    For a detailed walkthrough, see our guide How to Create a Winning Social Media Content Calendar.

    How can I grow my social media followers?

    Growing your social media following takes time, effort, and consistency. To attract and retain followers, consistently post valuable and engaging content, interact with your audience, use relevant hashtags, and collaborate with influencers and complementary brands. Paid advertising and promotions can also help boost your follower count.

    To grow your social media following, consider these strategies:

    • Post valuable and engaging content. Consistently share content that’s relevant, valuable, and interesting to your target audience.
    • Interact with your audience. Respond to comments, questions, and messages to build relationships with your followers and encourage new users to join the conversation.
    • Use relevant hashtags. Incorporate popular and relevant hashtags in your posts to increase your content’s visibility and reach a larger audience.
    • Collaborate with influencers and complementary brands. Partner with influencers and other businesses in your industry to tap into their audience and expand your reach.
    • Run paid advertising and promotions. Utilize paid advertising campaigns, such as Facebook Ads or Instagram Sponsored Posts, to target and attract potential followers.
    • Host giveaways and contests. Organize social media contests and giveaways to encourage engagement, increase your reach, and reward your followers.

    For a detailed walkthrough, see our guide How to Grow Social Media Followers for Your Business.

    How can I automate social media posts to save time?

    Social media automation tools, like Jetpack Social, can help you schedule and publish posts across multiple platforms, saving you time and ensuring consistency. These tools also offer analytics to help you monitor your performance and optimize your social media strategy.

    Jetpack Social: Bringing automation to your social media strategy

    Now that you’re well-versed in the many benefits of social media for your business, it’s time to consider a game-changing tool that will help you effortlessly harness the power of social media: Jetpack Social.

    Jetpack Social is a robust social media sharing plugin for WordPress that allows you to auto-share your content across multiple platforms, schedule posts, and track engagement — all from one convenient dashboard. With Jetpack Social, you can ensure that your social media strategy is firing on all cylinders without breaking a sweat.

    By automating your social media efforts with Jetpack Social, you can focus on creating compelling content, engaging with your audience, and growing your business, while Jetpack Social takes care of the nitty-gritty.

    Social media is an essential tool for businesses of all sizes, offering countless benefits for brand visibility, customer engagement, sales, and much more. By leveraging these benefits and incorporating a social media automation tool like Jetpack Social into your strategy, you can elevate your brand to new heights and ensure that your business thrives.

  • Social Media for Nonprofits: 2023 Guide, Best Practices, & Tools

    Social media is an integral part of our lives, and it’s impossible to ignore its impact on nonprofits. These organizations can leverage social media to build relationships, spread awareness about their cause, and increase donations.

    Social media platforms provide an avenue for organizations to connect with their supporters and share their mission with the world. In this guide, we’ll explore the benefits of social media for nonprofits, the unique challenges these kinds of organizations face, and how they can create an effective strategy.

    We’ll also cover best practices for nonprofit social media management and content creation. And, of course, we’ll share how Jetpack Social can help fuel success.

    Is social media important for nonprofits?

    Social media is a vital tool for nonprofits to reach a wider audience and cultivate support. With over four billion social media users worldwide, it’s hard to ignore.

    Social media platforms can help nonprofits build their brand, share their mission, and engage with their audience. Nonprofits that leverage social media effectively can increase their reach, raise more funds, and drive more action towards their cause.

    Benefits of social media for nonprofits

    There are many benefits of social media for nonprofits. Some of the most significant benefits include:

    • Increased visibility. Social media allows nonprofits to reach a wider audience and increase their visibility. With the right content and strategy, nonprofits can gain more followers, improve engagement, and build awareness.
    • More donations. By sharing compelling stories, statistics, and campaigns, nonprofits can inspire followers to support their cause.
    • Improved engagement. Social media allows nonprofits to engage with their audience in a more personalized way. By responding to comments, sharing user-generated content, and thanking donors, nonprofits can foster a sense of community around their cause.
    • Greater volunteerism. Nonprofits can share job and volunteer opportunities, and highlight the work of existing team members to inspire others to get involved.

    Challenges of social media for nonprofits

    While social media offers many benefits for nonprofits, there are also challenges to using it successfully. Some of the most common ones include:

    • Limited resources. Many nonprofits have limited resources, including staff and budget. Social media can be time-consuming and requires a lot of effort to manage effectively.
    • Limited reach. While social media platforms have a large user base, it can be challenging for nonprofits to reach their target audience. To be successful, nonprofits need to continually create compelling content that resonates with their followers.
    • Negative feedback. Nonprofits need to be prepared to handle negative feedback and criticism on social media. It’s essential to respond professionally and handle issues quickly to avoid damaging their reputation.

    What can a nonprofit social media strategy be used for?

    The reach that social media provides makes it an essential tool for nonprofits to communicate with their audience and mobilize support. By having a clear and effective social media strategy, nonprofits can maximize their impact, reach new audiences, and build long-lasting relationships with supporters. In this section, we’ll explore the ways in which a nonprofit social media strategy can help further the mission.

    1. Support fundraising efforts

    Social media is a great tool for nonprofits to raise funds and support their cause. Without spending a ton of money, they can share their fundraising campaigns, calls to action, and success stories with a wide audience. They can also promote crowdfunding campaigns or donation-matching challenges to inspire their followers to donate more.

    By leveraging the right platform, nonprofits can reach potential donors where they spend most of their time. Social media can also be used to engage with donors and supporters, thank them for their contributions, and build better relationships.

    Instagram post from World Vision

    2. Promote events and advocacy campaigns

    Social media provides an opportunity for nonprofits to promote their events and advocacy campaigns. They can share information about events, create buzz around their campaigns, and invite their followers to participate. 

    Nonprofits can also use social media to showcase past event highlights, share photos and videos from activities, and thank supporters for their attendance. By leveraging social media, nonprofits can increase event attendance and raise awareness about their advocacy campaigns.

    3. Share milestones and success stories

    Social media can be used to help keep supporters encouraged, engaged, and motivated. By sharing updates on the nonprofit’s impact or recent milestones surpassed, organizations can build long-lasting momentum. 

    From creating graphics that summarize accomplishments to showcasing success through video interviews with beneficiaries, volunteers, and partners, there are plenty of ways nonprofits can demonstrate the impact of their work.

    post from Priority One Worldwide sharing the impact of their work

    4. Engage and cultivate relationships with donors

    It’s not all about finding new supporters — social media can be used to bolster relationships with existing donors and volunteers as well. Nonprofits can thank their donors for their contributions, and share updates and individual stories about the impact their donations have had in the real world. 

    Organizations can use social media to provide behind-the-scenes glimpses of their work, showcase the people behind their organization, and offer exclusive opportunities for supporters. 

    By leveraging social media, nonprofits can build lasting relationships with their donors and increase the likelihood of future donations.

    5. Recruit board members, volunteers, and staff

    Social media can be a powerful tool for nonprofits to recruit board members, volunteers, and staff. They can post new job openings and volunteer opportunities, as well as showcase the work of current team members. 

    Nonprofits can also use social media to highlight the benefits of working for their organization, share testimonials from current and past staff, and provide a glimpse into the culture. By leveraging social media, nonprofits can attract the right talent and build a strong team to support their mission.

    6. Drive website traffic

    Driving more website traffic is often a top goal for nonprofits, and social media provides plenty of opportunities to help meet that objective. Organizations can share links to their website, blog posts, and other content to encourage followers to abandon scrolling and explore more about them. 

    Many social media platforms also allow nonprofits to create targeted, paid ad campaigns to collect new email subscribers, find leads for potential donors or volunteers, or simply drive site traffic on a pay-per-click basis. 

    7. Engage with media outlets and personalities

    Social media can be used to engage with media outlets and build relationships with key reporters and contributors. Nonprofits can connect with journalists, bloggers, and other media influencers, share their story ideas and news releases, and establish themselves as an expert in their field. 

    Organizations can also use social media to respond to media requests, share relevant content, and thank outlets for their coverage. 

    The amplification of their message through the media relationships built on social media is an indirect benefit of using social platforms, but it’s one that can’t be ignored. 

    8. Build relationships with key stakeholders

    Nonprofits need the support of many different key stakeholders, such as policymakers, community leaders, and influencers. Through social media, organizations can engage with these stakeholders, share relevant information, and build rapport. 

    Nonprofits can also use social media to demonstrate their impact and effectiveness, highlight accomplishments, and advocate for their cause.

    9. Collaborate with other nonprofit organizations 

    Social media can be used to collaborate with complementary organizations and form partnerships to increase each other’s reach and impact, share resources, and support each other’s missions. 

    They can promote joint events, campaigns, and initiatives, and encourage their followers to get involved. 

    10. Foster a sense of community

    Nonprofits can use social media to foster a sense of community around their cause and mission. By sharing their stories, accomplishments, and impact on social media, nonprofits can inspire followers and create a sense of belonging.

    Nonprofits can also use social media to engage with their followers, respond to comments and messages, and recognize their support. 

    How to create a nonprofit social media strategy in ten steps

    With so many social media opportunities available, it can be overwhelming to know where to start. That’s why we’ve put together this step-by-step guide to help you create a successful social media strategy for your nonprofit:

    1. Define your organization’s social media goals

    Before you start creating your nonprofit’s social media strategy, it’s crucial to define your goals. What do you hope to achieve through your efforts? Are you looking to raise awareness, build relationships, or promote your campaigns? Having clear goals in mind will help you stay focused and measure your success.

    Once you’ve defined your goals, think about how social media fits into your overall strategy. Are there specific, existing campaigns or initiatives you want to promote through social media? Are there certain audiences you want to target? 

    2. Identify your strengths and unique value proposition

    Next, take a step back and think about what sets your nonprofit apart. What are your strengths and unique value proposition? How can you use your strengths to achieve your social media goals? This will help you identify the messaging and content that will resonate with your target audience and make your organization stand out.

    Think about the values and mission that drive your nonprofit. Use this to inform the messaging and content that you share on social media and make sure your online presence accurately reflects your organization.

    3. Research what other organizations are doing 

    Once you clearly understand your strengths and unique value proposition, it’s time to research what other organizations in your sector are doing on social media. What strategies are they using? What seems to be working well for them? This research can provide valuable insights into best practices, as well as areas where you can differentiate yourself and stand out.

    Take the time to review the social media profiles of other nonprofits in your sector, and make note of what you like and what you think could be improved. 

    Here’s what your research process could look like:

    • Review the social media profiles of 5-10 other nonprofits.
    • Take note of what they’re posting, how often they do so, the days of the week and times they post, and what seems to be resonating with their followers.
    • Write down what you like about their strategy and what you think could be improved.
    • Analyze their engagement metrics (likes, comments, shares, etc.) to see what kinds of content seems to work best. 
    • Consider how you can incorporate elements of their successful strategies into your own plan.
    • Look for areas where you can differentiate yourself from what they’re doing.

    4. Choose the right social media platforms

    Next, it’s time to choose the right social media platforms for your nonprofit. Consider your goals, target audience, and resources when making your decision. Each platform has its unique features and audience, so choose the ones that make the most sense for your organization.

    Identify where your target audience is spending their time online, and make sure you have a presence on the platforms that are most relevant. It’s usually best to start small and focus on a few platforms at first. You can always expand later as you grow your following.

    Here’s how to determine which social media platforms to use:

    • Research your target audience to determine where they’re spending their time online.
    • Consider platforms such as Facebook, Instagram, LinkedIn, and YouTube.
    • Make sure you fully understand each platform’s unique features and audience.
    • Choose the platforms that are most relevant to your goals and target audience.
    • Determine what kind of content works best on each platform. For example, images are a great fit for Pinterest and Instagram.
    • Keep in mind that your target audience and the platforms they use may change over time, so be prepared to adjust your strategy as needed.

    WooCommerce has a great guide to help you choose the right social media platforms. While it focuses on ecommerce stores, there’s a lot of great information for nonprofits, too!

    5. Develop brand guidelines for content creation and curation

    With your social media platforms in place, it’s time to develop brand guidelines for content creation and curation. These guidelines should outline the tone, style, and messaging that should be used across all of your social media profiles. This will help ensure consistency and coherence in your messaging and make it easier for your team to create and curate content.

    Focus on the image you want to project through your social media presence, and make sure your brand guidelines reflect this. Ensure that all content created for your social media channels aligns with your brand guidelines, and consider hiring a professional to help with content creation, if necessary.

    Here are some tips related to developing social media brand guidelines for a nonprofit:

    • Define the tone and voice you want to use on social media.
    • Determine the style of content that will best represent your brand.
    • Decide on the messaging you want to convey through your social media channels.
    • Make sure your brand guidelines are clear, concise, and easily accessible to your team.
    • Make sure all team members involved in social media management are trained on the brand guidelines and understand how to apply them in their work.
    • Regularly review and update your brand guidelines as needed to ensure they remain relevant and effective.
    • Create or highlight real-world examples of posts that you want to emulate. Do the same for posts whose content, tone, or imagery goes against what you want for your organization. Make notes on why these examples are good or bad. 

    6. Choose the right automation tools to increase efficiency

    There are a variety of automation tools available that can help increase efficiency and save time. Tools such as Jetpack Social can help you automate your social media posting and streamline your efforts by auto-sharing your website content on social media and scheduling posts in advance.

    Jetpack Social homepage with the text, "write once, post everywhere."

    When choosing tools, consider taking the following steps:

    • Research and compare different automation tools to determine which ones are the best fit for your organization.
    • Consider factors such as ease of use, cost, and the specific features offered by each tool.
    • Make sure your top choice integrates with your existing tools and systems.
    • Take advantage of free trials or demos to test out the tool before making a decision.
    • Consider how the automation tool will impact your team’s workflow and whether it will save enough time to warrant any expenses.
    • Make sure the automation tool you choose offers analytics and reporting capabilities so you can track your social media performance.
    • Take advantage of the support and resources offered by the tool to ensure you’re making the most of its features.

    7. Create a content calendar

    Once you have your brand guidelines and automation tools in place, it’s time to build a content calendar. This calendar should outline the content you plan to post on each of your social media platforms and when those posts should be distributed. This will help ensure that you’re consistently sharing engaging and relevant content. It will also make it easier to plan and schedule posts in advance.

    Having a content calendar in place can help you stay organized and avoid last-minute scrambling to create posts.

    To create a content calendar for your nonprofit:

    • Start by mapping out important events, campaigns, and milestones for your organization.
    • Plan content around these events in advance to make sure you are capitalizing on opportunities to engage with your audience and that your social media efforts are purposefully contributing to your goals.
    • Consider the different types of content you want to create and when each type of content is best shared.
    • Make sure you include a mix of promotional, educational, and engaging content in your calendar.
    • Use your brand guidelines to inform the tone, style, and messaging of your content.
    • Use analytics and insights from past posts to inform the content you include in your calendar.
    • Make sure you’re scheduling posts at optimal times for each platform.
    • Consider using a shared calendar or project management tool to keep your content calendar organized and accessible to your team.

    8. Leverage social media influencers and advocates

    Social media influencers and advocates can help spread your message and reach a wider audience. Partner with individuals who are passionate about your cause, have a large following on social media, and whose reputation will reflect positively on your organization. 

    To successfully partner with influencers and advocates, consider the following:

    • Research potential influencers and advocate partners by looking at their social media presence, following, and engagement levels. A smaller audience that’s heavily engaged is often better than a large group of followers who never pay attention. 
    • Reach out to individuals who align with your mission and values and see if they would be interested in partnering with you.
    • Create a clear agreement outlining the terms of the partnership, including the type of content you want them to create, the compensation you can offer, and the expected outcomes from the partnership.
    • Provide influencers and advocate partners with the resources and information they need to create effective content.
    • Make sure you’re tracking the impact of your influencer and advocate partnerships and adjusting your approach as needed.
    • Consider offering incentives to your influencer and advocate partners, such as exclusive access to events or early access to new campaigns.
    • Foster ongoing relationships with influencer and advocate partners to ensure that the partnership continues to be mutually beneficial.

    9. Integrate social media into your broader strategy

    Social media should be integrated into your broader communications and fundraising strategy. Make sure your efforts support your overall goals and objectives. For example, you can use social media to promote your fundraising campaigns, thank donors, and share updates on your progress.

    Things to keep in mind when integrating social media into your broader strategy:

    • Make sure your social media profiles are connected to your website, email, and other communication channels so that you can drive traffic and conversions from social media to other parts of your organization.
    • Develop a cross-promotion strategy that takes advantage of the strengths of each channel. For example, you can promote your social media channels through email and vice versa.
    • Use social media to build relationships with donors and supporters by responding to comments and messages, publicly recognizing their contributions, and sharing updates on the impact of their donations.
    • Use social media to promote fundraising campaigns and events by creating compelling visuals and videos that highlight the impact of the campaign and the reasons why people should donate.
    • Keep your supporters informed and engaged with regular updates on your progress by sharing success stories, impact updates, and other content that highlights the impact of their contributions.

    10. Analyze and adjust your social media strategy

    Finally, regularly analyze the success of your social media efforts and make adjustments. Continuously iterate and improve your strategy to ensure that you’re making the most of your social media presence. Use analytics tools to measure the reach and engagement of your posts and identify areas for improvement. This will help you make informed decisions about how to adjust your strategy and achieve your goals more effectively.

    It’s important to remember that social media is constantly evolving, and your strategy should be flexible and adaptable. Be open to trying new tactics, experimenting with different types of content, and adjusting your approach as needed. By continuously refining your strategy, you can ensure that your social media efforts are making the biggest impact possible for your nonprofit.

    Best practices for nonprofit social media management and content creation

    Social media is a powerful tool for nonprofits to engage with their audience, build relationships, and increase their impact. Here are 12 best practices for nonprofit social media management and content creation:

    1. Optimize your content for each platform

    To maximize the impact of your social media efforts, you should optimize your content for each platform. Consider the unique features and audience of each one and adjust your content accordingly. For example, on Instagram, visual content like images and videos tend to perform well, while on others, short, concise updates are often the most effective.

    Take the time to understand what generally works best for each platform, and experiment with different types of content to see what resonates with your specific audience.

    2. Experiment with different types of content

    Don’t be afraid to try new things. Experimenting with different types of content can help you find what works best for your audience and make the most of your social media presence. Try incorporating images, videos, live streams, and other types of content into your strategy to see what gets the most traction.

    Think about the different ways you can tell your nonprofit’s story, and consider how each type of content can help you achieve your goals. For example, visual content like images and videos can help create emotional connections with your audience, while live streams can help you engage with your followers in real time.

    3. Use storytelling to create emotional connections

    Storytelling is a powerful tool for creating emotional connections with your audience. Share stories that demonstrate the impact of your work and inspire others to get involved. Think about the different ways you can bring your nonprofit’s stories to life, and how you can use storytelling to engage and inspire your audience.

    Humanize your nonprofit and make a personal connection with your audience. Share stories about the people you serve, the impact of your work, and the challenges you face. Make sure your stories are relatable, inspiring, and memorable.

    4. Incorporate user-generated content from supporters and advocates

    Incorporating user-generated content from supporters and advocates can help build a sense of community and create a more authentic and engaging presence on social media. Encourage your followers to share their own stories and experiences related to your nonprofit’s cause, and feature this content on your social media channels.

    Consider using contests, challenges, and campaigns to encourage your supporters to share their own stories and experiences.

    5. Create social media content that’s accessible to all

    It’s essential to ensure that your social media content is accessible to all, including individuals with disabilities. Use alternative text for images and closed captioning for videos to ensure that everyone can access and enjoy your content. 

    Also, make sure your social media content is easily understandable, regardless of the language or culture of your audience. Use clear and concise language, and avoid jargon and technical terms whenever possible.

    Instagram post from Youth on Their Own, a nonprofit organization

    6. Use visual and video content to tell your nonprofit’s story

    Visual and video content are a powerful way to tell your nonprofit’s story and create emotional connections with your audience. By incorporating images, videos, and other types of visual content into your social media strategy, you can bring your story to life and engage your followers in new and exciting ways.

    Consider using a variety of types of visual content, including photos and videos of your staff and volunteers in action, graphics and infographics to explain complex concepts, and behind-the-scenes glimpses of your work. You can also showcase the impact of your work, share inspiring stories from your supporters, and connect with your audience on a deeper level.

    When creating visual content, focus on high-quality images and videos that clearly communicate your message. Use compelling captions, hashtags, and other creative elements to make your visual content stand out on social media.

    7. Leverage tools to automate social media posting

    Automating your social media posting can save you time and increase efficiency, allowing you to focus on creating and curating the most engaging content. There are a variety of tools available, including Jetpack Social, that can streamline your efforts.

    When choosing a tool for automating your social media posting, consider your goals, target audience, and resources. Make sure the tool you choose is easy to use and integrates seamlessly with your existing systems and processes.

    Once you have a tool in place, consider how you can put it to work to automate your social media — including scheduling posts in advance, creating and publishing content at optimal times, and tracking your performance and engagement metrics.

    By leveraging tools to automate your social media posting, you can increase your efficiency, save time, and make the most of your social media presence.

    8. Develop a social media ambassador program

    Developing a social media ambassador program is a great way to engage your supporters and encourage them to share your message with their own followers. People who are both passionate about your cause and have a large following on social media are incredibly valuable assets for your nonprofit.

    To develop a social media ambassador program, consider how you can involve your supporters and advocates in your existing efforts, and think about what types of recognition and rewards you can offer. You can also provide ambassadors with training and resources to help them effectively share your message.

    By working with the right people, you can make a bigger impact through your social media. And by recognizing and rewarding their contributions, you can create a sense of loyalty and teamwork that can further help your efforts thrive. 

    9. Recognize and thank supporters, donors, and partners

    Regularly recognizing and thanking your supporters, donors, and partners on social media is a powerful way to build a sense of community and strengthen your relationships with key stakeholders. Whether you’re thanking a donor for their contribution, recognizing a volunteer for their service, or acknowledging someone for their support, this is an important part of building a strong and engaged community.

    When recognizing and thanking your supporters, focus on personalizing your messages and making them feel valued. Use images and other types of visual content to increase the impact of your messages, and consider offering exclusive opportunities or rewards to those who are recognized.

    10. Highlight the work of your staff and volunteers

    Your staff and volunteers are the backbone of your nonprofit, and highlighting their work on social media can help create a more personal and engaging presence. By showcasing their work, you can create a more human and relatable presence on social media and connect with your followers on a deeper level.

    Plus, it can invigorate and encourage your team, so they remain productive and motivated in their day-to-day work. 

    Here are some ways to highlight the work of your staff and volunteers:

    • Share updates on what they’re doing. Whether it’s about specific projects or initiatives, or just a general overview of what they’re working on, talking about the work of your staff and volunteers can help followers get a better understanding of the impact of your nonprofit.
    • Highlight the impact of their efforts. Consider how you can showcase the impact of the work of your staff and volunteers. This could be in the form of stories from people whose lives have been positively impacted by your nonprofit’s work, or data and statistics that demonstrate the progress made by their efforts.
    • Share behind-the-scenes content. People love to get a behind-the-scenes look at organizations, and your staff and volunteers are a great way to give followers a sneak peek into your nonprofit. Consider sharing photos and videos of your team in action, or hosting a Q&A session with your staff or volunteers on social media.
    • Recognize and reward their efforts. Donors aren’t the only ones who deserve recognition. Regularly recognizing and thanking your staff and volunteers on social media can help build morale and encourage them to continue their great work. Consider how you can reward their efforts, whether it’s through shoutouts on social media, special events, or other forms of recognition.

    11. Respond to comments and messages promptly and professionally

    Responding to comments and messages is an essential part of social media management. By focusing on quick, respectful responses, you can build stronger relationships with followers and create a more engaging presence on social media.

    Here are tips to help you respond to comments and messages:

    • Train your team. Make sure your team is trained to handle comments and messages in a professional and consistent manner. This could involve creating a set of guidelines or providing training on how to handle difficult or sensitive situations. Newer members of your team should defer tricky responses to senior staff until they’ve gained full confidence.
    • Set a response time. Ensure that all comments are responded to in a timely fashion. Consider setting a target response time, such as within 24 hours, to ensure that you’re meeting the expectations of your followers.
    • Be proactive. Don’t wait for comments and messages to come to you — be proactive and reach out to your followers on social media. This could be in the form of asking for feedback, hosting Q&A sessions, or simply checking in with your followers to see how they’re doing.
    • Respond professionally. When responding to comments and messages, make sure you’re doing so in a professional and consistent manner. This could involve using a specific tone or style in your responses or making sure that your team is trained on how to handle difficult or sensitive situations.

    12. Highlight the work of other nonprofits and organizations

    Collaboration and community-building are key components of any successful nonprofit strategy, and social media is a powerful tool for achieving these goals. By highlighting the work of complementary nonprofits and organizations, you can demonstrate your commitment to the common good and help build relationships with other organizations. This can lead to increased opportunities for partnerships and joint initiatives, which can help you achieve shared goals and make a bigger impact.

    To get started, consider the following tips:

    • Identify other organizations that are making a difference. This can include nonprofits with similar missions, as well as organizations that are addressing related issues in your community.
    • Follow these organizations on social media and engage with their content. Share their posts, comment on their updates, and participate in their initiatives.
    • Collaborate on social media to achieve shared goals. Share each other’s campaigns, promote each other’s initiatives, and work together on joint projects.
    • Highlight the work of other organizations in your posts and updates. This can include showcasing their initiatives, sharing their success stories, and recognizing their contributions to the community you’re serving.
    • Consider hosting joint events or initiatives with other organizations. Work together on social media campaigns, live events, or fundraising initiatives. 

    Frequently asked questions about social media for nonprofits

    Do nonprofits need social media?

    Yes, social media is essential for nonprofits. It provides a platform for organizations to reach a wider audience, engage with supporters, promote their cause, and raise awareness about their work. Social media also offers an opportunity for nonprofits to build relationships with their stakeholders, share their impact, and develop a greater sense of community.

    What should a nonprofit post on social media?

    A nonprofit should post content that aligns with its goals and objectives, and is relevant and engaging to its target audience. Some examples of the types of content that nonprofits can post on social media include:

    • Updates on their work and impact
    • Stories and testimonials from beneficiaries and supporters
    • Behind-the-scenes videos that highlight the work of staff and volunteers
    • Calls to action and fundraising campaigns
    • Success stories and achievements
    • Behind-the-scenes content that provides a glimpse into the day-to-day work of the nonprofit
    • Inspiring quotes and messages
    • Relevant news and articles related to their cause
    • Images and videos that showcase their work

    How often should a nonprofit post on social media?

    The frequency of posting will depend on a variety of factors, including your goals, target audience, and resources. On average, it’s recommended that nonprofits post one to two times per day on each of their social media platforms. However, it’s essential to find the right balance between frequency and quality and not to compromise on the quality of your content for the sake of posting more frequently.

    When are the best times for nonprofits to post on social media?

    The best times to post on social media will vary depending on your target audience and the platform you’re using.

    On Facebook, the morning usually works best. On platforms like Instagram, users tend to be more active throughout the daytime hours. 

    Consider using a social media management tool, like Jetpack Social, to schedule your posts in advance and optimize for the best times.

    Jetpack Social: Fueling your nonprofit’s social media success

    With Jetpack Social, nonprofits can schedule and share their content across multiple social media platforms, auto-share their website content, and manage their social media presence from one convenient dashboard.

    If your nonprofit has a website on WordPress, then Jetpack Social is the perfect solution to help you achieve your social media goals. By leveraging the power of Jetpack Social, you can focus on what you do best — making a difference — while leaving your social media management in the capable hands of Jetpack.

    To learn more about Jetpack Social and start fueling your nonprofit’s social media success today, visit the following page: https://jetpack.com/social/

  • The 22 Different Types of Social Media Content (2023 Guide)

    Do you feel like your social media posts are stuck in an endless loop? Have you run out of new things to say and grown bored? Does it seem like you’re not getting any traction? 

    Don’t worry — these feelings are common among marketers and small business owners. Today we’re going to explore the world of social media content and provide you with 22 different types of content to help you engage your audience in new and exciting ways.

    22 types of social media content that can help you grow your brand in 2023

    1. Text-based posts

    These kinds of posts are like plain white bread — they’re easy and have their place, but can get boring after a while. So, think of creative ways to spice them up and add some personality and humor to your text-based posts.

    For instance, try incorporating jokes, puns, or funny anecdotes relevant to your brand or industry. You can also use emojis, and depending on the platform, play around with bold and italicized text, and various fonts to make your text-based posts more visually appealing.

    2. Blog posts and articles

    Sharing blog posts and articles from your own website is a great way to drive traffic and engagement. It allows you to showcase your expertise and establish your brand as a thought leader in your industry. 

    When sharing your own content, make sure it aligns with your brand’s messaging and provides value. You can also add commentary or insights to the shared content to provide additional value and spark conversations with your readers.

    Jetpack Social is a powerful tool that can help automate the process of sharing blog posts and website content on social media platforms such as Facebook, LinkedIn, and more.

    By connecting your WordPress site to Jetpack, you can easily set up automatic sharing of new blog posts and website content to your social media accounts. This can save you a significant amount of time and effort, allowing you to focus on creating new high-quality content and engaging with your audience.

    You can also schedule posts in advance, so you can plan and execute an effective social media content calendar without being constantly tied to a phone or computer. 

    Pro tip: You can share your blog posts and native content more than once. When you complete a new piece of blog content, use Jetpack Social to schedule social media posts to promote it every few months. When scheduling far into the future, just be sure to consider holidays and other things around future dates that might conflict with your messaging.

    3. Images (and their captions)

    A picture is worth a thousand words, but a clever caption can take your social media content to the next level. It’s akin to adding a dash of salt and pepper to your food — it can make a big difference. When creating captions for your images and photos, try to tell a story, convey a message, or ask a question that encourages engagement.

    This is also an opportunity to get your followers involved. Post a picture and ask them to write a caption and leave it in the comments. This can quickly turn into a fun and highly-engaging activity for everyone. 

    4. Stories and reels

    Short-form video content is all the rage these days — and for good reason. They give you a quick burst of energy and excitement. Plus, they’re a great way to showcase your brand’s personality.

    Try to keep your stories and reels short, sweet, and to the point. Use music, animations, and stickers to add some flavor to your content.

    5. GIFs and memes

    Humor is a powerful tool in the world of social media, and nothing gets a chuckle quite like a well-placed GIF or meme. Use GIFs and memes that are relevant to your brand, industry, and audience. You can also create your own custom designs to add a personal touch to your content and stand out in the social media landscape.

    Pro-tip: Sometimes memes and GIFs have a short shelf life. You don’t want to use an image that’s six months too late! And being an early adopter can pay off. If you or your team sees an opportunity while watching TV or browsing online, act quickly and post right away. Unlike promoting blog posts, you may not want to schedule memes and GIFs to repost months and months into the future. 

    6. Infographics

    Infographics provide valuable information in a visually-appealing format. Creating infographics that are easy to read and understand is crucial. Use colors, icons, and illustrations to make the content more engaging. You can also use them to explain complex concepts or data in a simple and digestible way.

    You may want to test formats to see what sizes work best to post on social media, or add the infographic to your website, then share previews on social media. This is another thing you can pre-schedule using Jetpack Social and promote several times a year. 

    Pro-tip: Infographics are a great example of content you can update each year to keep content fresh with minimal effort. Once you have an initial design created, you can simply update the stats each year. 

    7. User-generated content (UGC)

    Encourage your audience to create and share content related to your brand. Be sure to give proper credit to the UGC creators and ask for their permission before sharing their content. You can also hold contests or challenges to incentivize your audience to create more!

    Tweet from Day One, sharing a testimonial from a customer

    Social listening tools can help you spot people who have already naturally posted about your brand. Pick the best ones and reach out to them about using what they’ve created. Most people will be honored that you’d share their content, but you can offer a discount code or similar incentive if you need to. 

    Working with influencers who have a niche following in your industry is another great way to get creative, natural-looking content that’s likely to appeal to your audience. 

    8. Testimonials

    Sharing customer testimonials can help establish trust with potential customers and showcase the value of your products or services. Testimonials should be both authentic and highlight specific benefits or results. You can also include photos or videos of the customers to add a personal touch to the content. 

    While these might be reviews left naturally, you can also contact happy customers to record a formal interview and take video or audio snippets to use on social media. 

    WooCommerce video testimonial posted on Instagram

    You don’t need to have expensive production value when recording testimonials. Often, a genuine, Zoom-style recording is more trustworthy and authentic to followers. 

    9. Interviews

    Speaking of interviews — you don’t have to stick to customers as your subjects. Connect with industry experts or other thought leaders who can provide valuable insights. Their credibility will rub off on your brand, and they might benefit from reaching new people when you promote the end result. Though, sometimes, you may need to pay experts for their time. 

    Be sure to use your interview in as many ways as possible. Publish video snippets, share the entire interview, create an audio version with a podcast, add quotes to social media graphics, write a blog post with a nicely-edited summary and quotes from the interview, and design an infographic with top takeaways. 

    When conducting interviews, prepare thoughtful and relevant questions, and provide context for your audience. If interviews are well received, you can start an entire series or podcast to continue the momentum.

    10. Demos and tutorials

    You can create both live and pre-recorded demos of how your product works. These provide a less scripted way to showcase the benefits of what you have to offer than a highly-edited brand video or commercial. 

    Doing live demos opens you up to mistakes, but can be much more engaging. They allow you to take viewer questions and immediately incorporate feedback into the demonstration. 

    Make sure that the demos and tutorials are easy to follow and understand, and use visuals and step-by-step instructions to guide your audience through the process. 

    Well-produced tutorials as part of a help section on your website can serve as marketing pieces for people seeking to better understand your offer before committing. They can also ensure a good experience for new customers, so you minimize returns or cancellations and maximize positive reviews and referrals. 

    11. Webinars

    Webinars offer an engaging way to educate your audience on a specific topic or product and provide a platform for real-time conversations. Make sure to promote your webinars in advance and provide clear instructions for joining. After the webinar, provide additional resources and information to keep your audience engaged.

    Webinars are often thought of as a business-to-business tool. However, any company can put on a webinar if it offers an opportunity to provide value to your audience, position your brand more favorably, and demonstrate how your products or services can benefit viewers. 

    Usually, only a fraction of those who sign up for a webinar will actually attend. For this reason, an automated email follow-up program can help you maximize the impact you receive from subscribers who opted in to the webinar.  

    Pro-tip: Webinars can take a lot of work. Instead of putting them on yourself, look for opportunities to speak on other brands’ webinars to reach a new audience with less work. You might also consider partnering with a complementary brand or two, so you can pool resources for production, promotion, and speaker fees (bringing in a known guest can boost attendance, but is often costly).  

    12. Live streams

    Offering real-time updates, behind-the-scenes glimpses, or Q&A sessions with your audience through live streams is a powerful way to create engagement. Remember to announce the topic in advance, and interact with your audience throughout the stream. The live stream can also be saved for later viewing or repurposed into other formats.

    Some platforms may boost the reach of live content to help grow this part of the platform. So, going live may help you get in front of more people than normal. 

    13. Podcast episodes and audio snippets

    Podcasts offer an opportunity to create long-form content and establish your brand’s voice. Ensure that your podcast format and topic align with your brand’s values and messaging. Using audio snippets from the podcast as teasers or promotional content for social media can also help you get the most from your efforts. 

    One way to grow a podcast is to have well-known guest panelists join your episode or appear on someone else’s episode. This is where working with an influencer can lead to a multi-faceted campaign. Have them post about your brand, appear in some photos you can use on product pages and social media, and do an interview on your podcast to attract new listeners. 

    People who take the time to listen to your podcasts are likely to have strong loyalty and a high lifetime value as a customer. 

    14. Quotes

    Providing inspiration and motivation to your audience using quotes is a simple yet effective strategy. You can create your own or feature famous words from important people throughout history. You can even quote your customers, reviews from your site, and employees! 

    15. Contests and giveaways

    Engage your audience and increase brand awareness by offering contests and giveaways. Ensure that your contests and giveaways have clear instructions and guidelines, so participants can avoid confusion. Partnering with other brands or influencers can also increase the reach of your contest or giveaway.

    This is another place where sales and promotions can take a back seat. If you sell a B2B product to those working in a specific industry, you could post business advice and inspirational quotes throughout the week to stay top-of-mind and encourage your customers. This will help further your goals without constantly bombarding followers with sales pitches.

    16. Discounts and promotions

    Coupons — both digital and physical — still work to drive action. Providing exclusive offers to your social media followers can help them feel appreciated and like they’re part of an exclusive group. If you have a long sales process, giving coupon codes at the start might not yield results. 

    However, providing discounts to social followers, who are further along in the sales process, may be enough to turn them from onlookers to customers. Limited-time offers can create a sense of urgency, encouraging action from your audience.

    Learn more about using urgency in marketing your ecommerce store

    17. Quizzes, polls, and surveys

    Engage with your audience and gather valuable feedback by creating quizzes, polls, and surveys. They can be about something related to your business — â€which new design do you like best?” — or something in pop culture that’s loosely related but gets eyes on your profile. 

    Some social media platforms allow you to run polls and quizzes directly on them. However, for more detailed insights, consider something like Crowdsignal. Crowdsignal integrates perfectly with WordPress sites — it’s built by the people behind WordPress.com — and makes it easy to create all kinds of surveys and understand the results. 

    CrowdSignal survey analytics dashboard

    18. Teasers and announcements

    Social media is great for building anticipation and excitement for upcoming products, events, or promotions. Teasers provide enough information to pique your audience’s interest but don’t reveal every detail. You could even release more clues each day for a period of time or have folks guess what the announcement will be about. 

    Roll out special announcement graphics when the time is right, go live to break the news, or film a polished promo and release it to your social media followers before anyone else. 

    teaser for WordPress V6.2 on social media

    Teasers and announcements can also be part of a larger marketing campaign to build momentum and create buzz. Give some clues, but require people to subscribe to your newsletter to hear the news early. This creates excitement and could help build your email subscriber base.

    19. AMAs (ask me anything)

    Connecting with your audience and providing a platform for open and honest communication can be achieved through AMAs. You could go live on video or host a live chat through text. Be prepared to be a little edgy, honest, and even controversial with opinions to get interaction going. However, make sure to stay within the bounds of your brand guidelines and editorial standards. 

    20. Slide decks and presentations

    Sales teams have long used slide decks to make convincing presentations for prospects. But an in-person meeting isn’t the only useful place for these. Create easy-to-follow decks that can be shared on social media platforms. Allow people to browse through them at their own pace and include strong calls to action and clear next steps so intrigued followers feel confident reaching out to further their journey. 

    These don’t have to be all about sales, however. Release a five-slide deck featuring four new products and one great achievement from the past year. Put out a ten page presentation on improvements you made to sustainability efforts. Or share snippets about a new raw materials provider that brings new benefits for users. 

    There are lots of ways to use these kinds of go-at-your-own-pace materials to educate followers and improve their perception of your products, services, or overall brand. 

    21. Shoppable content

    Turning social media into a sales channel and driving revenue for your brand can be achieved through shoppable content. Ensure that your message is clear and concise, highlighting the benefits of your product or service. You can also use them to showcase new products or promotions, adding value to your audience.

    Use these kinds of posts with influencer content so that people can see something they love and act right away. 

    Learn more about social commerce.

    22. Ephemeral content

    Ephemeral (short-term) content, such as Instagram or Facebook Stories, is a great way to create a sense of urgency and provide exclusive content to your audience. It’s like having a limited-time offer — it creates a fear of missing out and encourages engagement because followers know they can’t come back in a few days to view it again. 

    To create impactful ephemeral content, ensure that it provides value to your audience and is visually attractive. Pair this with a limited-time discount code for a quick boost in sales. 

    Best practices for creating social media content

    Now that we’ve explored the different types of social media content, let’s take a look at some best practices for creating and sharing content on social media.

    1. Leverage automation to create and post content

    Tools like Jetpack Social offer a range of powerful features to help you streamline your social media work and save time.

    Jetack Social homepage with the tagline, "write once, post everywhere"

    One of the key features is the ability to auto-share your blog posts and website content on social media platforms. Once you connect your WordPress site to Jetpack Social, you can easily configure the settings to automatically share your new blog posts and website content on your social accounts. This means that every time you publish a new blog post or update your website, your followers will automatically be notified.

    In addition to auto-sharing, Jetpack Social allows you to schedule your social media posts in advance. Plan out your content for the coming weeks or months, schedule it to be posted at the optimal times for your audience, and rest a bit easier.

    You can also repost evergreen content, such as popular blog posts or articles, to keep your social media channels active and engaging.

    To lean more about Jetpack Social and how you can leverage its features, visit the following page: https://jetpack.com/social/

    2. Know your audience

    Understand who your audience is, what they like, and what motivates them to interact with your brand. Use this information to create content that resonates with them and provides value.

    The following tips will help you better know your audience:

    • Use site and social media analytics. Website and social media analytics tools gather data on your audience’s demographics, behavior, and engagement that you can use to better understand what content resonates with your audience and what topics or formats you should focus on. Jetpack Stats is a great option for basic information on your WordPress site. As you advance, you can utilize tools like Google Analytics and built-in data on social profiles. 
    • Monitor your competition. Keep an eye on your competitors’ social media accounts to see what content is resonating with their audience. Use this information to identify gaps in your own content strategy, and incorporate what you learn into future posts.
    • Conduct surveys and polls. Ask your audience directly for feedback and insights on their preferences and behavior. Surveys and polls can help you gather valuable data on your audience’s interests, opinions, and pain points.
    • Use buyer personas. Create buyer personas that represent your ideal customers based on demographic, behavioral, and psychographic data. This can help you create more targeted and effective content that resonates with your audience.
    • Engage with your audience. Respond to comments and messages, and interact with your audience on social media. This not only helps build relationships with your customers, but also provides valuable feedback and insights for your content strategy.

    3. Choose the right format

    Consider the type of content and message you want to convey, and choose the format that best suits it. For example, use images and videos to showcase products, and use polls or quizzes to gather feedback from your audience.

    Choose the right type of content and messaging by following these guidelines:

    • Experiment with different formats. Don’t be afraid to try new formats and styles to see what resonates with your audience. Test out different types of content, such as live streams or Instagram Reels, to see what works best for your brand and audience. Once you’ve settled on what works, continue to experiment. What worked best last year may no longer be the right option for the months ahead.
    • Keep it short and sweet. Social media users have short attention spans, so make sure your content is concise and to the point. Use visuals and headlines to grab attention and communicate your message quickly.
    • Use storytelling. Use storytelling techniques to make your content more engaging and memorable. Create a narrative around your brand or products, or use user-generated content to tell authentic stories.
    • Incorporate calls to action. Include clear calls to action in your social media content, such as encouraging visitors to sign up, comment feedback, or share their own content. This encourages engagement and helps drive traffic and sales.
    • Use appropriate tone and voice. Consider your brand’s tone and voice when creating social media content. Use language and style that aligns with your brand’s personality and messaging, and avoid using jargon or technical terms that may confuse or turn off your audience.
    • Use localization. Consider localizing your social media content to appeal to specific markets or regions. Use local language, cultural references, and images that resonate with your target audience.
    • Use data and insights. Use social media analytics and insights to guide your content strategy and optimize your content for maximum engagement and reach.

    4. Use compelling visuals

    Visuals are key to creating engaging social media content. Use high-quality images, videos, or graphics that align with your brand’s visual identity and messaging.

    Compelling graphic with a photo and visuals from Day One app

    Here are best practices to follow when creating visuals:

    • Use consistent branding. Use consistent colors, fonts, and design elements across all your social media content. This helps reinforce your brand’s visual identity and creates a cohesive look and feel. You might consider creating brand guidelines and editorial standards, so others on your team can more easily contribute new content that fits in with your ongoing style.
    • Optimize for different platforms. Optimize your visuals for various social media platforms, taking into account image and video size, aspect ratio, and resolution. This ensures that your visuals look their best on all platforms. A one-size-fits-all graphic might save a small amount of time, but will hurt your results and reduce your return on investment.
    • Use user-generated content. Incorporate user-generated content, such as customer photos or videos, into your social media content. This not only helps showcase your products or services, but also adds authenticity and credibility to your brand.
    • Use humor and creativity. Use humor and creativity to make your visuals stand out and grab attention. This can help make your brand more memorable and increase conversations with your audience.
    • Use captions and text overlays. Use captions and text overlays to provide context and information about your visuals. This can help your audience understand your message and increase engagement.
    • Use video. Use video to create dynamic and engaging content that showcases your products or services. This can include product demos, behind-the-scenes footage, or customer testimonials.

    5. Write engaging captions

    Captions provide context and additional information for your social media posts. Use them to provide value, tell a story, or ask a question that encourages interactions.

    Expert tips:

    • Keep it concise. Keep your captions short and to the point and make sure they’re easy to read and understand.
    • Use storytelling. As opposed to alt text — which should briefly describe a visual for those who can’t see it — use captions to add to the “story” of the post, not just repeat what’s already available. 
    • Use emojis and hashtags. Use emojis and hashtags to add personality and context to your captions. This can help your posts stand out and make them more discoverable on social media. This isn’t appropriate for every brand or for every post, so use some discretion with emojis.
    • Provide value. Use captions to provide value to your audience, such as tips, insights, or information about your products or services. This helps build trust and credibility with your audience.
    • Encourage engagement. Use captions to ask questions, encourage feedback, or invite your audience to take action, such as liking or sharing your post. This can increase engagement and reach on social media.
    • Use a call to action. Use captions to include a call to action, such as visiting your website, signing up for a newsletter, or making a purchase. This can help drive traffic and conversions for your business.

    6. Use appropriate hashtags

    Hashtags can help increase the reach of your social media posts and make them more discoverable. Use relevant and specific hashtags that align with your content and brand.

    Here are best practices to follow when using hashtags:

    • Research and use popular hashtags. Research popular hashtags that are relevant to your content and industry, and use them in your posts. This can help increase the visibility of your posts and make them more discoverable to a wider audience. On platforms like Instagram, you can start by searching for a hashtag yourself and it will provide an estimated number of posts that have used that same one.
    • Use niche hashtags. Use specific and niche hashtags that target your audience and increase the relevance of your posts. This can help attract more engaged and targeted followers.
    • Create your own branded hashtag. Create your own branded hashtag that represents your brand and encourages user-generated content. They’re great for building brand awareness and engagement and creating a sense of community around your brand. Remember, though, branded hashtags are unlikely to increase your reach for new followers.
    • Use a mix of hashtags. Use a mix of popular, niche, and branded hashtags in your posts to reach a wider and more targeted audience. This will contribute to increased visibility and interactions.
    • Don’t overdo it. Use a moderate number of hashtags in your posts, and avoid overusing or spamming them. This can hurt the credibility of your brand and decrease engagement with your audience.
    • Use hashtags on different platforms. Use hashtags on different social media platforms, but be aware of the varying hashtag trends and practices. For example, Twitter and Instagram have different character limits and hashtag usage, so make sure to adjust your strategy accordingly.
    • Test and optimize. Test different hashtags and strategies to see what works best for your brand and audience. Use social media analytics to measure the performance of your hashtags and optimize your work over time.

    7. Encourage engagement and UGC

    Interact with your audience by responding to comments and messages, and encourage UGC by holding contests or challenges. This not only increases engagement but also helps build a sense of community around your brand.

    To encourage engagement and user-generated content, consider these action items:

    • Ask questions. Use your captions or posts to ask questions and encourage your audience to share their thoughts or opinions.
    • Respond to comments. Respond promptly and respectfully to comments on your posts, and engage with your audience to build relationships and trust.
    • Use polls and quizzes. Use polls and quizzes to gather feedback from your audience and encourage engagement. This can also provide valuable insights into your audience’s preferences and behavior.
    • Hold contests or challenges. Hold contests or challenges that encourage UGC and engagement, such as photo contests or caption challenges. 
    • Share user-generated content. Share user-generated content, such as customer photos or reviews, on your social media accounts. This not only helps showcase your products or services, but also adds authenticity and credibility to your brand.
    • Use incentives. Use incentives, such as discounts or prizes, to encourage engagement and UGC. This can motivate people to participate and increase the success of your campaigns.

    8. Post at the right time

    Consider the time of day and day of the week when your audience is most active on social media, and schedule your posts accordingly. This helps increase the visibility of your content.

    Here are tips to help you post at the right time:

    • Use social media analytics. Use social media analytics tools to track your audience’s activity and engagement patterns on different platforms. This can help you identify the best times to post and optimize your posting schedule. In Facebook Insights, for example, you can go to the Posts tab and scroll down to When Your Fans are Online to learn when the majority of your followers are active — by both day of the week and time of day.  
    • Test different posting times. Test different posting times and analyze metrics to determine the best times for your brand and audience. This can vary depending on your industry, audience demographics, and time zones.
    • Consider different time zones. Consider the time zones of your audience and schedule your posts to reach them at the most appropriate times. Posting about breakfast when it’s already early afternoon for a large portion of your visitors can make you seem out of touch and scripted. Plus, it will reduce interactions and reach and limit the amount of return you get for your efforts. 
    • Use scheduling tools. Use scheduling tools, such as Jetpack Social, to schedule your posts in advance and ensure that they’re published at the right time. This can save time and streamline your social media content creation process.
    • Focus on peak hours. Focus on posting during peak hours, when your audience is most active on social media. This can help increase the visibility of your content and ensure you reach a larger audience.
    • Post consistently. Post consistently and regularly to maintain engagement with your audience and keep your brand top of mind. Consistency works to build a loyal following on social media.

    9. Post daily

    Consistency is key when it comes to social media. Try to post daily to keep your audience engaged and your brand on the top of their minds.

    Here are some tips to help you post more consistently:

    • Use auto-posting and scheduling tools. Use automation tools, such as Jetpack Social, to schedule your social media posts in advance and auto-share all new articles and blog posts published on your website. This can help you save time and streamline your content creation process.
    • Create a content calendar. Create a social media content calendar to plan your social media posts in advance and ensure you have a consistent stream of content to publish. This can help you stay organized and on track with your posting schedule.
    • Repurpose content. Repurpose existing content, such as blog posts or videos, into social media posts to save time and keep your audience engaged. This can help you create a variety of content without constantly creating new content from scratch.
    • Use a mix of content formats. Use a mix of different content formats, such as images, videos, or infographics, to keep your content fresh and engaging. This can also help attract different types of audiences and increase your reach.
    • Monitor engagement. Monitor your metrics, such as likes, comments, and shares, to understand what types of content resonate best with your audience. Use this data to optimize your social media content strategy over time.
    • Stay up-to-date. Stay up-to-date with the latest trends and news in your industry, and share your thoughts about what’s going on. Sometimes, you can share posts or news from other sources that aren’t competitors.

    10. Repurpose content

    Repurpose existing content in different formats or on different platforms to increase its reach and engagement. For example, turn a blog post into a video or a podcast episode into a series of social media posts.

    Here are convenient ways to fuel your content repurposing strategy:

    • Identify evergreen content. Identify evergreen content, such as tutorials or how-to guides, that can be repurposed for social media. This type of content is relevant and valuable to your audience over time, and can be repackaged in different formats to keep it fresh.
    • Use a social media content calendar. Some content, like a “2022 gift buying guide,” can be updated each year with just a bit of work. When you first create and share a post like this, go ahead and schedule the following year’s post in advance with notes to revise the existing post before you start promoting it again.
    • Use different formats. Repurpose your content in different formats, such as images, videos, or infographics, to appeal to different types of audiences and increase engagement. This can also help you reach a wider audience on different social media platforms and lets you use content more than once without seeming redundant to your followers. 
    • Experiment with different platforms. Experiment with repurposing your content on different social media platforms, such as Instagram or Twitter, to increase its reach and engagement. Each platform has its own strengths and audience, so it’s important to tailor your content to each one.
    • Optimize for each platform. When repurposing content for different platforms, optimize it for each platform’s specific requirements and best practices. For example, on Instagram, you might need to create square images or use hashtags to increase discoverability.

    11. Measure and analyze results

    Track the performance of your social media content using analytics tools, and use the insights to optimize your strategy and create more effective content.

    Here are best practices to follow when tracking and measuring performance:

    • Set goals. Set specific goals for your social media content, such as increasing engagement or driving traffic to your website. This can help you measure your progress and determine what’s working and what’s not.
    • A/B test. A/B test different versions of your social media content, such as different images or captions, to determine what performs best with your audience. This can help you optimize your content for maximum engagement and impact.
    • Monitor your competition. Monitor your competitors’ social media activity and performance to identify opportunities and areas for improvement. This can also help you stay up-to-date with the latest trends and best practices in your industry.
    • Refine your strategy. Use your analytics data to refine your social media strategy over time. This might involve adjusting your posting schedule, trying new content formats, or targeting specific audiences.
    • Stay flexible. Stay flexible and adaptable with your social media strategy. Social media is constantly evolving, so it’s important to be open to new ideas and approaches.
    • Use data to inform content creation. Use your analytics data to inform your content creation process. This can help you create more effective content.

    Frequently asked questions about social media content

    What are some common mistakes to avoid when creating social media content?

    Posting too often or too little. Finding the right posting frequency can be tricky, but it’s important to strike a balance. Posting too often can overwhelm your audience and lead to them unfollowing you, while posting too little can cause your account to lose momentum and relevance.

    Instead, experiment with different posting frequencies and monitor your engagement metrics to find the sweet spot that works best for your audience.

    Focusing too much on promotion. Social media is not just a platform for self-promotion. It’s important to create content that provides value to your audience and spend time engaging with followers and other accounts.

    Consider creating a mix of promotional and non-promotional content. Share industry news, post behind-the-scenes photos, and ask questions that encourage discussion and engagement.

    Ignoring negative comments. Negative comments and feedback can be tough to handle, but ignoring them can do more harm than good. Responding to negative comments can help show your audience that you care and are committed to providing great customer service.

    Have a plan in place for responding to negative comments. Address the issue politely and professionally, and try to find a solution that satisfies the customer.

    Ignoring data. Social media provides a wealth of data that can help you optimize your content and strategy. Ignoring this data can cause you to miss out on important insights and opportunities. Use social media analytics tools to monitor your engagement metrics, and then adjust your content and strategy based on that information.

    How can I effectively leverage user-generated content in my social media strategy?

    User-generated content (UGC) is a powerful way to engage your audience and build a sense of community around your brand. Here are some actionable tips for effectively leveraging UGC in your social media strategy:

    Encourage UGC. Make it easy for your audience to create and share UGC by running contests, challenges, or giveaways. Ask them to share photos or videos of themselves using your product or service or to share their thoughts and opinions on a particular topic.

    Showcase UGC. Once you have UGC, showcase it on your social media accounts. Share the content and give credit to the creator. This not only helps increase engagement but also shows your audience that you value their input and participation.

    Monitor and moderate. Be sure to monitor and moderate UGC to ensure it aligns with your brand values and messaging. Avoid reposting content that could be offensive.

    Repurpose UGC. Repurpose UGC for other marketing initiatives, such as email marketing campaigns, website content, or ads. This can help you extend the life of the content and increase its reach.

    What are practical ways to repurpose social media content across different platforms and channels?

    Repurposing content is a great way to extend the life of your social media content and reach new audiences. Here are eight practical ways to repurpose social media content across different platforms and channels:

    1. Turn blog posts into social media posts. Take key points from your blog posts and turn them into bite-sized social media posts. This can help you promote your blog content and drive traffic to your website or simply fill your social media content calendar with interesting content.

    2. Repurpose videos into GIFs. Convert short video clips into GIFs, which can be used on social media platforms like Twitter or Instagram.

    3. Turn social media posts into blog posts. Compile a series of related social media posts into a longer-form blog post. This can help you repurpose content while providing additional context and value.

    4. Use infographics on different platforms. Create infographics that can be used on multiple platforms like your website, social media, and email marketing campaigns. Or, host the “full” infographic on your website and create custom-sized teasers for each platform that can link back to the full thing.

    Pro-tip: Pull individual stats or sections from infographics to use on their own for social media posts. For example, if you create an infographic with “26 ways to improve marketing efficiency,” you could drip out one way every other week for an entire year!

    WordPress VIP Facebook post sharing a stat from an infographic

    5. Repurpose testimonials into social media posts. Turn customer testimonials into social media posts using quotes or excerpts from the original testimonial. This can help build social proof and increase trust with your audience.

    6. Create a video series. Repurpose a longer video into a series of shorter videos that can be shared on social media or on your website.

    7. Turn podcasts into blog posts. Transcribe your podcast episodes and turn them into blog posts. This can help you reach a new audience and repurpose content.

    8. Share behind-the-scenes content. Repurpose behind-the-scenes content, such as photos or videos, from your social media accounts to your website or email marketing campaigns.

    What are the key benefits of creating a social media content calendar?

    Creating a social media content calendar can help you stay organized and consistent with your social media strategy. Here are five key benefits of creating a social media content calendar:

    1. Better organization. A content calendar allows you to plan and organize your social media content in advance, ensuring that you don’t miss any important dates or events.

    2. Consistency. A content calendar can help you maintain a consistent posting schedule, which is important for building a loyal audience.

    3. Better quality content. Planning your content in advance allows you to create higher-quality content that aligns with your brand messaging and goals.

    4. Increased efficiency. A content calendar can help you streamline your content creation process, allowing you to focus on other aspects of your business.

    5. Better tracking. A content calendar can help you track your content performance and adjust your strategy accordingly.

    How can I automatically share website content and blog posts on social media?

    Sharing your website content and blog posts on social media can help you reach a wider audience and drive traffic to your website. 

    Jetpack Social allows you to schedule and automate your social media posts in advance, including posts promoting your website content and blog posts. You can also use it to automatically promote new posts on social media as soon as you publish them.

    Jetpack Social: Share smarter, not harder, with automated social media posts

    Are you ready to take your social media game to the next level? Jetpack Social can help.

    With over one million posts shared every day, Jetpack Social offers an easy-to-use solution for scheduling and automating your social media posts, freeing up your time to focus on other aspects of your business.

    With Jetpack Social, you can:

    • Auto-share your content: Automatically share your new content, articles, and blog posts without needing to do it manually.
    • Schedule posts in advance: Plan your social media content in advance, and Jetpack Social will take care of the rest.
    • Repost evergreen content: Keep your social media channels active with evergreen content that can be reposted at regular intervals.
    • Integrate with WordPress: Jetpack Social seamlessly integrates with your WordPress site, making it easy to manage all aspects of your online presence in one place.

    It’s more important than ever to have a strong social media presence. Jetpack Social can help you achieve that with less effort. So, what are you waiting for? Try Jetpack Social today and start sharing smarter, not harder.

    To learn more, visit: https://jetpack.com/social/

  • Social Media Branding: How to Elevate Your Strategy in 11 Steps

    Are you struggling to make your mark on social media? Do you feel like your brand is getting lost in the endless stream of cat videos and memes? Fear not because we’ve got your back. In this article, we’re going to give you eleven tips to help you nail your social media branding strategy and stand out from the crowd. But first, let’s explore what social media branding is because and why it’s important.

    What is social media branding?

    Social media branding is all about defining who you are. It’s not about reaching as many people as possible or furthering your sales goals, but instead, properly representing your brand in terms of imagery, language, and attitude or approach. If you’re just like everyone else, you’re never going to stand out. If you try to be all things to all people, you’re going to confuse everyone. 

    It’s all about creating an image and identity on social media platforms that aligns with your brand’s values and objectives.

    This involves creating and sharing content, visuals, and messages that resonate with your target audience. By having a clear and consistent branding strategy, businesses can establish trust and credibility with their customers, stand out from competitors, and ultimately, drive more sales.

    Why is branding important on social media?

    In short: it helps you stand out and get noticed. Your social media presence is a reflection of your brand, so it’s important to make sure that it’s consistent with your values, personality, and tone. By doing so, you can establish a strong online presence, connect with your target audience, and build trust and credibility with your customers.

    Eleven tips to nail your social media branding strategy

    1. Know your audience like the back of your hand

    Before you start crafting your social media branding strategy, it’s important to know who you’re talking to. Do some research and figure out your target audience’s needs, interests, and behaviors.

    What social media platforms do they use the most? What type of content do they engage with? What tone and voice do they respond to? This knowledge will help you create a social media content strategy that resonates with your audience and helps you stand out.

    2. Align brand positioning and audience insights

    Once you know who you’re talking to, it’s time to align your brand positioning with what you’ve learned. What makes your brand unique from other popular accounts your audience follows? How can you address your audience in ways that’s different from any competitors targeting the same audience? 

    brand color options on a table in front of a laptop with Pinterest on the screen

    3. Choose colors, typography, and imagery that align with your brand

    Consistency is key when it comes to social media branding. You should choose colors, typography, and imagery that align with your brand. If you have a brand guide already established, stick to the color palette and specifications found there. 

    If you don’t, take some time to explore what colors and styles will resonate with the audience you already identified. Do they want something professional and trustworthy? Cool and innovative? Calming and comforting? 

    Once you’ve established this, be consistent across all your channels. Your audience should be able to instantly recognize you on your website, Facebook profile, Instagram feed, and YouTube channel.

    4. Make your social media visuals distinct

    It’s okay to occasionally jump on the most recent trend or put your spin on a relatable meme. But if all you’re doing is copying competitors and other popular accounts, you’re not giving people a reason to follow you

    Your visuals should be distinctive and stand out in a crowded social media landscape. It’s worth investing in high-quality visuals, including images, graphics, and videos. This might mean hiring a designer and supplementing with stock images. 

    Consider free or paid stock image sites, and learn how to make basic edits in a tool like Canva.  

    5. Choose and leverage the most appropriate social networks

    You don’t need to be present on every social media platform. Instead, you should identify the ones that your target audience uses most and prioritize those. This helps you make much better use of your time and money.

    Not sure how to choose? WooCommerce has a great guide to choosing social media platforms, and it’s helpful whether you run an ecommerce store or any other type of site.

    6. Build and showcase a compelling brand story

    Your brand story is a powerful tool that can help you differentiate your business from your competitors. Storytelling is a proven way to move beyond facts and features of what you’re selling and transition to building an emotional connection with your audience. This can not only move people further along the customer journey, but improve long-term loyalty with your existing base. 

    To create an outline for your story, think about why your company was started. What problem were the founders trying to solve? What important goals did they have for improving the lives of their target audience? Then think about who has been involved along the way, the challenges they faced, where you are today, how you’re making a difference for your audience, and where you hope to be in the future. 

    Learn more about creating a brand story. 

    7. Establish a clearly identifiable brand voice and tone

    The same way every person has a unique voice and tone, your brand should, too. Having a consistent voice and tone across all your social media profiles is crucial for building brand recognition and loyalty. Your voice should represent your company’s personality, values, and style of communication, and should align with your audience’s preferences.

    When defining your voice and tone, consider your brand personality, the emotions you want to evoke, and the language and style you would like to use. For instance, if you’re a fun and playful brand, you may use a conversational and lighthearted tone, while a more professional brand may be more formal and informative.

    Some companies create editorial guidelines to help them remember the kinds of phrases they want to use, words they’d prefer to avoid, and inspiration for new, creative ideas.

    person browsing Instagram on a computer

    8. Be consistent with your messaging and content themes

    Consistency is key when it comes to social media branding. Your messaging strategy should define the topics and themes you’ll cover and how you’ll present them to your audience.

    To ensure consistency, you can create a social media content calendar and plan your posts in advance. This will help you stay organized and avoid any last-minute confusion. It can also help you identify topics you’ve failed to cover and if you’re over-using any one kind of media or message.

    9. Leverage influencers and brand ambassadors

    Influencer marketing has become a popular way for brands to increase their reach and credibility on social media. It’s like having a famous friend vouch for you. By collaborating with influencers and brand ambassadors, you can tap into their audience and leverage their recognition to promote your brand.

    When choosing influencers, consider their relevance to your company and their audience’s demographics and interests. You can also use social media monitoring tools to find people who are already talking about your brand or related topics.

    Influencers tend to be popular because they’re highly creative, super engaging, and incredibly relatable. And though there are a number of mega-influencers who can reach millions, there are plenty of influencers with smaller, niche audiences whose followers are just as, if not more, loyal. Plus, influencers with smaller audiences are more accessible for smaller or new brands with limited budgets. 

    Aligning your brand with the right partner can provide an instant boost in credibility and — because influencers have such distinctive, creative voices — significantly help you in establishing your brand identity. Learn more about influencer marketing.

    10. Engage and communicate as your brand

    It’s not enough to simply post content and wait for the likes to roll in. You need to actively engage with your followers and communicate with them. Respond to comments, messages, and mentions promptly and professionally.

    Participate in relevant conversations and add value to your audience’s social media experience. By engaging with your audience, you can build stronger relationships and increase your brand’s visibility and credibility.

    Brands’ comments on competitors’ posts have become incredibly funny and memorable in recent years and audiences tend to respond quite strongly. 

    11. Find opportunities for humor and authenticity

    Finally, to truly elevate your social media branding, look for opportunities to inject humor and authenticity into your content. People are more likely to engage with content that’s funny, relatable, and genuine.

    Finding the right balance between professionalism and authenticity can be tricky, but it’s worth the effort. Look for ways to humanize your brand and connect with your audience on a more personal level. This could involve sharing behind-the-scenes glimpses of your team, highlighting your company culture, or even sharing a funny meme or GIF.

    How to measure and evaluate your social media branding strategy

    After implementing your social media branding strategy, it’s important to measure its effectiveness and make necessary changes. Here are some steps you can take to measure and evaluate your social media branding strategy:

    1. Set goals and KPIs

    Before you start measuring, define what you want to achieve with your branding strategy. Do you want to increase brand awareness, engagement, or conversions? Set measurable, time-bound goals and key performance indicators (KPIs) to track your progress.

    2. Monitor your social media analytics

    Social media platforms provide valuable insights into your performance. Track your engagement rates, follower growth, click-through rates, and other relevant metrics. Analyze which types of content and posts perform the best and use this information to refine your strategy.

    3. Monitor your brand mentions

    Track what people are saying about your brand on social media. Monitor mentions and relevant keywords and analyze the sentiment and tone of each.

    4. Conduct surveys and polls

    Ask your audience for feedback and insights. Conduct surveys and polls to gather information about your brand perception, audience preferences, and opinions.

    5. Compare yourself to competitors

    Monitor your competitors’ social media performance and compare it with your own. Analyze what they’re doing differently and see if you can incorporate any of their successful tactics into your own strategy.

    6. Review your content strategy

    Analyze the performance of your content and see which types of posts are resonating with your audience. Review your content calendar and see if it’s aligned with your brand positioning and messaging strategy.

    7. Measure ROI

    Calculate the return on investment (ROI) of your social media branding efforts. Compare the cost of your social media marketing activities with the revenue or leads generated from it.

    By following these steps, you can measure and evaluate your social media branding strategy and make necessary changes to improve its effectiveness.

    Frequently asked questions

    How can social media branding help you stand out from your competitors?

    Let’s face it: the competition is fierce out there. That’s where social media branding comes in. By showcasing your brand’s personality, values, and mission, you can set yourself apart from the competition and attract loyal customers.

    What are some common mistakes to avoid when creating a social media branding strategy?

    One of the biggest mistakes is not knowing your target audience well enough. Imagine trying to throw a party without knowing who’s coming — it’s bound to be a disaster. So take the time to get to know your audience and what makes them tick.

    Another mistake is not establishing a consistent voice and tone across all social media channels. This can be confusing and undermine trust with loyal followers.

    How can you use customer feedback to improve your social media branding strategy?

    By monitoring feedback on social media channels and through customer service channels, you can gain valuable insights into what your followers like and dislike about your brand. Customer feedback is a direct and crucial line to the pulse of your audience. Use this information to refine your branding strategy and make adjustments to better align with your audience’s expectations.

    How can you utilize user-generated content to strengthen your social media branding?

    By encouraging your followers to create and share content featuring your brand, you can increase brand awareness and engagement. You can build an entire community that’s excited to spread the word about your company!

    User-generated content also allows you to showcase your brand’s personality and values through the eyes of your customers, making it a powerful tool for building trust and authenticity

    How can you ensure that your branding message is consistent across all social media channels?

    Consistency is the name of the game when it comes to social media branding. To ensure that your branding message is consistent across all social media channels, you need to establish clear guidelines, including your voice and tone, visual identity, and messaging.

    The result will be a playbook that everyone on your team can follow. You should also create a social media content calendar to plan and schedule your posts in advance.

    And don’t forget to use a social media management tool like Jetpack Social to help you maintain consistency by automating your posts.

    Jetpack Social: Elevate your brand with automated social media posts

    If you’re feeling overwhelmed by the thought of implementing your social media branding strategy, fear not!

    Jetpack Social is here to save the day. With this powerful social media sharing plugin for WordPress, you can automatically post your website content to social media. 

    One of the best features of Jetpack Social is its auto-posting capability. You can easily share your website content on all of your social media platforms with just one click, freeing up time for you to focus on creating more amazing content. And if you prefer to have more control over your social media presence, you can always schedule your posts in advance, choosing the best time to share your content with your audience.

    But that’s not all. With Jetpack Social, you have the power to customize your posts for each social media platform you choose to share on. This means that you can tailor your message and image to fit the unique voice and tone of your brand.

    So, what are you waiting on? Elevate your brand’s social media game with Jetpack Social, and let it do all the heavy lifting for you. With this superhero on your side, you’ll be able to take your brand to new heights and make your voice heard in the noisy world of social media.

    Try Jetpack Social now and see the difference it can make for your brand: https://jetpack.com/social/

  • How Much Does Video Hosting Cost? (2023 Price Comparison)

    These days, most organizations use at least some form of video for marketing, training, or another integral part of their ongoing operations. So, finding a place to host all of this content is a big deal. But with so many options and pricing plans to choose from, it can be hard to know which service is right for you. That’s why we’ve put together this comprehensive guide on how much video hosting costs in 2023.

    We’ll take a look at popular services like Jetpack VideoPress, Vimeo, Wistia, and more, comparing their features and prices side-by-side to help you find the right fit for your budget.

    So if you’re looking for a place to host your videos or just want a better understanding of what’s out there, read on!

    Why pay for a video hosting service?

    When it comes to hosting your videos, there are a number of options available. While some websites may choose to host videos directly on their own server, this can quickly consume bandwidth and slow down the website’s loading time. This is where video hosting services and platforms come in.

    There are a number of pros and cons to paying for a video hosting service, specifically in the context of WordPress:

    Pros of a video hosting service:

    • Improved user experience: By hosting videos on a dedicated video hosting platform, they will usually load faster and more smoothly for visitors to your website, leading to a better overall user experience.
    • Bandwidth savings: Video files can be very large and hosting them on your own server can consume a significant amount of bandwidth, potentially leading to slow loading times and high costs. With a video hosting service, the provider will handle the bandwidth, freeing up your site’s resources.
    • Security: Video hosting services often provide security features such as encryption and secure storage, helping to keep the website’s content safe from theft or misuse. 
    • Advanced features: Many video hosting services offer advanced features like customizable video players, analytics, and monetization options that may not be available through self-hosting.

    Cons of a video hosting service:

    • Cost: Of course, the main disadvantage of paying for a video hosting service is the cost. Depending on the provider and plan selected, this can be a fairly significant monthly expense.
    • Dependence on a third party: By relying on a third party to host videos, you’re dependent on the video hosting service to keep its content accessible and secure. If the service experiences downtime or security breaches, your videos may become unavailable. They may also remove or limit access to your videos if they feel you’ve violated a policy. This is often an automated process with limited avenues for resolving disputes.
    • Limitations: Video hosting services come with varying limitations, such as file size restrictions, file format restrictions, and bandwidth limits. These things can impact your ability to host certain types of content or reach a desired audience.

    While there are certainly pros and cons to paying for a video hosting service, it’s often a worthwhile expense for websites looking to provide a fast, secure, and user-friendly video experience.

    What determines the price of video hosting?

    The cost of a video hosting service can be influenced by a number of factors, including:

    1. Storage limits

    The amount of storage space required by your videos will impact the cost of the video hosting service. Typically, the more storage space you need, the higher the cost.

    2. Hosting infrastructure

    The type of hosting infrastructure used affects the service price, too. For example, a provider that uses more advanced, high-performance servers may charge a higher fee than one that uses less sophisticated infrastructure.

    3. Streaming quality and speed

    The quality and speed of the video streaming experience will also impact the total amount you’ll shell out each month. Plans that offer high-quality, fast streaming may be more expensive than those that offer a lower quality or slower streaming experience.

    4. Bandwidth

    Some video hosting providers may charge based on the bandwidth used. So, as your content becomes more popular, you may need to upgrade to a higher plan.

    5. Technical support

    The level of technical support offered by the video hosting service can also have an impact on what you’ll pay. Providers that offer more extensive technical support, such as 24/7 assistance and live chat, may charge a higher fee than ones that offer more limited support options.

    6. Video monetization

    Some video hosting services offer monetization options, such as the ability to show ads or to charge for access to certain videos. The addition of this feature can contribute to a higher fee.

    7. Ad-free streaming

    Some streaming platforms may have options to disable ads before, after, or during your videos. This provides an uninterrupted experience for viewers and helps keep them focused on your message. Allowing for this ad-free experience, however, may come at your expense. 

    8. Customization

    Providers that offer more extensive customization options, such as the ability to fully brand the video player, may charge a higher fee than ones that offer more basic options.

    9. Integrations

    The ability to integrate the video hosting service with other platforms, such as social media or ecommerce tools can impact the cost, too. Providers that offer a wide range of integrations may charge a higher fee than ones that offer more limited integration options.

    10. Scalability

    If your aim is to grow your video offerings, scalability is vital. Providers that make it easy to increase storage, bandwidth, and other resources as needed may charge a higher fee, too.

    There are many factors that can impact the cost of a video hosting service. When considering a provider, it’s important to carefully evaluate the needs and goals of your website.

    Pricing comparison of top video hosting platforms

    Jetpack VIdeoPress homepage

    1. Jetpack VideoPress

    Jetpack VideoPress is specifically designed for WordPress and WooCommerce users, offering a sleek and unobtrusive video player that’s perfectly tailored to showcase your content.

    Users can take advantage of the platform’s broad customization options, including the use of blocks for easy page and post building.

    Additionally, there’s no limit to the number of users, making it an ideal solution for those with multiple contributors on their site. With its clean and lightweight interface, Jetpack VideoPress is designed to stay out of the way and allow your video content to take center stage.

    You likely recognize the Jetpack name as one of the premier toolkits for WordPress sites. It’s built by the same people behind WordPress.com and WooCommerce.

    You can get access to Jetpack VideoPress as part of the Jetpack plugin, and take advantage of its other security, performance, and marketing features. Or get the dedicated Jetpack VideoPress plugin and enjoy up to 1TB of video storage with a basic plan.

    Key features of Jetpack VideoPress:

    • High-quality video playback with up to 4K resolution.
    • The ability for viewers to select the video format they want, from 480p to 4K, with their selection saved for future videos.
    • Playback speed controls
    • Support for smooth playback of rapid-motion videos, up to 60 frames per second (FPS)
    • Full mobile optimization
    • Picture-in-picture support
    • The ability to drag and drop videos directly into WordPress and manage them directly from the Media Library
    • An ad-free experience
    • A global CDN for high performance
    • The ability to create full-width video backgrounds for your WordPress site

    Pros of Jetpack VideoPress:

    • Integration with WordPress and WooCommerce makes it easy to manage your video content.
    • A clean and lightweight interface helps keep the focus on your videos.
    • It has a fully customizable player and ad-free experience.

    Cons of Jetpack VideoPress:

    • The free version only allows for a single video

    Ease of use:

    Jetpack VideoPress is super easy to use and navigate. The interface is straightforward and intuitive, making it easy to upload and manage your videos. You can quickly create customized video galleries in minutes.

    Best use cases:

    Jetpack VideoPress is best for WordPress and WooCommerce users who need a reliable video hosting solution that can be easily integrated with their existing website. If user experience or keeping the attention of marketing leads is important to you, the fast, reliable hosting infrastructure and the ad-free, branded player is a great option.

    Pricing:

    Jetpack VideoPress is available through the Jetpack Complete plan ($50 / month with additional world-class WordPress security, performance, and marketing tools) or through an individual plugin for just $10 per month (billed annually).

    It includes 1TB of storage and an ad-free and fully customizable player for unlimited users. It also includes top-notch support from Happiness Engineers, who know both VideoPress and WordPress in and out.

    Vimeo plugin in the WordPress repository

    2. Vimeo

    Vimeo is a popular video hosting and sharing platform that was founded in 2004 by filmmakers Jake Lodwick and Zach Klein. The platform was created as an alternative to more commercial video-sharing sites like YouTube, with a focus on providing a space for artists, filmmakers, and content creators to showcase their work and connect with their audiences.

    Vimeo has since developed even more features and tools, including support for high-definition video, customization options for the video player, and a robust video editing suite. Today, Vimeo is one of the largest and most popular video-sharing platforms on the internet, with millions of users and a vast library of creative content.

    Key features of Vimeo:

    • Customizable embedding
    • Live streaming capabilities
    • 360-degree video support
    • Simulated live event support
    • API integration
    • Privacy controls
    • Streaming up to 4k Ultra HD

    Pros of Vimeo:

    • It offers high-quality video streaming across a variety of use cases.
    • It includes advanced customization options for the video player, so it will seamlessly flow with the rest of your site.
    • It includes a robust video editing suite with a variety of tools. 
    • It’s ad-free, which means that site visitors won’t be distracted by ads from your competitors while watching your content.

    Cons of Vimeo:

    • The platform can be expensive for those who need a lot of storage space or advanced features.
    • The interface is less intuitive than some of the other platforms.
    • Pricing is based on the number of users, which makes it a much more expensive option for sites with multiple administrators. 

    Ease of use:

    Vimeo is relatively easy to use, but the interface can be a bit overwhelming for those who are just getting started. However, it does offer a variety of helpful tutorials and documentation to help users get up and running.

    Best use cases:

    Vimeo is best for businesses, organizations, marketers, and content creators who need a reliable and high-quality video hosting solution. The platform is ideal for those who need a wide range of customization options and advanced features to give their videos a professional touch. The integrated live streaming capabilities make it a great option for events and conferences, too, though this feature is only included with higher-tier plans.

    Pricing:

    Vimeo offers four pricing plans:

    • The Starter plan, which costs $9 per user per month and supports 60 videos.
    • The Standard plan, which costs $25 per user per month and supports 120 videos. 
    • The Advanced plan, which costs $65 per user per month and supports 240 videos.
    • An enterprise plan, which is customized based on your specific needs.
    Wistia homepage design

    3. Wistia

    Wistia is a video hosting and marketing platform that was founded in 2006. The company was created by Chris Savage, Brendan Schwartz, and Jeff Vincent with the goal of making video hosting and marketing simple and accessible for businesses of all sizes.

    Wistia was one of the first companies to focus specifically on the needs of digital marketers, offering a range of features and tools designed to help organizations effectively use video as part of their lead generation efforts. It’s used by thousands of businesses worldwide.

    Key features of Wistia:

    • A customizable video player design
    • Customizable calls-to-action and in-video lead generation tools
    • Video editing capabilities
    • Collaborative feedback opportunities for teams
    • Advanced A/B testing
    • Livestreaming 
    • In-depth analytics and tracking

    Pros of Wistia:

    • It’s focused on the needs of businesses and marketers for advanced lead generation.
    • It has advanced integrations and tools for creating and optimizing videos.
    • It includes in-depth analytics and tracking capabilities.

    Cons of Wistia:

    • The platform can be expensive for those who need more than three users or a lot of storage space.
    • There’s no official WordPress plugin to integrate Wistia with your site.

    Ease of use:

    Wistia is designed with digital marketers in mind; anyone in the industry will likely find it easy to use. Advanced integration of forms with your existing tech stack might take a bit of learning. 

    Best use cases:

    Wistia is best for businesses that require an integrated video hosting and marketing platform. The platform’s advanced features, such lead capture tools, A/B testing, and in-depth analytics, make it ideal for those who want to optimize their videos for maximum marketing effectiveness. Medium to larger businesses with robust marketing teams will find Wistia most helpful.

    Pricing:

    • A free forever plan that includes support for ten videos, analytics, and captions. 
    • The Plus plan, which costs $19 per month and includes everything in Free as well as support for 20 videos and three users and lead capture forms.
    • The Pro plan, which costs $79 per month and includes everything in the previous plans, as well as support for 50 videos, five users, A/B testing, and video heat maps.
    • The Advanced plan, which costs $319 per month and includes all that comes in the other plans, plus support for 250 videos, up to 20 users, livestreaming, and various marketing integrations.
    JW Player homepage

    4. JW Player

    JW Player is a video platform that has been serving the industry for over a decade. It was founded in 2005 by Dave Otten, Jeroen Wijering, and Brian Rifkin. JW Player started as a simple Flash-based player for delivering video content over the web. 

    JW Player now powers billions of video views each month on some of the world’s most popular websites. It offers a complete suite of tools and services for creating, managing, monetizing, and distributing video content across any device or website.

    Key features of JW Player:

    • Video hosting and streaming
    • Embeddable video players
    • Analytics and insights
    • Advertising and monetization options for professional broadcasters and media creators
    • API access and integrations for advanced users and developers
    • Live broadcasting capabilities

    Pros of JW Player:

    • It’s one of the most well-established video platforms.
    • It has highly-customizable players and tools.
    • It includes enterprise-level playback, livestreaming, and custom integration options.
    • It offers advanced monetization tools.
    • It has great customer support.

    Cons of JW Player:

    • The free version is limited in terms of features, storage, and bandwidth.
    • Pricing plans are hidden behind a contact form, making it more difficult to do product comparisons.

    Ease of use:

    JW Player is fairly easy to use, even for those who are not familiar with the basics of online video hosting. The platform’s user interface is fairly intuitive and straightforward, making it easy to quickly get up and running.

    Best use cases:

    JW Player is best for those who need a powerful, feature-rich platform for hosting, managing, and distributing video content. It’s designed especially for enterprise-level video producers for whom video is a major revenue driver. The platform’s advanced monetization tools make it a great choice for those looking to monetize their videos. 

    Pricing:

    JW Player offers a free trial for up to 30 days to test everything out. The trial includes 25 GB of hosting space, plus 75 GB of streaming bandwidth.

    All premium plans are hidden behind a contact form, but do seem to include a wide range of features including those for the video player, streaming functions, as well as engagement and monetization options.

    As it’s more geared towards advanced and enterprise-level users, it’s not likely a great choice for those with a limited budget. 

    Dacast homepage design

    5. Dacast

    Dacast is a leading online video platform that provides video hosting, livestreaming, and video monetization services to businesses, organizations, and individuals worldwide. The company was founded in 2010 and is headquartered in San Francisco, California.

    From the beginning, Dacast focused on providing innovative video solutions that help organizations reach their audiences with engaging video content. With its intuitive interface and cutting-edge technology, Dacast has quickly become a popular choice for businesses and organizations.

    Key features of Dacast:

    • Multiple language options for the video player
    • The ability to utilize advanced video encoding techniques 
    • Seamless livestreaming with DVR capabilities
    • Closed captions, which make your videos more accessible
    • Video monetization options
    • Detailed video analytics

    Pros of Dacast:

    • It has an intuitive interface that’s easy to use and get started.
    • It offers unique, advanced features like video monetization and DVR capabilities.
    • It has competitive pricing with a range of features and options.

    Cons of Dacast:

    • There is no free tier available.
    • The video player is not as customizable as some other providers.
    • There is no WordPress plugin available, which can make adding videos to your site more difficult.

    Ease of use:

    Dacast is designed to be user-friendly and intuitive for both beginners and more experienced users. The platform is easy to navigate, with clear menus and options that make it simple to find the tools you need.

    Best use cases:

    Dacast is best for businesses and organizations who want a comprehensive video platform with advanced features. The platform’s monetization and livestreaming tools make it a great choice for those who want to maximize their video content’s potential, while the customizable video player ensures that viewers have a seamless experience.

    Pricing:

    Dacast does offer a 14-day free trial, so you can try out the features and decide if it’s right for you. After that, there are three plans to choose from:

    • The Starter plan, which is priced at $39 per month (charged annually), and includes 1.2TB of data per year, as well as 50GB of storage. This includes features like livestreaming, unlimited viewers, and HD broadcasting.
    • The Event plan, which is priced at $63 per month (charged annually), and comes with 6TB upfront and 50GB of storage, along with real-time analytics, a live countdown, and a paywall.
    • The Scale plan, which is $188 per month (charged annually) and includes 24 TB per year and 1000 GB of storage, plus unlimited channels, VOD chapter markers, and much more.

    There are also custom plan options available for those whose needs exceed the standard plans.

    Vidyard homepage design

    6. Vidyard

    Vidyard is a video marketing and hosting platform that was founded in 2010 by Michael Litt and Devon Galloway. The company was created with the goal of making video marketing and hosting easier and more effective for businesses of all sizes. Vidyard was one of the first companies to offer a comprehensive video hosting and marketing platform, and it quickly became known for its advanced features and tools.

    Key features of Vidyard:

    • Fully customizable calls-to-action that you can place inside videos
    • Thumbnail A/B testing
    • Email marketing integrations
    • Automatic transcripts
    • Full CRM support
    • Screen recording tools

    Pros of Vidyard:

    • It integrates with CRMs and sales tools like Salesforce and LinkedIn.
    • You can use its tools for email marketing. This means that you can easily share videos directly within emails.
    • It includes in-depth analytics and tracking capabilities.

    Cons of Vidyard:

    • The price point is out of reach for many small businesses.
    • While it has a lot of features, these can quickly become overwhelming for sites that just need basic video hosting capabilities.

    Ease of use:

    Vidyard is easy to use and navigate, with an intuitive user interface. The platform offers a range of features and tools that are designed to make video marketing easier, including email marketing, which is super helpful for those who want to promote their videos.

    Best use cases:

    Vidyard is best suited for businesses and organizations looking to enhance their video marketing and sales strategies, improve corporate communications, and develop e-learning and training programs through a comprehensive and secure platform. The platform’s advanced features and tools make it an excellent choice for those who need to track engagement and conversions from their videos.

    Pricing:

    • The Free Forever plan allows you to add up to 25 videos, edit videos, and share your videos via email and social media.
    • The Pro plan starts at $19 per month (billed annually) and includes hosting for unlimited videos, as well as video analytics and calls-to-action.
    • The Business plan includes all Pro features, plus full analytics, CRM and MAP integrations, and fully customizable video calls-to-action. Pricing is based on each specific business.

    Video hosting comparison table 

    Jetpack VideoPress Vimeo Wistia JW Player Dacast Vidyard
    Storage Limits 1TB 120 – 240 videos 10 – 250 videos Unavailable 50 – 1000 GB Unlimited
    Streaming Quality and Speed N/A Yes N/A Unavailable HD N/A
    Bandwidth Unlimited N/A N/A Unavailable 1.2 TB – 24 TB/year N/A
    Ease of Use Yes No Yes Yes More advanced features Yes
    Technical support Yes Yes Yes Yes Yes Yes
    Customization Yes Yes Yes Yes Yes Yes
    Integrations Yes No Yes No Yes Yes
    Scalability Yes Yes Yes Yes Yes Yes
    Pricing $10 per month $9/user per month – $65/user per month Free – $399 per month Contact for info/Trial available $39 – $188 per month Free – $29 per month

    How to choose the best video hosting service for your needs

    When it comes to choosing the best video hosting service, there are a few key factors you need to consider.

    First and foremost, think about whether the tool you choose can grow with you. You don’t want to have to switch providers or significantly increase spending as your videos gain more views or your business grows to include more team members.

    Next, think about the features offered by each provider. Make sure they have everything you need, such as analytics, seamless WordPress integration, an ad-free experience, and customization options.

    Finally, look at their pricing plans, and make sure that it fits with your goals and provides a high value. Ultimately, the choice should be based on your specific needs.

    Which platform offers the best bang for your buck?

    When it comes to choosing the right video hosting platform for your business, there are a lot of factors to consider, including cost. To get the best value for your money, it’s important to understand what you need from your video hosting platform and what kind of budget you’re working with.

    For businesses that are already on WordPress, or those looking for a highly customizable and scalable environment, Jetpack VideoPress is a great option. With its built-in integration with WordPress and its enterprise-grade features, it offers a cost-effective solution that can grow with your business.

    Of course, the best choice for you will depend on your specific needs and requirements. For businesses looking for other features, such as advanced analytics or livestreaming capabilities, other platforms may be a better fit. In that case, our comparison table will help you weigh the pros and cons of each platform and determine which one offers the best bang for your buck.

    Frequently asked questions about video hosting and its costs

    Want to learn more about how video hosting is priced and how that might affect your decision? Here are some answers to commonly asked questions:

    What’s the difference between self-hosting and using a video hosting service?

    Self-hosting requires you to have your own server (or a web hosting plan with access to a shared or dedicated server) and manage the hosting, streaming, and backups of your video content yourself. This includes hosting and storing your videos on your WordPress site.

    With a video hosting service, all of that is taken care of for you as part of the package. This helps reduce your web costs and can drastically improve the loading time of your videos. To have a deeper understanding of the different hosting options, read our guide on how to host videos on your website.

    What does video hosting cost?

    The cost of video hosting can vary depending on the provider and plan you choose. Generally speaking, the cost will be based on factors such as the size of your content library, storage space requirements, and features included in the package. Some services may offer discounts for long-term commitments.

    Are there any free video hosting services?

    Yes, some providers offer free plans with limited features and storage space. Keep in mind that these are usually best suited for smaller teams and personal projects. If you’re looking for a more robust solution, you’ll likely need to upgrade to a paid plan.

    How can I reduce my video hosting costs?

    One way to reduce the cost of video hosting is to use a service that offers discounts for long-term commitments. You can also look for providers that offer free plans with limited features and storage space, or that offer tiered plans, so you can pay for only the features you need. Finally, be sure to shop around and compare pricing between different providers. You may find a better deal when you do your research!

    Are there any hidden fees associated with video hosting?

    It’s important to read the fine print before signing up for a plan. Some services may charge extra for features like streaming or advanced analytics, while others may charge based on storage space or user accounts. Be sure to check out all the details, so you know exactly what you’re signing up for.

    Embrace the future of video

    For businesses looking for a comprehensive and reliable video hosting platform, Jetpack VideoPress is an excellent choice. With enterprise-grade features, seamless WordPress integration, and affordable pricing options, it’s a well-rounded option that can suit any budget. Plus, there’s a sizable discount available for the first year.

    Use our comparison table above to more succinctly weigh the features of each platform. You can easily compare the pros and cons of each to help determine which one is the best fit for your business.

  • How to Deactivate & Delete a Theme in WordPress (4 Ways)

    Deleting old and unused themes can boost your website’s performance and make it more secure. But you might not know how to remove inactive themes from WordPress.

    Fortunately, there are many ways to deactivate and delete themes in WordPress. This means you can find an option that suits your skill level. Plus, it’s also easy to clean up all theme-related content so that your new theme runs smoothly.

    In this post, we’ll look at when to consider deleting a WordPress theme. Then, we’ll explore some key considerations and show you four ways to deactivate and remove themes. 

    When to delete a WordPress theme

    When you activate a new theme on your site, your previous theme is automatically deactivated. But if you navigate to your Themes page, you’ll see that the old theme is still installed on your site.

    list of themes installed on a WordPress site

    While your deactivated themes aren’t in use, their software is still on your site. The theme’s data continues to be stored in your database. 

    That’s why, if you don’t need to use your theme again, it’s best to remove it entirely. With that in mind, here are some situations where it makes sense to delete a theme in WordPress:

    • You’ve installed a new theme, so you want to get rid of the old one.
    • You’ve installed a theme to try out, but you’ve decided it isn’t for you.
    • You have more than one default WordPress theme installed, and want to remove the extras.

    Deleting inactive themes is a good habit since themes (and other software) can make your site more vulnerable to security threats. This is because the software gives hackers more opportunities to exploit and infiltrate your site. To reduce some of this risk, you can continue to update these inactive themes to receive the benefits of the latest fixes. But that just gives you another unnecessary chore to remember in the effort to keep a secure, well-performing site.

    Plus, inactive themes still store files in your database, taking up space. This can make your hosting plan more pricey and slow down your website’s performance by bloating its database. 

    When to NOT delete a WordPress theme

    Although it’s good practice to delete unused themes in WordPress, there are some situations when it’s better not to delete your theme. Let’s look at three reasons not to remove your theme! 

    The theme is a parent theme

    Creating a child theme is a great way to apply custom functionality and styling to your theme without losing your customizations due to software updates. However, your child theme inherits its functionality and styling from its parent, so it’s not recommended to delete the parent. 

    You’re unable to activate a child theme without its parent theme also being installed on your site. Therefore, if you delete the parent of your active child theme, it will cause it to break. Then, you may lose all of your hard work and customizations. 

    The theme is used on a multisite network

    What’s more, it’s best not to delete your theme if you’re on a multisite network. Multisite is a WordPress feature that enables you to manage multiple websites from the same WordPress installation, on the same server. All the sites share themes, plugins, and files.

    If, at the top of your WordPress dashboard, it says the name of your website, it’s a single website.

    website name circled in green at the top of the WordPress dashboard

    But if it says My Sites, then your site is part of a multisite network. If this is the case, and your theme is active on another site on the network, then it’s best to deactivate it rather than delete it. 

    If you delete a theme that another site is using, you could take down the website that’s using the layout or harm its user experience (UX). 

    One helpful thing, however, is that only the network administrator can manage themes on the multisite network since they can verify which ones are in use and where. So, if you’re not the administrator, you won’t be able to remove a theme that’s in use somewhere else. 

    You use it as a testing theme

    It’s also a good idea not to delete your theme if you use it regularly for testing. Some developers and experienced WordPress users will activate a specific theme just for testing purposes. 

    If this is the case, you’ll want to keep the testing theme installed so that it’s easy to access when needed. Otherwise, you’ll have to continually reinstall it, and you may lose progress on tests you’ve already run. 

    What to do before deleting a WordPress theme

    Now that you know a bit more about deleting a WordPress theme, let’s take a look at some important factors to consider before you get started. Keeping these tips in mind can prevent you from jumping in too soon and causing errors on your website.

    1. Back up your site 

    Before making any significant changes to your site, it’s always best to make a fresh WordPress backup. This way, should anything go wrong, you’ll be able to restore your content quickly and easily.

    One of the easiest ways to back up your WordPress site is to use a plugin like Jetpack VaultPress Backup.

    Jetpack VaultPress Backup homepage

    Jetpack VaultPress Backup automatically saves file backups, database backups, and WooCommerce data like customer and order details. Better yet, copies are stored across multiple servers for extra peace of mind.

    One of the reasons VaultPress Backup is so popular is its easy restore process. You can restore your entire site with just a few clicks on the mobile app or from your WordPress.com dashboard (even if you can’t access your site). 

    Your first backup will begin automatically when you activate VaultPress Backup. You can see it by going to Jetpack → VaultPress Backup in your WordPress dashboard. Then, whenever you change your site, Jetpack VaultPress Backup will save all of your work. 

    2. Run tests on a staging site

    A staging site is a duplicate version of your website. The difference is that your staging site is inaccessible to the public. This makes it ideal for updating your theme, running tests, or applying customizations in private. 

    If you have a staging site, it’s a good idea to delete the theme in this environment first to check for problems. You’ll then quickly know if you’ve made a mistake. 

    By using a staging website, your live site won’t be harmed if anything goes wrong. Then, once you’re happy with the changes you’ve made in the staging environment (and you know they’re safe), it’s easy to push the changes live and make them accessible to your visitors. 

    Some web hosts offer built-in staging functionality, so you might be able to set up your staging environment within your hosting or WordPress dashboard. 

    Alternatively, the easiest way to create a staging site is to use a plugin like WP Staging.

    WP Staging image with an illustration representing its functionality

    Once you activate the plugin, head to WP Staging → Staging Sites in your WordPress admin area. Then, click on CREATE NEW STAGING SITE.

    button to create a new staging site

    Then, choose which database tables and files you want to include in your staging environment. Alternatively, you can leave the settings as they are. In this case, the plugin will clone your entire website. 

    Next, click on Start Cloning.

    settings for the WP Staging plugin

    The plugin will provide instructions on accessing your staging site when the process is finished. Then, you’re free to use it to test changes to your website, including deactivating and deleting themes. 

    How to delete a theme in WordPress (4 methods)

    Now that you’ve backed up your site and created a staging site, here are four simple methods to completely remove themes from WordPress. Additionally, we’ll explain how to deactivate a theme in WordPress.

    1. Remove the theme using the admin dashboard

    The simplest way to delete a theme in WordPress is to use the admin dashboard. This option is straightforward and suitable for all types of users, including complete beginners. 

    Since this method requires access to the admin panel, it isn’t always possible. For instance, if you can’t log in to your WordPress site, you won’t be able to access your dashboard.  

    Assuming you can access your dashboard, navigate to Appearance → Themes.

    list of themes installed on a WordPress site

    Here, you’ll see all of your installed themes with the active theme listed first. If you want to delete a theme, you’ll first need to ensure that it’s deactivated. 

    You can deactivate a theme in WordPress by hovering your mouse over a different theme and selecting Activate.

    option to activate a WordPress theme

    Then, find and click on the theme you want to delete. In the bottom right-hand corner, you should see a small Delete link.

    option to delete a WordPress theme

    All you need to do is click on the link. Then, select OK in the popup form to confirm the action. It’s as simple as that!

    2. Remove the theme via FTP

    If you don’t have access to the WordPress admin area, you can delete your theme via File Transfer Protocol (FTP). To do this, you’ll need to connect to your site via FTP to access your website’s files.

    First, you’ll need to choose an FTP client. If you don’t already have FTP software downloaded, FileZilla is a high-quality and free option.

    FileZilla download page

    Go ahead and download your FTP client. Then, enter your FTP credentials. Next, open the root directory of your site. This is usually a folder named public_html

    Navigate to wp-content and click on your themes folder.

    the themes folder viewed via FTP

    Here, you can see a list of all your installed themes. If you simply want to deactivate a theme, just rename its folder to something like “twentytwenty-deactivated”. 

    If you want to go straight to deleting the theme, you can do that too. The downside of deleting your theme via this method is that there’s no way of telling which theme is active on your website (unless you remember which one it is). That’s why it’s so important to back up your site before this next step. 

    When you find the theme you want to remove, right-click on its folder and hit Delete.

    deleting a theme via FTP

    Then, you’ll be asked to confirm your choice. Once you navigate back to your WordPress dashboard, you should no longer see the deleted theme. 

    3. Delete the theme via cPanel

    cPanel is another helpful tool provided by many hosting providers within their account dashboards. If you don’t have access to the WordPress dashboard and prefer not to use FTP, cPanel is a great alternative. 

    First, you’ll need to log in to your hosting account. Then, access the File Manager.

    Look for the wp-content folder that you’ll find inside your site’s root directory. Next, select the themes folder.

    viewing the themes folder in cpanel

    Here, locate the theme folder that you want to delete or deactivate. If you want to deactivate the theme, rename its folder to something like “exampletheme-deactivated”. 

    If you want to remove a theme entirely, right-click on its folder and select the Delete option. You’ll then be asked to confirm the action. 

    4. Remove the theme via WP-CLI

    The quickest way to remove your WordPress theme is via the WordPress Command Line Interface (WP-CLI). WP-CLI enables you to directly interact with your website using commands.

    WP-CLI homepage with information

    There are many actions you can perform with WP-CLI. For example, you’re able to update plugins, create new pages, and configure multisite installations. 

    That being said, it requires a fair amount of technical expertise to use WP-CLI for site management. Therefore, this method isn’t recommended for beginners. 

    You’ll need to install WP-CLI and access your site via the command line to get started. Then, you can view a list of all installed themes by using the following command:

    $ wp theme list 

    You can also be more specific if you only want to view inactive themes. In this case, simply type:

    $ wp theme list --status=inactive

    When you find the theme(s) you want to delete, enter the following command

    wp theme delete themename 

    Remember that instead of “themename”, you’ll want to enter the name of your theme, like “twentytwenty”. Keep in mind that you must use the name of the theme folder, not the name of the theme as it appears in your dashboard. So, you’ll need to write “twentytwenty” instead of “Twenty Twenty”. 

    If you’re successful, you’ll see a message informing you that your theme has been deleted.

    Additionally, you can use WP-CLI to disable a theme on a multisite installation. You’ll just need to enter this command, substituting the name of the theme:

    $ wp theme disable twentysixteen

    What to do after removing a theme from WordPress

    At this point, you’ve successfully deactivated or deleted your WordPress theme. But before you move on to other tasks, it’s worth testing your site to verify that everything is running as it should. It’s also a good idea to remove theme-related content from your website. 

    Test your site

    The first thing to do is test your site once your theme has been deleted. This process is as simple as opening your browser and entering your website’s URL. Then, ensure everything is working correctly, and all content is loading.

    Here’s a list of actions you can perform to test out the functionality of your site:

    • Make sure all internal and external links are working.
    • Verify that everything looks as it should without design abnormalities. 
    • Fill out any forms, including contact and subscription forms.
    • Try enabling and disabling cookies on your site.
    • Make sure you can navigate the menu. 
    • Check that you can access your site on a mobile device and that the content displays properly.  
    • Go through any checkout or shopping functionality, if applicable.

    If you’ve deleted the parent of your active theme, you may find some (or all) of your CSS missing. So, your site will look unstyled, and you’ll need to restore a backup of your site or switch to a new theme. If you accidentally deleted the active theme, WordPress will have switched to one of your other installed themes. 

    Remove theme-related content

    Even though you’ve deleted your theme, you might still have content on your site that’s specific to the software. This might include elements like widgets, menus, images, or posts.  

    You can reassign this content so that it works with your new theme or simply remove these components from your site. 

    If there are widgets in the theme you deactivated, you’ll find them by going to Appearance → Widgets. Then, select Inactive Widgets:

    editing widgets in WordPress

    You can physically drag these into the widget areas in your new theme or delete them. To delete a widget, select it and click on the three dots to expand the toolbar. Then, choose Remove. 

    Additionally, you can remove any posts or pages after deleting your theme by going to Posts or Pages in your dashboard. But you can also leave them as they are and continue to use them with your new theme if you’d prefer. 

    On top of this, themes have different image settings, including featured images, sliders, and carousels. Therefore, you might need to resize these photos to fit your new layouts or simply remove them.

    Frequently asked questions

    While we’ve tried to cover all the most important aspects of deactivating and deleting themes in WordPress, you may still have some questions. We’ll answer them in this section!

    Can I delete the default WordPress theme?

    Yes. Like any other theme, if you’re not using the default WordPress theme, it’s simply taking up space. 

    But keep in mind that often, switching to a default WordPress theme is highly recommended for troubleshooting common WordPress issues. For instance, it’s a good idea to change to a default theme when you encounter login errors.

    This is because default WordPress themes are less likely to cause conflicts with the core software or third-party plugins. Therefore, you might prefer to delete all of your unused themes but hold on to a default theme for troubleshooting purposes. 

    Should I delete unused themes?

    You can just deactivate themes, but these will still be installed on your site, taking up unnecessary space. Therefore, deleting themes altogether is a great way to free up storage space, keep your database light, and reduce the likelihood of online attacks. As a result, you can boost your loading times and make your site more secure. 

    What if a WordPress theme has no delete button?

    You won’t find a delete button if you try to delete your active theme. Therefore, you’ll need to activate a new theme before deleting the previous one. 

    You may also not see the delete button if you’re trying to delete the parent of an active child theme. In this case, you will need to switch to a different parent theme and try again.

    What if I still can’t delete a theme?

    If you’ve followed all the steps in this tutorial and still can’t delete your theme, it’s best to reach out to your hosting provider for help. This situation shows the importance of choosing a quality WordPress host with 24/7 technical support. Plus, it helps if your web host is easily accessible via a direct contact channel like live chat.

    What can I do if I accidentally deleted a WordPress theme?

    If you accidentally deleted a theme, there are numerous ways to restore it. First, you can restore your theme from a backup, assuming that you use something like Jetpack VaultPress Backup

    Alternatively, you can download and install a fresh version of the theme by going to Appearance → Themes → Add New.

    adding a new theme in WordPress

    Then, search for new themes using the search bar in the top left-hand corner of the screen. Or, you can browse the list of WordPress themes. With this approach, it’s important to note that you’ll lose any customizations that you configured in your theme, like custom styles.

    Delete your WordPress theme quickly and easily

    If you don’t delete unused themes in WordPress, your site could be more vulnerable to security threats. Plus, theme files take up space on your server. Fortunately, it’s easy to deactivate and delete themes in WordPress, and by doing so, improve your web performance and reduce security risks. 

    To recap, here are four ways to deactivate and delete a theme in WordPress:

    1. Remove a theme using the admin dashboard.
    2. Remove a theme via FTP.
    3. Remove a theme via cPanel.
    4. Remove a theme via WP-CLI.

    Before you even think about deleting WordPress themes, it’s best to make a backup of your entire site. Jetpack VaultPress Backup automatically backs up all your site files, database tables, and WooCommerce data. Plus, you can restore your website from any location, even if you can’t access your dashboard. Get Jetpack VaultPress Backup today!

  • How to Edit & Customize Your WooCommerce Shop Page

    WooCommerce is a plugin that adds a store to your WordPress website. Owned by Automattic, the people behind WordPress.com, and supported by more than 300 employees, it’s considered the top option for aspiring ecommerce store owners and existing enterprise-level ecommerce operations alike. 

    Building your site with WordPress and WooCommerce gives you complete ownership over your store, with a flexible framework for building a system and design that’s as unique as your dream. 

    Today we’re going to talk about the WooCommerce Shop page, why you may want to build one, and how to customize it. 

    New to ecommerce? Learn more about WooCommerce

    What is a WooCommerce Shop page?

    The WooCommerce Shop page is included by default, and is the archive page for the product post type. This simply means that it will show all of your published products for visitors to scroll through. It’s essentially your online showroom, where visitors view your catalog. You can display items individually, by category, or both, with categories and products on a single page. 

    Why build a custom WooCommerce Shop page?

    The default WooCommerce Shop page is a good option for many stores, and helps you get up and running quickly. But customizing this page provides a curated experience for buyers that can lead to more sales for you and a more streamlined journey for your shoppers.

    So let’s begin with reasons you may want to customize your Shop page.

    1. Make it quick and easy for shoppers

    The faster your visitors can find what they’re looking for — and get the information they need to feel comfortable making a purchase — the better. A well-organized store keeps shoppers from feeling overwhelmed.

    In this example from The Hidden Grounds, there’s a category filter list on their sidebar so shoppers can quickly jump to any category. The Quick View and Select Options buttons make it easy to learn more, choose variations, and add to cart without leaving the Shop page.

    Hidden Grounds Shop page with Quick View options

    Greene King lets shoppers choose quantities and add items to their cart directly from the Shop page. They also added content sections to the Shop page that promote their personalization options.

    Greene King Shop page with options to add directly to cart

    2. Provide an experience tailored to your products and audience

    What you’re selling — and who you’re selling to — affects the amount and type of product information your customers need to make a decision. The approaches below let you provide an experience tailored to your audiences and their needs.

    For well-known brands and products, shoppers may not need to know anything more than item availability and price. In this case, the faster someone can find and add items to their cart, the better. A customer may want to add multiple products to their cart without leaving the Shop page, then proceed directly to checkout. 

    For new and unfamiliar items — or product categories where shoppers need detailed information like food ingredients or accessory specifications — you may want to display information right there on the Shop page. 

    Here are some examples of how you might modify your shop page based on the products you sell or your audience:

    • Add filters for large catalogs of products, or items that get very granular. Perhaps you sell replacement parts that shoppers need to find based on their size, color, SKU, etc.
    • Focus on images if you sell items that are more visual. Clothing stores, for example, might want to showcase larger photos or allow people to scroll through an image carousel directly on the Shop page.
    • Present products in a table. If you sell items that aren’t reliant on visuals, you may want to take images out of the equation entirely. Instead of a more traditional product grid, use a table presenting key information. This is a particularly good setup for service-based businesses or wholesale stores with customers who add a lot of items to their cart at once.
    • Include badges specific to your products. For example, if you sell food, you might have badges for “vegan” or “nut-free.” This helps shoppers immediately see what fits their needs (and what doesn’t.)

    This example from My LAB BOX uses a mix of tables categorized by type of test so visitors can quickly scan options and add them to their cart. Bonus: They also use badges to highlight special attributes (“new”, “popular”).

    MyLabBox products listed in a table

    3. Highlight featured products and promotions

    Editing your WooCommerce Shop page lets you grab your customers’ attention and direct their interest towards featured products and categories, promotional offers, and things like free shipping or satisfaction guarantees.

    Block themes really shine in this case. Use the Top Rated Products block to put your best foot forward, the On Sale Products block to highlight discounted options, or the Hand Picked Products block to have a section of items you can quickly swap out based on the season, current events, or other situation. 

    4. Reflect your brand and personality

    The default Shop page template has a clean and professional appearance, so many site owners choose to use it without any personalization. 

    That’s fine, but customizing your Shop page can help you stand out from competitors, present a unified look across your site and other company profiles, and build confidence by featuring reviews and other trust symbols.

    Daelmans’ Shop page is an excellent reflection of their brand design. Every detail — even the red bar that appears when someone hovers over a product — perfectly fits the style of their entire site.

    Daelman's Shop page, customized to meet their specific brand design

    And The Kind Pen added stars below each product to show how well-reviewed they are. Plus, there’s a slick little callout to the left where curious shoppers can click to read even more reviews to ease any hesitation they may have. 

    The Kind Pen shop page, with green stars underneath each item

    See more examples of what WooCommerce store owners have done with their Shop pages on the WooCommerce Showcase.

    How to customize your WooCommerce Shop page

    Okay, so how do you make changes to your Shop page? There are several options that you can choose from, depending on how your site is built and your experience level.

    1. Customize your Shop page using the WooCommerce Customizer

    The WooCommerce section of the Customizer includes tabs for Store Notice, Product Catalog, Product Images, and Checkout. This is the simplest way to make basic changes to your Shop page.

    To find it, go to Appearance → Customize → WooCommerce.

    making Shop page changes in the Customizer

    Customize the WooCommerce Store Notice

    The Store Notice appears to site visitors in an overlay bar at the very bottom of your site (some themes may place it at the top). The bar appears sitewide with an option to dismiss it. The feature is a great way to let visitors know about a current promotion, a featured product category, an upcoming event, or a storewide policy like free shipping for orders over a certain amount.

    The Store Notice tab has a field for you to enter text and HTML tags for formatting and linking. Click the Enable Store Notice checkbox to activate the feature.

    turning on the WooCommerce store notice

    Customize the WooCommerce Product Catalog

    The Product Catalog tab has dropdown menus for managing aspects of your Shop and Product Category pages.

    WooCommerce Product Catalog settings

    If you have a large number of items in your store, a single Shop page can be overwhelming to visitors. Use the Shop Page Display menu to select what should appear on the page — categories, products, or both. The Category option will display a grid of thumbnails representing the categories available on your store. 

    Use the Default Product Sorting menu to manage the display of items on the Shop page. It defaults to Custom ordering + name, but you can also sort by:

    • Popularity (sales)
    • Average Rating
    • Most Recent
    • Price (ascending)
    • Price (descending)

    To set a custom order for the default option, go to Products → All Products. Then, click the Sorting tab at the top.

    Next, select a category, product type, stock status, or any combination of the three. Click Filter. Now you can drag and drop products however you’d like.

    Customize the WooCommerce Shop page product images

    The Product Images tab lets you customize the size and display of product images on the Shop page. There are three options:

    • 1:1 (cropped to a square)
    • Custom aspect ratio
    • Uncropped (displayed using the aspect ratio in which images were uploaded)

    When you publish your changes, thumbnails in the new image sizes are generated automatically.

    Product Image options in the Customizer

    2. Customize your Shop page using the Gutenberg Block Editor

    If you’re using a block theme, you can edit and customize your WooCommerce Shop page with the Site Editor. Always back up your WordPress site before making edits to your Shop page template.

    To customize your page, go to Appearance → Editor and choose Browse all templates from the dropdown menu at the top center of the page. 

    template options in the Site Editor

    Click to edit the Product Catalog template.

    selecting the Product Catalog template

    The Product Catalog template consists of the header, the footer, and the body area. Click into the header or footer areas to edit their contents and add new blocks as desired, like an image or paragraph block.

    By default, the body of the page simply has the Product Grid block, which will display the product image, title, price, etc. 

    WooCommerce Product Grid block displayed by default in the Site Editor

    Add blocks above and below the Product Grid block to customize your shop page template. You can use any block type, including 20+ WooCommerce Blocks, located in a dedicated section of the Block Inserter for easier browsing.  

    Use the Best Selling Products and Top Rated Products blocks to promote your most popular items. Use the All Reviews block to include customer testimonials on the page.

    WooCommerce block options

    The custom Shop page below uses a Columns block to create the content area and sidebar layout. An All Products block loads the catalog into the main area, while filter blocks in the sidebar let the customer quickly find what they’re looking for.

    custom Shop page design

    The All Products block settings — accessed via the gear icon at the top right — include tools for adjusting the grid layout, hiding the sorting dropdown, and setting the default product ordering.

    options for customizing product display

    You can edit the All Products block to customize your WooCommerce Shop page further. Click on the block, then on the Edit icon. 

    To manage their settings, you can then click on elements within the example product — like Product Image and Product Title.

    settings for individual product displays

    You can rearrange the contents displayed for items in the grid. For example, you can move the Add to Cart button above the product ratings. Click to select an element, then use the up/down arrows to move its placement in the layout.

    moving a green Add to Cart button

    Learn more about WooCommerce Blocks.

    3. Customize your shop page using WooCommerce extensions

    Extensions are types of plugins created specifically for WooCommerce stores. You can use them to improve the shopping experience and enhance your Shop page’s content and features. 

    We’re going to go through a few examples. For more extensions, visit the extension library.

    Product Filters for WooCommerce

    With Product Filters for WooCommerce, you can allow customers to filter your products based on several criteria, including the category, price, average rating, and stock status. 

    Filters make a catalog of thousands of items accessible, since shoppers can use them to get relevant results quickly and easily. The extension uses AJAX to update results without the need for visitors to refresh the page. 

    Filtering options can display in multiple ways — checkboxes, radio buttons, price sliders, size charts, and color lists. They can be based on tags, allowing you to create custom filters like “Staff favorites.”

    Product Filters with a variety of options

    Learn more about Product Filters for WooCommerce

    WooCommerce Quick View

    WooCommerce Quick View lets your shoppers learn more about products, choose between variations, and add items to their cart without leaving the main Shop page. 

    The extension adds Quick View buttons to your Shop page that will trigger a pop up window when clicked. The window contains essential product information, plus the ability to choose between variations and add items to their cart. This speeds up the shopping experience, as visitors can compare products and make selections without having to load multiple new pages. 

    Quick View buttons in action on a product page

    Learn more about WooCommerce Quick View

    WooCommerce Advanced Product Labels

    WooCommerce Advanced Product Labels adds visual flair to your shop page to catch customers’ attention. You create custom labels to showcase new products, sale items, bestsellers, and more.

    various colored labels on top of product listings

    Labels can be applied globally, to a specific product, or a group of items based on conditions.

    You can set a wide variety of conditions for each label. Add a “New” label for all items added within the last two weeks. Display a “Sale” label for discounted items. Or showcase the items that shoppers purchase the most with a “Bestseller” label.

    Conditions include product category, type, price, stock status, popularity, shipping class, featured status, and more. You can even create conditions based on tags for flexible custom groups.

    There are six label graphics to help your shoppers browse visually, or you can upload your own label images. Select from a predefined color palette or apply custom colors to match your brand. A live preview option lets you see how labels will look to shoppers.

    Learn more about WooCommerce Advanced Product Labels.

    Product Tables for WooCommerce

    Product Tables for WooCommerce lets you display your catalog in a table format for easy reference and comparison on a single page. The column titles are customizable, and you can select a default sort order.

    The extension supports variable products, with dropdown menus to select variations. Each row has an Add to Cart button and a checkbox for adding multiple items to cart simultaneously. 

    example of a product table with a list of items

    Shoppers can use the fields above the table to filter their results based on category and price range. They can also filter by variation attributes like size or color. The filtering is done via AJAX, so it’s quick, with no page refresh required.

    filter and search options for product tables

    You can create as many customized product tables as you want, and use shortcodes to add them to your Shop page. Choose how much product data to display and configure options down to each individual table. 

    This extension is excellent for any store where customers choose multiple items from a list — like a B2B wholesaler or restaurant displaying menu items for online ordering.

    Learn more about Product Tables for WooCommerce.

    4. Customize your Shop page manually (using code and hooks)

    Hooks allow you to customize templates — like the Shop page — without any of the risks that come with editing core files. WooCommerce uses the template file archive-product.php for the Shop page. You can find a list of available hooks on the WooCommerce Action and Filter Hook reference page.

    Always back up your site before making any changes — when you modify site code, even one mistake can cause major problems. Jetpack VaultPress Backup is an excellent option, because it saves your site each time a change is made. Then, if your site is down, you can quickly and easily restore a version from right before you made your edits. 

    Also, never edit the plugin files directly, since future updates will overwrite your work. Instead, add your custom code to your child theme’s functions.php file or use a plugin like Code Snippets

    Here are some customizations you can make to your Shop page using hooks and code:

    Hide the shop page result count and default sorting dropdown menu

    These page elements are convenient for shoppers but aren’t very useful for stores with only a few items. Add this code to hide them from your Shop page. 

    // Hide the shop page result count
    
    remove_action( 'woocommerce_before_shop_loop', 'woocommerce_result_count', 20 );
    
    // Hide the shop page default sorting menu     
    
    remove_action( 'woocommerce_before_shop_loop', 'woocommerce_catalog_ordering', 30 );
    
    You can also hide these elements using CSS code. Go to Appearance → Customize → Additional CSS and add the following code:
    
    .woocommerce-result-count {
    
    display: none;
    
    }
    
    .woocommerce-ordering select {
    
    display: none;
    
    }

    Change the number of products per row on your Shop page.

    Use this code to override the default number of products per row. Set a higher number to increase the number of products visible on the page without scrolling. Set a lower number, and each product’s image will appear larger for a more detailed view. 

    In this example, we set the number to two items per row:

    // Change the number of products per row on the shop page
    
    add_filter('loop_shop_columns', 'loop_columns', 999);
    
    if (!function_exists('loop_columns')) {
    
        function loop_columns() {
    
            return 2; // 2 products per row
    
        }
    
    }

    Move the product titles above the product images on your Shop page.

    Use this code to move your product titles from below each row of product images to above them. This layout change gives you a design option to stand out from other stores and puts your titles higher on the page, so shoppers see them without scrolling.

    // Move the product title above the product image
    
    add_action( 'woocommerce_before_shop_loop_item', 'woocommerce_template_loop_product_title', 10 );
    
    remove_action( 'woocommerce_shop_loop_item_title', 'woocommerce_template_loop_product_title', 10 );

    Make your prices stand out. 

    Make your prices stand out to shoppers by adding the following code to the Additional CSS field in the Customizer. This style change is helpful if the price point is important to your customers. In this example, the price is bolded and set to the color blue.  

    .wc-block-grid__product {
    
    font-weight: bold;
    
    color: blue;
    
    }

    Add some color to your product image borders.

    This code adds a colored border to your product image. Here the border is set to 2px wide and the color is orange.  

    .wc-block-grid__products .wc-block-grid__product-image img {
    
    border: 2px solid #f27c21;
    
    }

    Frequently asked questions about customizing the WooCommerce Shop page

    What is the WooCommerce shop page?

    When you install WooCommerce, it creates several pages by default, including Shop. The default URL is /shop/, but you can choose a different option via WooCommerce → Settings → Product → General. For example, if you’re selling memberships, you could change the default Shop page to one titled “Memberships.”

    WooCommerce uses your Shop page name in the URL path for your products: yoursite.com/shop/product-category/product-name/. Go to Settings → Permalinks to customize the URL structure for your Shop and products. 

    permalinks settings in WordPress

    What is the best way to customize a WooCommerce Shop page?

    The best way for you to customize your Shop page depends on considerations like your budget for extensions, your comfort level with coding, and your familiarity with blocks and the Site Editor. 

    You can use the WooCommerce documentation library and blog to enhance your knowledge of WooCommerce and how to customize it.

    Should I back up my site before editing the Shop page template?

    WordPress does not store a revision history of templates like it does pages and posts. For this reason, you should always back up your site before editing the WooCommerce Shop page template.

    Jetpack VaultPress Backup is a real-time, automatic backup solution for WordPress that lets you restore your site without losing crucial customer and order data. It saves to the cloud every time you make a change to your site, so you can restore it even if your dashboard becomes inaccessible. 

    Learn more about how to back up your WooCommerce store.

    How do I boost my Shop page’s loading speed?

    Jetpack Boost is the speed optimization plugin for WordPress that beat five top performance plugins in a head-to-head test

    It specifically targets key areas related to the user experience. These are some of the same things measured by Google when determining site rankings, so an improvement in this area might also help you attract more traffic. 

    Jetpack Boost can defer the parsing of JavaScript that’s not essential, optimize CSS delivery, and implement lazy loading on your site.

    Simply install and activate the plugin, then go to Jetpack → Boost. You can see your performance scores and toggle acceleration features for debugging and speed-testing purposes from one convenient screen.

    Jetpack Boost dashboard and settings

    For more ways to speed up your Shop page, check out Nine Ways to Speed Up a WooCommerce Store.

    What else can I do to enhance my WooCommerce Shop page?

    Below are more ways you can enhance and optimize your WooCommerce Shop page. 

    Customize your Shop page’s “Add to Cart” behavior

    Speed up the shopping process for your customers by allowing them to add items to their cart directly from the Shop page and then immediately redirecting them to the cart page. You’ll do this through the options found by going to WooCommerce Settings → Products → General.

    Check Enable AJAX add to cart buttons to display on archives to display Add to Cart buttons on the main Shop page. 

    Check Redirect to the cart page after successful addition, and shoppers will go directly to the Cart page after adding an item. This option is great for stores where customers generally don’t need to stay on the Shop page to add more items. 

    Set a custom product placeholder image 

    If WooCommerce doesn’t have a photo for one of your SKUs, it will use a default placeholder image.

    You can update the Placeholder image to use a custom graphic like your logo. This way, if there’s ever a product without a picture in your store, WooCommerce will show your branded image vs. the default placeholder.

    Go to WooCommerce Settings → Products → General and enter the image URL or attachment ID into the Placeholder image field. Save your changes to update the default image.

    Improve the speed of your WooCommerce store

    A one-second delay in mobile loading times can reduce conversion rates by 20%. So improving your site speed can have an immediate impact on sales. 

    Jetpack Boost is the fastest and most convenient WordPress speed solution, with a simple dashboard for monitoring your site’s performance and enabling speed tools. Install the plugin, review your mobile and desktop speed reports, then measure the difference after activating the one-click optimization features.

  • A Comprehensive Guide to the WordPress theme.json File

    Making custom stylistic changes to your WordPress site generally means editing multiple files manually. Plus, if you switch themes, you’ll have to reconfigure all these settings from scratch. This can be a time-consuming process. 

    Fortunately, when WordPress launched version 5.8, it introduced a new theme.json file. This is a dedicated space for styling the block editor (and individual blocks) on the front and back end. As a result, it’s much easier to manage styles for your website.

    In this post, we’ll take a closer look at the theme.json file. Then, we’ll run through some key considerations before we show you how to edit your theme.json file. 

    What is theme.json in WordPress?

    The theme.json file is a mechanism that enables you to configure the Block Editor with greater control. It’s useful for making site-wide stylistic changes, since you can assign default styles to all (or some) of your blocks.

    Essentially, theme.json is a solution that enhances the capabilities of the Block Editor API. For instance, with theme.json, you’ll gain the ability to control the editor programmatically. Plus, you can integrate a block style system. This facilitates how you manage user, theme, and core preferences.

    The theme.json file was introduced at the same time as the Site Editor. In conjunction, theme.json is one of the first major steps to managing styles for future WordPress releases. It’s a great way to gain more control over your theme (and site) so that you can make changes to your menus, headers, and footers.

    example of the Site Editor in action

    In short, the Site Editor enables you to make tons of global stylistic changes while theme.json is the mechanism that lets you configure custom options for your blocks.

    For example, you can redefine the settings of the Block Editor to hide or show customization options for certain users. Additionally, you can define default colors and font sizes for your blocks while configuring a new width or alignment for the editor.

    Where is the theme.json file located?

    You can find your theme.json file inside the root of your theme directory. If you’re using the Site Editor, and you’ve activated a block-based theme like Twenty Twenty-Three, then you’ll definitely have access to a theme.json file.

    But, if your chosen theme doesn’t come with a theme.json file, you can either switch themes or create your own file. It’s important to note that some themes come with very specific CSS or style blocks that might be incompatible with changes that you make in theme.json. For instance, the dark mode in Twenty Twenty-One cannot be overridden by stylistic changes added in theme.json.  

    What to do before editing your theme.json file

    Now that you know a bit more about the theme.json file, let’s take a look at some important factors to consider before making your edits.

    1. Back up your site

    Before making any significant change, it’s important to make a backup of your site. That way, if something goes wrong, you can recover your website and start over again. 

    Using the Jetpack VaultPress Backup plugin is one of the easiest ways to back up your site.

    Jetpack VaultPress Backup homepage

    This Jetpack tool creates real-time, cloud-based backups and stores them on WordPress.com’s secure server network. Plus, the restoration process is quick and simple. 

    You’re able to take advantage of one-click restores from the mobile app, even if your site is completely down.

    2. Consider using a staging site

    A staging site is a great way to test out changes you want to make without affecting your live website. Essentially, a staging site is a copy of your website that isn’t made available to the general public. Therefore, you’ll gain privacy to test out new features or update your site. 

    This way, you won’t need to worry about things going wrong when you edit the theme.json file. Furthermore, if there’s a problem, you’ll still be able to access your live site. It also means that when you finally push any changes to your live site, you can rest assured that they won’t harm the functionality of your pages. 

    There are a variety of ways that you can set up a staging site. You can ask your web host, set up different subdomains for your site manually, or install a plugin. But it can be easier to opt for a local WordPress development tool.

    How to edit your theme.json file 

    At this point, you’re ready to access and edit your theme.json file! In this section, we’ll show you some useful ways to edit theme.json like creating a color palette and overriding the default font size for your blocks. 

    To get started, you’ll need to reach the root directory of your website. You can do this by using an SFTP client like FileZilla or visiting your File Manager. Then, simply head to the public_html directory. Within that, locate your wp-content folder.

    WordPress files and folders

    Next, go to themes and select the active theme for your site. This is where you’ll find theme.json if your theme has one. 

    1. Create a default color palette 

    You might want to establish a set color palette for the Editor. That way, you can access your colors quickly and ensure a consistent visual brand across your pages. 

    Plus, it can be helpful if you have other users who create posts and pages on your site, since they’ll only be able to access the colors that you include within your color repository. Additionally, they won’t have the ability to create their own hues and gradients.

    To get started, locate theme.json following the steps we outlined earlier. There are three factors to take into account to enable this setting:

    1. You’ll need to disable custom gradients
    2. You’ll need to disable custom color options
    3. You’ll need to add a custom palette with your brand colors

    After you’ve connected to your theme files using SFTP or your File Manager, you’ll need to copy the following code and save it in the root directory of your theme: 

    {
    “version”: 1,
    “settings”: {
    “color”: {
    “custom”: false,
    “customGradient”: false,
    “gradients”:[],
    “link”: false,
    “palette”:[
    {
    “slug”: “vivadcyanblue”,
    “color”: “#0693E3”
    },
    {
    “slug”: “vividgreencyan”,
    “color”: “#00D084”,
    },
    {
    “slug”: “white”,
    “color”: “#ffffff”
    }
    ]
    }

    Keep in mind, you’ll need to tweak the above code to reflect your preferences. Here, we’ve disabled the custom gradient and custom color options. 

    Plus, we’ve determined a set color palette of three different shades. Therefore, when users create posts and pages on the site, they’ll only be able to access these shades. 

    What’s great about creating a custom palette in theme.json is that WordPress will also rewrite all the required CSS. This way, any color changes made in the Block Editor will also be reflected on the front end.

    2. Configure custom font sizes

    It can also be useful to configure certain font sizes for the Paragraph block. Of course, the block provides a set of default font sizes, but you can use theme.json to override it with your preferences. 

    Again, you’ll need to find the root directory of your theme by visiting the themes folder in wp-content. Then, locate theme.json. Font sizes are added to theme.json under settings → typography → fontSizes. 

    Then, you’ll need to input your values. You’ll use size to add a valid CSS font size value. Meanwhile, slug is the identifier that WordPress uses in the CSS custom property. You can also add a name, but this is just for your own use since it’s what you’ll see in the editor.

    In WordPress, the default “small” font size has the value 13px, so you can base your values around this. All in all, your theme.json file will look something like this once you’ve added this code to the file:

    add_theme_support( 'editor-font-sizes', array(
    
        array(
    
            'name' => esc_attr__( 'Small', 'themeLangDomain' ),
    
            'size' => 12,
    
            'slug' => 'small'
    
        ),
    
        array(
    
            'name' => esc_attr__( 'Regular', 'themeLangDomain' ),
    
            'size' => 16,
    
            'slug' => 'regular'
    
        ),
    
        array(
    
            'name' => esc_attr__( 'Large', 'themeLangDomain' ),
    
            'size' => 36,
    
            'slug' => 'large'
    
        ),
    
        array(
    
            'name' => esc_attr__( 'Huge', 'themeLangDomain' ),
    
            'size' => 50,
    
            'slug' => 'huge'
    
        )
    
    ) );

    Simply save the changes to update your WordPress block settings.

    3. Create custom templates and template parts

    Another way to edit theme.json is to create custom templates and template parts. Since themes can list the custom templates that are present in the templates folder, you can declare the post types that can use it and the title you show your users. 

    To get started, open theme.json. You’ll need to think of a name, title, and post type, although the last setting is optional. Then, add the following code to the file:

    {
    
    “version”: 1,
    
    “customTemplates”: [
    
    {
    
    “name”: “custom-template-example”,
    
    “title”: “The Custom Template Title”,
    
    “postTypes”: [
    
    “page”,
    
    “post”,
    
    “my-cpt”
    
    ]
    
    }
    
    ]
    
    }

    At this point, you’ve created a template for your pages, posts, and custom post types. You can go one step further and create template parts for your theme. 

    This way, you can configure theme.json to declare the area term for a template part, like a header or footer block. By defining this in theme.json, you can ensure that the setting is applied across all uses of that template part entity rather than just a single block. 

    Before you get started, you’ll need to consider the name, title, and area of your template part. It’s important to note that if you don’t specify an area, it will be set to “uncategorized” and trigger no block variation. 

    To create a template part for your theme, add the following code to theme.json

    {
    
    “version”: 1,
    
    “templateParts”: [
    
    {
    
    “name: “my-template-part”,
    
    “title”: “Footer”,
    
    “area”: “footer”
    
    }
    
    ]
    
    }

    Then, be sure to save your changes before exiting theme.json. 

    Frequently asked questions about theme.json in WordPress

    Now you know how to edit theme.json, but you may still have a few doubts about it. That’s why we’ve answered some of the most common theme.json questions below!

    When was theme.json first introduced in WordPress? 

    The theme.json file was first introduced with the release of WordPress 5.8. This is when Full Site Editing (FSE) was launched, along with the ability to use block-based themes. 

    This release indicated a huge shift for the platform, since users gained the ability to make site-wide changes and got more control over stylistic settings. Later, with WordPress 5.9, theme.json evolved to a second version. 

    What can you do with the theme.json file? 

    In short, theme.json enables you to change and apply new style-related settings to all of your WordPress blocks. Therefore, you gain a finer level of control over stylistic changes. Plus, it means you can avoid the need to configure these changes individually at the block level. 

    For example, you can edit theme.json to disable/enable features like drop cap, padding, margin, and custom line-height. Additionally, you’re able to add multiple color palettes, duotones, and gradients to make it faster to apply your brand colors to elements on your page.

    What’s more, you can specify exact font sizes and apply this across your site. Or add default widths for your content and assign template parts to template part areas.

    What are the prerequisites to using the theme.json file? 

    Editing theme.json is an easy way to make site-wide stylistic changes. But, unfortunately, it isn’t an option for all users.

    First off, you’ll need to use the Block Editor. If you prefer to use page builders, you won’t be able to take advantage of this functionality. On top of that, you’ll need to have some understanding of CSS and feel comfortable editing your site files. 

    Lastly, you’ll need to be able to access theme.json. As we discussed earlier, not every theme has a theme.json file. Plus, the settings of some themes will override any changes that you make in theme.json

    If your theme does have theme.json, you’ll be able to find it in the root directory of your site. You can locate this using SFTP or visiting your File Manager. Then, find the themes folder within wp-content. This is where theme.json resides. If your theme does not have theme.json, you can either switch themes or create a theme.json file yourself.

    Use the WordPress theme.json file for streamlined web design

    Making custom, site-wide changes often means editing numerous files or completing lots of manual tasks. But, with theme.json, you’ll get a dedicated space for controlling and managing all the stylistic settings for your site.

    The theme.json file is located in the root directory of your site from WordPress 5.8 onwards. You can edit the file to make sweeping changes like apply a custom color palette to your site and override the WordPress default font sizes. 

    Before you edit your theme.json file, it’s important to make a backup of your site. Jetpack VaultPress Backup is an easy-to-use plugin that enables you to restore your site even when you’re offline. Plus, it backs up all your files, WooCommerce data, and your database!

  • WordPress Search: How it Works & How to Enhance It

    If you manage a site with lots of content or information, it’s crucial to organize it all in a way that makes sense to visitors. A well-thought-out navigation menu and intuitive design is a good start, but it’s not always enough. 

    To go the extra mile, you can turn to the WordPress search function to increase your site’s user-friendliness and navigation. You can add this feature to almost any design, or create a dedicated page for it. Then, you can customize it to meet your unique needs, and use tools like Jetpack Search to enhance its functionality.

    In this in-depth guide, we’ll talk more about WordPress search and discuss how you can add this vital function to your website. We’ll also explore some troubleshooting tips and frequently-asked questions. Let’s get started!

    What is WordPress search?

    Before we can discuss how to leverage WordPress search on your website, it’s best to have a basic understanding of what this feature is and how it works. Of course, you’ve probably used plenty of search engines before, like Google. 

    This type of search engine enables you to look for specific content anywhere on the web, using sophisticated algorithms and vast databases.

    WordPress search lets you conduct the same type of inquiry, but it targets the content on a single website. 

    example of search bar on Jetpack's website

    Typically, the search function is represented by the familiar magnifying glass symbol and is often found in the sidebar or website header. But it’s important to note that you can add a search bar virtually anywhere on your WordPress site.

    How does WordPress search work?

    WordPress search works like a search engine, only on a smaller scale. It’s included in WordPress core by default, and some themes may style it to match the rest of your theme settings. You can add it to your site using a Search block or widget, depending on the theme you’re using.

    When it was first introduced, the standard search tool simply returned results based on the terms users input. Users could then click on the links in those results, and go directly to the pages that contained the specific content they were looking for.

    Similar to the larger-scale search engines, though, WordPress has evolved its search function over the years. Initially, it could only return results that contained specific search terms, and in chronological order. Now, it can do a better job of understanding what users are looking for, and return results based on their relevance.

    Furthermore, these days, adding a WordPress search bar to your website is easier than ever. You can add one to your pages and posts using the Search Block and the Site Editor. We’ll show you how to do that shortly.

    What are the limitations of WordPress search?

    While the default WordPress search option is very useful, it does have its shortcomings. First of all, it can only scan content from “the titles and the bodies of your posts and pages.” This includes:

    • Page titles
    • Media titles (images, videos, GIFs, etc.)
    • Alternative text (alt text)
    • File names
    • Single image captions
    • Paragraph text

    This may seem like a lot, especially since it includes some elements that aren’t even visible to most users (like alt text and file names). But the fact is that this search still excludes lots of important information, including content contained in the following page and post elements:

    • Widgets
    • Comments
    • Categories
    • Gallery captions
    • Tags 

    As you can see, a portion of your site is entirely ignored when you’re using the default functionality. In particular, if you run an ecommerce store, this means that some information from product pages could be completely left out.

    Additionally, if your website contains a lot of content, it could take longer for search results to display. This may lead to a poor user experience (UX) for the searcher.

    Fortunately, there are many ways you can customize and improve the WordPress search function. But first, let’s talk a little more about why this feature is so important.

    Why should I use the WordPress search feature?

    If you’re not familiar with web design or development, you may want to keep your website as simple as possible. So you might be wondering if using the WordPress search feature is really worth it.

    The answer will depend on a few factors that are unique to your audience and content. But in most cases, you’ll likely benefit from using the WordPress search function. In particular, it can be very useful for sites with a lot of content that’s difficult to navigate, like blogs with extensive archives.

    Cookie + Kqte website, showing the search results page

    Ecommerce sites with lots of product pages and categories can also benefit from adding a search feature. This will likely result in an improved UX, and can even lead to a boost in conversions. 

    Alternatively, if your website features an extensive customer support or knowledge base page, it might be useful to add a search element there.

    Dreamhost search bar in their knowledge base

    This way, you can provide answers more quickly, and reduce the number of customers reaching out directly to your support team. As a result, customer support representatives will have more time to work on trickier cases and improve satisfaction overall.

    It’s important to note that there are some cases when you may not need to add an internal search feature to your site. For example, it might not be necessary for one-page websites and other sites with very limited content. For most websites, though, this particular function is essential.

    How to add search functionality to your WordPress site

    Now that you know a bit more about how WordPress search works and why you may want to take advantage of this feature, we’re going to show you how to add it to your site!

    1. Start by adding the default search functionality

    If you don’t need premium search capabilities, you can use the default WordPress search functionality. As we discussed, this might not be ideal since it excludes key information from elements like comments, widgets, and more. Plus, if you have a lot of content to search, it might return results rather slowly.

    However, even if you do plan to use the amazing benefits of Jetpack Search, you’ll start with this step as Jetpack Search essentially builds upon the default capabilities. 

    For this tutorial, we’ll be adding a search bar to the navigation menu in our global header. But keep in mind that the process is similar, no matter where you add your search bar, as long as you’re using WordPress blocks.

    To begin, navigate to your WordPress dashboard. Go to Appearance → Editor, and select the page element you’d like to modify. In our example, it’s the menu within the header.

    Then, click on the plus symbol (+) to find and add the Search block.

    adding a search bar to the header

    In this example, since we’re adding it to our header, you’ll find it under the Transform submenu. After you’ve added the search bar, simply save your changes or publish your page. Here’s what the final result looks like:

    example of a WordPress search bar in the header

    As you can see, by default, the search block shows a brightly-colored magnifying glass and an empty field for inputting a query. These default appearance settings might not be ideal for your site’s color scheme or theme. But don’t worry; we’ll show you how to customize these elements later.

    2. Now, install Jetpack Search for enhanced capabilities

    As we discussed, the native WordPress search function comes with its limitations, so you may want a more powerful internal search option. If that’s the case, your best choice is Jetpack Search

    Jetpack Search homepage with the text, "Help your visitors find what they need."

    This powerful tool will help you take your website’s search feature to the next level. It’s highly customizable and optimized for speed.

    Jetpack Search uses “instant search” (a.k.a. AJAX search) to deliver results as fast as possible. Thanks to its real-time indexing, users can see results as they type. 

    Plus, it allows for advanced filtering, so your visitors can find exactly what they’re looking for in record time. Jetpack Search comes in both free and premium versions. Or you can purchase it as a part of a package with other performance tools.

    Before you get started, make sure your site meets the minimum requirements for installing Jetpack Search. These are pretty straightforward. For instance, you’ll need the latest version of WordPress, a WordPress.com account, and a publicly-accessible site.

    Then, simply navigate to your WordPress dashboard. Go to Plugins → Add New and input “Jetpack Search.”

    Click Install now → Activate. 

    Jetpack Search in the WordPress plugin repository

    You’ll then be directed to a screen where you can select either a free or premium plan. 

    Next, click Approve to connect your site to WordPress.com, then complete the checkout process. 

    Another great thing about Jetpack Search is that it’s pre-configured. That means it will be ready to go after you choose your plan. You’ll be taken straight to the Customizer screen, so you can confirm that everything is working properly.

    How to improve and customize WordPress search

    After you’ve added the WordPress search function to your website, you can then customize it to your liking. Continue reading to learn how!

    1. Editing the default search functionality

    Earlier, we showed you how to add the default WordPress search function to your site. Now, here’s how you can customize your search bar using this standard feature.

    Return to the Site Editor or the page or post you want to work with. Then, select the search bar element. Make sure to highlight the embedded Search block and not the parent block, which in our example is the Navigation element.

    When you select the Search block, you should see its unique toolbar.

    toolbar for the Search block

    From left to right, you have a search tool, a drag feature, and arrows to move the search element. Then you have three more icons you can use to make adjustments. You can use the first icon to add a label to your search bar.

    Alternatively, you can modify the location of your search button.

    settings for the Search block

    Finally, you can change the magnifying glass symbol to text if you prefer.

    Next, you can explore additional settings in the Block menu on the right. For instance, you may want to change the background color of your button.

    changing the search button background color

    If you continue to scroll down, you can change other display settings like width, typography, and more. Just keep in mind that while you do get a decent level of control over your search bar’s appearance, you won’t have the ability to change how results are displayed.

    2.  Advanced customizations with Jetpack Search

    At this point, you’ve already modified the search bar to match the look of your site. Now, if you’re using Jetpack Search, you can take things a step further by customizing the user experience of search results.

    Customizing the Jetpack Search experience for advanced design and functionality is pretty straightforward. There are a few ways you can go about this, but the easiest approach is to navigate to your WordPress dashboard and go to Jetpack → Settings → Performance.

    settings for Jetpack Search

    Make sure that both of the toggle buttons are enabled (this is recommended), and then click on Customize your Search experience.

    customizing search results

    Under the Options tab, you’ll see that you can customize the Styling, Result Format, and Search settings. When it comes to Styling, you can opt for Light or Dark. You can also display images in results, modify the background color for your search field, and choose from different Overlay Trigger options.

    Further down, in the Options menu, you can exclude post types and disable additional settings like infinite scroll and the “Powered by Jetpack” message. As you can see, Jetpack Search allows you to personalize almost every detail of your search bar.

    If you want to offer your users the best search experience possible, you might consider creating a dedicated search page. Alternatively, you could include the search element on every page, as we did in our example by modifying our site-wide header. Even better, you may want to provide both options! 

    What if WordPress search isn’t working as intended? 

    Once you’ve added and customized your internal WordPress search bar, chances are you won’t have to worry about it any further. But occasionally, your WordPress search tool may not work as intended. 

    In case this happens to you, let’s go over some common issues and how to resolve them. 

    1. WordPress search is not returning any results

    When you use the native WordPress search function, you may occasionally encounter a 404 error. That means your searches won’t return any results.

    If this happens, you may need to regenerate your site’s permalink structure. Fortunately, this can be done in just a few steps within your WordPress permalink settings.

    2. WordPress search is not showing all possible results

    As we’ve discussed previously, when you add the default WordPress search bar to your site, it only scans certain types of content.

    This means that some relevant content may not show up in the search results. You can avoid this by upgrading to Jetpack Search, so visitors can find what they need, no matter where it’s located.

    3. WordPress search is very slow

    Unfortunately, another common issue with WordPress search is results that take a long time to display. This most often affects larger websites with lots of content and pages, like blogs with lots of posts and sizable online stores. 

    If this occurs, you can use a WordPress search plugin instead of the default functionality. Jetpack Search is designed for speed, and uses real-time search that allows users to view results as they type.

    Frequently asked questions about WordPress search 

    Hopefully, by now you have a good understanding of WordPress search. But just in case you still have lingering questions, we’re going to cover some frequently-asked questions about this feature.

    Why is internal search important for a website?

    As we discussed previously, internal search can greatly benefit most websites. This is particularly true for larger sites with lots of information. 

    For example, blogs with extensive archives and ecommerce sites with many product pages will definitely need a search tool. Otherwise, visitors may wind up frustrated when they can’t find what they want quickly, and could abandon your website as a result.

    While robust and user-friendly navigation menus can help organize larger sites, the WordPress search feature greatly enhances UX and ultimately boosts your business goals.

    How can I make WordPress search faster?

    While WordPress search can be a valuable tool, if your website houses lots of content and you’re using the default functionality, your users could end up waiting longer than they need to for results. 

    To make WordPress search faster, you can install and customize a plugin specifically designed for this purpose, like Jetpack Search. Additionally, you may want to implement a caching solution.

    Can I customize WordPress’ default search options?

    The short answer is yes: you can customize WordPress’ default search options. There’s a lot you can do to alter the search bar’s appearance. If you want more advanced customization options, though, you’ll need to upgrade to a WordPress search plugin.

    What is the best plugin to improve WordPress site search?

    There are a handful of high-quality WordPress search plugins that you might want to consider. But if you’re looking for a trustworthy, all-in-one solution, Jetpack Search is hands-down the best option. 

    It comes with advanced filtering, real-time search, and performance optimization. Plus, you can easily pair it with other Jetpack tools to ensure that your WordPress site is always functioning as it should.

    Elevate your website with WordPress search

    If you manage a large WordPress website with lots of valuable content, you may struggle to present it to visitors in an accessible way. While proper site structure and robust navigation can help with this, they might not be enough. That’s where the WordPress search function comes in handy.

    You can easily add a WordPress search bar almost anywhere on your site. You can use the Search block to access the default functionality. But this basic feature may not be ideal for some sites, as it can’t scan certain page elements like widgets, comments, categories, and more. To ensure that your users get lightning-fast results, you can upgrade to Jetpack Search. This tool also unlocks advanced features like powerful filters to help people find what they’re looking for more easily.

    Are you looking for additional ways to improve your site’s performance and security? Check out the rest of the Jetpack products!