EDITS.WS

Author: Simon Keating

  • 24 Social Media Tips for Businesses Looking to Maximize ROI

    Let’s get one thing straight: social media marketing is not a golden ticket. It won’t solve all your business problems, and it won’t make you an overnight success. However, if you’re willing to put in the time and effort, social media can be a powerful tool for building relationships, establishing credibility, and growing your business.

    In this post, we’re going to share 24 social media tips to help you maximize results, efficiency, and ROI for your business.

    1. Start with a strong strategy and clear goals 

    It’s time to put on your thinking caps and get strategic. Starting with a strong social media strategy and clear goals is essential to avoid wasting your precious time and resources on ineffective tactics. Here are some tips to get you started:

    • Define your target audience. Who are you trying to reach? Determine the demographics, interests, and behaviors of your target audience. This will help you create content that resonates with them and drives engagement. Don’t be afraid to get specific — knowing your audience inside and out is key to success.
    • Determine your unique value proposition. What sets your brand apart from the competition? Determine your unique value proposition and use it to guide your content and messaging. Maybe you offer the best customer service in the industry, or your products are sustainably sourced. Whatever it is, make sure your audience knows why you’re special.
    • Set specific, measurable goals. Define specific, measurable goals that align with your overall business objectives. Want to increase website traffic, generate leads, or drive sales? Set a clear goal and track your progress to ensure you’re moving in the right direction.
    • Choose the right platform. Don’t waste your time on platforms that your target audience doesn’t use. Determine which social media platforms your audience uses most frequently, and focus your efforts on those platforms. Running an ecommerce business? Here’s how to choose the right social media platforms for your store.
    • Develop a content strategy. What types of content will you create? How often will you post? What’s the tone and voice of your messaging? Developing a solid content strategy for social media is key to staying organized, consistent, and aligned with your goals.
    • Allocate resources. Determine the resources, including time and budget, you’ll need to execute your social media strategy. Remember, social media can be a time-consuming endeavor, so make sure you’re allocating enough resources to do it right.
    • Perform a competitive analysis. Research your competitors and their social media presence. Determine what types of content they’re sharing, how often they post, and what seems to be resonating with their audience. Use this information to inform your own strategy and differentiate from the competition.

    Don’t forget, a strong social media strategy is a living, breathing thing that requires constant evaluation and refinement. Keep your goals in sight and regularly review your progress to make sure you’re on track. 

    2. Create content that speaks to your target audience

    Clearly defining your target audience is essential for creating content that resonates with them and drives engagement. 

    Here are some tips to help you find the mark with your content:

    • Conduct market research. Use market research to gather data on the demographics, interests, and behaviors of your target audience. This can include surveys, focus groups, or even social media analytics. The more data you have, the better you can understand your audience.
    • Create buyer personas. Get in the shoes of your customers and create detailed buyer personas that represent their characteristics, pain points, and preferences. These personas should include information such as their age, gender, interests, challenges, and goals. This will help you understand their motivations, pain points, and preferences.
    • Tailor your messaging. Speak their language, and address their pain points, so they know you get them. Think of it like speaking their love language — it’s all about making a connection.
    • Use social listening. Join in or review public conversations to gather insights about needs and preferences. This can include monitoring hashtags or keywords related to your brand or industry, and reviewing posts and comment threads. You may even want to join groups related to your niche to understand how your target audience interacts and the kinds of things that really capture attention.
    • Create content that solves their problems. Address the pain points and challenges of your target audience in your content. Offer solutions, tips, and advice that can help them overcome their problems and improve their lives. You want to be the hero in their story!

    Remember, when you know your audience, you can create content that resonates with them, and that’s when you can really find success. 

    3. Be authentic and humanize your messaging

    Being authentic and human in your messaging is essential for building relationships and establishing trust with your audience. Social media is a platform for connecting with people, not just selling to them. When you show the human side of your brand, you build rapport and establish credibility with your audience.

    Here are five tips for being authentic and human in your messaging:

    • Be genuine. Don’t try to be something you’re not or pretend to have values that don’t align with your brand. Your audience can tell when you’re not being genuine, so it’s important to be true to yourself and your brand.
    • Show your personality. Your brand has a unique personality, and you should showcase it in your messaging. Use humor, storytelling, and personal anecdotes to connect with your audience. This helps them relate to you on a personal level.
    • Use real-life examples. One of the best ways to be authentic is to use real-life examples and case studies to demonstrate the value of your products or services. By showcasing real people who have benefited from your brand, you establish credibility and build trust with your audience.
    • Engage with your audience. Social media is all about two-way communication, so it’s important to engage with your audience. Respond to comments, questions, and concerns in a timely and professional manner. Don’t simply copy + paste standardized responses — craft unique answers for every situation. This shows that you value their input and are committed to building relationships.
    • Show appreciation. Lastly, don’t forget to show appreciation for your audience. Thank them for their support and highlight their contributions to your brand. This creates a sense of community and makes your audience feel valued and appreciated.

    Remember, people are eager to do business with brands they trust, and by being authentic, you establish that trust. 

    example of a look behind the scenes of Offerman Woodshop
    Example of a social media post from Offerman Woodshop that looks behind the scenes

    4. Embrace storytelling to create emotional connections

    Embracing storytelling is a powerful way to create emotional connections with your audience and make your brand more memorable.

    Here are some tips to help you leverage storytelling in your social media marketing:

    • Identify your brand’s story. What makes your brand unique? Is there an interesting story behind your company’s founding? Do you have a mission or values that guide your business? Use this to guide your messaging and content.
    • Use visual storytelling. Humans are visual creatures. Use images and videos to tell your brand’s story. This will help you convey emotion more effectively than text alone.
    • Use customer stories. Your customers are a vital part of your brand’s story. Share their experiences to showcase the impact of your products or services. This not only creates an emotional connection with your audience but also demonstrates the value of your offerings.
    • Share behind-the-scenes glimpses. Give your audience a glimpse behind the curtain to humanize your business and create a sense of authenticity. Share photos of your team at work, your production process, or your workplace culture.
    • Identify your audience’s pain points. What are the pain points and challenges of your target audience? Use storytelling to offer solutions and help them overcome their problems.
    • Use narrative structure. Use narrative structure to create a compelling and engaging story. This includes elements like setting, characters, conflict, and resolution.

    5. Inject humor into your social media presence

    Using humor is a great way to create a more approachable and relatable brand. Humor can help you stand out from the competition and build a strong emotional connection with your audience. However, it’s important to ensure that your humor aligns with your brand values and voice.

    These tips will help inject humor into your social media presence:

    • Define your brand’s humor style. Just like your brand has a unique voice, it should also have a unique sense of humor. Determine what style of humor aligns with your brand values and voice, and use it consistently across your social media platforms. Whether it’s dry humor, sarcasm, or playful humor, make sure it resonates with your audience.
    • Highlight brand values. Whether it’s humor that shows your commitment to sustainability, social responsibility, or customer service, it can help communicate one of your brand differentiators without coming across as salesy. 
    • Avoid controversial or offensive humor. While humor can be a powerful tool, it’s important to avoid using humor that could be controversial or offensive. This could damage your brand’s reputation and alienate your audience. Always ensure that your humor is respectful and inclusive.
    • Use memes and pop culture references. Memes and pop culture references are a great way to inject humor into your social media content. They can help you communicate your message in a fun and engaging way. 
    • Use visuals. Visuals like GIFs, cartoons, and infographics can be a great way to inject humor into your social media content. 
    • Be self-deprecating. Don’t be afraid to poke fun at yourself or your brand. This can help humanize your business and make you more relatable to your audience. Self-deprecating humor can also show that you don’t take yourself too seriously.
    • Be timely. Use humor to capitalize on current events or trends. This can help your brand stay relevant and showcase your wit and creativity. However, be careful not to exploit sensitive or tragic situations for humor.
    • Use humor sparingly. Humor is a powerful tool, but it’s important to use it sparingly and ensure that it doesn’t overshadow your brand’s messaging or goals. Use humor to supplement your content, not to distract from it.

    Keep in mind that humor is subjective, and what’s funny to one person might not be funny to another. So, always test your content with a small sample of your audience before sharing it widely. With the right balance of humor and strategy, you can make your social media presence more engaging and memorable.

    6. Create a social media calendar

    Are you ready to plan and schedule your social media content like a pro? Let’s dive into some tips to help you create a social media calendar that ensures consistency, frequency, and organization.

    • Choose a calendar format that works for you. Are you a spreadsheet guru or a paper planner aficionado? Choose a format that aligns with your work style and preferences.
    • Determine your posting frequency. How often will you post on each social media platform? Determine the optimal frequency for each one based on your audience’s preferences and behavior. Then, schedule your posts accordingly.
    • Plan your content in advance. Brainstorm ideas for content themes or series, plan seasonal or holiday content, or create a content bucket list.
    • Include important dates. Don’t forget to include important dates and events in your calendar, such as product launches, promotions, or holidays. This will help you stay organized and prepared for upcoming events.
    • Develop a content mix. Variety is the spice of life, and the same goes for your social media content. Develop a content mix that includes a variety of content types, such as images, videos, infographics, blog posts, and user-generated content. This will keep your audience engaged and entertained.
    • Adjust your calendar as needed. As you track your social media performance, be prepared to adjust your calendar based on what’s working or to stay aligned with updated business goals. Be flexible to keep your social media strategy on track.
    • Use social media management tools. Finally, use social media management tools like Jetpack Social to schedule your posts in advance. This will save you time and help you stay organized.

    A well-planned social media calendar, and a pinch of automation with tools like Jetpack Social, is the key to success. 

    Jetpack Social sharing options

    7. Use social media automation tools 

    Social media automation tools can save you time and ensure a consistent posting schedule. Automation tools help you manage your social media accounts, schedule posts, and analyze your performance.

    Check out these tips for using social media automation tools:

    • Be selective in your choice. Don’t just pick any automation tool. Choose ones that are compatible with your social media accounts and that will help you achieve your specific goals. Jetpack Social is an example of a social media automation tool that allows you to schedule and share content across multiple platforms from one central location.
    • Schedule ahead. With automation tools, you can schedule posts in advance, making sure you have a consistent posting schedule without having to be glued to your phone 24/7. It’s like setting your social media on autopilot, giving you more time to do other things.
    • Analyze your performance. Use automation tools to track your performance, engagement rates, and follower growth. 
    • Use social listening. Social media listening tools can monitor conversations about your brand or industry and provide valuable insights into what people are saying about you and what’s trending with your most valuable audiences. 

    With the right automation tools, you can streamline your social media strategy and free up more time for the important things in life.

    8. Experiment with posting times and frequencies 

    Audiences have different habits and preferences, so it’s important to test strategies and find what works best for your brand.

    These tips will help you find the right cadence for your strategy:

    • Get experimental. Get out of your comfort zone and try new things. Don’t be afraid to mix up your content, try different posting times and frequencies, and see what resonates with your audience.
    • Use data to guide your experiments. Use social media analytics to track engagement rates, reach, and other important metrics. This will help you identify what’s working and what’s not.
    • Consider your audience’s behavior. Keep your audience’s behavior and preferences in mind when experimenting. For example, if you’re targeting a global audience, you may need to post at different times to accommodate varying time zones. You can use analytics tools to determine when your audience is active. Facebook Insights, for example, has a section for When Your Fans Are Online, that graphs activity by days of the week and time of day.
    • Embrace the unexpected. Don’t be afraid to try something unexpected or even risky. Going live for a midnight FAQ session could help you stand out from all the noise at peak hours.

    You’re unlikely to find a set day of the week and time to post that simply works forever. Audience behavior shifts and times change — literally. Always keep measuring and adjusting your frequency and posting schedule to maximize engagement. 

    creative graphic on Facebook for Aunt Fannie's cleaning products
    Example of a high-quality, branded graphic from Aunt Fannie’s

    9. Invest in high-quality visuals

    Investing in high-quality visuals is essential for grabbing your audience’s attention and conveying information quickly. Images and videos are more engaging and shareable than text alone, making them a valuable addition to your social media content.

    Get inspired to create beautiful visuals for your social media with these tips:

    • Use high-quality photos. Use high-quality images that are relevant to your brand and messaging. No blurry photos, please! Make sure your images are crisp, clear, and visually appealing. Whether it’s product photos or lifestyle images, make sure they tell a story and evoke emotion. Don’t settle for a dark shot taken with a cell phone. Instead, hire a pro, use a stock image service, or even send your products to a company that specializes in product photography. Learn more about taking professional product photos.
    • Use videos. Videos showcase your brand’s personality and convey information in a more engaging way. Create videos that highlight your products, give a behind-the-scenes look at your business, or showcase customer testimonials. And don’t forget to have fun with it — humor goes a long way!
    • Use infographics. Infographics are a great way to present complex information. Use them to communicate your brand’s message in a visually-appealing manner, and be creative with your designs!
    • Use branding elements. Make sure to incorporate your brand’s colors, fonts, and logos into your visuals to maintain consistency across all of your platforms. This will help build brand recognition and create a cohesive look.
    • Invest in quality equipment. Investing in quality equipment, like cameras and editing software, can make a big difference. Plus, it shows your audience that you’re serious about your brand and willing to invest in it!
    • Optimize visuals for each platform. Make sure to optimize your visuals for each social media platform to ensure they display correctly and are engaging for your audience. This means using specific dimensions, aspect ratios, or file types for each platform.

    Go forth and create some beautiful visuals! Remember, quality over quantity, and always stay true to your brand’s voice and values.

    10. Provide educational content

    You don’t need to be an expert at everything to provide value to your audience. Just think about what your audience needs and the areas where you have unique knowledge that can help meet those needs. And, if all else fails, lean on others for their expertise. Conduct interviews and compile the advanced knowledge of multiple contributors in a single place. 

    Here are some tips to help educate and engage your audience: 

    • Identify your audience’s needs. It’s crucial to understand your audience’s pain points and needs. What are they struggling with and how can you help? Use this information to create a plan for how-to guides, tutorials, or webinars to address these topics.
    • Share industry insights. Discuss and share the latest trends to show your audience that you’re a thought leader in your field. This could be in the form of blog posts, white papers, or case studies. 
    • Collaborate with influencers. Partner with influencers in your industry to co-create educational content. This is a great way to reach new audiences and build trust with your existing followers. Plus, it’s always more fun to work with others.
    • Create evergreen content. Creating evergreen content means making something that will remain valuable and relevant to your audience for a long time. Think of beginner’s guides or glossaries that provide a foundational understanding of your industry or topic.
    • Host Q&A sessions. Hosting Q&A sessions on social media or via live streaming is a fantastic way to engage with your audience in real time and build community.
    • Repurpose existing content. Don’t let your old work go to waste! Repurpose existing content into new formats or update older pieces to ensure they remain relevant and valuable. This could mean turning a blog post into a video or updating an outdated how-to guide.

    11. Utilize user-generated content 

    User-generated content not only helps your brand appear more genuine and relatable, it’s a great way to have your customers do a lot of the work for you! Just as people may trust a personal recommendation more than an advertisement, they often respond better to user-generated content than an overly-polished ad. It can help you showcase your brand’s authenticity and personality while also building a loyal group of unofficial brand ambassadors.

    Here are some tips to help you get the most out of user-generated content:

    • Encourage customers to share. Customers may be shy or won’t naturally think to share content unless you encourage them to do so. Make it easy for them by creating unique hashtags or hosting photo contests.
    • Share customer success stories. Sharing success stories is a great way to humanize your brand and connect with your audience. Be sure to highlight the impact your products or services have had on your customers’ lives.
    • Partner with influencers. Engaging influencers for a paid campaign is an opportunity to build truly unique user-generated content that will be highly-relatable to subscribers.
    • Use social listening tools. Use social listening tools to monitor conversations about your brand. Identify the most engaging posts and ask for permission to repost them.
    • Respond to user-generated content. Responding to user-generated content, even if you don’t share it with your entire audience, shows appreciation for your customers and can encourage others to participate themselves. 
    a testimonial posted on the Instagram account of Dr. Scholls
    Example of a customer testimonial shared from Dr. Scholl’s

    12. Partner with influencers

    Partnering with influencers lets you leverage the reach and credibility of popular personalities in your niche. Influencers have engaged followings — from a few thousand to a few million people — and their endorsement is akin to a powerful recommendation from a personal friend or relative.

    Here are some tips to maximize your influencer marketing strategy:

    • Choose the right influencers. Look for influencers who share your values and have a following that matches your target audience. And remember, bigger isn’t always better. Don’t be fooled by an influencer’s follower count alone. Take a closer look at their engagement rate and the quality of their content.
    • Define the terms of the partnership. Be clear about what you expect from the influencer, what they can expect from you, and the compensation for their work. And make sure to get everything in writing so there are no surprises.
    • Set clear goals. Set specific goals for your influencer campaign, such as visits to your site, new followers for your brand account, or actual sales. This will help you measure success and adjust your strategy if needed.
    • Collaborate on content creation. Work with the influencer to create content that is both authentic to their style and aligned with your brand messaging. 
    • Give creative freedom. Trust your influencers to create content that resonates with their audience. They know their audience best, so give them some creative freedom to do their thing and let them shine in their own way.
    • Provide value. Offer something of value to the influencer beyond compensation, such as exclusive access to products or experiences. This can help incentivize them to create high-quality content and promote your brand even more.
    • Build long-term relationships. Don’t just work with an influencer once and move on. Building long-term relationships can help further engrain your brand with their followers, leading to more impactful results.
    • Measure the impact. Track engagement rates, website traffic, and sales to measure the impact of your influencer campaign. Use this data to adjust your strategy and optimize your results. Having them provide their audience with a unique promo code is a great way to do this. 

    13. Join forces with other brands

    Working with other, complementary brands is a proven way to cross-promote and reach new audiences. 

    Here are some tips that will help you make the most of your brand collaborations:

    • Choose the right partners. Choose partners who share your values, audience, and approach. It’s important to collaborate with brands that are complementary to your offerings and have engaged social media followings. 
    • Define the terms of the collaboration. Be sure to define the terms of the collaboration before you get started, including content requirements, compensation, and timelines. And don’t settle for a handshake — get everything in writing and make sure you’re both on the same page.
    • Establish common goals. Establish common goals with the other brand to ensure that both parties benefit from the collaboration. This could include increasing follower counts, gaining email subscribers, driving website traffic, boosting sales, and more.
    • Leverage each other’s strengths. Each brand has its own strengths, and combining them can create a more impactful collaboration. For example, if one brand has a strong social media presence while the other has a popular blog, consider cross-promoting on both platforms. Don’t be afraid to get creative and think outside the box!
    • Follow up and maintain relationships. Follow up with the other brand after the collaboration to evaluate the success of the partnership and maintain the relationship. Building long-term relationships can lead to more impactful collaborations in the future. 

    14. Collaborate with social media groups or communities

    Social media groups and communities are often highly engaged and can be a valuable source of information and feedback.

    Consider the following tips when collaborating with social media groups or communities:

    • Identify relevant groups or communities. Don’t just join any group that has a large following. You want to be intentional about where you invest your time and effort. Look for groups that are active, engaged, and have a narrow focus relevant to what you offer.
    • Join the group or community. Once you’ve found the right groups, it’s time to join the conversation. Offer valuable insights and information to establish yourself as a thought leader in your industry. Remember, you’re not there to promote your brand; you’re there to build relationships and provide value.
    • Collaborate on events. Consider reaching out to a group admin and offering to provide exclusive opportunities for members. Host a webinar or go live to answer questions. But remember, it’s not just about promoting your brand.
    • Pay attention to the rules. Each social media group has different rules that dictate your conduct within the group. Some only allow promotional content on certain days, or even ban it entirely. Make sure you’re familiar with the rules so you can create content that fits within them and avoid getting kicked out.
    • Reach out to admins and group creators. They may be open to collaborating with you for approved promotional posts or official recommendations. Group creators may want something in exchange or, at the very least, will want to vet that you’ll add true value to the community and won’t put off members. Building relationships with admins of large groups can open doors to new opportunities and provide insights you can’t get anywhere else.

    15. Monitor social media mentions 

    You probably get excited when someone mentions your brand on social media. However, this tip isn’t about the ego boost, but instead about engaging with people to spur further conversation or handle complaints.

    Keep a pulse on your brand’s reputation with these social media mention monitoring tips:

    • Use social listening tools. These tools allow you to monitor conversations about your brand, even if customers don’t directly use your handle or hashtag. You can set up alerts for specific keywords or phrases related to your brand and track them across multiple social media platforms. This way, you won’t miss any mentions and can respond promptly.
    • Personalize your responses. Don’t just copy and paste a generic response to every mention. Take the time to read and understand what the customer is saying and respond accordingly. This shows that you’re listening and care about their experience with your brand.
    • Use positive interactions to build relationships. When a customer has a positive experience with your brand, it’s an opportunity to turn them into a brand advocate. Take the time to thank them for their feedback, ask for their opinion on future products or services, or even offer them a discount on their next purchase. These little touches can go a long way in building a strong relationship with your audience.

    16. Engage with your followers in a timely and professional manner

    Social media is all about connecting with people. As a brand, it’s essential to foster meaningful, genuine interactions with your audience. 

    Here are some tips to help engage your audience:

    • Respond in a timely manner. When someone takes the time to comment, question or express a concern, they’re looking for a response. So, be sure to reply in a timely manner to show your followers that you’re present and listening.
    • Show personality. Let your brand’s voice shine through in your responses. Don’t be afraid to use humor, emojis, or even GIFs (when appropriate) to connect with your audience on a human level. Remember, people want to connect with people, not just computers.
    • Be helpful. Provide valuable information or resources to your followers whenever possible. This could be anything from a helpful how-to guide to a link to a blog post on a relevant topic. This shows that you’re not just there to sell, but to provide value to your audience.
    • Monitor and address negative feedback. We all know that not everyone is going to love your brand all the time. How you respond to negative feedback can make all the difference. Monitor your social media channels for any negative feedback and address it in a timely and professional manner. This shows that you take feedback seriously and that you’re willing to listen and make things right.

    17. Host contests and giveaways

    By offering prizes or rewards, you can encourage your audience to engage with your brand and build strong relationships with your followers.

    Boost your engagement and loyalty with these tips:

    • Choose the right prize. You want to choose a prize that aligns with your brand and is relevant to your audience. For example, if you’re a fitness brand, you could give away a free gym membership or a set of workout gear. This not only incentivizes engagement, but also helps you attract the right followers.
    • Define the rules. This includes entry requirements, timeline, and eligibility. Make sure that everyone knows what they need to do to enter and what they can expect if they win. Be clear and concise in your messaging to avoid any confusion.
    • Promote the contest or giveaway. Don’t just post about it once and forget it. Promote it on social media regularly to keep the buzz going. Use eye-catching graphics or videos to grab people’s attention and encourage them to participate.
    • Follow through on rewards. This is crucial for building trust and loyalty with your audience. Make sure you deliver rewards in a timely and professional manner. Don’t make people jump through hoops to claim their prize. The easier and more seamless the process, the better.
    • Have fun with it! Contests and giveaways are a great way to inject some fun and excitement into your social media strategy. Get creative with your prizes, rules, and messaging to make it more engaging for your audience.

    18. Offer time-limited discounts or flash sales

    Generate excitement with your audience and encourage action with short-term promotions. 

    Here are some tips for making the most of time-limited discounts and flash sales:

    • Use scarcity to your advantage. Set a clear end date for the promotion and emphasize that the offer is only available for a limited time. You can also limit the sale to a certain number of customers, purchases, or quantity of products. This creates a sense of urgency and encourages your followers to take action. 
    • Harness the power of exclusivity. Make it clear that the offer is only available to your social media followers. This makes them feel special and appreciated, which can lead to increased loyalty and engagement. Plus, it’s a great way to reward your followers for sticking around and engaging with your brand.
    • Offer tiered discounts. For example, you could offer a 10% discount to anyone who shares your post, and a 20% discount to anyone who refers a friend. This not only incentivizes engagement but also encourages your followers to spread the word about your brand.
    • Use social proof to build credibility. Share testimonials or reviews from customers who have taken advantage of your previous promotions. This can help build trust with your audience and encourage them to take advantage of the current offer. 
    • Personalize the offer. Use data from your social media analytics to personalize the offer for different segments of your audience. For example, you could provide a different discount to followers who have previously purchased from your brand versus those who are new to your social media page.
    • Follow up with your audience. After the promotion has ended, follow up with your audience to thank them for participating and encourage them to continue engaging with your brand on social media. You could even offer a sneak peek of upcoming promotions to keep them engaged in the long term.

    19. Share customer success stories and case studies

    You’ve probably heard the saying “show, don’t tell,” and that’s exactly what sharing customer success stories and case studies is all about. 

    Use the following tips to help demonstrate the value of your products or services: 

    • Choose the right stories. It’s important to choose stories with specific, measurable results that can demonstrate the impact of your offerings. This helps your audience understand the real-world value of your products or services.
    • Use a variety of formats. Use a variety of formats to share customer success stories, including blog posts, images, videos, and more. The more diverse the format, the wider the audience you can reach.
    • Include quotes and testimonials from the customer. This adds credibility and provides a personal touch to your success stories. A customer’s words can be much more powerful than anything you say about your own products or services.

    20. Humanize your brand

    It can be tempting to focus solely on promoting your products or services, but it’s important to remember that social media is a social platform. That means it’s about building connections and establishing trust with your audience. And one way to do that is by showcasing the people behind your brand.

    These tips will help you create a more personable and approachable brand image:

    • Showcase your employees. Use employee spotlights or day-in-the-life features to  highlight your team and their experiences. This can help your audience understand the people behind your brand and the values that drive your organization. Plus, it’s a great way to recognize your employees’ hard work and achievements.
    • Use behind-the-scenes content. Use behind-the-scenes content to showcase your brand’s personality and culture. This could include photos or videos of your team in action, or sneak peeks of new products or services. This gives your audience a glimpse into what it’s like to work at your company and can make your brand more relatable and approachable.
    • Tell stories. Use storytelling to highlight the human side of your brand. This could include stories about how your brand got started, or how your products or services have impacted the lives of your customers. 

    21. Create a social media crisis plan

    As much as we all love positive interactions on social media, negative feedback is bound to happen at some point. That’s why it’s important to be prepared and have a plan in place to handle potential crises.

    Here are some tips to get started:

    • Identify potential crisis scenarios. Think about the different scenarios that could arise on social media that might require a response. This could include negative reviews, customer complaints, or social media backlash.
    • Define your response strategy. Define your response strategy for each scenario, including who will respond, how quickly they will respond, and what they will say. This saves you a lot of time and effort during a real-life problem.
    • Monitor social media mentions. Monitor social media mentions to identify potential crisis situations as they happen. The earlier you can catch a potential crisis, the more effective your response will be.
    • Respond quickly and professionally. When negative feedback or backlash happens, it’s important to respond in a timely and professional manner. This can help you mitigate the impact of the situation and build trust with your audience. And if you’re lucky, you might even be able to turn a negative situation into a positive one.

    22. Conduct regular social media audits

    It’s important to evaluate your performance and identify areas for improvement so that you can optimize your strategy and achieve better results. But let’s face it, conducting a social media audit can be overwhelming. So, let’s break it down with these tips:

    • Define your goals. Define your goals and metrics for success, such as engagement rates, follower growth, or website traffic. It’s important to have a clear understanding of what you’re trying to achieve on social media before you start evaluating your performance.
    • Evaluate your content strategy. Take a deep dive into your content strategy and evaluate the type of content you’re sharing and the frequency of your posts. Are you sharing the right type of content for your audience? Are you posting enough or too often? These are all questions to consider.
    • Analyze your audience. Analyze your audience and identify opportunities to better engage with your target demographic. What are their interests, pain points, and needs? How can you better serve them on social media?
    • Conduct a competitive analysis. See how your social media performance stacks up against your competitors. What are they doing well, and where do you have room for improvement?
    • Schedule regular social media audits. Ensure that you’re consistently evaluating your performance and making improvements. It’s important to keep an eye on your social media strategy and make adjustments as needed to keep up with the ever-changing landscape.

    23. Be agile and adaptable

    Social media is constantly changing, and it’s important to be able to pivot and experiment with new ideas and formats to stay ahead of the curve. With these tips, you’ll be ready for whatever comes your way:

    • Stay up-to-date. This can include following industry leaders and publications, attending conferences, and monitoring relevant hashtags. The more you know, the better equipped you’ll be to adapt to new changes.
    • Experiment with new ideas. Try out new formats or trends to see if they resonate with your audience. But, don’t be afraid to fail. Embrace failure as an opportunity to learn and grow, and use those lessons to inform your future strategies. To get you started, here are 23 ideas for social media posts that you can integrate into your content strategy.
    • Embrace failure. Don’t be afraid to fail because, let’s face it, not every post will be a winner. Social media is a constantly evolving landscape, and what works today may not work tomorrow. Embrace failure as an opportunity to learn and grow, and use those lessons to inform your future strategies. In other words, don’t cry over spilled milk — instead, use it to make a delicious latte!
    • Stay true to your brand. While it’s important to experiment and stay current, don’t lose sight of your brand values and messaging. Make sure that any new formats or trends align with your overall brand strategy and communicate your unique value proposition.

    24. Don’t forget to have fun!

    Social media is not just about driving traffic to your website or increasing your follower count. It’s also about unleashing your creativity and building real connections with your audience.

    Here are a few tips to add some enjoyment to social media:

    • Use humor. Don’t take yourself too seriously. Let your hair down, crack a few jokes, and watch your engagement soar.
    • Showcase your brand’s culture and values. Give your audience a peek behind the curtain with behind-the-scenes content and employee spotlights. This will help them connect with your brand on a deeper level and feel like they’re part of your community.
    • Connect with your audience on a personal level. Respond to comments, engage in conversations, and show your followers that you care about them as individuals, not just as customers.
    • Create social media challenges. These can encourage your audience to engage with your brand in fun and creative ways. This could be anything from a photo contest to a scavenger hunt. 

    In conclusion, life’s too short to not have fun on social media. So, take a deep breath, let your creativity flow, and enjoy the ride!

    LinkedIn post from ISC Sales advertising a product
    Example of a LinkedIn post from ISC Sales

    Frequently asked questions about social media

    What are the benefits of social media marketing for businesses?

    Social media marketing offers a wide range of benefits for businesses, including:

    1. Increased brand awareness. Social media platforms provide businesses with the opportunity to reach a wider audience.
    2. Improved customer engagement. Social media allows businesses to engage with customers in real-time, responding to comments and addressing concerns promptly.
    3. Enhanced customer loyalty. Social media provides businesses with an opportunity to build stronger relationships with their customers, resulting in increased loyalty and repeat business.
    4. Increased website traffic. Social media can drive traffic to a business’s website through links and promotions.
    5. Greater visibility. Social media can help businesses increase their visibility on search engines, as well as on social media platforms.
    6. Cost-effective advertising. Social media advertising can be more cost-effective than traditional advertising methods, allowing businesses to reach a larger audience for less money.

    To maximize the benefits of social media marketing, businesses should have a clear strategy in place, set measurable goals, and consistently evaluate their performance.

    What are the best ways to create engaging content on social media?

    Creating engaging content on social media is essential for building a strong online presence and connecting with your audience. Here are some tips for creating engaging content on social media:

    1. Use visuals. Visuals, such as images and videos, are more likely to capture the attention of social media users than text-only posts.
    2. Keep it concise. Social media users have short attention spans, so keep your content concise and to the point.
    3. Use humor. Humor can help your content stand out and connect with your audience.
    4. Tell stories. Storytelling can create emotional connections with your audience and make your brand more memorable.
    5. Ask questions. Asking questions can encourage engagement and help you improve your content and brand.
    6. Use hashtags. Hashtags can help increase the visibility of your content and connect to users interested in specific topics.
    7. Provide value. Providing valuable information, such as tips or how-to guides, can establish your expertise.

    How often should businesses post on social media, and at what times?

    The frequency and timing of social media posts can have a significant impact on engagement and reach. However, there is no one-size-fits-all answer to this question, as the ideal frequency and timing will vary depending on the platform and your audience.

    As a general rule of thumb, businesses should aim to post at least once a day on platforms like Facebook and Instagram. It’s also important to consider the timing of your posts, posting when your audience is most active on the platform.

    To determine the ideal posting frequency and timing for your business, monitor your analytics and experiment with different strategies to see what works best.

    What are some effective strategies for growing your social media following?

    Growing your social media following can help you reach a wider audience and increase engagement with your brand. Here are some effective strategies for growing your social media following:

    1. Use hashtags. Hashtags can help increase the visibility of your content and connect with users interested in specific topics.
    2. Engage with your audience. Responding to comments and messages can build stronger relationships with followers.
    3. Partner with influencers. Partnering with influencers in your industry can help increase your reach and credibility on social media.
    4. Host giveaways. Hosting giveaways can incentivize engagement and get more users to follow your account.
    5. Cross-promote on other platforms. Cross-promoting your social media accounts on your website, email newsletter, and other platforms can help increase your following.
    6. Consistently provide valuable content. Consistently providing valuable content can help establish your expertise and build trust with your audience, resulting in increased engagement and followers.

    How can businesses measure the success of their social media marketing efforts?

    Measuring the success of your social media marketing efforts is essential for evaluating the effectiveness of your strategy and making improvements. Here are some metrics to consider:

    1. Engagement rate. Engagement rate measures the number of likes, comments, shares, and other interactions on your posts, providing insight into the effectiveness of your content.
    2. Follower growth. Follower growth measures the number of new followers on your social media accounts, indicating the growth of your audience and the effectiveness of your strategy.
    3. Click-through rate. Click-through rate measures the number of clicks on links in your social media posts, indicating the effectiveness of your calls-to-action and the engagement of your audience.
    4. Conversion rate. Conversion rate measures the number of users who complete a desired action, such as making a purchase or signing up for a newsletter.
    5. Impressions and reach. Impressions and reach measure the number of users who see your posts, providing insight into the visibility of your content and the size of your audience.

    By regularly monitoring these metrics and making adjustments to your strategy as needed, you can optimize your social media marketing efforts and achieve your goals.

    What are common mistakes businesses make when using social media for marketing?

    Social media marketing can be a powerful tool for businesses, but there are several common mistakes that can hinder the effectiveness of your strategy, including:

    1. Over-promoting. Focusing solely on promoting your products or services can come across as spammy and turn off your audience.
    2. Neglecting engagement. Neglecting to engage with your audience, respond to comments and messages, and build relationships can limit the effectiveness of your strategy.
    3. Inconsistent posting. Inconsistent posting can make it difficult to build momentum and connect with your audience on social media.
    4. Ignoring analytics. Ignoring your analytics and failing to evaluate your strategy regularly can prevent you from making data-driven decisions and optimizing your performance.
    5. Failing to tailor content for each platform. Failing to tailor your content for each platform and audience can limit the effectiveness of your strategy and reduce engagement.

    What are some common misconceptions about social media marketing that businesses should be aware of?

    There are several common misconceptions about social media marketing that businesses should be aware of, including:

    1. Social media marketing is free. While social media platforms are usually free to use, effective social media marketing often requires investment in resources such as time, tools, and advertising.
    2. More followers are always better. While a large following can be beneficial, it’s more important to focus on growing a highly-engaged audience that fits your niche market. 
    3. You need to be on every platform. While it’s important to be present on the platforms your audience uses most, it’s not necessary to be active on every platform.
    4. Social media marketing is easy. While social media marketing can be a powerful tool, it requires consistent effort, creativity, and strategic planning to achieve success.

    What are some ways businesses can use social media to drive website traffic and sales?

    Social media can be an effective tool for driving website traffic and sales. Here are some ways businesses can use social media to achieve these goals:

    1. Share links. Sharing links to your website or blog can drive traffic to your site and increase the visibility of your content.
    2. Use call-to-actions. Including clear calls-to-action in your social media posts can encourage users to click through to your website and take desired actions, such as making a purchase.
    3. Run promotions. Running promotions or offering exclusive discounts to your social media followers can incentivize engagement and drive sales.
    4. Use social media advertising. Social media advertising can be an effective way to reach a larger audience.
    5. Partner with influencers. Partnering with social media influencers in your niche can help increase your reach.
    6. Utilize user-generated content. Sharing user-generated content, such as customer reviews and testimonials, can help build trust and drive traffic to your website.
    7. Host contests and giveaways. Hosting contests or giveaways on social media can encourage engagement.

    By using these strategies and consistently engaging with your audience on social media, you can increase website traffic and drive sales for your business.

    How can businesses use social media to build brand awareness and credibility?

    Social media can be an effective tool for building brand awareness and credibility. Here are some ways businesses can use social media to achieve these goals:

    1. Consistently post high-quality content. Posting high-quality content that aligns with your brand voice and values can help build credibility.
    2. Engage with your audience. Engaging with your audience on social media by responding to comments, messages, and mentions can foster relationships.
    3. Partner with influencers. Partnering with social media influencers in your niche can help increase your reach and credibility.
    4. Share customer success stories. Sharing customer success stories and case studies can help demonstrate the value of your products or services and increase brand credibility.
    5. Use social proof. Using social proof, such as customer reviews and testimonials, can help build trust.

    How can businesses integrate user-generated content into their social media marketing strategy?

    User-generated content (UGC) can be a powerful tool for businesses to increase engagement and build credibility on social media. Here are some ways businesses can integrate UGC into their social media marketing strategy:

    1. Encourage customers to share their experiences. Encouraging customers to share their experiences with your products or services on social media can generate UGC and increase engagement.
    2. Share customer reviews and testimonials. Sharing customer reviews and testimonials can help build credibility and encourage others to engage with your brand.
    3. Host a contest. Hosting a contest can encourage engagement and generate content that can be used in your social media marketing.

    By integrating UGC into your social media marketing strategy, businesses can increase engagement, build credibility, and showcase their brand in an authentic way.

    customizing a message for social media using Jetpack Social

    How can businesses effectively manage their social media presence across multiple platforms?

    Managing a social media presence across multiple platforms can be challenging, but with the right tools and strategy, it can be done effectively. Here are some tips for effectively managing your social media presence across multiple platforms:

    1. Use a social media management tool. Using a social media management tool, such as Jetpack Social, can help streamline your social media management and make it easier to post consistently across multiple platforms.
    2. Tailor content for each platform. Tailoring your content for each platform and audience can increase engagement and effectiveness.
    3. Utilize automation. Utilizing automation tools, such as scheduling posts in advance, can save time and ensure a consistent posting schedule.
    4. Monitor analytics. Regularly monitoring your social media analytics can help you identify what’s working and what’s not, and make adjustments to your strategy accordingly.

    By using these strategies and leveraging the right tools, businesses can effectively manage their social media presence across multiple platforms and achieve their social media marketing goals.

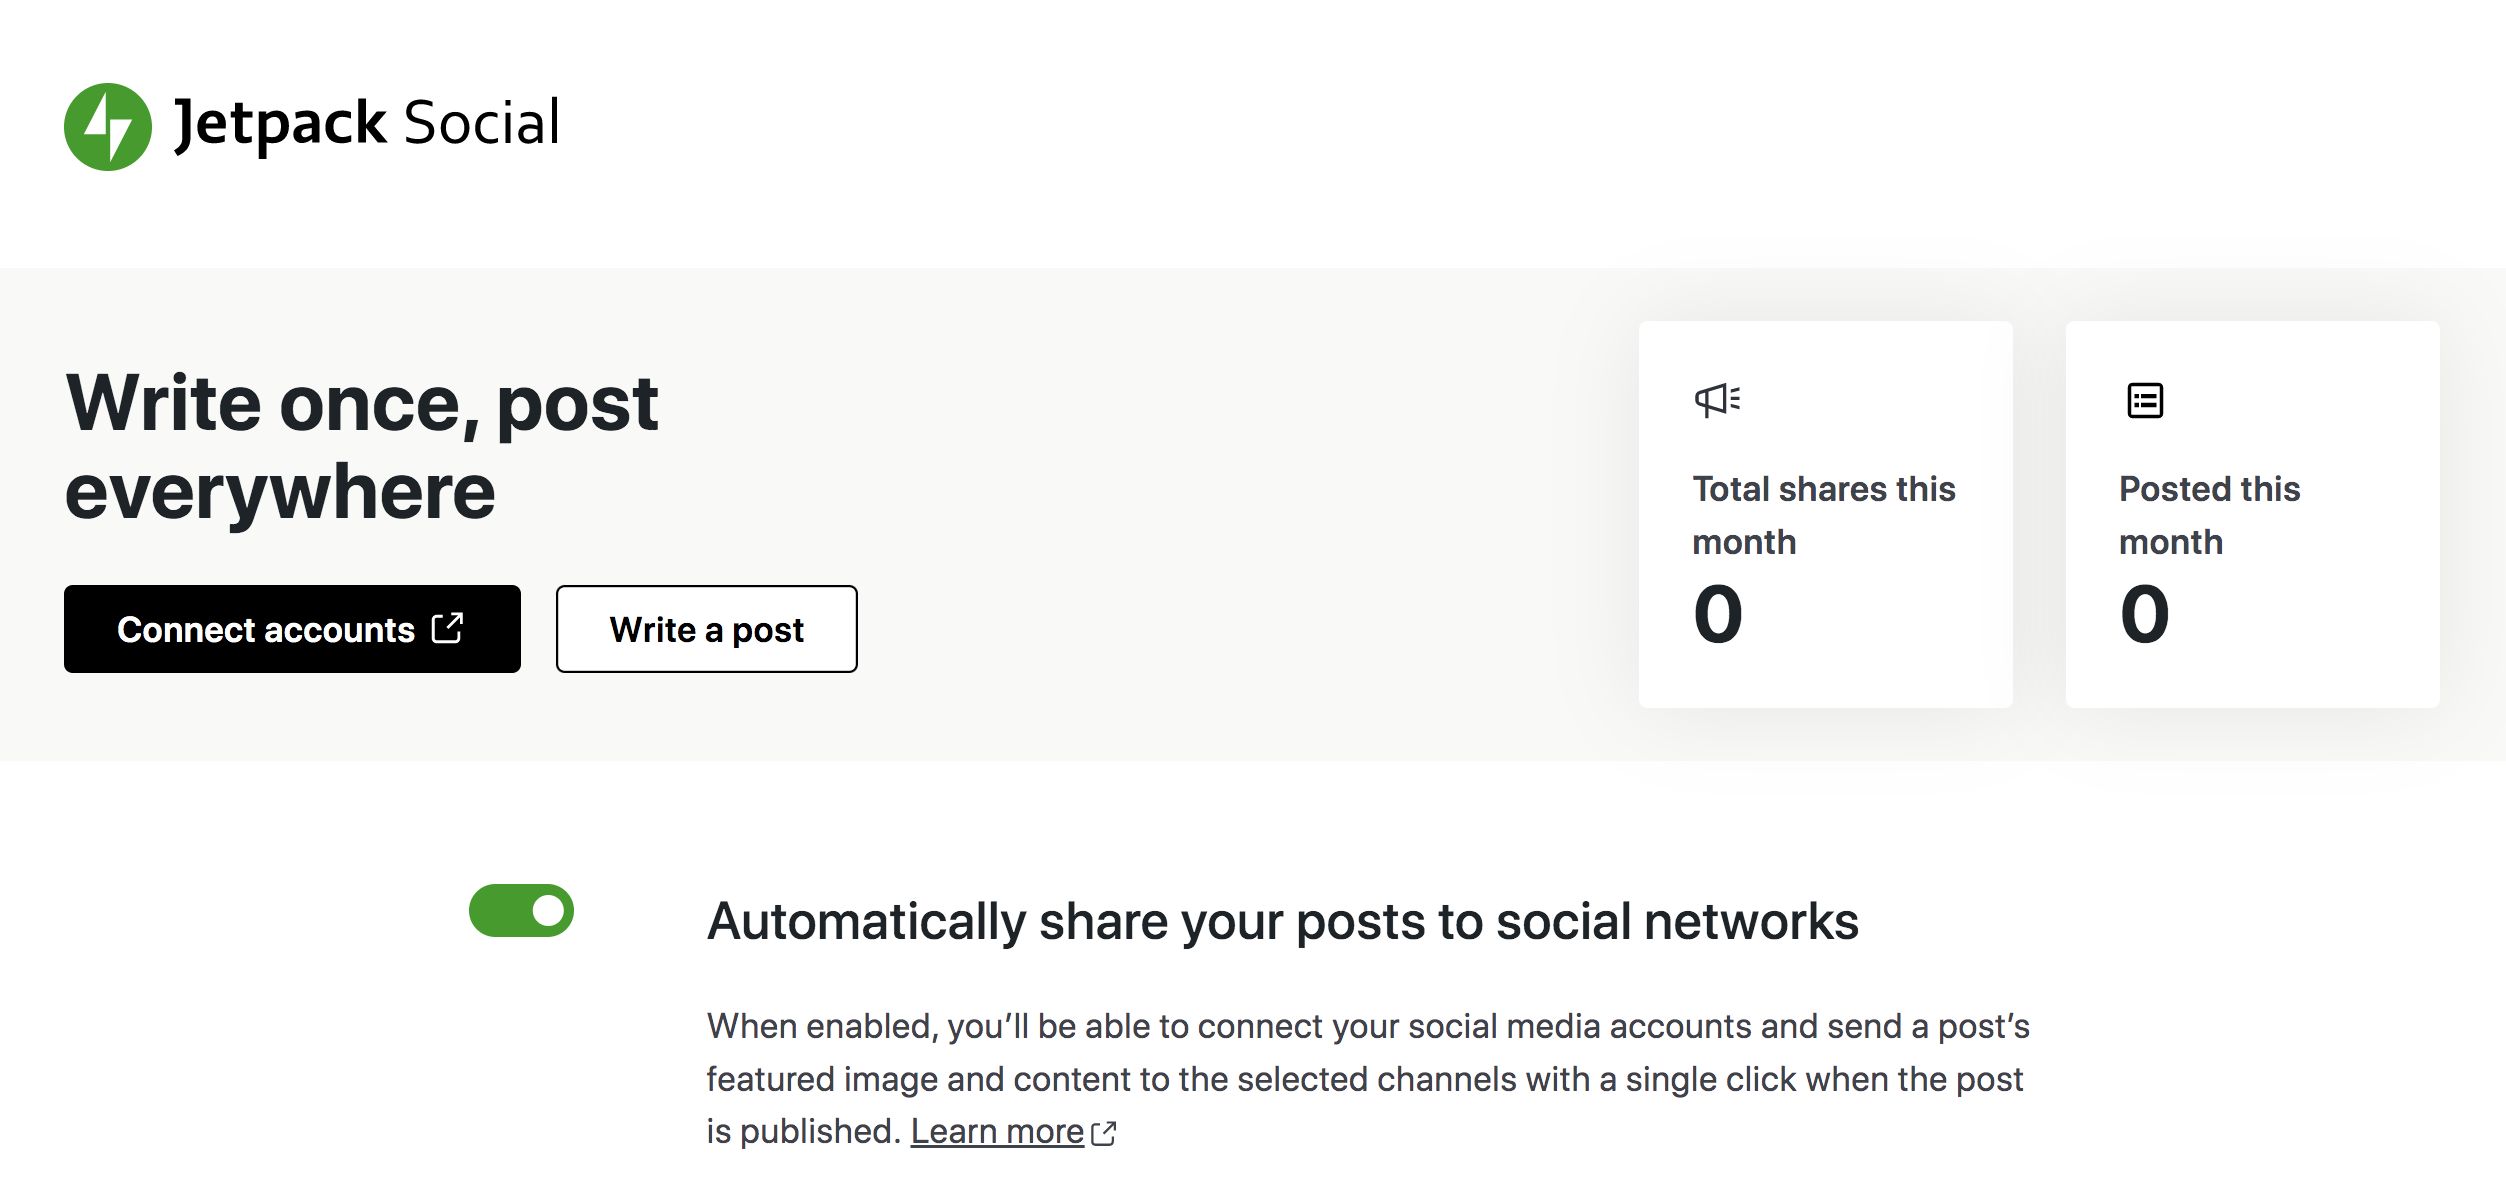
    Jetpack Social: Social media automation for businesses using WordPress

    Are you struggling to keep up with the demands of managing your social media accounts? Do you feel like you’re constantly juggling multiple tasks, leaving you with little time to focus on growing your business?

    Jetpack Social is the answer you’ve been looking for. This powerful social media sharing plugin for WordPress is the ultimate solution for businesses that want to streamline their social media management.

    You can focus on what really matters — creating great content that resonates with your audience. Jetpack Social takes care of the rest, automatically sharing your content on your social media channels and giving you a chance to schedule posts in advance.

    So, if you’re ready to take your social media strategy to the next level, visit the following page to learn exactly how Jetpack Social can help your business: https://jetpack.com/social/

  • How to Grow Social Media Followers for Your Business (16 Ways)

    Growing your social media following can seem difficult, but it’s a critical task for businesses of all sizes. With the right approach, it’s possible to attract a loyal following and build a strong presence on social media. In this article, we’ll explore 16 effective ways to grow your social media followers and engage with your audience.

    Why social media followers matter

    Social media followers are the lifeblood of your social media strategy. They’re the ones who engage with your content, share your posts, and help spread the word about your brand. Having a large and engaged following can help you build brand awareness, attract new customers, and increase loyalty. So, it’s important to focus your social media marketing efforts on growing your following and engaging with your audience.

    The psychology of social media and why people follow brands

    People follow brands on social media for a variety of reasons. Some follow to stay up-to-date on the latest products and promotions, while others want to get a behind-the-scenes look at the company. People are attracted to content that’s entertaining, informative, or emotionally resonant. So constant sales pitches or simply repeating what others have already done won’t get you much attention. 

    One key factor is the need for social proof. People are more likely to follow a brand that has a large and engaged following, as it signals that they’re popular and trustworthy. Plus, it’s more fun to join in on what’s already a lively discussion taking place in the comments. In this way, there’s a snowball effect where, as your following grows, the pace at which you add new followers may increase. 

    Whatever the reason, understanding the psychology of social media can help you craft a content strategy to find more followers.

    How to increase your social media following (16 effective steps)

    1. Create authentic content that resonates with your audience

    Authenticity is key to building a strong social media presence. People are attracted to content that feels genuine and honest. So, it’s important to create content that speaks to your audience and reflects your brand’s values.

    To create authentic content:

    Conduct research on your target audience: Research your target audience to understand their needs, interests, and pain points. 

    Keep your content relevant and timely: Stay up-to-date with the latest trends and news in your industry and create content that is relevant and timely. This will show your audience that you are a thought leader in your industry and are knowledgeable about the latest trends.

    Publish user-generated content: User-generated content is a powerful way to showcase the experiences of your customers and build trust with your audience. Encourage your followers to create and share content related to your brand, and share their content with your followers.

    Use humor and personality: Adding humor and personality to your content can make it more engaging and memorable. Showcasing your brand’s personality can also help build a connection with your audience.

    Experiment with different formats: Experiment with different formats, such as videos, infographics, and blog posts, to keep your content fresh and engaging. This will help you attract new followers and keep your existing followers engaged.

    2. Encourage and share user-generated content

    User-generated content (UGC) is like free media for your brand. UGC is genuine media created by your followers, such as photos, videos, or reviews. This type of content acts, again, as social proof, showing potential followers that people love what you’re doing.

    user-generated content in the form of an Instagram post from Veer

    To make the most of UGC and encourage more:

    Showcase your customers: Showcasing your customers and their experiences with your brand is a powerful way to build trust and credibility with your audience. Feature customer testimonials, success stories, and reviews on your social media channels.

    You may have to reach out proactively to obtain your earliest examples. However, once others see what you’re sharing, they’ll be more encouraged and confident in creating content on their own.

    Host social media challenges: Host social media challenges that encourage your followers to create and share UGC related to your brand. For example, you could ask your followers to share photos of themselves using your product or service and award the best ones with a prize.

    Repurpose UGC: Repurpose UGC across your social media channels and other marketing materials to showcase your brand’s community and build social proof. Sharing a post once doesn’t preclude you from using it again a few months later or including it in your email newsletter.

    Engage with UGC creators: Engage with users who create and share UGC related to your brand. Respond to their comments and messages, and thank them for their support.

    3. Maintain a consistent, distinguishable brand image

    Your brand image is like your fingerprint. It’s what sets you apart from the competition and makes you recognizable to your followers. Maintaining a consistent brand image is critical for building brand recognition and attracting new followers.

    To foster a consistent, memorable brand image:

    Develop a strong brand personality: Developing a strong brand personality can help differentiate your brand from the competition and make it more memorable. Consider what values and traits you want your brand to be associated with and infuse them into your content and messaging.

    Use a consistent visual theme: Use consistent colors, fonts, and imagery that align with your brand’s values and personality. For example, if your brand is focused on sustainability, use nature-inspired imagery and colors.

    Create a social media content calendar: Creating a social media content calendar can help ensure that your content is consistent and flows together to help advance your brand toward a common goal.

    Monitor your brand mentions: Monitoring your brand mentions on social media can help ensure that you’re being portrayed accurately and fairly across all channels. Respond to any negative mentions when appropriate, but stay away from starting a back-and-forth squabble, as it can further diminish your brand’s professionalism in the eyes of followers. 

    Perhaps even more importantly, respond to positive mentions and get involved in fun conversations. 

    4. Post regularly 

    Consistency is key when it comes to social media. Posting regularly helps you stay top-of-mind with your followers and attract new ones. Ideally, you should aim to post at least once a day on each social media platform to keep your followers engaged.

    To make the most of posting regularly:

    Use a content calendar to plan in advance: A content calendar is a great tool for planning your social media posts in advance. It allows you to organize your content by theme or topic, schedule your posts, and ensure that your content is aligned with your overall content strategy. When creating a content calendar, consider your audience, brand identity, and goals, and make sure to leave room for flexibility and spontaneity.

    Use tools like Jetpack Social to automate your posts: With Jetpack Social, you can schedule your posts across multiple social media platforms, and auto-share content on social media directly from your WordPress site. By automating your social media posts, you can save time, stay consistent, and increase your social media presence.

    Vary the type of content you post: Switching between images, videos, and text-based posts can give you more material to work with and helps you use the same idea more than once without annoying your audience.

    Experiment with post frequency: While posting daily is a good goal, find the right balance for your brand and the platforms you use. Experiment with different posting frequencies to find the sweet spot. It will likely be different for various channels.

    Focus on quality over quantity: While posting regularly is important, quality should always come first. Focus on creating high-quality content that adds value to your audience. If you’re looking for inspiration on what to create, you’ll enjoy this list of social media post ideas for businesses trying to stand out.

    Jetpack Social homepage

    5. Leverage automation tools to create and share faster

    Social media can be time-consuming, but there are tools that can help you automate your workflow and improve efficiency. One of the best is Jetpack Social, a powerful social media plugin for WordPress that allows you to plan, schedule, and auto-post your social media content.

    With Jetpack Social, you can:

    Easily share your content on social media: Jetpack Social allows you to share your social media posts across multiple channels with just one click. This feature saves you time and ensures that your content is reaching the widest possible audience.

    Schedule your posts in advance: With Jetpack Social, you can schedule your social media posts in advance, so you don’t have to worry about posting in real time. You can schedule posts for specific days and times, ensuring that your content is posted when your audience is most active.

    Use the auto-post feature to save time: Automatically share your blog posts on your social media channels as soon as they are published on your website. This means that your social media channels will always be up-to-date with your latest content.

    To learn more about Jetpack Social, visit the following page: https://jetpack.com/social/

    6. Integrate gamification in your content strategy

    Gamification is the use of game-like elements in non-game contexts. By integrating gamification in your social media content strategy, you can make your content more engaging and fun for your audience. Examples of gamification include quizzes, polls, and challenges.

    To successfully integrate gamification in your content strategy:

    Know your audience: Understanding your audience is critical for creating effective gamified content. Use social media analytics to identify your audience demographics, interests, and behavior, and tailor your gamified content accordingly.

    Keep it simple: While gamification can be a powerful tool for engaging your audience, it’s important to keep it simple and easy to understand. Avoid overcomplicating your gamified content, and make sure that the rules and objectives are clear.

    Use rewards: Rewards can be a powerful motivator for encouraging participation in gamified content. Consider offering prizes or discounts to participants who complete quizzes, polls, or challenges.

    Create a sense of competition: Competition can be a great motivator for encouraging participation and engagement. Create leaderboards or ranking systems that incentivize users to participate and share your content.

    Use storytelling: Storytelling can make your gamified content more engaging and memorable. Create a narrative that ties your gamified content together and makes it more meaningful for your audience.

    promotion of a product from Garantia on Facebook

    7. Share exclusive discounts and promotions with social media followers

    Everyone loves a good deal, and offering exclusive discounts or promotions to your social media followers is a great way to grow your audience and build customer loyalty. By offering a special deal or promotion, you can incentivize your followers to engage with your brand and share your content.

    To successfully use discounts and promotions on social media:

    Set clear objectives: Before sharing exclusive discounts and promotions with your social media followers, set clear objectives and goals for what you hope to achieve. Are you trying to attract new followers, increase sales, or build customer loyalty? Align your objectives with your overall social media strategy.

    Create a sense of urgency: Creating a sense of urgency can be a powerful motivator for encouraging your followers to take action. Consider setting a deadline for your promotions or creating limited-time offers to incentivize your followers to engage with your brand.

    Share your promotions: To ensure that your exclusive discounts and promotions reach as many people as possible, advertise them across all your social media channels. Use eye-catching visuals and persuasive copy to grab your followers’ attention and encourage them to take action.

    Monitor your results: Monitoring your social media analytics is critical for understanding the effectiveness of your exclusive discounts and promotions. Use your analytics to track engagement, conversions, and ROI, and adjust your promotions accordingly.

    Use social proof: Social proof is another proven way to motivate followers to take action. Consider sharing testimonials or reviews from satisfied customers who have taken advantage of your exclusive discounts or promotions.

    8. Run social media contests and giveaways

    Contests and giveaways are a powerful way to increase engagement and attract new followers. By offering a prize or incentive, you can encourage your followers to participate and share your content.

    To maximize the potential of contests and giveaways:

    Choose the right type: There are many different types of contests and giveaways that you can run on social media, including photo contests, caption contests, and trivia contests. Choose a type that’s relevant to your brand and will resonate with your audience.

    Use a social media contest tool: Social media contest tools can help you create and manage your giveaways more efficiently. Tools like Gleam or Rafflecopter can help you set up your contest or giveaway, choose a winner, and track results.

    Follow legal guidelines: Make sure that you follow all legal guidelines when running a contest or giveaway on social media. Be clear about the rules and guidelines, and make sure that you comply with all applicable laws and regulations.

    Analyze your results: Reviewing your social media analytics is critical for understanding the effectiveness of your contest or giveaway. Use your analytics to track engagement, conversions, and ROI, and adjust your strategy accordingly.

    9. Leverage interactive content like polls and quizzes

    By creating content that requires interaction, you can encourage your followers to engage with your brand and share your content.

    To leverage interactive content:

    Make it relevant: Interactive content should be relevant to your brand and your audience. Make sure that your content aligns with your brand’s values and messaging, and tie it into the rest of your content calendar or take advantage of current events when you can.

    Keep it short and sweet: People have short attention spans, so make sure that your interactive content is short and easy to digest. Keep your quizzes and polls to just a few questions, and use visuals and infographics.

    Keep it fun: Interactive content should be fun and engaging. Use humor and personality to make your content more enjoyable for your audience, and encourage them to share it with their friends and followers.

    10. Collaborate with influencers your audience follows

    Influencer marketing involves partnering with popular social media accounts to promote your brand to their followers. By connecting your brand with influencers that your audience follows, you can increase your reach and dramatically improve your reputation.

    For a successful influencer collaboration you should:

    Choose the right influencers: The key to successful influencer marketing is choosing the right influencers to partner with. Look for those who align with your brand values and target audience, and whose followers are likely to be interested in your products or services.

    Build relationships: Influencer marketing is all about building relationships. Take the time to build a relationship with the influencers you would like to partner with, and be sure to communicate clearly and professionally throughout the collaboration process.

    Provide clear guidelines: To ensure that your influencer collaborations are successful, provide clear guidelines and expectations for the content you want the influencer to create. This includes guidelines around messaging, tone, and branding, as well as any legal or regulatory requirements.

    Measure and analyze results: To determine the ROI of your influencer collaborations, track and analyze the results of your campaigns. This includes metrics like engagement rates, reach, and conversions, as well as any feedback from the influencer or their followers.

    Follow ethical guidelines: Influencer marketing is subject to various ethical guidelines and regulations, and it’s important to follow these guidelines to maintain the integrity of your brand and the influencer’s audience. 

    customer story on Instagram from Hydatem8

    11. Use social media to showcase customer success stories

    Customers are the lifeblood of your business, and showcasing their success stories can be a powerful way to build customer loyalty and attract new followers. By highlighting the success of your customers, you can demonstrate the value of your products or services and build trust with your audience.

    To get the most value from sharing customer success stories:

    Choose the right customers: Not all customer success stories are created equal. Look for customers who have achieved tangible and measurable results from using your products or services, and who can provide a compelling story.

    Use visual content: Use high-quality visuals to help bring your customers’ stories to life, and to make them more engaging and shareable.

    Make it personal: When sharing customer success stories, it’s important to make them personal and relatable. Use storytelling techniques to create a narrative that draws your audience in and makes them care about your customer’s success.

    Highlight your brand’s role: While your customers are the heroes of their success stories, it’s important to showcase how your products or services played a key role in their success, and how your brand’s values and mission align with theirs.

    Encourage engagement: To make the most of customer success stories, encourage your followers to engage with the content. This includes asking questions and sharing their own success stories. 

    12. Create and share original memes and GIFs

    Memes and GIFs can be a fun and effective way to increase engagement and attract new followers. 

    To create and share original memes and GIFs:

    Know your audience’s tastes: Before creating memes and GIFs, it’s important to understand your target audience and what type of humor or messaging will resonate with them. Use data from your social media analytics to gain insights into your audience’s preferences and behaviors.

    Keep it relevant: When creating memes and GIFs, stay up-to-date with current events and trends to ensure that your content remains relevant and timely. Use social listening tools to monitor conversations and trending topics in your industry.

    Use high-quality visuals: While memes and GIFs are often associated with low-quality or amateur content, using high-quality visuals can help your content appear more professional. Use tools like Photoshop or Illustrator to create custom graphics and animations.

    Avoid offensive or controversial content: While humor can be a powerful tool for engagement, avoid offensive or controversial content that could harm your brand’s reputation. Always review your posts carefully and seek feedback from colleagues or trusted advisors.

    Be consistent: To make the most of memes and GIFs, maintain a consistent brand image and tone of voice. Use your brand style guide to ensure that your content aligns with your visual identity and messaging.

    13. Use relevant and trending hashtags

    Hashtags are great for increasing visibility and attracting new followers.

    To make the most of hashtags:

    Use them in a strategic way: Rather than simply adding hashtags to your posts, use them in a strategic way to increase engagement and attract new followers. Take the time to determine which hashtags your audience uses on a regular basis, along with their popularity. Typically, you’ll want a balance between hashtags that are popular, and ones that you’re likely to stand out for.

    Tailor them to each platform: Different social media platforms have different rules and best practices for using hashtags. For example, Instagram allows up to 30 hashtags per post, while Twitter recommends using no more than two or three hashtags per tweet. 

    Adjust and optimize your strategy: Like any other social media strategy, it’s important to monitor and adjust your hashtag strategy over time to ensure that it is effective. Use social media analytics to track the performance of your hashtags and make adjustments as needed to improve engagement and reach.

    14. Tie your brand or product into current events and trends

    Tying your brand or product into current events or trends can be a powerful way to increase engagement and attract new followers. 

    To tie your brand or product into current events and trends:

    Be timely: Set up alerts for news and trending topics in your industry, so you can capitalize on a trending conversation.

    Create shareable content: When you tie your brand into current events and trends, make sure you create shareable content. This means creating content that is visually appealing, easy to read, and provides value to your audience.

    Don’t force it: While it’s important to stay relevant and timely, it’s also important not to force your brand or product into a conversation where it doesn’t fit. Be authentic and genuine in your approach, and make sure your content adds value to the conversation.

    Use humor carefully: Humor can be a powerful way to make your content more engaging, but it’s important to use it carefully. Make sure your humor is appropriate for your brand and audience, and avoid offensive or controversial jokes.

    Experiment with different formats: Try different formats for tying your brand into current events and trends. For example, you could create a blog post, a social media post, a video, or an infographic. Experiment with different formats to see what works best for your audience.

    How-to video for a floral arrangement from FLWR

    15. Create and share interactive video content

    Video content is becoming increasingly popular on social media, and interactive video content can help you increase engagement and attract new followers. 

    To win with this kind of content: 

    Use live video to engage with your audience in real-time: Platforms like Instagram, Facebook, and Twitter offer livestreaming features that allow you to interact with your followers in real-time. You can use live video to answer questions, provide demonstrations, or host Q&A sessions.

    Create video tutorials or how-to guides: Educational content is a great way to provide value to your audience of existing customers, demonstrate the benefits of your products to prospective customers, and further showcase your expertise in the industry. 

    Use video testimonials to highlight customer satisfaction: Video testimonials can build trust with your audience and demonstrate the value of your products or services. Reach out to satisfied customers and ask them to record a short video testimonial that you can share on your social media channels.

    Use native video on each social media platform: Many social media platforms have their own native video features, and using them can help increase your reach and engagement. For example, Facebook’s algorithm favors native video content, so creating and sharing videos directly on the platform can help boost your visibility.

    16. Utilize employee advocacy programs to amplify social media reach

    Employee advocacy programs involve encouraging your employees to promote your brand on social media. By utilizing your employees as brand ambassadors, you can amplify your social media reach and attract new followers. This can also improve company morale and foster employee loyalty. 

    To utilize employee advocacy programs:

    Define clear goals: Before starting your employee advocacy program, define your goals and what you hope to achieve. This will help you measure the success of the program and determine its effectiveness.

    Choose the right social media platforms: Determine which social media platforms are most relevant to your business and where your employees are most active. Focus on these platforms to maximize the impact of your program.

    Train employees: Provide your employees with the necessary training and resources to promote your brand effectively. This includes teaching them how to create content, use social media tools, and engage with followers.

    Provide incentives: Offer incentives to encourage employees to participate in the program. This could include prizes, recognition, or financial rewards.

    Encourage participation: Encourage your employees to participate in the program by making it easy and fun. Provide regular updates and share success stories.

    Recognize and reward success: Recognize and reward employees who achieve success through the program. This will encourage others to participate and help to create a positive culture of advocacy within your organization.

    How to track and measure social media follower

    Tracking and measuring your followers is critical for understanding the effectiveness of your social media strategy. By monitoring your analytics and metrics, you can identify areas for improvement and optimize your efforts for maximum engagement and growth.

    To track and measure your social media followers, consider the following metrics:

    • Follower count: The number of followers you have on each social media platform.
    • Engagement rate: The percentage of followers who engage with your content.
    • Reach: The number of unique users who see your content.
    • Impressions: The number of times your content is viewed.

    Also, make sure to:

    Set specific goals: Before you start tracking your metrics, it’s important to set specific, measurable goals for your social media strategy. This will help you determine which metrics to focus on and evaluate whether your strategy is working.

    Use analytics tools: Most social media platforms offer built-in analytics tools that allow you to monitor performance. 

    Analyze your competitors: Analyzing your competitors’ social media presence can provide valuable insights into what’s working in your industry. Look at their follower count, engagement rate, and the types of content they’re posting.

    Experiment with different types of content: Don’t be afraid to experiment with different types of content to see what resonates with your audience. Track the engagement rates and reach of each type of content to determine what works best for your brand.

    Regularly evaluate and adjust your strategy: Social media is constantly evolving, so it’s important to regularly evaluate your strategy and make adjustments as needed. Use your metrics to identify areas for improvement and optimize your strategy for maximum engagement and growth.

    By effectively tracking and measuring your social media followers, you will be able to gain valuable insights into the effectiveness of your social media strategy and optimize it for success.

    Frequently asked questions

    What are social media followers?

    Social media followers are users who have chosen to subscribe to a brand’s or individual’s social media account and see more of their updates and content. Followers can engage with the content by liking, sharing, or commenting on the posts. 

    Growing a large following is important for brands if they want to maximize the return on their investment because it leads to more impressions for each post and a greater number of people eventually making a purchase for the first time or continuing to buy from the company. 

    Are social media followers and likes the same thing?

    No, social media followers and likes are not the same thing. While followers are users who have subscribed to a brand’s or individual’s social media account, likes are a measure of engagement on individual posts. Likes can come from both followers and non-followers who come across the post on their social media feeds.

    While likes are a good indication of engagement, brands shouldn’t focus on these alone. Followers are important as they represent a loyal audience that’s interested in the brand. Companies should focus on creating content that resonates with potential followers and encourages them to engage with your posts.

    Why are social media followers important?

    Social media followers are essential for building brand awareness, attracting new customers, and increasing customer loyalty. A strong social media following can help a brand establish a personal connection with its audience and create a community of engaged users. Followers can also act as brand ambassadors and share the brand’s content with their followers, which can help attract new customers.

    What are some common mistakes businesses make when trying to grow their social media following?

    Common mistakes businesses make when trying to grow their social media following include:

    • Buying followers: While it may be tempting to buy followers to boost your follower count, it’s not a sustainable strategy. Bought followers are usually fake accounts or bots that don’t engage with your content. It looks nice at first, but won’t actually help you achieve a return on your investment. Buying followers can even be a violation of a social media platform’s terms of service and get you removed from the platform.
    • Focusing on quantity over quality: It’s better to have a small, engaged audience than a large, disengaged one. Focus on creating high-quality content that resonates with your audience instead of trying to attract as many followers as possible. If you get great engagement, even with a small audience, more followers will likely follow. 
    • Not engaging with their audience: Social media is a two-way conversation. Don’t just post content and expect your audience to engage with it. Respond to comments and messages, and use social media to interact with your audience.
    • Not optimizing their social media profiles: Your social media profile is often the first thing users see when they come across your brand on social media. Make sure your profile is complete, visually appealing, and accurately represents your brand.

    How often should I post on social media to maximize my reach and engagement?

    The optimal posting frequency for social media varies depending on the platform. Your brand may want to post once per day on Instagram, LinkedIn and Facebook, and several times per day on Twitter. However, the most important thing is to maintain a consistent posting schedule that works for you and your audience.

    Experiment with different posting frequencies to determine what works best for your brand and your audience. Use analytics to measure the effectiveness of your social media strategy and make adjustments accordingly.

    What are some tips for engaging with social media followers and building a loyal community?

    Engaging with social media followers and building a loyal community is critical for creating a strong social media presence. Here are some tips for engaging with your social media followers and building a loyal community:

    • Respond to comments and messages: Make sure to respond to comments and messages from your followers to show that you value their feedback and engagement.
    • Use social media in interactive ways: Ask questions, run polls, and share user-generated content to keep your followers engaged.
    • Show appreciation to your followers: Show appreciation to your followers by thanking them for their engagement, offering exclusive promotions or discounts, and featuring them in your content.
    • Collaborate with influencers and other brands: Collaborating with influencers and other brands can help you reach new people and improve your reputation in the eyes of niche audiences. 

    Engaging with your social media followers and building a loyal community takes time and effort, but it’s essential for building a strong social media presence. 

    Growing your social media following can be a challenging task, but it’s an essential part of any brand’s marketing mix. By following the tips and strategies outlined in this article, you can position your brand for long-term success. And remember, it’s about building a community of engaged and loyal followers who love your brand!

    Jetpack Social: Plan, schedule and auto-post your social media content

    Whether you’re a business owner, blogger, or marketer, Jetpack Social can help you optimize your social media strategy and save time. With its user-friendly interface and powerful automation tools, Jetpack Social makes it easy to plan, schedule, and auto-post your social media content in just a few clicks.

    With Jetpack Social, you can streamline your social media strategy directly from your WordPress dashboard, and focus on creating high-quality content that resonates with your audience. To learn more about the plugin, and how it can help you grow your social media following, visit this page: https://jetpack.com/social/

  • 6 Best WooCommerce Product Search Plugins in 2023

    A great search tool is an essential element of a fantastic customer experience for any ecommerce store. Plus, as customers are two times more likely to make a purchase online after searching on a retailer’s website, providing a modern search experience could even help you increase your store’s revenue. 

    The default search functionality included with WooCommerce works, but enhancing the experience for customers can help boost your reputation and set you apart from competitors. Thankfully, a WooCommerce search plugin can make it easy to upgrade search for faster, more accurate, and more intuitive results. 

    With so many WooCommerce search plugins available, finding the best one for your store can be confusing. So, we’ve put together this handy guide. Read on to explore the features you should be looking for in a WooCommerce product search plugin, and then discover our reviews of six of the best options. 

    What to look for in a WooCommerce search plugin

    Some of the most important features to look for when deciding on the best WooCommerce product search plugin for your site include:

    Instant search results

    It’s important that your WooCommerce product search plugin responds quickly to your customers’ search queries so that they can easily find the products they need. 

    Some plugins, such as Jetpack Search, give instant results, which means your customers start seeing the products that match their query as soon as they start typing. 

    Accurate results

    One of the main things to consider when choosing a WooCommerce search plugin is the accuracy of its product results. This will depend on two main factors:

    1. The plugin’s index. While the standard WordPress and WooCommerce search function works by querying your database each time a user searches, specialized plugins build their own index of your site. This means that the accuracy of this index determines how accurate your customer’s search results are. You should also make sure your customers can always discover your latest products by ensuring it automatically updates every time you add new products or pages to your store.
    2. The plugin’s algorithm. The algorithm used by your search plugin affects the results that it returns for visitors’ search queries. You should look for a WooCommerce product search plugin that allows you to customize its algorithm to meet the needs of your store. For example, you may decide that the plugin should give priority placement to products you currently have on sale or that you’ve recently added to your site.

    It’s also important that your product search delivers accurate results for complex searches. For example, Jetpack Search can instantly respond to complex, multi-faceted searches, such as ‘men’s xl blue shirt,’ which helps your customers find the product they need without needing to refine or filter their query. 

    Autocorrect

    Around one in ten search queries are misspelled, but the great news is that some of the leading WooCommerce search plugins, such as Jetpack Search, feature powerful autocorrect features. This means that a typo won’t get in the way of your customers finding the product they’re looking for. 

    Responsive design

    Over 40% of ecommerce sales take place on a mobile device. So, it’s vital that your website is responsive and delivers an excellent customer experience regardless of the size of their screen. The same is true for your WooCommerce product search plugin — it should display results in a way that looks great on both small and large screens. 

    Filter options

    Filters can help visitors narrow their search results to find the product they’re looking for. You should seek a WooCommerce search plugin that allows your customers to filter their search results by your product categories, tags, and attributes. It’s also important to ensure your plugin quickly applies these filters without needing to reload the page, so visitors enjoy a seamless search experience. 

    Foreign language support 

    If your store has different language options for your customers, then it’s also important that your search plugin works regardless of the language your customer uses. Some plugins offer support for a wide range of languages — for example, Jetpack Search provides comprehensive support for 38 popular languages, ranging from Arabic to Ukrainian, meaning all your customers can get instant search results and find the right product for them.

    A review of the best product search plugins for WooCommerce

    How do you find the best WooCommerce search plugin for your store? To help, we’ve looked at the top options and carefully compared them based on their features, pros and cons, ease of use, and pricing.

    Jetpack Search homepage design

    1. Jetpack Search

    Jetpack Search is one of the best WooCommerce search plugins available. It offers a wide range of advanced tools designed specifically for WordPress and WooCommerce to help your customers quickly find the right product for them. Thanks to its instant search functionality, the plugin displays results as soon as a customer begins to type, eliminating the need to wait for results to load. 

    Jetpack Search was made by the experts at Automattic — the same people behind WooCommerce and WordPress.com. This means it integrates seamlessly with WooCommerce and automatically indexes a wide range of product data, including attributes, variants, descriptions, tags, and categories. 

    Jetpack Search also fully supports faceted searches, which help your customers find the right product without refining or rephrasing their search. For example, a search for “blue size 8 maxi dress under $150” will prioritize results for maxi dresses with a product color attribute of blue that are available in size 8 and that have a price under $150. 

    The plugin has a wide range of features and options to provide a great search experience for your customers that blends perfectly with your site design — for example, choosing to display your results in an attractive grid layout with product pictures. The plugin also offers instant autocorrect, so a rogue typo or spelling mistakes won’t prevent your customers from finding the products they’re looking for. 

    Jetpack Search uses Automattic’s powerful cloud servers to index your site and conduct searches, which means it can deliver lightning-fast search speed regardless of the size of your store. And this is all without placing strain on your servers or slowing down your site. Automattic’s servers automatically index new products, so they’re discoverable within minutes of being added to your store.

    Features of Jetpack Search:

    • Instant product search without reloading the page
    • Instant filtering by a wide range of product attributes
    • Support for faceted search queries
    • Infinite scroll, which automatically loads more search results
    • Autocorrect
    • Advanced ranking algorithms to deliver highly-relevant results
    • Prioritization of results based on your store’s most popular products
    • Advanced customization options
    • Integration with Jetpack Stats to help you see what products visitors are searching for
    • Super fast indexing, so your search index will update within minutes of adding a product to your site
    • Support for over 38 different languages

    Pros of Jetpack Search:

    • Jetpack Search offers instant search, which means your customers can quickly find the product they’re looking for without waiting for a results page to load.
    • The plugin supports complex, faceted search queries, alongside instant filtering by product attributes, which makes it easy for your customers to refine their searches.
    • Jetpack Search can deliver highly accurate search results in a wide range of languages without needing an additional plugin.
    • The plugin also works perfectly with other content on your WordPress site, enabling your customers to easily find relevant blog articles or support pages.
    • Jetpack Search is a cloud-based service that uses Automattic’s speedy servers to index your site and deliver search results, which reduces the impact on your server. 

    Cons of Jetpack Search:

    • Visitors cannot add items to their cart directly from their search results. 

    Who is Jetpack Search most suitable for?

    Jetpack Search is one of the best WooCommerce search plugins and is an ideal solution for any WooCommerce store owner who wants to offer a best-in-class search experience to their customers.

    Ease of use

    Jetpack Search is simple to install. It will automatically replace the default WordPress search function and will get straight to work indexing your store. While this WooCommerce search plugin offers powerful customization options, they’re easy to understand and detailed documentation is available. Jetpack’s team of Happiness Engineers is also on hand to provide email support.

    Pricing

    Jetpack Search is available free of charge for three months. It then costs $8.25 per 10,000 records or search requests a month.

    Yith Ajax product search plugin

    2. YITH WooCommerce Ajax Search

    YITH WooCommerce Ajax Search is an advanced product search plugin from YITH, one of the leading producers of WooCommerce plugins. It adds Ajax-powered live search with autocomplete to your store, allowing customers to find the perfect product for them as soon as they start typing their query. 

    The plugin’s premium version adds many additional features, including indexing a wider range of product data, such as product excerpts, descriptions, and SKUs. It also allows you to show product images in your search results and provides instant filtering, so your customers can refine their search results to find the product they’re looking for. 

    Features of YITH WooCommerce Ajax Search:

    • Ajax-powered live search
    • Autocomplete 
    • The ability to show product images, descriptions, prices, and promotional banners in search results (premium only) 
    • Indexing of categories, SKUs, excerpts, tags, and site posts and pages (premium only)
    • A customizable search box and results pages
    • Automatic indexing for new products
    • The ability to exclude out-of-stock products from search results (premium only)
    • Foreign language support via WPML

    Pros of YITH WooCommerce Ajax Search:

    • The plugin enables your customers to get instant results for their search queries, and with the premium version, they can see results that include a wide range of product information and attributes.

    Cons of YITH WooCommerce Ajax Search

    • The plugin lacks some of the advanced features offered by other premium WooCommerce product search plugins, including autocorrect and support for faceted search.
    • The plugin uses your site’s servers for indexing and processing search requests, which could impact your site’s speed and take up space on your server.

    Who is YITH WooCommerce Ajax Search most suitable for?

    Due to the comparatively limited feature set and the use of your own server space and bandwidth to perform searches, YITH WooCommerce Ajax Search is best suited to relatively small WooCommerce stores. 

    Ease of use

    The plugin is easy to install and activate and automatically starts indexing your products. Documentation is provided, and email support is available for all premium subscribers. 

    Pricing

    A free version of the plugin is available, which offers Ajax-powered search with autocomplete. The premium version unlocks all features for $65 a year.

    WooCommerce Product search demonstration

    3. WooCommerce Product Search 

    WooCommerce Product Search is a search plugin developed by itthinx, who also produces a number of popular WooCommerce extensions. The plugin offers instant live search and provides a wide range of options to customize search results, including adjusting the weighting the algorithm places on different product categories or content types. 

    WooCommerce Product Search also provides advanced search statistics and business insights, allowing you to spot trends in your customers’ searches and discover opportunities for growth by reviewing search terms that didn’t generate any results. Your customers can also instantly filter their search results using intuitive icons, including filtering by color, category, and price. 

    Features of WooCommerce Product Search:

    • Instant live search
    • An add to cart option on both live search results and the search results page
    • The ability to index a wide range of product data and attributes, including SKUs, price, categories, tags, and titles 
    • The ability to display product images in search results 
    • Instant filtering by product attribute, tags, categories, keywords, or price range
    • Automatic integration with WooCommerce and many popular themes
    • Search statistics and business insights
    • A customizable algorithm and search weighting 
    • Automatic indexing of new products

    Pros of WooCommerce Product Search:

    • The plugin offers live search, which includes product images by default, and your customers can add products straight to their cart from the live search results. 
    • WooCommerce Product Search is compatible with many popular WooCommerce themes, which minimizes the need to make custom CSS changes. 

    Cons of WooCommerce Product Search:

    • The plugin does not offer autocorrect or auto-complete. 
    • While search filters are offered, the plugin does not support faceted search requests.
    • The plugin uses your server’s storage and resources to index your site and process search requests, which could cause issues if you have a large number of products or a basic hosting package.

    Who is WooCommerce Product Search most suitable for?

    As WooCommerce Product Search lacks some of the features offered in other premium search plugins, it’s most suited for small ecommerce store owners who want to improve their search function for a relatively low cost. 

    Ease of use

    WooCommerce Product Search includes an automated setup wizard that integrates the plugin with your site and activates the most common features and settings. Detailed documentation is also provided alongside support from the developer through the WooCommerce helpdesk.

    Pricing

    WooCommerce Product Search costs $49 per year.

    Doofinder WooCommerce Advanced Product Search homepage

    4. Doofinder

    Doofinder is an ecommerce search provider that works with a wide range of platforms, including WooCommerce. It processes your visitors’ search requests on its own servers, which means that it can cope with a large volume of customers searching at the same time without slowing down your site. 

    Doofinder’s live search feature shows search results to your customers as soon as they start typing their results. Its natural language processing technology helps deliver relevant results to your customers by filtering out typos and considering a range of information like product titles, descriptions, and attributes. Doofinder also supports faceted searches and offers instant filtering, so your customers can refine their search results to find the product they’re looking for. 

    Features of Doofinder:

    • Live search with autocomplete 
    • Integration with the native WordPress and WooCommerce search functions
    • Faceted searches and instant filtering
    • Support for over 30 languages
    • Search logging and analytics
    • Customizable results (Pro plan and above)
    • Automatic indexing of new products
    • Recommended products and product banners (Pro Plan and above)
    • A hosted search solution
    • Support for visual and voice search
    • A customizable search box
    • A fully responsive, mobile-friendly design

    Pros of Doofinder:

    • Doofinder offers a range of advanced features, including autocomplete and instant search, which helps create a seamless search experience for your customers.
    • As Doofinder is a hosted service, indexing and processing search requests don’t use your server’s resources. 

    Cons of Doofinder:

    • Doofinder has a high monthly cost, which varies based on the number of requests each month. Requests include indexing, as well as any searches. The instant search feature can also send multiple requests per search, making pricing unpredictable.

    Who is Doofinder most suitable for?

    Due to Doofinder’s relatively high cost, it’s best suited for large WooCommerce stores. 

    Ease of use

    Doofinder’s WooCommerce search plugin simplifies the process of connecting your store to the Doofinder service. While most features can be accessed within the WooCommerce dashboard, some advanced features can only be accessed on Doofinder’s site. This may be confusing for some users. Doofinder has documentation available and email support is provided for all paid plans.

    Pricing

    Doofinder offers a free plan with limited features which supports up to 1,000 requests per month. The basic plan offers more features and costs $35 a month for up to 10,000 requests. The Pro plan unlocks more features and costs $59 a month for up to 10,000 requests. 

    Advanced Woo Search homepage

    5. Advanced Woo Search

    Advanced Woo Search is a highly customizable WooCommerce product search plugin that aims to deliver the most relevant product search results to your customers. It uses an advanced search algorithm to index and search through a wide range of product information, including descriptions, titles, and variants. The plugin is created by a full-time WordPress and WooCommerce developer, and is designed to seamlessly integrate with many popular WooCommerce plugins. 

    The plugin uses Ajax to display visitors’ search results without them having to reload the page, and you can choose which elements are shown in your search results, including images and prices. In addition, the Pro version of the plugin unlocks additional features, including indexing product attributes, the ability to put an ‘add to cart’ button next to each search result, and instant results filtering, so your customers can refine their search results. 

    Features of Advanced Woo Search:

    • Fully customizable search results, including adding product images and prices 
    • The ability to search across all product variations
    • Options to exclude products, categories, or tags from search results
    • The capability to search for synonyms and ignore stop words
    • Search filters (Pro version only)
    • The ability to extend the search index to include product attributes and custom fields (Pro version only)
    • An add to cart button in search results (Pro version only)
    • Google Analytics integration
    • A range of ready-to-go search layouts and styles (Pro version only)
    • Foreign language support through integrations with WPML, Polylang, qTranslate, and WooCommerce Multilingual

    Pros of Advanced Woo Search:

    • The plugin allows a high level of customization of how search results appear, so you can tailor it to display the information you want your visitors to see and match your site’s design. 
    • The plugin automatically searches for synonyms and ignores stop words, which helps make sure that relevant products are not unnecessarily excluded from search results. 

    Cons of Advanced Woo Search:

    • The plugin doesn’t support faceted searches, so customers may have to refine their results using filters to find the right product for them. 

    Who is Advanced Woo Search most suitable for?

    As it uses your site’s servers to carry out searches and index your site, Advanced Woo Search is best suited to small to medium-sized stores. The free version offers many useful features to enhance your site’s search experience, which may make it a good choice for stores with very limited budgets.

    Ease of use

    The plugin is easy to install and has been designed to automatically integrate with many popular WooCommerce themes. There’s detailed documentation available, and the plugin’s author regularly responds to support requests for free users via the plugin’s support forum. Email support is offered for users of the premium version.

    Pricing

    There’s a limited free version available on the WordPress plugin directory. The ‘Pro’ version unlocks all features and costs $69 a year for a single website.

    Smart WooCommerce Search homepage

    6. Smart WooCommerce Search

    Smart WooCommerce Search is a product search plugin that offers your customers an instant live search experience. The plugin, developed by a WordPress developer known as YummyWP, will automatically index your product descriptions, tags, categories, and SKUs.

    Alongside adding images and prices to your search results, the plugin’s premium version allows your customers to add items to their cart straight from the search result. The premium version also supports the display of labels, which means you can clearly show customers which products are featured, on sale, or out of stock. It also aims to improve the relevancy of search results by extending the plugin’s index to include a wider range of data, including product attributes, variations, and custom fields. 

    Features of Smart WooCommerce Search:

    • Instant live search
    • The display of images and prices in results
    • Indexing of product descriptions, categories, tags, and SKUs
    • Exclusion of out of stock products from search results
    • Compatible with a range of page builders, including Elementor, Visual Composer, and Divi
    • The ability to extend the search index to include product attributes, variations, brands, and custom fields (pro only)
    • Capability to searches for synonyms and ignore stop words (pro only)
    • An add to cart button on search results (pro only)
    • Foreign language support through integration with WPML and Polylang (pro only)

    Pros of Smart WooCommerce Search:

    • The plugin offers a simple way to add instant live search to your store, so customers don’t have to wait for a search results page to load to find the items they’re looking for.
    • The plugin is compatible with a range of popular page builders.

    Cons of Smart WooCommerce Search:

    • The plugin lacks many features found in other WooCommerce product search plugins, such as filtering and faceted search support.
    • While the synonyms feature can be used to enter commonly misspelled words and their correct spelling manually, there is no automatic autocorrect feature.
    • The plugin doesn’t offer the ability to customize the search algorithm, meaning you can’t increase the weighting given to specific products, categories, or tags.
    • The plugin uses your site’s server to index your site, which may mean it takes longer to return results for larger stores.

    Who is Smart WooCommerce Search most suitable for?

    Smart WooCommerce Search is best suited to small store owners who want to add live search functionality to their site without some of the more advanced features offered by other plugins.

    Ease of use

    The plugin is easy to install and automatically replaces the default WordPress search function. The developer has provided detailed documentation and offers email support for all plugin users.

    Pricing

    There’s a limited free version available in the WordPress plugin directory. A premium version of the plugin is available for a one-time cost of $49.

    Comparison of the top WooCommerce search plugins

    Jetpack Search YITH WooCommerce Ajax Search WooCommerce Product Search Doofinder Advanced Woo Search Smart WooCommerce Search
    Live Search Yes Yes Yes Yes Yes Yes
    Autocorrect Yes No No Yes No No
    Instant filtering Yes Premium Only Yes Yes No Pro only
    Support for faceted searches Yes No No Yes No No
    Customizable results Yes Premium Only Yes Pro Plan only.  No Pro only
    Hosted service to remove strain on your site’s servers Yes No No Yes No No
    Foreign language support Yes – 38 languages. Requires additional plugin. No Yes – over 30 languages.  Requires additional plugin. Pro only. Requires additional plugin.
    Cost Free for the first 3 months, then only $8.25 a month per 10,000 records Limited free version. Premium version $65 a year. $49 a year. The basic plan is $35, and the Pro Plan is $59 a month for up to 10,000 requests. A limited free plan supports 1,000 requests a month.  Limited free version. Pro version $69 a year. Limited free version. Premium version $49 one time.

    Factors to consider when choosing a product search plugin

    Does it seamlessly integrate with WordPress and WooCommerce?

    You don’t want to spend hours troubleshooting issues or waste money on something that doesn’t work. Solutions available in the WordPress repository or WooCommerce extension library are the most likely to work smoothly with your store. Check reviews and documentation before installing. 

    Could it slow down your site?

    Nearly all WooCommerce search plugins use your site’s web server to index your product and carry out your customers’ search requests. Depending on the number of products in your store and your web hosting package, this could slow down your site. 

    But, the great news is that the top plugin in our review, Jetpack Search, uses Automattic’s speedy cloud servers to index your products and search your site — this means that no matter how many products you add to your store, you are guaranteed to always offer a lightning-fast experience to your customers. 

    Does it update its search index in real time?

    Your customers can only find your products through search if they’re added to the index of your WooCommerce search plugin. Therefore, it’s important that the plugin you choose indexes your products as soon as they are added to your store. For example, Jetpack Search automatically indexes your site using powerful cloud servers, meaning products are visible in search results within minutes of them being added to your store.

    What support is offered?

    It’s also important to consider the support available. Is there a way to directly reach out to an expert for support with the plugin, or are you limited to asking your questions through a forum? The top plugin in our review, Jetpack Search, allows you to easily raise support tickets, which are responded to by a dedicated team of Jetpack Happiness Engineers, who are experts in WordPress and WooCommerce.

    Does it offer a good value for your money?

    You should also consider if your WooCommerce search plugin is cost-effective. You should consider the features it offers against its cost. For example, Jetpack Search offers an excellent value for most WooCommerce stores as it provides a lightning-fast search experience with a wide range of advanced features, all for a relatively low monthly cost. 

    Conclusion: What is the best product search plugin for WooCommerce?

    The best product search plugin for WooCommerce will depend on several factors, including your experience with WooCommerce and WordPress, the size of your site, and if you need the plugin to offer features such as instant search. 

    But it’s clear from the comparison table above that Jetpack Search is the best product search plugin for WooCommerce. Jetpack Search is an affordable, hosted search solution that can easily scale with your store as your business grows.

    It offers an impressive range of premium features, including instant search and powerful product filtering. It’s simple to set up and works automatically behind the scenes to keep your site’s search index up to date and deliver fast search results to your customers without using your valuable server resources. 

    Plus, as it’s made by the people behind WooCommerce and WordPress.com, it’ll integrate seamlessly into your site, and you can get help from Jetpack’s team of Happiness Engineers if you have any questions about how to set up, install, or optimize the plugin.

    Frequently asked questions about WooCommerce product search plugins

    What makes a good WooCommerce product search plugin?

    A good WooCommerce product search plugin should provide fast and accurate search results that help your customers find the products they’re looking for. It should also offer a range of search features that ensure your store’s search experience is seamless, including instant search, filtering, and support for faceted search. 

    A good WooCommerce search plugin should also be easy to use and automatically update its index every time you add new products to your store. Jetpack Search, the top plugin in our review, offers all these features plus many more and is one of the best WooCommerce search plugins available. 

    How much does a top-tier WooCommerce product search plugin cost?

    WooCommerce product search plugins vary significantly in price. The top plugin from our review, Jetpack Search, is fantastic value, offers a wide range of powerful features, and is available to try free of charge for three months. Then, it’s $8.25 for 10,000 records or search requests per month.

    Is it easy to set up a product search plugin on WooCommerce?

    This varies massively between plugins. Jetpack Search is the top WooCommerce search plugin in our review and allows you to easily set up your customers’ search experience. You can also fully customize your site’s search functionality to help customers find the products they are looking for.

  • 12 Ways to Increase Sales on Your WooCommerce Store

    Do you ever feel like you’re just waiting for the phone to ring? Or, these days, waiting for your next order notification? You hear stories about store owners who are so overwhelmed with orders that they can barely keep up. And… you want to be overwhelmed, too. 

    Well, if you want to increase sales, revenue, and profits, it’s time to get moving. There are very specific, proven steps you can take to increase sales in your WooCommerce store, and we’re going to show you the 12 that will make the greatest impact.

    Whether you sell physical products, digital products, or both, the ecommerce strategies in this article apply to almost every WooCommerce store. 

    And the best news is, you can start working on all of these right now. Even better, since there are twelve, you’ve got a plan you can use as a roadmap for improvement over the next year. Focus on one strategy per month, and this time next year you might just be one of those store owners overwhelmed with orders. 

    Let’s get to it.

    1. Boost your page loading speed

    There’s a direct link between page loading speed and sales. Why? Because if your pages take too long to load, potential customers will abandon your site before they interact with your content. If they don’t use your site, they can’t buy anything. 

    So it’s in your interest to make sure your site is running quickly. If your pages take more than three seconds to load, 40% or more of visitors will simply give up. 

    But how do you boost your site’s speed? Even if you’re a relatively new store owner or aren’t familiar with the technical aspects of WordPress, there are some simple steps you can take to help your site’s performance.  

    First, you can test your current site speed using a variety of free online tools like GTmetrix and Google PageSpeed. These tools will not only tell you how quickly your site loads, they’ll also show you specific ways you can improve.

    Your next step is to install Jetpack Boost, a free plugin you can use to optimize your core web vitals. These metrics are a good indication of the experience that people have with your store, measuring things like loading performance, visual stability, and interactivity. Additionally, Google factors them in when determining where to rank your sites on search engine results pages. 

    settings in Jetpack Boost

    Jetpack Boost will allow you to optimize your CSS loading, defer non-essential Javascript, and implement lazy image loading. And you can turn on each of these features with a simple toggle.

    Then, give Jetpack CDN a try. This is a free content delivery network that loads your website from super-fast servers located around the world. This means that every individual visitor will get the best possible experience based on their location.

    Jetpack CDN also has extra speed-boosting powers like image optimization based on the device each visitor is using to access your website. You can get both things in one place, along with additional security, performance, and marketing tools through Jetpack Complete

    Looking for more tips? See 9 Ways to Speed Up Your WooCommerce Store.

    Pro tip: Hosting isn’t the best place to try and save a few dollars per month. Even a perfectly-optimized site will run slowly if its hosting service is subpar. Your host provides the foundation for everything else needed to run and deliver your site to visitors. Learn how to choose a host for your WooCommerce store, or look through our recommended WordPress hosts

    2. Improve the checkout process

    No matter how many ads you run, blog posts you write, or referrals you receive, the checkout page remains one of the single most important points in the sales process. Despite getting so close to the finish line, many potential customers abandon their cart during these final steps. 

    So improving this single point in the process could have an immediate, profound impact on your sales. 

    Think about it: Every abandoned cart represents someone who found your site, chose one or more products, and at least began the process of making a purchase. But something held them back from completing it. And this happens way more often than any of us like to admit — about 69% of shopping carts are abandoned. 

    So how do you improve your checkout process?

    Start with the easy stuff — remove unnecessary fields. Only keep the ones you need in order to complete the sale. If you want, you can provide opt-ins for joining your email list and other incentives and optional items, but don’t overdo it and be sure they don’t interfere with simply completing the purchase. 

    Also, don’t require customers to log in or register just to buy something. In most cases, you won’t need to do this, and customers can always return later to create an account if they want to make another purchase. If creating an account is absolutely necessary, you should at least allow people to log in using their social media accounts to offer a more frictionless experience.

    Next, allow multiple forms of payment. Credit cards are the baseline, but many people also expect to be able to pay using things like Venmo, Paypal, and Apple Pay. And, for many stores, the time is right to start offering the ability to pay with cryptocurrencies.  

    WooCommerce Payments homepage design

    WooCommerce Payments makes it easy to accept payment in multiple forms and in many different currencies. The best part? It’s completely free.

    3. Consider offering free shipping

    While consumers always love free shipping, you can’t afford to simply give everything away. For most merchants, fulfilling and delivering orders is a major expense. But, if done correctly, it might just turn into an advantage. Here are a few factors to consider about free shipping on your ecommerce store:

    • The weight of your products
    • The shipping providers you’re using
    • Packaging
    • Distance to customer
    • Speed of shipping
    • Cost of the product or order
    • Profit margins

    If offering free shipping eats up all your profits, it’s a bad deal. Some businesses include shipping in their prices. This means they charge higher prices up front, but then there’s no shipping charge added on the checkout page. 

    You can also offer free shipping if the order size is above a certain amount. And you can hold special free shipping for particular days, events, or promotions. 

    4. Improve the user experience

    Website usability matters no matter what type of site you run. But for ecommerce stores, its importance magnifies. A WooCommerce store that’s hard to navigate will make fewer sales because shoppers will get frustrated and give up. 

    And, the more products you have, the more complicated it becomes to maintain a store that’s easy to use. You need clear product categories, a logical navigation menu, a responsive design, and a functional search feature.

    Jetpack Search makes it easy to add a search feature to your WooCommerce store that allows your customers to find what they’re looking for with minimal hassle. It offers advanced filters, spelling correction, and live results to make the process fast and simple.

    example of Jetpack Search in action

    For more options, check out the best WordPress search plugins

    5. Give the information your customers need

    If all your product pages are looking pretty bare — maybe just a photo, a title, and price — you can increase your WooCommerce sales by making these pages more robust. 

    People have questions. They want to know certain facts about products before buying. If your store has been around very long, you probably already know what people ask. You’ve answered the same questions dozens of times. Don’t make them come to you or your FAQ page — get out ahead of them so they can make a purchase decision right then and there. 

    If you’re not sure what information your visitors might be looking for, go back and look at your customer service communications and make notes. If you get any product returns, find out why. 

    If it’s food, list the ingredients. If it’s clothing, specify the sizes. Describe the materials. Explain the care procedures. If it’s a more complicated product, give some information about how to use it, what it’s made of, things to know, and even directions for use. Include high-quality photos

    And another note about clothing. Sizes are not standardized, especially if you’re selling children’s clothes. If possible, include a size chart with measurements so there’s no room for error.

    Anticipate what a customer might want to know, and put that on the product page.

    6. Use email more effectively

    Once you’ve won a customer or gotten someone to opt into your email list, start sending emails! There are a number of smart ways for WooCommerce stores to increase sales using email, such as:

    • New product announcements
    • First-time customer discounts and rewards
    • Referral rewards
    • Abandoned cart emails 
    • Holiday campaigns
    • Birthday and anniversary specials
    • Segmented emails based upon prior purchases

    Email is an excellent method for following up with potential customers. They cost very little to send and the subscriber list data is yours. You have more control and ownership over this kind of marketing when compared to advertising on social media or search engines. 

    WooCommerce store owners who are new to email marketing should look into MailPoet. It has automations that are built specifically for WooCommerce stores, so it works seamlessly. Plus, you can manage everything directly from the WordPress dashboard. Create promotions for those who ordered from a particular product category. Follow up with people who’ve abandoned a cart, announce your newest product launch, or reward your most loyal customers. 

    There’s a lot you can do, and improving your email marketing is almost guaranteed to help grow your store.

    7. Be available to online store visitors

    When potential customers have questions, they want answers. At the bare minimum, every WooCommerce store should have a phone number and contact page. 

    If you want to increase sales from your WooCommerce store, respond within minutes, if possible, but certainly on the same day. If you wait too long, a shopper might buy from somewhere else or just give up.

    Live chat is even better than contact forms! Customers can get answers more quickly. You can designate an employee to handle requests based on their availability, or if it’s just you, connect a chat program to your phone so you can respond to notifications right away. 

    WooCommerce LiveChat

    WooCommerce has a number of chat extensions that are simple to use. LiveChat and Facebook’s chat integration are both popular options. 

    8. Use coupons strategically

    Coupons make great sales boosters, as long as you’re not giving up too much revenue. Look at it this way:

    Suppose you sell a product for $30, and your profit margin is $10. If you give a 20% off coupon that a customer uses on that item, they’re now buying it for $24. That reduces your profits by 60%! 

    So while coupons can sometimes seem like an appealing strategy for convincing more customers to buy from you instead of the competition, you need to be careful. Here are few ways to use coupons strategically:

    • Offer one-time coupons to encourage new or returning customers
    • Use coupons on specific holidays when competition is more fierce
    • Offer coupons for new or specific products that have a higher dollar value
    • Use dollar-off coupons rather than percentages

    That last one could appeal to customers, increase your order size, and reduce your profit losses. 

    Suppose you offer a deal where the customer saves $20 off a purchase of $100 or more, and $40 off a purchase of $200 or more. Seems like the same thing right? 20% off. But it’s not, because the discount doesn’t increase with the price. How many people will spend exactly $100 or $200 dollars?

    A customer who spends $200 saves $40. But a customer who spends $280 also saves $40. Your profits increase the more they spend. And anyone who spends $180 or more in that scenario will probably try to bump up their order to get over $200. This approach increases order size and doesn’t cut into profits as much as a percentage discount. 

    If you offer a 20% off coupon and a customer spends $280, your profits go down $56 instead of $40, because the percentage increases the amount saved no matter how much is spent.

    Another coupon strategy is to offer an upsell. 

    Suppose the customer is about to spend $50 on an item. Offer them the chance to buy two for $89 before they check out. It saves them $11, but it increases your order size without much effect on profits since shipping one order costs less than shipping two separate ones. Here are more creative ways to use coupons

    9. Nurture your leads

    One of the most effective ways to use email marketing is with segmented and personalized emails. But what does that mean? 

    A large part of it revolves around knowing what your customers have purchased, and communicating with them based on that knowledge. 

    As a simple example, suppose a WooCommerce store sells T-shirts, sweatshirts, and jackets, and also has a business line where companies can create branded versions of those same products. Any business customer should be communicated with as a business, not a person. They’re not going to be ordering a couple shirts here and there. 

    On the other hand, another customer may be ordering kids’ shirts and sweatshirts every couple years. Clearly, this customer is a parent buying for their kids, and their kids are getting older, as kids tend to do. So you would communicate with that customer very differently from a business. 

    How do you keep track of customer purchases at this level? With a CRM (customer relationship management) tool.

    Jetpack CRM enables you to keep track of customer purchases, order sizes, dollars spent, and other information that will help you to nurture and follow up with your customers and leads in ways that are relevant and timely to them. 

    customer profile in Jetpack CRM

    For the family buying ever enlarging kids’ clothes, the best time to send special deals and new product announcements would probably be before school starts, and in the months leading up to the holidays.

    A CRM plugin or tool allows you to keep track of this information and make your marketing more effective. And the best thing about JetpackCRM is that it connects seamlessly with WooCommerce. See how it works

    10. Offer social proof

    One of the greatest barriers to online sales is trust. Can I trust this company and their products? One of the best ways to overcome that is with testimonials and reviews. 

    As you acquire more reviews, post them all over your site. You can integrate reviews from well-known sites like Google, and put them on your own product pages to increase authenticity. 

    And don’t just put all your testimonials on one page, or on the homepage. When you get reviews that mention specific products, put those on that exact product page. If you get a review commending your customer service, put that on your contact page, checkout page, or other relevant page. 

    If you have any reviews on social media, connect people so they can see the reviews on your site. 

    You can’t have too many customer reviews and testimonials. And the more detail you include, the better. Full names are better than first names. Cities are better than states or provinces. For business customers, include company names and the job title of the person leaving the review. Photos are better than just names. Video testimonials are gold.

    See more ways to use reviews to generate sales.

    11. Harness the power of upsells and cross-sells

    One of the most powerful ways to increase WooCommerce sales is with upsells and cross-sells. 

    An upsell could be like the example given earlier, where a customer bought an item for $50, and you offer them the chance to buy two for $89 before they finish checking out. You’re getting them to spend more, but it’s a good deal for them, too. 

    Another common upsell strategy is to offer a bonus item or some other perk such as an event ticket or contest entry. You can also upsell by offering larger quantities. This works great for food and consumable products. 

    Cross-selling, on the other hand, involves recommending other products that relate in some way to the first one. Using the clothing example again, if someone orders a couple t-shirts, you can mention sweatshirts and jackets of a similar color or style as a product recommendation. 

    This is also another place you can use coupons strategically. You could combine the product recommendation with a one-time-only coupon to buy two items and get a third one free. Or, if you have a minimum threshold for free shipping, mention how close the shopper is to reaching that when you recommend other products. 

    Here are five more strategies for upselling and cross-selling.

    12. Increase your marketing efforts

    Even though this is the last tip on this list, if you’re using this article to help plan out your next twelve months, don’t wait until the 12th month to start this one. Marketing is a continuous process and many of these methods begin with a slow build. So start early, and keep building on it as you implement other strategies on this list.

    Online marketing requires online traffic. How do you get traffic? In general, there are two ways:

    1. Attract the traffic organically
    2. Pay for the traffic

    You can attract online traffic from social media and from search engine optimization (SEO). Social media sites such as Facebook and Pinterest offer ways to showcase products, post comments and updates, get feedback, and interact with customers. You can also use social media to send people to your site. 

    For many WooCommerce stores, Pinterest can be particularly helpful because it’s a visual showcase. With the free Pinterest for WooCommerce extension, you can link your online store to your Pinterest page and put your entire product catalog on display. 

    SEO is how you attract online traffic organically, through search engines like Yahoo, Bing, and Google. SEO relies on having high quality content on your website that uses keyword terms that your ideal customers might be searching for. This is another reason why having quality product pages with lots of helpful information should be a high priority. Your SEO also improves with well-organized and clearly-defined product categories and site architecture that’s easy to navigate. 

    And you can greatly improve your SEO by writing helpful high-quality blog posts, which offer a natural way to answer questions often asked by customers, and provide solutions to common problems. 

    With paid online ads, you can more directly attract people who are searching for your products, and leapfrog ahead of the organic listings in search engines. The downside is that you’ll pay for every click and, if you stop paying, the traffic stops flowing. That said, it can still be a great way to generate profitable traffic and learn what terms your audience uses most. 

    The Google Listings & Ads extension, another free download for WooCommerce, makes it easier to run ads that sync with your specific product pages. 

    Frequently asked questions about increasing sales on WooCommerce

    1. How can I analyze my WooCommerce sales performance?

    The simplest way to begin is with the site stats you can see through Jetpack. This is a free feature that shows where your traffic is coming from, and your most popular pages. Next, review the built-in stats that come with WooCommerce. You’ll see which products are most popular along with everything from gross and net sales to average order size, taxes, shipping, refunds and more with WooCommerce Analytics

    And if you want more data, you can use Jetpack to connect WordPress with Google Analytics for an advanced view of site stats and marketing performance.

    2. Which metrics or KPIs should I focus on, in priority? 

    For most WooCommerce stores, your key metrics will include total sales, average order size, returns, and discounts. There’s a lot more depth within each of these such as date ranges, categories, coupons redeemed, and more. All of these metrics and much more can be found within WooCommerce Analytics. See what else WooCommerce Analytics can show you

    3. How can I see where my sales come from?

    The best way to see which of your marketing sources are producing the most sales is to connect Jetpack with Google Analytics. Here’s how to set it up. This will show you geographical data, but also which paid ads, blogs, social media sites, emails, and other marketing channels are producing your sales and converting your customers. 

    When you’re ready to get more detailed, you can learn about advanced analytics and marketing performance tracking for WooCommerce

  • 23 Social Media Post Ideas for Businesses Looking to Stand Out

    Social media has become an integral part of modern business. It provides an unprecedented opportunity for businesses to connect with their customers and build a loyal following. However, with so many competing voices on social media, it’s harder than ever to stand out.

    In this article, we’ll share 23 social media post ideas that can help your business stand out on social media. First, we’ll cover some basics by defining the different types of social media posts. Then, we’ll highlight the importance of automation before sharing two dozen social media post ideas you can use right away!

    The different types of social media posts

    There are a variety of types of social media posts that businesses can use to engage their audience and stand out on social media. These include text, image, video, live video, and more. Each type of post has its own unique strengths and can be used in different ways to stand out on social media:

    • Text posts are a great way to share information and updates with your audience. They’re quick and easy to create, and you can use them to share news, updates, and other important information.
    • Image posts allow you to share visual content with your audience. They can be used for product images, infographics, and other types of visual content.
    • Video posts can be used to share product demos, tutorials, and other types of promotional content.
    • Live video posts let you connect with your audience in real time. They can be used to host live Q&A sessions, product demos, and other types of live content.

    The importance of automation in a social media posting strategy

    Managing and maintaining a consistent presence across multiple platforms can be a daunting task. This is where automation comes in. Automating certain aspects of your social media strategy can not only save you time and energy, but also help you reach a wider audience and increase engagement.

    One of the best ways to automate your social media strategy is through the use of social media sharing plugins. Jetpack Social is a great option for businesses running their sites on WordPress.

    settings for Jetpack Social

    With Jetpack Social, you can easily share your content across multiple platforms, including Facebook, Twitter, and LinkedIn with just one click. Additionally, Jetpack Social allows you to schedule posts in advance, so you can create a content calendar and ensure that your accounts are always active, even when you’re not. This allows you to focus on other important tasks while still maintaining a strong social media presence.

    Overall, automation is a key component of any successful social media strategy. By using a plugin like Jetpack Social, businesses running their sites on WordPress can easily automate their social media efforts, save time, and increase engagement. To learn more about Jetpack Social, visit Jetpack.com/social/

    Stand out on social media with these 23 post ideas

    1. Share your blog’s content on autopilot

    One of the easiest ways to keep your social media accounts active and engaging is by maintaining an active blog. By consistently creating valuable and relevant content on your blog, you’ll have a steady stream of new material to share across your social media channels.

    Each time you publish a new blog post, you can share it on your social media accounts, along with a brief summary and a call-to-action to encourage readers to visit your website.

    By using a solution like Jetpack Social, you can automatically share your blog content across multiple social media platforms, saving you time and effort.

    2. Show your product in an unexpected situation

    Showing your product in an unexpected situation can help to create a sense of intrigue and interest around your brand. For example, showcasing your outdoor gear in an urban setting or your fashion brand on a hiking trail can be a great way to stand out.

    3. Launch a recurring series (daily, weekly, etc.)

    Launching a recurring series can be a great way to build an audience and keep them engaged. This can be a daily or weekly series of posts that provide valuable information, tips, or entertainment, such as a “Tip of the Day” or “Throwback Thursday.”

    4. Make a meme your audience will relate to

    Memes are a great way to connect with your audience and build a feeling of community. By creating a meme that your audience can connect with, you can create a sense of connection and engagement.

    When crafting your meme, however, make sure to consider your audience. Are they likely to understand the joke? Could it be offensive in any way? Memes tend to have a short shelf life. So jumping on a trend that’s several years old may not get you the attention you anticipate. 

    Pro-tip: You don’t need a background in graphic design to create this kind of post. Use an online meme generator like this one to save time!

    5. Share customer interviews and testimonials

    Sharing customer interviews and testimonials is a great way to showcase your brand’s value. It helps to build trust and credibility with your audience and can be a powerful way to stand out on social media.

    6. Answer commonly-asked questions

    Posting frequently asked questions (FAQs) and answering them is a great way to provide value to your audience. This can help overcome sales objections and customer service questions before potential people even reach out, saving staff and employee time and bolstering the confidence followers have in your brand.

    FAQ section on Heggerty's YouTube channal

    But what questions do you ask? If you have a customer service or support team, find out what they encounter most often. Check your contact form submissions, social media comments, and direct messages. You can even send out a survey via email or ask social media followers what they’d like you to answer. 

    7. Share behind-the-scenes content

    Sharing behind-the-scenes content can help to give your audience a glimpse into the inner workings of your business. It’s a clever way to highlight the processes, ingredients, and quality of care that set you apart. It also humanizes your brand when people get to know the team behind the products or services you offer. This is particularly helpful for premium brands who may need to justify why their offerings cost more than competitors. 

    8. Post product demos and tutorials

    Product demos are an excellent way to show all the different use cases for your items. Perhaps they can be used in unexpected ways, opening the possibilities up to a whole new audience! 

    They also provide valuable content for those who have already purchased. Perhaps someone bought your espresso maker and can’t quite figure out how to use one specific feature. If you share a video walking them through the steps, it might keep them from returning it while simultaneously showing potential customers how easy your product is to work with. Plus, it provides opportunities to present new options — like espresso beans — to existing customers for recurring business. 

    There’s a reason there are so many late-night infomercials with product demos — they work! And social media is a great place for the modern day equivalent without the need to purchase expensive air time. 

    9. Showcase user-generated content

    User-generated content (UGC) is a great way to relate to a variety of potential customers. These days, people are hyper-vigilant, and even resistant to advertising. They know about stock footage and aren’t as impressed by models. 

    Instead, when you highlight content created by real users, authentic fans of your brand, people are often much more receptive. Plus, you can save significantly on production costs and potentially turn the contributor whose content you used into a super-fan or brand ambassador for life. 

    user-generated content on Veer's Facebook page

    Here are some ways to encourage UGC for your brand. 

    10. Align yourself with a cause that’s important to your audience

    Supporting a cause that your audience can identify with helps you connect with them and build a sense of community.  You can contribute to a fundraiser and ask others to do the same. Highlight the work your staff is doing as volunteers. Organize a fundraiser or open your doors or resources for use by like-minded members of your audience. There are all kinds of ways to contribute positively to the world, help or encourage others to do the same, and improve your brand positioning. 

    Pro-tip: Find something you and members of your team are truly passionate about. Don’t come across as braggadocious and don’t only support causes for the publicity. Followers can tell, and it can do more harm than good. 

    11. Run exclusive promotions (only for your social media audience)

    Exclusive promotions act as a reward for your social media followers, letting them know that you appreciate them and building engagement at the same time. You might offer free shipping, throw a freebie or sample into orders placed by followers, or share a special discount code for a percent off their next order. And setting a time limit for promotions harnesses the power of urgency to drive sales quickly. 

    12. Host a contest or giveaway

    Hosting a contest or giveaway can be an exciting way to encourage comments and shares on your posts (some of the most important forms of engagement) without appearing desperate. In fact, it’s usually a super-fun process for both you and your followers. This often works best when the giveaway is something from your brand (not an unrelated, random prize) so that it serves as an advertisement for one of your most popular products. Those who don’t win might actually end up purchasing it for themselves, or as a gift, later on.

    Make sure to check with any rules for the social media platform you choose, but many contests involve having followers like, comment, tag a few friends, and share your post as a method of entry. You can then use an app or even a random number generator to select the winner. 

    13. Conduct polls and surveys

    Polls and surveys help you accomplish two things: increase engagement and learn what your followers are interested in. While you can publish polls on any platform, you’ll often see quick polls in Instagram stories. Sometimes these are fun — Pineapple on pizza: yes or no? — and other times they more directly ask for feedback — What flavors do you want to see on our Spring menu? 

    Regardless, these are excellent opportunities to find out what your followers want to see more (or less!) of on your account or in your products or services.

    14. Create infographics and data visualizations

    There are a number of programs with pre-built templates you can use to create fun graphics out of almost any fact or stat about your brand. One idea is to do a year in review. How many customers did you serve last year? How many different recipes did you try to find the perfect one? How many miles did your delivery trucks accrue? How many customer service requests did your team respond to?

    Quickly browse your site to find any numbers or facts. Even if they’re kind of random or simple, it’ll look more interesting in graphic form and can be a fun way to fill in gaps on your content calendar.

    15. Publish holiday-themed content

    People love the holidays! And we don’t just mean Christmas and New Years. You can also create fun and relevant content around Arbor Day and even National Pancake Day. 

    There are lots of ways to be creative here. Share how kids can create holiday crafts using your items. Showcase your products in holiday-themed decor. Or tie the holidays into a promotion or giveaway. 

    16. Share event and conference coverage

    Conferences and events bring together people from all over to learn about an industry or topic and connect with like-minded individuals. But not everyone can attend every conference! 

    So if you’re attending an event that you think your audience would find valuable, share what you’re learning with them. Live Tweet valuable quotes, take pictures, and post quick videos, as long as you stick to the recording/publishing rules of the convention. This will provide value, establish you as an expert, and show customers and clients that you’re investing in your growth.

    17. Virtual tours and 360-degree videos

    Virtual tours and 360-degree videos are a powerful way to showcase the features and benefits of your products. Of course, this will be somewhat industry-dependent. 

    Are you a realtor? Do you sell renovated camper vans? Do you offer staging services? Virtual tours are perfect. 

    If you sell complicated or custom products, 360-degree videos might also be an excellent option. Or, you could even share virtual tours of your workspace or warehouse.

    18. Podcasts and audio content

    ​​If you host a podcast — or were a guest on one — share intriguing clips on social media! You can also turn these into videos by simply overlaying the audio on top of a brand-related image or even just your logo. 

    The goal here is to reuse content in as many ways as possible. Yes, you want to encourage people to download and listen to your podcast, but pulling short clips for social media posts gives you another way to take advantage of the work you’ve already done.

    19. How-to guides that demonstrate expertise

    How-to guides help you share information, updates, and tutorials with your audience. Typically, you’d want to create guides on your website first, either as a blog post or as a digital download like a PDF. 

    What would make the most sense for your business? Perhaps it’s a digital cookbook of recipes that use your handcrafted spice blends. Maybe it’s an eBook about creating a household budget. Or perhaps it’s simply an instruction manual for assembling your product.

    Style Girlfriend free guide on their website

    Then, share these resources on social media and encourage followers to read them. You can also tie this into an email marketing strategy by asking for an email address to access the guide.

    20. Live video content (live streaming)

    With live video, you can connect with your followers in real time, making yourself and your business much more relatable. Host live Q&A sessions, demonstrate your products, or show a behind-the-scenes look at your process. When possible, announce your upcoming livestream ahead of time so that people can add it to their calendar.

    21. Employee spotlights

    Employee spotlights put a face and name behind your brand. Depending on the number of employees you have, you could turn this into a series, highlighting a different one every week or month. Share pictures and videos, ask questions, and even conduct a full interview if it makes sense for your business.

    22. Company milestones and updates

    You know those little celebrations you have in the office? The literal bulletin boards with media placements you’re proud of? The announcement at your founders meeting that you finally broke a huge sales goal? 

    Many of the things that are exciting to you, will be exciting to followers — especially those who are most connecting with and truly championing your brands. 

    No, you may not want to share that, “It’s been 4 days without an accident!” But did you just hit order number 1,000? Shout it out! 

    23. Breaking industry news

    This is, perhaps, one of the easiest ways to fill a content calendar. Since it’s not original content, it likely won’t have as far of a reach as other kinds of posts, but it keeps you on the minds of followers and maintains an active account. Set up Google Alerts with keywords related to your company (put your company name itself in there, too, so you can find out how folks are talking about you). Then, as particularly compelling stories come out, share them to your feed with a sentence or two about your thoughts.

    Frequently asked questions about posting on social media

    How can I make my social media posts stand out?

    To make your social media posts stand out, you can:

    • Use high-quality images and videos
    • Use engaging captions and calls-to-action
    • Use relevant hashtags and keywords
    • Engage with your followers and respond to comments
    • Use a consistent brand voice and aesthetic
    • Use different types of content, such as images, videos, and GIFs
    • Use interactive features, such as polls and quizzes
    • Use social media tools like Jetpack Social for scheduling, analytics, and tracking

    How often should a business post on social media?

    The frequency of social media posts will vary for each business depending on the industry and target audience.

    However, it’s generally recommended to post at least once a day on platforms like Facebook and Instagram, and more frequently on platforms like Twitter and TikTok. It’s also important to consider the engagement level, and adjust your posting frequency accordingly.

    Jetpack Social: the well-known secret to automating social media posts on WordPress

    Jetpack Social is a powerful plugin that enables businesses to share their website content on all of their social media channels from one place, through an automated “set it and forget it” system that’s easy to set up.

    Jetpack Social saves you time and effort by automating your social media sharing, so you can focus on creating high-quality content.

    Whether you’re a blogger, a merchant, or a small business owner, Jetpack Social is the perfect solution for automating your social media posting on WordPress.

    So, why wait? Try Jetpack Social today and take the first step towards building a stronger, more engaged social media presence.

  • How to Edit & Customize Your WooCommerce Product Pages

    The product page is crucial to the sales process. It’s where the shopper decides to proceed and purchase the item or leave with no guarantee of return. Your goal as an online store owner is to get site visitors to your product pages, then have them take the final steps of Add to Cart and Checkout. 

    To that end, it’s essential that your product pages do the best possible job of promoting the item being sold. The WooCommerce default product template is clean and professional, giving you a solid foundation for your page that you can build upon using the methods below.

    How to optimize your WooCommerce product page template

    There are a number of ways you can customize your WooCommerce product pages or template. Some methods are included within WooCommerce. For others, you’ll need an extension. You can also use the Site Editor or make customizations manually. Let’s take a closer look at each option. 

    How to customize your WooCommerce product page using built-in features

    Many product page optimizations can be done without any add-ons or coding. High-quality photos, informative descriptions, and key product info make it easier for the visitor to feel comfortable buying the product. 

    Enable reviews and ratings to build confidence. Set up related products, cross-sells, and upsells to increase average order size and make it easier for customers to discover new items. Include customer testimonials in your product descriptions or tabs for social proof.

    Once you’ve optimized your page content, you can further enhance your product pages by using WooCommerce extensions, editing your product page template with the Site Editor, and manually customizing them with code and hooks.

    How to customize your product page using WooCommerce extensions

    An extension is a WordPress plugin built specifically to provide additional functionality to WooCommerce stores. Below are some WooCommerce extensions that you can use to provide extra product information, upgrade the shopping experience, and extend your page beyond its default features. You can find even more extensions for further customization in the official WooCommerce extension library.

    1. Advanced Product Variation for WooCommerce

    Variable products are items with options like size and color — choices that the shopper makes before checking out. On the front end, WooCommerce displays a dropdown for each attribute (like size or color) with a list of available variations below (like Small, Medium, or Large).

    example of variable product

    For a more visual approach, Advanced Product Variation for WooCommerce lets you showcase product variations with swatches (colors, images, and text), galleries, and tables. You can even include videos in your swatches.  

    adding swatches to product variations

    Variation swatches show on the Product page or the main Shop page, based on the settings you configure. You can create swatches by leveraging existing product images and featured images. 

    example of product page with variation swatches

    You can also customize the product gallery layout, moving it from its default position below the featured image over to the left side.

    options for gallery position

    Learn more about Advanced Product Variation for WooCommerce.

    2. WooCommerce Tab Manager

    WooCommerce product page tabs appear beneath the Add to cart button, and allow you to showcase additional information while keeping key elements like title and price above the fold.

    example of tabs in WooCommerce

    This additional information can include product materials and ingredients, weights and dimensions, size charts, pricing tables, delivery times, shipping fees, how-to videos — anything that will help the customer feel confident making their purchase.

    With WooCommerce Tab Manager, you can rename, reorder and remove the default tabs  — Long Description, Additional Info, and Reviews â€” and customize this section by creating your own global, category-wide, and product-specific tabs. 

    example of custom tabs in WooCommerce

    Use the plugin to set a default tab order that can be overridden at the product level. With a drag-and-drop interface, there’s no need for you to modify theme files or get into the code.

    backend interface for creating new tabs

    If you already have custom tabs through other plugins, WooCommerce Tab Manager detects them, giving you the option to show or hide them. A major benefit of this plugin is that the content in your tabs is included in your site search results.

    Learn more about WooCommerce Tab Manager.

    3. Product FAQs

    Frequently asked questions, or FAQs, are a user-friendly way to organize and present product information to your visitors. With the Product FAQs extension, you can add a dedicated FAQ tab for each product with unlimited questions and answers. 

    The plugin works with all product types, and adds an FAQ section when you’re creating or editing a product page. 

    FAQ box for an individual product

    On the front end, the FAQs are displayed in accordion style with animation. 

    Learn more about Product FAQs.

    4. Composite Products

    With Composite Products, your customers can build kits or configurable products.

    For each composite product, you’ll allow customers to choose between pre-determined selections from existing inventory. You can assign extra fees to specific selections and allow certain categories to be optional. 

    example of configurable product kit

    For example, a necklace might contain options for the chain (silver, gold), the stone (ruby, garnet, emerald), and an optional charm (multiple shape choices).

    For each of the kit’s building blocks — chain, stone, and charm — you can select SKUs the customer may choose from or let them pick any option from an entire product category.

    Conditional logic lets you show or hide options based on previous choices (e.g. the red shirt is not available in specific sizes), and component-level tracking supports advanced inventory management. If you have a massive number of options, you can create views with sorting, filtering, and pagination for easier shopping.

    Learn more about Composite Products.

    5. Product Add-Ons

    The Product Add-Ons extension lets your shoppers customize and upgrade their purchases through free and paid extras. 

    Add-ons could include warranties, higher-quality materials, priority shipping options, or personalizations like custom monogramming and engraving. If people often buy your products as gifts, you could add a wrapping option or gift message field.

    Nonprofits could allow shoppers to include a donation with their purchase and make the donation in honor of someone by adding a name and message.

    If you have WooCommerce Bookings, Product Add-Ons lets you create options for extra services (hair rinse after haircut), or VIP upgrades for special seating and access. It also works with WooCommerce Subscriptions so that you can offer add-ons to your subscription products.

    Your add-ons can include custom fields displayed as text boxes, dropdowns, checkboxes, image-based selections, and custom price inputs for items like tips and donations. These fields can be applied to your entire catalog or assigned to specific products.  

    adding additional fields to a product page

    Once you’ve set up your add-ons, they appear on product pages above the Add to Cart button in the order you choose.

    beanie product page with the option to add gift wrapping

    Learn more about Product Add-ons.

    Customize your product page using the Site Editor

    With block themes, you can customize your product page’s appearance by editing the Single Product page template in the Site Editor. In the WordPress admin, go to Appearance → Editor. 

    Choose “Browse all templates” from the dropdown menu at the top center of the page. Choose the Single Product template from the list that appears. 

    finding the single product template

    The default page layout contains the header, footer, and WooCommerce Single Product block, which displays product info, price, and image elements. 

    You should back up your site before making edits to your product page template. Certain changes — for example, accidentally deleting the Single Product block and saving — will make it impossible for your visitors to shop or buy.

    WooCommerce single product template shown with default blocks

    How to edit the Single Product page header and footer templates 

    The Template tab under Settings (the gear icon in the top right) contains links to manage the Header and Footer. Click either option to manage that part of the page template. You can also click into an area of the template directly to start editing. Remember that any changes made here will be applied to all products using the template. 

    In the header, you can edit the Site Title and the links in your main navigation menu, and even add new blocks to customize your product page specifically. Use this space to add images, text, and more to enhance the selling power of your product page. You could add a promotional or policy note or banner to let shoppers know about a current sale or how to get free shipping on orders over a certain amount. 

    You can do something similar with the product page footer. For instance, add a customer testimonial or information about a Satisfaction Guarantee policy.

    How to customize the Single Product body

    The Single Product block displays a bold warning at the top, “Do not remove this block! Removing this block will cause unintended effects on your store.” Take this message seriously!

    WooCommerce Single Product block

    However, you can add new blocks around the Single Product block to completely customize your product page design.

    Use the + icon to add elements above or below the Single Product block, then include whatever blocks you’d like to customize the page. 

    Use a Paragraph block to include current offers (“Spend $100 or more for free shipping”), a satisfaction guarantee, or anything that will help visitors make the decision to purchase. Add a Video block that gives a behind-the-scenes look at your processes. Or include specific recommended products that you’d like to promote. The sky’s the limit here!

    adding extra blocks to the individual product page

    And for each block, you can edit settings like background color, typography, and spacing to make it truly your own.

    Customize your product page manually (using code and hooks)

    For advanced options — without the cost or maintenance of plugins — you can edit and customize your product page manually using code and hooks.

    Before you make any changes to your files, it’s important that you take the time to back up WooCommerce. If you’re using Jetpack VaultPress Backup, this is done for you automatically, in real time. So if any of your changes cause your site to go down, you can restore a backup in just a few clicks, even if you don’t have access to your WordPress dashboard.

    And you’ll also want to use a child theme to make these changes. Otherwise, when you update your theme or WooCommerce down the road, you might lose all of your customizations. Another option is to use a plugin like Code Snippets, which lets you add custom code to your site in snippets that you can turn on and off as needed. 

    Customize WooCommerce product pages using hooks 

    Hooks allow site owners to add code and customize pages without the dangers associated with editing core files. There are two types of hooks: actions and filters. Actions allow you to insert code at specific points, while filters allow you to manipulate and return a variable. 

    For example, you can use actions to add a new checkout field, then use filters to change the labels or placeholders of existing checkout fields. You can find the list of available WooCommerce hooks here.

    Here are a few more examples of changes you can make to your product pages using hooks:

    Customize WooCommerce product pages using CSS

    CSS is a coding language used to control design elements (as opposed to JavaScript, which controls actions). You can use it to modify the design of your product pages. Once you’ve learned the basics of CSS, you can customize everything from colors and fonts to sizes of individual elements. 

    You can easily add CSS code by going to Appearance → Customize → Additional CSS in your WordPress dashboard. For example, if you wanted to change the font color of your product titles, you would use the following code, replacing the color’s hex code with your own:

    .woocommerce div.product .product_title {
    
    color: #222222;
    
    }

    If you wanted to change the color of the Buy Now button, you would use this code, again replacing the hex code with your color of choice:

    .woocommerce div.product .button {
    
       background: #000000;
    
    }

    You can see more examples in this article from WooCommerce.

    How to boost your product page loading speeds

    Fast loading sites are important to both visitors and search engines. People don’t want to wait around and search engines don’t want to send people to underperforming sites.

    Literally every second counts — a one second delay in loading times can reduce conversion rates by 20%! 

    Jetpack Boost is the top website speed and performance optimization solution for WordPress. It has a quick and easy setup process — no developer needed — and boasts results that beat the top five performance plugins in a head-to-head test.

    After you install the free plugin, you can run an audit and get a report on your current site performance scores. These will serve as benchmarks you can use to measure improvements to your Core Web Vitals, metrics that Google uses to gauge your site’s user experience and technical performance.  

    A simple dashboard makes it simple to configure optimization options via one-click activations. This gives you the flexibility to test the performance modules individually and configure Jetpack Boost to fit perfectly into any scenario.

    Jetpack Boost settings

    For more ways to speed up your product pages, check out Nine Ways to Speed Up a WooCommerce Store.

    Frequently asked questions about customizing product pages

    Still have questions? Take a look at the answers to some common ones below.

    What is the best way to customize a WooCommerce product page?

    There is no single best way. The best way for you depends on your comfort level with the various approaches. 

    The Site Editor puts all the power in your hands, letting you drag and drop elements to create your own, personalized product page without having to edit any code at all. This is an excellent solution for beginners and advanced users alike!

    If you’re looking for specific additional functionality, WooCommerce extensions are a great option. They’re vetted and approved by WooCommerce, and give merchants advanced customization options without custom code

    Manual customization and coding offer the greatest flexibility, but also require the most technical knowledge. Compared to using blocks or extensions, this method has the greatest chance of causing an issue or even breaking the site. 

    Should I back up my site before editing the product page template?

    Yes. Unlike pages and posts, site templates don’t have a revision history. Back up your site before making any updates to your product page template, so you can do a quick restore if there’s any issue. 

    Jetpack VaultPress Backup is a real-time WordPress backup plugin, which means that your site isn’t just backed up on a daily schedule or when you make a manual copy. Instead, it’s saved automatically every time you make a change to your site, a customer places an order, or a visitor leaves a comment. Any time something important happens? It’s saved! 

    Ecommerce stores can’t afford to lose data, especially when that data represents real-world customer orders. Don’t settle for solutions that only save your site occasionally or require a lengthy customer service interaction to restore things when there’s an issue.

    With Jetpack VaultPress Backup, you can restore your site with one click and get back online quickly. With the Jetpack mobile app, you can restore any time, anywhere, even if the site is completely down. 

    The best part for store owners? All of your customer data and orders are protected and stay current.

    What are some best practices for customizing a WooCommerce product page?

    Regardless of the method you use to edit and customize your WooCommerce product page, follow these best practices to protect yourself, your site, and your customers.

    Back up your site first, every time. When you add or update site code, a single error can cause issues. You need to be ready to restore the site ASAP, without losing a single order. Jetpack VaultPress Backup is the best real-time, automatic backup solution for WordPress.

    It’s done for you, so you don’t even have to worry about saving your site before experimenting with changes. 

    Make your code changes outside of your parent theme files. When you edit a theme or  plugin file, those changes will be overwritten and undone the next time that the theme or plugin is updated. 

    There are multiple ways to add code to your site without editing the theme or plugin files directly. You can use the Code Snippets plugin to add, edit or remove elements on a page, and style your site via the Additional CSS field in the Theme Customizer. You can also create a child theme. The important thing is to make your changes where they won’t be affected by theme or plugin updates.

    Keep an eye on speed. No matter how you customize your product pages, you want to make sure that your site speed doesn’t suffer. With Jetpack Boost, you can instantly improve key areas that improve both user experience and Google’s perception of your site quality. A faster site means customers will be more likely to stay and Google will be more likely to recommend you in the search results. A quick boost can go a long way. 

  • Choosing the Best WordPress Lazy Load Plugin: Top 7 Plugins Compared

    Adding visual elements to your site is an easy way to make your pages more engaging. You might include marketing banners, product images, galleries, or video tutorials. Unfortunately, including a bunch of files can weigh your site down and result in slower performance.

    Lazy loading is a great way to relieve pressure on your server while increasing the loading speed of your website. It delays images from rendering for visitors until they’ve scrolled down to their place on the screen. Better yet, some lazy load plugins are free, easy to use, and come with extra features for website optimization. 

    In this post, we’ll explore some of the best lazy load plugins for WordPress. Then, we’ll show you how to choose the ideal tool for your needs. 

    The seven best lazy load plugins for WordPress

    Let’s take a look at seven of the best lazy load plugins for your WordPress website!

    1. Jetpack Boost

    Jetpack Boost homepage design

    Jetpack Boost is an all-in-one optimization plugin that increases your overall website loading speed. Not only will you have an efficient lazy loading tool, but you can also enjoy plenty of other features to improve your web performance. 

    What’s more, Jetpack is one of the most beginner-friendly options on this list. With a clean, intuitive dashboard, it couldn’t be easier to navigate your way through. 

    What really sets Jetpack Boost apart is that it’s built specifically to help you improve metrics like First Contentful Paint (FCP) and Largest Contentful Paint (LCP). Therefore, using Jetpack Boost can help you improve your Core Web Vitals, user experience, and search engine rankings.

    Key features of Jetpack Boost

    • Simple reports with an instant performance score across mobile and desktop devices
    • An intuitive, clean dashboard to view your performance and adjust your settings
    • Additional optimization tools that generate critical CSS, among other things

    Pros of Jetpack Boost

    • It provides SEO insights to enhance your search rankings and Core Web Vitals.
    • It optimizes CSS loading and defers non-essential JavaScript.
    • You can automate critical CSS with a premium plan.
    • It’s made by Automattic — the people behind WordPress.com — so you can rest easy knowing it’s reliable and compatible with most popular themes and plugins.

    Cons of Jetpack Boost

    Ease of use

    Jetpack Boost is incredibly easy to set up and maintain. You can install Jetpack Boost just as you would any other WordPress plugin. Then, simply head over to your dashboard and toggle on each of the settings individually.

    Price

    You can access many of its features through the free Jetpack Boost plugin. To use the automated Critical CSS feature, you’ll need to upgrade to a premium plan, starting at $20 per month.

    2. Smush

    Smush homepage design with an illustration of their features at work

    Smush is a popular image optimization plugin, with over one million active installations. Besides lazy loading in WordPress, Smush also offers image optimization, compression, and resizing tools. 

    Like Jetpack, Smush is very easy to use. In fact, once it’s installed, you can get it up and running in just a few seconds. Better yet, Smush is compatible with many themes, plugins, and browsers, so you can go about your business as usual. 

    Key features of Smush

    • Image optimization, compression, and resizing tools
    • Automatic file compression as you upload images to WordPress
    • The ability to view all Smush image data directly in your image blocks

    Pros of Smush

    • You can choose to optimize images individually or in bulk (up to 50 images at a time).
    • You can limit the output locations of media like widgets, content areas, and thumbnails.
    • Smush Pro comes with Smush CDN and WebP conversion, and it stores backups of your original images.

    Cons of Smush

    • Smush skips images over 5MB, which could be problematic for some websites like those with portfolios.
    • The compression options with the free version may be too simplistic for some users.

    Ease of use

    Getting started with Smush is super simple. You can activate the features with just the click of a button. This instantly defers the loading of images below the fold. Simply head to the plugin’s settings, visit the Lazy Loading section, and hit Activate.

    Price

    You can use the free version of the plugin or opt for Smush Pro, starting at $7.50 per month. Additionally, you can test the tool first with a seven-day free trial.

    3. Lazy Loader

    Lazy Loader hero image with three "Zs" on a blue background

    Lazy Loader is a simple, straightforward plugin that does exactly what it says. You won’t get any fuss or frills with this tool. Instead, you can simply enable/disable lazy load on certain elements and add a spinner animation to loading content. 

    Additionally, Lazy Loader can be applied to many types of content, including videos, iframes, audio content, images, and even backgrounds, scripts, and page styles. Therefore, while there are no fancy features to play around with, Lazy Loader is certainly a robust tool.

    Key features of Lazy Loader

    • The ability to lazy load background images and scripts with manual modifications
    • A checkbox to enable/disable lazy loading for specific posts and pages 
    • The ability to use the native lazy loading feature in browsers to modify iframes and images

    Pros of Lazy Loader

    • It defers the loading of all types of content, from page styling to iframes and scripts.
    • You can disable lazy loading for images with specific CSS classes, and add filters for the plugin to process.
    • It utilizes a “noscript” element as a fallback for disabled JavaScript.

    Cons of Lazy Loader

    • You’ll need to modify the markup to use it for background images not inserted with inline styles and scripts.

    Ease of use

    Lazy Loader requires a little more technical expertise if you plan on using it for background images not inserted with inline styles and scripts. But for any other elements, Lazy Loader is pretty easy to set up. Under Settings → Media, configure the exact options that you want, and the plugin gets to work immediately. 

    Price

    Free.

    4. Optimole

    Optimole hero image with a rocket illustration

    Optimole is a full-service cloud-based system that offers lazy loading and resizing. It also enables you to optimize and compress images in WordPress. Plus, you can even take advantage of the Optimole CDN for faster content delivery. 

    A unique feature of Optimole is that it replaces all image URLs with cloud-based URLs and compresses them on the fly. Moreover, you can enjoy extra features like format-based optimization, smart cropping, and watermarks.

    The free version can handle 5K monthly visitors from over 200 locations. But if that’s not enough, you can always upgrade to the Pro version to accommodate 50K visitors per month. 

    Key features of Optimole

    • A global CDN at no extra cost
    • Full support for page builders 
    • Cloud image library support and AVIF support for lower image sizes

    Pros of Optimole

    • It doesn’t affect layouts, so you can improve your User Experience (UX).
    • Optimole supports all image types including WebP and retina.
    • It optimizes in real-time based on each visitor’s device.

    Cons of Optimole

    • Lazy loading isn’t as effective as other tools (sometimes the image is replaced with a blurred image momentarily).
    • The Pro option is pricier than others on this list.

    Ease of use

    Optimole is a fully automated plugin. Therefore, you can “set and forget” the settings, and the tool works in the background of your site, requiring very little ongoing maintenance. Plus, you can uninstall Optimole just as easily, and your site will be left completely intact.

    Price

    There is a free version of the Optimole tool that is very functional. Alternatively, you can upgrade to accommodate more traffic, use the tool on unlimited sites, and access email support. Paid plans start at $19.08 per month.

    5. LazyLoad by WP Rocket

    LazyLoad hero image with an orange background and illustrations of images

    LazyLoad is a powerful yet lightweight plugin with scripts weighing less than 10KB. We say powerful because LazyLoad takes care of all assets on your site, including avatars, thumbnails, iframes, background images, YouTube videos, and more.

    It injects JavaScript into your header and delays images without using any JavaScript library like jQuery. With fewer HTTP requests, LazyLoad provides another way to boost speed and improve your LCP score.

    Key features of LazyLoad

    • The ability to lazy load images in post content or widget text
    • Filters that deactivate lazy loading on some pages
    • Automatic (or manual) lazy loading for background images

    Pros of LazyLoad

    • It targets specific goals such as improving metrics on PageSpeed Insights or boosting First Input Delay scores.
    • It uses a “transparent” placeholder for images (as opposed to blurring images).
    • It replaces YouTube iframes with a preview thumbnail.

    Cons of LazyLoad

    • Reviews claim that LazyLoad can disrupt image placement, layouts, and other design elements on your site.
    • It isn’t the most mobile-friendly plugin.
    • It receives less frequent updates than other lazy load plugins.

    Ease of use

    LazyLoad is easy to install and configure if you stick with the basic options. But, if you want to achieve greater control, like excluding certain pages from lazy loading, you’ll need to manually edit your functions.php file

    Price

    LazyLoad is a free plugin by WP Rocket. Additionally, if you already have the WP Rocket Cache plugin, LazyLoad is included.

    6. Lazy Load for Videos

    Lazy Load for Videos image with logos and a video image

    Lazy Load for Videos is one of the best lazy load plugins for video-heavy websites like portfolios or sites with embedded content from YouTube or Vimeo. It works by substituting any embedded video with a clickable image preview, which defers JavaScript.

    Better yet, YouTube videos are also loaded in a privacy-enhanced mode. Plus, you can enjoy plenty of customization options, like tweaking the Play button or hiding related video suggestions once the video ends. 

    Key features of Lazy Load for Videos

    • No vendor lock-in and no custom shortcodes, so your videos will still work if you decide to stop using the tool 
    • GDPR compliance, enabling you to display a privacy disclaimer above preview images
    • A custom color for your Vimeo player and progress bar

    Pros of Lazy Load for Videos

    • You can set your embeds to autoplay if you prefer.
    • You can hide annotations and YouTube controls to create a clean, neat space.
    • It includes extras like pre-roll/post-roll advertisements that you can apply to all videos.

    Cons of Lazy Load for Videos

    • There are some compatibility issues with the Jetpack “Shortcode Embeds” extension, BuddyPress, and the YouTube Embed WordPress plugin.

    Ease of use

    Like other plugins on this list, Lazy Load for Videos is super simple to install and manage. Plus, it’s easy to turn the plugin on and off at any time.

    Price

    Free.

    7. a3 Lazy Load

    a3 Lazy Load plugin hero image with icons of a clock and car

    Finally, a3 Lazy Load delivers an exclusive lazy loading service. It’s very easy to set up, even for beginners, and it’s mobile-friendly. 

    While the plugin enables your pages to load faster, you can also toggle the setting for videos and iframes, thanks to a3 Lazy Load’s extensive customization options. Better yet, you’re able to include/exclude particular elements and even add some smooth transition effects like fade and spinner.

    Key features of a3 Lazy Load

    • The ability to use the plugin with content-heavy sites (it’s been tested with 1000 images)
    • Lazy loading for thumbnails, avatars, widgets, custom post types, and more
    • Full compatibility with WordPress embeds

    Pros of a3 Lazy Load

    Cons of a3 Lazy Load

    • It only works with media that’s been added using core WordPress functions and won’t work with any custom written functions.

    Ease of use

    a3 Lazy Load is super easy to set up and customize for all user levels.

    Price 

    There’s a free version available, or you can upgrade to premium. Paid plans start at $24.99 per month for use on five sites. What’s more, you can try a3 Lazy Load free for 14 days and easily cancel the subscription if you decide against it.

    The best lazy load plugin: comparison table

    Easy to use Additional image optimization features Fully compatible with popular plugins Free version available 
    Jetpack Boost Yes Yes Yes Yes
    Smush  Yes Yes Yes Yes
    Lazy Loader Yes No Yes Yes
    Optimole Yes Yes Yes Yes
    LazyLoad Yes No Yes Yes
    Lazy Load for Videos Yes No No Yes
    a3 Lazy Load Yes No Yes Yes

    Verdict: what’s the best lazy load plugin for WordPress?

    The best lazy load plugin depends on your website needs. For instance, if you have many high-quality images on your site, you might prefer a plugin that offers image optimization features like compression and resizing. 

    Additionally, if most of your media files are videos or WebP formats, then it’s important to find a plugin with this capability since some tools will only work with JPEG/JPGs and PNGs. 

    With Jetpack Boost, you can tick multiple checkboxes. While you’re able to enjoy extra features like Critical CSS and deferral of non-essential JavaScript, Jetpack Boost isn’t going to weigh your site down with a bunch of tools you don’t need. Instead, these features are used to enhance quick content delivery along with lazy loading.

    Better yet, you couldn’t ask for an easier tool to set up and configure. Once it’s installed on your site, simply head to the dashboard, where you’ll use toggles to enable/disable each of the settings. Then, Jetpack Boost works in the background of your site, requiring little to no ongoing maintenance. 

    How to choose a lazy load plugin

    Now that you know the best lazy load plugins for WordPress, here are some ways to narrow down the right option for your site.

    1. Make sure it matches your skill level

    Some users might want a more hands-on tool with lots of control configurations and customization options. But for a beginner, all these settings can be intimidating. That’s why finding a lazy load plugin that matches your skill level is important.

    If you don’t have a lot of tech experience, you’ll probably prefer a tool that’s easy to install and works automatically. There are plenty of options with “set and forget” options, so there’s no need to tinker around with complicated features and ongoing maintenance. 

    2. Check for additional features

    If you’re looking for a lazy load plugin, you might simply want a method to delay the loading of images below the fold. Some of these plugins, like LazyLoad and Lazy Loader, do just what they say on the box.

    But, for more complex, content-heavy websites, you can benefit from tools that provide additional features to enhance your content delivery. For instance, if you have a portfolio, you might want optimization and compression tools. Meanwhile, photography websites could find a watermarking feature useful. 

    3. Find out which image formats and sizes are supported

    Typically, most plugins will accommodate popular image formats like JPEGs and PNGs. But not all tools offer lazy loading for animated images like GIFs or videos. Plus, some newer image formats like WebP and Retina might be ignored.

    That’s why it’s important to ensure that the lazy load plugin you choose can support all the file types you intend to use on your website. Additionally, keep in mind that the free versions of some plugins are often a lot less powerful. Therefore, while a free lazy load plugin may seem like the best option in the short term, it might not work on large media files.

    4. Make sure it’s compatible with other plugins on your website

    The last thing you want to do is to get started with a lazy load plugin only to find that it isn’t compatible with other plugins essential to the running of your site. For example, if you own an online store, you probably rely on a platform like WooCommerce. Meanwhile, forum sites utilize specialized plugins like bbPress to gain functionality. 

    If the plugin isn’t compatible with other software you’ve installed, you risk breaking your site. Therefore, it’s crucial to pay close attention to the integrations and compatibility of your preferred tool. A good example of this is the Lazy Load for Videos plugin, which doesn’t work with a specific extension of Jetpack.

    In general, Jetpack Boost, because it’s made by the people behind WordPress.com, will work reliably with most themes and plugins.

    Frequently asked questions about WordPress lazy load plugins

    Now that you know how to choose the best lazy load plugin for your site, here are some of the most popular questions about lazy loading.

    What makes a good lazy load plugin?

    A good lazy load plugin can delay loading your images below the fold. Doing so speeds up the delivery of content that’s immediately visible to your users. While this is the default feature, you can also find lazy load plugins that offer additional features like image optimization, compression, and resizing tools.

    On top of that, the best lazy load plugins are automated, easy to use, and compatible with popular plugins like WooCommerce. Plus, it’s vital to find a tool that doesn’t damage your UX or adjust the image quality too visibly since this can be frustrating for your visitors.

    How much does a lazy load plugin cost on WordPress?

    There are plenty of free lazy load WordPress plugins. But many providers also offer a paid option that might include extra features or handle larger file sizes. It’s important to note that some free tools can be very limited.

    That’s why Jetpack Boost is a great option. There’s a completely free version that is super simple to configure. Once you’ve set it up on WordPress, you can lazy load images, defer non-essential JavaScript, and optimize Critical CSS. These settings enable you to speed up content delivery without spending a penny.

    Is it easy to set up a lazy load plugin on WordPress?

    Lazy load plugins vary in their ease of use. You’ll find more complex tools that require a more hands-on approach and configuration. But you can also opt for simple lazy load plugins that are easy to install and use. 

    One of the best features of Jetpack Boost is that you can set it up with just a few clicks. Then, use toggles to enable or disable individual features. Plus, you can deactivate the plugin at any point without damaging your site.

    What other features can I get with a lazy load plugin?

    You can find lazy load plugins that offer a streamlined service. But if you want to access additional features, it’s worth choosing a tool that offers other features to improve the performance of your site.

    Jetpack Boost is a great lazy load plugin because the lazy load service is simple but powerful. Better yet, you’re able to defer non-essential JavaScript, optimize Critical CSS, and with paid plans, you can even automate critical CSS. You can also pair Jetpack Boost with Jetpack’s CDN to further optimize and stabilize your web performance.

    Boost your site’s performance with a lazy load plugin

    While adding images is a great way to spruce up your site, too many photos can disrupt your UX with slow loading times. Fortunately, with the right lazy load plugin, you’re able to deliver content faster and keep your site running smoothly.

    To recap, here are some of the top WordPress lazy load plugins:

    1. Jetpack Boost: An easy-to-use plugin with additional features for speed optimization.
    2. Smush: A popular image optimization plugin with compression and resizing tools.
    3. Lazy Loader: A simple, fuss-free way to lazy load your images.
    4. Optimole: A full-service cloud-based system that includes a CDN.
    5. Lazy Load by WP Rocket: A lightweight but powerful plugin that helps you target specific goals.
    6. Lazy Load for Videos: The best option for video lazy loading, with plenty of customization tools. 
    7. A3 Lazy Load: A user-friendly plugin exclusively dedicated to lazy loading.

    Overall, using Jetpack Boost is the best plugin to implement lazy loading on your site. Plus, with a bunch of extra features, you can optimize your entire web performance. Get started with Jetpack Boost today!

  • VaultPress Backup: Your Agency’s Superhero Against Website Crashes

    If you build WordPress sites, you know the importance of keeping them up and running smoothly. But let’s face it, even the best-laid plans can go awry. That’s why having a reliable backup system in place is crucial — and that’s where Jetpack VaultPress Backup comes in. This powerful plugin is the ultimate solution for your client’s websites, providing peace of mind for everyone.

    Picture this: you’ve just finished building a stunning website for your client, and everything is going great. But then, a hacker strikes out of nowhere, and the site goes down. With traditional website backups, it could take all day to restore the site to its previous state. 

    You’ll have to work to find an uncompromised version that you can restore, which sometimes involves digging through files or working with the host’s support chat. Then, you’ll need to use a tool like FTP and phpMyAdmin to restore both the database and files. And if you don’t have an uncompromised backup on hand, then there’s even more work involved to get the site to its most recent version.

    But with VaultPress Backup, you can restore the site in minutes, even if it’s completely down and you’re not near a computer. With real-time backups, everything that happens on the site is saved, and you can reference the activity log to determine the exact point to which you want to restore. This enables you to protect the site’s assets, even if you recently made changes or a client is constantly adding new posts. 

    The benefits of VaultPress Backup don’t stop there. As an agency, you know that time is money. And with traditional website backups, you could be wasting a lot of both. Hosting providers often charge extra for backups, and backing up and then restoring a site can be a time-consuming process.

    With VaultPress Backup, you get top-of-the-line backup services at a fraction of the cost, and one-click restores mean you can get your client’s website back up and running in no time.

    And it’s not just your agency that benefits from Jetpack VaultPress Backup. Your clients will love the peace of mind that comes with knowing their website is protected and that their critical data — like orders from a WooCommerce website — is safe and sound.

    Frequently asked questions

    Now, let’s answer some FAQs about website backups and how Jetpack VaultPress Backup stacks up against traditional hosting provider backups.

    What is a website backup?

    A website backup is a copy of all the files and data on a website, including the database. This can be used to restore the website if something goes wrong, such as a hack or a coding error.

    What does a typical hosting provider back up, and how often?

    Many hosting providers only back up a website once a week or less frequently. Some only back up certain parts of a website, such as the database. This can mean that if something goes wrong, you’re unable to restore the site in full.

    What does VaultPress Backup back up, and how often?

    VaultPress Backup creates full copies of a website, including the database and all files, in real-time, so you always have the most recent version of the site. This means that every new comment, post, order, or other important change is secured safely as soon as it happens. 

    What amount of control do you have over host backups vs. backups from VaultPress Backup?

    With a traditional hosting provider backup, you often have limited control over when and how backups are created and restored. But with Jetpack VaultPress Backup, every change is saved in real-time, and you can choose which elements of the site you want to restore.

    What are the chances of lost or corrupted data for each type of backup?

    The chances of lost or corrupted data can be higher with traditional hosting provider backups, as they may not be created as often and may not include all parts of the website. With VaultPress Backup, real-time backups minimize the risk of lost or corrupted data. VaultPress Backup stores copies of your backups in the cloud, too, which means you’ll never lose any site or store data.

    Jetpack VaultPress Backup is built and maintained by Automattic, the people behind WordPress.com, so it’s designed with WordPress sites as the sole focus. With this level of expertise, you can rest assured that it’s a stable, reliable solution for every site.

    How long does a hosting provider usually keep backups vs. VaultPress Backup?

    It depends on the hosting provider, but many only keep backups for a few weeks or even less. Jetpack VaultPress Backup retains a history only limited by the generous amount of storage included with your plan.

    Become a partner agency today

    Jetpack VaultPress Backup is a must-have for any WordPress developer. The plugin provides top-notch backup services and peace of mind for you and your clients. And most importantly, it saves your agency time and money.

    The real-time backups and one-click restores make it a step above traditional hosting provider backups. And with available security scans, spam filtering, and malware protection provided by Jetpack’s suite of tools, Jetpack can become your all-in-one solution for website management.

    Don’t wait any longer! Install VaultPress Backup on your client’s websites and experience the benefits for yourself. And when your client’s site goes down, you’ll be the hero who saved the day, just like Batman saving Gotham. VaultPress Backup is your trusty sidekick in the fight against website crashes and data loss. Protect your client’s websites, your agency’s reputation, and your peace of mind by using VaultPress Backup.

    To get started today, join our Agency Program and unlock up to 60% off all our products: https://jetpack.com/for/agencies/

  • How to Access and Edit the Default WordPress .htaccess File

    Every WordPress installation has a selection of “core” files. These are the files behind critical functionality, and one of them is .htaccess. It includes configuration options for your web server. In other words, it’s extremely important.

    If you know how to find and edit .htaccess, you can change your site’s permalink structure, set up redirects, increase security for the dashboard, and make many more tweaks. You don’t even need to know how to code if you follow instructions carefully.

    In this article, we’ll talk about the .htaccess file and how it works. We’ll show you how to locate, access, and edit the file. Finally, we’ll wrap up with some frequently asked questions.

    What is an .htaccess file?

    .htaccess or Hypertext Access files aren’t unique to WordPress. Every Apache web server has an .htaccess file that contains configuration settings for the server. In the case of WordPress, the file also includes instructions for your website’s permalink structure. 

    Here’s how the file looks by default on most websites:

    sample .htaccess file

    We say “most websites” because some hosts customize their clients’ .htaccess files to include additional functionality. Still, the file is always located in the WordPress root directory.

    If you have access to the server, you can locate and edit .htaccess to make critical changes to your site’s functionality. Some of the changes you can implement include:

    • Adding redirects. Implement redirects at the server level.
    • Changing the permalink structure. When you change your website’s permalink structure, these changes are reflected in .htaccess. You can use the file to manually change the URL structure instead of doing so in the WordPress admin panel.
    • Preventing resource hotlinking. If you don’t want other websites to use images or other elements from your website, you can disable hotlinking by modifying the .htaccess file.
    • Configuring access to the website. .htaccess enables you to password-protect directories, whitelist IP addresses for access to the dashboard, and more.

    It’s important to understand that .htaccess is an incredibly delicate file. Since it lets you configure server-level rules, changing the file can break your website if you’re not careful.

    You don’t need to know a specific programming language to edit .htaccess, although PHP knowledge can help. If you follow instructions and copy the necessary code snippets, you can easily modify the file. 

    If you’re not comfortable using code, several plugins can edit .htaccess for you. Most security and redirect plugins work by editing the file without you having to open it. Depending on the changes you want to make, you may be able to use a plugin to edit .htaccess.

    Where is the .htaccess file located in WordPress?

    The .htaccess file is located in the WordPress root directory. This directory contains all of your WordPress core files (like wp-config.php), as well as everything that you upload to your website.

    You can’t access the root directory from the WordPress dashboard. To get access to .htaccess and other similar core files, you’ll need to connect to your server via File Transfer Protocol (FTP) or your hosting control panel.

    Since WordPress is open-source software, you can freely edit all the files in any way you want. In the next section, we’ll show you how to make changes to .htaccess safely (and the same advice applies to all other WordPress core files).

    How to edit your WordPress .htaccess file (3 methods)

    Editing the WordPress .htaccess file requires access to the root directory. But before making any changes, we highly recommend downloading a backup of your .htaccess file. Since .htaccess deals with server configuration settings, any errors in the file’s code can render your website inaccessible. If that happens, you’ll need to restore a previous version of .htaccess, remove the incorrect code, or create a new .htaccess file to reaccess your site. With that in mind, it’s best to play it safe and have a recent backup available.

    Thankfully, backing up the .htaccess file is a pretty simple process. Start by accessing your server’s files via either your host’s file manager or file transfer protocol (FTP) software like FileZilla. Navigate to your website’s root folder, typically called public_html, www, or your website name. Here, you’ll find the .htaccess file.

    If you don’t see that file, you may need to turn on a setting that enables you to view hidden files. This will depend on your host or FTP software. If you’re using cPanel, click the Settings button at the top right, followed by Show Hidden Files (dotfiles) and Save.

    choosing to show hidden files

    With FileZilla, you’ll need to toggle this setting before you connect to your server. All you have to do is go to Server → Force showing hidden files.

    choosing to show hidden files in FileZilla

    Once you’ve found the .htaccess file, download it to your computer and rename it to something you’ll remember, like .htaccess_before-changes. Then, if you do need to revert any changes that you’ve made, you can simply copy the code from this file and paste it into the live version on your server.

    1. Using an FTP client

    The best way to access the .htaccess file is with an FTP client. FTP clients tend to be easier to navigate than file managers in hosting control panels, and they provide more control for interacting with your site’s directories and files.

    It’s up to you which FTP client you use. But you might consider the open-source FileZilla option if you haven’t used FTP before. 

    To connect to WordPress, you’ll need your site’s FTP credentials. You should have received these when signing up for a hosting plan. If not, you can find them in your hosting control panel.

    Once you have the right credentials, connect to your website via FTP. Navigate to the folder that says www, public_html, public, or your site’s name. Those are the most common names for the WordPress root directory. 

    Open the directory, and you should see a collection of files and folders that looks like this:

    list of website files on a WordPress site

    The file we’re looking for, .htaccess, is located in this top-level directory. Once you find it, right-click on the file and select View/Edit (the name of this option may change depending on which FTP client you use). This will open the file using your default text editor.

    Again, before taking this step, make sure you download the file to a safe location so you can restore the code if you make a mistake.

    example of the default .htaccess file

    Any changes that you make to this file need to come before the “# END WordPress” line. To keep things organized, we recommend adding new snippets of code with a line of separation from others. 

    If possible, also add comments like this to identify what each snippet does:

    # This is a comment

    That way, if you return to the file to remove part of its code, you’ll know precisely what each snippet does. When you’re ready, save the changes to the file and close it.

    The FTP client will ask if you want to update the file on the server. Choose the option that says Yes, and that’s it. The changes that you made to .htaccess should be live now.

    2. Using your cPanel

    Editing a WordPress .htaccess file using cPanel is relatively simple since the software includes file manager functionality. But keep in mind the text editor included with the file manager is very bare bones. We recommend using an FTP client instead if you can. 

    If you prefer using cPanel, login to the hosting control panel and look for the File Manager option under the Files section.

    tools in cpanel

    On the next screen, look for a directory called www, public_html, public, or your website’s name. That is your WordPress root directory, and it contains the .htaccess file.

    Right-click on .htaccess and select the Edit option. This will open the file manager’s text editor and enable you to make changes to the file. Again, make sure you have a current version of your .htaccess file on hand that you can restore if needed.

    editing the .htaccess file in file manager

    We included instructions on how to edit .htaccess safely in the previous section. Make sure to review those instructions before adding code to the file to prevent any problems with your server.

    3. Using a WordPress plugin

    If you don’t want to use an FTP client or cPanel to access the .htaccess file, some plugins provide this functionality from the WordPress dashboard. One example is Htaccess File Editor by WebFactory.

    image of Htaccess File Editor in the WordPress repository

    This plugin adds a new WP Htaccess Editor tab to the dashboard. From here, you can use a basic text editor that works only with .htaccess.

    editing the .htaccess file with a plugin

    The advantage of using a plugin to edit .htaccess over a regular text editor is that you may get access to functionality like testing the file before saving. You might also be able to restore backups in case of an error. 

    Other plugins that let you edit .htaccess include Redirection and Htaccess File Editor. In most cases, we recommend using FTP over plugins. But a plugin might do the trick if you only plan on making minor changes to .htaccess.

    How to create a new WordPress .htaccess file

    Creating a new WordPress .htaccess file is relatively simple. Sometimes, you won’t see the .htaccess file if you go to the root folder of your WordPress website. This can happen because WordPress hasn’t generated the file yet.

    Sometimes, WordPress doesn’t generate an .htaccess file until you make changes to your site’s default permalink structure. To do this, go to Settings → Permalinks. The default permalink structure for WordPress is set to Plain. But you might want to change that structure to another, more user-friendly option, like Post name or Month and name.

    updating WordPress permalinks

    When you change the permalink structure from Plain, WordPress will generate a new .htaccess file. It will contain the instructions for the new structure that you choose.

    After saving the changes to your site’s permalink structure, return to the WordPress root folder. There should be a brand new .htaccess file inside, ready for you to start editing it.

    How to replace your current .htaccess file with a new one

    If you want to restore the .htaccess file to its original contents, you can either delete all custom code or replace it altogether. In many cases, replacing the file is the easier option. That applies particularly if you run into an error and are unsure which part of the code is causing it.

    Before moving forward, download a copy of your existing .htaccess file, just in case.

    First, you’ll need to make a new copy of a default .htaccess file. To do so, create a new file called .htaccess on your computer (including the period). 

    Then, open the new file using a text editor and paste the following code within:

    # BEGIN WordPress
    
    RewriteEngine On
    
    RewriteRule .* - [E=HTTP_AUTHORIZATION:%{HTTP:Authorization}]
    
    RewriteBase /
    
    RewriteRule ^index\.php$ - [L]
    
    RewriteCond %{REQUEST_FILENAME} !-f
    
    RewriteCond %{REQUEST_FILENAME} !-d
    
    RewriteRule . /index.php [L]
    
    # END WordPress

    That is the default code for the .htaccess file, and it should work with every website. The only exception is if you’re using a Multisite installation. In that case, the default .htaccess file should look like this, with a subdirectory setup:

    # BEGIN WordPress Multisite
    
    # Using subfolder network type: https://wordpress.org/support/article/htaccess/#multisite
    
    RewriteEngine On
    
    RewriteRule .* - [E=HTTP_AUTHORIZATION:%{HTTP:Authorization}]
    
    RewriteBase /
    
    RewriteRule ^index\.php$ - [L]
    
    # add a trailing slash to /wp-admin
    
    RewriteRule ^([_0-9a-zA-Z-]+/)?wp-admin$ $1wp-admin/ [R=301,L]
    
    RewriteCond %{REQUEST_FILENAME} -f [OR]
    
    RewriteCond %{REQUEST_FILENAME} -d
    
    RewriteRule ^ - [L]
    
    RewriteRule ^([_0-9a-zA-Z-]+/)?(wp-(content|admin|includes).*) $2 [L]
    
    RewriteRule ^([_0-9a-zA-Z-]+/)?(.*\.php)$ $2 [L]
    
    RewriteRule . index.php [L]
    
    # END WordPress Multisite

    Alternatively, if you’re using a subdomain setup for Multisite, the code will look like this:

    # BEGIN WordPress Multisite
    
    # Using subdomain network type: https://wordpress.org/support/article/htaccess/#multisite
    
    RewriteEngine On
    
    RewriteRule .* - [E=HTTP_AUTHORIZATION:%{HTTP:Authorization}]
    
    RewriteBase /
    
    RewriteRule ^index\.php$ - [L]
    
    # add a trailing slash to /wp-admin
    
    RewriteRule ^wp-admin$ wp-admin/ [R=301,L]
    
    RewriteCond %{REQUEST_FILENAME} -f [OR]
    
    RewriteCond %{REQUEST_FILENAME} -d
    
    RewriteRule ^ - [L]
    
    RewriteRule ^(wp-(content|admin|includes).*) $1 [L]
    
    RewriteRule ^(.*\.php)$ $1 [L]
    
    RewriteRule . index.php [L]
    
    # END WordPress Multisite

    In any case, save the new .htaccess file and upload it to the WordPress root directory. You can follow our earlier instructions on accessing the directory using FTP or cPanel. Once you’re inside, delete the existing .htaccess file and upload the new one, or simply upload and overwrite it. 

    Five examples of rules you can add to your .htaccess file

    There are several ways to edit the .htaccess file and add new functionality to WordPress. Each code snippet is known as a “rule” because it tells the server what to do.

    In this section, we’ll introduce you to several rules you can implement in the WordPress .htaccess file and explain what they do!

    1. Redirect all traffic via HTTPS

    Once you add a Secure Sockets Layer (SSL) certificate to WordPress, you’ll want to configure the website to load over HTTPS. There are several plugins you can use to implement this change, but you can also do so by adding a new rule to the .htaccess file:

    RewriteEngine On
    
    RewriteCond %{HTTPS} off
    
    RewriteRule ^(.*)$ https://%{HTTP_HOST}%{REQUEST_URI} [L,R=301]

    This rule implements 301 redirects that will process every HTTP request over HTTPS. If you see security errors in the browser after implementing this rule, there might be an issue with your site’s SSL certificate.

    2. Add a password to a directory

    .htaccess enables you to password-protect specific parts of your website. The password prompt doesn’t appear as a login screen, but as a pop-up window directly through the browser. The server will block your access to the page if you don’t enter the correct password.

    In this example, we’re using code to password-protect the WordPress admin dashboard:

    <Files /wp-admin>
    
    AuthName "Prompt"
    
    AuthType Basic
    
    AuthUserFile /wp-admin
    
    Require valid-user
    
    </Files>

    You can change which page you want to add a password to by editing the part of the snippet that comes after the “/”. For example, you can add a password prompt to /wp-login.php to protect the login page further.

    Note: Requiring a password to access the homepage will break Jetpack’s connection. So, if you’re using any of Jetpack’s tools, you won’t want to implement this rule.

    3. Disable access to specific files

    On top of disabling access to parts of your website, you can block every user from being able to access specific files. This rule can come in handy for core files, since you don’t want anyone else to be able to download or edit them.

    For this rule, we’re using code that tells the server if a visitor tries to access a file that matches one of the names you specify, it should block that connection:

    <FilesMatch "^.*(error_log|wp-config\.php|\.[hH][tT][aApP].*)$">
    
    Order deny,allow
    
    Deny from all
    
    </FilesMatch>

    You can add more files to that list by separating them with a “|”. Keep in mind that there should be one final “|” symbol right before the slash in the first line within the rule.

    4. Blocklist an IP address

    One of the most useful functions in .htaccess is the ability to blocklist specific IP addresses. If you include an IP address using a blocklist rule, it won’t be able to access any of your site’s pages. Here’s what that rule looks like:

    order allow,deny
    
    deny from 192.168.1.1
    
    allow from

    That example uses the localhost IP, but you can replace it with any other address. To include multiple addresses, separate them using a comma.

    Note that blocklisting an IP means the user with that address won’t be able to load any of your site’s pages at all. They won’t see 404 errors or be redirected to login pages. Instead, they’ll get “access denied” errors.

    It’s also important to understand that blocking or allowing IP addresses in your .htaccess will not supersede any IP blocking or allowing that is done at the server level, or via a security plugin or service. That is why it is important to ensure that our IP addresses are allowed at the server level and in any security plugins you may use.

    5. Add a redirect

    You can use the .htaccess file to implement multiple types of redirects. Earlier, we showed you how to use redirects to force WordPress to load over HTTPS. But you can also implement more straightforward rules to redirect a single page to a second address. 

    Here’s how a basic 301 redirect looks in .htaccess:

    Redirect 301 /page.html 
    
    http://www.yoursite.com/page2.html

    The file also supports more complex redirects, like redirecting an entire website to a new URL. Here’s what that rule would look like in action:

    Options +FollowSymLinks
    
    RewriteEngine on
    
    RewriteRule (.*) http://www.newsite.com/$1 [R=301,L]

    This rule can be useful if you want to stop working on a website and redirect all of its traffic to a different property. 

    Keep in mind that 301 redirects are “permanent.” That means that search engines interpret them as “This page has moved permanently to a new address” and pass along some of its link equity.

    Frequently asked questions about the .htaccess file

    If you still have questions about the WordPress .htaccess file, this section will answer them. Let’s start by talking about what you can do with this file!

    What can you do with your .htaccess file on WordPress?

    The .htaccess file on WordPress is highly versatile. You can use it to implement redirects, update your site’s permalink structure, whitelist IP addresses, password-protect directories, force your site to load over HTTPS, and more.

    These changes require you to either use plugins or add code to the .htaccess file. You can do this even if you’re unfamiliar with coding since the snippets can be found online, including in this article!

    What if you can’t find your WordPress .htaccess file?

    You may not be able to find the .htaccess file in the WordPress root directory if it hasn’t been created yet. In some cases, WordPress doesn’t generate the file unless you change your website’s permalink structure from Plain to another option. Earlier in this article, we explain how to do this. 

    Do .htaccess changes take effect immediately?

    Any changes that you make to .htaccess should take place immediately. You don’t need to restart the server for changes to take effect.

    If you edit the file and you don’t see the changes reflected immediately, there might be an issue with your web host. In some cases, hosting providers might not provide the necessary permissions for your .htaccess file to override the server’s configuration. This is particularly common in shared hosting plans.

    Should I use a plugin to edit .htaccess?

    Many plugins can edit .htaccess, but some of these tools don’t give you access to the file itself. For example, if you use a redirect plugin, it likely implements redirects via .htaccess, but it doesn’t show you the changes in the file.

    Some tools enable you to edit .htaccess from the dashboard. But these plugins often offer limited editor functionality, making it harder to implement changes. Whenever possible, we recommend using FTP so you can use your favorite text editor to interact with .htaccess.

    Can your WordPress site’s .htaccess file be hacked?

    If attackers can gain access to your server, they can also access the .htaccess file and use it to break parts of your site, implement malicious redirects, and even lock you out of the website altogether.

    Backing up your website regularly is vital to protect user data and avoid downtime from attacks. With Jetpack Security, you can access real-time automatic backups and malware protection.

    Jetpack also adds a firewall to your website. This feature helps further prevent other attacks, like DDoS events or attempts to brute force the WordPress login page.

    How do I edit the .htaccess file in Nginx?

    .htaccess files are unique to Apache servers. They’re still very common because Apache is one of the most popular server software options on the market. But it’s not the only one.

    Many popular WordPress web hosts use Nginx since it offers several advantages over Apache. But Nginx servers don’t have .htaccess files. That means you may be unable to implement several of the customizations discussed in this article, or the process might be entirely different.

    What is an example of a default WordPress .htaccess file?

    By default, the .htaccess file should look the same on most WordPress websites. Here’s the code the file should contain if you’ve made no changes to it:

    # BEGIN WordPress
    
    RewriteEngine On
    
    RewriteRule .* - [E=HTTP_AUTHORIZATION:%{HTTP:Authorization}]
    
    RewriteBase /
    
    RewriteRule ^index\.php$ - [L]
    
    RewriteCond %{REQUEST_FILENAME} !-f
    
    RewriteCond %{REQUEST_FILENAME} !-d
    
    RewriteRule . /index.php [L]
    
    # END WordPress

    You can use this code to restore the .htaccess file to its original settings in case of any errors while customizing it. We include instructions on how to replace the file in one of the previous sections of this article.

    Change the WordPress .htaccess file

    Knowing how to access and edit the WordPress .htaccess file can help you change key functionality on your website and keep it safe. You can use this file for anything from implementing redirects to password-protecting directories if you know how to edit it.

    Since you’re dealing with a WordPress core file, we always recommend creating a backup ahead of time. Once you start working on the file, you can use the code snippets from this article to implement new features.

    Editing your .htaccess file is just one way to secure your WordPress website. Jetpack Scan constantly monitors your site for threats, notifies you about any problems, and helps you resolve any issues. Check out Jetpack Scan today!

  • How to View WordPress Site Analytics in Your Dashboard

    If you want to grow your site or business, the ability to review analytics and stats is pretty important. With the right tools, you can learn how many people visit your site, what pages are most popular, where traffic comes from, and other metrics that can help you optimize site performance and create more targeted content for your audience.

    WordPress connects with multiple plugins and tools that generate statistics about your website. However, services like Google Analytics are complicated and provide extra data that you don’t always need. 

    Jetpack Stats, on the other hand, generates simple data, graphs, and charts about visitors and traffic, making it the go-to plugin to help you understand the basics. 

    Does WordPress have a built-in analytics dashboard?

    Two out of every five sites on the internet use WordPress, making it the most popular website creation platform. But the tool doesn’t come with any in-built analytics and stats, meaning you can’t automatically view data about visitors and traffic. 

    One way to analyze information about your WordPress website is to use Google Analytics, which is free. But this service is complicated for small business owners and other people who have just created their first site. That’s because the tool has advanced features like custom dimensions and event tracking. These provide little value to those who just want to understand essential aspects of how their site is performing. 

    Installing and downloading Google Analytics for WordPress is also complicated. Most people use a third-party plugin or manually add JavaScript code to their site. Jetpack solves these problems by seamlessly connecting Google Analytics with WordPress (more on that later.) 

    What is the easiest and fastest way to view WordPress analytics and stats?

    Using Jetpack Stats is a simple and quick way to view information about your WordPress website. Unlike Google Analytics, you won’t need to use something outside the WordPress ecosystem for this service. You download and install this tool just like any other plugin. All you need is a free account on WordPress.com and the latest version of WordPress. It’s that simple! 

    Automattic, the company behind WordPress.com, created Jetpack Stats. This feature lets you track the number of people who visit your website and what posts and pages generate the most traffic. You can also view other valuable insights about your site without trying to decipher complicated charts and graphs.

    Another great thing about Jetpack Stats is its flexibility. As well as viewing simple analytics and stats about your site, with a paid upgrade to Jetpack Security or Jetpack Complete, you can connect Google Analytics to WordPress for more advanced metrics. So, when you’re ready to take things a step further, there’s nothing else you need to install.

    Once you download and install the Jetpack plugin, you can start analyzing information about your WordPress site on your desktop computer or mobile device. 

    Why do you need to learn how to view WordPress site analytics?

    There are various reasons you need to use an analytics service like Jetpack Stats. As a site owner, you can learn what content is most popular with visitors. Then you can use this information to plan future content or make informed decisions about your endeavor. If you’re a hobbyist, it’s always fun to know how many people are reading your website and where those individuals come from. If you run a business, understanding real-world stats can guide you towards growth and profitability. 

    Here are some of the things you will discover about your website when you use a service like Jetpack Stats:

    • How many visitors view a particular page or post over time
    • How long someone watches a video on your website
    • How many likes and comments your website receives
    • The search terms people use to find your WordPress site
    • How many digital files individuals download from your pages
    • What countries and regions visitors come from
    • How many times readers click on external links in your content
    • Which websites, blogs, and search engines link to your posts

    Jetpack Stats lets you better understand your website visitors. You can also make statistics reports available to other WordPress users. 

    How to add site analytics to your WordPress dashboard

    The easiest way to add analytics and statistics to your WordPress dashboard is with the Jetpack plugin, which gives you access to Jetpack Stats. You can download and install it with a few clicks. Before you do, make sure that:

    • You have a WordPress host that meets WordPress hosting requirements. Examples are Bluehost, Liquid Web, and Pressable, but there are many different ones you can choose from. 
    • You’ve downloaded the latest version of WordPress.
    • You’ve signed up for a WordPress.com account. 
    • Your WordPress site is publicly accessible. That means visitors don’t need to enter a password to use your website. 

    A step-by-step guide to adding site analytics for WordPress

    Follow these steps to learn how to view WordPress site analytics with the Jetpack plugin:

    1. Install the Jetpack plugin

    Install the Jetpack plugin from the WordPress admin dashboard (WP Admin). This is where you create and manage content on your website and choose different themes, so you should already be familiar with it. 

    Once you’ve logged in to WP Admin, follow these simple steps:

    • Click on Plugins, then click Add New.
    • Search for “Jetpack” in the search bar. The latest version of Jetpack will pop up.
    • Click on Install Now.
    Jetpack plugin in the WordPress repository

    Depending on your internet connection, the Jetpack plugin will take a few seconds to install. 

    2. Activate Jetpack 

    After downloading Jetpack, follow these steps:

    1. Click on Activate.
    2. Wait for Jetpack to activate.
    3. Click on Set up Jetpack.
    setup screen for Jetpack

    3. Connect your website to WordPress.com

    Jetpack will now prompt you to connect your website to WordPress.com. You need to carry out this step to use Jetpack’s incredible features. 

    By connecting your site with WordPress.com through Jetpack, you’ll benefit from enhanced website security and performance. That’s because Jetpack syncs your site with the WordPress.com cloud. 

    • Click on Approve to connect your website with WordPress.com.
    • Wait for Jetpack to finish setting up.
    Jetpack setup screen

    You can always check your website has connected to WordPress.com by heading to Jetpack → Dashboard → Connections

    checking Jetpack connection in WordPress

    4. Choose a Jetpack plan

    Jetpack has different plans depending on your specific needs. Jetpack Stats is included by default for free, and you can access its benefits as soon as you have the plugin installed. However, if you want to use Jetpack to connect to Google Analytics, you’ll need a paid plan. Paid plans also come with additional security, performance, and growth tools that you may want to take advantage of. If you’re interested in one of these, follow the instructions below. Otherwise, skip to Step 6.

    Now, you’ll need to enter the WP-Admin credentials for your WordPress website. Jetpack doesn’t store this information and only uses it to install its plugin on your site securely. 

    Remember to add the WP-Admin credentials for the user account you want to connect to Jetpack, not the details of any other accounts you might have.

    Complete the checkout process by entering your payment information.

    5. Enable recommended features

    After choosing and paying for a plan, Jetpack will prompt you to enable recommended features that will benefit you. You can select the ones you like or manage them later.

    6. Complete the installation process

    At this point, you should have successfully installed Jetpack. 

    • Click Return to WP Admin to head to your website’s dashboard.
    • Turn on Jetpack Stats by going to Jetpack, clicking on Settings, and then clicking on the Traffic tab. Scroll down this page and then click on Activate Site Stats.

    7. View stats in your dashboard

    Navigate to your WordPress Dashboard, then go to Jetpack → Dashboard.

    Here, you’ll see an in-depth view of how much traffic your website receives.

    site stats in the WordPress dashboard

    For even more stats, click on the View detailed stats button on the traffic screen.

    Here, you’ll see information about referrers, clicks, subscriptions, top posts and pages, and search engine terms.

    Click on the View more stats on WordPress.com button on the traffic screen.

    This will take you to more information like unique views and views by country. 

    Now you know how to view WordPress site analytics!

    Check out this troubleshooting guide if you have trouble installing or connecting the Jetpack plugin or using Jetpack with WordPress. 

    Final word about how to view WordPress site analytics

    WordPress doesn’t come with built-in statistics, so you’ll need to find your own preferred tool to generate insights about page views, visitors, and traffic sources. Follow the steps above to learn how to view WordPress site analytics with the Jetpack plugin — the easiest and fastest way to analyze information about your site. 

    Frequently asked questions 

    What is the best analytics plugin for WordPress? 

    Jetpack Stats is the easiest and quickest analytics plugin to use for WordPress. You install it in a few simple steps and can start viewing incredible insights about your website right away. Google Analytics is another popular service, but it’s challenging to navigate for beginners. Learning how to view WordPress site analytics is easy with Jetpack Stats.

    Is Jetpack Stats free to use?

    Jetpack Stats comes in a free version that provides essential website statistics. However, Jetpack has additional premium tools that can help you improve performance, secure your site, and grow your stats.

    Do I need Google Analytics to use Jetpack Stats?

    No, Google Analytics is a separate service from Jetpack Stats. However, you can use the Jetpack plugin (with a paid plan) to quickly connect Google Analytics to your WordPress dashboard if you need more advanced data. 

    Can I access Jetpack Stats on my mobile device? 

    Yes! The Jetpack mobile app lets you view analytics about your WordPress website on your smartphone or mobile device. You can also create, design, and manage your site and receive notifications about visitors, subscribers, and comments. You can download this app from Google Play and the App Store. 

    How do I turn Jetpack Stats on?

    After downloading and installing the Jetpack plugin, you can turn Jetpack Stats on by going to Jetpack, clicking on Settings, and then clicking on the Traffic tab. Scroll down this page and then click on Activate Site Stats. For more information, check out our Jetpack Stats documentation.

    How can I view WooCommerce analytics?

    Jetpack Stats does include information specifically for WooCommerce stores, like order data and trends. If you want more advanced, ecommerce-specific data, you can use the built-in analytics tools included with WooCommerce.

    To access these, go to Analytics in your WordPress dashboard. There, you’ll find reports that cover things like revenue, orders, coupons, taxes, and more.