EDITS.WS

Category: elegantthemes.com

  • How to Make a WordPress Website in 2023 (Beginners Guide)

    WordPress is a popular content management system (CMS) that allows you to create and manage websites easily. Whether you’re a blogger, freelancer, or business owner, WordPress offers a minimal learning curve, multiple ways to customize it, and create any website your heart desires. In this post, we’ll show you how to make a WordPress website, including purchasing a domain and hosting to designing and launching your site. So, let’s dive in.

    What is WordPress?

    what is WordPress

    Originally created as a blogging platform in the 1990s, WordPress has evolved into a versatile CMS that can be used to build various types of websites, including membership sites, forums, learning management systems (LMS), ecommerce sites, and more. With its user-friendly interface, extensive theme and plugin options, and versatility, WordPress gives users the control they need to bring their website to life. Whether you’re a beginner or a tech-savvy web developer, WordPress offers a user-friendly and scalable solution for creating and maintaining your online presence.

    Why Choose WordPress?

    Aside from its versatility, customization options, and user-friendly interface, WordPress has a large following. With over 44% of the internet built on it, there are hundreds of reputable developers providing tips and tricks almost daily. Plus, WordPress is free to use. That said, there are hidden costs, such as hosting, plugins, and a domain. Additionally, new WordPress users will have the support they need to learn WordPress.

    What You’ll Need to Get Started

    When creating a new WordPress website, you’ll need a few things to get the process going, including a domain, web hosting, and determining the site’s structure. Let’s take a deeper look into the steps needed to be successful.

    Purchase a Domain Name

    how to make a wordpress website

    Image courtesy of VZ_Art | Shutterstock

    Before considering where your website will live or its content, you must decide on the perfect domain name, you’ll want it to stay true to your brand, so ensure that you’re researching the best domain names for your business.

    Additionally, consider which top-level domain (TLD) extension you’d like to use, whether it be .com or something else. For most people, .com makes the most sense due to its recognizability and trustworthiness. TLDs are an important part of the selection process for several reasons, including SEO.

    After you’ve decided on your domain name, you’ll need to purchase it. You can do this through a hosting provider or using a good domain name registrar, such as Namecheap. The process isn’t difficult and is a crucial first step. However, it is generally advised to refrain from purchasing your domain from a hosting provider since it can complicate matters if you switch hosts for your website. Therefore, we recommend keeping the two separate to retain greater control over your domain.

    Purchase Hosting

    Another important step is purchasing a WordPress hosting plan for your website. You’ll want to arm yourself with information before making a final decision. First, learn about the different hosting types available to determine which is best for your unique situation.

    Next, decide which host aligns best with your needs. You’ll want to choose one that fits your budget and has the most features. Good hosting providers will guarantee at least 99% uptime, take care of security patches and updates, and provide freebies such as SSL, emails, backups, staging sites, and good security.

    how to make a wordpress website

    A rock-solid option that includes all of these features is SiteGround. Their hosting plans are optimized for WordPress and include benefits such as fantastic support and affordable prices. For newcomers, SiteGround’s StartUp plan is an excellent jumping-off point. With 10 GB of storage, freebies such as an SSL, CDN, business email, migration, staging, and more, you’ll have everything you need to get started for under $15 a month. As an added bonus, based on our own testing, it’s also the fastest WordPress hosting you can get.

    Planning Your WordPress Structure

    Planning WordPress website structure

    Image courtesy of aliaksei kruhlenia | Shutterstock

    Before setting out to build your website, it’s important to plan the structure of your site. Consider the pages you want to include, such as an about page, services or product pages, a blog, contact information, and any other relevant pages. By mapping out the pages in advance, you’ll provide visitors with a well-organized and easy-to-navigate website.

    Additionally, consider the content you need for each page, including text, images, videos, or other elements such as social media feeds. By outlining your content, you can write good SEO copy, create videos, images, and other elements. Taking the time to do this the right way gives you an excellent shot at boosting your position in the search engine ranking pages (SERPs) and provides a seamless user experience for your visitors.

    How to Make a WordPress Website

    There are a lot of steps involved when setting out to build a WordPress website. From installing the platform to taking it live, we’re here to walk you through every step, giving you a great shot at success.

    Subscribe To Our Youtube Channel

    Step 1: Install WordPress

    The first step to creating your masterpiece is by installing WordPress. This can be accomplished in several ways. If you opted for a VPS or dedicated hosting provider, you’ll likely need to install WordPress on your own. If you chose a managed hosting company, the steps to install WordPress are quite different. For example, using SiteGround, you can install WordPress in just a few clicks. This is the method we plan to use in this tutorial. Check out our in-depth post, How to Install WordPress, if you’re looking for tips on other installation methods.

    SiteGround provides a simple way to install WordPress. Once you set up your account, you’ll be directed to your account dashboard. Click the Start New Website button to install it.

    start a new WordPress website

    Next, choose whether to install WordPress on a new, existing, or temporary domain. We’ll build our new site on a temporary domain so we can design and perfect it before pushing it live.

    choose temporary domain

    When the screen refreshes, you’ll notice you’ve been assigned a temporary domain for your website. Proceed by clicking the continue button.

    temporary domain

    Next, click Start New Website.

    start new website

    Then choose WordPress as the application.

    Choose WordPress

    For the installation details, provide your email address, create a password (or generate a strong one), then click continue. Be sure to save your login information, as this is how you’ll log in to your WordPress admin dashboard.

    how to host a website

    Click the finish button to install WordPress.

    finish setup

    When your screen refreshes, you’ll have three options: view your site in a browser, log in to the WordPress admin panel, or head to SiteGround’s site tools dashboard. Click the log in admin button to view the admin panel.

    how to make a wordpress website

    Step 2: Choose Your WordPress Theme

    A WordPress theme allows you to change how your website looks to visitors. You can customize colors, the layout, fonts, and other design elements to match your branding or style. There are two types of themes available, including free and premium themes. Free themes are available through the WordPress directory. Premium themes are offered by third-party developers, like the makers of Divi, and usually provide excellent features such as no-code page builders, full site editing capabilities, and premade layouts.

    To view available free themes, navigate to Appearance > Themes.

    add WordPress theme

    Click the Add New Theme button to add a new theme.

    add new theme

    From here, you can search for themes (1), use one of SiteGround’s recommendations (2), browse the WordPress directory (3), or upload a premium theme (4).

    theme install options

    If you prefer to start with a free theme, click browse the WordPress directory, peruse the available options, then click the install button once you’ve made a selection.

    install free theme

    For this tutorial, we’ll use our favorite premium theme, Divi. Click on the upload theme tab to upload a theme, then click choose file to upload your zipped WordPress theme file.

    upload WordPress theme

    Finally, click Install Now to install your WordPress theme.

    install WordPress theme

    Click the activate button to make your theme live on your site.

    Activate theme

    Step 3: Add Your Pages

    Now that your theme is installed and activated, we’ll create our pages. We’ll create a home, about, services, blog, and contact page for our site. This is a basic setup for most starter sites. We won’t add any content; we’ll just set up the page structure to create our navigation in the next step.

    Creating your first page is simple. Navigate to Pages > Add New in the WordPress dashboard.

    add new WordPress page

    Every new WordPress installation comes standard with two pages: privacy policy and sample pages. We’ll leave those alone and add a new home page to our site. To add a new page, click the Add New button on the top left of the page.

    how to make a wordpress website

    Next, give your page a title (1) and click publish (2) to create the page.

    Publish WordPress page

    Click the WordPress logo at the top left of the page to return to the pages section in WordPress.

    WordPress pages

    To add more pages, repeat the process above until all your pages are created.

    Step 4: Set Up Your Navigation

    The next step is to set up the navigation for our site. Let’s start by setting up our home page in WordPress settings. Navigate to Settings > Reading (1), click the static page radio and choose your home page (2), tick the checkbox to discourage search engines from indexing your site (3), and save the changes (4).

    Setting WordPress home page

    Note: It’s a good idea to discourage indexing while building your website. It keeps unwanted traffic from discovering you before your site is ready for prime time.

    Now, we’ll set up our main navigation for the site. Head to Appearance > Menus (1). Give your menu a name (2), tick the Primary Menu checkbox (3), then click create menu (4).

    create WordPress menu

    Next, click the View All tab (1) and select the pages we just created (2), then click Add to Menu (3).

    add pages to menu

    Once your pages are added, you can click and drag them to change their order (1). When satisfied with their placement, click the save menu button (2).

    save WordPress menu

    Step 5: Build Your First Page

    Creating your home page is the next and possibly most important step when learning how to make a WordPress website. The home page serves as a window into your business’s identity. It should reflect what your business is about, along with supporting content.

    As a general rule, your home page should contain all of the information a new visitor should see, including:

    • Your logo
    • Navigation
    • A headline
    • Sub-headline
    • Images
    • Calls to action (CTA)
    • Text content (at least 300 words)
    • Footer
    • Social proof (optional)
    • Video content (optional)
    • An eye-catching design (a must)

    When building your page, there are several ways to add content. You can use WordPress’s default editor, Gutenberg, or a page builder like the Divi Builder. Since we chose Divi as our theme, we can add elements to our home page using Divi’s Visual Builder, a no-code front-end builder that allows you to view your design in real time. Divi offers more than 320 full layout packs with over 2300 individual pages, making building your WordPress website a breeze.

    Building a WordPress Page Using Divi

    To showcase its ease, we’ll walk you through importing a layout into your home page using Divi. Head back to Pages in the WordPress dashboard. Next, click on home within your site’s pages.

    edit WordPress home page

    Next, click Edit With The Divi Builder.

    Once the screen refreshes, you can tour the Visual Builder or start building your page. Select start building.

    start building with Divi

    Next, select choose a premade layout.

    browse layouts

    Select the marketing layout pack (or another one of your choice here).

    Divi marketing layout

    Then select the home layout.

    marketing home page

    Finally, select use this layout to insert the design into your home page.

    how to make a wordpress website

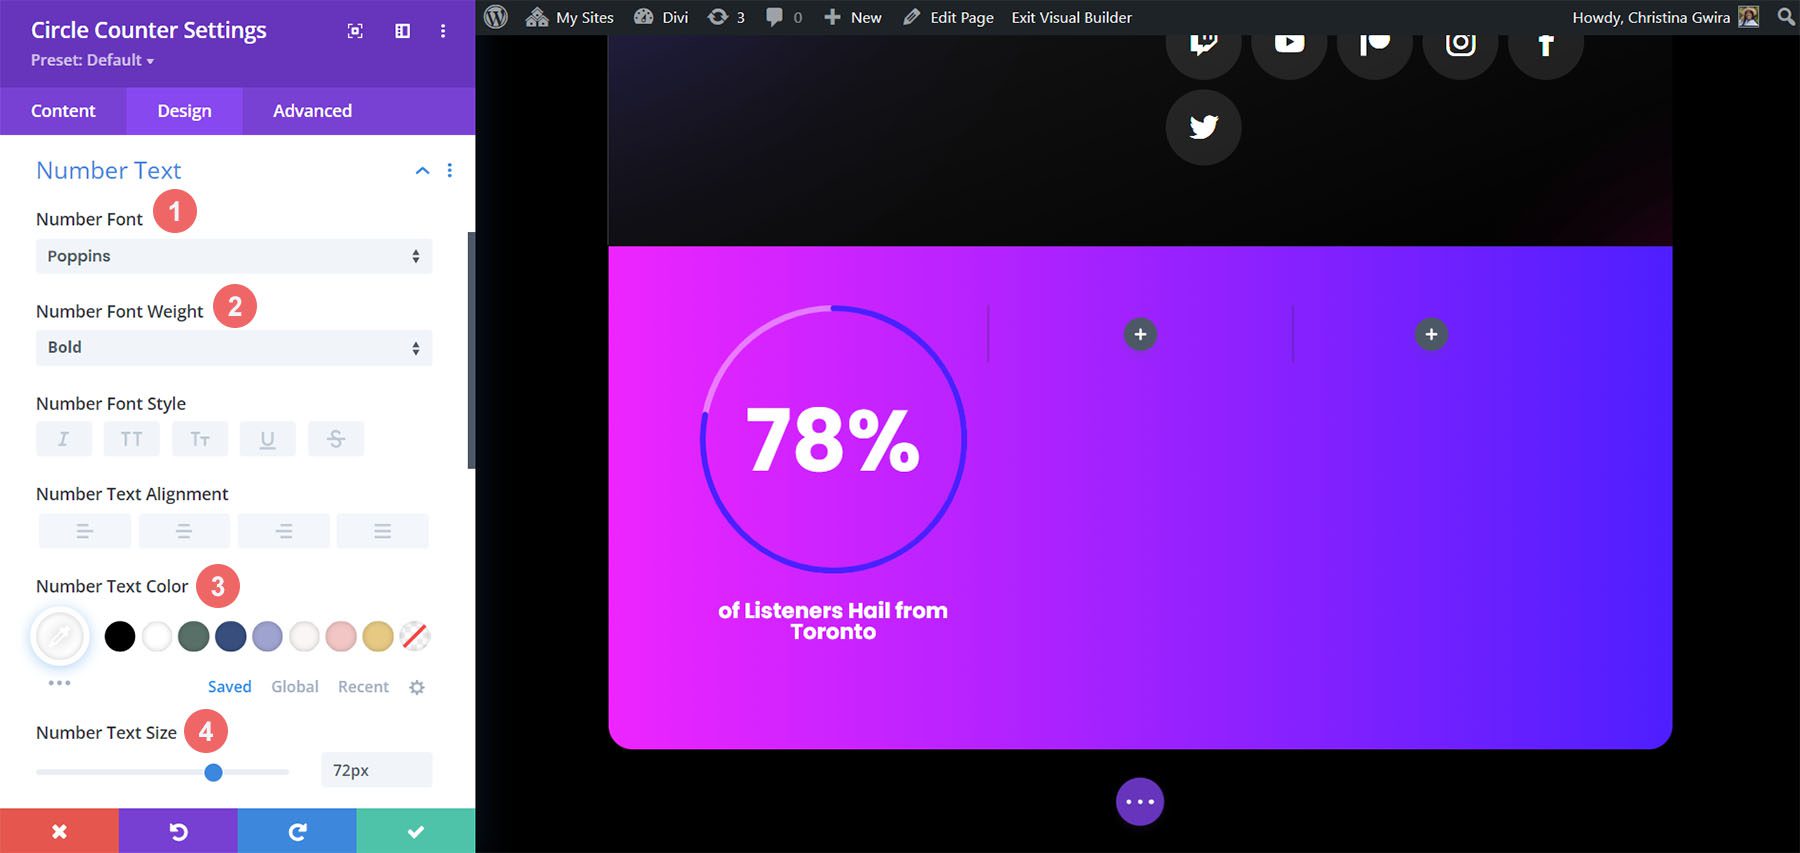
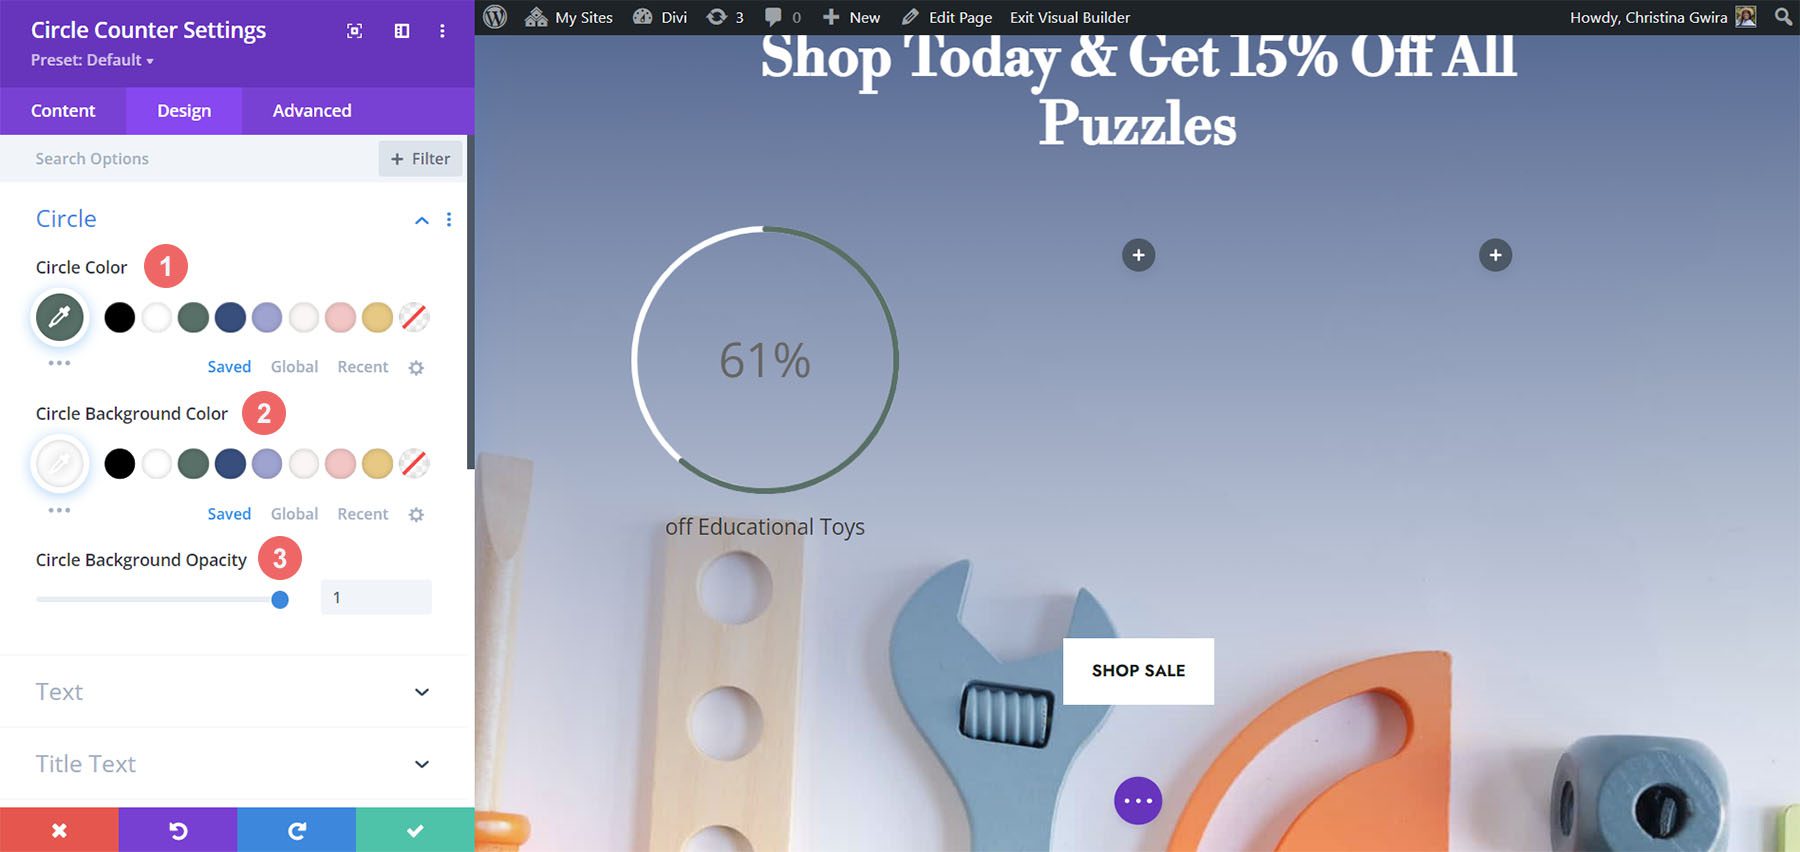
    From there, you can hover over any module to reveal the settings. Click the gear icon to edit any module.

    editing Divi modules

    Once you have edited all text modules and replaced stock images and videos, you can save your page by clicking the green save button at the bottom right.

    save Divi page

    If you’d like to learn everything there is to know about Divi, check out our extensive documentation. It contains more than 70 helpful Divi tutorials to aid in building your website.

    Building a WordPress Page Using Gutenberg

    Using WordPress’s native Gutenberg editor is quite simple. To add content, you can choose from various blocks, such as rows, text, images, videos, social icons, and more, to construct your pages. Start by clicking the + icon to add a block to your page.

    adding content with Gutenberg

    In addition to singular blocks, you can create reusable blocks or block patterns for use throughout your website.

    Once you’ve added all content to your page, you can publish it by clicking the update button.

    update WordPress page

    Page Checklist: What To Do Before Publishing

    Before you can publish your page, there are a few essential things to consider, including:

    • Check your page’s responsiveness: Ensure that all content on your page is optimized for all screen sizes.
    • Look for placeholder content: Ensure you’ve replaced all placeholder text and images.
    • Use alt tags: Every image on your page should contain an alt tag.
    • Check for misspellings: Use an integrated browser spell check or a service like Grammarly to ensure your content is spelled correctly and flows well.
    • Configure SEO: Ensure that SEO best practices are being used. Make sure there is a keyword assigned and fill out the meta box (title, URL, meta description)

    Step 6: Modify Your Headers and Footer (if Needed)

    If you use a full site editing theme, you can customize headers and footers for your site. For example, you can create any number of custom templates using Divi’s Theme Builder. Alternatively, a block theme such as GeneratePress allows you to edit permanent sections of your site through full site editing.

    To create a new header or footer in Divi, navigate to Divi > Theme Builder.

    Divi Theme builder

    Next, click Add Global Header.

    add global header

    Finally, select Build Global Header to launch the Visual Builder.

    Build global header

    You can use a premade header and footer pack, or use one of Divi’s 200 modules to easily create a header (or footer) for your website.

    Step 7: Install Plugins

    Now that your content is in place, you must decide which plugins to use. Generally speaking, there are several essential WordPress plugins that you should include on your site to help with various aspects, including SEO, security, and caching. Other optional plugins, such as social media, affiliate marketing, or live chat, are worth consideration. Since WordPress is so popular, there are thousands of plugin choices. This can be overwhelming for newcomers, so here is a breakdown of some essential plugins you will need for your WordPress website.

    • SEO: Choose a good SEO plugin, like RankMath, so you can easily configure your SEO, both on and off-page, to give yourself a fighting chance at ranking high in search pages.
    • Security: Protecting your site from nefarious actors and malware should be one of your top priorities. Incorporate a security plugin into your site for peace of mind.
    • Optimization: Keeping your site speedy involves adding a speed optimization plugin to your site. You should also consider a database optimization plugin to keep the bloat out of your site’s database. Cleaning your database keeps your site running smoothly for the long haul.
    • Caching: If you’re using a shared, VPS, or dedicated hosting provider, you may need to install your own caching solution. These cache plugins are considered the best of the best, ensuring your site’s files are served fast, keeping your bounce rate down and customer engagement up.

    Optional Plugins To Consider

    In addition to must-have plugins, plenty are available to add extra functionalities, such as social media, advertising, live chat, and more. Here are a few additional plugins you might consider using. Depending on the type of website you plan to build, some of these may need to be revised. That said, it’s good to know what’s out there in case you need to add one in the future.

    • Chat: Incorporating a chat plugin into your website is an excellent way to stay connected to your customers. Plus, it’s a lot more personal than sending an email.
    • Affiliate marketing: If you have aspirations of turning your website into a money-making machine, adding an affiliate marketing plugin may be exactly what you need.
    • Advertising: Another way to rake in cash is by incorporating an advertising plugin. You can create banner ads, import ads from Google, and track their progress to boost your online sales.
    • Social media: Social proof is a key marketing strategy that every website owner should consider. You can boost SEO, increase engagement, and build trust with your audience by giving visitors a glimpse into your social platforms. A good social media plugin can give you all of those things.

    Step 8: Go Live!

    The last and most exciting step in creating your WordPress website is taking it live. At this point, you’ve made your navigation, configured your SEO, and added content. This last step involves tying up a few more loose ends. With that in mind, we’ve created a handy checklist for you to follow to ensure you don’t miss anything.

      1. Conduct a content review: Make sure all content is accurate, free of misspellings, and check all links.
      2. Optimize: Make sure all images are under 200kb, and enable caching and modification to ensure your site loads fast. Run a GTMetrix report to see how well your site is performing.
      3. SEO and Analytics: Set up Google analytics, integrate it into your site and check all posts and pages to ensure a keyword, title, URL, and meta description are configured properly. Using an SEO plugin, generate an HTML sitemap.
      4. Security: Update all plugins, themes, and WordPress core.
      5. Check all forms: Test all forms to ensure email deliverability. If you encounter any issues, install and configure an SMTP plugin.
      6. Connect your domain: Point your domain to your new website, then install an SSL.
      7. Search engine visibility: Head back to Settings > Reading and uncheck the discourage search engines from indexing this site checkbox.
      8. Back up your site: Before pushing your site live, make a backup of your website either with your host or a plugin such as Updraft. If disaster strikes, you want to be sure you have the most recent iteration of your site to fall back on.

    Final Thoughts on How to Make a WordPress Website

    Creating a WordPress website doesn’t have to be scary. You’ll bring your vision to life by following the steps outlined above. With careful planning, thoughtful content creation, partnering with the right host, and incorporating necessary plugins, your WordPress website will be optimized for search engines, safe against threats, and engaging for your visitors.

    If you’re looking to create a WordPress website that caters to a specific demographic, check out some of our handy tutorials to help you create the specialized website of your dreams:

    Frequently Asked Questions (FAQs)

    Before we wrap up, let’s answer some of your most common questions regarding WordPress website creation. Did we miss one? Leave a question below, and we will respond!

    How do I make a WordPress website?

    Choose a domain name, hosting provider, and a WordPress theme to create a WordPress website. Install WordPress on your hosting account, customize your theme, add content, and install plugins for added functionality. Regularly update and maintain your site for optimal performance.

    Can I create a WordPress website for free?

    Technically, yes, you can create a WordPress.org website for free, but it will require a domain name and hosting, which may have costs associated with them. Additionally, some themes and plugins may also have fees. Free options are available, but they may be partially free, depending on your needs.

    What is WordPress?

    WordPress is a free and open-source content management system (CMS) that powers millions of websites. It allows users to create and publish content, customize the appearance and functionality of their sites with themes and plugins, and manage their site’s back end through a user-friendly interface.

    Why should I use WordPress to make my website?

    You should use WordPress to make your website because it’s easy to set up, has a user-friendly interface, offers a wide range of customizable themes and plugins, and is SEO-friendly. It also has a large community of users, so you can get help and support quickly. Plus, it’s free to use.

    Can a beginner build a website with WordPress?

    Yes, a beginner can build a website with WordPress as it offers user-friendly tools and templates for designing websites without technical expertise. With its intuitive interface, drag-and-drop features, and customizable themes, beginners can easily create a professional-looking website. Additionally, numerous online resources are available, including tutorials, forums, and support communities, to assist beginners in building their WordPress website.

    Does WordPress require coding experience?

    No, WordPress does not require coding experience. It has a user-friendly interface and offers a variety of pre-designed templates, plugins, and widgets that you can easily customize without any coding knowledge. However, some coding skills can be helpful for advanced customization.

    What kind of websites can be created using WordPress?

    You can use WordPress to create various websites, including blogs, business websites, eCommerce stores, portfolios, forums, social networks, online directories, non-profit websites, and much more. Its flexibility, scalability, and user-friendly interface make it popular for website building.

    Where can I learn more about WordPress?

    You can learn more about WordPress on their official website, WordPress.org, where they offer documentation, guides, forums, and a community of users. You can also read blogs and tutorials on blogs like ours and WPBeginner, attend WordPress meetups and conferences, or enroll in online courses on platforms like Udemy and Coursera.

    Where should I host my WordPress website?

    Several options for hosting your WordPress website include shared hosting, managed WordPress hosting, cloud hosting, and VPS hosting. Factors to consider include budget, website size and traffic, technical expertise, and desired level of support. Popular hosting providers include SiteGround, Hostinger, Cloudways, and Pressable. You can read our detailed comparison of various WordPress hosts here.

    Which WordPress Theme should I use for my website?

    Choose a WordPress theme that aligns with your website’s goals, has a user-friendly interface, and is regularly updated for security and compatibility. A theme such as Divi can be an excellent choice for your WordPress website, as it comes with multiple pre-made templates, inbuilt integrations with numerous services like WooCommerce and Mailchimp, a full-blown theme builder, transparent and affordable pricing, support, and a lovely community!

    What are the top plugins I should install?

    The top plugins you should install vary depending on your website’s needs. However, some essential ones include RankMath for SEO optimizing your content, UpdraftPlus for timely backups, and EWWW Image Optimizer for compressing images. Additionally, you may consider plugins like WP Rocket for speed optimization, WPForms for form creation, and MonsterInsights for analytics and data. Look at our comprehensive list of every plugin you need here.

    Which is better, Wix or WordPress?

    WordPress is better than Wix because it offers greater flexibility and customization options, a wider range of plugins and themes, better SEO capabilities, and more control over website hosting and data ownership. Additionally, WordPress is open-source software, meaning it is free and community-driven, whereas Wix is a proprietary platform with limited control over its features.

    Featured Image via Darko 1981 / Shutterstock.com

    The post How to Make a WordPress Website in 2023 (Beginners Guide) appeared first on Elegant Themes Blog.

  • How to Host a Website in 2023 (Simple Beginner’s Guide)

    Whether you’re a business owner, blogger, or freelancer, understanding the ins and outs of hosting a website is essential for establishing an online presence. There are many things to consider, from selecting the right hosting provider to choosing the right hosting type. This post will give you the tools to learn how to host a website, navigate the process, and set you up for success. So, let’s dive in!

    What is Hosting?

    Web hosting is a service that allows your website’s content to be displayed online. Web hosts typically handle all of the resources, security, and features your website requires to keep it running. When you purchase a hosting plan, you are leasing a web server section where your website’s files and data will live. Depending on the type of website you plan to host, you’re hosting requirements will vary. For example, if you plan to host WordPress, the host you choose should be optimized for it and possess the latest version of PHP and MySQL.

    Website Builder vs CMS

    how to host a website

    As previously mentioned, the hosting you need depends on the type of site you wish to host. Website builders, such as Squarespace, Wix, and Shopify, typically have their own hosting, whereas content management systems (CMS) like WordPress.org are self-hosted. There are other differences, so before deciding on a host, it’s important to determine which platform suits your needs best.

    Asking the Right Questions

    When you’re in the market to host a website, you need to ask yourself a few questions. First, what type of website will you host? If you’re building a static HTML site, the hosting requirements are slightly different than if you plan to use WordPress. Secondly, plan for the traffic you hope to have rather than what you anticipate when starting out. A website with minimal traffic will likely only need a shared rather than a VPS hosting provider.

    Additionally, determine whether you want to build your site in a local environment first. Local hosting is a great option for those just starting out that want to take the time to learn WordPress.

    Lastly, you need to decide what hosting type is right for you. Read on to learn about the different kinds of hosting and who they are best suited for.

    Different Hosting Types

    how to host a website

    Image courtesy of marketinggraphics | Shutterstock

    It’s important to decide which hosting type you need. If you plan to use WordPress, you’ll need to understand the different hosting solutions available to you and which ticks the most boxes. There are several to choose from, each with pros and cons.

    Shared Hosting

    how to host a website

    Image courtesy of Andrea Danti | Shutterstock

    Shared hosting involves sharing server space and resources, such as RAM, bandwidth, and storage. It’s an affordable hosting solution but is best utilized by small websites or blogs that expect minimal traffic. Because of the resource limitations and potential performance impact, shared hosting isn’t the best choice for those looking to grow their business. That said, if you only want to host a small information website, you can get by just fine with shared hosting.

    Managed Hosting

    Managed WordPress hosting

    Image courtesy of BestForBest | Shutterstock

    Unlike other hosting types, managed hosting offers a hands-off experience in server maintenance. Managed hosts typically handle all security updates and patches, offer backups and staging sites, and an optimized server for your website. For WordPress users, managed hosting is a double-edged sword. On the one hand, you can leave all of the techy stuff to the professionals. On the other hand, you may not be allowed to use any plugin you want. That said, the benefits of good managed hosting far outweigh the cons. Additionally, managed hosting is more affordable than VPS or dedicated hosting plans, ranging from a few dollars a month to $30.

    VPS Hosting

    VPS hosting

    Image courtesy of Pramith Patali | Shutterstock

    Virtual private server (VPS) hosting functions much like shared hosting, except you won’t have to share your resources with other customers. You’ll have more control over your sites, be able to scale up easier, and have definite performance enhancements. This is because each VPS environment functions separately, providing better use of resources, better security, and more customization. Because of this, VPS is suitable for growing websites with higher resource demands. The downside to VPS hosting is that it’s more expensive than shared or managed hosting plans, with average prices ranging from $30-$100 per month.

    Cloud Hosting

    Cloud hostin

    Image courtesy of Eny Setiyowati | Shutterstock

    One of the best hosting solutions is cloud hosting. It’s different than others, as all of a website’s files are served from a series of web servers hosted in the cloud. Because of this, websites built on cloud servers are faster, more scalable, and more reliable. With cloud hosting, you have the freedom to configure your own server and, in some cases, such as Pressable, a managed solution. Cloud hosting is relatively affordable, with prices ranging from $10-100 per month, depending on the provider.

    How to Host a Website: Dedicated Hosting

    dedicated hosting

    Image courtesy of Sammby | Shutterstock

    Lastly, there is dedicated hosting. With this type of hosting, you’ll get your own server. One of the benefits of dedicated hosting is the freedom to configure your server in any way you choose. Dedicated hosting is an excellent choice for tech-savvy people who know their way around a server and have high-traffic requirements. The downside to dedicated hosting is the price, where you should expect to pay at least $100 per month. That said, if you have lofty goals for your website and anticipate a lot of visitors, it’s the best choice.

    Register a Domain

    Before purchasing a hosting plan, you’ll want to buy a domain name. There are a couple of ways to do this, including through a good domain registrar or through a hosting provider. There are several things to consider when purchasing a domain, such as choosing the right domain for your business, choosing the perfect domain registrar, and determining which top-level domain (TLD) extension to pick. For most, it’s best to opt for a .com domain simply because it is the most recognizable. That said, there are cases where you might want .net rather than .com.

    Purchase Your Hosting Plan

    SiteGround WordPress hosting

    Now that you understand the different hosting types, it’s time to purchase your hosting plan. For the best value, features, and scalability, we highly recommend SiteGround. They offer cloud-based managed hosting at reasonable prices. If you’re starting out, their StartUp plan is a great choice. With pricing for less than $15 per month, you’ll get a lot of bells and whistles, including free emails, migration, SSL, and CDN, along with several security features such as daily backups, malware scanning, and more.

    SiteGround site tools

    SiteGround is simple to navigate, too, thanks to its intuitive Site Tools dashboard. There you can manage your websites, domains, and emails, make performance tweaks, access your website’s files, and get statistics on your website’s performance.

    Let’s walk through the steps to set up your new hosting account through SiteGround.

    Choose Your Plan

    As previously mentioned, SiteGround offers several hosting plans depending on your needs. For this tutorial, we’ll start with the StartUp plan. If you need more storage or resources in the future, you can easily change your plan at the click of a button. For now, this should suit newcomers quite well. Start by clicking the Start Now button on SiteGround’s home page.

    how to host a website

    Scroll down the page to reveal the hosting plan choices. Click on the Get plan button for the StartUp plan.

    Choose StartUp plan

    Next, you’ll decide whether to purchase a new domain through SiteGround or use one already purchased.

    register a new domain

    Create a SiteGround Account

    The next step in the process is to create your SiteGround account. This information will be used for billing and registering your domain with ICANN should you purchase a domain through SG.

    Complete registration

    Once you complete the registration fields, click the Pay Now button to set up your account.

    Complete SiteGround purchase

    Ready to Host!

    Once you complete your purchase, you’ll be taken to your new SiteGround account, where you can set up your website. On the main home page in SiteGround, you’ll have access to a wealth of information to help you get started, along with quick links to your hosting plan, domains, and some helpful blog articles. Click the Set Up Site button to start.

    how to host a website

    Next, choose whether to build your new website on a new, existing, or temporary domain. In this tutorial, we’ll start with a temporary domain. Click the Select button to continue.

    choose temporary domain

    SiteGround will assign a temporary domain to your account. Click the Continue button to proceed to the next step.

    temporary domain

    Next, select Start New Website. Alternatively, if you have a website you’d like to migrate to SiteGround, you can choose Migrate Website, and SiteGround will move your existing website to your new hosting plan for free.

    start new website

    The next step is to choose the application you’d like to install. In this post, we’ll select WordPress.

    Choose WordPress

    From there, you’ll need to create your WordPress login credentials. Input your email address (1), create a password (2), then click continue (3).

    how to host a website

    Finally, if you wish to add extras like Site Scanner, you can do so on the final screen. Otherwise, click Finish.

    finish setup

    That’s it! SiteGround will install WordPress for you, set up your database, and give you an easy way to build the website of your dreams.

    Final Thoughts on How to Host a Website

    These decisions are essential for establishing an online presence, from choosing the right hosting partner, like SiteGround, to considering the different hosting types. You can be confident that your new website will succeed by asking the right questions, understanding your business’s requirements, and taking advantage of features such as one-click installations. Remember to prioritize features such as uptime, performance, and security to ensure your customers have a seamless, enjoyable browsing experience. Initially, hosting a website may appear daunting, but once you acquire the right tools and know-how, you’ll have the necessary skills to create and maintain your website successfully.

    Are you looking for a new theme to accompany your new website? Check out our picks for the best themes for WordPress:

    Featured Image via alexdndz / Shutterstock.com

    The post How to Host a Website in 2023 (Simple Beginner’s Guide) appeared first on Elegant Themes Blog.

  • 5 Ways to Style Divi’s Circle Counter Module

    Showcase stats, skills, and more with Divi’s Circle Counter Module. Utilizing this module helps break up the monotony that can be present on pages that contain a lot of numerical data. The Circle Counter Module gives you a beautiful and visually-compelling way to display a single data point. Upon page load, the module has an eye-catching animation that showcases data in an exciting way. Say goodbye to boring tables on your web pages! In today’s blog post, we’ll learn how to style Divi’s Circle Counter Module, with the help of some of the free layout packs that come with Divi.

    Examples of How-to Style Divi’s Circle Counter Module

    We’ll use a variety of layout packs throughout this tutorial. Each layout pack is from a different sector. This will showcase that there are many instances where the Circle Counter Module can be put to use.

    Option One: Divi Streamer

    With this layout pack, we used the Circle Counter Module to showcase the demographic stats of the Divi Streamer.

    Style Divi's Circle Counter Module - Divi Streamer

    Style Two: Divi Chocolatier

    For a chocolatier, we used the modules to showcase the number of orders that had come into the business.

    Style Divi's Circle Counter Module - Divi Chocolatier

    Design Three: Divi Jewelry Designer

    In this case, we used the Circle Counter module to present information to the viewer.

    Style Divi's Circle Counter Module - Divi Jewelry Designer

    Look Four: Divi Hostel

    Measuring the “happiness quotient” among guests with an animated module just makes sense.

    Style Divi's Circle Counter Module - Divi Hostel

    Demo Five: Divi Toy Store

    We use Circle Modules here to promote a sale on an online store.

    Style Divi's Circle Counter Module - Divi Toy Store

    Preparing to Style Divi’s Circle Counter Module

    Before we begin to style Divi’s Circle Counter Module, we need to first create a separate section that will house these modules. Whether you are adding this section to a new page or an existing page, you will need to do the same preparation. Prior to styling, decide which data points you would like to showcase in the Circle Counter Module. Next, you will need to create a section for your modules. Thirdly, you will need to decide how many columns will be within the row. This is why you’ll need to know which data points will be populating the data for your Circle Counter Module. Your data points will influence the number of columns that you will be using. Once this is set up, you will then add your Circle Counter Module to each column.

    Creating Your Section

    First, click on the blue plus icon. This will add a new section to your page.

    Add a new section to your page.

    Selecting Your Columns

    Next, you will use the green plus icon to add a row with the number of columns that you’ll be using. Each column will hold one Circle Counter Module.

    Add a new row with columns to your page.

    Add Circle Counter Modules

    Once you have your columns created, click on the gray plus icon. This will open the Modules Modal. From here, select the Circle Counter Module.

    Add the Circle Counter Module

    For consistency, I would recommend styling one Circle Counter Module at a time. Then, use Divi’s right-click menu to duplicate each Circle Counter Module and modify the data point within.

    Now that we have the fundamentals down pat, let’s start styling the module.

    Style One ft. the Divi Streamer Layout Pack

    You can follow this blog post to see which layout from the Divi Streamer Layout Pack suits your needs best. For this tutorial, we’re going to modify the About Section within the landing page layout.

    About section of the Divi Streamer Landing Page Layout

    Prepare the Section

    First, let’s delete the Number Counter Modules that are currently in this section. Hover over the module, and from the gray popout menu that appears, click the trash can icon.

    Remove Number Counter Modules

    Repeat this for the other Number Counter Module within the section.

    Add Circle Counter Module

    Next, click on the gray plus icon to add a Circle Counter Module to the first column of your row. Next, click on the Circle Counter icon to add one of the modules to the column.

    Adding the Circle Counter Module to the row

    Adding Your Content

    Once your first Circle Counter Module has been added, you’ll now need to enter your data point. In the Content tab of the module, enter a description for your data point. In our case, we’ll be showcasing a percentage of users who are from Toronto. So, we enter our text and the number 78 (without the percent sign!)

    Enter your content and data

    Style the Circle Counter Module

    We now will move to the Design tab. As our section is part of the Divi Streamer Layout Pack, we’ll use the font, text, and colors that are a part of the pack to influence the styling of our module.

    Styling the Circle Graph

    Let’s start first by clicking on the Circle tab to decide on the colors used for the circle part of the module.

    Circle Design Settings:

    • Circle Color: #5200ff
    • Circle Background Color: #ffffff
    • Circle Background Opacity: 0.4

    The Design Tab Settings for the Circle Tab

    Styling the Title Text

    Following styling the circle graph, we’ll move on to the Title Text of the module. Click on the Title Text tab, then use the following settings to add some life to the title text of our Circle Counter Module.

    Title Text Settings:

    • Title Font: Poppins
    • Title Font Weight: Bold
    • Title Font Color: #ffffff

    Styling the Title Text for the Circle Counter Module

    Adding Style to the Number Text

    Last but not least, we’ll be fixing the numbers within the Circle Counter Module. For this, we click on the Number Text tab. Then, we’ll use the following settings to style. Notice, we pulled inspiration from the layout pack, but also the Number Counter Modules that were there before.

    Number Text Settings:

    • Number Font: Poppins
    • Number Font Weight: Bold
    • Number Text Color: #ffffff
    • Number Text Size: 72pt

    Circle Counter Number Text Settings

    Once you have ended these final edits, click on the green check mark at the bottom of the modal box. This will save your changes.

    Copy and Update Module

    With styling complete, we can now duplicate this module. We will modify it with our other data points and their corresponding titles. To do this, hover over the module. This will bring up the modules settings menu popup. Click the copy icon. Then, move the module to the other columns in your row.

    Duplicate Circle Counter on the Divi Streamer Page

    In our case, in addition to updating the title and the data for the module, we also changed the colors to match the layout pack.

    The finished Divi Streamer Circle Counter example

    Design Two with the Divi Chocolatier Layout Pack

    Follow the Divi Chocolatier Layout Pack blog post to find out how to install the layout onto your website. We’ll be modifying the events sections on the home page layout. Let’s add some Circle Counter Modules to show data on how many orders have been collected.

    The section we'll be replacing on the Divi Chocolatier home page layout

    Remove Current Content

    Firstly, we want to remove the current modules. While the Text and Image Modules here look great, they’re quite static. By using the Circle Counter Modules, we’ll add some excitement and animation to this section. Hover over each module and click the trash can icon. The icon will appear in the module settings popout menu.

    Remove old modules to prepare the row for the Circle Counter Modules

    We’ll end up with an empty 3-column row.

    The empty row in preparation for our new modules

    Update Titles

    You may also want to consider updating the text modules for the titles to something that is more aligned with the upcoming content for the section. To do so, hover over the text modules, and click on the gear icon to edit the module text.

    Edit title Text Modules

    Add Circle Modules

    Before we add our Circle Counter Modules, we’re going to change the column number for our row. Hover over the row, and click on the grid icon. This will bring a popup where we can select the number of columns we need. For this design, we’ll be visualizing four pieces of data. So, we’ll choose to add four columns to this row. Click on the four-column icon.

    Change column number for Circle Counter Modules

    Now, we’ll add the Circle Counter Modules to the first column by clicking on the gray plus sign icon. Then, when the module popup appears, we click on the Circle Counter icon to add our first Circle Counter Module.

    Add Circle Counter Module to the first column of the row

    Add Data to Circle Modules

    With our first module in place, we can begin to style and add content to it. Firstly, let’s add our title for this module. Next, we’ll add our data point.

    Add your data and content

    For this design, we’ll remove the percent sign that comes with the module by default. To do this, we click on the Elements tab. Next, we uncheck the toggle next to the Percent Sign option.

    Remove percent sign from Circle Counter Module

    Now, we can style this module.

    Styling the Circle Counter Module

    To begin, we switch to the Design tab of the module.

    Switch to the Design tab

    Adding Branding to the Circle Graph

    Next, we click on the Circle toggle to access the design settings for the circle graph aspect of the module. We’ll use the following settings to style it:

    Circle Design Settings:

    • Circle Color: #ff6a28
    • Circle Background Color: #000000
    • Circle Background Opacity: 0.3

    Circle Background Color Settings

    Stylizing the Title Text

    For the title text, we’ll use the following settings after clicking on the Title Text tab:

    Title Text Settings:

    • Title Font: Jost
    • Title Font Weight: Regular
    • Title Text Color: #000000

    Title Text Settings

    Designing the Number Text.

    We’re going to use the same font and color for the number text. However, we’re going to change the size. We have more room within the Circle Counter Module since we are not using the percent sign. We’ll use this to our advantage in our design. Click on the Number Text tab, and enter the following settings:

    Number Text Settings:

    • Number Font: Jost
    • Number Font Weight: Regular
    • Number Text Color: #000000
    • Number Text Size: 72px

    Number Text Settings

    Duplicate and Finish

    Now that we have our first Circle Counter Module designed, we can go ahead and duplicate it.

    Duplicate our Circle Counter Module

    We’ll move the duplicates into their own row, and update the content within to reveal our finished product.

    The Completed Divi Chocolatier Layout with Circle Counters

    Style Three with the Divi Jewelry Designer Layout Pack

    For this design, we used the Divi Jewelry Designer Layout Pack as our starting point. We wanted to add an educational section to the product page of this layout, and will be using the Circle Counter Module to showcase this information. We’ll convert the testimonial section at the bottom of the page into this.

    The testimonial section of the Divi Jewelry Designer Product Page Layout

    Remove Modules

    As with our previous work, we need to go in and delete the current modules within this section.

    Remove old modules from section

    Update Section and Row Design and Structure

    For this layout pack, we also want to change the section’s background to add some interest. Click on the gear icon within the blue settings menu of the section.

    Edit section settings

    First, let’s remove the background image. Click on the Background tab. Then, click on the image icon. Finally, click on the trash can icon to remove the background image.

    Removing the background image from the section

    We want to leave the background gradient and color. Now, let’s add a background pattern to the section. Click on the Background Pattern icon. Then, click the plus icon to add a Background Pattern.

    Add background pattern

    We’ll use the following background pattern.

    Selecting background pattern

    Click the green check icon to save your settings for the section. We’re now going to change the column count of our row. For this design, we’re going to have five columns for our Circle Counter Modules.

    Change column number to five columns

    Add Circle Module

    With the columns and sections created, click on the gray plus icon to add our Circle Counter Module.

    Add Circle Counter Module to the Jewelry Designer

    With the module added to the column, as before, we add in our content. We’ll use the percent sign in this design.

    Add content to the Circle Counter Module

    Style Your Circle Counters

    Now, we’re going to begin to style our counters.

    Stylizing the Circle Graph

    We first start with the circle portion of our counter. The following settings will be used:

    Circle Design Settings:

    • Circle Color: #000000
    • Circle Background Color: #ac8961
    • Circle Background Opacity: 0.5

    The Circle design of the Circle Counter Module


    Notice how we changed the background opacity for this design. We went with a similar beige color, but increased the opacity to add an air of luxury to our design.

    Adding Style to the Title Text

    For the title text, we’ll use the same font family that is used throughout the layout pack. You can find the settings by clicking on the Title Text tab. Below, find the settings that were used to style the title text:

    Title Text Settings:

    • Title Text Font: GFS Didot
    • Title Font Weight: Bold
    • Title Text Color: #000000

    Styling for the Divi Jewelry Designer Layout Pack

    Styling the Number Text

    For the number text, we’ll use a gold color to call back to the colors used within the branding of this layout pack. We click on the Number Text tab to enter the settings which we’ll use below:

    Number Text Styling:

    • Number Font: GFS Didot
    • Number Text Color: #ac8961 
    • Number Text Size: 48px

    Styling for the number in the Divi Jewelry Designer Layout Pack with Circle Counter Modules

    Saving and Duplicating Our Work

    Once we’ve entered in all these settings, we now click on the green check mark at the bottom of the settings box. This will save all our hard work. Now, we can duplicate the module, as we did in previous styles, and edit the content with the remaining data.

    The finished Circle Modules for the layout pack

    We also added some Text Modules in another row above our Circle Modules to add context to our data points.

    Onto the next design!

    Design Four ft. Divi Hostel

    We’ll use the Divi Hostel Layout Pack for our fourth design of this post. Specifically, we’ll modify the amenities section within the landing page template.

    Divi Hostel amenities section within the landing page template

    Remove Modules from the Section

    To prepare for our circle module, we need to remove the modules that are within the section.

    Remove old modules from the Divi Hostel page template

    We want to have four columns for our circle modules, so we’ll leave the row structure as it is.

     Add Circle Module

    Click on the gray plus icon to add the Circle Counter Module to the first column of the row.

    Add Circle Counter to your first column

    Add Content

    Once in the Content tab of the module settings, add in your title and data point.

    Add content to Circle Counter Module

    Start Designing the Circle Counter Module

    Switch to the Design tab to start styling your Circle Counter Module. We’ll start with the circle graph.

    Styling the Circle of the Circle Counter Module

    We’ll use the following settings to style the circle graph of the module:

    Circle Design Settings:

    • Circle Color: #008186
    • Circle Background Color: #d37643
    • Circle Background Opacity: 0.2

    Title Text Styling

    Next, we’ll move on to styling the Title Text of the module. We’ll use the following settings:

    Title Text Settings:

    • Title Text Font: Manrope
    • Title Font Weight: Ultra Bold
    • Title Text Color: #000000

    The Title Text settings for the Circle Counter Module ft. the Divi Hostel Layout Pack

    Number Text Styles

    Finally, we’ll style the number within our Circle Counter Module. The settings that we’ll use are here:

    Number Text Styling:

    • Number Font: Manrope
    • Number Font: Regular
    • Number Text Color: #d37643
    • Number Text Size: 54px

    Number font styling for the Circle Counter Module Divi Hostel

    Add Border and Padding

    Let’s add a border and some spacing to the module to add some interest to the Circle Counter Module. Within the Circle Counter Settings Design tab, click on the Border tab. There, here are the settings to use:

    Border Settings:

    • Borders: All borders
    • Border Width: 4px
    • Border Color: #008186
    • Border Style: Solid

    Adding a border to the Circle Counter Module

    As you can see, we need to add some padding to the module so that the borders don’t stick to the modules. First, we click on the Spacing tab. Next, we’ll use a 25px padding for all the sides.

    Adding spacing to the Circle Counter Module

    Duplicate and Update Your Module

    To save time, we’ll use the right-click menu to duplicate our finished work for the other columns. Right-click on the finished Circle Counter Module, and click the copy icon. Update the content as needed for your needs.

    Final look of the Circle Counter Modules

    Final Example: Divi Toy Store

    For our last example of styling Divi’s Circle Counter Module, we’ll use the Toy Store Layout Pack. We’ll be modifying the home layout within the pack, specifically, the call to action section at the bottom of the page.

    The default Divi Toy Store Footer

    Add Rows to Section

    Unlike our previous examples, we’ll add two rows to this section. This row will be where we’ll add our Circle Counter Modules. To add a new row, hover over the row, and click on the green plus icon. Do this twice.

    Adding two rows to the section

    Then, move the Button Module from the first to the third row. So, we’ll have three rows within this section now: the first row will hold the call-to-action, the section will remain empty (for now), and the third row will have the button.

    Setting up the section with three rows

    Change Column Structure and Add Module

    Now, let’s change the structure of the row that will house our Circle Counter Module. To do this, hover over the grid icon on the green row menu. Select the 3-column structure,we’ll add three modules to this row.

    Change column structure for the row

    In the first columns, we’re going to add the Circle Counter Module by clicking on the gray plus icon, then clicking the Circle Counter Module icon.

    Adding Circle Counter Module

    Add Content to Circle Counter Module

    Now, we’re going to add our content and data to our Circle Counter Module.

    Adding text to the Circle Counter Module

    Style the Circle Counter Module

    As with our previous examples, we move to the Design tab to style the title text, number text, and more. However, we’ll be doing something a little differently to round out this tutorial.

    Styling the Circle Counter

    We’ll start by styling our circle counter with the following settings:

    Circle Design Settings:

    • Circle Color: #557068
    • Circle Background Color: #ffffff
    • Circle Background Opacity: 1

    Styling Circle Graph Circle Counter Module

    Notice how we’re using no transparency for the circle’s background opacity. For this design, we’ll click on the Text tab, and select Light as the text color. This will make the title and the number will be white, or the color you’ve set as the light font color for the page.

    Text Design Settings:

    • Text Alignment: Center
    • Text Color: Light

    Setting text color

    Adding Style to the Title Text

    For the Title Text styling, we’ll use the same font used through the Divi Toy Store Layout Pack. Here are the settings to use:

    Title Text Settings:

    • Title Font: Libre Baskerville
    • Title Font Weight: Bold

    Title Text Settings for the Circle Counter Module

    Styling the Number Text

    For the number text, we’ll use the following settings:

    Number Text Settings:

    • Number Font: Libre Baskerville
    • Number Font Weight: Bold
    • Number Text Color: #ffffff
    • Number Text Size: 72px

    Number Text Settings for the Toy Store Layout Pack

    Adding Accents to Circle Counter Module

    To finish this tutorial, we’re going to go back to the Content tab. We’re then going to click on the Background tab for us to add some accents to our Circle Counter Module. We’re then going to move to the Background Mask icon.

    Background mask as an accent to the Circle Counter Module

    Styling the Background Mask for the Circle Counter Module

    For the Background Mask, we’ll use the following settings to add an accent to your Circle Counter Module

    Background Mask Settings:

    • Background Mask Design: Rock Stack
    • Mask Color: #eac989
    • Mask Transform: Rotate, Invert
    • Mask Aspect Ratio: Square

    Styling Background Masks as accents

    For the second module, we use the following settings:

    Background Mask Settings (Module 2):

    • Background Mask Design: Rock Stack
    • Mask Color: #354e7c
    • Mask Transform: Invert
    • Mask Aspect Ratio: Square

    Styling Background Masks as accents for the second module

    For the last module, these are the settings to use:

    Background Mask Settings (Module 3):

    • Background Mask Design: Rock Stack
    • Mask Color: #f6c6c5
    • Mask Transform: Flip Horizontal, Rotate, Invert
    • Mask Aspect Ratio: Square

    Styling Background Masks as accents for the last module

    With all the accents in place, this is what the final product looks like:

    Final look of the Circle Counter Modules with the Divi Toy Store

    Final Thoughts

    With some guidance and great data, you can change the way in which your users will interact with the content on your site. Using the Circle Counter Module helps to add some interest into your page while showcasing information about your product or service in an eye-catching way. We look forward to seeing you implement some of these tutorials on your site. If you are inspired, let us know in the comments section down below!

    The post 5 Ways to Style Divi’s Circle Counter Module appeared first on Elegant Themes Blog.

  • 10 Best AI Audio Tools in 2023 (For Podcasts, Music & More)

    Artificial intelligence (AI) is transforming the audio industry. What used to require complex software and a high skillset is now accessible to the masses. AI audio tools are opening up new possibilities for anyone to create podcasts, videos, music, and more, in ways we’ve never seen before. Whether you are a podcaster, musician, or content creator, these AI tools can take your productivity and creativity to a whole new level. In this post, we’ll explore the best AI audio tools with various useful applications. We’ll compare features, pricing, and how they can best be used to fit your needs.

    What is an AI Audio Tool?

    In its basic form, an AI audio tool uses artificial intelligence, advanced algorithms, or state-of-the-art neural networks to manipulate audio. With AI audio tools, users can tap into the power of AI to edit, create, and enhance audio in different ways with ease. There are many different types of AI audio tools with various applications, including:

    • Audio enhancers to can help refine audio tracks automatically
    • Voice generators to create humanlike speech for podcasts or videos
    • AI music creators to help anyone make their own music with the help of AI
    • Text-to-speech tools for content creation
    • AI Video generators with built-in AI audio tools for faster video production.
    • and more

    With that in mind, let’s explore some of the top AI audio tools out there.

    10 Best AI Audio Tools in 2023


    Subscribe To Our Youtube Channel

    Our list of the best AI audio tools hopes to provide a platform for everyone. Whether you plan to use these tools for personal or professional use, our list has the top AI audio tools to make your process a smoother experience.

    1. LANDR

    LANDR AI audio mastering suite

    LANDR is an AI-powered audio tool that allows you to create, collaborate, master, distribute, and promote your music. From one intuitive interface, you can do more regarding audio engineering. LANDR is lauded as the first and best AI audio tool used by megastars like Lady Gaga, Gwen Stefani, Snoop Dogg, and Seal.

    Its claim to fame is its powerful, unrivaled AI mastering, which can automatically create personalized masters based on your music with amazing precision. LANDR’S AI is toasted as being the best in the industry, providing excellent quality, clarity, and security when it comes to using AI to master audio, regardless of the size of your studio. LANDR has a fantastic drag-and-drop interface that allows you to master tracks with ease. Additionally, the suite comes with bespoke mastering plugins that help you produce the best tracks without investing additional resources on incompatible extras.

    Key Features of LANDR:

    • Boasts of a large selection of curated samples
    • 30+ exclusive VST (virtual studio technology) plugins
    • Unlimited online masters and revisions with full album mastering
    • Audio distribution to platforms like Spotify, Tidal, YouTube Music, Apple Music, and More
    • Collaborate directly on tracks from within the studio or remotely using state-of-the-art text and video messaging

    LANDR's exhaustive sample library

    LANDR’s sample library provides a great starting point for your mastering journey. You have access to a wide array of tracks that you can use within your work. Additionally, you can save and use individual stems (or music mixes) from said samples to further power your AI audio mastering journey.

    Best For:

    For serious sound engineers, producers, and those looking for a total solution for mastering, complete with the ease of AI in the editing process, consider adding LANDR to your suite of tools. It has a robust feature set utilized by industry greats that can be harnessed from the comfort of your studio.

    Pricing: Paid plans start at $19.99 per year

    Get LANDR

    2. Descript

    Descript, an AI audio editor

    Descript is more than just a simple AI-based audio editing studio. While it stands out as a podcast editing solution, as a platform, it can do so much more for the creator. Descript perfectly merges video editing in an environment powered by artificial intelligence. With AI, your transcripts are automatically transformed, so you can easily edit them like a Google Document. Add your visuals, and you can enjoy the freedom of merging text, audio, and video in a format similar to putting together a PowerPoint presentation. Descript gives you access to thousands of premium stock media like photos and videos, so creating content for YouTube, TikTok, and other social media channels can be done from the same platform you use to edit your next podcast. Indeed, for a user-friendly editing experience, choose Descript as your AI audio tool today.

    Key Features of Descript:

    • A powerful, AI multitrack production engine
    • Transforms low-quality recordings to studio sound with machine learning
    • Filler word removal
    • Clone your voice using overdubbing
    • A massive gallery of presentation and video templates

    Descript's interface design is it's key feature

    Descript’s key feature is its easy-to-navigate editing interface. You can input your text for text-to-audio, perform video editing tasks, splice audio tracks, and more from one sleek panel.

    Best For:

    Podcasters, video essayists, journalists, and those working with mediums that utilize audio and video within their content will love working with Descript. The simple interface and its powerful features allow you to edit video and audio simply yet powerfully.

    Pricing: Free, Paid plans start at $15 per month

    Get Descript

    3. Mubert

    Mubert AI generative music

    Mubert melds human-created audio and AI to create stunning music for your content. Never again will you need to spend time looking for creative commons music or paying for expensive royalty-free music. You can create your theme song, music, and more with Mubert. With AI, Mubert can take your English prompts and generate any track you can think of. Mubert comes with over 100 AI-generated tracks that you can use for free immediately after creating your account. As a creator, you can monetize your digital assets through Mubert Studio. If you’re looking for a way to add AI-generated music to your product, Mubert has an API that you can use to bring truly royalty-free music to your next project. If you’ve ever thought of making your music, Mubert is one of the best AI audio tools you can use to make your music today.

    Key Features of Mubert:

    • 20+ genres, 10+ moods, and 5+ activities to use as a reference for music generation
    • Four AI generation modes: track, jingle, loop, and mix
    • Explore and search for AI-generated and user-submitted tracks
    • Set the track length up to 25 minutes, beats per minute as well as the key of your track

    Mubert's simple and effective interface

    The Mubert interface is simple yet effective. At its most basic level, you enter your prompt, set a duration, and generate your track. However, you can choose your song’s genre, mode, and activity or set its BPM or key. With a few short sentences, you could have the theme for your next YouTube video or a jingle for a Facebook ad campaign.

    Best For:

    Creatives that create video content, podcasts, and apps will have tons of fun creating their music with Mubert. Creating unique and royalty-free music has become more accessible with the power of AI used through a platform like Mubert.

    Pricing: Free, Paid plans start at $14 per month

    Get Mubert

    4. LALAL.AI

    LALAL.AI, and AI audio stem splitter

    LALAL.AI is an AI audio tool that specializes in stem splitting, allowing users to extract the individual parts of any audio or video. Vocals, instruments, and accompaniments can be separated and edited using its AI-powered technology. LALAL.AI also has a voice cleaner that lets you strip away the vocals on a track and leave behind just the instruments and background music. Powered by its Phoneix algorithm, LALAL.AI is twice as fast as its competitors because of its evolutionary signal processing method. Furthermore, it boasts cleaner results with fewer mistakes and muddier sounds (artifacts) than its predecessors.

    Key Features of LALAL.AI:

    • Clip instruments, vocals, and background music from video and audio files
    • Vocal cleaner with effective noise reduction and complete background music removal
    • API available to bring noise reduction and stem splitting into your next product or project
    • Works with: drums, bass, piano, electric guitar, acoustic guitar, and synthesizer tracks without loss of quality
    • Works on Linux (Ubuntu), Mac OS, and Windows

    LALAL.AI and it's stem splitting capabilities

    LALALA.AI’s ability to identify and separate multiple instruments and vocals is their platform’s vital and powerful feature. From their minimal interface, you can easily and quickly see which parts of your uploaded track you’d like to isolate,

    Best For:

    Overall, LALAL.AI is a tool anyone who works with audio engineering, remixing, and music should consider adopting. Sound engineers, beat makers, producers, and those who create instrumentals will love having LALAL.AI in their toolkits. With their highly trained AI and easy-to-maneuver interface, routine tasks like stem splitting have been made easier with the help of artificial intelligence.

    Pricing: Free, Paid plans start at a one-time fee of $15

    Get LALAL.AI

    5. Murf

    Murf, a text-to-speech audio tool

    Murf is a text-to-speech (TTS) AI tool that’s great for voiceovers. Using Murf’s TTS tool is often used to create humanlike voices for podcasts, videos, and multimedia presentations. Adding and editing your script is a simple process within the Murf Studio. Murf boasts over 120 AI voices you can use in many languages. Plus, you can upload your own voiceovers and use AI to change them to match the tone needed to make your next presentation stand out. There are also more than 8,000 licensed audio tracks that you get access to when you use Murf Studio to work on your next project. Murf also supports video import from YouTube and Vimeo, providing a seamless process for video editors. Common audio and video editing functionalities are possible when you use Murf, an AI audio tool that does more than just text-to-speech.

    Key Features of Murf:

    • 20+ languages for text-to-speech
    • Edit your voiceovers through a simple, clean, and easy-to-understand interface
    • Easily emphasize specific words, change and edit pitch, and add pauses to your voiceovers
    • Pitch-perfect, life-like, and editable voice cloning
    • Comes with a collection of royalty-free background music

    Murf's Google Slides integration

    You’re in luck if you use Google Slides to craft your presentations! Adding professional yet simple voiceovers to your next presentation is possible with Murf. When you write and edit your slide content, Murf will enable you to select your favorite AI voice from the Murf library and add a voiceover to your next Google Slide document.

    Best For:

    If you’re looking for a platform that seamlessly combines video editing and text-to-speech, look no further than Murf. This handy audio tool packs a punch and can be easily maneuvered through its minimal online interface.

    Pricing: Free, Paid plans start at $29 per month

    Get Murf

    6. Listnr

    Listnr AI, An AI text-to-speech tool

    Listnr is an AI audio tool with text-to-speech, speech-to-text, and voice cloning capabilities. Make realistic audio from text inputted into Listnr. Add pauses, check pronunciation, change your speech speed, and more when you use Listnr as your text-to-speech generator. Alternatively, you can upload your finished audio file to Listnr and have a transcript created. For example, this is a great way to generate show notes for your podcast. For voice cloning, in less than 5 minutes, Listnr can duplicate your voice. You can then use your voice to have greater control over your voiceovers, add pauses, change your pitch, and much more.

    Key Features of Listnr:

    • 600+ voices, 75+ different languages
    • Export audio files in WAV and MP3
    • Provides podcast hosting and distribution
    • Embeddable audio player widget

    Listnr's native podcast creator

    Quickly start your very own podcast through the Listnr dashboard. Add your title, select your category, and edit your show cover with Canva. Then you can either use Listnr’s Speech Synthesis Engine to record your episode from your browser directly. Or, you can upload your podcast episode directly to Listnr to use its podcast hosting services. Furthermore, it’s simple to distribute your latest podcast to your platform of choice via RSS, URL, or with an iframe embed.

    Best For:

    Listnr is a platform you want to get acquainted with for a dedicated AI audio tool. Whereas other platforms seek to work with multiple mediums, Listnr sticks to working with AI audio and provides you with the tools to work with this medium.

    Pricing: Free, Paid plans start at $19 per month

    Get Listnr

    7. Speechify

    Speechify, a text-to-speech reader

    Speechify is a reading assistant that is powered by artificial intelligence. As a speech reader, it makes listening through long documents, articles, emails, and more a straightforward task. With a vast library of voices and accents, you can easily read textbooks, emails, and documents. Speechify’s interface is uncomplicated, making turning text-to-speech a simple one. In addition to playing back your documents, Speechify has a library of royalty-free music tracks that you can use to accompany your next listening session. Export and share your audio with just the click of a button with Speechify. If you want to be more proactive and productive with your time, leave all the heavy reading to Speechify.

    Key Features of Speechify:

    • 200+ high-quality AI voices, 20+ languages, and accents
    • Detailed control over pitch, tone, pauses, and speed
    • AI voice dubbing for video with over 100 languages supported
    • Works as a Chrome extension and an app for Apple and Android devices

    Speechify's upload settings

    Speechify allows you to upload full documents or import a YouTube video to begin its reader service. Once you’ve imported your content, you can manipulate the speech speed, add advanced pauses, change the pitch, and more. And all of this is possible from a light and crisp interface.

    Best For:

    If you need to consume long documents, need help with studying, or want to read my books, Speechify can help you reach all of your goals. Its ability to upload documents easily, plus its highly customizable voice playback, make it an excellent AI audio tool.

    Pricing: Free, Paid plans start at $11.58

    Get Speechify

    8. Otter

    Otter, live AI-powered transcription and more

    Otter has a suite of AI audio tools that work with your favorite chat programs. Firstly, it’s a live transcription service that is excellent for meetings. With AI, Otter can listen in on your meeting and create notes with key points and takeaways that can be ready by the meeting’s end. When it comes to being more productive, Otter has got your back. Otter can record audio while taking notes. Using AI, the software can highlight any vital information that it may find important. This is a great way to capture lectures, meeting notes, and more. Real-time captions are also a feature of Otter. Make your meetings inclusive and accessible by providing a way for people who may interact with online meetings differently. When it comes to a solid AI audio transcription tool, Otter is one of the best.

    Key Features of Otter:

    • Record and transcribe meetings on Zoom, Microsoft Teams, and Google Meet
    • Automatically captures slides and presentations, then generates meeting notes
    • Share notes with meeting attendees right after or during meetings
    • Sync transcriptions to the cloud
    • Provides captioning within your next online meeting

    Otter's dashboard

    Otter’s dashboard makes editing your transcriptions a smooth process. With features like takeaways, you can add notes to certain transcript parts. Use the highlights feature to point out poignant points from your meeting. You can include your meeting link for automatic translations that can take place even if you aren’t on your browser.

    Best For:

    If you need an AI audio tool to help you with all your transcription needs, look no further than Otter. Packed with exciting and necessary features, every meeting note-taker will be thrilled to have Otter in their back pocket as they enter their next meeting.

    Pricing: Free, Paid plans start at $16.99 per month

    Get Otter

    9. Krisp

    Krisp, a voice productivity tool

    Krisp is touted as the world’s best noise-canceling app. Another tool focused on online meetings, Krisp, helps to keep your background noise to a minimum with the power of its neural networks and artificial intelligence. Background noise and echo can be removed while you are live on a call. This will ensure your voice is crisp and clear during the meeting and that you’re clearly understood by your team members, even if you may be in the busiest Starbucks in your city. Furthermore, Krisp allows meeting transcription to take place on its platform. Automatically take meeting notes and show your best self using Krisp’s bot-free and non-intrusive meeting assistant in your next meeting.

    Key Features of Krisp:

    • It provides both inbound (through your speakers) and outbound (through your microphone) noise cancellation
    • Removes background noise from live and pre-recorded meetings
    • Unlimited meeting transcriptions
    • Real-time meeting assistant and automated meeting notes
    • Automatic summarization of transcriptions and meeting notes

    Krisp's transcription summaries

    In addition to optimizing your voice calls, Krisp has stellar transcription features that allow you to turn your meetings and calls into polished notes. Automatically summarize, add critical points, and download the transcription of your calls through the Krisp interface.

    Best For:

    Virtual assistants, digital nomads, and anyone who carries many online and virtual meetings will be thrilled to use a product like Krisp in their day-to-day work. Additionally, those who work in call centers will be thrilled to know that a product like Krisp exists.

    Pricing: Free, Paid plans start at $12 per month

    Get Krisp

    10. Podcastle

    Podcastle AI audio tool

    Podcastle is an all-in-one AI-powered podcasting platform. Record, edit, and export your podcasts from one web-based interface. Podcastle gives you multiple AI audio tools under one roof. First, you can publish and stream your podcasts on multiple platforms. Secondly, you can use a sample of your real voice to create a custom AI-generated voice that you can use to create content with Podcastle’s Revoice feature. Upload or import audio files from Dropbox, Google Drive, or your computer to create your next podcast episode. Then, use Podcastle to upload it to your favorite platforms. Podcastle’s audio tools are easy-to-use and understand based on its unique and clean online dashboard. Lastly, use Podcastle to create show notes from your new podcast recording. The modern podcaster can rely on a platform like Podcastle to assist them with their podcast production needs.

    Key Features of Podcastle:

    • Unlimited lossless, high-quality audio recording
    • Multitrack recording, Auto-leveling, dynamic fading, audio effects, and more
    • 10+ hours of transcription, 8+ hours video recording
    • AI-powered noise cancellation
    • Publish podcasts to Apple, Spotify, Google Podcasts, and more

    Podcastle's resource library

    Podcastle has a library of music and special effects when editing your next podcast episode—filter by genre, instrument, and more. Adding additional accouterments to your podcast makes for a thrilling experience for your listeners.

    Best For:

    As the name implies, podcasters will most benefit from this platform. With everything that a podcaster could need under one roof and for one reasonable price, if you plan on starting a podcast soon, consider using Podcastle as your platform and editor.

    Pricing: Free, Paid plans start at $14.99 per month

    Get Podcastle

    Comparing the Best AI Audio Tools

    Our list of the best AI audio tools has something for everyone. Whether you’re a producer, looking for the latest AI-powered technology, or a business owner searching for a tool to help you through your meetings, our list has some of the top AI audio tools you can use to make your life easier.

    Best AI Audio Tools Price Comparison

    Here’s how we’d rank our top AI audio tools and see how they compare regarding price. Also, we’ve highlighted the tools on our list that have a free trial or free version on our list, so you can give them a spin before buying:

    Rank AI Audio Tools Starting Price Free Option
    🥇 LANDR $19.99/mth ❌ Visit
    🥈 Descript $15/mth ✔️ Visit
    🥉 Mubert $14/mth ✔️ Visit
    4 LALAL.AI $15 one-time fee ✔️ Visit
    5 Murf $29/mth ✔️ Visit
    6 Listnr $19/mth ✔️ Visit
    7 Speechify $11.58/mth ✔️ Visit
    8 Otter $16.99/mth ✔️ Visit
    9 Krisp $12/mth ✔️ Visit
    10 Podcastle $14.99/mth ✔️ Visit

    What are the Best AI Audio Tools?

    AI is becoming commonplace in tools and software. So it’s no surprise that AI tools can be found to help you with your various tasks when working with audio. If you’re a producer or audio engineer looking for an AI-powered mastering tool, LANDR is an excellent platform for your process. For an all-in-one AI-powered platform to handle all your podcast and video editing needs, Descript is the platform that will give you all the necessary features within its easy-to-use studio. Lastly, if you want to explore the world of audio creation and make music that uses both human and AI components, Mubert provides several products to help you do just that. Overall, we know that an AI audio tool is available for any personal or professional need that you may have, and we know that our list will assist you in finding the one that’s perfect for you.

    For music lovers, you might also like these top AI music generators that are changing the music industry. And, if you need help picking out a platform for your music or podcast, this list of the best podcasting platforms is right up your alley!

    And if you’re looking for more AI tools, check our ultimate list of the best AI tools.

    Featured Image via smashingstocks / shutterstock.com

    The post 10 Best AI Audio Tools in 2023 (For Podcasts, Music & More) appeared first on Elegant Themes Blog.

  • Get a Free Online Banking Layout Pack for Divi

    Hey Divi Nation! Thanks for joining us for the next installment of our weekly Divi Design Initiative; where each week, we give away a brand new Layout Pack for Divi.

    This time around, the design team has created a beautiful Online Banking Layout Pack that’ll help you get your next Online Banking website up and running in no time!

    This layout pack includes:

    6 Premade page layouts strategically designed for any Online Banking website (including a footer design)
    – Original, royalty-free photos and graphics + customizable source file (see below)
    – Plus, a large collection of pre-designed website elements that are customizable and reusable anywhere.

    This layout pack is available right inside Divi for all Divi customers for FREE as the latest addition to our growing Divi library of hundreds of premade layout packs, thousands of page designs, and countless web design elements and resources.

    divi layout

    Check Out The Divi Online Banking
    Layout Pack Below

    Get it for free today!

    Online Banking layout pack

    Landing Page Design

    Online Banking layout pack

    View The Live Layout Demo

    Home Page Design

    Online Banking Layout Pack for Divi

    View The Live Layout Demo

    Features Page Design

    Online Banking Layout Pack for Divi

    View The Live Layout Demo

    About Page Design

    Online Banking Layout Pack for Divi

    View The Live Layout Demo

    Blog Page Design

    Online Banking Layout Pack for Divi

    View The Live Layout Demo

    Contact Page Design

    Online Banking Layout Pack for Divi

    View The Live Layout Demo

    Key Features

    The Online Banking Layout Pack for Divi is a beautiful, user-friendly design that will grab the attention of potential customers. It provides slick animations that present your content in an engaging way. That, combined with bright colors and a convenient FAQ section, keeps your visitors engaged while building trust in your brand.

    Live Demos

    Click the links below to see a live demo for each of the layouts included in the pack.

    1. Online Banking Landing Page (live demo)
    2. Online Banking Home Page (live demo)
    3. Online Banking Features Page (live demo)
    4. Online Banking About Page (live demo)
    5. Online Banking Blog Page (live demo)
    6. Online Banking Contact Page (live demo)

    Access This Layout Right Now

    Directly from Your Divi Builder

    Since Version 3.0.99 of Divi, you can find and import any of the layouts included in this pack (along with ALL of Divi’s Premade Layout packs) directly from the Divi Builder. They are already waiting for you.

    To access your new layout, simply activate the Visual Builder when editing a page and look for the “Load From Library” icon in the page settings bar (it looks like a plus symbol). Click this icon to launch the Load From Library popup. Under the Premade Layouts tab, you can easily find the new layout by scrolling through the list of layout packs. Once you find the Online Banking Layout Pack, click on it. You will see all the individual layouts included in the pack. Select the layout you want to use and then click the “Use This Layout” button.

    Online Banking Layout Pack for Divi

    For more, check out this video to learn how you can get this layout pack up and running today.

    Subscribe To Our Youtube Channel

    Authentication Required

    Before you can download Premade Layouts from the Divi Library you must authenticate your Elegant Themes Subscription. You can do this by navigating to Divi > Theme Options > Updates. There you can enter your username and API key and save changes.

    Online Banking Layout Pack for Divi

    You can find your API Key under your members area on the Elegant Themes site. After you enter the Username and API Key, you will gain immediate access to our library of hundreds of free layouts (including this one). If you haven’t done this, when you click to import a layout to your page, you will be prompted to enter your Elegant Themes Membership Username and API Key.

    Use Layout Images for FREE with No Licensing Restrictions

    Online Banking Layout Pack for Divi

    The image assets included with these layouts (icons, illustrations, photos, etc.) have no licensing restrictions. This means you can use them in all of your commercial projects without having to worry about paying licensing fees or attributing the photographer. Use them in your commercial websites, sell them within your Divi child themes, include them in your own Divi layout packs or just use them on your blog. We know how challenging it can be to find good photos and how confusing and scary the licensing that governs those photos can be. We want to fix that problem for our users.

    Download the Full Res Image Assets

    New Layout Pack Every Week!

    We hope you enjoy this layout pack. We look forward to hearing your opinions in the comment section below. Make sure you check out next week’s layout pack as well!

    The post Get a Free Online Banking Layout Pack for Divi appeared first on Elegant Themes Blog.

  • Divi Product Highlight: Divi Pixel

    Divi Pixel is a third-party plugin for Divi that adds over 45 custom modules and more than 200 settings to extend the capabilities of Divi. These settings make it easy to create websites that stand out from the crowd. In this post, we’ll look at Divi Pixel and see what it can do to help you decide if it’s the right plugin for your needs.

    What to Expect from Divi Pixel

    Let’s start by taking a look at what you can expect from the Divi Pixel plugin, if you decide to purchase it.

    45+ Customizable Modules

    Divi Pixel adds a ton of new customizable modules to Divi. There’s a lot of variation in modules. It ranges from a before/after slider, to star rating, floating images, carousels, and more.

    Divi Pixel Product Highlight

    200+ Custom Options

    Divi pixel also provides you with a ton of custom options, more than 200 extra options to take your website to the next level! These custom options help you customize your Divi website even further. This goes from being able to upload SVG files, to creating a custom login page, customizing your header & navigation, and more.

    Divi Pixel Product Highlight

    & More

    The options and modules mentioned above aren’t the only ones that come with Divi Pixel. You can expect unique features dedicated to the Blog area and the mobile experience. There’s a also a layout injector included that lets you insert layouts wherever you want!

    Installing Divi Pixel

    Upload and activate Divi Pixel the same as any plugin. Go to the WordPress dashboard and select:

    1. Plugins
    2. Add New
    3. Upload Plugin
    4. Choose File
    5. Install Now

    Installing Divi Pixel

    Next, activate the plugin. Divi Pixel is now ready to use.

    Installing Divi Pixel

    Divi Pixel Settings Screen

    The settings are found in the dashboard under Divi > Divi Pixel. They include 7 tabs with detailed options.

    Divi Pixel Settings Screen

    The settings add features through CSS class IDs, options to enable, and modules added to the Divi Builder. The newest features are labeled. A few are marked as coming soon.

    We’ll look at the latest features and some interesting features in each tab. We’ll see many of the settings on the back and front end.

    Divi Pixel General Tab

    The General tab includes 25 settings that include general options, header and navigation options, and footer options.

    Particles Background

    The Particles Background displays a CSS class ID to add to the module or section you want to display the background. It includes two class IDs to choose from and you can adjust them in the customizer settings.

    Particles Background

    I’ve added the CSS ID to the section.

    Particles Background

    Here’s the background with the animated particles enabled.

    Particles Background

    Maintenance Mode

    Maintenance Mode sets your website to show that it’s coming soon or performing updates. Select any page to show as the maintenance mode page. A custom URL provides access to the site.

    Maintenance Mode

    Here’s the page I selected for my coming soon page. It now shows this page in place of my home page.

    Maintenance Mode

    Allow TTF, OTF, and WOFF Uploads

    Enabling this lets you upload more file types. These file types can now be uploaded the same as any regular file in your media library.

    Allow TTF, OTF, and WOFF Uploads

    Custom Header and Navigation Styles

    Custom Header and Navigation Styles includes hover animations, custom menu dropdown, CTA button, selecting the menu, button text and URL, CSS, a few mobile settings, and more.

    Custom Header and Navigation Styles

    Here’s the header on the front end. It has added a CTA button with a hover animation.

    Custom Header and Navigation Styles

    Footer Customizations

    Footer customizations add new features to the theme customizer.

    Footer Customizations

    The customizer adds the footer menu, bottom bar, and social icons. I’ve adjusted the menu and bottom bar in this example. You can also see the custom scroll bar in this image, which is added separately.

    Footer Customizations

    Divi Pixel Blog Tab

    The Blog tab adds 9 settings and lots of theme customizer options.

    Custom Archive Page Style

    The custom styles include 6 layouts. Choose from a single column with the image on top, a single column with the image on the left, a single column alternating, two columns with the image on top, three columns with the image on top, and alternating using smaller images. You can also apply these layouts to the Divi Blog Module with the CSS Class.

    Custom Archive Page Style

    Here’s the default setting. It adds styling to all the elements including a styled button. The images are wide. This also shows another setting that’s enabled by default called Add icons to meta text and the Read More button. It also adds the author box, post navigation, and related posts, which you’ll see on the posts themselves.

    Custom Archive Page Style

    Changing the layout is as simple as clicking the one you want and saving the changes. Here’s the 3-column layout. The images are tall. I’m hovering over the middle image in the example below to show the overlay.

    Custom Archive Page Style

    You can adjust all the styling with the theme customizer. It includes options for the categories, archives, buttons, sidebar, post navigation, author box, related articles, and comments. I’ve adjusted the title font and excerpt font in the example below. This example also shows the social icons added to the header.

    Custom Archive Page Style

    I’ve adjusted the fonts for the navigation, author box, and related posts. You can adjust all the elements independently. For the author box, I’ve adjusted the title font, body font, and image.

    Custom Archive Page Style

    Divi Pixel Social Media

    The Divi Pixel Social Media tab lets you add social media icons to the header. Choose which part of the header the icons are added to, and the social networks to add.

    Enable Divi Pixel Social Icons

    You can enable the social media icons to display in the header. This also includes options to control how they work on click, for mobile devices, etc.

    Enable Divi Pixel Social Icons

    The icons are placed in the secondary menu by default.

    Enable Divi Pixel Social Icons

    You can also adjust them in the theme customizer. Adjust the icon, background, hover, animation, shape, size, etc. I’ve added the social icons to the primary menu, adjusted the size of the icons, and the hover settings for the icon and background colors.

    Networks

    Select from 19 popular networks. Display them by adding your URL.

    Networks

    Divi Pixel Mobile Tab

    The mobile tab includes breakpoints, fixing the mobile header, hiding the search icon, changing the logo on mobile, etc. This gives you a lot of control over the mobile settings. You can upload any logo you want.

    Divi Pixel Mobile Tab

    Mobile Menu

    The mobile menu adds 9 settings that include options for the menus’ animation style. Choose from a slider, squeeze, spin, elastic, collapse, stand, spring, minus, and vortex. Simply click the one you want. It shows an animation on the settings screen to give you an idea of how it would work on the front end.

    Mobile Menu

    You can adjust all the styling for the hamburger icon in the theme customizer. Adjust the color, open color, background color, opened background color, border radius, padding, etc. In this example, it’s using a different logo, background color, and dropdown menu than the desktop version.

    Mobile Menu

    Collapse Submenu Items on Mobiles

    Choosing Collapse Submenu Items on Mobiles opens another new option- Remove Parent Menu Link. This prevents the parent menu links from opening.

    Collapse Submenu Items on Mobiles

    Divi Pixel Modules Tab

    The Module tab adds over 40 new modules to the Divi Builder. Some of these work with the new post types that are added by Divi Pixel and accessed in the WordPress dashboard. You can show or hide them all or enable the specific modules you want. We’ll look at a few of the Divi Modules.

    Divi Pixel Modules Tab

    Testimonials

    Testimonials adds a new post type where you can create the testimonials for the module to display. You can create them in the editor or get them from Facebook, Google, and WooCommerce. The editor includes fields for the title, content, image, name, company, website, and rating.

    Testimonials

    The module displays the testimonials and provides many options, including the number to display, testimonials to include or exclude, which elements to show or hide, popup settings, carousel settings, the review type, and more. All of the standard Divi design options are here as well.

    Testimonials

    Popup Maker

    The popup maker uses the Divi Builder to create the layouts. The editor also includes trigger settings, popup location options, and customization. This one isn’t a module, but you can show or hide it in the module settings. It’s added to any element with a CSS class ID.

    Popup Maker

    The trigger settings let you choose the trigger events, close options, etc.

    Popup Maker

    The location options include the user roles, site area, and posts that can show the popup. Choose post types, specific posts, and exceptions.

    Popup Maker

    The customization options let you choose the overlay background color, popup animation, position, blur, and more.

    Popup Maker

    FAQ with Schema Markup

    Divi Pixel’s FAQ module is built upon Google’s Structured Data principles. The FAQ builder uses the classic editor. You can create them like any content in the classic editor and add FAQ categories.

    FAQ

    Once you’ve built the FAQs, you can display them with the FAQ Module. Show all FAQs or exclude specific FAQs, display by categories, output structured data and HTML, etc. Style them in the design tab.

    FAQ

    Balloon

    The Balloon Module creates a balloon that is selected as a menu item. Add any content within the balloon and style it in the design tab.

    Content Toggle

    The Content Toggle Module is interesting. It lets you specify two layouts and provides a toggle so the user can switch between them. I’ve specified two layouts. The image below shows the first layout.

    Content Toggle

    Clicking the toggle changes to the second layout, as seen below.

    Content Toggle

    Info Circle

    The Info Circle Module is an interesting way to display information and content. It lets you add icons or images around a circle. Create as many sets of info as you want, choose icons and images for each one, and style them together or independently.

    Divi Pixel Layout Injector Tab

    The layout injector lets you select a Divi layout and place it in certain locations on the website. Place the layout before and after the navigation, footer, and after the blog and archive header. It can also build a 404 page.

    Divi Pixel Layout Injector Tab

    Divi Pixel Supplementary Files

    Divi Pixel also includes many demos you can import to get a head start on your layouts.

    Divi Pixel Supplementary Files

    Where to Purchase Divi Pixel

    Divi Pixel is available in the Divi Marketplace for $169. It includes unlimited website usage, a 30-day money-back guarantee, and 1 year of support and updates.

    Where to Purchase Divi Pixel

    Ending Thoughts

    That’s our look at Divi Pixel. There are a lot of features and modules in this plugin. I’ve only scratched the surface in this post. If you want to extend what you can do with Divi, Divi Pixel is a good place to start.

    We want to hear from you. Have you tried Divi Pixel? Let us know what you think about it in the comments.

    The post Divi Product Highlight: Divi Pixel appeared first on Elegant Themes Blog.

  • 31 Ways You Can Use AI Today (2023 Guide)

    Artificial Intelligence (AI) is sweeping across industries and making the jobs and lives of millions of people easier. All you need is an idea and access to the right tool to apply AI to the tasks you do every day. We’ve gathered 31 unique ways how to use AI today and the exact tools to get each job done.

    Is AI for Actual People or Only Advanced Users?

    To say that AI is useful is an understatement. Five years ago, the tech giants were the only businesses working with AI. At this point, you probably use AI every day, even if you don’t realize it.

    Generative AI has been the AI trend of the year and has reached mass adoption.

    Leading the pack was ChatGPT, which garnered an unprecedented 1 million users in its first five days of availability. It took Netflix 3.5 years and Instagram 2.5 months to reach the same user count. People are swarming to generative AI because of its usefulness in everyday tasks.

    ChatGPT UI Screenshot

    ChatGPT is hardly the only tool out there. Google launched Bard shortly after ChatGPT became a massive success.

    Google Bard UI Screenshot

    Aside from the big names, tons of niche AI tools made it to market to make the tasks you and I perform every day easier. Many popular apps and tools, like Snapchat AI, Grammarly, and Spotify AI DJ, have adopted the technology.

    Let’s explore how you can use AI for the tasks you care about.

    31 Ways You Can Use AI Today

    Are you chomping at the bit to try AI and see what productivity gains you can start enjoying?

    We’ve gathered 31 everyday tasks you can automate or infuse AI with to achieve better results. We grouped tasks that can be done with AI into:

    • Text-based AI tasks
    • Image/video-based AI tasks
    • Audio-based AI tasks

    Each of these types of AI tools has utility in business, personal productivity, and even entertainment. Starting with text-based tasks, here is how you can use AI right now.

    Text and Content Uses for AI in Business and Productivity

    Writing and Natural Language tasks are some of the easiest to start with as you learn how to use AI.

    The ultra-popular ChatGPT is the shining example of an LLM that can do it all (with creative things you can do with it).

    Here we’ve gone through some of the best tasks you can use AI for. These aren’t trivial suggestions, either—no, “write a note for a birthday card” here.

    1. Write Sales Copy and Content for a Website Landing Page

    Writing compelling sales copy for a website landing page is crucial for attracting and converting visitors. But it can be challenging, especially if you’re not a professional copywriter.

    With the power of AI, you can generate persuasive sales copy that captures your visitors’ attention and motivates them to take action.

    Jasper Use Cases Dashboard

    Write anything from a product description to an entire landing page

    AI can analyze your product or service, understand its unique selling points, and craft a compelling message that resonates with your target audience. This can save you a lot of time and effort and help you create a landing page that effectively drives conversions.

    ✨ Jasper, Copy.ai, and Writesonic, among many other AI Writers, can write LP content for you with ease

    2. Summarize Long-Form Articles

    Reading long-form articles can be time-consuming, especially when staying up-to-date with your industry’s latest news and trends. But with AI, you can quickly get the gist of any article without having to read it in its entirety.

    Summarize Article with Bing AI

    Bing AI summarized a news article about a WordPress Release Beta

    AI can generate a concise summary highlighting all main points and key details. Instead of spending hours reading articles, you can use AI to generate summaries and save yourself a lot of time.

    ✨ Try using ChatGPT, Bing AI, or Bard to summarize this article

    3. Write Professional Emails with AI

    Writing professional emails can be daunting, especially when trying to make a good impression or convey a complex idea.

    AI can help you structure your emails, choose the right words, and ensure correct grammar and spelling so you never embarrass yourself. It can even suggest content based on the context of your email threads, making it easier for you to express your thoughts and ideas.

    Hoppy Copy Email Newsletter Generator

    Hoppy Copy used to create a newsletter for Divi eCommerce modules in under 2 minutes

    While there are different options, AI writers are some of the most widely used AI tools. If you write a lot of cold emails for your sales process, there are even AI sales tools to help you with that.

    ✨ Grammarly, Constant Contact, or Hoppy Copy all can create email content with AI

    4. Create Excel Formulas Quickly

    Excel is a powerful tool for organizing and analyzing data, but creating formulas can be complex and time-consuming. AI can simplify this process and develop formulas more quickly.

    CodePal.ai Excel Formula Generator Example

    By explaining what data you have and what you need to do, AI can help you create the right formula for your needs. This can save you time and effort, especially if you’re not an Excel expert.

    Using AI for formula creation ensures accuracy and efficiency, leading to more dependable outcomes from your spreadsheet tasks.

    ✨ Use CodePal or ChatGPT to help you understand your data and create formulas

    5. Spruce Up a Resume

    Creating a professional and compelling resume can be challenging, especially when trying to stand out in a competitive job market. AI can enhance your resume and increase your chances of getting noticed by employers. It can even help with layouts and formatting, which can be challenging in MS Word.

    Resume.io Templates and AI

    AI can analyze and enhance your resume, highlighting relevant skills and experiences, and crafting a compelling career objective. Utilizing AI for your resume optimization can bolster your presentation and boost your chances of securing your dream job.

    ✨ By using Resume.io and ChatGPT, you might just achieve resume perfection

    6. Write Narrative Dialogue for a Story

    Writing dialogue for a story is challenging, especially when trying to make your characters sound authentic and engaging. AI is now helping writers by enhancing storytelling and creating an effective dialogue throughout a piece.

    Create a Story with Sudowrite

    AI can generate dialogue based on the context of your story, the characteristics of your characters, and the tone you want to set. This can save you much time and effort, especially when experiencing writer’s block.

    Bringing in AI for dialogue writing ensures character consistency and believability, making your story more engaging and enjoyable for your readers.

    ✨ Sudowrite, ChatGPT, and Jasper can all help you craft original stories

    7. Have a Back and Forth Conversation on Anything

    AI chatbots have come a long way in recent years, and they can now hold a conversation about virtually any topic.

    Whether you want to discuss the latest news, learn about a specific topic, or chat about your day, an AI assistant might just be the unexpected conversational partner you’ve been waiting for.

    What is Character AI

    Give it a specific persona to act as (personal coach or childhood friend), and the conversational AI will blow your mind with the quality of conversation it has with you.

    ✨ Character AI, ChatGPT, or Bard are great conversational AI tools

    8. Understand Complex Topics Much Faster

    Navigating complex information, whether it’s for work, personal interest, or helping kids with homework, can be daunting.

    AI, powered by advanced language models, can help simplify this process. It can break down any complex information into smaller, digestible segments, identifying key concepts, ideas, and themes. This structured approach allows you to focus on one segment at a time, making the information more manageable and easier to understand.

    ChatGPT Summarize and Teach a Topic

    This will make your study more efficient and effective, as you can focus on one sub-topic at a time and gradually build your understanding of the overall topic. Instead of learning “how to improve SEO for a website,” AI can break down the concept into manageable chunks so you can learn all the individual skills and concepts that make up a whole SEO strategy.

    ✨ Try ChatGPT or any ChatGPT Alternative to break down topics so you can understand each aspect with greater confidence

    9. Practice for a Job Interview

    Preparing for a job interview can be nerve-wracking. This is especially so when you don’t know what questions to be prepared to answer.

    With conversational AI tools, you can practice for your interview and dramatically increase your confidence.

    Using ChatGPT to Prep for Job Interview

    By providing information about the job opportunity, its requirements, and your past experience, an AI tool can generate potential interview questions and help you formulate your responses. It doesn’t matter what you are applying to, like a  first job out of college or a brand-new career in software—AI can help you be prepared.

    You will better anticipate questions and prepare your answers in advance, making you feel more confident and perform better in your interviews.

    ✨ With ChatGPT and Bard, you can prep for any interview with absolute confidence

    10. Grow Website Trafic with SEO Insights

    Growing website traffic is a crucial goal for many businesses, and SEO (Search Engine Optimization) is an essential strategy for achieving this.

    AI SEO tools will analyze your website and provide insights on improving your SEO.

    Writesonic + SurferSEO integration

    By looking at other top-ranking pages in SERPs, it can identify keywords you should be targeting, suggest content you should be creating, and even identify technical issues that could hurt your search engine rankings.

    Using AI to optimize your SEO, you can attract more organic traffic to your website, increase your visibility on search engines, and ultimately grow your business.

    ✨ Surfer SEO, Rank Math, GrowthBar, as well as many other AI SEO Tools, are poised to help you grow your website traffic

    11. Improve Writing Style

    Whether you’re writing a blog post, a fiscal report, or a novel, your writing style can significantly impact how your audience perceives your work.

    Grammarly AI Tone and Grammar Checking an Email

    AI analyzes your writing and provides feedback on how to improve your style. It can suggest ways to make your writing more straightforward, concise, and engaging. It can also help you avoid common grammar and spelling mistakes and ensure your writing is appropriate for your intended audience.

    ✨ Grammarly, Rytr, and Writesonic all have tools to help you correct your writing so it is ready for your readership

    12. Rephrase and Rewrite Your Work for Clarity

    Sometimes, you know what you want to say but are unsure how to say it. Maybe you’re trying to avoid repetition in your writing or struggling to convey a complex idea and need help with better ways of saying something.

    AI has a way with language and can help you express yourself even when you are hitting a wall.

    It can suggest different words, phrases, or sentence structures to help you express your ideas more effectively. It can also be used to avoid duplicate content issues when writing cluster content that shares many of the same pieces of information from different posts.

    ✨ Quillbot, Copy.ai, and other AI Paraphrasers can rewrite anything for you in a jiff

    13. Write or Improve Code

    Coding is often complex and time-consuming process, especially when working on a large project or learning a new programming language.

    GitHub Copilot AI Assistant for Coding Autocomplete

    But with AI, you can write and improve your code more efficiently. AI can suggest code snippets, identify errors, and generate code based on your specifications. This can save you a lot of time and effort and help you create more efficient and reliable code.

    Whether a professional developer or a coding beginner, AI can be a valuable tool for improving your coding skills and productivity.

    ✨ Use Github Copilot, CodePal, and other AI Coding Assistants or AI Website Builders to make coding easier

    14. Create Social Posts and Schedule at the Best Time

    Managing multiple social profiles can be challenging, especially when engaging with your audiences at the best times.

    With the right AI tool, you can create and schedule your social posts more effectively than ever.

    Ocoya Social Media Creation and Scheduling

    AI analyzes your audience’s behavior and suggests the best times to post. It also helps you create engaging content by offering post ideas, generating captions, and creating visuals.

    Managing your social media with AI saves time, boosts engagement, and expands your online presence.

    ✨ Ocoya, Adzooma, and more AI Marketing Tools can help you manage your social channels and more

    15. Detect Plagiarized or AI Written Text

    Plagiarism and AI-generated content are becoming increasingly common. Whether you’re a teacher checking student assignments, an editor reviewing submissions, or a website owner protecting your content, AI can help you detect plagiarized or AI-written text.

    AI analyzes and compares a selected text with a vast content database to identify matches. It can also detect the patterns and nuances characteristic of AI-written text.

    Using AI to detect plagiarism or AI-written content can bring more trust and accountability to your and others’ work.

    ✨ Try out Originality.ai, along with other top AI Content Detectors

    16. Create an AI Second Brain

    Imagine having a personal assistant that remembers everything you’ve asked to read, every idea you’ve noted down, and lets you use that knowledge for future projects. That’s what it’s like to use AI as your second brain.

    AskYourPDF Second Brain Example Screenshot

    With AskYourPDF, we uploaded a Grammar PDF and asked it a question

    By uploading documents, articles, notes, and other text-based information into an AI system, you can create a digital knowledge base that you can query at any time.

    Need to recall a specific piece of information from a document you read months ago? Want to synthesize information from multiple sources to write a new article or report? Just ask your AI.

    Using AI as your second brain offers immense benefits, including enhanced organization, productivity, and creativity. It saves time by swiftly locating needed information and sparks new ideas by linking various pieces of information in your knowledge base.

    ✨ Use a tool like AskYourPDF, Anything LLM, or customer service AI chatbots to build a Second Brain using AI

    Graphic Design, Art, and Video Editing with AI

    Some of the most complicated digital tasks involve images and videos. Yet, they are so important for business that it’s a shame more people haven’t been able to get involved. AI makes it easier than ever for people to create and edit visual elements for all their personal or business projects.

    17. Create Custom Art

    Creating custom art takes a lot of skill and is nearly impossible if you’re not a professional artist. But with AI, you can create unique and beautiful art with just a little imagination!

    Stable Diffusion AI image tools

    Shown: Stable Diffusion Image Tools

    AI can generate art based on your specifications, such as style, colors, and subject matter—all from a natural language prompt. This saves you a lot of time while still generating some fantastic pieces.

    It allows you to create custom art for your home, business, or digital projects. Whether you’re creating a hero image, album cover, or a blog post’s featured image, AI can help you bring your vision to life.

    ✨ Give Midjourney a try and learn from our Midjourney + Divi tutorial for creating unique website templates

    18. Make Product Photos Look Professional

    High-quality product photos attract customers and drive sales, especially in e-commerce. Taking and editing professional photos can be a complex task requiring a lot of experience.

    With AI product image tools, you can easily enhance your product images and make them professional and appealing.

    MagicStudio Create Professional Product Photos

    AI can automatically adjust your photos’ lighting, color, and composition to make your products look their best. It can also remove backgrounds, add effects, and show off what the item may look like in different colors.

    Are you ready to attract more customers, increase sales, and make your products stand out?

    ✨ Try Magic Studio to take your product photos to new heights

    19. Create Logos and Brand Assets

    Creating a unique and memorable logo is crucial for establishing your brand identity. But hiring a professional designer can be expensive, and designing a logo yourself can be challenging if you’re not a skilled artist.

    Generate Logo Versions with Looka

    With AI, you can create a professional-looking logo in minutes. AI can generate logo designs based on your color, style, and symbolism preferences. It can also make other brand assets, such as business cards, letterheads, and social media graphics, ensuring a consistent brand identity across all your materials.

    ✨ Try out Looka, Logo.ai, Design AI, and other AI Logo Makers to get a brand refresh

    20. Design Custom Illustrations

    Custom illustrations add a unique and professional touch to websites, print media, and apps. But creating custom illustrations requires having a lot of experience with tools like Adobe Illustrator.

    Illustroke AI Vector Illustration Generation

    With AI, you can easily create custom illustrations using a natural language description of what you want. In your prompt, you can define the artistic styling, colors, and object ideas you wish to create.

    This eliminates the skill barrier for an in-demand digital skill while bringing you custom graphics for your websites and print projects.

    ✨ Illustroke is the perfect tool for simply creating illustrations and vectors

    21. Create and Edit Videos

    Creating engaging videos can be a complex task that takes a lot of skill and computational resources. But you can create videos more efficiently and effectively with various AI video tools.

    AI can help you edit videos, add effects, and generate content. It can also analyze your video content and provide suggestions for improvement.

    FlexClip AI subtitles

    Different AI video creation tools do different things. Some use text scripts to create a video with an AI avatar that speaks the words you had written down. Others let you take out filler words (like “umm”) and let you edit your actual video by editing a transcripted version.

    ✨ To do both those video creation/editing tasks, try out Synthesia, FlexClip, and Descript

    22. Generate Professional Headshots

    Creating professional headshots can be challenging, especially if you don’t have access to a professional photographer or studio.

    Aragon AI Professional Headshots with AI

    AI is, once again, able to help by creating professional-looking headshots from the comfort of your home. AI can scan older photos of yourself and use them to generate new, high-quality headshots. The AI uses your likeness to create images instead of just touching old ones up. This allows it to create images you wish you had without hiring an expensive photographer.

    ✨ Try Aragon or Try it on to transform your selfies and other photos into professional headshots

    23. Edit Photos Like an Expert

    Editing photos has traditionally been best done by a professional photographer or graphic designer. But with AI, you can edit your photos like an expert. Even with Adobe products—here’s an Adobe Firefly tutorial!

    generative fill taskbar

    Photoshop’s Generative Fill and Remove BG Taskbar

    AI image editing can automatically adjust your photos’ lighting, color, and composition to enhance their quality and appeal. It can also add effects, remove unwanted elements, and even transform your photos into different styles.

    Using AI to edit your photos, you can create stunning visuals for your website, social media posts, or personal projects without learning complex editing software or techniques.

    ✨ Try using HitPaw, Fotor, and Remove.bg to edit photos effortlessly with AI

    24. Enhance and Upscale Images

    Old or low-resolution images are a thing of the past with AI image upscalers and AI photo enhancers. With image-based AI, you can enhance your images and upscale them to a higher resolution—all without losing quality.

    AI analyzes your images, identifies areas of low quality, and enhances them to improve their clarity and detail.

    Zyro AI Image Upscaler

    Using AI to enhance and upscale your images, you can breathe new life into your old photos and ensure that your images look their best, regardless of their original quality or size.

    ✨ Try out Icon8 Smart Upscaler or Zyro AI Image Upscaler today

    25. Build a Website with AI

    Starting a personal blog or portfolio can be a tall order, especially if you’re unfamiliar with web design or coding. But with AI and AI website builders, you can create a complete website in minutes without getting into the weeds.

    Some popular website builders (like Wix) use AI to generate an entire website design. All you have to do is describe the type of site you want and click a button. They also have built-in AI tools to help you tweak the design, layout, color scheme, and content to suit your needs. You can generate new text and images to match your brand in a few clicks. It can also help you add features like a contact form, social media links, and a gallery for your work or photos.

    With Framer AI, you can easily jumpstart a blog, portfolio, or online store with a simple text prompt. Don’t like the result? You can generate new designs with ease. So if you are looking for an easy way to start a blog or showcase your portfolio online, AI can help you save time and effort.

    ✨ Use Wix ADI, Framer AI or Hostinger AI to see what AI can do in web design

    Audio Productivity and Production

    AI can be applied to audio workflows and processes. From creating human voices and music to editing soundtracks and more, AI is making it easier for people to get involved with audio production.

    26. Create an Audiobook

    Producing an audiobook is long and hard, particularly without professional voice acting experience or sound engineering skills.

    However, AI simplifies this task, transforming written text into engaging, natural-sounding speech effortlessly.

    Listnr Best Text to Speech tools

    AI is a valuable tool for authors seeking to broaden their audience or educators aiming to offer accessible learning resources. Leveraging AI for audiobook creation breathes life into your text, providing a new and captivating way to connect with your audience.

    ✨ Give Listnr or Murf a try for creating audio experiences with AI

    27. Transcribe Video Meetings in Realtime

    Ensuring you have meeting notes available for your whole team, even if they weren’t at a particular meeting, is important for staying in sync. But manually writing notes down as you try to participate still is a challenge.

    Otter.ai Meeting Summary Email Notes

    AI-Generated Meeting Summary Auto-Sent to Email


    AI can listen to your meetings, accurately transcribe the speech, and even identify different speakers. This can be particularly useful for keeping records of your meetings, creating meeting minutes, or providing accessible content for team members who are deaf or hard of hearing.

    ✨ Try out Otter.ai for better meetings and team organization (and see our full Otter review)

    28. Turn Any Webpage Text into Listenable Audio

    Lengthy web pages can be time-consuming and tiring, especially if you’re researching or reading for hours.

    Speechify TTS Audio Player

    You can turn any webpage into an audio experience with various voice generators and AI text-to-speech recognition. AI can read out the content of a webpage, allowing you to listen to it while doing other tasks.

    This can be particularly useful if you’re multitasking, have visual impairments, or prefer listening over reading.

    ✨ Try turning any webpage into an audio format with Speechify

    29. Professionally Edit Recorded Music

    Editing music for an album is notoriously tricky because of the technical skills and personal tastes involved. Figuring out how to master multiple tracks (vocals, instruments, etc.) and make them sound amazing together is no short order.

    With AI editing software, you can edit your recorded music like a pro. AI can analyze your tracks, identify issues, and apply enhancements to improve sound quality. It can also help you master your tracks, ensuring they sound balanced and professional.

    Lalal Break music into separate tracks

    With AI editing for recorded music, you can create professional-quality music regardless of your technical skills or equipment setup.

    ✨ Give Lala.ai, Landr Studio, or Izotope a try for advanced music AI editing

    30. Edit and Publish Podcasts

    Editing and publishing podcasts can be complex and time-consuming, especially when dealing with long recordings or multiple episodes.

    But AI can edit and publish your podcasts with greater efficiency. AI can help you cut and arrange your recordings, remove unwanted background noise, enhance sound quality, and even remove filler words and on-mic coughing.

    Podcastle's resource library

    Never has podcasting been more accessible to the masses. AI continues to break down barriers so everyone can express themselves.

    ✨ Podcastle is the premier AI podcast editing and hosting service that does it all

    31. Generate Original Songs & Music

    AI can generate original songs and music with absolute ease. It can create music based on genre, mood, and instrumentation preferences. It can even generate lyrics and melodies, creating a complete song from scratch.

    Mubert's simple and effective interface

    This can be particularly useful for content creators who need background music, aspiring musicians who need inspiration, or anyone who enjoys creating and listening to music.

    You can unleash your creativity and enjoy the music creation process with AI music generators.

    ✨ Log into Mubert and see just how easy creating music can be

    What Are You Going to Try?

    AI is no longer a distant concept but a practical tool that reshapes our daily tasks and enhances productivity.

    From text-based tasks to audio and visual applications, the 30 ways we’ve explored demonstrate the versatility and accessibility of AI today.

    Embracing these AI tools saves time and opens up new possibilities for creativity and efficiency. So, don’t hesitate to explore and integrate these AI tools into your routine and experience the transformative power of AI in your everyday life.

    What tasks are you going to start exploring with AI tools?

    FAQ For Using AI in Everyday Life

    How can I use an AI?

    AI is integrated into our daily lives in many ways. There are AI-driven assistants like Google Assistant and Siri to help with tasks. AI can research and write for you. AI chatbots assist with customer service conversations. The uses for AI are increasing each day and are becoming more accessible to the average person.

    Is there a free AI I can use?

    Several free AI tools are available, including ChatGPT for powerful conversational AI, Writesonic for writing assistance, Github Copilot for coding help, and Google’s Bard for research. Most of these tools also offer premium plans for more features.

    Featured Image by Allies Interactive / shutterstock.com

    The post 31 Ways You Can Use AI Today (2023 Guide) appeared first on Elegant Themes Blog.

  • 16 Best AI Assistants to Make You More Productive in 2023

    AI assistants, our increasingly trusted digital counterparts, are at the forefront of a wave of productivity. They are reshaping how we interact with technology and the world around us. From managing our schedules to controlling our smart homes, these AI-powered marvels are making our lives easier, more organized, and more efficient.

    But with a giant selection of AI assistants available today, how do you choose the one that best suits your needs? This article will delve into the fascinating world of AI assistants, comparing their unique features, capabilities, and how they can make your life more convenient.

    16 Best AI Assistants in 2023


    Subscribe To Our Youtube Channel

    While this article is about the best AI assistants available, we’ve decided to break our list into everyday tasks. Not all assistants are equally good at the same things. We wanted to show you some of the most popular categories for artificial intelligence agents and give you multiple options for each.

    Here’s a list of the best assistants built with AI:

    We’ll start our list with AI writing assistants and Jasper AI leading the pack.

    Best AI Writing Assistants & Chatbots

    AI writing assistants have been some of the most widely adopted AI technology. They started as generative content creators, but many have turned into full-scale assistants (for their purpose) with the addition of comprehensive toolsets and chatbots with conversational abilities. Here’s a look at our top picks for AI writing assistants and chatbots.

    1. Jasper

    Jasper - Homepage July 2023
    Jasper is an AI writing assistant that helps users create high-quality content as efficiently as possible. It’s designed to generate unique, long-form content that engages readers and drives traffic. Jasper is used by content creators, marketers, and businesses looking to automate and enhance their content creation process. It stands out from other platforms because of its brand voice and memory features that take content from generic to very specific and helpful. See our detailed Jasper AI review.

    Jasper Brand Voice AI


    Key Features:

    • Saves Brand Voice guidelines and important company information so it is always on brand
    • Offers a wide range of writing templates for one-off tasks to long-form content
    • Unlimited word generation with every plan
    • Includes Jasper Chat, an AI chatbot that is a powerful alternative to ChatGPT.
    • Chrome Browser extension to bring generative ai into every text box on the internet

    Teach Jasper company and product memory

    One of Jasper’s newest features is saving critical information about your business. You can upload file formats that teach Jasper about your business, products/services, and how you communicate things. This makes generative AI more up to the task when creating your marketing collateral. And it dramatically reduces editing time since it knows what you know about your business. Finally, an AI assistant that learns and applies essential information about your business.

    Best For:

    Jasper is best for content creators, marketers, and businesses who need to produce high-quality, SEO-optimized content regularly. It’s particularly beneficial for those looking to streamline their content creation process and increase efficiency. It integrates with several tools, like SurferSEO, to create even better content.

    Pricing: Plans start at $49/mo

    Get Jasper

    2. Copy.ai

    Copy.ai - Homepage July 2023
    Copy.ai is a comprehensive AI writing assistant for any writing task. It’s designed to help users generate high-quality copy for various purposes, from blog posts to social media content and sales emails. Copy.ai is used by writers, marketers, and businesses looking to enhance their content creation and marketing efforts. See our detailed Copy.AI how-to guide.

    Key Features:

    • AI Chatbot with real-time internet data access for more accurate responses
    • Inline doc editor for easy content creation and editing
    • Prebuilt prompts to guide content generation
    • Supports multiple languages

    AI Chat Assistant by Copy.ai

    Copy.ai includes AI Chat, a great assistant for document writing and creation. The chatbot has real-time access to public internet data, making it an ideal alternative to ChatGPT. Use AI Chat to dive into a topic and ask for suggestions conversationally to get accurate and up-to-date responses. And use critical insights and generated copy for your long-form document without switching workflows.

    Best For:

    Copy.ai is an excellent assistant for anyone who regularly creates written content. Bloggers can use it to generate engaging posts, email marketers can craft compelling messages, and social media managers can create captivating content for various platforms. The platform’s chat feature adds a conversational element to the editing process, making it even more intuitive and user-friendly. It’s one of the most trusted ai writing platforms out there.

    Pricing: Free option available with paid pricing starting at $49/mo

    Get Copy.ai

    3. WriteSonic

    Writesonic - Homepage April 2023

    WriteSonic is another all-purpose AI content creation platform that does a lot. It handily covers most AI-writing bases with over a hundred writing recipes/templates for various applications. This means it can generate a whole blog in seconds, paraphrase selected text, write product descriptions, and help with your Google Ads copy (plus a whole lot more). Its writing features are great for SEO, sales, and personal use—everybody stands to benefit from Writesonic’s feature set.

    Key Features:

    • AI-generated art creation using Photosonic
    • ChatSonic – a GPT-4 powered AI chatbot assistant
    • Botsonic – a customer support bot that’s easy to deploy
    • Easy-to-use content creation UI

    Writesonic Document Editor

    Writesonic sports one of the better long-form document editors of many AI writers. Every use case/writing template is easily accessible for creating content, no matter how articles are structured. You will also have access to Chatsonic, a robust chatbot assistant, within the document editor so you can use command prompts and have full control over how you want to use AI while writing.

    Best For:

    WriteSonic is ideal for power users of AI tools and technology. It handles generative writing very well but also corners the AI art and chat market. Plus, it’s backed by Y Combinator and poised to keep innovating.

    Pricing: Free plan with paid plans starting at $19/mo

    4. Hoppy Copy

    Hoppy Copy - Homepage July 2023
    Hoppy Copy is an AI-powered platform designed to change how marketers and salespeople create email campaigns. It’s not just an AI copywriter; it’s a comprehensive tool that assists in every step of email creation, from drafting to editing and monitoring competitor strategies. With Hoppy Copy, you can save countless hours and generate compelling content for hundreds of email marketing campaigns, drips, newsletters, and more—in seconds.

    Key Features:

    • Generate unique campaign ideas, witty headlines, eye-catching subject lines, bold calls to action, and more
    • Track your competitors’ email strategies in real-time and learn from their tactics
    • Automatically identify and replace spam keywords that could land your emails in the junk mail folder

    Hoppy Copy AI Spam Assistant Checker

    Hoppy Copy solves so many email-specific tasks. Where other platforms can generate a subject line or use a copywriting principle to create body text, they don’t go far enough for email marketers. Hoppy Copy’s spam checker analyzes your email copy with AI to find those common trigger words and phrases that can send your email straight to spam. Better yet, it tells you precisely what triggers your copy is hitting. This lets you know what to change and how. How’s that for an AI email assistant?

    Best For:

    Hoppy Copy is an ideal assistant for marketers and salespeople who regularly engage in email campaigns. Whether you’re a small business owner, a busy creator, or part of a large marketing agency, Hoppy Copy can help you create high-converting emails and newsletters, sequences/drips, and more. It’s particularly beneficial for those who want to stay ahead of the competition by monitoring their strategies and ensuring their emails always land in the inbox, not the spam folder.

    Pricing: Pricing starts at $29/mo

    Get Hoppy Copy

    Overview of AI Assistants for Writing

    Rank AI Writing Assistants Starting Price Free Option
    🥇 Jasper $49/mo ❌ Visit
    🥈 Copy.ai $49/mo ✔️ Visit
    🥉 Writesonic $19/mo ✔️ Visit
    4 Hoppy Copy $29/mo ❌ Visit

    Best AI Personal Assistants

    Now we are getting into some of the big-name, original AI assistants from some of tech’s finest. You’ve likely used one even if you don’t remember using one of these AI assistants.

    5. Google Assistant

    Google Assistant - Homepage July 2023
    Google Assistant is a virtual assistant powered by artificial intelligence and developed by Google. It’s designed to engage in two-way conversations, helping users set reminders, answer questions, and control smart home devices. Google Assistant is available on most Android, Google Home, and Wear OS devices.

    Key Features:

    • Initiates tasks with voice and text commands
    • Helps with tasks like setting reminders, updating contacts, and answering questions
    • Controls smart home devices
    • Easily accessible by saying, “Hey Google”

    Best For:

    Google Assistant is best for Android users who want an easier way to interact with their phones and Google apps. Those who wish to take voice notes, add calendar events, and set on-time reminders in a sinch will benefit from this simple AI phone assistant.

    Pricing: Free and preloaded on many Android devices

    Get Google Assistant

    6. Amazon Alexa

    Amazon Alexa - Homepage July 2023
    Amazon Alexa is a virtual assistant AI developed by Amazon that works with many of its products and services. It’s designed to help users purchase items from Amazon, play music, and control smart home devices (Echo). It’s preloaded on many Amazon products and IoT devices.

    Key Features:

    • Voice service that connects brands with their customers
    • Controls smart home devices, play music, and connects with millions of Alexa “skills”
    • Easily accessible by saying, “Alexa …”

    Best For:

    Amazon Alexa is best for individuals who want reliable voice assistants for simple tasks around the office and at home.

    Pricing: Free apps and preloaded on many Amazon products

    Get Amazon Alexa

    7. Siri

    Siri by Apple - Homepage July 2023
    Siri is a virtual assistant part of Apple Inc.’s iOS, watchOS, and tvOS operating systems. It uses voice recognition to respond to queries, make recommendations, and perform actions by delegating requests to Internet services. Loved and used by millions of iPhone users and is one of the most long-standing AI assistants on the market (released in 2011).

    Key Features:

    • Responds to queries and make recommendations
    • Performs actions like adding calendar events and pulling up driving directions
    • Connects to many Apple services as well as 3rd party services
    • Easily accessible by saying, “Hey Siri”

    Best For:

    Siri is best for individuals and businesses using Apple devices and needs a reliable and intelligent assistant to help manage daily tasks and control smart home devices.

    Pricing: Free and preloaded on many Apple devices

    Get Siri

    Overview of Best AI Personal Assistants

    Rank AI Personal Assistants Starting Price Free Option
    🥇 Google Assistant Free ✔️ Visit
    🥈 Amazon Alexa Free ✔️ Visit
    🥉 Siri Free ✔️ Visit

    Best AI Financial Assistants

    It’s easy to make bad or uneducated financial decisions. Even understanding your personal finances can be a chore that leaves you unmotivated to take decisive action. Financial decision-making and insight generation have been vast areas of opportunity for AI assistants. Consumers have been readily tapping into the potential of AI to help make them more informed about their finances than ever before. Here’s a look at our favorite AI assistants for financial topics.

    8. Tykr

    Tykr - Homepage July 2023
    Tykr is an AI financial assistant that helps users make informed investment decisions. It’s designed to provide clear, actionable insights into the stock market, assisting users in identifying the best investment opportunities. It doesn’t automate stock market tasks but significantly improves research tasks so you can be as confident as possible in your buys and sells.

    Key Features:

    • Provides clear, actionable insights into the stock market (On sale, Watch, and Overpriced labels/scores)
    • Helps users identify the best investment opportunities
    • Analyzes stocks, ETFs, and Crypto with open-source models
    • Helpful courses to learn the basics of investing

    Tykr AI Stock Analysis Assistant

    Best For:

    Tykr is best for individual investors and businesses who must make informed investment decisions. Its courses help new investors get up to speed while the rest of the platform brings instant insights into the markets.

    Pricing: AI stock insights start at $29.99/mo

    Get Tykr

    9. Wally

    Wally - Homepage July 2023
    Wally is an AI financial assistant that helps users manage their personal finances. It gets personal to be as helpful as possible. It’s designed to provide insights into spending habits, assisting users in budgeting effectively and saving money. Connect bank accounts and then chat with Wally to find out what your bank statements would say about your financial outlook.

    Key Features:

    • Provides insights into spending habits
    • It helps users budget effectively and save money
    • Easily connect your bank accounts and track every data point

    Wally App Preview Financial Assistant

    Best For:

    Wally is best for individuals who need to manage their finances better. Its AI assistant features are particularly beneficial for those looking to gain insights that have been hard to come by before using the app.

    Pricing: Wally is free to use for most features but does feature in-app purchases for more features

    Get Wally

    10. Cleo

    Cleo - Homepage July 2023
    Cleo is another great (but sassy) AI financial assistant that helps users manage their personal finances. It’s designed to provide insights into spending habits, assisting users in budgeting effectively and saving money. It also has other traditional fin-tech features, such as a credit-building starter credit card and simple cash advances. But if you need a little rough talk to get you in the savings mood, Cleo is up to the task.

    Key Features:

    • Provides insights into spending habits
    • Chat with Cleo to find out what it thinks about your spending habits
    • Other banking features as needed

    Best For:

    Cleo is best for individuals who need to manage their finances effectively. It’s particularly beneficial for those looking to gain insights into their spending habits, budget effectively, and save money.

    Pricing: Free version of the app, but Cleo Plus costs $5.99/mo

    Get Cleo

    Overview of the Best AI Finacial Assistants

    Rank AI Financial Assistants Starting Price Free Option
    🥇 Tykr $29.99/mo ❌ Visit
    🥈 Wally In-app purchases ✔️ Visit
    🥉 Cleo $5.99/mo ✔️ Visit

    Best AI Coding Assistants

    If you aren’t part of the 92% of developers using generative AI coding assistants, we can change that for you. Here are our top three picks.

    11. GitHub Copilot

    Github CoPilot - Homepage July 2023
    GitHub Copilot is an AI-powered coding assistant that helps developers write better code faster. It’s designed to suggest whole lines or blocks of code as you type, helping you complete your work more efficiently. Built using OpenAI’s Codex model, Copilot is trained on code from almost every programming language. It helps reduce repetitive outputs and gives you a little life back when thinking through complex tasks.

    Key Features:

    • Suggests whole lines or blocks of code as you type
    • It helps developers avoid simple errors from missing characters
    • Supports a wide range of programming languages

    GitHub Copilot AI Assistant for Coding Autocomplete

    Best For:

    Copilot is best for developers who need to write high-quality code quickly and efficiently. It’s particularly beneficial for enhancing their coding process and increasing productivity.

    Pricing: Free plan available for individuals with Team pricing starting at $4/mo per user

    Get GitHub Copilot

    12. Amazon Code Whisperer

    Amazon CodeWhisperer - Homepage July 2023
    Amazon Code Whisperer is an AI-powered service that helps developers automate code reviews and improve application performance. It’s designed to provide intelligent recommendations, assisting developers in identifying and fixing code issues. It’s another impressive option that has increased developer adoption.

    Key Features:

    • Code scans across programming languages through multiple IDEs
    • Provides intelligent recommendations to identify and fix code issues
    • Reference tracking across code bases

    Amazon Code Whisperer AI Generated Code

    Best For:

    Code Whisperer is best for developers who need to automate code reviews and improve application performance. It’s particularly beneficial for identifying and fixing code issues efficiently. The price point is probably worthwhile for those that work heavily with AWS and other Amazon services.

    Pricing: Free for individual developers with Professional pricing starting at $19/mo per user

    Get Amazon Code Whisperer

    13. Tabnine

    Tabnine - Homepage July 2023
    Tabnine is an AI-powered coding assistant that helps developers write code faster and with fewer errors. It’s designed to provide relevant code completions, assisting developers to increase their productivity. It also has natural language to code generation that lets users type out (in plain English) what code they want. From there, they can continue writing themselves with the assistance of other AI tools.

    Key Features:

    • Provides relevant code completions with multiple options
    • It helps developers write code with fewer errors
    • English to code generation
    • Learns your coding patterns and can be trained on your code bases

    Tabnine AI Code Assistant Autocomplete

    Best For:

    Tabnine is best for developers who need to write high-quality code quickly and with fewer errors. It’s ideal for those looking to increase their productivity and enhance their coding process. It’s also an excellent option for those who want an AI code assistant trained with only open-source code.

    Pricing: Free to use basic features with paid plans starting at $15/mo per user

    Get Tabnine

    Overview of The Best AI Coding Assistants

    Rank AI Coding Assistants Starting Price Free Option
    🥇 GitHub Copilot $4/mo ✔️ Visit
    🥈 Amazon Code Whisperer $19/mo ✔️ Visit
    🥉 Tabnine $15/mo ✔️ Visit

    Best AI SEO Assistants

    Content marketers and Search Engine Optimizers are some of the heaviest users of AI tools. Whether they’re performing programmatic SEO or increasing their publishing clip, AI assistants for SEO tasks are of immense help. Here’s a look at some of our favorites, starting with Surfer.

    14. SurferSEO

    Surferseo - Homepage July 2023
    SurferSEO is an AI SEO assistant that helps users optimize their content for search engines. It’s designed to provide data-driven insights, assisting users in improving their website’s search engine ranking. It analyzes keyword SERPs (search engine results pages) to see what contributes to ranking top articles. Surfer pulls those insights into the content editor to compare your article against those data points so you know how to optimize your piece to be competitive. It can also generate outlines and full articles with AI based on these same insights with some plans. It’s a one-stop shop for improved SEO.

    Key Features:

    • Provides data-driven insights on SERPs and top articles for every keyword
    • Helps users optimize their content for search engines
    • Grow Flow analyzes GSC (Google Search Console) data to give you actionable tasks every week
    • Integrations with Jasper, Writesonic, WordPress, and Google Docs

    Writesonic + SurferSEO integration

    Surfer is trusted to provide critical SEO insights for many other AI services. Pictured above is Writesonic with SurferSEO integrated. It’s also trusted by Jasper to offer these critical NPL insights for content analysis. Since SurferSEO is helpful by itself or with other services, it has become a must-have assistant for content creation.

    Best For:

    SurferSEO is best for marketers and businesses who need to optimize their content for search engines. Surfer’s NPL and AI provide pivotal insights for improving website search engine ranking and increasing traffic. It’s packed with tools that might replace many other writing and SEO AI assistants in your tool belt.

    Pricing: Plans start at $29/mo for Lite users

    Get SurferSEO

    15. Alli AI

    Alliai - Homepage July 2023
    Alli AI is an AI SEO assistant that helps users optimize their websites for search engines. It’s designed to provide actionable insights, assisting users to improve their website’s search engine ranking and increase traffic. Its Javascript code insertion can dynamically change your website without making every change in your CMS or content. This can make SEO optimization as quick as you’ve seen but may also lock you into using the platform.

    Key Features:

    • Provides actionable insights with easy implementation
    • Ideal for agencies to make broad SEO updates across multiple websites
    • Bulk-on-page optimization rules that can apply across an entire website

    Alli AI live editor

    The live editor works similarly to Google Optimize or Microsoft Clarity (without the A/B test features). It makes dynamically changing content based on SEO suggestions dead simple, whether you use a static HTML website or a complicated CMS.

    Best For:

    Alli AI is best for marketing agencies that handle SEO for multiple clients and need to optimize their websites as efficiently as possible. Its real-time deployment of recommendations makes it faster than almost any method, all without any coding. Alli is incredibly intuitive and impressive with what it can do.

    Pricing: Agency pricing only, starting at $249/mo

    Get Alli AI

    16. Frase

    Frase - Homepage July 2023
    Frase is an AI writer + SEO assistant that helps users create unique, SEO-optimized content. It’s designed to provide data-driven insights, assisting users in improving their content’s search engine ranking. It works like SurferSEO in many ways but focuses on an incredibly efficient content creation workflow. It starts with SERP research for a desired keyword. From there, Frase helps craft an outline that’ll be the basis for a great article. Based on that, Frase can start writing content—taking insights from the SERP and applying them directly to the outline. From there, it scores the content against multiple criteria to judge whether it is ready for publishing.

    Key Features:

    • Provides data-driven insights using NPL
    • AI content generation for blog articles
    • Ease of use is among the best with its total-workflow approach

    Frase.io SEO AI Assistant SERP Explorer

    Best For:

    Frase is best for content creators, marketers, and businesses who need to create SEO-optimized content. It’s particularly beneficial for those looking to improve their content’s search engine ranking and increase traffic.

    Pricing: Pricing starts at $14.99/mo

    Get Frase

    Overview of the Best AI SEO Assistants

    Rank AI SEO Assistants Starting Price Free Option
    13 SurferSEO $29/mo ❌ Visit
    14 Alli AI $249/mo ❌ Visit
    15 Frase $14.99/mo ❌ Visit

    Best AI Assistants: Price Comparison

    Here’s a quick price comparison of the 16 best assistants using AI to help you find the right solution for your needs.

    Rank Best AI Assistants Starting Price Free Option
    🥇 Jasper $49/mo ❌ Visit
    🥈 Copy.ai $49/mo ✔️ Visit
    🥉 Writesonic $19/mo ✔️ Visit
    4 Hoppy Copy $29/mo ❌ Visit
    5 Google Assistant Free ✔️ Visit
    6 Amazon Alexa Free ✔️ Visit
    7 Siri Free ✔️ Visit
    8 Tykr $29.99/mo ❌ Visit
    9 Wally In-app purchases ✔️ Visit
    10 Cleo $5.99/mo ✔️ Visit
    11 GitHub Copilot $4/mo ✔️ Visit
    12 Amazon Code Whisperer $19/mo ✔️ Visit
    13 Tabnine $15/mo ✔️ Visit
    14 SurferSEO $29/mo ❌ Visit
    15 Alli AI $249/mo ❌ Visit
    16 Frase $14.99/mo ❌ Visit

    What is the Best AI Assistant?

    The best AI assistant entirely depends on what tasks you need assistance with. The best overall AI writing assistant and chatbot is Jasper AI. It can assist you in creating high-quality content at speeds you didn’t know were possible. It’s perfect for businesses that need marketing, sales, and website content. Chat.ai and Writesonic are also great choices for those looking for another AI writer and chatbot combo with a suite of powerful AI writing tools.

    SurferSEO is our top AI assistant for SEO. Use it to squeeze out the best SEO insights for all your SEO content needs.

    Google Assistant, Alexa, and Siri are readily available based on your devices at home and in your pocket. Learning how to use those will immediately increase your productivity.

    Financial AI assistants like Tykr will help you make better investing decisions, whereas Wally might be a game-changer for personal budgeting.

    Last but not least, developers of any stripe can leverage a tool like Github Copilot to see how AI can speed up code writing.

    AI Assistants FAQs

    What are AI assistants?

    AI assistants are advanced technologies that leverage artificial intelligence to reduce the time required to complete specific tasks significantly. They can assist in various areas, including content creation, SEO optimization, financial decision-making, and coding. These tools learn from data and user interactions to provide personalized and efficient assistance.

    What is the best AI assistant?

    The ideal AI assistant varies based on your specific needs. Jasper AI could be an excellent fit if your primary focus is content creation for marketing, sales, or website content. It accelerates the content creation process significantly. For SEO-focused content, pairing it with SurferSEO can yield optimal SEO results. For everyday tasks, Google Assistant, Alexa, and Siri are widely accessible and can enhance productivity. AI assistants like Tykr can be invaluable for financial decision-making, while Wally can revolutionize personal budgeting. Developers can also benefit from tools like Github Copilot to expedite code writing.

    How do I use AI as an assistant?

    To use an AI assistant, you first need access to one. Many AI assistants, including ChatGPT and others on the list, offer free versions to try out. Some require a paid subscription for full access. These tools can significantly reduce the time spent on tasks, enhancing productivity and efficiency.

    Who is better Alexa or Siri or Google?

    The choice between Alexa, Siri, or Google Assistant largely depends on your device preference and ecosystem. Alexa differs slightly from the other two and is integrated with Amazon’s ecosystem. Google Assistant and Siri depend more on whether you use Android or Apple devices, respectively.

    Not had your fill yet? Well, plenty more AI tools are out there for you to check out. See our complete list of the best AI tools for all sorts of productivity. We also have a full list of the best AI marketing tools and AI chatbots that didn’t make this list.


    Featured Image by Dmytro Novitskyi / shutterstock.com

    The post 16 Best AI Assistants to Make You More Productive in 2023 appeared first on Elegant Themes Blog.

  • How to Start a Succesful Blog in 2023 (Detailed Tutorial)

    Blogging has been around since the late 1990s and has become one of the most popular mediums for people to express their thoughts, share information, and generate income. If you’re thinking of starting a blog of your own, it’s important to understand the steps needed to be successful. In this post, we’ll provide a step-by-step guide on how to start a blog. So, let’s dive in and explore the possibilities.

    What is a Blog?

    A blog is an online platform where you can regularly publish and share content. It acts as a digital journal or online diary, allowing people to express ideas, experiences, tutorials, or opinions on various subjects. They can cover multiple topics, provide a space for writers to connect with others, and create a community around published content. With the ability to incorporate text, images, videos, and interactive elements, blogs offer a dynamic and accessible resource for sharing information and fostering an online community.

    WordPress.org

    One of the most popular platforms for a blog is WordPress. There are two iterations of WordPress: .org and .com. Either one will suit your needs, but it’s important to understand their differences. WordPress.org is a self-hosted solution, which means you install and host the software on a WordPress hosting provider. On the other hand, WordPress.com offers a blogging platform with its own hosting, which can be a solid choice for beginners. For this tutorial, we will focus on the .org version of WordPress and walk you through the steps to launch your online blog.

    How To Start a Blog: Step by Step

    To succeed at blogging, it’s important to set goals, determine who you intend to cater to, and pay attention to more technical considerations. These include picking the right host, choosing a worthy platform, and incorporating all the moving parts needed to support your efforts.

    Step 1: Setting a Goal for Your Blog

    The first and most important step in the process is planning. Sit down and list what you’d like to accomplish with your blog. Are you interested in monetizing your blog? If so, research how you want to turn your blog into a money-making machine. Consider whether you want to run ads directly on your blog or use other methods, such as Google Adsense. You can also incorporate a good advertising plugin that will allow you to create and host banner ads on your blog quite easily.

    Consider creating an informational blog if monetization isn’t in the cards right now. These types of blogs are a great source of information and tend to perform well in search results; that is, if your SEO copywriting is up to par.

    Lastly, decide whether to incorporate social media into your blog. Having a social media presence on your website is a wonderful way to drive more traffic to your website. There are a lot of excellent social media plugins available that will allow you to embed social feeds, schedule posts to Facebook, or incorporate events.

    Step 2: Picking a Niche

    The next thing to evaluate is whether you want a lifestyle blog that encompasses various topics or drill it down to be more of a niche blog. In general, niche blogs are great for people looking for specific information on a topic versus a more generalized lifestyle blog. There are several benefits to creating a niche blog, including appealing to individuals with particular interests, being excellent for building email lists, and, most importantly, being easier to manage.

    Step 3: Picking Your Domain

    The next crucial step in the process involves securing a domain name, which plays a pivotal role in shaping your online presence. When choosing a domain for your business, it’s important to ensure that it is both memorable and easy to spell, while accurately reflecting your business’s niche. While various top-level domain (TLD) extensions are available besides .com, opting for this widely utilized TLD is often best due to its trustworthiness. However, alternatives like .net or .org can also be considered, particularly if your preferred domain with the .com extension is unavailable.

    Namecheap domain registrar

    In certain cases, it is possible to acquire a domain that has already been taken, although this can be challenging, especially if the desired domain already has an associated website. To explore available domains, we recommend using a reputable domain name registrar such as Namecheap.

    Step 4: Choosing Your Hosting

    how to start a blog using SiteGround

    Once you’ve planned out your blog and chosen a niche and a domain, you’ll need to find a good hosting provider. Generally speaking, you’ll want to avoid free hosting platforms and opt for a good managed hosting provider like SiteGround, because they offer the most bang for your buck. Not only do they provide competitive pricing, but they’re one of the fastest hosting companies you can get.

    A fast host is crucial to your blog’s success for several reasons. First, no one likes a slow website. Potential readers who land on your site and wait for the page to load aren’t going to stick around. Secondly, a fast website is good for search engine optimization (SEO). Because Google and other search engines prioritize speed, going for a quality host is in your best interest.

    Step 5: Create Your Blog

    Now that you have all of the necessary moving parts in place, it’s time to start the exciting process of creating your blog. In this section, we’ll advise you on the best blogging platform to use, recommend a good theme and plugins, and walk you through the process of setting up your categories, tags, and templates.

    Pick a Platform

    While there are many blogging platforms to choose from, they are still far from matching the versatility of WordPress.org. With full site editing capabilities and a platform that was built for blogging, WordPress is the way to go. It’s free to use, has a huge following, and provides endless customization options. Plus, it’s relatively easy to learn, making it a great solution for beginners.

    get WordPress

    When it comes to installing WordPress, you can usually leave the dirty work to your web host. The best WordPress hosting providers will install WordPress for you when you set up your account, making your life a lot easier. However, that also depends on the hosting you choose. Most VPS hosting or dedicated hosting companies won’t offer this feature, requiring you to install it on your own through cPanel.

    Pick a Theme

    how to start a blog with Divi

    Now that we’ve opted for WordPress.org as a place to build our masterpiece, we’re going to need a good WordPress theme for bloggers. Although we may seem a bit biased, Divi is the absolute best solution. With the ability to create pages using a no-code Visual Builder incorporating more than 200 design elements, Divi is capable of showcasing your blog beautifully.

    Divi Theme Builder

    Plus, you’ll gain the benefit of full site editing, which allows you to create custom templates for your posts, categories, tags, and more, through Divi’s Theme Builder.

    Install Key Plugins

    One of the best aspects of WordPress is the ability to install plugins. They add features and functionalities to your site, allowing you to build any website you wish. For example, if you’d like your blog to have gated content, you can install a membership plugin, set up a paywall, and you’re off to the races. There are plugins for literally anything you can fathom. You can get a little help getting seen in the search engines by installing a good SEO plugin, such as Rank Math.

    Monster Insights Homepage Jan. 2023

    Furthermore, you can track how your posts are performing by incorporating a plugin such as MonsterInsights, which provides crucial information on what’s working on your site and what’s not. This is especially important when you’re just starting out. No matter what you want your site to do for you, there’s a plugin for it. To help you determine what you need, take a look at our article, 31 Best WordPress Plugins in 2023 (Everything You Need).

    Set Up Categories

    Before you can start writing posts, you’ll need to create categories. Using categories is an essential part of SEO and, if done correctly, can help bring traffic to your website. For example, let’s say you’re building a blog about pets. You’ll want to create categories for the types of pets you want to write about and subcategories that would pertain to those pets.

    To add categories, navigate to the WordPress dashboard, then hover over posts. Next, click categories.

    WordPress blog categories

    The next step is to give your new category a name, add a description, then click Add New Category.

    naming WordPress categories

    Once you have created a main category, you can create new top-level categories or subcategories by assigning a parent category.

    parent category

    Alternatively, categories can be created on the fly at the post level. To accomplish this, click on Posts > Add New.

    Add new post

    To add a new category at the post level, click the Categories dropdown on the WordPress editor’s right-hand side. Then, click Add New Category.

    how to start a blog

    Once you have added all the categories you need, you can showcase your category list on a blog roll page in a sidebar or any other page. As a Divi user, you can even find creative ways to display them in your header or footer by using the Theme Builder.

    Create Your Pages

    Next, we’ll use Divi to create our first page. To keep things simple, we’ll use one of Divi’s awesome layout packs. First, we’ll create the home page from the Marketing Layout Pack for Divi. Navigate to Pages > Add New in your WordPress dashboard.

    Add wordpress page

    Add Home as the title, then click the Use Divi Builder button.

    create a new page

    Next, select Browse Layouts.

    browse layouts

    Choose the marketing layout back by clicking on it.

    Select marketing layout pack

    Next, click on the Homepage layout.

    how to start a blog

    Finally, click the Use This Layout button to insert the design into your page.

    load layout

    If you’d like to import the presets of the layout pack, be sure to check Import Presets, then click the Import button.

    import layout

    Once the page reloads, you can edit the text and images in the layout’s modules by hovering over the module you’d like to edit, then clicking the gear icon to bring up the module’s contents.

    how to start a blog

    Make your edits by replacing the placeholder content in text modules.

    edit text module

    Once you’ve completed the editing process, save your draft or publish the page by clicking the corresponding button in the lower right-hand screen of the Visual Builder.

    Publish Divi page

    Create Your Templates

    As previously mentioned, Divi’s Theme Builder allows you to create custom templates for every section of your website. Design custom headers and footers, blog post layouts, category and tag page templates, and more.

    The default website template (1) is the section you’d use to create a global header, body, and footer. This allows you to create any layout to feature your blog’s navigation. To create new templates, you’ll click the Add New Template button (2). If you want to use a premade theme builder set, click the + icon (3). To save your templates, click the save button (4). The remaining icons allow you to delete (5), view your design history (6), and import or export your layouts (7).

    theme builder options

    As you begin creating templates for your website, you’ll notice that multiple templates can get messy. So, take steps to organize them so they are easier to find.

    Ok, on to creating your first template. Start by navigating to Divi > Theme Builder.

    Divi theme builder

    As noted, you’ll click the Add New Template button to create a template. Select Build New Template from the popup.

    how to start a blog templates

    Next, tick All Posts, then click the Create template button. These selections will allow you to create a template for posts which will be applied to every post you write.

    create post template

    Next, click Add Custom Body in the All Posts template. Click Build Custom Body when the popup appears.

    Build custom body

    From there, you can use the Visual Builder to design a blog post template to match your site’s design.

    Step 6: Create a Content Strategy

    Now that your pages and blog post template are created, you can concentrate on forming a content marketing strategy. It involves creating content that is specifically related to your niche. Strategizing your content can help you get your business noticed, build a good reputation, and boost your SEO. You’ll be best served by analyzing your competition, learning about your potential audience, and conducting keyword research.

    Step 7: Write Your First Post

    When the time comes to write your first post, the most important thing is to focus on writing quality content. Be sure to keep your target audience in mind so that you’re delivering content that aligns with their interests. Start by organizing your thoughts, creating a blog post outline, and structuring your post to maximize your reader’s attention. Remember, writing your first post sets the tone for your blog, so take your time and make it a captivating and valuable piece that leaves a positive impression on your readers.

    When writing in WordPress and Divi, there are a couple of ways to create your post, either in the Visual Builder, classic editor, or the Gutenberg editor. Since we created a template for our blog posts, the easiest route is using Gutenberg. It functions much like the word processors of the past, allowing you to directly type text, or use blocks to add other content.

    block editor

    If you find yourself suffering from writer’s block or need a little help crafting a good headline or outline for your post, consider incorporating a good AI writing software to help jumpstart your creativity.

    Once you’ve added all of your content, you can easily make your post live by clicking the Publish button.

    Publish post

    Step 8: Optimize Content for SEO

    You can write the best content in the world, but you’re missing the mark if you aren’t optimizing for SEO. To optimize your content, start by using a good keyword strategically throughout your post, avoiding keyword stuffing. It’s also important to add alt tags to your images, ensure that you’re using headlines properly, and keep your paragraphs concise, yet engaging.

    pn page SEO

    Additionally, pay close attention to on-page SEO elements such as titles, permalinks, and meta descriptions, as they contribute to search engine visibility. Finally, ensure that you’re focusing on mobile SEO, considering more than half of all internet users utilize a smartphone to navigate the internet.

    To help you keep a handle on things, consider incorporating a good SEO tool, such as SEMRush, in addition to your chosen SEO plugin.

    Step 9: Post Content Consistently

    how to start a blog

    Next, you’ll want to plan how often you release new posts. Set a regular posting schedule that works for you and your target audience, whether weekly, bi-weekly, or monthly. A good editorial calendar plugin helps you plan how often to release new content and helps to keep track of your goals. By establishing a good routine, you create expectations for your readers to keep them coming back for more.

    Step 10: Monetize Your Blog

    Once you have established a solid foundation and built your audience, you can take steps to generate income with your new blog. One popular method is through native advertising, where you can display ads or sponsored posts anywhere on your blog to earn revenue based on clicks or impressions.

    ad placement

    Another option is affiliate linking, where you promote products or services to earn a commission for every sale. Remember that choosing affiliate partnerships that align with your niche is important to provide value to your audience.

    You’ll also want to incorporate a good affiliate marketing plugin to help disguise ugly links, gain access to reporting, or offer discounts on purchased products.

    Final Thoughts on How to Start a Blog

    Starting a successful blog requires careful planning, dedication, and consistent effort. By following our step-by-step process, you can establish a strong foundation for your blog and increase your chances of success. It begins with setting a clear goal and identifying a niche that truly resonates with your audience. As you progress, partnering with a reputable host like SiteGround provides a reliable platform for your blog to thrive. Remember the importance of optimizing your blog for search engine optimization (SEO) to ensure maximum visibility. Let’s not forget about the exciting prospect of income-generating opportunities that can put some cash in your pocket.

    Are you looking for more tutorials? Check out a few Divi-related how-to’s to kick your new blog into high gear:

    Featured Image via Fonstra / Shutterstock.com

    The post How to Start a Succesful Blog in 2023 (Detailed Tutorial) appeared first on Elegant Themes Blog.

  • What Is Generative AI and How Can You Use It in 2023

    The realm of artificial intelligence (AI) technology is expanding at an unprecedented rate. What was once considered the stuff of science fiction is now becoming an integral part of our everyday lives. From voice assistants and recommendation algorithms to cyber-security and advanced healthcare diagnostics, generative AI is reshaping the world as we know it.

    One way to grasp this rapid progression is by the sheer volume of research being produced in the field.

    “We are seeing 500,000 new AI research papers per year.”
    Joelle Pineau, VP of AI Research at Meta

    This all-in mindset for the technology shows the intense interest and investment in AI across academia, private industry, and government. But what about you? How can you use Gen AI for your business, hobbies, and personal life? We’ve collected all our best articles on different categories of generative AI products that will make it easy for you to see how AI can directly impact your day-to-day.

    But first, what is Generative AI?

    What is Generative AI?

    Generative AI is a branch of artificial intelligence that focuses on creating unique content based on training data and neural networks. This can range from creating text content to images, music, and even video.

    To understand generative AI, it’s helpful first to understand what AI is. Artificial Intelligence, or AI, is a broad term that refers to machines or software mimicking human intelligence. It’s about creating systems that can understand, learn, and apply knowledge, handle new situations, and carry out tasks that would typically require human intelligence. AI isn’t on par with human intelligence, but it is phenomenal at what it can do.

    Generative AI takes AI a step further. It doesn’t just mimic human intelligence; it creates like a human might. This happens using machine learning models. These are like rules that get better over time through practice and training. The more data and training these models see the better they get at making high-quality, relevant content.

    Development of Generative AI

    Generative AI developed slowly, building on previous AI advancements. It began with machine learning. This kind of AI lets systems learn and improve from experience without specific programming.

    As machine learning techniques evolved, we saw the development of neural networks, which are computing systems loosely inspired by the human brain. These networks can learn from vast amounts of data, making them incredibly powerful tools for tasks like image recognition, natural language processing, and content generation.

    AI Generative Models Image by Pro_Vector

    Image by Pro_Vector / shutterstock.com

    Generative AI made significant strides with the advent of Generative Adversarial Networks, or GANs. A GAN is made up of two competing parts: a generator and a discriminator. These two parts work together to create very realistic “synthetic data.”

    The generator’s job is to create new outputs. The discriminator’s job is to compare the output to trained data and attempt to fail it. When the discriminator doesn’t approve, the generator is tasked with trying again. Both parts keep this up until there is an approved output. This process helps the generator learn and refine itself. Over time, it improves at making data that looks much like the training data.

    With all of this working under the hood, AI has been able to creep into several types of use cases for the average person. You don’t need to be an expert in programming GANs to leverage the technology fully.


    Applications of Generative AI

    Generative AI has flooded many digital tools, providing practical solutions for everyday tasks.

    “In 12 months, call it next year this time (Mid-2024), I really think every company, every marketing team, every sales team, this generative and predictive AI is going to be a core part of every tool that they use. I just cannot see technology in the next year not incorporating this capability.”
    Joyce Kim Chief Marketing Officer, Board Member at Twilio

    If Joyce is correct, you’ll be using these tools in your professional life before you know it (if you haven’t already).

    Let’s explore some of the key domains where generative AI is making a significant impact.

    Language Processing and Writing

    Generative AI is revolutionizing the field of language processing and writing. AI tools like ChatGPT (based on the GPT-3 model) and Copy.ai are becoming indispensable for creating content, streamlining tasks, drafting emails, writing articles, and answering questions. These tools dramatically enhance productivity and boost creativity.

    Throughout our research on the state of AI writing and natural language processing (NLP), we’ve found some of the best tools that leverage these text-based AI models. These include:

    As you can clearly see, Natural Language Processing (NPL) and language-based AI models are seeing some of the swiftest adoptions by businesses. Their use cases span many different types of tasks and tools. But language is far from the only thing that generative AI is capable of.

    Visual Art and Enhancement

    Generative AI is reshaping the landscape of visual creativity and enhancement. With foundation models like Stable Diffusion, products can generate unique images and art using text prompts. AI is now creating stunning artwork, creating realistic videos, and helping with photo editing. Tools like Midjourney and Photoshop are paving the way with this type of AI. We’ve written extensively about the best AI tools for creating visuals. These include:

    Audio Generation and Speech Processing

    Generative AI is transforming the auditory landscape as well. It can generate music in a specific style. Or you can use it as a text-to-speech tool to convert written text into spoken words. That opens up content to be more accessible for visually impaired users. On the other hand, speech-to-text tools can transcribe audio files, making them searchable and easier to analyze. Some of the best audio-centric AI tools include:

    How to Use Generative AI Responsibly

    Generative AI, with its ability to produce human-like content, offers a multitude of opportunities. However, the power of this technology also introduces a range of ethical considerations and potential for misuse. It’s crucial to navigate these challenges responsibly to harness the full potential of generative AI while minimizing harm. Whether you are using consumer-level AI tools, developing off the back of a broader AI model, or creating your own, we each have our roles in responsibly using AI.

    Aside from the sky-is-falling forecasts about what AI could cause, tangible yet elusive risks are involved in using it.

    Inherent Risks and Criticisms of Using Generative AI

    As with any powerful technology, generative AI comes with its own set of challenges and potential pitfalls. One of the primary concerns is that generative AI models do not inherently fact-check the information they generate. They may produce content based on inaccurate or misleading data, leading to the propagation of false information. Worse still is that when they make an error, it isn’t obvious or always easy to figure out that they did.

    This is particularly concerning in areas like journalism or academia, where the accuracy of information is paramount. Even in casual writing, AI “hallucinates” or invents facts (especially when it has a hard time finishing its output).

    Another potential risk lies in the realm of content authenticity. As AI-generated content becomes more prevalent, AI detection tools are being developed to detect and flag such content. Publishers or individuals using AI-wholesale may experience great reputational damage, especially if the AI-generated content is not clearly labeled as such.

    What Experts Are Saying About Gen AI Risks

    There is no doubt that LLM training data includes copyrighted material, content that was added against website TOSs, and harmful and potentially defamatory information.

    Use of AI Rules of Conductx1800

    Image by designium / shutterstock.com

    It’s still to be seen what legal ramifications exist for using AI. Whether you are developing a model or using one as a service in your own business.

    “Serious legal issues exist around of using training data involving materials with copyright, TOS violation, reputational harm issues.”
    Regina Sam Penti, Partner at Ropes and Gray

    Bias (of each and every kind) is a part of generative AI training data. Collecting, cleaning, and keeping up with data are the biggest jobs for generative AI systems in the future.

    “Bias will continuous problem because the data it was trained on human generated data…guardrails will need to be continue to be refined”
    Eric Boyd, CVP of AI Platform at Microsoft

    Even as a consumer, it’s important to know the risks that exist, even in the products we use. That doesn’t mean that you shouldn’t use these tools—it just means you should be careful about the information you feed these tools and what you ultimately expect from them.

    Where Do We Go From Here?

    As we stand on the brink of a new era in digital innovation, generative AI’s potential is only beginning to be realized. It’s not just about the technology itself. It’s also about how people and businesses can use it to change their everyday jobs and creative work.

    Imagine using AI chatbots to handle customer service inquiries, providing immediate responses and support. Or using AI to transcribe audio, making content more accessible to a wider audience. Generative AI can even assist in writing, from drafting email responses and resumes to creating compelling marketing copy. And on and on.

    For a deeper dive into the topic, check out our comprehensive post on the best available AI tools today. It provides a detailed overview of the top AI tools across various categories, helping you choose the right tool for your needs.

    Generative AI is not just a technological advancement; it’s a tool for creativity, efficiency, and innovation. As we explore its potential, one thing is clear: generative AI is not just shaping our future; it’s here and now.

    Generative AI FAQs

    What kinds of output can a generative AI model produce?

    Generative AI models can produce various outputs based on their training data. These include:

    • Text such as news articles, product descriptions, or creative writing
    • Images from realistic portraits and landscapes to abstract art
    • Audio outputs like music, speech, or sound effects
    • Video including product videos, 3D animation, and realistic human avatars
    • Code outputs for software applications, websites, or custom apps

    What are the limitations of AI models?

    AI models, while powerful, have certain limitations:

    • Bias: AI models can reflect biases in training data, leading to potentially unfair or inaccurate predictions.
    • Complexity: The intricate nature of AI models can make them hard to understand, debug, or improve.
    • Data requirements: AI models need large amounts of data for training, which can be costly to collect and prepare.
    • Creativity: AI models lack human-like creativity and can only generate content based on their training data.
    • Emotion: AI models don’t possess or comprehend emotions.

    Despite these limitations, AI models are instrumental in solving many problems, and ongoing advancements may help overcome these challenges.

    What is ChatGPT?

    ChatGPT is an AI chat experience developed by OpenAI, leveraging the company’s Generative Pre-trained Transformer (GPT) series of large language models (LLMs). It’s built on OpenAI’s GPT-3.5 and GPT-4 models and fine-tuned for conversational applications using supervised and reinforcement learning techniques.

    Launched on November 30, 2022, ChatGPT quickly gained recognition for its articulate responses across various knowledge domains. However, it has been noted for occasionally providing inaccurate information with confidence.

    Key features of ChatGPT include:

    • Natural Conversations: ChatGPT can engage in natural human-like conversations, employing various conversational techniques such as questioning, clarifying, and making statements.
    • Comprehensive Answers: It can provide detailed and informative answers to a wide range of questions, even those that are open-ended or complex.
    • Creative Text Generation: ChatGPT can generate diverse formats of text content, including poems, code, scripts, emails, and letters.

    Could generative AI replace jobs?

    Generative AI, while potentially automating certain roles, is also expected to create new job opportunities. For instance, it could automate customer service, marketing, content creation, and data entry tasks, potentially impacting roles such as customer service representatives, graphic designers, writers, and data entry clerks.

    However, the rise of generative AI also necessitates skilled professionals to develop and maintain these systems, creating new roles. Furthermore, as generative AI is used in innovative ways, it’s likely to open up new job opportunities.

    While generative AI may transform specific jobs, it also presents new career paths, underscoring the importance of adaptability and continuous learning in the evolving job market.

    This is all still speculative and could go any number of directions.

    What is Auto-GPT?

    Auto-GPT, an open-source, autonomous AI tool, leverages OpenAI’s GPT-4 and GPT-3.5 text-generating models to execute tasks. Developed by Toran Bruce Richards and released on March 30, 2023, Auto-GPT is speculated to have the following features:

    • Autonomy: Auto-GPT is designed to carry out tasks independently, minimizing the need for human intervention.
    • Versatility: It’s believed to handle many tasks, from debugging code and writing emails to craft presentations, blog posts, and marketing materials.
    • User-Friendly: Auto-GPT is expected to be easy to use, making it accessible to individuals regardless of their technical expertise.

    Given these potential capabilities, Auto-GPT could significantly transform our work processes, though its full impact remains to be seen.

    What is Google’s Search Generative Experience?

    Google’s Search Generative Experience (SGE) is an innovative feature currently under testing. It employs generative AI to generate summaries of search results, providing a comprehensive overview of the topic alongside the traditional list of links. This helps users quickly locate the information they’re seeking.

    SGE operates by generating a summary of search results when a user initiates a search. The summary, influenced by factors like the user’s location and search history, is displayed alongside the traditional list of links. Users can delve deeper by clicking on the summary or the original source links.

    Benefits of SGE include a more comprehensive topic overview, improved user experience by facilitating information discovery, and reduced reliance on traditional search results. As such, SGE represents a potential enhancement to the user search experience.

    Featured image by Doloves / shutterstock.com

    The post What Is Generative AI and How Can You Use It in 2023 appeared first on Elegant Themes Blog.