EDITS.WS

Category: elegantthemes.com

  • How to Register a Domain Name in 2023 (Step by Step)

    Having a strong online presence is one of the most important aspects of running a successful business. Whether you’re starting a new blog, setting up an ecommerce website, or creating a portfolio to showcase your work, securing a good domain name is an absolute must. Understanding how to register a domain name serves as an important first step toward establishing your online presence. In this post, we will guide you through the entire process, explain what a domain name is, and offer insight into the ways you can register your new domain.

    Let’s dive in.

    What is a Domain Name?

    Also known as a uniform resource locator, or URL, a domain name is essentially your website’s address. Without domain names, people would have to access your website through an IP address with a string of numbers, such as 12.364.23.354. Can you imagine how tedious it would be to navigate websites using that method? Thankfully, there’s a better way: domain names. A domain name provides an easier way to navigate websites directly or through a search engine. A domain name helps your business be more memorable and easier to find and helps with search engine optimization (SEO).

    How to Choose a Domain Name

    When starting the process of choosing a domain name, there are a few things to consider. First, your domain should be related to your brand, website, or business name. Typing it should be easy, so avoiding overly long domain names is key. After all, you want your visitors to be able to easily type your domain into the browser directly, so keeping it short, catchy, and memorable is important.

    Another consideration is to always opt for a top-level domain (TLD), such as .com. They are the most common, so most people consider them safe and reliable. Although there aren’t any technical differences in TLDs, it’s widely considered that .com will likely be more effective than a .net, .biz, or .org. In fact, according to w3Techs, .com domains make up nearly 48% of all domain names on the internet.

    However, not having a .com TLD doesn’t have to be a deal breaker. The most important thing is to find the right domain name for you. That means choosing a lesser-known TLD is okay if your desired domain isn’t available as .com, and you’re set on your choice.

    Choosing a Registrar

    Before registering your new domain, it’s important to consider the best registrar for your business. Thankfully, several domain name registrars will fit the bill. But first, let’s explain what a registrar is. Domain registrars are like an online store for domain names. You can buy, register, and point your domain to your hosting provider, where your website’s files are located. That said, there are some hosting providers, such as SiteGround, where you can purchase your domain and hosting together. Generally speaking, we don’t recommend doing this, as moving your domain could be difficult if you fall out of love with your hosting provider.

    Check Domain Availability

    Namecheap domain registrar

    When brainstorming domain name ideas, checking for their availability is essential. All reputable domain registrars offer this capability, so it’s typically easy to determine what is available. For example, Namecheap allows you to check for potential domain names without having to purchase anything upfront.

    One thing to keep in mind is not to get frustrated if your first pick isn’t available. With thousands of domain names being registered daily, it’s not out of the realm of possibility to miss out on your favorite. That said, you can easily find variations of your initial pick, with most registrars offering similar options based on your initial search.

    How to Register a Domain Name

    There are nearly unlimited registrars, each capable of helping you find the perfect domain name. As previously mentioned, there are hosting providers that offer the same service. For this tutorial, we’re going to cover an example of each. First, we’ll walk you through securing a domain through one of the most popular hosting providers, SiteGround. Additionally, we’ll show you how to register a new domain through a popular domain registrar, Namecheap.

    How to Register a Domain Name Through SiteGround

    SiteGround is one of the best managed hosting providers on the market. They are known for their excellent features, customer service, and value for the money. If you’re in the market for a new provider to go along with your new domain name, SiteGround is the way to go. Setting up a new domain through SiteGround is fast, easy, and affordable. Let’s walk you through the steps to purchase a new hosting plan and add a domain.

    Step 1: Choose Your Hosting Plan

    SiteGround offers three plans to get you started: StartUp, GrowBig, and GoGeek. If you’re starting out, the StartUp plan is the most affordable option at $14.99 monthly, although SG typically offers up to 80% discounts. Start by selecting the StartUp plan.

    SiteGround pricing

    Step 2: Choose a Domain

    When the screen refreshes, you’ll be forwarded to the domain registration screen, where you can register a new domain or add an existing one. Select Register a new domain. Ensure the Domain Registration checkbox is selected.

    register a new domain

    Step 3: Search for Domains

    Type in your first choice for a new domain, then click proceed.

    search for domain

    If your choice is available, you’ll proceed to the next step in the process. If it’s already taken, SiteGround will offer several alternative selections based on the original.

    Alternate domain

    From that point, you can choose one of the suggested domain names or search for an alternate.

    Step 4: Register Your Domain

    The final step is to complete the registration process. You must complete the account and client information and input your payment method to secure your domain and hosting plan. Once the registration process is complete, your domain is secured, and you’re ready to start building the website of your dreams.

    Complete registration

    How to Register a Domain Name With a Domain Registrar

    Namecheap is among the best domain registrars you can get. With affordable pricing, multiple options for TLDs, and a user-friendly interface, beginners and professional web gurus alike can register a new domain in minutes.

    Step 1: Conduct a Domain Search

    The first step to registering your new domain using Namecheap is to search for what’s available. Fill in your choice on the Namecheap homepage and click search.

    Namecheap domain search

    Step 2: Choose Associated Domains

    Once you search for the domain of your choice, the registration page will appear, letting you know whether the domain is available. Additionally, you’ll have the option to purchase similar ones should you want to map multiple domains.

    Namecheap alternate domains

    Once you’ve selected the domains you wish to purchase, add them to your cart.

    Step 3: Purchase Add-ons

    Namecheap will offer add-ons such as WordPress hosting, an SSL, and premium DNS, which provides DDoS attack protection and 100% uptime.

    Namecheap addons

    Step 4: Create A Namecheap Account

    Next, you’ll need to create an account to manage your domain and any add-ons you purchase.

    how to register a domain name

    Step 5: Register Your New Domain

    On the next screen, you’ll take steps to register your new domain with Internet Corporation for Assigned Name and Numbers (ICANN). When a new domain is registered, it goes into a public directory. Your name and contact information will be recorded and available to anyone searching the ICANN directory.

    how to register a domain name

    Finally, you’ll set up your ICANN directory listing using the Whois database. This allows anyone with your domain name to learn who the owner is and their contact information. If you want that to remain private, you’ll need to opt into the domain privacy service by checking the Associate to this domain and enable it at the time of purchase checkbox.

    how to register a domain name

    From there, the only thing left to do is purchase your domain.

    As you can see, registering a new domain with a hosting provider or domain registrar is a straightforward process, making it simple for people with any skill level to achieve.

    Final Thoughts on Registering a Domain

    Registering a domain name is an exciting milestone in building your online identity. By following our comprehensive guide, you’ll gain the knowledge and confidence needed to navigate the domain registration process effortlessly, ultimately securing the best domain for your business.

    If you need both a domain and hosting, you should try SiteGround. However, if you only need to purchase and register your domain, Namecheap is the perfect choice to kickstart your new business.

    Looking for more tutorials? Check out some of our most popular articles to help you become an online guru:

    Featured Image via Heena Rajput / Shutterstock.com

    The post How to Register a Domain Name in 2023 (Step by Step) appeared first on Elegant Themes Blog.

  • How to Use Divi’s Circle Counter Module to Showcase Your Skillset

    Although a traditional resume is timeless, consider creating an online resume website to showcase your skills as well. Especially if you’re searching for a job in the tech industry. In this tutorial, we’ll show you how to use Divi and the FREE Creative CV Layout Pack to create an online resume website design! We’ll focus on using the built-in Divi Circle Counter Module as well.

    Online Resume Website Design: Why is it Important?

    While dropping off a paper resume may work in some industries, in tech, that is a thing of the past. It is important to consider resources that will give your resume the boost it needs to get the job. At the very least, we want an interview! An online resume website creates a central place where recruiters, headhunters, and potential managers can learn more about you. Building a strong personal brand online allows your future employers to see the real you, in addition to what’s on your resume. Some pages that you can consider adding to your personal resume website include:

    • An About Page: Firstly, and more importantly, remember to craft a brand voice that is uniquely you. Don’t forget to brag about yourself!
    • An Online Resume: An online resume puts you in front of the companies looking at your job application. Additionally, search engines like Google and Bing can find it as well. The more eyes that see it, the more chances you have of finding your next opportunity!
    • A Testimonials Page: Showcasing praise and good work from prior (or current!) bosses and is great social proof.
    • A Portfolio/Gallery: If you have examples of your work, putting them into a portfolio adds dimension to your resume.
    • A Contact Page: A contact form and email address make it easy for people to get in touch with you, and give you that job!

    If this is all new to you, don’t worry! We’ll help you get started with designing your online resume website. At Divi, we created the FREE Creative CV Layout Pack that you can download. In this pack, we have page layouts for each of the pages listed above. Also, we’ll be using Divi’s animation features, as well as cool modules like the Circle Counter Module to showcase our various skill sets online.

    Let’s get started and get that tech bag!

    Starting Your Online Resume Website Design

    Download and Install the Layout Pack

    The first step to building our online resume website is downloading and installing the Creative CV Layout Pack. We have instructions on the process in this blog post. This tutorial will focus on upgrading the home layout of the pack with the Circle Counter Module. This is a native Divi module and is the perfect way to showcase your skill set. With clean lines, animation, and more, you can display your skills in a highly visual way, setting you and your resume apart.

    This is what the home layout looks like out of the box:

    The Creative CV Home Layout, the foundation of our online resume website design

    Though this layout is a good jumping-off point for our online resume website design, we will make it more personalized. Firstly, we will use Circle Counter Modules to animate the skills section. Then, we will add some animation to the other modules on the page. Finally, we’ll add some more visual interest to the page with the Icon Module.

    Updating the Skills Section

    Changing the Row Structure

    First, let’s remove the Text Modules that are currently in this section. Hover over each module, and click on the trash can icon in the Module Settings menu that appears.

    Remove Text Modules from the skills section in our online resume website design

    Secondly, change the structure of the row. Click on the grid icon within the row’s hover menu. Then, select the number of columns that match up with the number of skills you want to showcase. We went with 5 columns, so we clicked the icon for 5 columns.

    Change number of columns

    Styling the Row

    For each column within the row, we want to add a border. This is a callback to the borders that are used throughout the Creative CV Layout Pack. To do this, click on the gear icon to open the Row Settings modal box.

    Edit row settings to prepare for column styling

    Adding the Column Border

    Once in the Row Settings, click on the gear icon on the first column.

    Edit column for border styling

    This will open the Column Settings. Within the Column Settings, click on the Design tab. Next, click on the Border tab. We’ll add a thick, black, bottom border to each of the 5 columns in this row. Here are the settings to use:

    Bottom Border Settings:

    • Border Weight: 5px
    • Border Color: #000000
    • Border Style: Solid

    Styling the bottom column border

    Once your settings are inputted, click the green checkmark to save your column settings. Follow the steps for the remaining columns in the row. When that is complete, save the row.

    Integrating Circle Counter Module

    Now that our foundation is set, let’s add the first star of the show, the Circle Counter Module. Click on the gray plus icon in the first column. Select the Circle Counter icon to add the first module to the row.

    Add Circle Counter Module

    Adding Content

    We’re going to take inspiration from the branding of the Creative CV Layout Pack to style our newest addition. To start, add the skill that you want to showcase in the Title field under the Content tab. Next, add in the percentage that correlates to that skill. Remember, authenticity is key when building your personal brand and showing up online.

    Adding text content to Circle Counter Module in our online resume website design

    Styling the Circle

    Using the brand design of the Creative CV template as a guide, we move to the Design tab to start adding color to our Circle Counter Module. In the Design tab, we start by clicking the Circle tab. We use the following settings to style the circle part of our module:

    Circle Design Settings:

    • Circle Color: #fe5a25
    • Circle Background Color: #000000
    • Circle Background Opacity: 0.2

    Circle Counter circle design and branding

    Setting Up Title Text Styles

    Next, we move to style the title of our module by clicking on the Title Text tab. We will use the same font that is used throughout the layout: Candal. The settings for the Title Text styling is as follows:

    Title Text Design Settings:

    • Title Font: Candal
    • Title Text Color: #000000

    Title Text settings for the Creative CV layout

    Styling the Number Text

    The Number Text styling follows the same pattern as the Title Text. However, we use a larger font size. This draws attention to our skillsets displayed in the Circle Counter Module. Here are the settings for the Number Text that we access by clicking the Number Text tab:

    Number Text Settings:

    • Number Font: Candal
    • Number Text Color: #000000
    • Number Text Size: 46px

    Number Text Styling

    Add Animation

    The final touch to our Circle Counter Module is to add an entrance animation. Once our visual design is established, we can set up our motion design. With Divi, it’s easy to add micro animations to various modules used throughout your design. In our case, we’ll add a slide animation to our Circle Counter Modules. To do this, we first start by clicking on the Animation tab. Next, we click on the Slide Animation Style. Lastly, we click on the Up Animation Direction.

    Animation Settings:

    • Animation Style: Slide
    • Animation Direction: Up

    Circle Counter Animation Settings

    As you can see, there are quite a few settings available to further style the animation of this module. However, we want to keep our motion design simple and classic, so we will leave most settings at their default.

    Click on the green icon at the bottom of the Circle Counter Setting menu to save your settings.

    Duplicate and Edit

    Now that the first Circle Counter Module is complete, we can duplicate our work. This will allow us to save time and create continuity within our work. To do this, hover over the Circle Counter Module and click on the Duplicate icon. Next, on the newly duplicated module, click on the gear icon to enter the settings.

    Duplicate the Circle Counter Module

    Update the Content tab with your other skills and talents. However, leave the Design tab alone. After saving your work within that module, hover over the module again, and click and drag it to move it into the second column.

    Update and move circle counter module

    Repeat this until all your skills are within the columns of your row.

    Final Circle Counter Modules in the Creative CV Online Website Resume Design

    With our Circle Modules beautifully in place showing our skills, let’s add some excitement to the other modules on this page.

    Add Animation to Profile Photo

    At the top of our page, we have an Image Module. Here, upload a professional, bright, and crisp headshot of yourself. To do this, click on the gear icon after hovering over the module. Then, click on the Design tab for us to add an exciting animation to the photo.

    Upload professional headshot to online resume website design

    Once in the Design tab, click on the Animation tab. Like the Circle Counter Modules, we’ll keep our animations relatively simple. In this case, we’ll use a Zoom animation with the default settings to grab visitors’ attention to our website. Here are the settings that we use to apply a zoom animation to our image:

    Animation Settings:

    • Animation Style: Zoom
    • Animation Direction: Center

    Adding animation to the Image Module

    As we’re working through the online resume website design, remember to modify the static modules such as text to personalize the template to your needs.

    Add Blurb Modules

    Next on our hit list, we’ll replace the contact text with Blurb Modules. We do this for two reasons. The first is to add more color to the icon that is included within the module. Secondly, we can add a subtle animation to a single Blurb Module, as opposed to having several lines of text flying across the screen if we were to keep the section as is.

    To get started, we hover over each Text Module, click the trash can icon, and remove them from the section.

    Replace text modules within the

    Next, we click on the gray plus icon to add a Blurb Module to the first column. Like the Circle Counter Modules, we’ll duplicate the module once we have styled it.

    Add Blurb Module to the first column

    Next, we click on the Blurb Module icon.

    Click on the Blurb Icon

    Add Your Content

    We navigate to the Text tab and add our content. We’ll showcase our phone number, email address, and location. For this first module, we’ll be inputting our phone number details.

    Add content to blurb module

    Add Icon

    Next, we click on the Image & Icon tab. Once there, we select yes on the Use Icon toggle. We then use the search box to select a phone icon. This is the one we chose.

    Choosing the phone icon for the Blurb Mobile

    Style Icon

    Now we click and move to the Design tab to style our blurb. We use the following settings for the icon:

    Image & Icon Design Settings:

    • Icon Color: #fe5a26
    • Image/Icon Placement: Top
    • Image/Icon Width: 96px

    Styling Blurb Icon

    Set Text Alignment & Color

    Now, we click on the Text tab. We want to center-align our text and make the text throughout the module Dark. Therefore, we click the center icon, and then we click Dark from the Text Color dropdown.

    Setting text alignment and base color

    Style Title Text

    As with the Circle Counter Module, we’ll use the font throughout the layout pack. Clicking on the Title Text tab, the only setting we change is for the font family, which will be Candal.

    Styling the Title Font

    Body Text Styling

    For the Body Text, we’ll be using a different font. As such, we’ll have to add a few other tweaks to the settings to make the Blurb Module mimic the styling of the Text Modules that used to grace this section. Here are those settings:

    Body Text Settings:

    • Body Font: Montserrat
    • Body Font Weight: Regular
    • Body Text Size: 16px 

    Body Text Styling

    Add Animation

    To wrap up our design of the Blurb Module, we’re going to add an entry animation. Like the Image Module, we want this entrance to catch the eye. After clicking on the Animation tab, we click on the Bounce icon. We leave the Animation Direction, as well as the other settings, at their default options.

    Animation Settings:

    • Animation Style: Bounce

    Adding animation to the Blurb Module

    Duplicate Module

    After clicking on the green icon to save all our hard work, we will duplicate our Blurb Module.

    Duplicate Blurb Module

    After duplicating the module, go back to the content tab to update the Text and Image & Icon tabs to match your needs. While we used the Blurb Modules to showcase our phone, email, and location, you may want to use them to display other relevant things to your role or industry. Get creative!

    Contact Information Related Blurb Modules

    Adding the Final Touches to Your Online Resume Website Design

    Using one of the newest Divi native modules, the Icon Module, we will add a sprinkling of iconography to our digital resume. To do this, we will first scroll to the resume section of our page.

    Adding the Icon Module

    Then, we will click on the gray plus icon to add one Icon Module to the column. We want the icon to go at the start of each entry within our resume. Ideally, we also want the icon to be a general visual representation of the company or role.

    Adding Icon Module

    Then, using the search box, type in a term that resonates with the position this icon will represent on your resume.

    Searching for an icon within the Icon Module

    In our example, we used a color swatch to represent the role that color plays in UI, UX, and ultimately the work of a product designer.

    Styling the Icon

    We then click on the Design tab. We use the following settings to change the color and size of the icon:

    Icon Settings:

    • Icon Color: #fe5a26
    • Icon Size: 32px

    Icon Color Settings

    Our last design change will be to left align the Icon Module. To do that, click on the Alignment tab. Then, click on the left align icon. Finally, click on the green checkmark button at the foot of the settings window to lock in your icon settings.

    Change icon alignment

    With the Icon Module designed, we will now click and drag it to the top of our role title.

    Icon positioned over online resume

    For each entry in your resume, add an icon to represent the mentioned role. For this current resume, these are the icons chosen:

    Icons used within the online resume section

    Final Look

    With these subtle animations and additional modules like the Icon Module and the Circle Counter Module, we’ve been able to bring new life to the Creative CV home layout:

    The final look!

    If you’d like to take the layout a step further, you can also check out the FREE header, footer, and blog post template which can supplement the Creative CV Layout Pack as a whole. You can see the header and footer freebie in use above. Making your work public online can be a scary step in your job search journey. But with a tool like Divi in your arsenal, the pressure to build and maintain an online presence can be reduced. Having the right resources to create a visually appealing yet professional website requires balance and skill.

    Final Thoughts

    All in all, we’d love to hear your thoughts on your tech journey. If you’ve been looking to get into tech, would you consider making a website for your resume? If you’re not in tech, do you think a website like this could help you in your career? Let us know in the comments down below, and let’s get a conversation going.

    The post How to Use Divi’s Circle Counter Module to Showcase Your Skillset appeared first on Elegant Themes Blog.

  • 10 Best AI Avatar Generators in 2023 (Free & Paid)

    AI art is all the rage and with good reason. With artificial intelligence (AI), you can create photos with only your imagination as the limit. Build extraordinary worlds or create a cat with feathers; AI art generators help you realize your design dreams. Previously, you would need quite a few tutorials and hours on the computer to create digital art. But now, with the help of AI art creators, you can make the most sophisticated pieces with only a few words. When it comes to AI art generators, there are quite a few categories that they fall into. In this post, we’ll be focusing on AI avatar generators. These allow you to create profile photos – or videos – that you can use around the web and on social media. AI avatars are a fun way to add your personality to the photos that you’ve taken.

    What is an AI Avatar Generator?

    An AI avatar generator is an art generator that uses artificial intelligence, algorithms, and neural networks to create unique AI avatars based on user input and prompts. These avatars can be used across the internet and are popularly used as profile pictures for social media accounts. AI avatars typically use a selfie or photo as a starting point. However, some can start with simple text prompts. AI avatars are not just static images. Creating an AI avatar that can be used in the video is possible. AI avatars can be used in gaming, live-streaming, tutorials, and business presentations. At the end of the day, AI avatar generators allow you to be creative with your likeness. Whether you picture yourself as your favorite anime character or want to make your profile photo look more lively, our list has an AI avatar generator.

    10 Best AI Avatar Generators in 2023


    Subscribe To Our Youtube Channel

    Our list of the best AI avatar generators carries a range of platforms for creating AI avatars in both image and video formats. If you’re looking for a generator with lots of features, or one with a more streamlined approach, there’s an AI avatar generator here that you can use to explore your creativity.

    1. Picsart

    Picsart AI avatar generator

    Picsart has a suite of AI tools for editing photos, including a popular AI avatar generator. It allows you to generate an AI avatar from your photos quickly. It is a mobile app available on Android and Apple devices. The app works by synthesizing 10-30 photos and applying an AI style to the photos, creating new avatars. Picart generates between 50 – 200 avatars for you using the styles and photos that you’ve chosen. As an easy-to-use app, Picsart requires no prompts or text to generate your AI avatars. Instead, its powerful algorithms can scan your photos, apply your presets of choice, and create many unique images. Additionally, Picsart has a suite of AI tools that can further edit and enhance your creativity for photos and videos. Using their gallery of tools, you can add further embellishments to your AI-generated avatars, such as stickers, text, and more.

    Key Features of Picsart:

    • 20+ avatar styles
    • Three types of avatar generators: individuals (selfies), couples, and animals
    • Thousands of templates, fonts, and stickers to add to avatars
    • Available in PNG and JPG formats at 512px x 512px

    Picart's community features

    Picart’s community features are a great way to use and share your AI avatars. You can gain ideas from other creators, learn about different filter combinations, and more. You can create your own space, join other spaces, join competitions, and check leaderboards to see who has created the best avatars.

    Best For:

    Picsart is an excellent AI avatar app for those who want to have fun creating avatars in an environment shared by other digital creators and artists.

    Pricing: Paid plans start at $7.50 per month

    Get Picsart

    2. Synthesia

    "</a

    Synthesia is an AI video creation platform that focuses on creating life-like AI avatars for video, whereas most AI avatar generators focus on static imagery. It has a wide array of avatars for you to use when creating video avatars for your presentations, tutorials, and online courses. It works in a variety of languages, with different life-like avatars. Additionally, it is possible to create custom video avatars using just a few video snippets you upload.

    Furthermore, you can use your voice within these avatars. Synthesia also does an excellent job of preparing extensive tutorials and documentation on creating your professional video avatar. If you’re a business looking to create an AI mascot or spokesperson and want to save money, using an AI avatar in your content is imperative, and Synthesis makes the process painless.

    Key Features of Synthesis:

    • 90+ diverse AI avatars
    • 120+ languages and voices
    • Change the attire and age of AI avatars
    • AI script assistant
    • Upload background music, images, and videos

    "</p

    The Synthesia Studio is their most powerful feature for creating videos with an AI video avatar. You can set your scenes, add text, and even create custom AI avatars from your videos! The studio is a vital part of the Synthesia AI avatar generation process and a significant feature that makes creating video avatars simple.

    Best For:

    Small businesses and companies who want to create video content with AI avatars should consider using Synthesia for their next video training or documentation project.

    Pricing: Paid plans start at $22.50 per month

    Get Synthesia

    3. Aragon

    Aragon AI headshot generator

    Aragon produces AI-generated headshots. While most of the generators on our list have a more creative focus, this generator is all about business. Aragon focuses on transforming your selfies into polished headshots that will rival the work of many veteran photo retouchers. Instead of hiring a photographer, studio, or your cousin, upload 12 or more selfies to Aragon, and see their proprietary AI model handle the rest. Aragon works either for business professionals or for teams that may require headshots for their entire group. Create a team on Aragon, and add members who can create their headshots. Generate AI headshots in bulk for company websites, LinkedIn, and more.

    Key Features of Aragon:

    • Creates 200+ AI-generated headshots
    • Choose up to 40 high-quality, AI-created headshots
    • 120-minute turnaround time
    • 20+ different editing styles and techniques
    • Photos are made available in 1024px x 1824 px

    Aragon and it's questionnaire

    Aragon requires you to fill out a detailed questionnaire before generating your headshot. The questionnaire provides you with a list of professions and uses cases that it uses to generate an accurate set of headshots. This helps ensure that your headshots have the right hair color, ethnicity, and poses.

    Best For:

    Aragon is an AI avatar generator for business professionals. If you want polished corporate headshots while building your brand on websites like Indeed and LinkedIn, use Aragon to upgrade your selfies into stylized headshots.

    Pricing: Paid plans start from $29 per 40 avatar headshots

    Get Aragon

    4. Fotor AI Avatar Generator

    Fotor AI Avatar Generator

    Fotor AI Avatar Generator is an online and mobile-based AI avatar generator. Like most generators, it works best with selfies. You select your gender, upload 8-15 photos, and then select the plan you want to purchase before generating your avatars. On both mobile and desktop devices, Fotor has an intuitive interface, making AI art generation accessible to those who may not be familiar with digital art tools. Furthermore, Fotor’s AI Avatar Generator is a part of the full suite of Fotor’s photo and graphic design tools. From premium templates to collages, online photo editing, and more, choosing Fotor as your AI avatar generator is the best choice if you’re looking for a digital photo studio that embraces new and exciting AI tools.

    Key Features of Fotor AI Avatar Generator:

    • Available on Apple, Android, and web
    • Generates up to 10 avatar styles automatically
    • Bulk download or individual download created avatars
    • Access to the Fotor Online Photo Editing Studio for advanced edits to your avatars
    • Generates up to 200 unique avatars

    Fotor's AI avatar gallery

    A separate area on both the Fotor web interface and the mobile app allows you to re-download and preview your generated avatars after they have been created. Each generation you create is added to its folder, which is timestamped and dated so that you can organize, arrange and compare all the avatars you’ve created with the Fotor AI avatar generator.

    Best For:

    If you want an AI avatar generator with additional AI editing tools for your phone or desktop, using the Fotor Face Generator would be a great fit.

    Pricing: Free, Paid plans start at $10.99 per month

    Get Fotor AI Avatar Generator

    5. Lensa AI Magic Avatars

    Lensa AI avatar generator

    Lensa AI is a popular photo editing app well-known for its Magic Avatars.  It is one of the most popular AI avatar generator apps available, providing a seamless process for turning your selfies and photos into creative AI avatars. Magic Avatars gives you a large selection of styles that you can use to create your avatars. Additionally, Lensa’s full suite of photo editing features makes it easy to edit your AI avatars once they have been generated. You can download each individually or enter the pack of avatars in two resolutions. You can easily share your favorite avatars on social media or save them on your phone for offline use. It has had a rocky history dealing with privacy issues; however, with special precautions, it is still a contender on our list of the best AI avatar generators. The mobile app is available on both Apple and Android devices.

    For more, check out our step-by-step guide to creating magic avatars with Lensa AI.

    Key Features of Lensa AI Magic Avatars:

    • Generate AI avatars for humans, cats, and dogs
    • 30+ avatar styles that you can use in your generations
    • Generates between 56 – 200 unique avatars
    • It provides a push notification or allows you to navigate outside the app while generating avatars
    • Download avatars in 4k or standard resolution

    Lensa AI and Pixels.com for printing off your AI avatars

    Lensa’s AI avatars can be brought to life by collaborating with Pixels.com. This integration allows you to print, frame, and receive a physical hard copy of your AI avatar. If you’ve created a beautiful and creative avatar you’re proud of, Lensa allows you to turn it into a puzzle, canvas, and more.

    Best For:

    Lensa provides a staggering number of styles to generate your AI avatars. If you want to stretch AI’s creativity with the sheer number of styles and filters available, use Lensa as your AI avatar generator.

    Pricing: Paid plans start at $3.99 per 50 avatars

    Get Lensa AI Magic Avatars

    6. Magic AI Avatars

    Magic AI Avatars, AI generator

    Magic AI Avatars is a mobile app for Apple and Android that generates AI avatars. Unlike most of the generators on our list, Magic AI Avatars allows you to generate AI avatars for free. While these avatars may not be available in high resolution and are a smaller dimension than their premium counterparts, you can still create custom, AI-generated avatars quickly and easily from your mobile device. It is also one of the few AI avatar generators working with selfies and full-body photos, though this is only available when you purchase credits. While it doesn’t have a suite of AI tools available to edit further and optimize your avatars, it provides a one-click enhancement feature that provides basic image touch-ups to your newly created avatars.

    Key Features of Magic AI Avatars:

    • Generates 200+ avatars in each generation
    • 25+ different avatar themes
    • Can create full-body AI avatars as well as headshots
    • Ability to download standard and high-resolution avatars

    Take a selfie within the Magic AI Avatar mobile app

    While most AI avatar generators require you to upload a photo as a starting point for your avatar, Magic AI Avatars allows something different. You can quickly snap a selfie and use that to create your avatar. No longer will you need to scroll through your photo folders or search for the perfect selfie; you can take one right on the spot and use that to create your AI avatar.

    Best For:

    If you’re looking for a free AI avatar generator, you’ll be hard-pressed to find one. Luckily, Magic AI Avatars provides a decent selection of AI avatar themes that you can use for free to see if you’re a platform fan before committing to purchasing credits.

    Pricing: Free, Paid plans start at $4.49 per 200 avatars

    Get Magic AI Avatars

    7. Reface

    Reface, an AI avatar generator

    Reface is known for being a face swap web and mobile application. You can also create custom AI avatars with your uploaded photos, but it does so much more than that. Reface has an enormous library of more than 100 preset avatars that you can switch the face with your own. Upload your selfie, select your template, and Reface will do the rest. You can save up to five different faces within the app. Add friends, family, or your favorite selfie to this app’s hundreds of AI avatar presets. Unlike most AI avatar generators, Reface does have a lot of free options that you can use. However, they do come watermarked. Nevertheless, Reface is a fun way to use AI to create avatars in various styles using your and your loved ones’ faces.

    Key Features of Reface:

    • 35+ AI avatar styles
    • 100+ AI avatar styles for face swapping
    • Generates avatars for people and pets
    • Generates 48 unique AI avatars per generation cycle
    • Create video and GIF avatars in addition to static images

    Reface''s AI avatar animator

    Reface’s photo animation feature is a great way to add some life to your newly created AI avatar. This feature’s free and pro versions give you an easy way to swap your face onto popular memes and songs. You can also use this to animate your AI avatars, creating a static and interactive way to share your new avatar with your friends.

    Best For:

    If you want to be able to create fun animated avatars in addition to custom AI avatars, use Reface as your AI avatar generator. Also, its face-swapping feature is a fun way to get creative with your digital art.

    Pricing: Free, Paid plans start at $9.49 per month

    Get Reface

    8. Dawn AI

    Dawn AI, an AI avatar generator

    Dawn AI is an avatar AI generator that uses 8 – 12 different selfies to create highly realistic self-portraits. While many of the AI avatar generators on our list have features like photo editing, video studios, and more, Dawn AI is an AI avatar generator that focuses heavily on creating for you the best avatars possible, and that’s it. You can save your favorite avatars in your gallery, download them quickly to your phone, or share them on social media. Dawn AI has the most styles of all the AI avatar generators on our list, boasting over 400 and counting. The free app version also provides over 40 avatars generated in their Essenitals style pack. This is great as it allows you to see how their AI will function with your photos down the line, should you choose to purchase credits or a membership.

    Key Features of Dawn AI:

    • 400+ AI avatar styles
    • Generates 48 avatars immediately
    • Provides two new themed packs every day
    • Available for both Android and Apple devices

    Dawn AI free video avatar

    An added perk of the Dawn AI avatar generator is the avatar video. With each pack of avatars you generate, Dawn AI creates a slideshow of some of the avatars you’ve generated. This is a fun and unique way to incorporate video into your AI avatar generation process.

    Best For:

    If you’re looking for a simple AI avatar generator that has hundreds of avatar styles that you can quickly use, Dawn AI is the tool for you. With a steady focus on creating AI avatars, this dedicated AI avatar generator is excellent for people who don’t want additional fluff getting in the way of them creating their avatars for use on social media and beyond.

    Pricing: Free, Paid plans start at $2.69 per week

    Get Dawn AI

    9. Starry AI

    Starry AI avatar generator

    Starry AI is an AI art generator that offers an AI avator generator that stands apart from others in our list, especially for its free version. You can generate and download five free AI avatars (or “Starrytars”) daily without watermarks! This is a great way to test and use the product, which is very generous of this popular avatar generator. This AI avatar generator gives you three ways to create an avatar. You can upload your selfie and use text prompts; you can directly draw in-app with a stylus or your finger. You can generate either 4 or 8 images at a time, increase the number of iterations generated or remove objects from your uploaded images before turning them into avatars. Starry AI also comes with a growing community of other artists who use the app and share their AI art and avatars for inspiration.

    Key Features of Starry AI:

    • Generate AI avatars using text prompts, images, or sketches created in-app
    • 1000+ AI avatar styles
    • Bulk-generate avatars with your custom prompts
    • Set canvas ration to: 1:1, 4:5, 9:16 or 5:3
    • Upscale and use digital painting to edit and customize your generated avatars

    The custom prompt generator by Starry AI is a powerful way to get the exact AI avatar generation that you want. You can choose from artists’ styles and popular prompts, as well as their large selection of styles, to build the perfect prompt to create the best AI avatar for you. Also, you can save and manage these prompts, turning them into presets you can reuse continuously when using Starry AI.

    Best For:

    If you want to use prompts to generate your AI avatars, use Starry AI. While you can use the premade styles that Starry AI provides to create your next AI avatar, you can also gain greater control of your outputted avatars by using text prompts.

    Pricing: Free, Paid plans start at $15.99 per month

    Make Avatars with Starry AI

    10. Photoleap

    Photoleap AI avatar generator

    Photoleap is an AI avatar app and platform that allows you to create and edit AI avatars. The app allows for the creation of AI avatars with both text prompts and uploads you’ve made from your phone or computer. Photoleap has a vast library of styles that range from comical to mythical and everything in between. The app’s free version allows you to download your AI avatars as images. Still you also can download a video showing the transformation from your original image to the AI-generated avatar. Photoleap also boasts excellent photo editing tools. Whether you want to change the exposure, add a different sky, or smooth your skin, Photoleap’s suite of editing tools will help you create the perfect AI avatar to share on social media and beyond.

    Key Features of Photoleap:

    • Available online as well as on Andoird and Apple devices
    • Works with selfies, headshots, and full-body photos
    • Generate avatars from a single person, multiple people, or pets
    • Change the background of AI avatars with AI Room and AI scenes features
    • Advanced photo editing tools for avatars, including animation, enhancements, colorizations, and more

    Photoleap Google Photos integration

    Photoleap allows you to pull photos from the cloud to use in your AI avatar generations. If you use Google Photos to store your photos, Photoleap allows you to upload directly from the cloud to create your AI avatars and art. Furthermore, you can use your camera in-app to take a real-time photo and use that as the base for your AI avatar.

    Best For:

    While Photoleap has a web app version, if you prefer to edit your AI avatars from your phone, Photoleap will be a handy tool for you. Additionally, their editing tools make mobile photo editing a simple process that can be done with photos from your phone, the cloud, or your camera.

    Pricing: Paid plans start at $4.09 per month

    Get Photoleap

    Comparing the Best AI Avatar Generators?

    We’ve looked at the best AI avatar generators and found some that work with images and some with video. We have AI avatars that let you explore the furthest reaches of your imagination and some that focus on helping you craft a stellar impression for your brand. All in all, our list will help you find the best AI avatar generator that you can use to start creating refined digital art today.

    Best AI Avatar Generators Price Comparison

    Let’s compare our top contenders based on price. We’ll also see which ones give you free credits or a free trial that you can use to test out their services before committing to purchasing:

    AI Avatar Generator Price Free Option
    🥇 Picsart $7.50 per month ❌ Visit
    🥈 Synthesia $22.50 per month ❌ Visit
    🥉 Aragon $29 per 40 headshots ❌ Visit
    4 Fotor AI Avatar Generator $10.99 per month ✔️ Visit
    5 Lensa AI Magic Avatars $3.99 per 50 avatars ❌ Visit
    6 Magic AI Avatars $4.49 per 200 avatars ✔️ Visit
    7 Reface $9.49 per month ✔️ Visit
    8 Dawn AI $10.76 per month ✔️ Visit
    9 Starry AI $15.99 per month ✔️ Visit
    10 Photoleap $4.09 per month ❌ Visit

    What is the Best AI Avatar Generator?

    Our list of the best AI avatar generators has a tool for everyone who wants to start getting creative with AI. However, some made the top of our list for a reason. Firstly, Picsart is excellent for those new to creating digital art with AI. While it has robust avatar generation tools, its community features can inspire you as you embark on this journey of creating art with AI. Secondly, Synthesia is the best tool for creating video AI avatars. Its powerful studio makes online courses, tutorials, and presentations a walk in the park. It is one of the best AI avatar generators for businesses that want to incorporate AI video into their processes. Lastly, Aragon is the best AI avatar generator for the ambitious career person to create the perfect headshot for your LinkedIn profile or professional online accounts. Save money using AI to perfectly edit your headshots without hiring a photographer.

    All in all, AI avatar generators allow us to think outside the box when representing ourselves online. Whether we want to look

    Want to learn more about photo editing, image generation, and AI? Check out our recent articles surrounding the best AI art tools and more.

    Featured Image via Studio_G / shutterstock.com

    The post 10 Best AI Avatar Generators in 2023 (Free & Paid) appeared first on Elegant Themes Blog.

  • Get a Free Esthetician Layout Pack for Divi

    Hey Divi Nation! Thanks for joining us for the next installment of our weekly Divi Design Initiative; where each week, we give away a brand new Layout Pack for Divi.

    This time around, the design team has created a beautiful Esthetician Layout Pack that’ll help you get your next Esthetician website up and running in no time!

    This layout pack includes:

    8 Premade page layouts strategically designed for any Esthetician website (including a footer design)
    – Original, royalty-free photos and graphics + customizable source file (see below)
    – Plus, a large collection of pre-designed website elements that are customizable and reusable anywhere.

    This layout pack is available right inside Divi for all Divi customers for FREE as the latest addition to our growing Divi library of hundreds of premade layout packs, thousands of page designs, and countless web design elements and resources.

    divi layout

    Check Out The Divi Esthetician
    Layout Pack Below

    Get it for free today!

    Esthetician layout pack

    Landing Page Design

    Esthetician layout pack

    View The Live Layout Demo

    Home Page Design

    Esthetician Layout Pack for Divi

    View The Live Layout Demo

    About Page Design

    Esthetician Layout Pack for Divi

    View The Live Layout Demo

    Services Page Design

    Esthetician Layout Pack for Divi

    View The Live Layout Demo

    Service Page Design

    Esthetician Layout Pack for Divi

    View The Live Layout Demo

    Pricing Page Design

    Esthetician Layout Pack for Divi

    View The Live Layout Demo

    Blog Page Design

    Esthetician Layout Pack for Divi

    View The Live Layout Demo

    Contact Page Design

    Esthetician Layout Pack for Divi

    View The Live Layout Demo

    Key Features

    We have just the layout for you if you’re looking for a fresh new look for your Esthetician website. The Esthetician Layout Pack for Divi has gorgeous royalty-free photos, well-placed illustrations, and features pricing on the home page. Take your Esthetician website to the next level with this stunning layout.

    Live Demos

    Click the links below to see a live demo for each of the layouts included in the pack.

    1. Esthetician Landing Page (live demo)
    2. Esthetician Home Page (live demo)
    3. Esthetician About Page (live demo)
    4. Esthetician Services Page (live demo)
    5. Esthetician Service Page (live demo)
    6. Esthetician Pricing Page (live demo)
    7. Esthetician Blog Page (live demo)
    8. Esthetician Contact Page (live demo)

    Access This Layout Right Now
    Directly from Your Divi Builder

    Since Version 3.0.99 of Divi, you can find and import any of the layouts included in this pack (along with ALL of Divi’s Premade Layout packs) directly from the Divi Builder. They are already waiting for you.

    To access your new layout, simply activate the Visual Builder when editing a page and look for the “Load From Library” icon in the page settings bar (it looks like a plus symbol). Click this icon to launch the Load From Library popup. Under the Premade Layouts tab, you can easily find the new layout by scrolling through the list of layout packs. Once you find the Esthetician Layout Pack, click on it. You will see all the individual layouts included in the pack. Select the layout you want to use and then click the “Use This Layout” button.

    Esthetician Layout Pack for Divi

    For more, check out this video to learn how you can get this layout pack up and running today.

    Subscribe To Our Youtube Channel

    Authentication Required

    Before you can download Premade Layouts from the Divi Library you must authenticate your Elegant Themes Subscription. You can do this by navigating to Divi > Theme Options > Updates. There you can enter your username and API key and save changes.

    Esthetician Layout Pack for Divi

    You can find your API Key under your members area on the Elegant Themes site. After you enter the Username and API Key, you will gain immediate access to our library of hundreds of free layouts (including this one). If you haven’t done this, when you click to import a layout to your page, you will be prompted to enter your Elegant Themes Membership Username and API Key.

    Use Layout Images for FREE with No Licensing Restrictions

    Esthetician Layout Pack for Divi

    The image assets included with these layouts (icons, illustrations, photos, etc.) have no licensing restrictions. This means you can use them in all of your commercial projects without having to worry about paying licensing fees or attributing the photographer. Use them in your commercial websites, sell them within your Divi child themes, include them in your own Divi layout packs or just use them on your blog. We know how challenging it can be to find good photos and how confusing and scary the licensing that governs those photos can be. We want to fix that problem for our users.

    Download the Full Res Image Assets

    New Layout Pack Every Week!

    We hope you enjoy this layout pack. We look forward to hearing your opinions in the comment section below. Make sure you check out next week’s layout pack as well!

    The post Get a Free Esthetician Layout Pack for Divi appeared first on Elegant Themes Blog.

  • Divi Product Highlight: Kali Multi-Purpose Divi Child Theme

    Kali is a multi-purpose Divi child theme that comes with over 18 beautifully designed pages. It is fully customizable with built-in Divi options and can be used for many different types of websites, with many page layouts that are ideal for service-based businesses in particular. The child theme is modern and colorful and utilizes motion and interactivity in an engaging way throughout the site. In this post, we’ll take a look at the Kali multi-purpose Divi child theme to help you decide if it’s the right Divi child theme for you.

    Let’s get started!

    Installing Kali Multi-Purpose Divi Child Theme

    Before installing the Kali multi-purpose Divi child theme, make sure you have Divi installed on your WordPress site. The theme author recommends installing Kali on a fresh WordPress installation since the child theme will overwrite the existing website. Once you are ready to install, navigate to the Themes page under Appearance in your WordPress dashboard and click Add New.

    Kali Multi-Purpose Divi Child Theme Installation Add New

    From the Add Themes page, click the Upload Theme button at the top. Select kali-divi-child-theme.zip from your files, then click Install Now.

    Kali Multi-Purpose Divi Child Theme Installation Upload

    Once installed, activate the theme.

    Kali Multi-Purpose Divi Child Theme Installation Theme Activated

    When the child theme is activated, you will see the Kali Demo Import tab appear in the Dashboard menu. This page allows you to easily import all child theme content and settings with one click. Select Import Demo Content to begin.

    Kali Multi-Purpose Divi Child Theme Installation Import

    Once the import is successful, you will see a completion message.

    Kali Multi-Purpose Divi Child Theme Installation Import Complete

    Now open up your home page, and you will see that the child theme has been fully installed and set up for you to use – all you need to do is replace the content! Now let’s explore the page layouts that come with the Kali multi-purpose Divi child theme.

    Kali Multi-Purpose Divi Child Theme Pages

    Kali comes with 18+ pages that are fully designed and customizable with your content. The overall design is clean, modern, and colorful. Each page is full of graphic elements that are animated as you load the page or move as you scroll, creating an enjoyable and engaging user experience throughout the site. Each section is designed well and is fully responsive. Let’s take a look at each of the page layouts that you get with the Kali multi-purpose Divi child theme.

    Kali Home Page

    The home page opens with a large hero section. Loading animations are applied to the text and graphic elements, creating an eye-catching visual right as you open the page. Below is a services section followed by a call-to-action section, another section to highlight services, and a “featured on” section where you can feature logos. Next is a dynamic section with a large central image, two blurbs on either side, and a couple of smaller images around the title that move on scroll.

    Kali Multi-Purpose Divi Child Theme Home 1

    Next is the about us section, then a section where you can outline steps of a process. There is a portfolio section, a testimonial section, and a pricing plan section with a toggle that you can use to switch between pricing plans. Following this is another section with text, an image, and a button where you can talk about your services, then a section with eight blurbs you can use to show off features. The blog post section has a large single post highlighted on the left and 4 posts on the right. At the end of the page is the contact section, which has text and some blurbs on the left, and the contact form on the right.

    Kali Multi-Purpose Divi Child Theme Home 2

    Kali About Us Page

    The About Us page has a header section with a button, an about us section with “featured on” logos, a team section that reveals social media icons on hover, values, and a contact section.

    Kali Multi-Purpose Divi Child Theme About Us Page

    Kali Services Page V1

    Services page version 1 starts with a header section that has a free estimate contact form. Following this is a services section with 3 blurbs, values, and a contact form.

    Kali Services Page V2

    Services page version 2 also opens with a header with a free estimate contact form. This page features 8 service blurbs that fill with color on hover. Next is a values section, followed by the contact section.

    Kali Single Service Page

    The single service page also opens with a header that has a free estimate form. There is a services section with text and a CTA on the right side, a testimonial section with a section for logos, a CTA, team members, values, and a contact section with a form.

    Kali Projects Page

    The projects page is where you can highlight your portfolio items and recent projects. The header features an image section where you can show off screenshots. Next is the projects section, a CTA, a section for logos, values, and a contact section.

    Kali Multi-Purpose Divi Child Theme Projects

    Kali Single Projects Page

    The single project page is where you can share about your project in-depth. The header features space for screenshots. There is a section with some project information, including blurbs on the right that highlight some project features. Next are two sections where the challenge and the solution are highlighted. Below is an about section, values, and a contact section.

    Kali Pricing Page

    The pricing page features a header with a button, an image, and several graphic elements. Below this is the pricing table, which features toggle buttons at the top to switch between pricing plans, followed by values and a contact section.

    Kali Multi-Purpose Divi Child Theme Pricing Plans

    Kali Testimonials Page

    The testimonials page has a header section, four large testimonial blurbs, values, and a contact section.

    Kali Multi-Purpose Divi Child Theme Testimonials


    Kali Blog Page V1

    Blog page version 1 opens with a header section that has a search bar. A featured post is highlighted below this, with the latest articles to the right. Next is a newsletter sign-up form, followed by 3 columns of blog posts sorted by category and a contact section.

    Kali Multi-Purpose Divi Child Theme Blog V1

    Kali Blog Page V2

    Blog page version 2 also has a header with a search bar. The blog posts on this page are organized in a grid-style layout. At the bottom of the page is the contact section.

    Kali Multi-Purpose Divi Child Theme Blog 2


    Kali Contact Us Page

    The contact us page features a graphic header section, blurbs with contact information, and a contact section.

    Kali Multi-Purpose Divi Child Theme Contact Us

    Kali Thank You Page

    After completing the contact form, users will be redirected to the thank you page. It features a header, a section with text and an image, blurbs with contact information, recent articles from the blog, and a contact section.

    Kali Multi-Purpose Divi Child Theme Thank You

    Kali Multi-Purpose Divi Child Theme Divi Theme Builder Templates

    Now let’s take a look at the theme builder templates that are included with Kali.

    Kali Blog Post Layout

    The blog post layout features a header section with the blog title, meta information, and a large featured image. The post is below, followed by a newsletter sign-up box and a contact section.

    Kali Multi-Purpose Divi Child Theme Blog Post

    Kali Blog Category Layout

    The blog category layout has a header with the category title. The blog posts are below, in a grid layout with read more buttons. At the bottom is a contact section.

    Kali Multi-Purpose Divi Child Theme Blog Category Page

    Kali 404 Page Layout

    The 404 page features a centered image, some text, and a button leading users back to the home page.

    Kali Multi-Purpose Divi Child Theme 404 Page

    Kali Multi-Purpose Divi Child Theme Header and Menu Layouts

    There are three different header and menu layouts that come with the Kali multi-purpose Divi child theme.

    Kali Header and Menu Layout V1

    The first header layout features a blue secondary menu at the top with social media icons, contact information, and a CTA button. The primary menu section has a logo on the left, right-aligned menu items, and a hamburger menu that opens the custom slide-in.

    Kali Multi-Purpose Divi Child Theme Header Menu Layout 1

    Kali Header and Menu Layout V2

    Header layout 2 is a simpler design and doesn’t have a secondary menu. It has a logo, a right-aligned menu, a CTA button, and a hamburger menu icon to open the custom slide-in.

    Kali Multi-Purpose Divi Child Theme Header Menu Layout 2

    Kali Header and Menu Layout V3

    Header layout 3 features a simpler design for the secondary menu with some centered text and a CTA button. Like the other layouts, the primary menu features a logo on the left, right-aligned menu items, and a hamburger icon to open the custom slide-in.

    Kali Multi-Purpose Divi Child Theme Header Menu Layout 3

    Kali Multi-Purpose Divi Child Theme Additional Layouts

    Finally, there are some additional layouts included with the Kali child theme, including a custom slide-in and some header layouts.

    Kali Custom Slide-In

    The custom slide-in is a section that can be opened by the hamburger menu icon in the header. It features information about services and includes a CTA button. You can add your own modules to the slide-in to customize it to your site.

    Kali Multi-Purpose Divi Child Theme Custom Slide-In

    Kali Hero Header Layouts

    Kali Hero Header V1

    The first hero header layout features text that slides in, a CTA button, a large image that has a bounce effect as it loads, and some smaller graphics around the section.

    Kali Multi-Purpose Divi Child Theme Hero Header 1

    Kali Hero Header V2

    The second hero header layout features some text and a CTA button that slide in. On the right side is a free estimate contact form with some images around it.

    Kali Multi-Purpose Divi Child Theme Hero Header 2

    Kali Hero Header V3

    Hero header version 3 features text that slides in, a CTA button, and an image where you can showcase some mobile screenshots.

    Kali Multi-Purpose Divi Child Theme Hero Header 3

    Kali Hero Header V4

    Hero header version 4 has text and a CTA button that slide in, and a large image that has a bounce effect on load.

    Kali Multi-Purpose Divi Child Theme Hero Header 4

    Kali Sub Hero Header Layouts

    Kali Sub Hero Header V1

    The first sub hero header layout features the page title and CTA button on the left and an image on the right.

    Kali Multi-Purpose Divi Child Theme Sub Hero Header 1

    Kali Sub Hero Header V2

    Sub hero header version 2 has the text on the left and a free estimate form on the right.

    Kali Multi-Purpose Divi Child Theme Sub Hero Header 2

    Kali Sub Hero Header V3

    Sub hero header version 3 features text on the left and a placeholder for screenshots on the right.

    Kali Multi-Purpose Divi Child Theme Sub Hero Header 3

    Kali Sub Hero Header V4

    Finally, sub hero header 4 features a centered title text and a CTA button.

    Kali Multi-Purpose Divi Child Theme Sub Hero Header 4

    Where to Purchase the Kali Multi-Purpose Divi Child Theme

    The Kali multi-purpose Divi child theme is available in the Divi Marketplace. It costs $35 for unlimited website usage and 1 year of support and updates. The price also includes a 30-day money-back guarantee.

    Kali Multi-Purpose Divi Child Theme

    Final Thoughts

    The Kali multi-purpose Divi child theme has a high-quality design, and I love the use of motion and interactivity throughout each page. With service pages, project pages, eye-catching CTA sections, pricing tables, testimonials, a custom slide-in section, and so much more, this child theme is feature-packed and provides a great foundation for your next web design project. If you are looking for a child theme for your next web design project, the Kali multi-purpose Divi child theme is a great option.

    We would love to hear from you! Have you tried the Kali multi-purpose Divi child theme? Let us know what you think about it in the comments!

    The post Divi Product Highlight: Kali Multi-Purpose Divi Child Theme appeared first on Elegant Themes Blog.

  • 11 Best WordPress Theme Builders in 2023 (For Easy Full Site Editing)

    If you’ve ever found yourself wanting more control over the design of your website, you may want to consider using a theme builder. WordPress theme builders allow you to build every aspect of your website, from headers to footers and everything in between—no need to add complex PHP to your template files. You can easily design and manage all your templates with the right theme builder. In this post, we’ll lay out some of the best WordPress theme builders available for you to use in your next project.

    What is a WordPress Theme Builder?

    A WordPress theme builder is a tool that gives you complete control over the design of every aspect of your website or theme on the front end. With a theme builder, you can use modules (or blocks) to custom-build your header, footer, and templates without adding custom code to your theme’s PHP files. For example, with our Divi theme builder, you can visually design your entire site from top to bottom on the front end. And you can build new templates and assign them to any part of your site using a drag-and-drop interface.

    Theme builders typically allow you to change the look and feel of:

    • Post templates
    • Page templates
    • Archive templates (category, tags, etc.)
    • Search Result Page templates
    • 404 Pages
    • Headers and Footers
    • Custom Post Types
    • and more…

    Without a theme builder, you are forced to edit templates and other global elements on the backend using custom code which will require creating a child theme.

    WordPress Theme Builders vs. Page Builders

    In many cases, the most popular WordPress page builders are also theme builders. But this isn’t always the case. Some page builders may only work within a page or post and don’t allow access to the templates created by the theme. This is why choosing a theme builder to build your website is imperative to have maximum control over your website.

    WordPress Theme Builders vs. Website Builders

    In general, website builders are all-in-one platforms (like Wix, Weebly, or Shopify) that provide everything you need to build your website online from the ground up. They are often offered by hosting companies (like Hostinger) or other hosted platforms that may or may not use WordPress. You can get your domain, hosting, website builder, and other tools for eCommerce, marketing, SEO, and more all under one platform. AI website builders can use artificial intelligence to design a website for you.

    The main difference (or drawback) of using website builders over WordPress Theme Builders is flexibility. Website builders tend to be much more limited when it comes to customization than using a theme builder on WordPress.

    WordPress Full Site Editing vs. Theme Builders

    Older classic WordPress themes typically lack support for full site editing and limit your control over certain aspects of your website. But this is not the case anymore. WordPress block themes now support full site editing, allowing users to customize templates in the Site Editor using dynamic theme blocks. For example, the default Twenty Twenty-Three Theme is a block theme with full site editing features, allowing you to build headers, footers, templates, and more.

    WordPress Theme Builders take full site editing in WordPress to a new level. The default WordPress block editor may give you control over the design of your entire site, but the options for design and functionality pale in comparison to those of top theme builders. Many theme builders have hundreds of no-code design options for each module and allow you to build pop-ups, mega menus, scroll animations, and more. All without having to use additional plugins or code. Overall, a theme builder makes building your own unique and one-of-a-kind WordPress website an easy task that requires no coding experience.

    10 Best WordPress Theme Builders

    Our list of the best WordPress theme builders has a theme builder for every niche — blogs, small businesses, eCommerce stores, and more. Even if you are a beginner building a website for the first time, these theme builders can help you create the perfect website from top to bottom.

    1. Divi

    Divi, Elegant Themes premier page builder project

    Divi is our premier WordPress theme builder crafted for those who want maximum control over the design of their entire website. With over 800,000 users, Divi is one of the most popular themes in the World. Out of the box, Divi’s Theme Builder lets you build templates for pages, blog posts, archive pages (including date, category, tag, and author pages), search results, and the 404 page.

    Divi has over 40 native modules to add everything you need to your templates. You can also use Divi’s 20+ WooCommerce modules to build unique pages and templates for your online store, including shop, cart, checkout, and my account pages.

    Divi's Theme Builder

    Template assignments in Divi’s Theme Builder allow you to get granular with your designs. You can build different headers and footers for different templates. And you can assign or exclude pages you want to inherit your custom template designs. With Divi, the sky is the limit when building a custom WordPress website.

    Frontend editing with Divi

    The Divi Theme Builder supports full-site front-end editing. That means your template design elements (Sidebars, headers, menus, footers, etc.) are accessible when using the visual builder on any page or post. You don’t have to jump back and forth to make changes to your header or footer while editing a post.

    Divi has 2,000+ free page layouts to jumpstart your designs, as well as premade headers and footers, and other downloadable templates from our blog. You can also find more theme builder products from our marketplace, including the Divi Headers Pack and the Divi Footers Pack.

    Key Features of Divi:

    • Visually build headers, footers, 404 pages, archives, blog pages, and more
    • Create an unlimited number of templates for pages, posts, and custom post types
    • Easy template management with options to edit, duplicate, copy, page, and hide
    • 2,000+ layouts are available in the Divi Layout Library. Easily import these layouts to pages and templates.
    • Save Theme Builder templates to the cloud with Divi Cloud
    • Assign templates to anything: pages, posts, categories, custom post types, and much more
    • Use Divi’s Dynamic Content features to pull data from custom fields to add dynamic content to your templates.
    • Conditional logic options can show elements based on a set of criteria that you determine, which is great adding member-exclusive content or triggering popups based on page visits.

    Theme Builder Sets by Divi

    Theme Builder Sets are a key feature of Divi’s Theme Builder. These allow you to compile your favorite Theme Builder templates and instantly download them onto any Divi website or your Divi Cloud account. Efficiently build websites with complete website templates stored in Divi’s Theme Builder Sets.

    Best For:

    Divi is one of the best WordPress theme builders that anyone can use, with no coding necessary. Divi melds the flexibility of no-code building with the power of WordPress, giving you the ultimate website-building tool for anyone who wants to build their perfect website on WordPress.

    Pricing: $89 per year

    Get Divi

    2. Astra

    Astra fastest WordPress themes

    Astra is rated one of the most popular WordPress theme builders available. It’s fast, highly customizable, and has a free version available from the WordPress Theme Repository. As a theme builder, Astra has a dedicated header and footer builder. Easily drag-and-drop various elements to craft your perfect header and footer. Astra’s theme builder has live editing, so you can immediately see what you’re building as you build it. WooCommerce pages can also be customized with Astra. There are hundreds of options available for you to edit things like your cart icon, the layout of your product variations (colors, sizes, etc.), and so much more. For WooCommerce, Astra focuses on being mobile responsive from the very beginning, so you can give your customers a beautiful mobile experience as they shop your site. All in all, Astra is one of the fastest and best WordPress theme builders available.

    Key Features of Astra:

    • 240+ importable templates for theme building
    • Clone, delete, edit, and set global presets for elements,
    • Accessible, SEO friendly, and Schema.org ready
    • 3-layered header and footer structure to build above and beneath the header and footer
    • Build separate headers and footers for mobile

    Astra's checkout options for WooCommerce

    Astra’s checkout page options are a vital feature that should be noted by those looking to build online stores with WooCommerce. In addition to the default WooCommerce checkout process, with Astra, you can have a distraction-free checkout process, a two-step checkout process, and much more. A conversion-ready checkout process can be easily created using Astra as your WordPress theme builder.

    Best For:

    If you’re looking for a free theme builder that has a premium feel, use Astra. Even at its free version, you can still build custom headers and footers, and if you need more functionality, that is also an option when you upgrade to a paid plan.

    Pricing: Free, Paid plans start at $59 per year

    Get Astra

    3. OceanWP

    OceanWP ecommerce WordPress theme

    OceanWP is a theme builder that is the most generous of the theme builders on our list. It provides a wide array of options you can work with when using the free version of the builder. Quickly turn on or off features for your product pages. Choose from a wide selection of blog post templates you can assign to all your blog posts or a select few. There are multiple pagination styles, editable metadata elements, and more. OceanWP has created a set of bundles that can be used to extend the already feature-rich theme builder further. The Ocean eComm Treasure Box is a premium addon for OceanWP geared toward taking your online store to higher heights. Whether you’re building a blog, an online store, or a simple informational website, get the control needed to make a standout website customized to your specifications with OceanWP.

    Key Features of OceanWP:

    • 7 header styles, 4 page title styles, 3 archive page layouts, 3 mobile menu styles, and more
    • Set global page layouts, typography, and branding
    • Regular or distraction-free checkout for WooCommerce
    • Assign default styles to all forms on your website

    "</p

    Building a mega menu for your website is accessible with OceanWP. Use widgets or create templates in the OceanWP library and easily assign them to your menu to create mega menus without the need for programming or shortcodes.

    Best For:

    OceanWP is the best WordPress theme builder for designers on a budget. Many of OceanWP’s free version features are considered premium options throughout some of the contenders from our list. So if you’re looking to save money as you build your next website, choose to use OceanWP to build your website.

    Pricing: Free, Paid plans start at $43 per year

    Get OceanWP

    4. GeneratePress

    GeneratePress fastest WordPress themes

    GeneratePress is one of the first block-based theme builders for WordPress. It allows you to build anything your website needs using blocks. From posts to metadata, footers to custom post types, GeneratePress uses blocks to make building your website easy. In addition to a strong focus on block-based building, GeneratePress is a fast, secure, and accessible theme builder. If you want to build a site that looks good and performs well, especially for those who use the internet differently, you should consider building your website with GeneratePress. While you can use code with GeneratePress via their Dynamic Block Elements, you don’t have to if you decide to use one of their stater templates. With over 75 starter sites and the GenerateBlocks plugin, you don’t have to build your website entirely from scratch. For building a solid website that works perfectly with Gutenberg, trust GeneratePress as your theme builder.

    Key Features of GeneratePress:

    • Block-based theme building and full-site editing
    • Advanced layout system with custom display rules
    • Expert-level and well-documented hooks system
    • Multiple navigation customization like mobile headers, secondary navigation, off-canvas panels, and more

    "</p

    Pictured above, you’ll see how GeneartePress uses every aspect of Gutenberg within its theme-building processes. With GeneratePress, you can select dynamic text (like the page title) and insert dynamic images (like a featured image) to create repeatable content elements that you can use throughout your site. This example will use this content block as the template for all blog posts in a particular category.

    Best For:

    As one of the first block-based theme builders, GeneratePress is on the cutting edge of theme building in the WordPress ecosystem. If you love building with Gutenberg, GeneratePress is one of the best WordPress theme builders for you to use.

    Pricing: Free, Paid plans start at $59 per year

    Get GeneratePress

    5. Elementor

    Elementor WordPress page builder

    Elementor is a theme builder that does it all. Headers, footers, blog posts, product pages, pop-ups, and more can all be created with this theme builder. It has over 100 elements, from basic widgets like counters and tabs to more complex elements like price lists and animated headings. These can be used together to create incredible templates for all aspects of your website. Elementor works well in building custom product pages for your WooCommerce websites. Create a custom cart page, add additional content to your purchase summary pages, or even build an off-canvas menu cart without writing a single line of code. If you don’t want to start from scratch, Elementor has an extensive library of pre-built website kits that you can tap into. All this and more can be done without programming and using Elementors simple visual builder.

    Key Features of Elementor:

    • 100+ elements and website kits for theme building
    • Visually build templates for 404 pages, headers, footers, posts, products, and more
    • Custom field integration with Toolset, Advanced Custom Fields, and Pods
    • Loop builder for creating archive, product, and category pages
    • Easily manage all aspects of your website within the Elementor All Parts library

    Hello Elementor fastest WordPress theme

    Elementor is unique among our list because it can function as a separate theme builder. This means it does not depend on a specific theme to function and can work on many available themes. As such, Elementor suggests using their Hello Theme, a bare-bones framework from which you can add everything you need to the theme through Elementor. Hello Elementor is a perfect canvas for you to start building your WordPress website because the theme-building power of Elementor shines through beautifully in this fantastic pairing.

    Best For:

    Widely compatible with many themes, Elementor is a theme builder that you can use with almost any theme. Many themes available are compatible with Elementor, so if you haven’t decided on your theme yet, choose Elementor to help you build your perfect website.

    Pricing: Free, Paid plans start at $59 per year

    Get Elementor

    6. Beaver Themer

    Beaver Themer

    Beaver Themer is an addon of the popular page builder Beaver Builder. It allows you to extend the Beaver Builder plugin by adding theme-building capabilities to this beloved plugin. With Beaver Themer, creating headers, footers, 404 pages, and more is simple. Its easy-to-use interface makes it quick and easy for anyone to build the perfect website for their business or project.  It should be noted that while Beaver Builder can work with almost any WordPress theme, Beaver Themer works best with the Beaver Theme and a small number of popular themes. There are some instances where you may need to use code with Beaver Themer to get the layout you want. However, for most use cases, you can use its drag-and-drop functionality to create beautiful websites.

    Key Features:

    • Create layouts for custom post types, blog archives, products, 404 pages, search pages, and more
    • Integrates with BigCommerce and WooCommerce for eCommerce customization
    • Works with Podcs and custom fields for deeper theme customization through dynamic content
    • Build partial layouts (called Theme Parts) like headers, footers, announcement bars, etc., and control with display

    Themer Parts

    Beaver Builder’s Themer Parts is a unique feature that differentiates it from other builders on our list. Themer Parts allow you to place elements and pieces of content in various areas of the page outside the content area. Whereas the page builder focuses on the content area, and most theme builders focus on areas outside of the content area, Themer Parts fill in the gaps of both of these locations regarding site-building. There is a long list of parts that Beaver Themer provides for you to add your content and designs, making it easier to ensure that you are building the perfect website for your needs.

    Best For:

    If you’re already a fan of Beaver Builder, then you’ll also be pleased to have the Beaver Themer in your back pocket to help you fully customize your websites. Consider adding the Beaver Themer product to your web design process and bring full site editing to your next Beaver Builder-led project.

    Pricing: $147 per year, in addition to a paid plan for Beaver Builder, which starts at $99 per year

    Get Beaver Themer

    7. SeedProd

    SeedProd responsive WordPress theme

    SeedProd is a theme builder that is geared toward those who are working in digital marketing. If you need to build a landing page, create a sales funnel or get a squeeze page off the ground, SeedProd is the theme builder that should be in your toolkit. Each template that SeedProd provides is designed with conversions in mind. Knowing that each template you choose covers some ground regarding sales optimization is helpful for marketers who need to build a slew of landing pages repeatedly. Like other builders on our list, you can create templates for pages and posts with SeedProd. Additionally, you can customize login screens, create 404 pages and use domain mapping to point your landing pages to specific domains without additional WordPress installs. As a marketer, SeedProd is one of the best theme builders you can use when building your online business with WordPress.

    Key Features of SeedProd:

    • 150+ landing page templates, 90+ pro blocks for drag-and-drop building
    • Deep version control through revision history, undo, redo, and draft mode features
    • Saved page templates, sections, and blocks, plus favorited templates and sections
    • Built-in coming soon, maintenance mode functionality with access controls
    • WooCommerce integration, subscriber management, and premium integrations

    SeedProd template variety

    As a theme builder geared towards online marketers, SeedProd’s library of templates is outstanding. They have a library of over 150 landing page templates and starter themes, and you can find templates for webinars, thank you pages, login screens, and more. Each template can be customized and assigned to pages, posts, or other custom post types you’ll need as you build your WordPress website.

    Best For:

    Marketers, entrepreneurs, and those who make money online will love working with SeedProd. As one of the best WordPress theme builders for digital business owners, SeedProd makes building high-converting websites accessible with its powerful theme builder.

    Pricing: Paid plans start at $79 per year

    Get SeedProd

    8. Genesis Pro

    StudioPress and Genesis Pro

    Genesis Pro is another blocks-based theme builder. It comes with a library of pre-built sections and custom content blocks that you can add to your theme templates to save you from building your website entirely from scratch. You also can create your blocks and content and build your library of reusable elements. Genesis Pro enhances the WordPress editor through its free additional plugins, Genesis Blocks, and Genesis Custom Blocks. As a theme builder, Genesis Pro differs from many other builders in our list as it requires quite a bit of custom coding to move around features like headers, footers, and sidebars. Coding will be needed when using Genesis Pro. Because of this, Genesis Pro does move faster, is more accessible, and ultimately be as customizable as possible if you are familiar with coding.

    Key Features of Genesis Pro:

    • Comes equipped with Genesis Blocks and Genesis Custom Blocks for easy theme building
    • Visually build custom blocks for use throughout your website
    • Library of code snippets within its Documentation to help with custom coding
    • Role-based editing permissions to ensure layouts stay on-brand
    • Pre-built sections and layouts to help the theme-building process

    Building custom blocks with Genesis Pro

    Custom Blocks is a powerful feature of Genesis Pro. With this, the ball is in your court to use your imagination to code and design the perfect block for your WordPress website. Mixing visual design and programming, Genesis Pro adequately bridges the gap for those who want the highest level of customization through custom code but also want the support that is working with a visual builder like Gutenberg brings.

    Best For:

    If you like building with blocks and are comfortable coding, build your entire website with Genesis Pro. For true flexibility, Genesis Pro allows you to custom code blocks and reuse them quickly. It makes building a custom, lightweight WordPress website simple, melding coding and block-building together.

    Pricing: Free, $360 per year

    Get Genesis Pro

    9. Thrive Theme Builder

    Thrive Theme Builder, for building marketing focused WordPress websites from scratch!

    Thrive Theme Builder is a theme builder geared toward those in the online marketing space. The theme builder focuses on giving you the tools that you need to build conversion-focused websites. As such, Thrive Theme Builder’s modules for building your website make it easy to craft landing pages, sales funnels, and more. Testimonials, countdown timers, and lead generation forms that integrate with popular marketing tools are all part and parcel of building a website with Thrive Architect. The theme builder is packed with various landing page templates and pre-built sections called Page Blocks and is optimized for getting you leads and closing sales online.

    Key Features of Thrive Theme Builder:

    • Instant drag-and-drop editing with 1-click global color customization
    • Six marketing-focused Companion Themes for easy site setup
    • 40+ integrations with popular online marketing, email, and CRM solutions
    • 100+ design, conversion tools, and site-building elements included

    The Thrive Theme Builder Wizard

    The Thrive Theme Builder Wizard takes the guesswork out of setting up the necessary templates for the various pages, posts, custom post types, and more you’ll use to build your site. Set up your brand colors, choose your typography, create your menu, and much more with only a few clicks. No more is there a need to struggle with building each template for each page or post type on your website. The Thrive Theme Builder Wizard will help you do all this while ensuring your site is up to the best online marketing practices and standards.

    Best For:

    Digital marketers, agency owners, content creators, and online entrepreneurs will enjoy using Thrive Theme Builder as their theme builder. With an extensive library of templates, a thriving ecosystem of products, and design elements crafted with conversions in mind, using one of the best WordPress theme builders available for digital business owners is the right choice for your next launch.

    Pricing: Paid plans start at $599 per year

    Get Thrive Theme Builder

    10. Brizy

    Brizy next gen website builder

    Brizy is a relatively new theme builder in the WordPress market. It’s different from most theme builders on our list as it comes in a cloud platform and a WordPress plugin. If you’d rather have a managed platform for your theme builder, Brizy can assist you in this department. Like many theme builders, Brizy is a visual, no-code builder. It is powered by a library of elements that you can click and drag to build templates for almost any aspect of your website.

    Furthermore, Brizy connects with various marketing tools and email platforms like ActiveCampaign, Drip, and Calendly, to name a few. Brizy also supports the use of custom fields within its content. So pulling dynamic information from tools like ACF, Pods, and Meta Box is welcomed. If you’re looking for a new way to build in WordPress, consider testing Brizy today.

    Key Features of Brizy:

    • 36+ powerful drag-and-drop design elements
    • 500+ beautiful design templates for pages, blocks, pop-ups, or stories
    • Customize blog posts, archives, headers, footers, 404 pages, and more visually
    • Define global branding and typography
    • Customizable animation options, including Lottie animations, hovers, entrance animations, scroll reveals, and more

    Brizy white label capabilities

    As an agency owner, Brizy has impressive white-label capabilities. Invite unlimited team members and assign roles to staff for easy collaboration between your team and your clients. You can sync content between websites and still have access to the powerful theme builder that makes it easy to build with Brizy. Furthermore, your platform comes packed with SEO tools ensuring you can provide your clients with a unique white glove service.

    Best For:

    Brizy is a theme builder that is best for those who want to have a hosted and managed WordPress experience. No longer will you need to worry about updates or patches. Brizy allows you to build with WordPress while having the comfort and security of a managed platform.

    Pricing: Free, Paid plans start at $60 per year

    Get Brizy

    11. Oxygen Builder

    Oxygen Builder

    Oxygen Builder is one of the few theme builders on the market that is genuinely theme agnostic. It does not require a theme at all to work beautifully. It has a library of design assets and elements to build your templates visually. You can use code to get a pixel-perfect design for your website. Write custom CSS, PHP, and Javascript directly in the builder, and see a live result of your code. Oxygen has more breakpoints than any theme builder on our list, so responsive design is a breeze for this builder. Of course, you can set global colors throughout your site and use dynamic data within your templates. Oxygen Builder has a steeper learning curve than other builders on our list. However, if you are unafraid of using code to build your website, consider using Oxygen as your theme builder today.

    Key Features of Oxygen Builder:

    • Dedicated header builder element
    • Build layouts with both Flexbox and CSS grid
    • Global WooCommerce styles and styling controls for WooCommerce elements
    • Fully granular client access control with edit-only builder mode
    • Visually build editable Gutenberg Blocks

    Composite elements are a key feature of Oxygen Builder

    Composite elements within Oxygen take your visual building to the next level. They allow you to have multiple native Oxygen elements combined to create beautifully feature-rich ways of displaying your content. Additionally, the code for these elements is light and clean, meaning you don’t have to sacrifice beauty for function. Mega menus, section indicators, icon buttons, and more are all composite elements you can find when you use Oxygen as your theme builder.

    Best For:

    Oxygen Builder is your theme builder if you want complete flexibility over your WordPress website and are familiar and comfortable with coding. Oxygen beautifully meshes coding and visual building as a theme builder, making it one of the best WordPress theme builders for those unafraid to program.

    Pricing: Paid plans start at $129

    Get Oxygen Builder

    Top WordPress Theme Builders: Price Comparison

    Now that we have our list of the best WordPress theme builders, let’s see how they stack up on price. We’ll also see which ones have a free version you can use today to test their capabilities and see if it’s the right theme builder for your project.

    Theme Builder Price Free Option
    🥇 Divi $89/yr ❌ Visit
    🥈 Astra $59/yr ✔️ Visit
    🥉 OceanWP $43/yr ✔️ Visit
    4 GeneratePress $59/yr ✔️ Visit
    5 Elementor $59/yr ✔️ Visit
    6 Beaver Builder $147/yr ❌ Visit
    7 SeedProd $79/yr ❌ Visit
    8 Genesis Pro $360/yr ❌ Visit
    9 Thrive Architect $599/yr ❌ Visit
    10 Brizy $60/yr ❌ Visit
    11 Oxygen Builder $129/yr ❌ Visit

    What are the Best WordPress Theme Builders?

    For those who want to build their following website without writing a line of code, Divi is the best choice. As our top selected theme builder, you never have to use code to build a beautiful website wholly customized to your specifications. Astra is a great freemium theme builder that allows you to build beautiful websites while still giving you the option to upgrade to unlock deeper functionality. It’s also one of the most downloaded theme builders from the WordPress repository. Lastly, if you’re on a tight budget but still want the freedom of visual theme building, start your website with OceanWP.

    If you feel a theme builder is too much responsibility, consider using a page builder with your favorite WordPress theme. Check out this article on the best page builders for WordPress and see if a page builder may be a better approach for your next project.

    Featured Image via Katy Flaty / shutterstock.com

    The post 11 Best WordPress Theme Builders in 2023 (For Easy Full Site Editing) appeared first on Elegant Themes Blog.

  • Divi 5 Progress Update: Exploring Divi 5’s Extendability

    I’m back with another Divi 5 progress update. If you aren’t familiar with Divi 5, check out our original announcement post. To put it briefly, we are recreating the builder in Divi 5 from the ground up, focusing on performance, stability, scalability, and extendability. It won’t come with many new features, but it will be way faster and more capable, and it will give our team and the community the tools we need to hit the ground running with fantastic new modules and features.

    Last month, I gave a demo of the Divi 5 Visual Builder to showcase its lightning-fast speed, so if you missed that video, be sure to check it out.

    I’ll discuss Divi 5’s extendability and give a quick demonstration in this month’s update. But first, let’s talk about what our team has been up to over the past month.

    What We Accomplished This Month

    We made a lot of progress last month. We are nearing the launch of Divi 5 Dev Beta, the next phase of the Divi 5 beta program, and I hope to announce its release in my next update.

    While on the home stretch, we remain focused on simplifying the module creation process so that creators from the community and our team can build Divi 5 modules more quickly. The work we put in during this phase will pay dividends in the proceeding phases, with the ultimate goal being to get your hands on Divi 5 sooner.

    Changelog Entries:

    • Refactored all currently built modules to incorporate a new and improved element-based attribute system.
    • Added saveInlineEditorValue Util Function In packages/module-utils To Store Value From Inline Text Editor
    • Added canEditInline Util Function In packages/module-utils To Check If the Module Attribute Can Be Edited Inline
    • Added onPaste Handler Event To The Inline Text Editor to Process Clipboard Data
    • Replaced Inline Text Editor Event Based classNames With data-* Selectors (e.g: et-vb-editable-element–empty, et-vb-editable-element–html) In The Builder.
    • Updated CSS For Inline Text Editor With data-* Selectors (e.g: [data-et-vb-editable-element]).
    • Updated Inline Text Editor to Check Whether Module is Editable and The User have ProperPpermission to Edit
    • Refactored Keyboard Shortcut Store To Disable Shortcuts When Inline Text Editor Is In Editing Mode
    • Added Inline Text Editor functionality To Audio Module For Title
    • Added Inline Text Editor functionality To Blurb Module For Title
    • Added Inline Text Editor functionality To Bar Counter Module For Title
    • Added Inline Text Editor functionality To Circle Counter Module For Title
    • Added Inline Text Editor functionality To Code Module For code (HTML) Content
    • Added Inline Text Editor functionality To Countdown Timer Module For Title
    • Added Inline Text Editor functionality To Fullwidth Header Module For Title and Subhead
    • Added Inline Text Editor functionality To Fullwidth Code Module For code (HTML) Content
    • Added Inline Text Editor functionality To Login Module For Title
    • Added Inline Text Editor functionality To Number Counter Module For Title
    • Added Inline Text Editor functionality To Person (Team Member) Module For Name and Position
    • Added Inline Text Editor functionality To Pricing Table Module for Title, Subtitle, Currency, Sum and Frequency
    • Added Inline Text Editor functionality To Slider Module For Slide Heading
    • Added Inline Text Editor functionality To Tabs Module For Tab Title
    • Added Inline Text Editor functionality To Testimonial Module for Author, Job Title and Company Name
    • Added Inline Text Editor functionality To Toggle Module for Title
    • Added Inline Text Editor functionality To Wireframe View for Module Admin Labels
    • Updated Inline Text Editor functionality To Set Default Text When Module Attribute Is Edited With Empty Value (e.g Admin Labels in Wireframe View Mode)
    • Added Test Cases To Ensure Editing Mode For Inline Text Editor Doesn’t Get Activated For Locked Module
    • Added Tests For In All The Modules That Use The Inline Text Editor To Ensure It Works As Expected.
    • Added Base InlineRichTextEditorContainer And InlineRichTextEditor Components In The Builder For Inline Editing Of Rich Text.
    • Introduced the ElementInnerContent class, a simplified version of the MultiViewElement class.
    • Improved MultiViewScriptData class.
    • Added custom filter and hook in Responsive Content FE script.
    • Introduced MultiViewElement class.
    • Dynamic Content: New Dynamic Content value format: `$variable(JSON_VALUE)$`.
    • Dynamic Content: Introduced new attributes conversion functionality for Dynamic Content attributes.
    • Dynamic Content: Introduced initial Dynamic Content rendering in frontend part.
    • New approach on processing Dynamic Content values. The Dynamic Content values will be processed on the block parser before the document is parsed into list of block structures.
    • Back ported the code to resolve the Dynamic Content built-in and custom field values based on the field name and settings.
    • Back ported the code to generate the Dynamic Content built-in and custom fields based on different conditions.
    • Dynamic Content: Introduced initial Dynamic Content rendering in VB
    • Dynamic Content: Integrated Dynamic Content functionality into `ModuleElements` class.
    • Dynamic Content: Implemented Dynamic Background Image functionality in VB.
    • Dynamic Content: Introduced initial Dynamic Content UI on Module Settings in VB. Right now this is available as prototype on testimonial module’s input text with support on `site_title` Dynamic Content Option only.
    • Inline RichText Editor: Added core TinyMCE editing capabilities to the Rich Text inline editor component
    • Inline RichText Editor: Updated the Rich Text inline editor to retrieve editable content and save edited content.
    • Module Attribute Refactor: Refactor Icon module’s attributes.
    • Module Attribute Refactor: Refactor Social Media module’s attributes.
    • Module Attribute Refactor: Refactor Video module’s attributes.
    • Module Attribute Refactor: Refactor Search module’s attributes.
    • Module Attribute Refactor: Refactor Full Width Code module’s attributes.
    • Module Attribute Refactor: Refactor Pricing Tables module’s attributes.
    • Module Attribute Refactor: Refactor Accordion module’s attributes.
    • Module Attribute Refactor: Refactor Full Width Map module’s attributes.
    • Module Attribute Refactor: Refactor Full Width Slider module’s attributes.
    • Module Attribute Refactor: Refactor Map module’s attributes.
    • Community Reported Bugs: Implementing Module Credit mechanism. Add Credit on module.json to display module credit.
    • Community Reported Bugs: Enable selected tag on field description
    • Transition Options: Added Transition Style Component for all modules which used ElementStyle.
    • Module Elements: Introducing ModuleElements class to simplify elements creation on Audio, Blurb, CTA, and Testimonial modules.

    Illustrating Divi 5’s Extendability

    One of the most essential aspects of Divi 5 is its extendability. When I talk about extendability, I am talking about Divi 5 being nimble and capable from an API perspective and the many unique features we can create thanks to those improvements. I have also spoken about aligning Divi 5 with the future of WordPress, removing shortcodes, and integrating many of the WordPress block packages into Divi 5.

    What does all of this mean for the future of Divi?

    I asked the manager of our dev team to find a little free time to whip up a quick demo that illustrates these aspects so that I could share something fun in this update that is visually representative of Divi 5’s extendability. He came up with the Automatic Block Module. A module that turns every Gutenberg block into a Divi module, supercharging them with Divi’s wide range of design settings and allowing you to mix modules and blocks on the same page!

    The block module grabs HTML elements from the block and dynamically generates option groups that give you complete control over its design. You can also generate new option groups on the fly, targeting and customizing any element.

    While we created this block module for fun, and it’s neither finished nor polished, it is a wonderful demonstration of what we can do with Divi 5, and with relative ease, thanks to the new foundation we are creating.

    Not only is it easy for us, but for you and the development community too, thanks to the open nature of the API. We may even finish up this Block Module and add it to Divi 5 as an official feature. But for now, we remain focused on progressing through the beta phases.

    Divi AI Is Almost Finished!

    That wraps up this month’s Divi 5 update. In other news, our first version of Divi AI is nearly finished, which will allow you to generate extraordinary images out of thin air and write and improve content with AI while you work in the Visual Builder. I’ve been having a lot of fun playing with the unfinished version and I am looking forward to wrapping it up and shipping it soon!

    Stay Tuned For More Updates

    I promised to give Divi 5 progress updates every month, and that’s what I plan to do! I can’t promise that every update will be exciting, but rest assured we are working as hard as we can to finish this huge project. Each day we get a little closer and the Divi 5 foundation gets a little stronger. We will soon be launching the Divi 5 Dev Beta, which means the foundation will be complete. From there, it’s full steam ahead on the user-facing features that you will get to test out in the Public Alpha later this year.

    Leave a comment if you have any questions. See you in the next update!

    The post Divi 5 Progress Update: Exploring Divi 5’s Extendability appeared first on Elegant Themes Blog.

  • How to Make a Website From Scratch in 2023 (Detailed Tutorial)

    Online presence knows many forms. One of them is having your own website. Whether for your business or your personal brand, having a website can help you boost your online presence. We’ll show you how to make a website from scratch to help you get your website up and running as soon as possible. We’ll provide you with all the essential steps you need! In total, we’ll go over 13 steps. This post should help you build a clear action plan when planning to build your own website.

    Let’s get to it.

    Do I Need to Know How to Code?

    Knowing how to code used to be essential when it came to websites. Although it is highly recommended that you have a background in some basic web development, it is not necessary. Many tools out there focus on making website building a visual experience. That’s the approach we’ll take in this post. You won’t need technical expertise to follow this tutorial and make a website from scratch.

    Step 1: CMS or Website Builder?

    WordPress.org

    The two main options you have when deciding to build your own website are:

    1. a content management system
    2. a website builder

    A content management system, like WordPress, lets you control every aspect of your website, including hosting. They’re often free as well. The combination of these two options makes content management systems the most popular option out there.

    A website builder, on the other hand, locks you into their hosting platform. You have way less control, and you’re often stuck with the website builder, which can result in you getting “stuck” if you’re disappointed with the software.

    Our choice: For this practical tutorial, we’ll choose WordPress.org. It’s free, has a reasonable learning curve, and has many options to bring your website to life.

    Step 2: Choose a Hosting Provider

    Choosing a hosting provider is the next important decision you must make when making a website. There are many hosting plans, so it can be hard to see the forest for the trees. We’ll try to lay it out for you as easily as possible.

    Hosting Types

    The hosting options vary based on website traffic. For low traffic, shared hosting works, but you’ll share storage and resources. Managed WordPress hosting is better for most as it handles security and technical issues. Those needing a robust solution can consider VPS hosting—a cheaper alternative to dedicated hosting with similar features. For more guidance on selecting the right WordPress hosting, refer to our comprehensive article on types and selection.

    Our Recommendation: SiteGround

    SiteGround WordPress hosting

    We’ll assume you want to build a simple website where you don’t expect too much traffic. In this case, a shared hosting plan will do its job (for now). You can always scale up your hosting option. Our recommendation for hosting is SiteGround. It has a 4.4 out of 5 score on Trustpilot and is well-merited. Their platform and hosting solutions prioritize the client and their needs.

    Pricing

    SiteGround pricing

    SiteGround offers three plans: the StartUp for $14.99 per month, the GrowBig for $24.99, and the GoGeek for $39.99. For this tutorial, we’ll select the GoGeek plan, which will give us 40GB of web space, 400,000 monthly visits, and quite a few excellent features to get us started.

    Create SiteGround Account

    The next step is to create your account. Start by selecting a plan (for us, it’s the GoGeek plan), then follow the steps to register a new domain or add your current one.

    choose a domain

    Finally, add account information such as your email and password, client information, payment information, and hosting length: monthly or yearly.

    Create SiteGround account

    Step 3: Choose Your Domain

    Once you’ve chosen your hosting provider, you can continue by choosing your domain (if you don’t already own one).

    .COM

    The most popular URLs end in dot com. It’s rooted in our brain. By default, we tend to trust dot com domains more than other ones, which positively impacts the brand.

    Make it Rememberable

    Whether you go with a dot com domain or not, it’s important to make your domain rememberable. Especially long term, you don’t want to make it hard for your visitors and customers to find you online.

    Register Your Domain

    Many domain registrars are available, but picking a good one is important. Some of the best domain registrars are Namecheap or SiteGround, but be sure to do your research to determine which is right for you.

    Step 4: Install WordPress.org

    Once your hosting and domain are in place, it’s time to install WordPress on your website. There are many reasons to choose WordPress above any other option. Firstly, it’s the most popular CMS out there for a reason. It’s intuitive, open source, and allows full customization. You also have endless theme and plugin options. It also doesn’t hurt that you don’t have to pay a dime to use WordPress.org on your website!

    Automatic Install

    To set up WordPress on your SiteGround domain, you can navigate to the home page of your SiteGround account and click Set Up Site.

    set up website

    Select your site’s new, existing, or temporary domain, then click continue.

    choose domain

    Next, select Start New Website.

    start new website

    Then, select WordPress, enter your email address, and create a password. Next, click continue.

    WordPress login credentials

    Step 5: Plan your website’s structure

    At this point, the environment of your website is ready to start thinking about the shape your website will take place. It’s important to consider how you want your website to look and what functionality you will need. Will a one-pager do? Do you need some basic pages for a brochure type of website? Do you need e-commerce functionality? For the sake of this tutorial, we’ll go off the goal of building a brochure website.

    Pages to Consider

    If you’re building a brochure website, there’ll be some indispensable pages:

    • Home
    • About
    • Contact

    On top of that, depending on what the website is for, you might find yourself adding more pages dedicated to:

    • Services
    • Portfolio
    • Blog

    There’s no right or wrong website structure; you’ll have to find the option that works for you, your website, and your website’s goals.

    Step 6: Choose Your Theme

    Once your WordPress environment is ready, it’s time to work! When using WordPress, you have the ability to set a theme. This theme forms the foundation of your website. Based on the functionality you’re looking to add to your website, choosing the right theme is going to be an important step.

    Types of Themes

    There are a variety of different themes that you can decide to go for in WordPress. The most popular themes are multipurpose and usually include a visual builder. The reason for that is the flexibility it offers. There are also themes that are specifically tailored toward ecommerce websites or portfolio websites too. Depending on what type of theme you’re looking for, you can check out different listicles with our top recommendations.

    Our Main Recommendation: Divi

    Choose Divi

    We will pick a theme to work with for the upcoming (practical) steps in this tutorial. We recommend using our very own Divi for any website you build. Divi is a multi-purpose theme and includes a no-code design Visual Builder that makes building websites very intuitive. Divi comes with a wide range of features, more than 200 customizable elements, and more than 2200 professionally designed layouts that you can choose from! Whatever type of website you’re looking to create, chances are high that there’s a layout pack dedicated to that specific business exactly.

    Pricing

    Elegant Themes pricing

    Divi provides you with two membership options: yearly and lifetime. You can get a yearly membership for $89/year or a lifetime membership for a $249 one-time fee.

    Become a Divi Member

    To become a Divi member, navigate to our join page. Or, take advantage of today’s discount of 10% off!

    Once you’ve signed up for a membership, you can navigate to your member’s area.

    Elegant Themes member area

    Download Divi

    Here, you’ll find the ability to download the Divi theme file.

    download Divi

    Install Divi on Your WordPress Website

    Once you’ve downloaded Divi, navigate to your WordPress dashboard, hover the Appearance menu item in the left sidebar and click on Themes.

    WordPress themes

    At the top of the page, you’ll notice a button that says Add New. Click on this button.

    add new theme

    Then, click on Upload Theme.

    Upload theme

    Search for the Divi zipped folder you downloaded in the previous part of this tutorial and click Install Now.

    install now

    Once you’ve succeeded at this, you’ll be able to activate the theme as well!

    Activate Divi

    Divi is now ready for you to use.

    Add API Key to Divi Theme Options

    To access all of the free layouts Divi provides you with, you’ll need to add your API key to the Divi Theme Options. You can find (and create) API keys by navigating to your Members Area. Once there, hover over Account.

    Elegant Themes account

    Next, click Username and API Key.

    get API key

    You can create and copy new API keys in the API keys area.

    generate new API Key

    To add the API key to your Divi Theme Options, you’ll need both your username and an API key.

    Next, navigate to your WordPress dashboard. Hover the “Divi” menu item in the left sidebar (1) and click on “Theme Options” (2). Go to the “Updates” tab (3). You can add your username (4) and API key (5) there. Make sure to save the changes (6).

    Divi Theme options

    Step 7: Install Plugins

    Another great part of WordPress is the ability to install plugins. There are literally thousands of plugins out there to help serve different needs. Let’s take a look at which plugins you’ll want to consider for your website.

    Essential Plugins

    With every WordPress website, there are some essential plugins you’ll need in order to be successful. You’ll want to install plugins for SEO, security, and other excellent WordPress plugins to help you keep your site in tip-top shape.

    SEO

    WordPress is SEO-friendly out of the box but needs a little help if you want to score higher placement in the search engine ranking pages (SERPs). Thankfully, there are some excellent SEO plugins out there, like Rank Math, to ensure your site is easily discovered by potential customers.

    Security

    Another vital aspect to consider is a reliable security plugin, like iThemes Security. Ensuring protection against malware, bots, and DDoS attacks is crucial. With over 44% of the internet built on WordPress, it becomes a prime target for malicious actors.

    Optional Plugins

    Aside from SEO and security plugins, some optional plugins can enhance your website. Consider chat, newsletter, social media, or other optional plugins to make your website a lead-generating powerhouse.

    Chat

    best wordpress chat plugins

    Customer engagement is crucial for the success of your website. You should consider installing a good chat plugin, like Tidio, to make yourself more accessible to customers. Whether you need to automate the customer experience or provide a live agent for your website, a chat plugin is an excellent way to give visitors the answers they crave.

    Newsletter

    best wordpress newsletter plugins

    If you’re looking to increase leads and grow your customer base, a newsletter plugin, like Bloom, fits the bill. It’s an excellent way to grow your customer base, provide useful information to them, and track your site’s engagement.

    Social Media

    best wordpress social media plugins

    Connecting your social media feeds to your WordPress website is an excellent way to increase the visibility of your website and social media accounts. Using a good social media plugin, like Monarch, you can embed your social media feeds from Facebook, YouTube, and more.

    And More

    best WordPress plugins

    Whether you need a solution for backing up, speeding up, or enhancing your website’s functionality, a good WordPress plugin can help you achieve your goals. Take a look at our 31 best WordPress plugins post to give you more insight on which plugins you can use to make your WordPress website the best it can be.

    Step 8: Create Your Very First Page

    At this point, we can confidently start creating the pages we want to showcase on our website! This part can be overwhelming if you’re new to building websites. Although making a website is easy, it can sometimes lead to information overload. Allow yourself to process and return to the information with a fresh mind when needed.

    Add New Page

    Navigate to your WordPress dashboard. Once there, hover over Pages and click Add New.

    add new WordPress page

    Give your page a title. In this case, we’ll call it Home.

    name your WordPress page

    You can save the page as a draft, or publish it to start working on it.

    save your page

    Once ready, switch to Divi by clicking on Use Divi Builder.

    use Divi Builder

    Select Premade Layout

    Divi is an intuitive tool, and you can create any page from scratch if you learn the basics. But to help speed up the process, Divi provides over a hundred website packs with more than 2200 layouts! With so many options available, you’ll find a website pack that matches your website’s needs. We release a new layout pack every week!

    Divi layout packs

    To upload a layout to your page, choose the middle option that says Browse Layouts.

    browse layouts

    Watch our library of layout packs and layouts unfold!

    Divi layout options

    You can use the search bar in the left sidebar if you’re looking for a specific layout pack.

    layout search

    For the purpose of this tutorial, we’re going to use the homepage layout of the Marketing Layout Pack. We’ll just type in Marketing in the search bar.

    Divi marketing layout

    Then, we’ll select the Marketing homepage.

    marketing home page

    This will lead us to the layout pack’s entire preview.

    marketing preview

    To upload the homepage, click the blue button that says Use This Layout.

    In no time, your page will be replaced with the layout!

    imported layout

    Change Content & Images

    Layouts are great starting points, but things still need to be fine-tuned to your website’s needs. You can go as far with this as you want. Divi is a visual builder that allows you to add new sections, rows, columns, modules, and more. It also has many efficiency features that speed up the design process.

    We’ll keep it simple for this tutorial by changing content only.
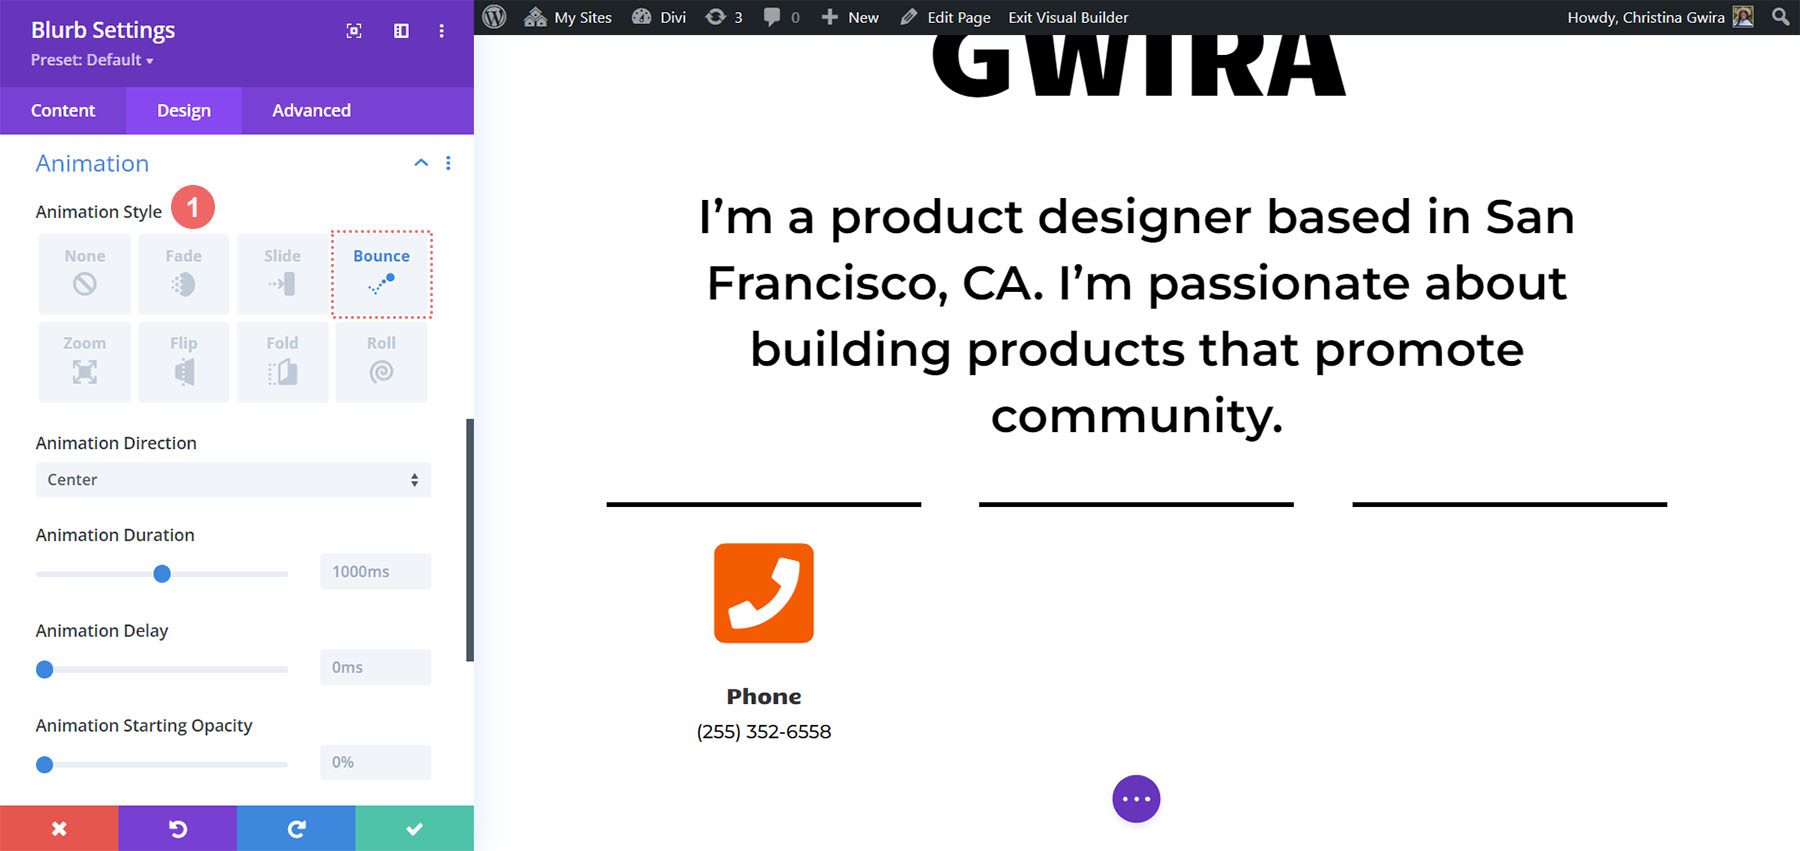
    Change Copy

    You can open each individual module containing copy and use the content box to change the copy. Easy!
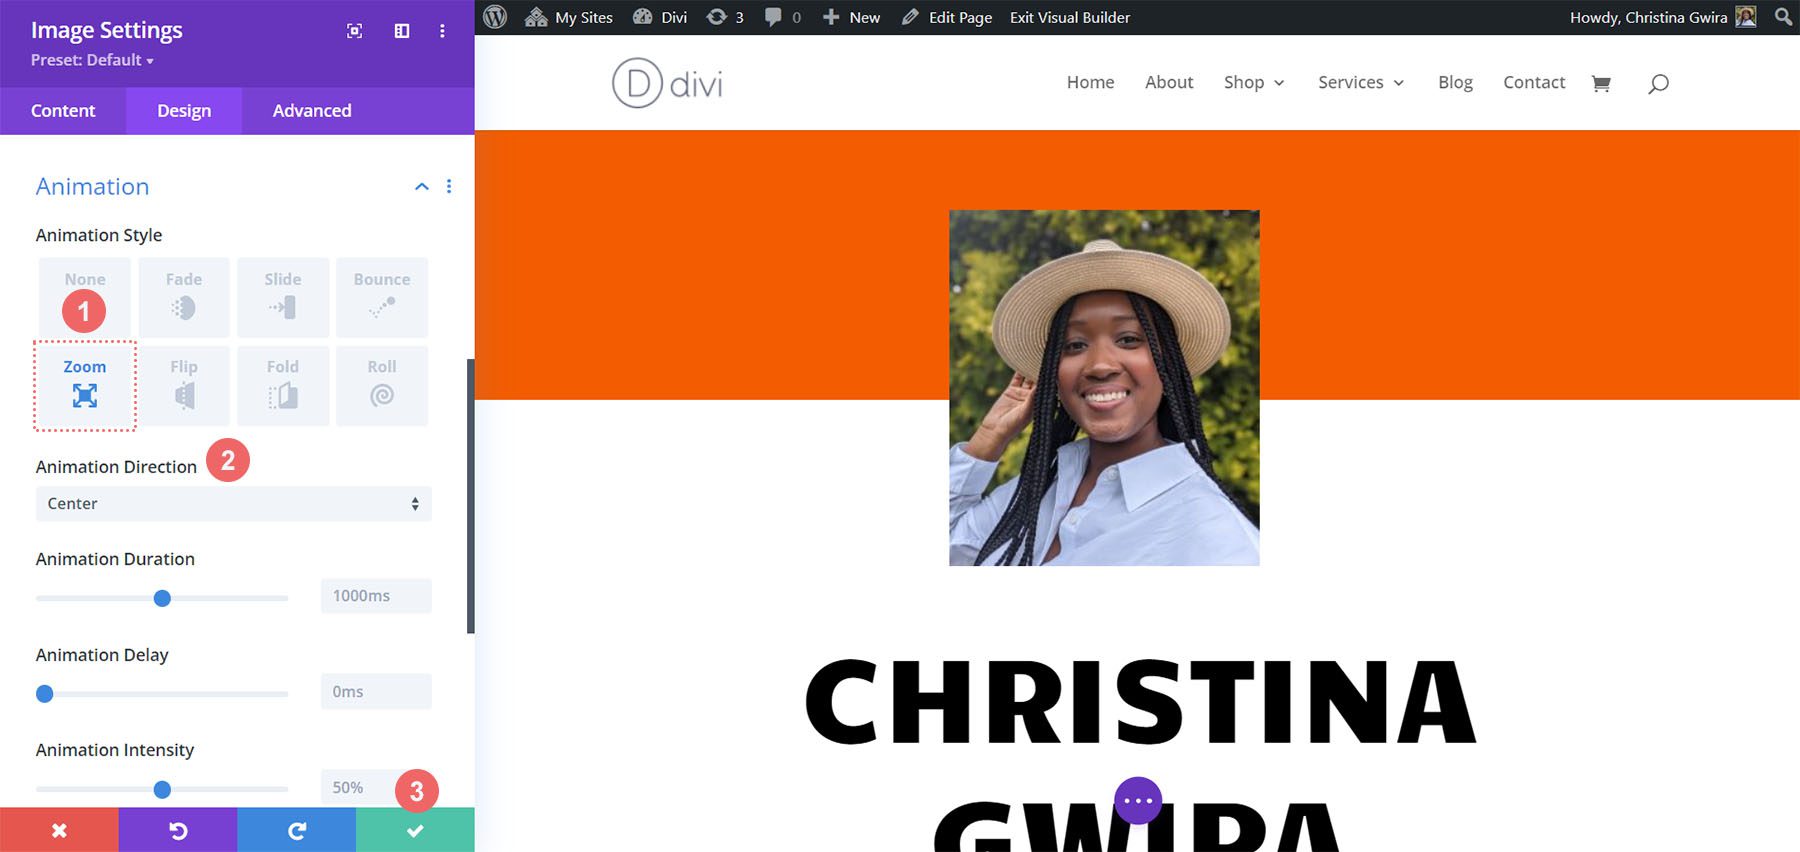
    edit text module

    Change Images

    Similarly, you can change all the images being used if needed/wanted. Make sure you optimize your images before uploading to avoid slow loading speeds.

    edit image module

    Save & Publish

    You can save and publish once you’ve applied the changes you wanted to your page!

    Publish Divi page

    Step 10: Create Additional Pages

    Depending on your website’s structure, you can repeat the steps above for each one of the pages you need. If you want to get your website live as soon as possible, you might consider going for a one-pager first, then slowly building the rest of your pages.

    Step 11: Create Your Website’s Navigation

    It’s great to have pages on your website, but if people can’t get to the page they want, we have a problem. That’s why you should pay extra attention to your website’s navigation. The navigation usually finds itself in a website’s header and footer areas. WordPress has a dedicated spot to create menus from existing pages dynamically.

    Select Homepage

    Before we create the menu, let’s set up a homepage first. If people type in your main URL, they’ll land on this page. By default, the homepage on a WordPress website is set to Your latest posts. To modify this, you can navigate to your WordPress dashboard, then hover the Settings in the left-side menu, and continue by clicking on Reading.

    WordPress reading settings

    Once there, select A static page under the first option and browse through your pages to find your homepage. Be sure to save the changes.

    set home page

    Create Primary Menu

    Next, we’ll create a primary menu. Navigate to your WordPress dashboard, hover over the Appearance menu item in the left sidebar, and select Menus.

    Click on Add a new menu and give your menu a name.

    create new menu

    Continue by adding the pages you want in your navigation.

    add pages to menu

    Once that’s done, set your menu as the Primary Menu.

    primary menu

    And save your menu. This primary menu will now reflect on your website’s header automatically.

    save menu

    Step 12: Additional Things to Consider

    A website is never truly finished. You’ll always have things to improve or update. If you want to get fine-tune your website even further, you might want to consider some of the items below.

    Creating a Header & Footer

    There are several ways to create headers and footers on a Divi website. You can use the WordPress theme customizer under Appearance > Customizer to style Divi’s default header and footer or use the Theme Builder to create them. We highly recommend using Divi’s Theme Builder since it allows you to create custom headers and footers using the drag-and-drop Visual Builder. To access the Theme Builder, navigate to Divi > Theme Builder.

    Divi Theme Builder

    Click Add Global Header to add a header.

    add global header

    You can create any header layout you want using Div’s Visual Builder.

    Creating Templates

    Divi is the ultimate full-site editing theme. In addition to creating headers and footers, you can create layouts for posts, products, categories, and much more. Divi’s Theme Builder gives you the ultimate freedom to create the website you want using your creativity or applying one of our pre-designed post layouts on our blog.

    Optimizing your SEO

    WordPress is already SEO-friendly, but using an SEO plugin and a good SEO tool will boost your visibility. Learn about keyword research, writing good SEO copy, and utilizing internal links. By taking these steps, you’ll become an SEO expert in no time.

    Optimizing for Mobile

    Creating a visually appealing website across all devices is crucial. Google’s mobile-first algorithm prioritizes small screen-friendly websites. Thankfully, Divi specializes in mobile-first designs, giving you quite an advantage.

    Step 13: Maintaining Your Website

    To have a successful website, you’ll have to keep maintaining it.

    Update Regularly

    Even if it’s just for security measures, updating your website regularly has advantages. Make sure that if you do update, you use a staging site. This will help you avoid conflicts when updating WordPress, a theme, or a plugin.

    Measure Data

    Consider measuring the data your website brings as well, through tools like Google Analytics. This will help you track the effectiveness of your website, depending on the goal you’ve set for your website.

    Final Thoughts

    That was it for this post on how to make a website! As with all things in life, the more you practice, the easier it becomes. Allow yourself to play around with different parts of the website creation process because that’s usually how you’ll learn the most. If you have any questions or suggestions, feel free to comment in the comment section below!

    Featured Image via Darko 1981 / Shutterstock.com

    The post How to Make a Website From Scratch in 2023 (Detailed Tutorial) appeared first on Elegant Themes Blog.

  • 10 Best AI Logo Generators in 2023 (Most are Free)

    You no longer need to be a graphic designer to create a professional logo. AI logo generators make the task quick and easy. The best AI logo generators use advanced AI technology to create logos in various styles, formats, and more. In this post, we will compare today’s top AI logo generators to help you find the one that works best for you. Most have a free version of the trial that you can take advantage of, which is created to test out the interface to see if it works for you and your needs.

    What is an AI Logo Generator?

    An AI logo generator is an online application that allows you to create a logo for your business or brand using artificial intelligence. Generators use machine learning to analyze patterns, colors, shapes, and typography commonly found in logos, melding them together and then creating a logo matching your criteria list. Firstly, most generators will ask for your business name. Next, you’ll be required to choose fonts, colors, and your logo’s general feel and style. Based on this, an AI logo generator will create a series of logos you can use on the web, print, and media.

    10 Best AI Logo Generators in 2023


    Subscribe To Our Youtube Channel
    All the best AI logo generators can take your vision, add machine learning, and produce a suitable logo for your branding. We hope that our list of the best AI logo generators will help you find the right platform for you to be able to design the perfect logo for your next brand launch or products.

    1. Wix Logo Maker

    Wix AI logo generator

    The Wix Logo Generator is a part of the Wix suite of products. In addition to being one of the best AI website builders, Wix has a broad collection of applications that can help you build your online presence. One such product is the Wix Logo Generator. Their logo maker tool is the most flexible on our list, allowing you to make deep edits to your logo once it has been generated with AI. Once you have created your logo, you can create several more, download themes, or integrate them into the Wix Brand Studio. Your logo is provided in eight file formats, including full-color, grayscale, and monochrome versions. You also have the option to get the SVG versions of your logo, allowing you to edit your design further in programs like Gimp and Adobe Illustrator.

    Key Features of Wix Logo Generator:

    • Over 40 color palette combinations
    • Hundreds of font selections, including Google Fonts
    • Over 100 full-color and monochrome icon choices
    • Add and customize geometrics shapes within your logo
    • Upload your own design assets and logos to the generator

    Freeflow logo design with Wix's AI logo generator

    Unlike many of the logo generators on our list, Wix’s Logo Generator allows you to click and drag the various elements of your logo to create your pixel-perfect visual identity. Change the alignment, opacity, outline width, and much more. Whereas other generators give you cookie-cutter logos, Wix’s generator gives you powerful graphic design tools to build an AI-informed, custom logo for your business or brand.

    Best For:

    If you’re looking for a combo deal when designing your logo and getting a good website builder, start your design journey with Wix’s Logo Generator. Additionally, for a fully customizable logo-building experience, Wix’s Logo Generator allows you to edit your logo deeply.

    Pricing: Free, Paid plans start at $26.40 one time

    Try Wix Logo Maker

    2. DesignEVO

    DesignEVO, an AI logo generator

    DesignEVO is a free logo maker and AI logo generator. Of all the AI logo generators on our list, DesignEVO has the most extensive library of assets that you can use to inform your AI-created logo. It starts first with a pre-designed logo. Then, you can edit it and add your colors, fonts, and icons. Using AI, DesignEVO helps you decide which templates match your business’s branding and style. The builder is highly functional and intuitive, allowing you to edit every aspect of your logo to meet your needs. You can click-and-drag elements of your logo around freely, add shapes, change icons, and much more. Additionally, once you are happy with your logo, you can download a free version or purchase a premium version that gives you lifetime updates, high-quality file downloads, and font files, among other things.

    Key Features of DesignEVO:

    • 10,000+ logo templates to start from
    • Millions of free vector icons to add to your logos
    • 100+ font styles to use and choose from
    • Editable solid and gradient color schemes
    • Download high-quality print-ready file types like SVG and PDF

    DesignEVO's gradient builder

    The gradient builder is a unique feature of the DesignEVO interface. While most logo generators on our list stick to plain, flat colors, DesignEVO provides a selection of pre-generated gradients and the ability to build your two-stop gradients for your logo. Add depth to your logos by adding gradients that will take your designs to the next level with DesignEVO.

    Best For:

    If you get stuck in analysis paralysis when deciding what you’d like your logo to look like, choose DesignEVO to help you with your logo-building needs. This generator provides tons of inspiration to help you build the perfect logo for your brand. With its colossal library of pre-built logos for you to edit, finding the spark of imagination to build and create your logo is easy with DesignEVO.

    Pricing: Free, Paid plans start at $49.99 one time

    Try DesignEVO Logo Maker for Free

    3. Looka Logo Maker

    Looka, an AI logo generator

    Looka is an online logo generator that starts building your logo by collecting market research. Its logo design process begins by asking you questions about the industry that you’re in. Next, the logo designer provides several common styles within the industry you are designing for. You can add a slogan to your logo, ensuring your brand messaging is clear to your audience. Once your logo is created, you can further edit it unlimited times. Looka also uses machine learning and artificial intelligence to give you what they classify as modern-day suggestions to help spruce up your logo.

    Key Features of Looka:

    • Generates more than 75 logos in one fell swoop
    • Seven color scheme categories with hundreds of choices and selections
    • More than 300 font options in a variety of styles, including handwritten, vintage, sans serif, and much more
    • Saves previous logo generations and allows you to favorite generations that speak to you
    • Upload your own logo to edit and generate a brand kit from

    Looka's brand kit is generated everytime to update and edit your logo

    After generating your logo, Looka also helps you to create the branding kit to support it. From business cards to letterheads, invoices to apparel, Looka provides myriad ways to use your logo to promote your brand, all from within its logo generator.

    Best For:

    Looka is an AI logo generator that provides many supporting materials for your logo. Social media banners, email signatures, brochures, and more can all be created once you use this platform for your logo. If you need help crafting your branding collateral for your website, Looka is the AI logo generator you need to use for your business.

    Pricing: Free, Paid plans start at $20 one time

    Make a Logo with Looka

    4. Tailor Brands Logo Maker

    Tailor Brands, an AI logo generator

    Tailor Brands is a full-scale platform for businesses and brands. Whether you need to get your business registration papers in order or need help with a website, Tailor Brands has the tools to help you get your business off the ground. This includes its AI logo maker. The logo maker has a clean and easy-to-understand layout, making creating a logo simple. From its vast library of fonts, icons, colors, and styles, Tailor Brands AI logo maker gives you plenty of options to create your perfect logo. Once you’ve made the logo of your dreams, the platform can also assist you with other business necessities with your new logo in tow. Overall, Tailor Brands’ logo generator is the best place to start building your brand for a one-stop shop that starts with your logo.

    Key Features of Tailor Brands:

    • The straightforward visual logo design process with hundreds of icons, color schemes, and layouts
    • Generates over ten different logo options based on your color, font, and style selections
    • Ability to download high-quality PNG and JPG versions of your logo on a white or transparent background
    • Save your favorite logo combinations and download a free sample
    • Generates business card designs, branding books, and more

    Tailor Brands logo style settings sets it apart from other generators on our list

    Tailor Brands questionnaire is one of the most thorough on our list. From asking about your logo style to colors and fonts to specific icon shapes, this AI logo generator does an excellent job deducing how you want your logo to look in just a series of clicks. Whereas other generators provide generic questions and options unrelated to branding, Tailor Brands questionnaire asks you the correct design queries to build a perfect, AI-powered logo.

    Best For:

    If you’re looking for a one-stop shop for your business needs, build your logo with Tailor Brands. Its full suite of tools takes your logo and adds it to design collateral like flyers, business cards, and a website. So if you need more than just a logo generator, Tailor Brands’ is a great place to start building your business online.

    Pricing: Free, Paid plans start at $12.99 per month

    Try Tailor Brands Logo Maker for Free

    5. LogoAI

    LogoAI an AI logo and brand generator

    LogoAI is an AI logo generator that has a simple interface. While LogoAI’s interface allows for click-and-drop design, it can be limited in some options when generating your logo, depending on the logo generation you choose to customize. Certain styles have a restrictive color scheme, making it difficult to use your custom colors when building your logo. However, there are many areas where LogoAI shines. For starters, it’s one of the few generators on our list that provides you with an animated version of your logo. Secondly, LogoAI has plenty of options for editing each aspect of your logo. From your icon to your text, LogoAI provides editing options such as skewing, rotation, and deep color customization of icons with solid colors and gradients that other logo generators skip out on entirely.

    Key Features of LogoAI:

    • Over 50 fonts to choose from, including Google Fonts
    • Upload your custom font for use within the AI generator
    • Seven primary color schemes with a custom color picker option as well
    • Logos can be made available in PNG, SVG, and PDF file formats
    • Download video and GIF animated versions of your logo

    LogoAI's text options

    LogoAI has a bountiful list of options for editing the text within your logo. Change the shape, solidify your text and outline, or choose your favorite Google Font. All these options and more are available to you when you use LogoAI. Additionally, you can edit the layout of your text, add accents like backgrounds and lines, and so much more.

    Best For:

    For those looking for an in-depth logo generator that will provide you with the tools to edit your logo deeply, LogoAI is for you. With its extensive customization options and a vast library of icons, creating an AI-powered logo that’s easy to customize is possible with this platform.

    Pricing: Free, Paid plans start at $29 one time

    Make a Logo with LogoAI

    6. Designs.AI

    Designs.AI an AI logo generator

    Designs.AI is a full-scale design studio with multiple AI generators for copy, videos, and logos. The AI logo generator allows you to build numerous logos based on your industry and branding. Once your logo is generated, you have a variety of controls that you can use to customize your logo. From changing its background to switching out icons from its extensive icon library, Designs.AI is an easy-to-use logo generator with enough tools to make a simple logo. Google Fonts power the generator, so you can choose from a selection of popular and web-based fonts that you can use in your branding and eventually on your website. Once you’ve designed your logo, you can download it in SVG, PNG, JPG, and PDF formats. With a monthly subscription, you can create and manage a complete branding and social media kit, brand story, and mockups using your logo.

    Key Features of Designs.AI:

    • 10,000+ icons available for use
    • Smart suggestions for font, color, and style combinations
    • Eight font style categories, 20+ color palettes, and 60+ icon border styles
    • Alignment, vertical and horizontal transformation, and undo/redo tools and options
    • Change font letter spacing, font size, and positioning of business name and slogan

    Designs.AI brand kit maker

    Designs.AI’s brand kit maker is a great and free way to track the colors used in your logo for use throughout the rest of the software. Add as many colors as you’d like and be able to copy their hex code for use on the Designs.AI platform or outside its ecosystem. Furthermore, when you upgrade your package, you can create an unlimited number of color palettes and brand fonts, which you can use to create more assets within Designs.AI.

    Best For:

    To have all your graphic brand assets hosted in one place, you need to use Designs.AI as your logo generator. With its easy-to-use logo maker and great online platform, building a brand is an uncomplicated process with this tool by your side.

    Pricing: Free, Paid plans start at $29 per month

    Make a Logo with Designs.AI

    7. Hatchful Logo Maker (by Shopify)

    Hatchful by Shopify, a free AI logo generator

    Hatchful by Shopify is a completely free logo generator. Because of this, it is one of the more basic generators on our list. You can’t change the spacing of your business name, can’t choose your colors, or upload your logos and fonts like other AI generators. Nevertheless, Hatchful uses AI to create color and logo combinations that you can use to get the basics of your visual identity established. The Hatchful interface is clean and easy to use, with only three main options. You can edit your business name and slogan, change your font and select a color from the generated color palettes. Overall, for the most basic of logos, consider using Hatchful. And if you haven’t settled on a business name yet, you can use Shopify’s Business Name Generator.

    Key Features of Hatchful by Shopify:

    • Integrated with Google Fonts
    • Ten different color styles
    • Hundreds of color and font options
    • Free social media assets based on your newly created logo

    Hatchful's free logo files

    Hatchful provides you with the most logo files from all the logo generators on our list. Once you’ve completed designing your logo, you’ll receive a ZIP folder in your email with your logo resized to the correct resolution and dimensions for many social media networks. You will also receive banners and have access to edit your logo if you need to make any changes and re-download your design assets.

    Best For:

    If you do not want to create all the design assets for your social media pages, like profile photos, banners, and more, use Hatchful. The logo generator creates all these files for you when you create your logo saving you time editing and resizing your logo and creating your social media branding assets.

    Pricing: Free

    Make a Logo with Hatchful for Free

    8. Logomaster.ai

    Logomaster.ai, an AI logo generator

    Logomaster.ai is genuinely one of the masters of AI logo generation, allowing you to create a professional logo in 5 minutes. The process starts with a simple questionnaire that allows you to share your industry, slogan, business name as well as the style of your logo. Next, you can select your fonts, colors, and icons. With all these options, the combinations you can generate with AI are extensive. Additionally, Logomaster.ai has a powerful editing interface, allowing you to make quick edits to your logo without using any design software. The platform is integrated with Google Fonts, so you can find your favorite fonts and choose from a deep library of backgrounds, shapes, and lines to add to your logo. You can download your logo in high-resolution and web-ready file formats when you’re happy, and depending on the package you choose, you can receive other variations of your logos.

    Key Features of Logomaster.ai:

    • 100+ logo design templates
    • 100+ icon options
    • 15+ premade color palettes
    • Six font categories, boasting over 100 fonts in total, powered by Google Fonts
    • Add decorations like frames, borders, patterns, separators, and decorative lines.

    Logomaster.AI's logo editing interface

    With click-and-drag functions, a wide array of editing tools, and layers, Logomaster.ai’s editing interface is one of the better ones on our list. While the interface is full of tools, bells, and whistles, it is easy to navigate, especially if you are familiar with concepts used in programs like Canva and Adobe Photoshop. Changing colors, moving layers, and more is easy with this platform, making your logo-building experience suitable.

    Best For:

    Logomaster.ai is an AI logo generator for those who want to do more with their logo. If you want more than the primary icon and text logo, you can add and customize additional flourishes and accents to your logo and edit them to match your needs.

    Pricing: Free, Paid plans start at $54 one time

    Make a Logo with Logomaster.ai

    9. Logobean

    Logobean, AI logo generator

    Logobean is an online AI logo generator with a complex yet powerful interface. Logobean’s interface has a slew of options that you can use to edit and style most aspects of your logo. You can select an icon, font, and color palette like the other logo generators. However, Logobean gives you additional controls. Rotating and flipping icons, line and letter spacing, font size, and text alignment can all be applied to the business name, slogan, and icon of the logo you create. Furthermore, you can pick various hues and tints from the color picker, opening up the possibilities for colonizing your logo.

    Key Features of Logobean:

    • Integrated with Google Fonts
    • Five central color palette schemes, with over 20 color palettes within each scheme
    • Generates interactive, digital logo style guide complete with brand guidelines for logo and typography usage
    • Download logo files in PNG and SVG.
    • Online logo management portfolio where your users or team can download your logo and associated brand guidelines

    Logobean's preview interface

    Logobean’s preview interface lets you see how your logo will interact in various use cases. See what your logo will look like on a darker background or if it is a lighter shade. See the placement on an envelope and decide how it will look on a notebook. Logobean provides multiple mockup previews of your logo once you’re done designing it so that you can see what your future logo will look like in the wild.

    Best For:

    If you’d like to see your logo in various real-life use cases as you design it, Logobean is a great tool. Its many editing options make it a great AI logo generator for those who want to customize their logos to match their needs while seeing what their options will look like out in the wild.

    Pricing: Free, Paid plans start at $29 one time

    Make a Logo with Logobean for Free

    10. Logo.com

    Logo.com, an AI logo generator

    The Logo.com platform offers a vast library of logo templates, icons, fonts, and colors, allowing users to customize their logos based on their unique requirements and preferences. Logo.com also provides tools and features to help users fine-tune their logo designs. Users can adjust the layout, change the colors, modify the font styles, and add or remove elements to create a logo that represents their brand effectively. In addition to logo design, Logo.com offers additional branding services. Users can explore various options for business card designs, social media assets, stationery, and other brand identity materials, allowing for a consistent and cohesive brand image across different platforms.

    Key Features of Logo.com:

    • Generates an unlimited of logos from your questionnaire
    • 100s of custom color palettes and themes
    • Easy-to-use interface with simple tools and controls for logo design
    • Save and share logo variations for use and download later

    Logo.com free brand board

    Logo.com’s free version provides you with a brand board that is easy to view and share. It includes all the visual elements of your brand. You can see variations of your logo and brand colors with their CMYK and RGB codes and your font faces in one document you can share with your team.

    Best For:

    The Logo.com generator will be an excellent choice for a simple logo. Its branding suite is also a great addition to the entire branding process.

    Pricing: Free, Paid plans start at $10 per month

    Make a Logo on Logo.com

    Comparing the Best AI Logo Generators

    Now that we’ve presented our list, we encourage you to take each platform for a spin as you journey to creating your logo and visual identity. Consider that each platform has pros and cons, and test each out with an open mind before choosing the tool that will assist you in building a critical piece of your business or brand’s visual identity.

    Best AI Logo Generator Price Comparison

    With most of the AI logo generators on our list coming with feature-rich free versions, let’s take a look and see how our AI logo generators compare to each other based on price:

    AI Logo Generators Price Free Option
    🥇 Wix Logo Maker One time fee of $99 ✔️ Visit
    🥈 DesignEVO One time fee of $49.99 ✔️ Visit
    🥉 Looka One time fee of $20 ✔️ Visit
    4 Tailor Brands $12.99/mth ✔️ Visit
    5 LogoAI One time fee of $29 ✔️ Visit
    6 Designs.AI One time fee of $29 ✔️ Visit
    7 Hatchful by Shopify $0 ✔️ Visit
    8 Logomaster.ai One time fee of $29 ✔️ Visit
    9 Logobean One time fee of $29 ❌ Visit
    10 Logo.com $10/mth ✔️ Visit

    What is the Best AI Logo Generator?

    After looking at the price, here are some of the top AI logo generators we’d recommend for various users. The Wix Logo Maker is the top AI logo generator because of its flexibility and easy-to-use interface. It provides a premium logo designing experience at an affordable price point. DesignEVO is the logo generator with the most options regarding icons, fonts, and colors. Use this tool to experiment thoroughly with color before settling on your logo. The Looka Logo Maker is a great choice for those who want a great logo with additional marketing tools. With their Brand Kit, you can apply your logo to t-shirts, letterheads, and more through the Looka interface.

    Need more design tools? Check out all our articles featuring the best design tools, tutorials, and plugins you can use as an aspiring designer.

    Featured Image via Siberian Art / shutterstock.com

    The post 10 Best AI Logo Generators in 2023 (Most are Free) appeared first on Elegant Themes Blog.

  • 10 Best WordPress Podcast Themes in 2023 (Compared)

    Podcasts have become a growing media form over the past few decades. What was once a highly technical form of content is now accessible to the masses. With WordPress, you can quickly launch your very own podcast website to share your podcast with the world. While podcast hosting platforms are great, having your own podcast website gives you more control, allowing you to share your show notes, sell merch, and more. You can do all this and more with the right WordPress theme. So, if you’re a podcaster looking to make the most out of your online platform, it’s time to explore the best WordPress podcast themes available.

    What is a WordPress Podcast Theme?

    WordPress podcast themes come in various forms and functions. At their core, a WordPress podcast theme will allow you to connect to your podcast’s hosting platform or RSS feed. This will allow you to display episodes of your podcasts on your WordPress website for your website visitors to listen to. In addition to its podcast playback functions, WordPress podcast themes may come with the ability to sell merchandise to listeners, display show notes, connect to your show’s social media accounts, and more. Some themes will work seamlessly with the best podcast plugins for WordPress or have their own built-in features.

    With that in mind, we’ve selected some of the best WordPress themes for your podcast that are packed with features every podcaster will enjoy.

    10 Best WordPress Podcast Themes

    Below you’ll find a list of our top best WordPress podcast themes. Within our list, you will find a theme that will work best for your podcast. Take a look, test the demos, and choose your new podcast theme today!

    1. StreamKing

    StreamKing, a podcast theme for WordPress

    StreamKing – as its name suggests – is a king among WordPress podcast themes. To begin, the theme’s podcast player is exciting and feature-rich. It supports playlists and individual episodes and can do all this as your listeners move through your website without missing a beat (thanks to Ajax!). Furthermore, StreamKing supports both famous and lesser-known podcast platforms. This also allows you to manage multiple podcast feeds from one place, your WordPress website. If you’d like, StreamKing can also support natively uploaded audio files directly from WordPress’ media library. You can use the Elementor page builder to build the various pages throughout your website, and you have at least 40-page templates that you can mix and match to make your perfect podcast website. StreamKing also allows you to show your podcast notes, has a series manager, and efficiently manages photo and video galleries.

    Key Features of StreamKing:

    • 40+ pre-designed page layouts, editable with Elementor
    • Dynamic, continuous podcast audio player
    • 1-click import of episodes from existing streaming platforms
    • Integrates with more than 12 podcasting platforms, including Icecast, Stitcher, Shoutcast, Mixcloud, and Podbean
    • Automatically generate Podcast RSS Feeds that can be used in iTunes, Apple Podcasts, Google Podcasts, and more

    StreamKing's dedicated subscribe button

    StreamKing has a dedicated subscribe button that opens into a unique vertical menu. Attach all your podcast platforms – and social media networks – as links and efficiently direct your listeners to your various podcast platforms easily with this eye-catching call-to-action.

    Best For:

    StreamKing is the best WordPress podcast theme for those who want to make an impact with their podcast. Its extensive list of platform integrations, its number of page templates, and its impactful audio player makes StreamKing one of the best WordPress themes for podcasts.

    Pricing: Paid plans start at $79 per year

    View Demo

    Get StreamKing

    2. Podcrafter

    Podcrafter, a WordPress podcast theme

    Podcrafter is one of the most complete podcasting themes available for WordPress. Powered by the Sonaar Music Plugin, there is so much that Podcrafter can accomplish for your content. With Podcrafter, you can pull episodes from many podcast platforms onto your WordPress site. The theme also supports natively uploaded MP3 files. Then, you can arrange and manage your episodes, putting them into albums, seasons, or categories you choose. The Sonaar Music Player can be made sticky, so it stays at the bottom of your site as listeners browse it. It also features optional skip-forward buttons, an audio speed rate, a scrubbing bar, quick jump links to other episodes, and more. On the design front, Podcrafter comes with more than 15 native widgets and blocks that you can use within Elementor. Quickly edit the provided page templates to create the perfect website for your podcast.

    Key Features of Podcrafter:

    • Continuous AJAX-powered audio player
    • Audio and playlist manager
    • Showcase multiple podcast hosts
    • Events and gigs manager
    • WooCommerce ready

    Podcrafter, single event page

    A feature you wouldn’t typically associate with a podcast theme, the gigs manager allows you to showcase your past and present events on your site. Showcase your brand events, shows, and more. Each gig can show a map, description, featured image, directions, and more.

    Best For:

    Those looking to build an exciting, feature-rich website for their podcast will enjoy using Podcrafter. With its unique features and powered by the Sonaar music plugin, building your podcast website with Podcrafter is an obvious choice.

    Pricing: Paid plans start at $79 per year

    View Demo

    Get Podcrafter

    3. Divi

    Divi as a podcast theme

    Divi is our very own WordPress theme and visual page builder that can give you more control over the design and functionality of your podcast website. It has over 2,000+ design layouts that are free to use within the Divi Builder. Complete website layout packs are also available that are specifically designed for the podcasting niche. Use them to get a new podcast site design up and running in minutes.


    Divi integrates seamlessly with popular plugins that allow you to equip your podcast site with everything it needs. You can use Blubrry Powerpress with Divi to build your podcast content, embed podcast players from other platforms like Libsyn, add Advanced Custom Fields to display podcast content dynamically, and more. You can even add a booking form and showcase events with Amelia Booking or the Events Calendar. And with Divi, you can have full control over the design of your site with a drag-and-drop visual builder with tons of style options.

    Key Features:

    • Intuitive drag-and-drop website theme builder for full site editing
    • Premade layouts for stunning website pages for podcasters
    • Customizable Audio Module for displaying audio players
    • Video module for displaying podcast videos
    • Integrations with popular podcast plugins and platforms
    • Connects with popular events management, booking, membership, and social media platforms

    Divi has built-in design modules that will make it easy to showcase your podcast features, including a  customizable audio module, video module, and video slider.

    Best for:

    Our Divi theme is best for podcasters looking to have more control over their podcast website from the ground up. The design resources and easy-to-use Divi Builder sets it apart from other themes. There aren’t as many built-in features specifically for podcasters, but Divi’s integrations make it a great choice for those looking for more flexibility with their theme.

    View Demo

    Get Divi

    4. VideoBox

    VideoBox, one of the best WordPress themes for podcasts

    VideoBox does not only focus on the audio aspect of podcasting but also has deep functionality for video. So, if you’re a podcaster who also creates video content for or from your podcasts, VideoBox is a great option for you. The theme has an audio player that allows you to connect your podcast through file upload, a URL, or embed code. VideoBox automatically detects links from popular platforms like SoundCloud, Spotify, Buzzsprout, etc. You can easily change the site’s branding with the WordPress Customizer and its built-in theme panel. For those looking to conquer the podcast realm, VideoBox is the theme for you.

    Key Features of VideoBox:

    • Integrates with SoundCloud, Mixcloud, Spotify, Buzzsprout, Radio Public, and other podcasting platforms
    • Customizable, sleek audio player
    • WooCommerce ready
    • Multiple header options and blog layouts
    • Widgetized homepage builder

    VideoBox's featured player and video player

    A key feature of VideoBox is its multimedia player. The player can play podcasts from a wide array of podcast platforms. In addition to the platforms listed prior, Transistor, Simplecast, Stitcher, Overcast, and Anchor are all natively supported by VideoBox. On the video front, Facebook, YouTube, and Vimeo videos can be showcased in the header of your blog posts and the body.

    Best For:

    VideoBox is one of the best WordPress themes for podcasts that also have a video component to them. If you plan on also creating video content alongside your podcast content, VideoBox is an excellent theme for you to use for your WordPress website.

    Pricing: Paid plans start at $69 per year

    View Demo

    Get VideoBox

    5. Ovation

    Ovation, a podcast WordPress theme

    Ovation is a beautifully designed, minimalistic podcast theme that does more. While you can use it to showcase your podcast episodes, that’s not all it does. The theme opens with an eye-catching header image but can be replaced with a video if you choose. The theme features a sidebar hidden by a hamburger menu with an audio player and newsletter module. However, this can be customized with its entire library of widgets. Ovation is also integrated perfectly with the AudioTheme plugin for those who want to add deep functionality to their WordPress websites. You can connect your social media accounts to Ovation and display them beautifully in the header and footer of your website. If your podcast is well established, you’ll like the out-of-the-box features Ovation provides to the experienced podcaster.

    Key Features of Ovation:

    • Episode management through the AudioTheme plugin
    • Manage and display video and photo content in galleries
    • Organize your podcast in either episodes and seasons
    • Display a list of upcoming events, such as live shows, meetups, and more
    • Build your homepage with the drag-and-drop homepage sections

    Ovation's sidebar playlist module

    Visitors on your website can use the secondary menu to choose a podcast episode they’d like to listen to as they browse their site. Sticking to its minimalistic roots, Ovation has a podcast playlist player neatly tucked into the sidebar that can be opened anytime as listeners visit your WordPress website.

    Best For:

    Ovation is best for the established podcaster. If you have multiple podcast seasons, do live events, and need more room to share all that your podcast does, both online and offline, consider choosing Ovation as the WordPress theme for your podcast.

    Pricing: Paid plans start at $69 per year

    View Demo

    Get Ovation

    6. Podcast Plus

    Podcast Plus, a WordPress podcast theme

    Podcast Plus is the theme for you if you’re looking for a WordPress theme for your podcast focusing on integrations. Firstly, this WordPress theme integrates with a wide array of podcast platforms. Popular and more niche podcast hosting platforms are integrated seamlessly with Podcast Plus. Secondly, Podcast Plus connects with some of the best podcast plugins available to WordPress. Building a fully integrated podcast website provides listeners with a distraction-free listening experience. Like most themes on our list, Podcast Plus is easily customizable with WordPress’ Customizer, so adding in your custom fonts, branding, and logos is a straightforward process. Finally, Podcast Plus has several page templates packed with blocks and patterns that can be used seamlessly with Gutenberg.

    Key Features of Podcast Plus:

    • Six one-click website demos
    • Integrates with Spotify, Apple Podcasts, Google Podcasts, SoundCloud, Stitcher, Libsyn, Captivate, YouTube, and more
    • Compatible with popular WordPress podcast plugins like Seriously Simple Podcasting (Castos) and PowerPress (Blubrry)
    • WCAG 2.0 compliant
    • GDPR Friendly Local Fonts

    Podcast Plus' playback options

    Podcast Plus gives your listeners many call-to-actions that can increase listenership and subscribers to your podcast. Easily allow your website visitors to subscribe to your podcast, download your episodes, or even listen in another window.

    Best For:

    If you’re looking for a podcast theme that integrates with many podcast and video platforms, Podcast Plus is for you. Additionally, if accessibility and search engine optimization are paramount to your theme requirements, choose to use Podcast Plus for your website.

    Pricing: Paid plans start at $80 per year

    View Demos

    Get Podcast Plus

    7. Mozzy

    Mozzy, a podcast theme for WordPress

    Mozzy is a simple podcast theme that focuses on bringing your podcasts online. While Mozzy doesn’t have all the bells and whistles of other themes in our list, this theme focuses on bringing your podcast episodes to your audience. The AudioIgniter media player is the crown jewel of this theme. The player allows unlimited tracks, playlists, shuffles, repeat modes, and more. AudioIgniter also has an analytics dashboard option to see how listeners interact with your episodes. Mozzy works with Elementor and Gutenberg, so building the pages of your podcast’s site will be a breeze. Mozzy allows you to showcase your episodes either within.

    Key Features of Mozzy:

    • Integrated with the AudioIgniter media player
    • Create audio or video playlists
    • WooCommerce ready
    • Compatible with Gutenberg and Elementor
    • Supports embeds of hundreds of platforms like SoundCloud, Castos, RadioRepublic, Sticher, Spotify, and more

    Mozy's subscribe page

    Showcase all the outlets where you host your podcasts with a subscribe page on your Mozzy-powered website. No matter where you home your podcast, this page template allows you to showcase the multiple avenues you have for your website. Additionally, your listeners can choose their platform to listen to your podcast, allowing them to enjoy your work anywhere they listen to podcasts.

    Best For:

    If you’re looking for a simple podcast theme that is easy to edit with a page builder, Mozzy is the theme for you. While it may not have advanced podcasting features, Mozzy holds your hands through creating a podcast website for the newbie to podcasting or website building.

    Pricing: Paid plans start at $49

    View Demo

    Get Mozzy

    8. ChicMoxie

    ChicMoxie, one of the best WordPress themes for podcasts by business owners

    ChicMoxie is the theme for coaches, consultants, and business owners who want to add podcasts to their websites. You may have specific pages on your website that sell to your clients, and with its additional page templates, ChicMoxie makes it easy for you to build and edit your coaching business website with Elementor. As a podcast theme, ChicMoxie allows you to show off video and audio content. You can embed your podcast code from anywhere. If you have a YouTube video to support your podcast episode, ChicMoxie allows you to showcase it alongside your podcast’s audio. ChicMoxie is also integrated with WooCommerce, so selling merchandise for your podcast is simple, straightforward, and expertly branded for your business. As a coach or consultant, selling your services and promoting your latest podcast episode is effortless.

    Key Features of ChicMoxie:

    • One-click demo and nine page templates
    • Dedicated podcast plugin and podcast custom post type
    • Compatible with Elementor
    • Dedicate podcast section on the homepage
    • SEO-friendly, GDPR cookie consent banner and announcement bar banner built-in

    BluChic's podcast plugin

    BluChic’s podcast functionality comes from its podcast plugin. This plugin creates a custom podcast post type, allowing you to organize and add your podcasts by date. Add a featured image, including show notes, and even add a video to your podcast posts.

    Best For:

    If you are a coach, content creator, or business owner with a podcast, ChicMoxie is a theme you can get behind. With its conversion-focused design, multiple page templates, and compatibility with Elementor, this WordPress theme is for the creative who wants to add a podcast to their business website easily.

    Pricing: $149

    View Demo

    Get ChicMoxie

    9. Bolden

    Bolden, a podcast network WordPress theme

    Bolden is a WordPress theme for those looking to build a website for a podcast network. If you have multiple podcasts, hosts, or shows you’d like to manage on the same website, choose Bolden as your podcast theme. Each show can have its own page with its own episodes. Furthermore, no code is required to manage this complex website. You can edit your headers, footers, pages, and posts with the popular page builder Elementor.

    Regarding your users browsing your shows, there are various options with Bolden. From sliders to grids, carousels to lists, display your shows and episodes in myriad options. It is painless to create a website for multiple podcast shows with Bolden.

    Key Features of Bolden:

    • Multiple podcast episodes and podcast show layouts
    • Integrates via embeds with Libsyn, SoundCloud, MixCloud, YouTube, Vimeo, and more
    • Supports locally hosted and external MP3 files
    • Supports podcast plugins PowerPress, Castos, Simple Podcast Press, and more
    • Compatible with Elementor

    Individual show page

    A standout feature of the Bolden WordPress theme is its ability to manage multiple shows. Each show can have its own page on the site, with links to its external streaming platforms. The latest episode for each show is showcased, in addition to a feature image, description, and excerpt.

    Best For:

    If you’re running a podcast network or managing multiple podcast shows, Bolden is the best podcast theme for you. Quickly build your podcast network’s website with Elementor and Bolden.

    Pricing: Paid plans start at $69 per year

    View Demo

    Get Bolden

    10. Gumbo

    Gumdo, a WordPress podcast theme

    Gumbo is a powerhouse for podcasts that want to shine. Pull your episodes from many podcasting platforms like Libsyn, MixCloud, YouTube, and Vimeo. Display your episodes in a list, grid, or masonry layout. Add filters to help your visitors navigate through your various podcast categories. Made with Elementor, you can easily edit the provided page templates with drag-and-drop functionality. The media player is compatible with all browsers and mobile devices, and you can add a download button for people to take your episodes offline.

    Furthermore, you can add the option to play your episodes in a new window. With the WordPress Customizer, you can update your typography, branding, and more to match your podcast’s theme. Finally, Gumbo works well with WooCommerce, allowing you to sell merch and more from your new podcast website.

    Key Features of Gumbo:

    • Featured audio and video display with a download feature
    • Multiple episode page layouts
    • 1-click podcast import feature
    • Compatible with Elementor
    • WooCommerce ready

    Podcast hosts and the Gumbo about page

    Show off the hosts of your podcast with the podcast host template. Add a short biography, link to social media profiles, and upload a headshot for all the hosts of your podcasts. This can be easily edited with Elementor; no coding is necessary.

    Best For:

    For those who want to use WordPress podcasting plugins for their show, Gumbo is a good fit. The theme integrates with WordPress’ popular podcast themes, making it simple to bring your podcasts from all over the internet to your WordPress website.

    Pricing: Paid plans start at $79 per year

    View Demo

    Get Gumbo

    11. Tusant

    Tusant, a WordPress podcast theme

    Tusant is a good WordPress theme for those who want a clean, easy-to-use podcast theme. With three show display layouts and over ten layouts for episodes and episode lists, display your podcasts in style with Tusant. The sheer number of podcast platforms that Tusant supports ensures it has a place on our list. Additionally, Tusant works with a wide range of WordPress podcast plugins. This means that building your podcast website on WordPress is made simple, as you can use almost any platform and plugin you want to build your website. Edit the pages of your website with Elementor, as Tusant comes with several podcast-specific widgets that you can use with this page builder. It also has some support for Gutenberg. You can use the Customizer to ensure that your theme matches your podcast branding, customizing everything from typography to branding and everything in between.

    Key Features of Tusant:

    • Integrates with more than 20 podcast platforms and counting
    • Add podcasts, videos, or audio playlists directly on all posts and pages
    • Display podcast episodes and shows in a variety of layouts
    • Beautiful audio and visual playlist player
    • Podcast subscribe button plugin included

    Podcast subscribe button popup

    Easy lead your website visitors to other podcasting platforms using Tusant’s dedicated subscribe plugin. Choose the platforms you’d like your listeners to access and display them to your visitors when they click on the subscribe button on your website. Build brand awareness and gain additional traffic for your podcasts with this neat feature.

    Best For:

    Whether you’re managing multiple podcasts or a single show, Tusant will be a good fit for you. With multiple show and episode layouts and an exhaustive list of supported podcast platforms, Tusant is a WordPress theme for anyone who wants to take their podcast website to the next level.

    Pricing: Paid plans start at $69 per year

    View Demo

    Get Tusant

    Comparing the Best WordPress Podcast Themes

    With all our themes lined up, you’ll notice a podcast theme for every kind of podcast. Whether you’re looking for something complex, want to run multiple shows, or have a theme that’ll help you sell your podcast merch, there’s a podcast theme on our list.

    The Best WordPress Podcast Themes Price Comparison

    Let’s compare the contenders for best podcast theme and see how they rank in terms of price and if they have a free version that you can try out today:

    Plugin Price Free Option
    🥇 StreamKing $79/yr ❌ Visit
    🥈 Podcrafter $79/yr ❌ Visit
    🥉 Divi $89/yr ❌ Visit
    4 VideoBox $69/yr ❌ Visit
    5 Ovation $69/yr ❌ Visit
    6 Podcast Plus $80/yr ❌ Visit
    7 Mozzy $49/yr ❌ Visit
    8 ChicMoxie $149 ❌ Visit
    9 Bolden $69/yr ❌ Visit
    10 Gumbo $69/yr ❌ Visit
    11 Tusant $69/yr ❌ Visit

    What is the Best WordPress Podcast Theme?

    As you’ve read through our list, we hope you’ll get some ideas and decide on the WordPress theme you’ll use for your podcast. If you’re looking for a podcast theme that will excite listeners and shame your competitors, try StreamKing. Our top-rated podcast theme, StreamKing, was made for the podcast that wants to make its mark on the scene. For a WordPress theme that can handle multiple podcast shows quickly, Podcrafter is your best bet. Display all your shows equally with ease from one WordPress installation. Lastly, if you plan on deep diving into customizing and building your perfect website for your podcast, Divi is the clearest option for you.

    Here’s a roundup of the best podcast plugins you can use with your new podcast theme. Which theme will you be using for your podcast? Was there any that caught your eye or that we missed from our list? Let us know in the comments section below!

    Featured Image via Elena Kalinicheva / shutterstock.com

    The post 10 Best WordPress Podcast Themes in 2023 (Compared) appeared first on Elegant Themes Blog.