EDITS.WS

Category: elegantthemes.com

  • WordPress vs Web.com

    WordPress and Web.com both offer viable platforms for building a website. WordPress is the most popular content management system (CMS) for building websites and has been for long time. Web.com is a popular website builder that provides an all-in-one website solution. Similiar to Squarespace and Bluehost, site builders like Web.com usually offer less customization options in order to keep things more streamlined and secure for users. A CMS like WordPres may not be as easy to get things up and running initially, but it offers a attractive balance of simplicity and extendability.

    Both WordPress and Web.com have unique platforms for building a website. In this post, we’ll walk through a WordPress vs Web.com comparison to help you decide which platform will work best for your needs. We’ll discuss important comparisons including ease of use, customization, security, built-in features, and more.

    WordPress vs Web.com Who are They For?

    When comparing WordPress vs Web.com, it is helpful know the difference between a CMS vs a Website Builder. Both can get you a website, but they are different usually when it comes to complexity and features.

    WordPress CMS

    WordPress is highly customizable, which makes it great building all types of websites using premade themes, plugins, and integrations. Additionally, WordPress is great for developers who like to code their own templates and themes. Those who are comfortable with CSS, HTML, and PHP will be right at home with WordPress. That being said, building websites with the WordPress Editor is relatively easy, so beginners won’t have issues learning the platform. WordPress has been around for nearly two decades, so there are plenty of resources and WordPress articles for new and seasoned users to fall back on when they can’t figure something out. What started out as a blogging software has quickly evolved into a multi-featured platform where users can build a website that has its own unique look and feel.

    Web.com builder

    Web.com got its start in 1999 as a domain provider. Over the years, they expanded their offerings from domains to include hosting and an online website builder. Like WordPress, they offer the ability to customize your website with ease, and offer templates to build upon. That being said, if you want more functionality, be prepared to pay. They charge additional fees for offerings such as security and additional domains. Web.com wants to attract all businesses — large or small. They target individuals who seek an easy way to customize their site without the need for coding. One of the best things about them is they give their customers a pretty nice drag and drop builder. The builder takes little time to learn, making it a solid choice for beginners.

    WordPress vs Web.com Ease of Use

    Having a simple interface is a huge factor when considering a CMS. WordPress and Web.com both have a different learning curve. Let’s see how they compare.

    WordPress

    One of the best things about WordPress is how easy it can be to build a website. Beginners can pick up the ins and outs of WordPress in a short period of time. The tools are laid out in the dashboard in a simplistic way. Posts, pages, plugins, and media are all easily accessible and identifiable with labels.

    WordPress dashboard

    The WordPress community is huge. Thousands of sources are available, making learning WordPress a snap. Additionally, with the release of WordPress 5.0, users were introduced to the Gutenberg block editor. Blocks enhances WordPress by enabling users to build responsive pages and posts with columns, then add content with more than 25 additional blocks. Plus, WordPress 5.8 introduced full site editing which has given users even more control over there entire website design.

    WordPress block editor

    Web.com

    One of Web.com’s main selling points is being user friendly. The interface is simple, and signing up is easy. Users can opt for an advanced SSL certificate for an additional $99 per year. Otherwise, your total cost to get started is a paltry $1.95 per month, which is billed monthly. There are no contracts, so you can cancel at any time.

    Once you start a plan, you’re automatically forwarded to the dashboard. You’ll be able to choose from over 150 templates to jumpstart your site design. Once you choose, editing is stunningly simple. Web.com uses a drag and drop website builder, so making changes to the template you choose is also a breeze.

    Editing

    WordPress vs Web.com: Customization

    Both WordPress and Web.com are customizable, but there are limitations.

    WordPress

    WordPress is well known for its customization capabilities. Depending on the amount of effort put in, users can create a one-of-a-kind website that can compete with any platform on the internet. Users can change themes, add plugins, or write custom code to make WordPress what they want it to be.

    When users want to change the functionality of their website, they can choose from tens of thousands of plugins on the WordPress repository. Plugins such as Yoast SEO, WooCommerce, Gravity Forms, Divi Page Builder, and other useful plugins allow WordPress to excel in the customization realm.

    WordPress vs Web.com customizations

    Web.com

    Since Web.com is an all-in-one platform, there aren’t any plugins. That being said, there are still plenty of customization options. In the site editor, there are options for adding blocks such as text, icons, social media, and galleries, amongst others. Additionally, they’ve made it easy to integrate google analytics, SEO, and custom scripts.

    Site editor

    Under advanced options, you can turn on the block editor, which gives you the capability to customize the template you choose at signup. By doing this, you expand on the already highly functional site editor. Users can add galleries, testimonials, banners, and much more.

    Advanced editor

    WordPress vs Web.com: Themes and Templates

    Both WordPress and Web.com have free templates to choose from. Let’s explore the options on each platform.

    WordPress

    WordPress is clearly the winner when it comes to choice of templates. With over 59,000 templates, WordPress is hard to beat. WordPress offers free themes as well. Users won’t have any problems finding a template to suit their needs. In addition, there are many premium themes available, such as our own Divi. Customization and choices are abundant should you choose to go the WordPress route.

    WordPress vs Web.com templates

    It’s important to note that some premium themes don’t just enhance the look of your site. They can enhance the functionality as well. Premium themes such as Divi offer much more than a pretty face. The modules available In Divi are geared towards improving the capability of WordPress, and integrate with other software such as learning management system (LMS) software, and Toolset, which allows you to create custom post types, taxonomies, and field groups.

    Web.com

    Web.com doesn’t have thousands of templates, but they do have solid choices. With over 150 templates to choose from, it’s likely you’ll find the right look for your website. The templates are more business-centric, which seems to be Web.com’s target audience. After you choose a template, you have the ability to add additional blocks and modules to customize it to suit your needs.

    Web.com templates

    Web.com categories its templates based on business type. You’ll find options for business, blog, services, personal, health, beauty, restaurants, and portfolios. Once you pick a template, you can feasibly have your site up in a few minutes — that is if you only want to change out text modules.

    WordPress vs Web.com: Ecommerce

    Both WordPress and Web.com have eCommerce options. Let’s dive into both platforms to get a better idea of how each platform works.

    WordPress

    WordPress integrates quite well with several ecommerce platforms including WooCommerce which is comparable to Shopify. This allows you to build out a full-featured online store with unlimited products, reporting, and shipping options. That being said, WooCommerce is pretty bland out of the box. If you require the ability for advanced reporting, tax and shipping calculations, or subscription based products, you’ll need to purchase add-ons from the WooCommerce store. Although WooCommerce is a free plugin, it’s only intended for the most basic shop setup.

    WooCommerce

    Web.com

    Web.com offers its users the ability to host an online store, but it is sold separately from the business site builder. The concept is the same, with the builder resembling the business site builder, only with product capability. Monthly plans begin at $1.95 for the most basic online shop. You’ll get the ability to create products, get reporting, easy shipping tools, and purchase order options. In addition to that, you can easily sell your products by integrating with Amazon, eBay, and Etsy marketplaces.

    Web.com eCommerce

    WordPress vs Web.com: Publishing Tools

    Publishing tools are at the forefront of any content management system. Both WordPress and Web.com have these options standard, and they are quite similar.

    WordPress

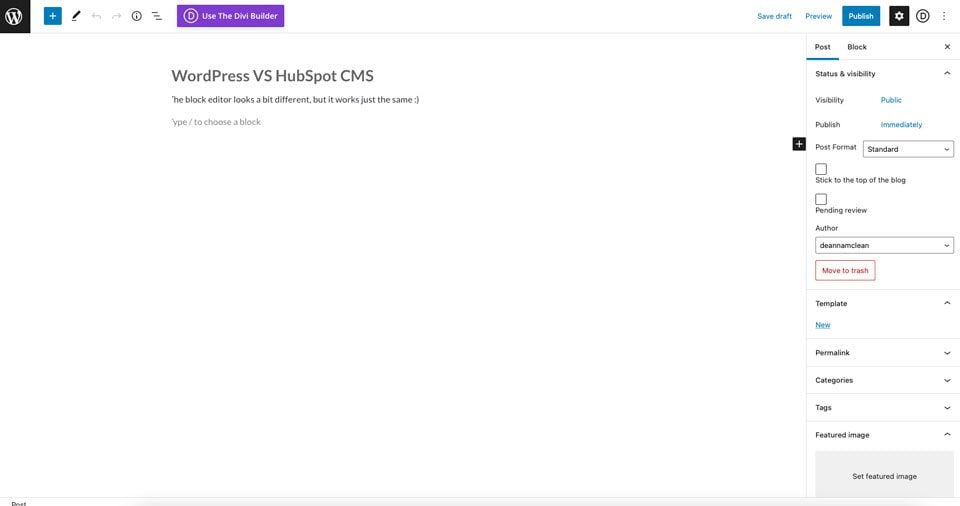
    WordPress began primarily as a blogger’s best friend. Publishing pages and posts is basically the meat of WordPress. There are two ways to insert content into the editor – either with the classic editor or Gutenberg blocks. The classic editor functions very much like Microsoft Word, Google Docs, or Apple pages. Creating a post with the classic editor is simple, and can be accomplished in only a few minutes.

    Classic editor

    The WordPress Block editor steps things up a notch. It functions the same as the classic editor, but gives users added functionality. Images, social media links, videos, and more are easily added as blocks of content in blocks.

    Gutenberg editor

    Web.com

    In order to publish posts, Web.com requires you to enable the blog. The process is easily done with the click of a button.

    Enable blog

    From there, users can add their first post. The post editor looks a lot like Gutenberg’s editor. You can simply start typing. You can add images, links, and text, just like in any other post editor. Publishing is easy, too. Pushing your content out to the world is one button click away.

    Web.com publishing

    WordPress vs Web.com: Security

    Website security is one of the most important issues one must consider when creating a website. In recent years, cyber crimes have increased exponentially. With ransomeware, malware, bot intrusion, and denial of service attacks (DDoS) rampart, you’re setting yourself up for major problems if your site and customers aren’t protected. Thankfully, both WordPress and Web.com are capable of fending off such attacks.

    WordPress

    As previously mentioned, WordPress is highly customizable. And depending on your themes and plugins, your website can be vulnerable to security threats. That’s why it is important to understand WordPress security beforehand. There are a number of free security plugins available to WordPress users that help protect their website. Plugins such as WordFence and Sucuri are good options. Plus, all hosting providers offer security features that help to protect WordPress sites. Some hosts, such as Divi Hosting by Cloudways, offer bot protection, a dedicated firewall, SSL certificates, and malware protection in their hosting plans. In addition to that, most WordPress hosting providers have bumped up their TLS security by making versions 1.2 and 1.3 standard practice.

    Cloudways Divi Hosting

    Web.com Security Options

    Web.com gives its customers an SSL certificate with every plan. Unlike WordPress, Web.com doesn’t offer free security plugins that you can add on to your website. If you require additional security, and most people will, you’ll need to upgrade your Web.com plan with their security add-on service. For $4.99 per month, Web.com will scan your site for any problems that may arise. Additionally, users will give their customers peace of mind with identity theft protection, and a built-in VPN client. Plus, there are product updates and training resources available to help you get the most of your security package.

    WordPress vs Web.com security

    Web.com WordPress Hosting

    Web.com does offer WordPress Hosting for those who want to host, manage, and design a WordPress site on Web.com. This might be a good option for those who need more customization capabilities that come with WordPress plugins, but also enjoy using the Web.com platform.

    Conclusion

    Now that we’ve explored some of the features of both WordPress and Web.com, one thing is clear. They are very different products. While Web.com does offer a very nice site builder, their customization options are pretty limited. On the security front, both WordPress and Web.com have good options to ensure your site is protected. However, with so many WordPress hosting companies to choose from, you’ll have plenty of research to do on who to choose and how much you should pay, should you decide to go with WordPress. If you’re looking for a WordPress hosting provider, we suggest taking a look at Cloudways or SiteGround. Both offer excellent features that will give you all of the security features that you need.

    In regards to publishing tools, options are comparable when we look at WordPress vs Web.com. Both are easy to use, and only take a few minutes to send your content out into the world. When choosing between WordPress and Web.com, it all depends on what your needs are. Beginners will be right at home with either platform, although the learning curve is a bit steeper with WordPress.

    Have you used Web.com? How do you feel it stacks up against WordPress? Let us know in the comments section below.

    The post WordPress vs Web.com appeared first on Elegant Themes Blog.

  • A Beginner’s Guide to SEO Copywriting

    Helping your content rank in the SERPs is one of your primary objectives as a website or business owner. A major piece of this puzzle is making sure you incorporate SEO copywriting into your site, as well as any relevant content and marketing materials.

    If you’re new to SEO copywriting, then you’ll need to learn how to incorporate SEO keywords into your overall content strategy. In this post, we’ll walk you through the basics of SEO copywriting, show you what the process looks like, then share some best practices to get you started on the right foot.

    What is Copywriting?

    Copywriting is the process of writing sales-driven copy that prompts your audience to take an action that results in conversions, revenue, or both. You encounter copywriting every day, whether you’re browsing a website, opening an email, or scrolling past a Facebook Ad. Its primary aim is to drive conversions and sales, which means you’ll see a call-to-action (CTA) with a clear next step, such as clicking a button, signing up for a newsletter, or purchasing a product.

    You’ll see copywriting in places such as:

    • Sales and product pages
    • Ads (both online, in print, audio, and video)
    • Social media posts with a CTA
    • Email newsletters that drive sales or conversions
    • Direct mail materials

    Copywriting is commonly confused with content writing, which also factors heavily into the marketing materials we see both online and off. However, the goals of each writing style aren’t the same. Let’s take a look at the differences between copywriting and content writing.

    How is Copywriting Different from Content Writing?

    While copywriting is more sales-driven, content writing aims to educate the reader with high quality content. Furthermore, content writing is about warming leads rather than asking them to make a purchase immediately. Content writing is more likely to take its time leading you to an eventual sale or conversion of some kind.

    An article like this one is a good example of content writing. In this article, the primary goal is to educate you about SEO copywriting. The main call to action at the end of this article is to leave a comment, not make a purchase. There’s not a hard sales pitch at the end of the blog post. Instead, you’ve got a few different options depending on what you want to do next.

    If you’re familiar with Elegant Themes and your interest is piqued, you can go ahead and check out Divi when you’re done reading. If not, you can move on to another educational post and learn a bit more. Later, you might choose to make Divi part of your WordPress website because of the expertise you’ve gleaned from our content.

    In a nutshell, content writing seeks to add value (first) which can eventually lead to sales (second). Copywriting on the other hand, is sales-driven from the start.

    For a more in-depth explanation, read our post on copywriting vs. content writing.

    What is SEO Copywriting?

    SEO copywriting uses targeted keywords and phrases to help your content rank higher on search engines. Because it’s primarily sales-driven, SEO copywriting uses the power of SEO keyword optimization to create high-converting sales copy that also ranks higher in search results. All in all, it’s a powerful strategy for leveling up your sales copy.

    Both SEO copywriting and SEO content writing use the same basic SEO techniques, although the writing style and overall goals differ. While SEO-optimized copywriting drives conversions, such as on a sales page, it makes appearances in pieces of content writing, too.

    Blog posts, for instance, contain CTAs that drive readers directly to a product or service offer. Other places where your SEO copywriting and content writing might overlap include your email marketing, long-form sales pages (which often educate the reader before the sales pitch), social media content, and more.

    The Process of SEO Copywriting

    Wondering what the SEO copywriting process looks like? It can be subjective based on your business, the client, deliverables, and your objectives. Still, there are some basic parts of the process that should be pretty much the same no matter what. Let’s take a look at those.

    Ideation: Pitch or Assignment?

    When it comes to SEO copywriting, the ideation process may look different from one situation to the next. If you’re writing for yourself, you may come up with your own ideas using keyword research tools. If you’re working for a client, you might pitch your own topics. On the other hand, the client might provide assignments to you. Regardless, for SEO copywriting, you’ll want to make sure those topics topics have the necessary keywords to grow help grow rankings as well as sales.

    Pre-Writing

    Pre-writing involves taking your sales content ideas and prepping them for drafting. This process usually involves SEO keyword research (including search intent), topic research, and outlining

    Here are some of the different scenarios I’ve experienced over the years as a copywriter:

    • Writer pitches the topic, conducts SEO and topic research, and builds an outline.
    • Client pitches the topic, then assigns SEO research, topic research, and outlining to the writer.
    • Client pitches the topic, conducts SEO and topic research, and provides the writer with a content brief (or outline) including the focus and secondary keywords they want to target.

    After you have your topic and keywords in hand, you’ll need to do some additional research on your topic. You can take a look at competitors’ posts to get a feel for what’s already ranking in the SERPs. Additionally, you’ll want to search and compile source materials to help you build your post. Always cite your sources. Make sure to use SEO links including external and internal links. Linking to other websites with domain authority, as well as linking to content within your site, will also help to boost your SEO ranking.

    Once you’ve got your topic, SEO keywords, and research, you can build your title and your outline. If possible, make sure you put your main SEO key phrase into your title and the first paragraph of your post. Then, use an SEO plugin such as Yoast as you write to help you distribute the key phrase at the optimal level.

    Oftentimes, you’ll have more than one SEO keyword you want to target. You should have one primary key phrase, along with some related secondary phrases. Try to include some of those secondary phrases as long-tail keywords into the text, but only where they naturally flow. Avoid keyword-stuffing and strategically place your selected phrases here and there when appropriate.

    Writing

    Now, it’s time to start drafting your article. If you’re writing for your own website, you likely have a good idea of how long you want your content to be. However, if you’re not sure, we’ve created a guide on the best word count for SEO.

    SEO copywriting should tell a story that compels your readers to take action. Storytelling is one of the most important aspects of marketing, particularly if you want your audience to feel a profound connection with your brand. As a general rule, marketing content works well when it’s open, approachable, and conversational.

    Your SEO copywriting story should have a clear beginning, middle, and end. Depending on the kind of content and its purpose, you might want to explore different sales copy frameworks to help you determine structure. Ray Edwards’ P.A.S.T.O.R. formula is one of my favorites for sales pages and email sequences. There are many examples out there, so test a few to find out what works best for you.

    Use Plugins and Apps to Aid in Clearer Writing

    One way to make sure your content is easy to read is by paying attention to the readability score in your Yoast SEO plugin. This tool will help you keep your writing clear and understandable. Additionally, you’ll get tips on how to improve it further. Sometimes, I’ll run my articles through Hemingway if I’m struggling to simplify complex sentences.

    As you write, you’ll want to make sure you break your content down into sections with H2 and H3 subheads. Breaking content down into bullet lists can also improve readability. Making your SEO copywriting as accessible and easily digestible as possible can help your overall SEO ranking. If you’d like, we have a more in-depth guide to using heading tags for SEO.

    While we’re talking about plugins, it’s important to note that you’ll need a strong meta description for each piece of content. If you’re using Yoast, there’s a plugin right inside your WordPress interface. We’ve written a more in-depth guide on how to write the perfect meta description.

    Don’t Forget the CTA

    Once you’ve drafted your content, broken it up into sections that flow well and make sense, and incorporated your internal and external links, it’s time to add a CTA. Where does your reader need to go next? What do you want them to do? Here are some possibilities:

    • Sign up for your newsletter
    • Sign up for a free download (lead magnet)
    • Enroll in a course
    • Purchase a product
    • Hire you for a service
    • Click through to a related post
    • Schedule a consultation
    • Buy tickets to an event (online or in-person)

    Revision and Publication

    Once you’ve drafted your content, make another pass to clean up any straggling issues (such as grammar or rambling sentences). You’ll also want to make sure to compress image sizes (Page speed does affect SEO). Then, submit it to your client, if applicable. They might come back to you with editorial requests, at which point you’ll need to make final edits and re-submit.

    Finally, it’s time to publish. That might mean publishing via a content management system (CMS) like WordPress or taking a sales page live on your website. Don’t forget to upload a featured image and include any other relevant images in your content. Then, schedule or publish your post.

    4 SEO Copywriting Approaches, Techniques, and Best Practices

    Now that you understand the basics of SEO copywriting, let’s jump into a few best practices.

    1. Consider search intent. Why are your readers searching for the specific topics you’re planning to write about? Tools such as SEMRush can help you analyze search intent, which ultimately helps you to conduct better keyword research–which ultimately leads to better SEO copywriting.
    2. Use the Inverted Pyramid to structure your writing. The Inverted Pyramid is a writing style that journalists use to structure breaking news stories. It places the main idea of a story in the first paragraph (sometimes the first sentence), ensuring that readers get a quick-hit overview of the topic ahead. This writing style translates very well into some forms of copywriting for marketing, such as blogging and social media copy. As a writer with journalism training and experience, I’ve found myself using the Inverted Pyramid often throughout my marketing career.
    3. Stay on-brand. Your SEO copywriting should be consistent with your brand voice. If the tone of your sales writing veers too far from your copy everywhere else, it’ll feel disjointed to your readers and will affect both SEO and conversions.
    4. Adapt style and tone for specific audiences. If you’re writing for multiple brands and audiences, keep your finger on the pulse of who you’re writing for at all times. You’ll need to be able to shift from one client to the next to maintain consistency for them.

    Conclusion

    If you want your content to rank well in the SERPs, then learning the basics of SEO copywriting is an absolute must. Your copy comes into play in a big way when people use search engines to look for the topics you write about. As a result, you want your content to be easy to find.

    Do you leverage SEO copywriting for your website or business? Thinking about getting started? Leave us a comment and let us know.

    Featured image via Julia Lazebnaya / shutterstock.com

    The post A Beginner’s Guide to SEO Copywriting appeared first on Elegant Themes Blog.

  • How to Organize Your Templates in Divi’s Theme Builder Library

    Consider using the new Divi Theme Builder Library in your workflow as you build your next website. With its integration with the Divi Cloud, you have the power to take your templates from one site to another. It can get tricky to keep this newfound creative expression under wraps though. Before you get out of hand with loading your library, let’s learn how to organize templates in Divi’s Theme Builder Library.

    Let’s Start with the Basics: Naming Conventions

    When working on a large project, as we are working through ideas and iterations, our workspace, documents, and folders can get a little bit… disheveled…

    A real life example of a disorganized logo design folder

    It is entirely possible to bring this same mindset to your Divi Theme Builder Library items. With new layout packs released almost weekly and freebies abounding, your library can easily get swamped. As such, having a standardized way of organizing your templates through having a naming convention is advised.

    A cross-section of a Divi Theme Builder with multiple templates

    In the Divi Theme Builder example above, we notice that each template follows a similar naming convention. Firstly, the name of the template pack is written down in sentence case. Next, there is a dash. Lastly, the type of freebie or template is stated. We can take these same learnings to organize templates in Divi’s Theme Builder Library.

    An example of an organized Divi Theme Builder Library

    In this example, we see that naming conventions aren’t followed as strongly. Nevertheless, it is a far cry from our logo design folder! Notice that at the very least, a sentence case is used with each template. Also, the type of template is denoted within the name.

    Use Tags to Make Searching Easier

    The Divi Theme Builder comes with three ways to search and find your templates. These are search (with filter), categories, and tags.

    Search with filter, tags and categories

    By having a consistent naming convention, it is easier to look for items in our library. For example, by using the word header in all our header templates, when we search for “header”, all header templates will show up. This is where tags can come in. Irrespective of your naming convention, if you were to tag all your header templates with the tag header, you will get the same result when you search.

    Manage tags and categories

    It is also possible to manage your tags and categories within the Divi Theme Builder Library. If you make a typo, or want to add alternatives, you can do so.

    Organize Templates in Divi’s Theme Builder Library with Categories

    Just like categories on a WordPress website, categories in the Divi Theme Builder Library allow you to group your templates together. Perhaps you want to have a category for all your blog post templates. Maybe you want a category for all your red templates. However you’d like to organize your templates, a category will help make your life easier.

    Local categories in the Divi Theme Builder Library

    Divi Cloud Categories vs. Local Categories

    A special note needs to be made for categories. In the Divi Theme Builder Library, you can make two types of categories. These categories are Divi Cloud Categories and Categories. As the name suggests, Divi Cloud Categories allow you to save templates to the Divi Cloud. However, these categories are not available on your local Divi installation. Your local Divi categories are relegated only to the site that they were built on.

    Managing categories in Divi Theme Builder

    Should you decide to manage your categories in the Divi Theme Builder Library, you are also able to manage your Divi Cloud Categories as well.

    Using Template Sets to Organize Templates in Divi’s Theme Builder Library

    The final way in which you can organize your templates within Divi’s Theme Builder Library is via Template Sets. A Template Set is a group of templates that were created within the Divi Theme Builder.

    A preview of a Theme Builder Library Template Set

    The above screenshot shows that currently, there are a few Template Sets that are matched to different layout pack categories provided by Divi. Template Sets can help you organize your Divi Theme Builder Library by helping you to create packs of templates that speak together. Take for example the Landscaper Set. Inside this Template Set, we have all built upon the free Landscape Maintenance Layout Pack, added it’s header and footer, as well as the blog post template. Changes were also made to all of these templates to customize it for our needs. If we were to simply have all those templates within our Divi Theme Builder, you’re looking at quite a few templates. However, by putting them all within a Template Set, we keep our Divi Theme Builder neat. In addition to a neat and tidy Theme Builder, we can easily reference all the templates within the set.

    Template Sets and their categories

    It is important to note that Divi Theme Builder Template Sets have their own set of categories. These categories are different from the categories used to organize standalone Divi Theme Builder Templates. Standard Theme Builder Templates and Divi Template Sets cannot be organized in the same categories. Similar to the standard Divi Theme Builder Template, there is also a different type of category for Template Sets that reside on the Divi Cloud.

    In Conclusion

    There are a number of ways to keep your Divi Theme Builder Library organized. Adopting a naming convention for your Divi Theme Builder Library is a practice that can assist you in keeping your library organized. Following this, you may want to consider adding tags to your individual templates. Tags make it easier to filter and search through your library. Noticing that there is a difference between categories on your local Divi install and Divi Cloud is an important point to remember. Also, don’t forget that you cannot store Template Sets and Templates in the same categories. With all of these things in mind, you have the tools that you need to ensure that your Divi Theme Builder is organized for your next project.

    The post How to Organize Your Templates in Divi’s Theme Builder Library appeared first on Elegant Themes Blog.

  • Get a FREE Seafood Restaurant Layout Pack for Divi

    Hey Divi Creators! Thanks for joining us for the next installment of our weekly Divi Design Initiative; where each week, we give away a brand new, free Divi Layout Pack from our design team to you.

    This time around, the design team has created a beautiful Seafood Restaurant Layout Pack that’ll help you get your next seafood restaurant website up and running in no time!

    This layout pack includes:

    7 Premade page layouts strategically designed for any seafood restaurant website (including a footer design)
    – Original, royalty-free photos and graphics + customizable source file (see below)
    – Plus, a large collection of pre-designed website elements that are customizable and reusable anywhere.

    This layout pack is available right inside Divi for all Divi customers for FREE as the latest addition to our growing Divi library of hundreds of premade layout packs, thousands of page designs, and countless web design elements and resources.

    divi layout

    Check Out The Divi Seafood
    Restaurant Layout Pack Below

    Get it for free today!

    seafood restaurant website

    Landing Page Design

    seafood restaurant website

    View The Live Layout Demo

    Home Page Design

    seafood restaurant website

    View The Live Layout Demo

    About Page Design

    seafood restaurant website

    View The Live Layout Demo

    Contact Page Design

    View The Live Layout Demo

    Blog Page Design

    View The Live Layout Demo

    Menu Page Design

    seafood restaurant website

    View The Live Layout Demo

    Reservations Page Design

    seafood restaurant website

    View The Live Layout Demo

    Key Features

    If you’re looking to build a seafood restaurant website, you’ll want to check out the Seafood Restaurant Layout Pack for Divi! This stunning layout pack lets you put your restaurant in the spotlight by sharing your menu alongside beautiful page structures and visuals.

    Live Demos

    Click the links below to see a live demo for each of the layouts included in the pack.

    1. Seafood Restaurant Landing Page (live demo)
    2. Seafood Restaurant Homepage (live demo)
    3. Seafood Restaurant About Page (live demo)
    4. Seafood Restaurant Contact Page (live demo)
    5. Seafood Restaurant Blog Page (live demo)
    6. Seafood Restaurant Menu Page (live demo)
    7. Seafood Restaurant Reservations Page (live demo)

    Access This Layout Right Now
    Directly from Your Divi Builder

    Since Version 3.0.99 of Divi, you can find and import any of the layouts included in this pack (along with ALL of Divi’s Premade Layout packs) directly from the Divi Builder. They are already waiting for you.

    To access your new layout, simply activate the Visual Builder when editing a page and look for the “Load From Library” icon in the page settings bar (it looks like a plus symbol). Click this icon to launch the Load From Library popup. Under the Premade Layouts tab, you can easily find the new layout by scrolling through the list of layout packs. Once you find the Seafood Restaurant Layout Pack, click on it. You will see all the individual layouts included in the pack. Select the layout you want to use and then click the “Use This Layout” button.

    seafood restaurant website

    For more, check out this video to learn how you can get this layout pack up and running today.

    Subscribe To Our Youtube Channel

    Authentication Required

    Before you can download Premade Layouts from the Divi Library you must authenticate your Elegant Themes Subscription. You can do this by navigating to Divi > Theme Options > Updates. There you can enter your username and API key and save changes.

    Hostel Layout Pack for Divi

    You can find your API Key under your members area on the Elegant Themes site. After you enter the Username and API Key, you will gain immediate access to our library of hundreds of free layouts (including this one). If you haven’t done this, when you click to import a layout to your page, you will be prompted to enter your Elegant Themes Membership Username and API Key.

    Use Layout Images for FREE with No Licensing Restrictions

    seafood restaurant website

    The image assets included with these layouts (icons, illustrations, photos, etc.) have no licensing restrictions. This means you can use them in all of your commercial projects without having to worry about paying licensing fees or attributing the photographer. Use them in your commercial websites, sell them within your Divi child themes, include them in your own Divi layout packs or just use them on your blog. We know how challenging it can be to find good photos and how confusing and scary the licensing that governs those photos can be. We want to fix that problem for our users.

    Download the Full Res Image Assets

    New Layout Pack Every Week!

    We hope you enjoy this layout pack. We look forward to hearing your opinions in the comment section below. Make sure you check out next week’s layout pack as well!

    The post Get a FREE Seafood Restaurant Layout Pack for Divi appeared first on Elegant Themes Blog.

  • Download 4 FREE Blog Post Template Sets for Divi

    Over the years we’ve provided a ton of freebies for your next Divi website. With the release of the Divi Theme Builder Library and Divi Cloud, we’re rounding up some of our freebies into template sets that you can add to your next project. For today’s post, we’ll be focusing on our Blog Post Template freebies. Not sure what a Blog Post Template is? Let’s take a look and find out!

    What is a Blog Post Template?

    Blog posts are the foundation of WordPress. Before WordPress became the main website builder of the internet, it was a humble blogging platform. With the advent of pages in WordPress 1.5, WordPress began making waves as a content management system. However it has never forgotten its blogging roots. With the Divi Theme Builder, we can create templates for our blog posts. We can even assign different templates to all blog posts in a tag or category. If we wanted to, we could even assign a different template to every single blog post on our website (I wouldn’t recommend it, but you could do it!).  Markedly in Divi, we use Blog Post Templates to set a consistent style for our blog posts, whether it be a single post or all the posts on our website.

    What is a Template Set?

    In the new Divi Theme Builder Library, we can group a number of templates together. This is called a Template Set. As an example, in your current Divi Theme Builder, you may have created a template for your homepage, your blog posts and your product pages. You can add all of these templates to a template set. Then, you can add this Template Set to your Divi Cloud account so that you can access it on another site at a different time.

    Four FREE Blog Post Template Sets

    In this freebie, we’ll be providing you with four FREE Blog Post Template Sets. We’ve organized each set according to their industry. Let’s take a look at the templates included in each set.

    Art & Design Template Set

    The Art & Design Blog Post Template Set is geared toward those in creative fields like artists and creators.

    Architecture Firm Blog Post Template

    Architecture Firm Blog Post Template

    Craft School Blog Post Template

    Craft School Blog Post Template

    Creative CV Blog Post Template

    Creative CV Blog Post Template

    Film Lab Blog Post Template

    Film Lab Blog Post Template

    Freelance Writer Blog Post Template

    Freelance Writer Blog Post Template

    Home Staging Blog Post Template

    Home Staging Blog Post Template

    Interior Design Blog Post Template

    Interior Design Blog Post Template

    Renovation Blog Post Template

    Renovation Blog Post Template

    Painter Blog Post Template

    Painter Blog Post Template

    Community & Non-Profit Template Set

    Our Community & Non-Profit Template Set speaks to those who have social good as their main purpose.

    Charity Blog Post Template

    Charity Blog Post Template

    Chess Club Blog Post

    Chess Club Blog Post

    NGO Blog Post Template

    Food & Drink  Template Set

    Restaurants and food vendors this set is for you.

    Bistro Blog Post Template

    Bistro Blog Post Template

    Cooking School Blog Post Template

    Cooking School Blog Post Template

    Home Baker Blog Post Template

    Home Baker Blog Post Template

    Italian Restaurant Blog Post Template

    Italian Restaurant Blog Post Template

    Meal Kit Blog Post Template

    Meal Kit Blog Post Template

    Nutritionist Blog Post Template

    Nutritionist Blog Post Template

    Pizzeria Blog Post Template

    Pizzeria Blog Post Template

    Produce Box Blog Post Template

    Produce Box Blog Post Template

    Sushi Restaurant Blog Post Template

    Sushi Restaurant Blog Post Template

    Winery Blog Post Template

    Winery Blog Post Template

    Health & Fitness Template Set

    Finally, if you’re in the fitness industry, this set will have your blog posts looking sharp.

    Acupuncture Blog Post Template

    Acupuncture Blog Post Template

    Family Doctor Blog Post Template

    Family Doctor Blog Post Template

    Fitness Coach Blog Post Template

    Fitness Coach Blog Post Template

    Golf Lesson Blog Post Template

    Golf Lesson Blog Post Template

    Meditation Center Blog Post Template

    Meditation Center Blog Post Template

    Psychologist Blog Post Template

    Psychologist Blog Post Template

    Telehealth Blog Post Template

    Telehealth Blog Post Template

    Tennis Club Blog Post Template

    Tennis Club Blog Post Template

    Therapy Blog Post Template

    Therapy Blog Post Template

    Virtual Fitness Blog Post Template

    Virtual Fitness Blog Post Template

    Women’s Health Center Blog Post Template

    Women's Health Center Blog Post Template

    Download All 4 FREE Blog Post Template Sets for Divi

    To lay your hands on all 4 of the free Blog Post Template Sets for your Divi Layout Library, you will first need to download it using the button below. To gain access to the download you will need to subscribe to our newsletter by using the form below. As a new subscriber, you will receive even more Divi goodness and a free Divi Layout pack every Monday! If you’re already on the list, simply enter your email address below and click download. You will not be “resubscribed” or receive extra emails.

    How to Upload The Blog Post Template Sets

    Go to Divi Theme Builder

    To upload the template, navigate to the Divi Theme Builder in the backend of your WordPress website.

    Getting started with the Divi Conference Layout Pack

    Upload Template Set

    Then, in the top right corner, you’ll see a plus sign icon. Click on the icon. This will open the Template Sets Library.

    Open the Sets Library within the Divi Theme Builder

    Once you are in the Template Sets Library, click on the two arrows icon.

    Upload template set

    Locate your .JSON file from the ZIP folder. Upload it to the library by clicking No File Selected.

    Upload template set .JSON file from computer

    Once you have selected your file, it’ll display the name of the file. Next, click the blue Import Theme Builder Library Templates button.

    After successfully uploading template set .JSON file from computer

    As your Template Set is uploading, you’ll notice a modal pop-up with a progress bar letting you know how your import is doing.

    Import progress

    Please Note: Due to the number of post templates and assets within each set, it can take some time for the set to install. Please be patient.

    Using Your Template Set

    After the Template Set has been added to your library, click on the kebab menu on the library item.

    Using your new template set

    In the menu that pops up, select Use This Set. This will begin the process to add the templates within your new Template Set to your Divi Theme Builder.

    Click use this set to add the templates within the template set to your Divi Theme Builder

    An Import Templates modal box will appear. Because this template set has multiple Blog Post Templates within, we’ll uncheck the Override Existing Assignments checkbox. Remember as  you’re working on your site, to set the templates to your chosen page, post, product, etc. assignment in the Divi Theme Builder. Next, click on the Import Divi Builder Templates button in blue.

    Import template modal box

    Please Note: Due to the number of post templates and assets within each set, it can take some time for the set to install. Please be patient. Also, template thumbnails do take some time to generate.

    Save Changes

    Once your Template Set has been installed, you’ll notice that all the Blog Post Template titles are in red. This is because as they stand, they have not been assigned to a page, post, product, etc. Don’t forget to assign them once you have carried out your changes. Press the green Save Changes button to save your new template set in the Divi Theme Builder.

    Save Template Set into the Divi Theme Builder

    New Freebies Every Week!

    We hope you’ve enjoyed our very first Blog Post Template Set freebie! We look forward to hearing your opinions in the comment section below. Make sure you check back next week for more freebies.

    The post Download 4 FREE Blog Post Template Sets for Divi appeared first on Elegant Themes Blog.

  • 5 Best WordPress VR and Metaverse Plugins

    Virtual Reality (VR) has become increasingly popular in recent years. It enables users to enjoy immersive experiences from the comfort of their own homes. Furthermore, adding this feature to your website can help make your content more interactive, which may lead to more conversions. Fortunately, there are several WordPress VR plugins you can use.

    In this post, we’ll closely examine WordPress VR plugins and how they work. Then, we’ll review some of the best options on the market. Let’s get started!

    What Are WordPress VR Plugins?

    When we talk about Virtual Reality (VR), we refer to features that mimic real-life experiences. You may also hear about “the metaverse“, which is an online connected network of VR and augmented reality. This simulated environment can take many forms.

    For example, during the COVID-19 pandemic, many attractions around the world created immersive 360° tours on their websites:

    The Smithsonian Virtual Tour

    These virtual tours are also offered by other businesses, including real estate agents and online shops:

    A virtual tour of a property

    If you use WooCommerce or run an online store, a WordPress VR plugin can help you improve the User Experience (UX). It gives users a clearer idea of what an item looks like in real life, whether people are shopping for jewelry, glasses, or furniture. This interactivity can help them make more informed decisions, which may lead to more conversions.

    You might also use a WordPress VR plugin to offer virtual tours of your premises. Alternatively, you can take site visitors on a virtual trip to different destinations if you work in the travel industry. These interactive experiences can help increase user engagement and draw more visitors to your physical site.

    5 Best WordPress VR and Metaverse Plugins

    As we have seen, different types of businesses can benefit from using a VR plugin. Now let’s look at some of the best options for WordPress sites. We’ve selected tools that receive frequent updates and have a substantial number of positive reviews, making them reliable plugins for your website.

    1. Flat 360° Panoramic Image Viewer

    Flat 360° Panoramic Image Viewer

    Flat 360° Panoramic Image Viewer turns your static panoramic photos into an immersive viewing experience. It gives users a 360° view of a particular location, with navigation features that enable them to proceed at their own pace.

    Key Features for Flat 360° Panoramic Image Viewer:

    • An auto-scroll feature with sliding controls
    • Mobile and touchpad support
    • Can be added to any post, page, or widget using a shortcode
    • Support for multi-site configurations

    Using Flat 360° Panoramic Image Viewer in WordPress

    With this plugin, you can give users a realistic view of a room, shop, or outdoor location. Additionally, you can enable different sliding effects for a more interactive experience.

    Flat 360° Panoramic Image Viewer is for you if…

    • You rent a place or run a B&B and want to give users an immersive view of your rooms.
    • You have a travel website with panoramic photos.

    Flat 360° Panoramic Image Viewer Pricing: $20. | Learn More About Flat 360° Panoramic Image Viewer.

    2. 360° Photo Viewer

    360 Photo Viewer

    360° Photo Viewer is another WordPress VR plugin that enables you to turn panoramic images into virtual tours. You can use it for rooms, buildings, shops, and more. Additionally, you can add markers to your content and display information about different objects.

    Key Features for 360° Photo Viewer:

    • Show unlimited locations and add as many markers as you want.
    • Configure different controls, animations, and more.
    • Use the plugin with WooCommerce.

    The 360 Photo Viewer for WooCommerce

    You can use this plugin to create an immersive shopping experience in your online store. For example, you can offer a virtual tour of your store and display informative markers for different products.

    360° Photo Viewer is for you if…

    • You want a WordPress VR plugin for your WooCommerce store.
    • You run a museum website or a similar attraction and want to offer educational tours.

    360° Photo Viewer Pricing: $32. | Learn More About 360° Photo Viewer.

    3. Modern Video Player for WordPress

    Modern Video Player

    Modern Video Player is a video and audio player that supports a wide range of media formats, including 360° virtual reality videos. It enables you to display subtitles in multiple languages, control playback speed, create password-protected content, and more.

    Key Features for Modern Video Player:

    • Publish self-hosted virtual reality videos.
    • Embed videos from YouTube and Vimeo.
    • Use AdSense integrations to monetize your content.

    A 360 degree video on Modern Video Player

    With Modern Video Player, you can share 360° virtual reality videos and panoramic images. Moreover, you can create unlimited playlists with as many videos as you like.

    Modern Video Player is for you if…

    • You publish video content on your site.
    • You have an international audience and want to offer VR experiences in different languages.

    Modern Video Player Pricing: $49. | Learn More About Modern Video Player.

    4. WPVR

    WPVR plugin

    WPVR lets you create virtual tours on your WordPress site. It has an easy-to-use interface that enables you to turn panoramic images into a realistic experience.

    Key Features for WPVR:

    • Use engaging hotspots, such as images and buttons, to display content on-click or on-hover.
    • Embed 360° videos from YouTube and Vimeo.
    • Use an auto-resize feature for mobile phones to make your content responsive.
    • Utilize dedicated Gutenberg blocks and widgets to embed your tours more easily.

    The WPVR interface

    WPVR gives you a live tour preview on the back end. This way, you can see what your content looks like as you’re creating it. Additionally, you can add a variety of features to your videos, including mouse drag control, auto rotation with speed control, scene fade animation, and more.

    WPVR is for you if…

    • You want to create responsive virtual tours of your property, showroom, or store.
    • You have a travel blog and want to create customized 360° videos of your trips.

    WPVR Pricing: Free, with a premium version that starts at $79.99 per year. | Learn More About WPVR.

    5. iPanorama 360

    iPanorama plugin

    Another WordPress VR plugin you can use is iPanorama 360. This tool enables you to create virtual tours of rooms and buildings. You can use elements such as text, images, and videos for a more interactive experience.

    Key Features for iPanorama 360:

    • Utilize an easy-to-use virtual tour builder to preview your work before publishing it.
    • Create markers, tooltips, and popups.
    • Control user permissions for authors and editors on your site.
    • Use a responsive design with two types of themes: light and dark.

    The iPanorama 360 tour builder

    The iPanorama 360 tour builder comes with a broad range of options. For instance, you can enable autorotate, insert markers, add an audio track, and more.

    iPanorama 360 WPVR is for you if…

    • You’re looking for a WordPress VR plugin that facilitates team collaboration.
    • You want to create educational tours for museums, galleries, and more.

    iPanorama Pricing: Free, with a premium version that starts at $39. | Learn More About iPanorama 360.

    Final Thoughts on WordPress VR plugins

    Virtual Reality (VR) enables users to explore a place from their couches. Furthermore, it gives business owners the opportunity to create more immersive experiences on their sites. For instance, you can use a WordPress VR plugin to offer virtual tours of your property and store.

    If you have a WooCommerce shop, you can use 360° Photo Viewer to create a real-life shopping experience. Meanwhile, if you have a travel website, WPVR and Flat 360° Panoramic Image Viewer enable you to turn your panoramic photos into immersive tours.

    Do you have any questions about the WordPress VR plugins featured in this post? Let us know in the comments section below!

    Featured image via Visual Generation / shutterstock.com

    The post 5 Best WordPress VR and Metaverse Plugins appeared first on Elegant Themes Blog.

  • Download a FREE Category Page Template for Divi’s Online Yoga Layout Pack

    Hey Divi Nation! Thanks for joining us for the next installment of our weekly Divi Design Initiative where each week, we give away brand new freebies for Divi. This time around we’re building upon the Online Yoga Layout Pack with a brand new Category Page Template that matches the rest of the pack perfectly. Hope you enjoy it!

    divi layout

    Check Out The Online Yoga
    Category Page Template Below

    Get it for free today!

    Category Page Template for Divi's Online Yoga Layout Pack

    Category Page Template for Divi's Online Yoga Layout Pack

    Download The Category Page Template For The Online Yoga Layout Pack

    To lay your hands on the free Online Yoga Category Page Template, you will first need to download it using the button below. To gain access to the download you will need to subscribe to our newsletter by using the form below. As a new subscriber, you will receive even more Divi goodness and a free Divi Layout pack every Monday! If you’re already on the list, simply enter your email address below and click download. You will not be “resubscribed” or receive extra emails.

    How to Upload The Template

    Go to Divi Theme Builder

    To upload the template, navigate to the Divi Theme Builder in the backend of your WordPress website.

    Online Yoga category page template

    Upload Website Template

    Then, in the top right corner, you’ll see an icon with two arrows. Click on the icon.

    Online Yoga category page template

    Navigate to the import tab, upload the JSON file that you could download in this post, and click on ‘Import Divi Theme Builder Templates‘.

    Online Yoga category page template

    Save Divi Theme Builder Changes

    Once you’ve uploaded the file, you’ll notice a new template with a new body area that has been assigned to All Category Pages. Save the Divi Theme Builder changes as soon as you want the template to be activated.

    Online Yoga category page template

    How to Modify The Template

    Open Category Page Template Body Layout

    To modify the template’s elements, start by opening the template’s body layout.

    Online Yoga category page template

    Inside the Body Layout Editor, you can edit the design on the front end using the Divi Builder just like you would with a normal Divi page.

    About the Template

    This category page template has a few dynamic elements that will work automatically including:

    • Category Page Post/Archive Title
    • Post Slider Module – displays the first three posts for the current category page.
    • Blog Module 1 – displays the first post content for the current category page.

    Here is a quick illustration that identifies the dynamic elements of the Online Yoga Category Page Template.

    Category Page Template for Divi's Online Yoga Layout Pack

    Updating the Template’s Dynamic Elements

    Category Page Title

    The Page title is added using a text module that displays the post/archive title as dynamic content. By default, the category page title is going to be the name of the current category.

    To edit the title, open the settings for the text module, click the gear icon to edit the dynamic element, then update the before and after HTML as needed.

    Category Page Template for Divi's Online Yoga Layout Pack

    Blog Module(s)

    Posts for Current Page

    Since this is a template that has been assigned to all category pages for the site, there are going to be one or more blog modules that are set to display posts for the current page. This is how the template displays the posts dynamically for each category page.

    Category Page Template for Divi's Online Yoga Layout Pack

    You can update the rest of the settings (like post count) to adjust the module elements and design. However, make sure to keep the option Posts for Current Page set to YES.

    Post Offsets

    If more than one blog module is used on the template, the post offset option is used in conjunction with the previous blog module to preserve the order of dynamic posts by picking up where the previous blog module left off. For example, if the previous blog module had a post count of 1, the next blog module will have a post offset of 1 to display posts starting at #2.

    Category Page Template for Divi's Online Yoga Layout Pack

    Keep this in mind when making updates to blog modules’ post count and offsets.

    Updating the Template’s Static Elements

    Some elements on a category page template will need your immediate attention before using it live on your own website. These elements are called static because they will not update dynamically.

    Email Optin

    To allow the Email Optin Module to show up in your design, you’ll need to link an email account.

    Category Page Template for Divi's Online Yoga Layout Pack

    Contact Form

    You’ll add your email address to the Contact Form Module to ensure you receive emails.

    Category Page Template for Divi's Online Yoga Layout Pack

    Update Other Category Page Static Content

    Other content that isn’t going to change dynamically should be updated as well. These include all modules displaying text, links, social media follow icons, etc.

    New Freebies Every Week!

    We hope you’ve enjoyed the Online Yoga Layout Pack and the Category Page Template freebie that goes along with it. We look forward to hearing your opinions in the comment section below. Make sure you check back next week for more freebies!

    The post Download a FREE Category Page Template for Divi’s Online Yoga Layout Pack appeared first on Elegant Themes Blog.

  • How to Create a Survey on WordPress

    Surveys are an essential tool for marketers to gain valuable information about their customer base. Posing questions to customers is a great way to determine what is important to them, and is a valuable way to learn why they choose certain products. After all, knowledge is power. Marketers can take the information they gather from consumers to help them develop new marketing strategies that will increase sales. In this post, we’ll show you how to create a survey on WordPress using the Formidable Forms plugin. Let’s get started.

    Finding the Right Survey Plugin for WordPress

    Without question, the easiest way to create a survey form for your WordPress website is using a plugin. Thankfully, there are quite a few WordPress survey plugins to choose from that will allow you to build an effective survey form in WordPress. Choosing the best one for your needs depends on a few key factors including quality, cost, and ease of use. For this post, we’re going to use Formidable Forms.

    The Formidable Forms WordPress plugin.

    Formidable Forms is one of the most popular contact form plugins available today that allows you to create surveys for FREE using an easy-to-use form builder. With both free and pro options, you can create any type of form including surveys. It boasts a simple drag and drop interface, so it’s easy for users with any skill level to create all types of forms. The free version includes 14 basic fields that can be used to create surveys, contact forms, and more.

    The premium version is more robust, with over two dozen more choices to build forms and surveys including star rating, likert scale rating, NPS rating fields, and more premade templates. That being said, you don’t really need those to successfully build a survey form.

    How to Use Formidable Forms in WordPress to Create a Survey

    For this post, we’re going to use the free version of Formidable Forms to show you how simple it is to create a survey form.

    Installing the Plugin

    The first step is to install Formidable Forms. Simply log in to your WordPress site, then navigate to Plugins > Add New in your WordPress dashboard. Next, search for Formidable Forms in the search field. Finally, click the activate button to install Formidable Forms.

    create a WordPress survey install plugin

    Create a New Form

    Next, you’ll create a new form. Click on Formidable > Forms (lite). Then click the Add New button.

    Create a new form

    Next, select blank form and give your form a name. Finally, click the create button.

    Add Fields to the WordPress Survey Form

    The next step is to add fields to your form. Add a dropdown field to your form.

    dropdown field

    Dropdown Field Settings

    Click into the dropdown field to begin adding options to it. Give your field a field label. Type Which upcoming product are you most interested in? into the field. Next, with the first option selected, type Choose one. In the next option field, type Tablet Case. Next, click the Add Option button to add another option.

    create a WordPress survey field options

    Add three more options by clicking the Add Option button with the following field information: Laptop Case, Smartphone Case, and Mouse Pad.

    Add another dropdown field with the following information. Field label: What is most important to you? Dropdown options: Choose one, Cost, Quality, and Color options.

    Next, you’ll add a radio buttons field.

    radio buttons field

    Radio Buttons Field Options

    Leave the display format set to simple. Then, add the following two options: Natural and Vegan.

    radio buttons options

    Add the Final Dropdown Field

    Finally, add another dropdown field to the form. Give the field the following label: How often do you purchase leather goods? For the dropdown options, enter Choose one, Once a month, Once every six months, Once a year, and Hardly ever. Finally, click the update button to save your form.

    With all fields populated, your form should look like this:

    WordPress survey form fields

    Set Email Notifications for the WordPress Survey

    The next step is to tell WordPress the email address where entries should be sent. Navigate to the form settings tab. Next, click on Actions & Notifications. Then, toggle Send Email to on. Click the dropdown arrow next to the toggle to expand it. You’ll fill in an Action Name, then either leave the to field set to admin email, or enter an email address. Add in a subject line of Leather Goods Survey. Finally, click the update button once more.

    WordPress survey email settings

    Embed the WordPress Survey Into a Page or Post

    The final step is to embed your survey. The easiest way to embed a Formidable survey form in WordPress is using the Formidable Form Block. When editing a page or post in WordPress using the block editor, simply click to add a new block and search for the Formidable Form block.

    embed survey form

    Then choose the form you want to embed from the drop down.

    select the form

    That’s it!

    survey form

    The plugin options include a few ways to embed your survey form into a page. You can add it directly to a page on your site, create a new page, or insert a code manually. For this example, you could use a shortcode to add the form to your page. To do this, you would click the embed button in the form builder, select insert manually, and choose the WordPress shortcode option. Generate the shortcode then copy and paste it to your page.

    use shortcake

    If you are using a page builder, like Divi, you can easily add the shortcode to a code module to embed the form on your site.

    embed survey

    Styling the Form

    By default, Formidable Forms will have a generic appearance. If you want the form to match the styling of the layout pack, you will need to add a bit off CSS to achieve a similar look. For example, we can style the button for the form to match the other buttons on your theme. Here is an example of a snippet of CSS that restyles the button on the survey form.

    /*Formidable form button */
    
    .frm_style_formidable-style.with_frm_style .frm_compact .frm_dropzone.dz-clickable .dz-message, .frm_style_formidable-style.with_frm_style input[type="submit"], .frm_style_formidable-style.with_frm_style .frm_submit input[type="button"], .frm_style_formidable-style.with_frm_style .frm_submit button, .frm_form_submit_style, .frm_style_formidable-style.with_frm_style .frm-edit-page-btn {
        font-size: 14px;
        background: #D9B882;
        border-width: 1px;
        border-color: #D9B882;
        border-style: solid;
        color: #000000;
        font-weight: 700;
    		text-transform:uppercase;
        border-radius: 0;
        padding: 15px 80px;
    }
    

    This custom CSS can be added to the Additional CSS section of the Theme Customizer to style the survey form.

    survey form css

    Final Result

    Here is an example of what a survey form would look like on a live page.

    WordPress Survey

    Conclusion

    Using survey forms on WordPress is an excellent way to communicate with your customers. With lots of options available for WordPress, it’s essential to pick a method that is easy to use and doesn’t break the bank. Formidable Forms is a great plugin that fills both of those needs.

    If you’d like to learn about more options for building surveys in WordPress, check out our post featuring the 9 top WordPress survey plugins.

    For creating a form in a different way using Divi, check out our post How to Create a Stylish Survey Using Typeform.

    Have you used Formidable Forms on your WordPress site? If so, let us know in the comments below.

    The post How to Create a Survey on WordPress appeared first on Elegant Themes Blog.

  • How to Use the All Reviews WooCommerce Block

    Most modern customers will look at product reviews before making even the smallest purchase. Enabling user reviews for your own products helps you build trust with new customers, and it lets them share important information with other buyers. One of the best ways to display reviews on your website is by using the All Reviews WooCommerce block.

    In this article, we’ll talk about how the All Reviews WooCommerce block works. We’ll show you how to add it to your website, configure it, and use it effectively. Let’s get to work!

    How to Add the All Reviews WooCommerce Block to Your Post or Page

    The All Reviews WooCommerce block enables you to display a list of the latest product reviews on your website. By default, the block shows reviews for every item, which means visitors will get an overview of how happy your latest customers are.

    To use this block, open the Block Editor for the page or post where you want to showcase the reviews. Select the option to add a new block, and use the search tool to look for the All Reviews option:

    Adding an All Reviews block in WordPress

    Note that the All Reviews block is only available if you’re using WooCommerce. If the plugin isn’t active, you won’t have access to any WooCommerce blocks in the Block Editor.

    Once you place the All Reviews block, it will display a list of all the latest reviews in your store:

    The All Reviews WooCommerce block

    By default, every review includes the customer’s name, the body of their review, their rating, when they wrote it, and their profile picture. However, you have full control over how reviews appear within the All Reviews block, as we’ll show you in the next section.

    All Reviews WooCommerce Block Settings and Options

    Unlike most other blocks, the All Reviews WooCommerce block doesn’t offer any formatting options. That means you can’t change its alignment or layout. However, the block does offer a variety of settings that enable you to configure what elements it includes.

    To access this block’s settings, select it within the editor, and then click on the gear-shaped icon in the top-right corner of the screen. A menu will appear to the right, including all of the settings that are available for the All Reviews block.

    Content Settings

    The first part of the settings menu enables you to decide what elements the block will display for each review:

    Configuring what elements appear in the All Reviews block

    You can choose whether to include reviewers’ names, profile pictures, dates, review content, and product ratings. In most cases, we recommend including all of those items.

    However, you might choose to disable review dates if purchases aren’t made very often, so as not to discourage potential customers. Finally, you can choose between displaying reviewers’ photos (their profile pictures) or product images alongside each review.

    List Settings

    The next section enables you to decide in which order to show reviews in, and how many of them to display. By default, the All Reviews block will display the latest reviews across the entire store. However, you can also choose to display reviews from highest to lowest rated and vice versa.

    You can also configure how many additional reviews will appear when users click on the Load more button (or disable that option altogether):

    Configuring how many reviews the All Reviews block should display

    Text Color

    The next section allow you to customize the color of your text within the All Reviews block. To change the text color click on the text color option. Then you can choose one of the default theme colors or select the hex code to add your own custom color.

    changing all reviews block text color

    Font Size

    In addition to text color, you can also change the font size for the All Reviews block under the Typography settings. To change the font size, click the plus icon on the Typography toggle and select font size. There you can choose from one of the built-in theme font sizes or click the customize icon to add your own custom font size value.

    all reviews block font size

    Additional CSS Class(es)

    Finally, there’s an Advanced tab within the All Reviews block settings menu, which enables you to add new CSS classes to the element. You can use those CSS classes to modify the block’s style if you’re comfortable using stylesheets.

    Tips and Best Practices for Using the All Reviews WooCommerce Block Effectively

    In most cases, we recommend displaying the All Reviews block on your store’s home page and/or landing pages. This shows new visitors how satisfied past customers are right away, encouraging them to stick around. Moreover, if you have a lot of recent ratings, displaying review dates can show visitors that you get a lot of sales. That, in turn, can help you to build trust even further.

    If your store is still growing, we recommend showcasing the reviews with the highest ratings instead. If you do this, we’d also suggest disabling review dates, so visitors won’t be discouraged if there aren’t any recent sales.

    Sorting reviews from highest to lowest ratings

    As for whether to display user profile pictures or product photos, that choice is up to you. Displaying customer pictures can help make reviews look more trustworthy and give them a human touch. However, that will only be effective if most customers set profile pictures. Otherwise, you’re typically better off displaying product photos alongside each review, so potential customers get a glimpse of what you offer.

    Frequently Asked Questions about the All Reviews WooCommerce Block

    If you have any questions left about how to use the All Reviews block, we’ll aim to cover them here. Let’s start by talking about how to style this handy block.

    Can I Change the Style or Layout of the All Reviews Block?

    The All Reviews block doesn’t enable you to change its layout. When you place the block, reviews will show up on a single-column list. However, you can change the text color or font size using Color and Typography options. You can also add custom CSS Classes to target the All Reviews Block in your custom CSS.

    Are There Any Other WooCommerce Review Blocks I Can Use?

    WooCommerce ships with several review blocks that you can use in your store. For example, there’s a Reviews by Product Block, which enables you to display reviews for individual items. You’ll also have access to the Reviews by Category Block, which lets you display reviews from specific product categories.

    When you’re using the All Reviews block, you can’t filter reviews either by product or category. However, the block does enable you to choose what order reviews will be displayed in.

    Where Should I Place the All Reviews Block in WordPress?

    Since the All Reviews block displays reviews for all the products in your store, it makes sense to place it on one of your website’s main pages. Both the home page and the Shop pages make ideal placements for this block. Alternatively, you can set up a page just for displaying reviews, and link to it in your navigation menu.

    Conclusion

    The All Reviews WooCommerce block enables you to display the latest reviews for all products in your store. You can also configure this block to display reviews from the highest to lowest ratings and vice versa (although we don’t recommend the latter approach).

    This block offers the perfect way to show visitors how much customers love your products. If you have a lot of recent reviews, it can also signal that you run an active store with a large volume of sales.

    For more, check out ultimate guide to WooCommerce Blocks.

    Do you have any questions about how to use the All Reviews block in WooCommerce? Ask away in the comments section below!

    The post How to Use the All Reviews WooCommerce Block appeared first on Elegant Themes Blog.

  • How to Create Template Sets Using Divi’s Theme Builder Library

    The Divi Theme Builder Library allows us to do more with the templates that we have created in the Theme Builder. We now have access to tools such as tags, categories, and search. These make the job of keeping our templates organized as we work with Divi on a day-to-day basis. Another thing we are now able to do is create template sets in the Divi Theme Builder Library. Template sets allow us to bulk-add templates to the Divi Theme Builder Library. Think of template sets in the same light as the premade layout packs that you can install in the Divi Builder. Now, not only can you save the templates that you’ve created, but you can also save each template’s assignments. Furthermore, with the Divi Theme Builder Library you can bundle all of these together into a template set.

    In this post, we’ll walk you through the process. Let’s get to it!

    What is a Template Set?

    We can learn alot about template sets from Divi’s premade layout packs.

    Divi Layout Packs Overview

    Layout packs typically come with a design for the home page, blog page, and some interior pages. Depending on the layout pack you’re installing some may come with a layout for a products page, a shop page, or even an online course. In the Landscape Maintenance Layout Pack below, we can see that there are 7 page layouts included.

    Divi Landscaper Layout Pack

    We can use this layout pack to create different templates for our site in the Divi Theme Builder. For example, we could assign the landing page layout to the homepage only. Next, we could assign the services page layout to the services pages on our website. Luckily for us, we can also download a free header, footer and blog post template from the Divi Resources section of the Elegant Themes blog.

    Equipped with our freebies, we can assign the blog post template freebie to all the blog posts on our website. We could then follow the tutorial to set up the header and footer to be global elements of our website. Let’s say that after following the tutorial, we decided to make a pretty cool edit to the header freebie template. With all of our assigned templates in place, as we are working on our site, we don’t need to think about the design of individual pages too much. This is the power that comes with using the Divi Theme Builder.

    Why Create Template Sets in the Divi Theme Builder Library?

    A friend approaches us and asks for our help with setting up a website for their pool cleaning business. They want their site to look “exactly” like ours. With template sets, we add all our handiwork together. We can gather the layouts from the layout pack, the template assignments plus our newly updated header template and create a template set. With the Divi Theme Builder Library, we can now download this template set to our friend’s Divi installation. No need to export and re-import JSON files from the Divi Theme Builder. We can simply bulk add our templates into a template set, and use the Divi Theme Library to move them to our friend’s website. Then we can make any necessary edits to our friend’s website.

    How to Create Template Sets in the Divi Theme Builder Library

    Navigate to the Divi Theme Builder Library

    First things first, we need to be in the Divi Theme Builder. From the WordPress backend, go to Divi. Then, click on Theme Builder.

    Navigate to the Divi Theme Builder Library

    As you can see able, we have our global header and footer installed. We also have our individual page and post assignments in place.

    Save Theme Builder Set

    Our templates have been customized and are ready to be added in bulk to the Divi Theme Builder. To do this, notice the new icon that has been added to the icon menu in the Divi Theme Builder.

    Begin to save the Theme Builder Set

    Click on this icon to begin the process of bulk-adding our templates to our Divi Theme Builder Library. Once we have done this, we are presented with the following popup. This is the Save Template Set modal, and this is where we’ll be able to bulk-add our templates to the Divi Theme Library.

    The Save Theme Builder Set Modal Box

    Enter in your Set Name. Because these are the only templates in our library, for the templates that we’re going to select, we’re going to check Include All Templates. If you have a library with a myriad of templates, select the appropriate templates that you’d like to bulk add to your Divi Theme Builder Library.

    A filled Save Template Set modal box

    For our case, we’ve assigned a Set Name. We also want to save this entire library as a set. We want it on the cloud because we will be using it on different sites. It’ll go in a category and a tag has been added. Once we are happy, we can go ahead and save our template set to Divi Cloud.

    Checking Our Work

    Let’s check to see if our template set bulk added all our necessary templates to the Divi Theme Builder Library. From the Divi Theme Builder icon menu, we click on the plus icon.

    Divi we correctly Bulk Add Templates to Your Divi Theme Builder Library?

    When this happens, our Divi Theme Builder Library will open. If you are logged into Divi Cloud, you will also see your Divi Cloud templates. Notice that we have our Landscaper Set here. Also, the Divi Theme Builder Library will automatically populate the thumbnail with screenshots of the templates within.

    This is how to successfully create template sets in the Divi Theme Builder Library

    Successfully Create Template Sets in the Divi Theme Builder Library

    Now, you can use template sets to bulk-add your templates to the Divi Theme Builder Library. When coupled with the Divi Cloud, you can take your beautiful designs from one site to another, easily. By streamlining your design process, you can set up sites faster, but also maintain a certain quality standard when it comes to your work. It’s always a good time being able to save your favorite design combinations is also a plus! Try creating your own template sets today and see how easy your work becomes as you build sites for clients with Divi.

    The post How to Create Template Sets Using Divi’s Theme Builder Library appeared first on Elegant Themes Blog.