Things don’t always go perfectly, and they seem to go wrong at the worst possible time. If you have a website, you may be familiar with this conundrum. Right when you’re about to publish a post you’ve been working on for hours, your power goes out, your browser crashes, or your cat walks across your keyboard.
But all is not lost! The WordPress autosave feature makes it possible to get that work back quickly and easily. Let’s find out how.
What is WordPress autosave?
Autosave is enabled on WordPress sites by default to help site owners protect their content. It automatically saves posts and pages while you’re using the Editor so that, if your site goes offline or something else goes wrong, you haven’t lost all of your hard work.
If something happens, simply try reloading your browser. With autosave enabled, WordPress should have a recent backup of the post that you can restore with a single click.
We say “recent†backup because a copy of your page or post is saved based on a time interval, not after every single keystroke.
What is the default autosave interval on WordPress?
Autosave intervals tend to be relatively low to offer the highest level of protection. By default, the WordPress autosave interval is 60 seconds, but that may vary depending on your web host’s configuration.
Some hosts with limited resources will increase autosave intervals to avoid performance issues. That’s unlikely tobe a problem if you’re using a quality provider.
In most cases, it’s not possible to check the default autosave interval on WordPress. But you can change that interval manually, which we’ll cover in the tutorial portion of this article.
Can you change your autosave settings?
WordPress lets you change the default autosave settings, but to do so, you’ll need to edit core files manually. That means accessing your site’s server via File Transfer Protocol (FTP) or your web hosting control panel.
You can change autosave settings by editing the wp-config.php file in the WordPress root directory. This allows you to do any of the following:
Enable autosave (if it was disabled previously)
Disable autosave (by increasing its interval to a high number)
Modify the autosave interval in WordPress
Another way to modify the autosave settings in WordPress is to edit the functions.php file for the theme you’re using. Adding custom code to functions.php will disable autosave for specific post types or turn off the feature altogether if needed.
What’s the difference between autosaves and revisions in WordPress?
The goal of autosaves is to save work in progress in case something goes wrong while editing a page or a post. Autosaves take place in the background, even without you hitting the Save Draft button.
Revisions are drafts of posts or pages that you’ve manually saved. When you save a new draft, WordPress stores previous versions as revisions in case you want to revert back. Autosaves are not listed as revisions, as they’re a separate system.
With WordPress, you can only have one autosave at a time. But the revisions system lets you store multiple drafts of a post or page, then easily view changes and toggle between them.
How to use and manage WordPress autosaves
How can you manage autosaves and edit their settings? Making certain changes requires editing WordPress core files and dealing with code — we’ll guide you through those processes step by step. But first, let’s talk about restoring autosaves.
1. How to restore WordPress autosaves
Restoring a WordPress autosave is simple. If you exit the Editor without saving changes to the page or post, WordPress will warn you that you might lose those changes.
After opening the Editor again, WordPress will let you know if it has an autosave available. Then, you can click on the Restore the backup button to load the autosave.
WordPress will load the autosaved version of the post you’re working on. From this point on, you can continue editing the post, but probably want to save drafts periodically to avoid further problems.
2. How to delete a WordPress autosave
WordPress stores autosaves in the database. If you want to delete an autosave, there are three ways to go about it. You can access the database using a tool like phpMyAdmin and find the corresponding entry, wait for new autosaves to overwrite old ones, or use a plugin to do the job for you.
From a practical perspective, there’s little reason to delete one single autosave from the database. But some users report seeing moderate increases in site performance after removing unnecessary entries, like revisions and autosaves.
Using a plugin to “clear out†the database may not be necessary if you have a hosting plan that offers great performance and you’ve taken steps to optimize your website. Still, plugins like Advanced Database Cleaner make the process very straightforward and can also help you clear orphaned tables from the database.
To use Advanced Database Cleaner to delete WordPress autosaves, install and activate the plugin, then go to the WP DB Cleaner tab in WordPress. This page includes a list of the database tables you can clean, including one that says Auto drafts.
Select the Auto drafts element, choose Clean from the Bulk actions menu, and click on Apply. The plugin will ask you to confirm the decision and, afterwards, it will delete all available autosaves for your website.
3. How to change the WordPress autosave interval
If you want to change your website’s autosave interval, you’ll need to edit the wp-config.php file. To access that file, connect to your site via FTP using a tool like FileZilla.
Once you establish an FTP connection, navigate to your WordPress website’s rootfolder. That folder can have several different names, including www, public_html, or your site’s name.
If you can’t identify it, these are some of the files and folders you should see inside the root directory, including the wp-content and wp-admin folders:
This folder also contains the wp-config.php file. Right-click it and select the Edit option. This will open wp-config.php using your default text editor.
To change the autosave interval, you’ll need to add the following line of code:
define( 'AUTOSAVE_INTERVAL', 60 );
The crucial part of that code is the number. In the example above, it’s set to 60 seconds. You can change it to any value you want, but we recommend against exceeding one minute. Autosave has a negligible impact on your site’s performance, so it’s better to run it often to keep your work safe.
When you’re done, save the changes to wp-config.php and close the text editor. Your FTP client might ask if you want to save the new version of the file to the server. Confirm the changes, and you’re good to go.
4. How to disable WordPress autosave
Autosave is enabled by default in WordPress, but you can disable it manually for posts, pages, or both. Unfortunately, these settings aren’t available via the WordPress admin dashboard. So, you’ll need to connect to your website via FTP.
Navigate to your root folder and find the functions.php file. Open the file and add the following line of code:
An alternative method of disabling the autosave feature is to follow the same steps for changing the autosave interval as above but set the interval to be an entire day. While this doesn’t turn off autosave entirely, it would only kick in after 24 hours. To do this, follow the instructions above, but add this line of code to your wp-config.php file:
define('AUTOSAVE_INTERVAL', 86400);
5. How to enable WordPress autosave
Autosave is enabled in WordPress by default. You don’t need to turn on the feature manually unless it was disabled at some point.
If the autosave feature isn’t working on your site, it might be due to a change in the autosave settings or code inside of the wp-config.php or functions.php files. In these cases, we recommend opening both files to see if there’s custom code that modifies the autosave functionality.
You can find examples of what this code looks like in the previous sections of this tutorial, where we show you how to disable autosave and modify its interval settings.
If you find similar code in either or both files, you can delete it to re-enable autosave in WordPress. Before you do this, though, we recommend backing up your site fully in case you run into any errors while editing your files.
Frequently asked questions about WordPress autosave
If you have any questions about how autosave works in WordPress, this section will answer them.
Can I preview an autosave in WordPress?
In the past, WordPress let you preview autosaves before restoring them. That feature is no longer available. Now, the Editor simply asks if you want to restore the autosave if one is available.
Which types of content does WordPress autosave?
WordPress only autosaves posts and pages. You can configure the Content Management System (CMS) to autosave custom post types, which requires adding some code to their respective settings files.
Does WordPress automatically save drafts?
WordPress requires you to save drafts manually to store them as revisions. If you don’t save a draft and the editor closes, you might be able to access an autosave when you reopen it. But the availability of an autosave will depend on the interval that you configure.
WordPress autosave isn’t working, what can I do?
If autosave isn’t working, someone might have disabled it for your posts and pages. You can check out the earlier instructions for disabling autosave for posts and pages. You may want to reach out to your hosting provider and ask if this was done on your plan.
Can I autosave my whole site in real-time?
WordPress autosave only works for posts and pages. If you want to save every aspect of your website, including its media library, settings, plugins, themes, and other elements, you’ll need to use a WordPress backup plugin.
For most websites, having full backups is a much better solution than relying solely on autosaves. With frequent backups, you can restore your website to a previous state if you delete content, run into a technical error, or need to undo changes to the site.
Although you can back up your website manually, the process can take a while, and we recommend making full copies frequently. With Jetpack Backup, you get automatic real-time backups of your entire website. That means the plugin creates and saves new copies of your site as you make changes to it.
Jetpack Backup can store backups for up to 30 days or a full year (depending on which plan you use) and lets you restore any of them with only a click. Additionally, you’ll have access to premium technical support in case anything goes wrong with your backups.
Use autosave to protect your work in WordPress
Autosave is an excellent feature for sites of any kind. After all, having a recent autosave can mean the difference between losing hours of work or picking up right where you left off if something ever goes wrong. While autosaves won’t help you restore deleted content, they can ensure that you don’t lose anything you’re currently working on.
On top of using autosave, creating website backups can ensure that you never lose your work. Jetpack Backup will automatically save your site in real-time and allow you to restore it with a single click.Â
Whether you sell physical products, digital items, services, bookings, or courses, an online store can be an incredible opportunity to reach your target audience. It helps you reach people where they already spend their time, even if they’re always on the go. And it allows you to share the benefits and strengths of your products in the best way possible.
But how do you get started selling online? And what tools do you need to build the best ecommerce store?
Let’s take a look at WooCommerce, a powerful ecommerce platform. We’ll learn what it is, how businesses use it to run their stores, and the steps you can take to get started.
What is WooCommerce in WordPress?
WooCommerce is a WordPress plugin that includes all of the functionality you need for an online store — product templates, cart and checkout functionality, coupon codes, payment processor integrations, shipping tools, and more. It’s built and supported by Automattic, the company behind WordPress.com, so you can trust that it integrates seamlessly with your site and can rely upon excellent support and high-quality code.
While WooCommerce itself includes everything that many stores will need, you can also choose from a vast library of extensions that offer extra functionality. Feature a wide variety of product types like memberships and subscriptions, integrate with marketing or accounting tools, create detailed product configurators, and more!
What is WooCommerce used for?
One of the biggest benefits of WooCommerce is its endless flexibility. You can create any kind of ecommerce store you’d like! Let’s take a look at a few ways you can use WooCommerce and WordPress.
1. An ecommerce store for physical and digital products
Out of the box, WooCommerce includes functionality to sell both physical and digital products. You can list your items, accept payments, design your storefront, host sales and offer discounts, market your products across a variety of platforms, and more.
If you sell physical products, you can charge for shipping based on factors like weight, size, and product type. If you sell digital products, you can deliver them to customers via email and make them downloadable from an account right on your site.
Orange Amps chose WooCommerce to sell their merchandise — like amp accessories, t-shirts, and gig bags — and ship to customers around the world. Shoppers can select a product, choose from options like size and amp model, then pick from multiple shipping speeds and payment methods when checking out.
TipoType uses the same platform, but sells digital fonts. When someone checks out, they can select the font they’d like, choose a license type, then easily download the fonts after paying.
2. A fully-customizable online marketplace
Want to run a multi-vendor marketplace similar to Etsy? You can, with WooCommerce and the Product Vendors extension.
Pick a niche or area of focus, then allow artisans to apply for your marketplace. Set commission rates, allow vendors to manage their products, quickly view sales reports, and pay vendors on a schedule of your choosing. The possibilities here are endless!
Dumpster Market is a collection of dumpster rental companies located across the U.S. Site visitors enter their location, choose the size dumpster they want, and can see a list of vendors in their area, along with information about each one.
Jinja Gift is an online gift shop chock full of handmade items from Uganda. Vendors all apply through a registration form on the website, then sell everything from energy bars and stuffed animals to candles and board games. Those products are then shipped to customers around the world.
If you’re a wholesaler, you can also use WooCommerce to easily sell to your retailers instead of manually managing each and every account. This keeps customers happy, helps you grow, and even saves you time!
Simply add the Wholesale for WooCommerce extension to unlock features like special wholesale pricing, minimum order quantities, wholesale roles, visibility settings, and more. You can either sell just wholesale products, or list your retail products alongside them with different rates.
There are also other extensions you can use to sell wholesale products, like B2B for WooCommerce. This offers similar functionality, like wholesale registration forms, “get a quote†buttons, the ability to hide products based on user role, customer-specific pricing, and more.
Porta Pro Chem, a portable restroom product distributor, uses this extension on their B2B wholesale store. Some of their products can be ordered by anyone, while others are only available to wholesale customers, requiring new visitors to request a quote instead. They also have special pricing and shipping rules for each wholesale client.
Subscriptions are a powerful way to generate recurring revenue. Help loyal customers restock on the products they use over and over, sell themed subscription boxes, or charge monthly for your services — there are a lot of great options!
You can do this with the WooCommerce Subscriptions extension. This versatile tool sets up automatic recurring payments, on a variety of schedules — yearly, quarterly, monthly, etc. Customers can manage their own plans, upgrading, downgrading, or canceling without having to connect with your service team. You can also access detailed reports, send renewal emails to subscribers, and more.
Brodo offers subscriptions of their delicious, nutritious bone broth. Customers can choose from pre-built bundles or build their own combination of broth flavors, then opt to get their order just once, every two weeks, or every month. Then they can easily edit their own subscription, change the frequency, skip an order, or cancel, saving Brodo customer service time and headaches.
4. A donation solution for nonprofit organizations
You don’t even need to sell products or services to benefit from WooCommerce. Nonprofits can also use it to collect donations to support their cause. And, if they do sell merchandise, too, they can do so on the same site.
The Donation for WooCommerce extension allows you to accept both one-time and recurring donations, show how close you are to meeting your goals, and even allow customers to round up their order total to contribute. Or you can use the Name Your Price extension to let site visitors donate whatever amount they’d like.
Supporters of Priority One Worldwide, for example, can donate the amount they’d like one time or on a monthly basis. They can also choose a specific area to support, such as Haiti or Mexico.
Of course, restaurants want to make it as easy as possible for diners to order food. Adding an online ordering system to your website helps hungry visitors select food for pickup or delivery no matter where they are, without having to call. You get to avoid the hefty fees that come with third-party ordering apps and can even sell merchandise — seasonings, sauces, shirts — alongside your food.
The Restaurant for WooCommerce extension makes this simple, letting you quickly create a restaurant menu, add delivery options, display hours, and more.
It also works seamlessly with other extensions, so you can include add-ons (sauces, upgraded sides, etc.), create customizable meals, or design a food-hall-style marketplace.
7. An online learning system
Online courses are a great way to create relatively passive income and share your knowledge with the world. Whether you’re an expert on knitting, woodworking, accounting, cooking, or travel, there’s someone out there who wants to hear what you have to say.
And with WooCommerce and Sensei LMS Pro, you can create courses full of helpful information, media, and quizzes, then sell access to them on your website. Offer standalone classes, certification programs, or subscriptions to a course library, then let students consume your content at their own pace. You can grade their work, communicate with them one-on-one, and even offer completion certificates.
AvantageLearn.com, for example, sells courses that prepare students for their academic exams. The courses include video lessons, practice quizzes, and downloadable worksheets.
8. A membership program
With WooCommerce, you can also sell membership programs online. Customers can pay a one-time fee or subscribe to get regular access to your products. And you can include a huge variety of perks in your program — videos, templates, music, discounts, free shipping, or special products.
PHLEARN created a membership program for design professionals. They can choose to pay monthly or yearly, then get access to a library of software tutorials, presets, brushes, and more. Plus they benefit from Photoshop support just for members.
9. A hub for your services
You don’t just have to sell physical or digital products to use WooCommerce. Service-based businesses can benefit, too!
You might accept online payments for your services, whether they’re one-time or subscription-based, in a way that’s easy for all of your clients. You could charge for service upgrades, book appointments, create a client portal, offer digital guides and manuals, and more.
YourBenefitStore.com offers insurance services, allowing clients to select between a variety of plans based on their needs. This creates a perfectly seamless system and reduces paperwork and phone calls for the company’s team.
If you sell accommodations, excursions, in-person classes, or even virtual consultations, you can use WooCommerce for bookings. Customers can book appointments, rentals, or reservations directly on your site, choosing between the time slots you make available.
You can offer multi-person classes or single-person consultations, let attendees cancel or reschedule through their online account, and send reminders when the date is getting close. It’s a complete booking management system, all on your website.
Icon Cookery School, for instance, offers access to their in-person cooking classes. Interested patrons select the number of people who will attend, along with the date, then pay for the class online.
11. A customer relationship management system (CRM)
A CRM is incredibly valuable for any type of business, compiling all of the details about your customers and clients in one central location. Collect order details, contact information, communication history, and more, so that team members can always be up-to-date on a specific lead. And you can use this data to send hyper-personalized emails to increase loyalty and sales.
But there’s no need to use a completely separate platform from your website. With WooCommerce and Jetpack CRM, you can pull all of this powerful functionality directly into your site. Your WordPress dashboard becomes your CRM dashboard, and you can do everything from view information and create marketing emails to send invoices all in one place. Your sales data will seamlessly sync, letting you avoid complicated third-party connections.
Why choose WooCommerce as your ecommerce solution?
Now that you know a bit more about WooCommerce and how businesses use it, let’s take a look at why it’s the best ecommerce solution.
1. It’s free to install and use
Like WordPress, WooCommerce is completely free to install and use. There are also a variety of free extensions you can use to add functionality for shipping, marketing, payments, and more. For the majority of online stores, this will be more than enough for you to get off the ground running!
That being said, there are premium extensions available for more advanced functionality.
2. It’s flexible
The flexibility of WooCommerce cannot be beat. You can sell absolutely anything you’d like, from physical and digital products to subscriptions, memberships, bookings, services, online courses, and more.
You can create any design you can imagine thanks to the WordPress block editor. Drag and drop paragraphs, headings, images, videos, columns, and more to build custom pages. And WooCommerce blocks for products, categories, reviews, filters, and checkout elements enable you to construct landing pages and checkout experiences that are perfect for your customers.
There’s also an entire library of free and premium extensions that provide any additional functionality you can imagine. From marketing and growth tools to payment gateways, shipping options, and third-party integrations, there’s something for everyone.
3. It integrates seamlessly with WordPress
Do you already have a WordPress site? Then WooCommerce will feel like an old friend. It’s built and supported by Automattic, the team behind WordPress.com, and integrates seamlessly. You’ll use the same dashboard you’re already familiar with to add products and manage your store. And you can trust that it works with the latest version of WordPress and popular themes and plugins.
4. You gain access to a close-knit community
The WooCommerce community is like no other, full of store owners and developers who are ready to help. Connect via in-person or virtual meetups, dive into the active support forums, chat with experts on the official Slack channel, or get involved on Facebook.
5. It scales with your business
WooCommerce is equipped to grow alongside your online store, no matter how many products, visitors, or customers you have. You can add an unlimited number of products and variations, and won’t experience any sort of additional fees because of your growth. The code is optimized and regularly updated for scalability, and there are powerful extensions designed specifically for large stores.
Even if you have very little tech experience, you can work with WordPress and WooCommerce. Use the block editor to design a beautiful site without any code whatsoever. Add products using a simple interface. Get help from detailed documentation and excellent support.
And if you are a developer, you can take advantage of the open-source nature of WordPress and WooCommerce. Edit the code however you see fit, and use the REST API to connect with external applications.
How to install and use WooCommerce
Ready to get started with the top ecommerce platform? Let’s take a look at the process of creating an online store with WooCommerce. Note that if you already have a WordPress site, you can skip to Step 4.
1. Find a domain name and host for your WordPress site
Your first step is to purchase a domain name — the URL that a visitor types in to access your site. You’ll want to pick one that’s easy to remember and representative of your business.
Then, find a hosting provider for your site. A host stores your website files and makes them available to visitors online. It’s the foundation of a quality site, affecting things like security and speed, so it’s important to choose one that’s high quality.
When choosing a host for your online store, look for ones that offer excellent support and maintenance, keep their servers updated, include security and speed features, allow you to scale easily, and have lots of WordPress experience.
Jetpack has an in-depth list of recommended WordPress hosts to help you get started. Or, for a simple and reliable route, try the WordPress.com eCommerce plan. It includes absolutely everything you need to build a WooCommerce store in one managed package.
2. Install WordPress
Now, it’s time to install WordPress. Most hosting providers offer easy, one-click installations and WordPress.com comes with the software already installed. But for a full guide, check out the documentation from WordPress.org. Then, take the time to log in and explore a bit.
The theme that you choose impacts the design and layout of your site, along with some of the functionality that’s available to you. Some themes work as blank canvases, letting you create absolutely anything that you can imagine. Others include in-depth templates and block patterns that are essentially ready-made sites. Just switch out your content and you’re good to go!
No matter which route you want to take, pick a theme that has excellent reviews, is regularly updated, loads quickly, integrates with WooCommerce, and is mobile responsive. You’ll also want to make sure that support and documentation are included.
Want ultimate flexibility? Choose a block theme, which allows for Full Site Editing. This enables you to use blocks — pieces of content like paragraphs, images, and columns — to build your entire website. This means ultimate customizability for more than just pages and posts, but also headers, footers, sidebars, templates, and more.
Next, you’ll need to install WooCommerce. Simply log into your WordPress dashboard, go to Plugins → Add New and search for “WooCommerce.†Click Install Now → Activate.
You’ll be met with the WooCommerce setup wizard, which will walk you through all the steps you need to get started. It will even customize instructions and settings based on the specific needs of your store!
5. Create pages
The specific content you create for your site will vary based on your needs, products, and audience. Think through the information that potential customers will find most helpful. Most stores will need pages for Home, About, Contact, FAQs, and Shipping.
You can use the WordPress block editor to build those pages in an intuitive, visual way. Start by going to Pages → Add New, then add a title for your new page.
Click the + icon at the top left to view all available blocks. You can either search for one you’d like, or scroll through to get some inspiration. You can also look at block patterns to get ready-made page sections, like pricing tables.
Drag the block you’d like to use anywhere on the page. You can then click on that element to open settings that will vary based on the specific block you’re using. For example, an Image block has options for alignment, filters, size, radius, etc.
Continue to build out your page using blocks until you’re happy with it. Click Preview in the top menu to get a sneak peak of how it looks, or click Publish to push it live. You can then add pages to your menu.
6. Create products
Ready to add products to your store? All you have to do is go to Products → Add New in your WordPress dashboard. Start by adding the name of your item in the Product Name box. Then, you can include a quick summary under Product short description, and more details in the large text box underneath the title.
In the Product data box, click the dropdown to choose a type of product. Simple products are items that have no options, while variable products allow for choices like size and color. Here, you can also set your product to be virtual and/or downloadable.
In the Product data section, you can set inventory levels, define shipping details, choose related products, and more.
On the right-hand side of the page, add a featured image, the photo that will represent your product, along with secondary images that visitors can scroll through. You can also assign categories and tags to your products, which will make them easier for shoppers to filter through.
When you’re ready, you can click the Preview button at the top right, or go ahead and click Publish to make your product live.
Your payment gateway allows you to securely accept payments online, and makes sure that money ends up in your bank account. You’ve probably heard of options like PayPal and Stripe, but there are lots of providers you can choose from.
When picking a payment gateway, consider factors like the currencies you want to accept, whether or not you want to offer recurring payments, and the fees involved with each specific provider.
One excellent, simple option for the majority of businesses is WooCommerce Payments. It lets you accept debit and credit cards, alongside digital wallets like Apple Pay and Google Pay. Take more than 135 currencies, process subscription payments, and manage everything directly in the WordPress dashboard.
8. Set up shipping
If you’re selling digital products or services, you can skip this step, though it’s important that you have a seamless way to deliver those to customers as well. But for physical items, you’ll need to determine the best, safest, fastest way to get them into the hands of your buyers.
There are a variety of ways you can structure shipping. You might offer free shipping for all purchases, or only over a certain amount. You could charge based on purchase total or weight. And there are many carriers you can choose from. This ecommerce shipping guide from WooCommerce walks you through it all.
WooCommerce Shipping is a great place to start. This free extension lets you purchase and print USPS and DHL labels directly from your dashboard, saving you money in the process.
9. Install a security plugin
Security is absolutely critical for any website, but that’s even more true for ecommerce stores. A WordPress security plugin like Jetpack helps you lock down your store and protect both your data and your customers’ private information.
There are several plans available that include features like:
Real-time backups: A copy of your store will be saved every time a major change is made, like an updated page, installed plugin, added post, or placed order. You never have to worry about losing anything on your site!
An activity log: Keep track of everything that happens on your site, along with who performed each action and when it took place.
Malware scanning: This tool scans your website for malware, alerting you if it finds anything. It can also fix the majority of known issues with one click.
Downtime monitoring: You’ll receive an instant alert if your site goes down, so you can identify and fix the issue quickly.
Spam protection: Automatically filter and discard comments and contact form spam.
Brute force attack protection: Block hackers and bots that try to access your site by testing thousands of password and username combinations.
Speed is an important component of a great user experience. After all, people aren’t just going to wait forever for your site to load. And Google prioritizes websites that load quickly in the search results.
There are a variety of factors that go into building a fast site, including the theme and hosting provider that you choose. One of the simplest steps you can take is to install a WordPress speed plugin like Jetpack Boost.
This tool takes just a few steps to configure, and it handles some of the biggest speed optimization tasks, like optimizing CSS loading and deferring non-essential JavaScript. It also runs a performance test on your site so you can get an idea of where you stand and make improvements as necessary.
You can also use Jetpack’s additional performance tools to make even more speed improvements. VideoPress takes the weight of hosting videos off of your server, delivering lighting-fast media without any third-party ads. Jetpack CDN delivers your content from servers located around the world, displaying your site from the location closest to each individual visitor.
Still have questions? Find the answers to some common ones below.
Is WooCommerce secure?
Yes, WordPress and WooCommerce were built with security in mind, and are regularly updated to patch any potential vulnerabilities. However, like any website platform, WooCommerce sites can be hacked. It’s important that you take additional security steps to lock down your site as much as possible. This includes:
Using quality passwords
Choosing a hosting provider that prioritizes security
Only giving full site access to trusted members of your organization
Setting up automatic backups and storing them in a secure location
Regularly updating WordPress, themes, and plugins
Jetpack Security offers a full suite of WordPress security tools that takes care of the majority of these tasks all at once. It’s an excellent starting point for stores of any size.
Is WooCommerce free?
Yes, WooCommerce, like WordPress, is completely free to install and use. There are also a variety of free tools directly from WooCommerce, like WooCommerce Payments and WooCommerce Shipping.
There is, however, a library of premium extensions that add functionality to your online store. You can purchase these individually or in packages to create the exact setup you need.
Does WooCommerce take a percentage of sales?
No, unlike many other platforms, WooCommerce does not take a percentage of sales. You’re free to grow your store as large as you want without paying any additional fees to WooCommerce.
What is the difference between WooCommerce and WordPress?
WordPress is a free website-building tool that enables you to create any sort of site you can imagine. WooCommerce is the ecommerce leg of WordPress, built and maintained by Automattic, the company behind WordPress.com. It’s an extra, free plugin that provides all the functionality needed to turn your WordPress site into an online store, from product listings to checkout tools.
You can build a WordPress site without WooCommerce, but need WordPress to have a WooCommerce store.
Does WooCommerce only work with WordPress?
Yes, you can only install WooCommerce on WordPress sites. It was built specifically for the WordPress platform, and the two work seamlessly together.
Does WooCommerce have a mobile app?
Yes, the WooCommerce mobile app makes running your online store on the go easy. From your mobile device, you can create products, print labels, view store data, and manage orders. Plus, you’ll get real time alerts when customers place an order.
How many items or products can WooCommerce handle?
WooCommerce can handle an unlimited number of items and products. ISC Sales, for example, uses WooCommerce to list more than 17,000 products. And, unlike other platforms, you won’t be charged any additional fees for extra listings or variations.
Can WooCommerce handle high-traffic stores?
Yes, WooCommerce can scale to handle an unlimited amount of traffic. It regularly supports shops with thousands of sales per minute and was built to handle spikes in site visitors.
It is important, however, that large stores choose a hosting provider and plan that can also support large volumes of traffic, and take steps to optimize their WooCommerce site for speed.
Can WooCommerce handle coupons and gift cards?
WooCommerce has built-in coupon functionality, yes. You can create coupon codes, choose the amount and type of discount you want to offer, include free shipping, set usage restrictions, and more. You can also use extensions for more advanced features like coupon personalization, store credits, free gifts, etc.
It doesn’t offer gift card functionality out of the box. However, with the Gift Cards extension, you can offer gift cards to your customers, then allow recipients to use them to make purchases on your store.
Can I add a blog to a WooCommerce store?
Yes, you can absolutely add a blog to your store. Since WooCommerce is an extension of WordPress, you can take full advantage of the powerful blogging features built into the content management system (CMS).
You can use the visual block editor to create beautiful posts, dragging elements like text, images, videos, quotes, and social media feeds wherever you’d like on the page. Then, you can categorize those posts, display them on the front-end of your site, and share them with the world.
Is WooCommerce an SEO-friendly ecommerce platform?
Yes, WooCommerce is a very SEO-friendly ecommerce tool. Again, you can harness the blogging power of WordPress to create high-quality content, one of the most important considerations when it comes to ranking well on search engines. WooCommerce is also mobile friendly, and uses clean, SEO-friendly code.
However, there are also steps that you should take to optimize your online store for SEO. You may want to install an SEO plugin to help you make the most of meta descriptions, page titles, schema markup, and more. It’s also important that you use tools like Jetpack Boost to ensure that your site performance is top-notch.
What are WooCommerce extensions?
WooCommerce extensions are plugins built to specifically add functionality to WooCommerce stores. They’re available directly from the WooCommerce team and there are both free and premium options. WooCommerce extensions offer tools for everything from marketing and growth to merchandising, shipping, and collecting payments.
Where are WooCommerce products stored in the database?
Since WooCommerce products are a custom post type, they’re stored in the wp_posts table. Product data — like price, stock status, etc. — is stored in the wp_postmeta table.
Where are WooCommerce orders stored in the database?
Again, WooCommerce orders are a custom post type, so they’re stored in the wp_posts table. The remaining information about orders — like billing and shipping information — is stored in the wp_postmeta table.
What are good tutorials on how to enhance WooCommerce?
WooCommerce offers in-depth documentation on the platform itself, along with all of its extensions, directly on their website. There, you can also find guides, developer resources, and blog posts designed to help store owners build and grow.
You can also find WooCommerce tutorials on Jetpack’s blog, including:
Picture this: an excited fan comes to your site to buy your newest product, or read your latest article. They go to the search box, type it in…and it doesn’t work. Sadness.
No matter the size of your site, people expect a working search box. That’s why we’re excited to bring the power and ease of Jetpack Search to even the smallest sites.
We’ve simplified our pricing, and also added a free tier and a 3-month free trial. Add Jetpack Search to your site to see how much it helps your fans find what they’re looking for — available today through Jetpack, the new standalone Jetpack Search plugin, and WordPress.com.
Try Search for Free
Sites of all sizes can take advantage of our new free tier — it has a limit of 5k records and up to 500 requests per month. We do not cut off your site from going over the limits for the first three months, so the free tier is also a good way for any sized site to see how Jetpack Search benefits your site and visitors.
Note that sites on the free plan include “Search powered by Jetpack†at the bottom of the UI, support is limited to forums, and searching across multiple sites is not supported. To remove the Jetpack branding, get email support, or search across multiple sites you can upgrade to a paid tier.
Simplified Pricing Based on Monthly Requests and Records
To make our pricing easier to understand and plan around, we’ve gone from having six separate tiers to simply charging $8.25 per month per 10k records or requests. As a reminder, records are all posts, pages, and other types of content you want to be indexed. And requests are every time a visitor searches for something on your site. The price is calculated based on the maximum of either how many search records your site has or the median number of search requests from the past three months.
An example: if your site has 25,000 records and the number of requests for the past three months are 120k, 35k, and 25k then your plan will auto-renew with a 40k limit. At $8.25 per month, the new price with the 40k limit is $33 per month, compared to $60 under the old pricing. We won’t penalize you for one busy month, so you won’t get a surprise bill.
Just like before, we don’t cut a site off for going over the limit, we just recalculate the limit and price when your plan renews based on the recent usage.
This new pricing does not yet affect existing Search customers. We will reach out by email before your pricing changes and it will only change when your plan renews.
Want to try Jetpack Search without adding the rest of Jetpack? We now have a separate Jetpack Search plugin for a streamlined experience.
When you’re working on a page or post in WordPress, you’ll likely go through several versions or “revisions.†WordPress revisions are the drafts of content you create using the editor. The revisions system works in the background to ensure that you always have previous versions of your work on hand.
In this article, we’ll outline everything you need to know about WordPress post revisions. We’ll discuss how they work, where you can find them, and how to use them.
What are WordPress revisions?
When you’re creating a page or post — or even making edits to one over time — you probably save every once in a while to make sure you don’t lose your work. Each of these saved drafts, along with any published updates, is stored as a “revision†in WordPress.
WordPress stores multiple revisions for each page or post. However, the exact number depends on how your specific site is configured. By default, there’s no limit to the number of revisions that are saved.
One key benefit of the revisions system is the ability to view and compare different versions of your content. You can see the current page right next to a previous version in order to review changes or decide which one you want to publish. You can also see who made each change and when it occurred, which is helpful if you have multiple users on your site.
It’s important to note that WordPress post revisions show the content using HTML code, which includes information about the blocks you use and your page or post layout. While you won’t need to edit this code, it could be confusing if you’re not familiar with it.
Where to find revisions in WordPress
You can find revisions by opening a specific post or page in the WordPress Editor. Once you land on a page, select Settings → Post and click on “_ Revisions.†The blank here will show the number of revisions you have available.
This will launch a new page that includes all available revisions for the post or page you’re working on. You can use the slider near the top of the screen to switch between content versions.
How to use and manage WordPress revisions
Let’s take a deeper dive into all aspects of the WordPress revisions system, from comparing and restoring versions to even disabling them altogether!
How to preview and compare revisions
To preview and compare revisions, you need to make sure the post or page you’re currently editing has past drafts saved. You can do this by opening the Block Editor, navigating to the Settings → Post menu, and looking for the Revisions option.
If you don’t see this in the postsettings menu, there are no revisions available. This may be because you haven’t saved multiple drafts, the revisions system is disabled, or you deleted the previous revisions.
If the Revisions option is available, click on it. This will launch a new page that enables you to preview existing revisions and compare them.
After selecting a revision, it will appear side by side with the current version of the page or post. Now, you can compare the differences between them.
The previous version of the post will be in the left-hand column, with the newer version on the right. You can use the slider at the top to switch between all available versions.
By default, WordPress displays revisions in succession. If you want to compare two versions that don’t immediately follow one another, check the box next to Compare any two revisions. This allows you to pick any two specific revisions to compare next to one another.
All new content will be highlighted in green, and any content that was removed will be highlighted in red.
Again, note that the page or post content is shown as code, not as blocks like in the WordPress Editor. However, this is relatively straightforward to navigate, even if you’re not a developer, thanks to HTML comments, which explain the code that follows. Let’s look at a couple of examples from the image above.
First, you’ll see this code:
<!-- wp:paragraph -->

<p>Welcome to WordPress. This is your first post. Edit or delete it, then start writing!</p>

<!-- /wp:paragraph -->
This tells you that there’s a Paragraph block here, with the text content, “Welcome to WordPress. This is your first post. Edit or delete it, then start writing!â€
If you run into anything that you’re unsure of, you can use resources like W3Schools to learn what a piece of code means.
If you want to exit the Revisions panel, simply click Go to Editor at the top left. This will take you back to the WordPress Editor for this page or post.
How to revert to a previous WordPress revision
While comparing WordPress revisions, you can select the Restore This Revision option. This will restore the revision in the right-hand column.
It’s always best to thoroughly review the content before restoring a revision, because WordPress doesn’t ask for confirmation first. And once you restore a past version of a post or page, you may not be able to revert to the most current draft you were working on.
How to limit WordPress revisions
By default, WordPress stores an unlimited number of revisions for each page or post. However, some hosts may limit this number. For example, WordPress.com saves 25 revisions for Free, Personal, and Premium plans, and 100 revisions for Business and eCommerce plans.
If you have lots of revisions, they can clog up your database and slow down your site. So, you may want to limit the number that your site saves. You can limit WordPress revisions by manually editing the wp-config.php file. The best way to access this file is by connecting to your site via FTP using a client like FileZilla.
Once you establish an FTP connection, navigate to the WordPress root directory. This might be called public_html or your site name. Open it and look for the wp-config.php file. Right-click on it and select the option to edit the file.
Look for the following line of code. The number at the end will vary because it determines the number of revisions your site can store:
define( 'WP_POST_REVISIONS', 3 );
If you can’t find that line within the file, copy the code above and paste it at the end of the wp-config.php file. You can change the 3 to any value you’d like, depending on the number of revisions you want to store. Here are some other options:
Use “true (default), -1†to store every revision
Use “false, 0†to not save any revisions at all
If you don’t feel comfortable editing code, another option is to use a plugin. One of the most user-friendly options is WP Revisions Control.
This plugin allows you to modify the number of revisions stored for different content types. For example, you can disable revisions for pages or products while increasing the number of stored versions for posts.
How to disable WordPress revisions
Although revisions are enabled by default in WordPress, you can easily disable them by taking similar steps to the ones discussed above. To disable WordPress post revisions, you’ll need to modify the wp-config.php file.
You can find instructions on accessing the file in the previous section, where we cover how to limit WordPress revisions. Once you find the file, you’ll need to edit the WP_POST_REVISIONS code to disable them entirely. This is the new line you’ll use:
define( 'WP_POST_REVISIONS', false );
Keep in mind that simply deleting the code won’t disable WordPress revisions. Instead, it will reset the system to WordPress’s default configuration.
Alternatively, you can use a plugin to disable post revisions in WordPress. Several tools are designed for this purpose, but one of the most straightforward options is called Disable Post Revision.
The plugin adds new settings to the WordPress dashboard, allowing you to disable revisions for posts, pages, and other types of content, all without touching a single line of code.
How to enable WordPress revisions
Revisions are enabled in WordPress by default. But if you’ve disabled them manually or using a plugin, you may want to enable them down the road. The exact method of doing so depends on how you disabled them to begin with.
If you modified the wp-config.php file manually, you can edit the code and set the number of revisions to a positive value, like in this example:
define( 'WP_POST_REVISIONS', 3 );
By using that code, you tell WordPress to store up to three revisions for every post.
If you’re using a plugin to disable WordPress revisions, you’ll need to either edit the settings or deactivate the plugin altogether.
How to optimize revisions in the WordPress database
In most cases, “optimizing the database†refers to deleting unnecessary content like revisions, autosaves, leftover data from plugins and themes, etc. While there are a variety of other speed optimization tasks that can make more substantial improvements, deleting revisions from the database can make a small difference.
One popular plugin for optimizing revisions is Optimize Database after Deleting Revisions. With this tool, you can choose which types of revisions you want to delete from the database, then set the tool to do so immediately or on a specific schedule.
Unfortunately, most database optimization plugins don’t let you choose which posts or pages to exclude from the cleanup process. That means you’ll lose access to most, if not all, of your revisions afterwards.
Frequently asked questions about WordPress revisions
If you still have questions about WordPress revisions, this section will answer them. Let’s start by talking about any potential downsides of the revisions system!
Are there any downsides to WordPress revisions?
The only potential downside to WordPress revisions is that they take up storage space. Every revision translates to an entry in your WordPress database. If you have a website with hundreds of posts and pages, revisions can contribute to a lot of additional data stored.
This may not necessarily be a problem for websites with a great hosting plan, but it can be limiting for other sites. Depending on your setup, relying on real-time backups that are stored off-site might be a better option. These don’t take up space on your server, and ensure that you always have a copy of your site on hand, even if your host is compromised.
Jetpack Backup is an excellent option here. It automatically saves your site whenever you make a change — updating a page, publishing a post, adding a plugin, etc. And, restoring a previous version of your site only takes a few clicks, even if it’s completely down!
Do WooCommerce products have revisions?
WooCommerce supports the WordPress revisions system, but this feature isn’t turned on by default. To enable revisions for WooCommerce products, you’ll need to edit the functions.php file for the theme you’re currently using.
We always recommend using a child theme when editing theme files, so that your work is saved even when you update the parent theme.
Then, you’ll simply need to add the following code to your child theme’s functions.php file:
Does WordPress support revisions for custom post types?
By default, WordPress only supports revisions for posts and pages. But you can add support for custom post types by editing the functions.php file for the theme that you’re using.
Again, we recommend using a child theme if you decide to edit theme files so you don’t lose your code when you update the parent theme.
What is the optimal number of WordPress revisions?
The optimal number of revisions will vary depending on your specific site. If you run a busy blog and update your posts regularly, you may want to keep several revisions on hand just in case. However, if your site is relatively stagnant, this feature may not be as important.
Of course, it’s always recommended to have full-site backups on hand in case of a hack or other issue. This is the best way to protect your content and customer data. Learn more about how to back up a WordPress site.
Can I only restore part of a revision?
No, unfortunately the WordPress revisions system restores the entire draft of the page or post. You can’t, for example, revert a single paragraph to a previous version.
If you only want to restore part of a revision, you can use the revisions feature to copy the code for a specific block. Then, you can paste the code into the Code Editor of the page or post you’re working on.
You can find this by clicking the three vertical dots at the top right of the WordPress Editor. From there, simply choose Code Editor and make any changes you need to.
Should I delete revisions from the database?
Deleting revisions from the database can improve the performance of your website, especially if you have a lot of pages and posts, and accompanying stored versions. However, the potential downside here is that if you delete all the revisions, you won’t have any that you can restore.
Another option is to simply limit the number of revisions that WordPress stores. Following the instructions above, you can configure WordPress to store just one or two versions of each page or post. That way, you’ll always have a revision available in case something goes wrong.
Why aren’t WordPress revisions showing in my screen options?
If revisions aren’t showing for a specific post or page, there may not be any available. Perhaps you haven’t saved any drafts of the content. Or, it’s possible that you or another member of your team disabled the revisions system for your site.
You can use the instructions in this article to see if revisions are disabled in your theme’s wp-config.php file. You may also want to check with your hosting provider’s support team to see if they disabled revisions for any reason.
What’s the difference between WordPress revisions and autosaves?
WordPress automatically saves a copy of your work in case the Editor closes due to an unexpected error. These are called autosaves, and only one is stored at a time.
Each individual WordPress revision is a saved draft of a page or post. You can save an unlimited number of these, compare different versions, and restore a previous one if needed.
Protect your work with WordPress revisions
Revisions are a helpful part of WordPress. You can save multiple drafts of your work, review previous versions, and restore them nearly instantly. The number of revisions you access will depend on your site’s configuration.
Keep in mind that you should also use backups alongside revisions if you want to save the rest of your site’s data.
Jetpack Backup offers you automated backups that are stored off-site. It creates copies of your site whenever you make a change and stores them for up to a year, depending on your plan.
Sometimes, a plugin can cause a fatal or critical error in WordPress that results in loss of access to a site’s web pages or WP Admin area. When a fatal error occurs on a WordPress site, it’s usually due to a bug in a plugin or theme’s code that causes the site’s server to become stuck and unable to respond to requests.
Usually, WordPress displays a critical error message when a bug is preventing the site from working. An email is also sent to the site administrator with more details about the error. If you cannot find that email, the next best step would be to check the PHP error logs in your web hosting account, if those are available.
If you’re unsure about how to access those logs, your web host can help you. You can also put WordPress in debug mode and check the error messages displayed when you attempt to visit your site.
The message should include the name of the plugin, theme folder, or file causing the error. Now, you just need to deactivate the plugin to resolve the issue, which can seem tricky without access to your WP Admin area. Thankfully, there is a straightforward solution.
Here’s how to deactivate a plugin without access to WP-Admin:
Step 1: Get your site’s SSH, SFTP, or FTP credentials
Since your site is down, you aren’t able to access your WordPress dashboard, and will need to find another way to deactivate the plugin. SSH (Secure Shell), SFTP (SSH File Transfer Protocol), FTPS (also known as FTP-SSL, and FTP Secure), and FTP (File Transfer Protocol) are different types of server access protocols/schemes.
These credentials allow you, or a service like Jetpack Backup, to directly access your site’s files on the server powering your website. You can get these from your hosting account dashboard or with the help of your hosting provider’s support team. Note that these server access credentials are unique and different from your WP Admin login details and, in most cases, your host’s control panel or dashboard login.
Step 2: Download a file transfer client application
For the next step, you’ll need to use a file transfer client app/software like FileZilla or Transmit. The file manager option in your hosting control panel (like cPanel) could also be a good option, but it’s typically better to use ftp because of its additional functionality and security.
Step 3: Connect to your server using the credentials
Once you have your FTP credentials and a file transfer app installed on your device, proceed to connect to your site using the credentials. FileZilla has some usage instructions that should help guide you along the way. Transmit also has a helpful guide on using their Quick Connect feature to connect to your server.
While the exact process depends on the tool you’re using, you’ll typically need to enter information like the server address, username, password, port, and WordPress installation path. Once you’ve done that, click Connect or the equivalent on the file transfer app of your choice to connect to your server. When you have successfully connected, you should see a list of files and directories in the remote path you provided.
Here’s what that looks like in Transmit:
Step 4: Rename the plugin folder to deactivate it
Now that you’re connected and can see your site’s files and folders, navigate to the /wp-content folder. Inside this folder, you’ll see a folder called plugins where WordPress stores the files for all plugins installed on your website.
Open this folder, select the plugin culprit, and right-click to view more options. Click Rename or the equivalent on your chosen file transfer client. Then, set the new name of the folder to something like plugin-name.deactivate. In other words, add .deactivate to the name of the folder.
Here’s what the rename option looks like in Transmit:
Once you rename the plugin, it will be deactivated because WordPress won’t be able to find the plugin folder in that location. If that plugin was the cause of the critical error, you should regain access to your WordPress site and the admin area. If you navigate to WP Admin → Plugins, you should see a notification saying that the plugin has been deactivated because the plugin file does not exist.
That’s it. You can follow the same steps to deactivate a theme if a theme is responsible for the critical error. Only this time, you should navigate to wp-content/themes when you’ve connected to your site via FTP.
Now you know how to easily deactivate a plugin that’s causing an issue on your site!
An easier way to restore access to your WordPress site
No matter your experience level, WordPress sites will occasionally run into issues outside of your control.
Jetpack Backup stores a real-time copy of your site on secure, independent servers so that you can quickly fix errors without any complicated problem solving. Even if your site is completely down, you can access and restore a backup 24/7.
It’s part of Jetpack’s entire suite of WordPress security tools that can prevent hacks and issues, alert you of any problems that do occur, and resolve them with as little as a single click.
It’s common for a plugin to cause a fatal or critical error in WordPress that results in loss of access to a site’s public web pages or WP Admin area. That fact that it is common doesn’t make it any less terrifying to experience. When a fatal error occurs on a WordPress site, it is usually due to a bug in the responsible plugin or theme code that causes the affected site’s server to become stuck and unable to respond to requests.
Usually, the WordPress.org software displays a critical error message when a bug on the site is causing an error preventing the site from working. WordPress also emails the site administrator with more details about the error. If you cannot find that email, the next best step would be to check the PHP error logs in your web hosting account, if those are available. If you’re unsure how to access those logs, your web host can help you. You can also put WordPress in debug mode and check the error messages displayed when you attempt to visit your site.
However you get the error messages, the entire message should include the name of the plugin, theme folder, or file causing the error. Upon discovering the plugin causing the error, you might wonder how to remove the plugin or theme and get your site working again when the plugin error prevents you from accessing your WP Admin area. Deactivating plugins via WP Admin is not the only way. There’s another way:
Step 1: Get your site’s SSH, SFTP, or FTP credentials
Now that your site is down, you’ll need the correct credentials to access your site’s files remotely via other non-HTTP means. SSH (Secure Shell), SFTP (SSH File Transfer Protocol), FTPS (also known as FTP-SSL, and FTP Secure), and FTP (File Transfer Protocol) are different types of server access protocols/schemes.
These credentials allow you, or a service like Jetpack Backup, to directly access your site’s files on the server powering your website. You can get these from your hosting account dashboard or with the help of your hosting provider’s support. Note that these server access credentials are unique and different from your WP Admin login details and, in most cases, your host’s control panel or dashboard login.
Step 2: Download a file transfer client application
For the next step, you will need to use a file transfer client app/software like FileZilla or Transmit. The file manager option in your WordPress hosting control panel is also a good option, but it might be better to use a file transfer client as they consistently provide better interfaces for viewing your site’s files than many hosting account file managers.
Step 3: Connect to your server using the credentials
Once you have your SSH, SFTP, or FTP credentials and a file transfer app installed on your device, proceed to connect to your site using the credentials. FileZilla has some usage instructions that should help guide you along the way. Transmit also has a help guide on using their Quick Connect feature to connect to your server.
The general process is to choose the protocol or server type and to fill out the form with the details (server address, username, password, port, and remote WordPress installation path that you have gotten from your hosting account, support, or server administrator). Once you have done that, click Connect or the equivalent on the file transfer app of your choice to connect to your server. When you have successfully connected, you should see a list of files and directories in the remote path you provided. Here’s what that looks like in Transmit:
Step 4: Rename the plugin folder to deactivate it
Now that you’re connected and can see your site’s files and folders, navigate to the wp-content folder. Inside this wp-content folder, you will see a folder called plugins where WordPress stores the files for all plugins installed on your website.
Navigate to the plugins folder, select the plugin culprit and right-click to view more options. Click Rename or the equivalent on your chosen file transfer client. Then set the new name of the folder to something like plugin-name.deactivate. In other words, add .deactivate to the name of the folder. Here’s what that the rename option looks like in Transmit:
Once you rename the plugin, it will be deactivated because WordPress won’t be able to find the plugin folder when it looks there. If that plugin was the cause of the critical error, you should regain access to your WordPress site and the admin area. If you navigate to WP Admin > Plugins, you should see a notification saying that the plugin has been deactivated because the plugin file does not exist like so:
That’s it. You can follow the same steps to deactivate a theme if a theme is responsible for the critical error. Only this time, you should navigate to wp-content/themes when you have connected to your site via SSH, SFTP, or FTP. If a theme bug is actually stopping you from accessing your site, then renaming the theme folder should resolve the issue.
Hopefully, this article has helped you resolve a critical error on your site. You may want to check out our Jetpack Backup product or the Jetpack Security bundle to keep your WordPress site’s data safe. With regular malware scans, a web application firewall, real-time backups, and one-click restores, you can relax and focus on publishing awesome content for your readers.
When you’re trying to access a website, the last thing you want is to experience technical difficulties. Unfortunately though, you’re likely to encounter a few, like the DNS_PROBE_FINISHED_NXDOMAIN error, at some point while managing a site.
The good news is that there are plenty of steps you can take to resolve the issue relatively quickly. The key is understanding what the error message means and following some simple troubleshooting steps to fix it. Regardless of which device or operating system (OS) you’re using, you should be able to get your browsing experience back on track with minimal effort.
In this post, we’ll explain what the DNS_PROBE_FINISHED_NXDOMAIN error means and some common things that cause it. Then, we’ll walk you through the steps you can take to fix it on Windows, Mac, iOS, and Android.
What the DNS_PROBE_FINISHED_NXDOMAIN error means
There are a wide variety of WordPress error messages you might encounter when trying to access your website. Some have to do with WordPress directly while others, like the DNS_PROBE_FINISHED_NXDOMAIN error, arise from other sources.
The above error message is what you’ll see using Google Chrome. But, you may also encounter it on other devices, browsers, and operating systems. If you’re not using Chrome, the exact wording of the error message may vary.
For instance, in Mozilla Firefox, it might look something like this instead:
In Microsoft Edge, it usually appears similar to the following:
Meanwhile, Safari displays a message like this:
The DNS_PROBE FINISHED NXDOMAIN error is returned if the nameserver cannot find the requested domain. This may happen due to a number of reasons. It’s often seen when trying to connect to a website using a web browser. Typically, it indicates an issue with your network or “DNS.â€
Before we get into what might be causing this error message, it’s helpful to understand what each element of the response code means. DNS stands for domain name system. A DNS server is responsible for translating human-friendly domain names (like http://www.Jetpack.com) into internet protocol (IP) addresses (like 192.168.0.1).
Your web browser does this automatically when you type in a URL (Uniform Resource Locator) into the address bar. To put it simply, when you type a URL in your browser, you’re asking the DNS server to translate the name into an IP address.
This process of requesting your computer to find the IP address of a website is referred to as a DNS probe. If the DNS server does not have a record for the requested name, then it returns an NXDOMAIN (Non-Existent Domain) error.
Common causes of the DNS_PROBE_FINISHED_NXDOMAIN error
There are many reasons why you may be seeing the DNS_PROBE_FINISHED_NXDOMAIN error message. Some of the most common causes include:
A typo in the URL or an incorrect IP address: Sometimes it can be as simple as mistyping the URL of the website you’re trying to visit.
Antivirus or firewalls blocking access to the name server: It’s not uncommon for antivirus or firewall software to block access to certain websites, resulting in the DNS_PROBE_FINISHED_NXDOMAIN error.
Misconfigured server settings or DNS configuration: Your computer may be configured to use the wrong DNS server or your internet service provider’s (ISP) DNS server may be unavailable.
Mismatched hostname: The hosts file on your computer may be blocking access to the website you’re trying to visit. You can check and edit your hosts file to see if that’s the case.
A DNS lookup timeout: The DNS lookup process can time out if it’s taking longer than expected.
Browser cache and cookies: Another common cause of this error is an outdated or corrupt cache and cookies in your browser.
It’s also possible that you’re seeing this error message simply because the server is down. If that’s the case, you’ll want to check back again in a few minutes.
Keep in mind that you might not be able to identify the source of this error message until you begin troubleshooting. You may have to attempt a handful of potential solutions before you uncover the problem and, in turn, take the necessary steps to remedy it.
How to fix DNS_PROBE_FINISHED_NXDOMAIN on desktop (Windows & Mac)
Now that we understand a bit more about what the DNS_PROBE_FINISHED_NXDOMAIN error is and what might be causing the problem, it’s time to get into how you can go about resolving it. The exact steps you should take will depend on the device that you’re using. To start, we’ll show you how to fix it on desktops, including both Windows and Mac.
1. Restart your device and router/modem
It’s possible that you’re seeing this error message because of your internet connection. So, after you’ve confirmed that you’ve entered the correct URL, it’s a good idea to check your internet connection, to make sure it’s working properly.
If everything seems to be operating as it should, the next step is to restart your device, as well as your router (or modem). You’ll need to power down your computer, then unplug your router or modem and wait a minute or so.
After that, you can plug it back in. Once you’re connected to the internet again, turn your computer back on and try revisiting the website. This may seem obvious, but it’s a tactic you won’t want to skip.
2. Clear your browser cache and cookies
If you’re experiencing issues with a particular website, one thing you can try is clearing your browser cookies and cache. Browser cookies and cache are two web technologies that are used to store data in order to improve the web browsing experience.
In a nutshell, browser cookies are small files that are stored on a user’s computer by the websites they visit. They’re used to store data such as login information, preferences, and other details that can help improve the user experience (UX) on a site.
Cache is a type of storage that is used by web browsers and servers in order to save frequently accessed data so that it can be quickly retrieved when needed. Both browser cookies and caching can help improve the speed and performance of web browsing. However, if not managed properly, they can also lead to privacy and security issues.
Clearing your browser cookies and cache will remove any temporary data that could be causing the problem.
2.1 Windows
To do this in Windows, go to the Start menu and type “Internet Options” into the search bar. Then, click on the Internet Options icon when it appears in the results.
In the Internet Options (or InternetProperties)window, go to the General tab and click on Delete in the Browsing history section. Make sure to check both the cookies and website data and the Temporary Internetfiles and website files options. Then, click on Delete.
Alternatively, you can clear your browser cookies and cache within the browser you’re using.
For instance, if you’re navigating with Google Chrome, you can click on the three vertical dots in the upper right-hand corner followed by More tools → Clear browsing data. In the window that appears, make sure the three items are selected, then click on the Clear Data button.
2.2 Mac
On a Mac, you’ll have to clear your cache in Safari. To do this, open Safari and click on Safari → Preferences in the top menu bar.
In the Preferences window, go to the Privacy tab and click on Remove All Website Data.
This will remove all cookies and cached data for all websites. Select Remove Now to confirm. Then, restart your browser and try loading the website again.
3. Refresh your DNS cache
Similar to a browser cache, a DNS cache is a type of storage that is used by DNS servers in order to save frequently accessed data. DNS servers use this in order to save time when resolving IP addresses.
If the DNS server has recently resolved an IP address for a certain website, it will be able to quickly retrieve the IP address from its DNS cache rather than having to look up the address again. This can help improve the speed of web browsing. But if it becomes outdated or corrupt, it can also lead to a wide range of issues, including the DNS_PROBE_FINISHED_NXDOMAIN error.
3.1 Windows
To flush your DNS cache in Windows, go to the Start menu and type “cmd” into the search bar. Click on the Command Prompt icon.
In the Command Prompt window, type “ipconfig /flushdns” and press Enter.
3.2 Mac
To flush your DNS cache on Mac, open the Terminal application. You can do this by going to the Applications → Utilities folder or by searching for it in Spotlight.
In the Terminal window, type “dscacheutil -flushcache” and press Return. This will clear your DNS cache.
4. Release and renew your IP address
If you’re still seeing the error message, the next step is to release and renew your IP address. This allows your computer to communicate with the network more effectively, which can improve your internet speeds and reduce any connectivity issues you may be experiencing.
4.1 Windows
To do this in Windows, you’ll want to return to the Command Prompt window. This time, type the following commands, pressing your Enter key after each:
ipconfig /release
ipconfig /renew
4.2 Mac
If you’re using macOS, you can navigate to your Terminal application. Then enter the following:
sudo killall –HUP mDNSResponder
After that, hit your Return key. Note that it may ask you to enter your device admin password to proceed.
5. Change your DNS servers
If you’re still having trouble accessing a website, you can try selecting a different DNS server. While there are a handful of alternatives you can use, a popular choice is the standard Google Public DNS. Google Public DNS is a free, global DNS resolution service.
It can make your internet browsing both faster and more secure. The service uses modern Anycast technology to spread traffic across multiple servers around the world. It also leverages DNSSEC to validate responses.
5.1 Windows
To change your DNS servers in Windows, go to Control Panel → Network and Internet. Then, select the Network and Sharing Center option.
Once there, click on the Change adapter settings in the left sidebar.
This will open the Network Connections window. Right-click on your active network connection and select Properties from the drop-down menu.
In the Properties window, go to the Networking taband select Internet Protocol Version 4 (TCP/IPv4) from the list of options, followed by the Properties button.
In the IPv4 Properties window, select the Use the following DNS server addresses radio button.
Next, you can enter “8.8.8.8†for the Preferred DNS server and “8.8.4.4†for the Alternate DNS server. Click on OK to save your changes and close the window.
5.2 Mac
You can use these same addresses for Mac. But, to get there, you’ll need to open the System Preferences application by clicking on the Apple icon in the top menu bar. Then select System Preferences from the drop-down menu.
In the System Preferences window, go to Network and choose the network interface you want to configure in the left sidebar. Next, click on the Advanced button.
In the window that opens, go to the DNS tab and select the + icon.
This will allow you to enter a custom DNS server. When you’re done, you can click on the OK button.
6. Temporarily disable your antivirus or firewall
6.1 Windows
To disable your antivirus and firewall in Windows, navigate to your Control Panel then go to the System and Security section and click on the Windows Firewall option.
In the Windows Firewall screen, click on the Turn Windows Defender Firewallon or off option in the left sidebar.
After that, click on the Off (not recommended) radio button for both the Private network settings and Public network settings options. Select OK to save your changes and close the screen.
6.2 Mac
To disable your antivirus and firewall on Mac, open the System Preferences application, then go to the Security & Privacy application.
Select the Firewall tab. Next, click on the Turn Off Firewall button.
You will be prompted to confirm your decision. Simply click on the Turn Off Firewall button again to confirm.
7. Check your hosts file
A hosts file is a text file that maps hostnames to IP addresses without using a DNS server.
When a computer visits a website, it first checks the hosts file to see if it can resolve the hostname to an IP address. If it can, then it will connect to the website using the IP address. Otherwise, it will use DNS to resolve the hostname.
7.1 Windows
To check your hosts file in Windows, go to the Start menu and type “Notepad” into the search bar and select the Notepad application.
Click on the File menu and select Open from the drop-down menu. In the Open window, navigate to C:\Windows\System32\drivers\etc and select the hosts file.
Make sure that All Files is selected in the drop-down menu next to the File name field. Click on the Open button to open the hosts file in Notepad.
Within this file, check whether the website that you’re trying to access that’s throwing the DNS_PROBE_FINISHED_NXDOMAIN error is listed. If it is, delete it, save the file, then try refreshing your browser.
Also, you don’t necessarily need to use the Notepad application to do this. You can use any text editor in Windows that lets you access and modify your files.
7.2 Mac
To check the hosts file in Mac, open the Terminal application. In the command prompt, type “sudo nano /etc/hosts” and press Enter. This will open the hosts file in a text editor.
Again, look for the site that you’re trying to access and delete it if you find it listed. When you’re done, press on your Ctrl+X keys to exit the Nano text editor and save your changes.
That’s it! After completing the above steps, you should no longer see the NDS_PROBE_FINISHED_NXDOMAIN error message on the WordPress website you’re trying to access from your computer.
How to fix DNS_PROBE_FINISHED_NXDOMAIN on Mobile (iOS & Android)
As we mentioned, you can also come across this error message when you’re browsing on your mobile device, not just a desktop computer. The process for resolving this issue is slightly different than if you were using a PC. Below is how you can fix the DNS_PROBE_FINSIHED_NXDOMAIN error on mobile for both Android and iOS.
1. Check for any app or system updates
To get started, first try restarting your mobile device. This may help resolve any minor connection issues you’re experiencing that may be leading to the error.
If this doesn’t work, the next step is to check to see whether your system or browser app requires any updates.
1.1 Android
On Android devices, you can do this by browsing to Settings → System.
Navigate to System update. If there is a new version available, it will tell you. In that case, simply update it, then try visiting the site once more.
To check for any updates on your Chrome app, you can open the Play Store, then search for “Chrome.†If one is available, you can click on the Update button next to it.
1.2 Apple iOS
If you’re using Apple iOS, you can check for system updates by selecting the Settings application (the gear icon), followed by General.
Next, click on Software Update.
If one is available, it will inform you on the screen. You can select Update Now to proceed.
To update any browser apps you use, you can navigate to the Apps Store from your home screen. Select the icon in the top right-hand corner of the screen. Here, you can find all the applications on your device that currently have an updated version available.
Scroll through the list and update any browser apps that you use. When you’re done, restart your device and try accessing the website again.
2. Clear your browser cookies and cache
As with desktop devices, you might be able to resolve this error message by clearing your browser cookies and cache.
2.1 Android
If you’re using Android, you can open your Chrome app and then select the three vertical dots.
Next, navigate to Settings → Storage → Apps → Chrome.
After you select Free up storage space, you’ll be prompted to do so. This will clear any unnecessary files or data.
2.2 Apple iOS
In Apple iOS, you can open your Settings application then scroll down to Safari.
On the next screen, scroll to the bottom to locate the Privacy & Security section.
Next, select Clear History and Website Data.
In the popup that appears, click on Clear History and Data. This will remove your history, cookies, and other browsing data.
3. Change your DNS settings
As with a desktop, the DNS settings of your mobile device may be to blame when you’re seeing this pesky error message. So, the next step is to try changing your network settings.
3.1 Android
If you’re an Android user, you can do this by opening your Settings app, then navigating to Network & Internet.
Next, tap and hold the Wi-Fi network connection, then click on Modify network.
In the Advanced options section, select Static then scroll to the bottom to locate the DNS server addresses fields.
For the preferred DNS value, you can enter “8.8.8.8†for DNS 1 and “8.8.4.4†for DNS 2. Save your changes then refresh your browser.
3.2 Apple iOS
For iOS, open your Settings application then select your Wi-Fi connection and select it again on the next screen. Scroll down to the DNS section and click on Configure DNS.
On the next screen, select Manual followed by Add Server.
You can then enter the same values as above into the fields. When you’re done, click on the Save button in the top right-hand corner of the screen.
Why backups are a WordPress site’s best friend
At this point, hopefully, you’ve learned how you can resolve the DNS_PROBE_FINISHED_NXDOMAIN error in WordPress.
To help minimize the potential damage that may occur as a result of website or browser errors, it’s essential to consistently create backups of your website. When it comes to WordPress site maintenance and management, the importance of backups can’t be stressed enough.
One of the reasons they should be a priority is that they help ensure your website’s content will always be available, even if something happens to your original files. Backups also make it easy to restore your website if it is ever hacked or damaged.
Plus, having a backup can save you a lot of time and money if you ever need to rebuild your site from scratch. The more frequently you back up your website, the more likely you are to have an updated version of it to restore in an emergency.
How often should you back up your WordPress website? It depends on how often you make changes to it. If you only update your site occasionally, then backing it up once a month or so should be sufficient. However, if you are constantly tweaking your site, then you may want to consider a solution that saves every change.
Real-time backups mean that your website’s content is constantly being saved as you make modifications. They also make it easy to restore your website to a previous state in a matter of minutes.
For WordPress users, Jetpack Backup is a trusted option for those looking to protect their work.
It offers a complete solution for handling website backups. It’s intuitive, easy to use, and lets you restore your site from anywhere, even if it’s offline.
Take control of your WordPress maintenance
If you see the DNS_PROBE_FINISHED_NXDOMAIN error when you’re trying to connect to a website, it likely means that the DNS can’t find the address of the page you’re trying to reach. This can happen for a number of reasons. Luckily, there are a few simple steps you can take to resolve it.
As we discussed in this post, you can often fix this error by simply checking and refreshing your DNS and network settings. In addition to configuring proper DNS and browser settings, it’s also important to make sure you’re creating regular backups of your website so you can quickly resolve other site or browser-related errors in the future.
It takes mere seconds for visitors to decide whether they want to stay on your website or go elsewhere. So it’s important that you grab their attention immediately and convince them to explore the rest of your site.
A great way to captivate and impress your audience is with a video background. In this post, we’ll take a look at the benefits of adding a video background to your site. Then, we’ll discuss some best practices and show you four easy ways to do this in WordPress.
What is a video background?
Video backgrounds are a way for you to provide a more engaging experience for your visitors. Instead of adding a solid color or image behind pieces of your content, you can use a video instead. These videos often loop (repeat) and are silent so as to enhance rather than take away from the rest of the page.
You can add a video background behind blocks of text, images, buttons, forms — whatever you’d like! — or even use it as the background of an entire landing page.
Strandberg Guitars, for example, displays a beautiful video background of their products in action right when visitors land on their site. Their header, intro text, and call to action button are layered on top of the video in a way that all content is still visible.
What are the benefits of a video background?
There are many benefits to using a video background. To begin, it can make your pages look more professional and attractive. When someone arrives on your site and sees a moving video, it grabs their attention in a way that stagnant content cannot.
Video backgrounds can also be an excellent way to showcase products and services in action. Feature the beautiful rooms in your bed and breakfast, show kids happily playing with the toys you sell, or share clips of the experiences you offer.
Best practices for adding a WordPress video background
If you’ve decided that your site can benefit from a video background, there are a few important things to consider. First, you’ll want to use videos sparingly but effectively. Having too many large videos on your WordPress site can slow it down and dilute the impact.
You’ll also most likely want to disable the audio.Sound can be off-putting for visitors when they simply want to view your website. The last thing you want is for your music to disrupt a visitor’s meeting or appointment.
If you’re placing content like text and buttons on top of your video background, it’s important that there’s enough of a contrast so that people can easily read them. This is particularly important for visitors with visual impairments. This color contrast checker is a great way to get a quick read on your site. Just type in your URL, and it will identify any improvements you need to make.
Finally, it’s always a good idea to use a fallback image. This sets the picture you want to display in the background if, for some reason, your video doesn’t load.
How to add a video background in WordPress
Now that you know a little bit more about video backgrounds, let’s explore some ways you can add them to your WordPress site.
1. Use the built-in Cover block
This is the simplest and most effective solution, requiring no external plugins or tools. With the Cover block, you can layer content like text, buttons, and forms on top of a photo or video background. This makes it a great option for hero sections or banners.
To get started, create your new page/post or open an existing one. Then, click the blue + icon in the top left corner. This will open up all the block options. Search for “Cover block,†then add it wherever you’d like on the page.
In the toolbar that appears, select Add Media. There you can either select a video from your media library or upload your own.
You can customize your video settings in the right-hand panel. Choose a focal point, select the opacity of the overlay, and more.
Then, add any blocks that you’d like on top of your video background by clicking the + icon within the cover block. For example, you might add a heading, line of text, and button. Remember, it’s important for that content to stand out from the background, so adjust the color and the background opacity as needed.
Once you’re happy with your cover block, save or publish your changes, and that’s it! Just a few simple steps to achieve an effective, beautiful video background.
2. Use a video plugin
If you’re looking for a very specific feature — like a full-site video background or scroll effects — video plugins could be a good alternative.
This tool enables you to create a range of background types, including images, self-hosted videos, and videos from third parties like YouTube. The best part is that it still works from within the WordPress block editor.
Once you’ve installed the plugin on your site, head to the page or post where you want to add a video background. Then, click the + icon to add a new block and search for “Background (AWB).†Add it wherever you’d like on the page.
In the right-hand settings panel, select the Video tab, then choose between YouTube/Vimeo and Self Hosted. Depending on which you select, you can either upload your video or enter an external URL.
Then, click the + icon within the Background (AWB) block to add the content you want to display on top. In this case, we’ve chosen to add a contact form.
From there, you can customize the settings using the right-hand toolbar. Choose a video start and end time, select the devices on which you’d like it to appear, add parallax effects, and more. When you’re all finished, save your page.
3. Use a page builder
If you’re already using a page builder like Elementor, you can use that to add a video background to your site. Create your new page with the builder and drag an Inner Section element onto the screen.
By adding your video to a section, you can overlay additional elements like text and buttons on top of your footage. Click on the dots at the top of the section to open the Section Editor. Then, navigate to the Style tab.
Next to Background Type, click Video and paste your video link into the box.
Here, you can determine start and end times, and adjust other display settings. You can also set a fallback image in case your video doesn’t play. You can then add any elements that you’d like on top of the video as you typically would.
Under Layout,you can change the height and width of your content. Then, you may want to add a background overlay and adjust the opacity to make other content in the section more visible. You can access these settings by scrolling to the bottom of the Style section.
4. Add a video background with your theme
Some themes automatically enable you to upload images, videos, or GIFs as background elements. These can fill your entire screen, or you can use them as headers or sliders.
To find a theme that allows for video backgrounds, head to your WordPress dashboard and click Appearance→ Themes → Add New. Next, search for “video background†and select a theme that offers this functionality. Or, you can always upload your own premium theme.
Colibri WP is one excellent, free option. Once you’ve installed and activated the theme, go to Appearance → Customize. Then, select the Settingsicon beside the Hero element.
Switch to the Styletab and change the Background type to Video.
You can either paste an external URL or upload a video file to the media library.
Then, you’re all set to customize your video background. You can apply color overlays and tweak the opacity of your video. Once you’re happy with your design, publish your changes.
Frequently asked questions
Let’s look at some frequently asked questions about using video backgrounds in WordPress.
Will a video background slow down my site?
Large video files can negatively affect your site’s performance. But the good news is that you can use a tool like Jetpack VideoPress to minimize the impact that they have on your site. It hosts your videos off-site and serves them through a powerful CDN, while helping you avoid third-party ads.
If you’re looking for ways to almost instantly improve your WordPress speed, Jetpack Boost is a great option.
In just a few clicks, you can optimize CSS loading, defer non-essential JavaScript, and turn on image lazy loading without using any custom code. This tool focuses specifically on Google’s Core Web Vitals, which are measurements of your site’s performance in real-world scenarios. Improving these metrics can positively impact your user experience and search engine rankings.
What’s the easiest way to add a WordPress video background?
The built-in Cover block is the simplest way to add a WordPress video background because it requires no additional plugins, tools, or custom code.
Instead, you can create your video background directly in the WordPress editor. This makes it an excellent option for all users, even complete beginners. However, you can still customize your background, with options for overlays, focal points, and more. This is just one great example of how the WordPress block editor makes creating a beautiful, effective site accessible to everyone.
Where should I host my videos?
You can host your video on the same server as your website. This way, you can skip the limitations of third-party platforms and provide an ad-free experience for your visitors.
But, self-hosted videos can require a lot of server bandwidth and you might be unable to upload large files. What’s more, they could slow down your user experience and result in a lot of buffering and other distractions.
VideoPress is the best of both worlds. It takes all of the weight off of your server, but also gives you control over how you display your files. Plus, there are no ads to pull visitors away from your content.
With VideoPress, you can manage your videos in the same space that you manage your site.
Boost engagement with video backgrounds
With so much competition on the internet, it can be difficult to make your site stand out. Fortunately, you can add a WordPress video background to grab your visitors’ attention and create an engaging experience. The key to success is choosing the best method for hosting and displaying this valuable content.
VideoPress is one of the best video hosting solutions for WordPress. It’s easy to use and can be accessed directly from your WordPress dashboard. Plus, it can help you provide an excellent user experience with fast-loading, ad-free videos.
This month we have worked on several under-the-hood improvements to enhance your Jetpack experience, including updates to forms, notification emails, and Jetpack Social.
In this release:
The Consent field result from forms will now show up in notification emails and feedback views.
Jetpack Social will now highlight if a previously connected social account has a broken connection in the editor.
The form block has had several small interaction enhancements and bug fixes.
This release also includes other minor bug fixes and improvements — check the changelog for more
Automattic listed in Newsweek’s “America’s 100 Most Loved Workplaces 2022â€
Our parent company Automattic has been listed #31 in America’s 100 Most Loved Workplaces 2022 by Newsweek.
We continue to grow and have some exciting open positions at Automattic, including in Engineering, Product, Marketing, Design, Business Development, HR, Customer Support, and more. Work for us, from anywhere: https://automattic.com/work-with-us/
A big thank you to everyone who contributed to this release:
Adnan Haque, Adrian Moldovan, Andrew Dawes, Aneesh Devasthale, Antony Agrios, Brad Jorsch, Brandon Kraft, Chris Jean, Christian Gastrell, Damián Suárez, Daniel Post, Dean Sas, Dehan, Derek Smart, Dognose, Douglas Henri, Dylan Munson, Foteini Giannaropoulou, Gergely Márk Juhász, Heyde Moura, Ivan Ottinger, Jason Moon, Jasper Kang, John Caruso, John Webb, Juanma Rodriguez Escriche, Kevin L, Kuba Birecki, Luiz Kowalski, Maciej Grabowski, Mike Stott, Nauris Pūķis, Nino Mihovilic, Osk, Paul Bunkham, Philip Jackson, Piotr Stankowski, Rafael Agostini, Renato Augusto Gama dos Santos, Renzo Canepa, Robert Felty, Robert Sreberski, Roberto Aranda, Samiff, Sergey Mitroshin, Siddarthan Sarumathi Pandian, Siobhan Bamber, Steve D, Tim Broddin, Yaroslav Kukharuk, bindlegirl, dkmyta, jcheringer, kirahsapong, leogermani, nunyvega, robertf4, thingalon
When putting together a WordPress site, it’s easy to get lost in the details. The content management system (CMS) offers so many features and options, it can be hard to decide what’s best for your website.
There’s a lot of talk about topics like what pages to include or how to set up a site header and menu. However, a slightly less talked about feature is the widget.
Thankfully, that’s the focus of our article today. We’ll break down what WordPress widgets are, explain how they work, and offer examples of how to set up widgets on multiple areas of your website.
There’s a lot to cover, so let’s get started.
What are WordPress widgets?
A WordPress widget is a drag-and-drop content feature that you can place almost anywhere on your WordPress website.
Widgets were originally designed to give users more control over their sidebar content. Over time, however, the WordPress community found new and improved ways to use widgets throughout a site.
For example, most WordPress themes now come equipped with widget-ready areas that can be used to display all sorts of helpful information.
This includes things like social media feeds, email opt-in forms, search bars, and more. You can even use widgets to create custom navigation menus in certain areas of your site.
In other words, widgets are versatile tools that can be used in a number of ways to improve the overall design and functionality of a WordPress website.
How do WordPress widgets work?
Now that we know what a WordPress widget is, it’s time to take a look at how they work.
For the most part, working with widgets is a pretty straightforward process. That said, there are a few key things you need to know before diving in and adding your first widget.
1. Widgets require a widget-ready area
As we mentioned before, not all WordPress themes come equipped with widget-ready areas. If you want to use them on your site, be sure to check and see if your theme has pre-designed locations for them.
If your theme does have widget-ready areas, you’ll be able to find them by navigating to the Appearance → Widgets section of your WordPress admin panel. Here, you should see a list of all the available widget areas on your site, as well as which ones are currently populated with content.
If you don’t see any widget areas listed, it’s likely that your theme doesn’t support them. In that case, you’ll need to either choose a different theme or look into installing a WordPress plugin that can create custom widget areas for you.
2. You can add widgets via the Appearance → Widgets section
The Appearance → Widgets area of the WordPress dashboard is where you’ll go to add, remove, and manage all the widgets on your site.
To add a new widget, simply drag and drop it from the list of available widgets into the desired location. Once you’ve added a widget to an area, you can then configure its settings to better suit your needs.
Let’s say you want to add a social media icon widget to your site. Drag and drop the Social Icons block wherever you’d like, then click on the widget to open its settings panel.
This will appear on the right side of the page, and allow you to choose which social media platforms to display links for, as well as how many links to show, what order they should be displayed in, and more.
Some widgets will have more settings than others. For example, a simple text widget will only let you add content, whereas a more complex widget, like the Jetpack Display WordPress Posts widget, has settings for blog URL, the number of posts you’d like to display, whether the links should open in a new tab, etc.
3. You can add widgets to multiple areas
For example, if you want to display a social media widget in both your sidebar and footer, you can simply add it to both areas from the Appearance → Widgets section.
This can be helpful if you want to make sure that your content is being seen by as many people as possible. It can also be useful for testing purposes, as you can easily add and remove widgets from different areas of your site without affecting the rest of your content.
What are some popular WordPress widgets?
There are all sorts of different WordPress widgets available, ranging from simple text boxes to complex social media plugins. If you’re using a block theme, you can also add any block that you’d like to a widgetized area.
Some of the most popular widgets include:
Thesocial media icons widget: This widget lets you display links to your social media profiles in a variety of ways.
Social media feed widgets: A social feed widget lets you display a feed of your social media content on your website. This can be helpful for promoting your latest posts and engaging with your audience.
A search bar: The search bar widget lets visitors quickly look for a specific piece of content on your site. This is especially helpful if you have a large volume of posts or pages.
Email opt-in forms: An email opt-in form widget lets you collect email addresses from visitors so that you can add them to your mailing list. This is a great way to grow your list and promote your content.
Calendar widgets: A calendar widget can be helpful for displaying events or deadlines on your site.
Slideshow widgets: A slideshow widget lets you display a series of images in a rotating carousel. This is a great way to showcase multiple images on your site.
RSS feed widgets: An RSS feed widget lets you display the latest content from another website on your site. This is helpful for keeping your content fresh and up-to-date.
Weather widgets: A weather widget can be used to display the current weather conditions. This is useful for sites that are weather-dependent, such as a ski resort or golf course.
Of course, this is just a small sampling of the types of widgets that are available. There are hundreds of different plugins and themes that offer their own custom widgets, so do your due diligence in finding those that best serve your needs.
If you’re using Jetpack, you’ll enjoy access to quite a few widgets and blocks by default, including:
Now that we’ve covered some of the basics, let’s take a look at how you can actually add widgets to your WordPress site in detail.
The Appearance → Widgets section is where you’ll find all the available widget areas on your site. Simply click the + sign in the designated widgetized area and select from the available widgets.
It’s important to note, however, that because widgets don’t have autosave or revisions functionality, you should always back up your WordPress site before adding new widgets or updating existing ones.
Here’s a brief rundown of how to add widgets to various places on a WordPress website. Note that these instructions assume that you’re using the Block Editor on your site.
1. In your sidebar
To add widgets to your sidebar, simply click Appearance → Widgets then click on the + icon and search for the widget you want to add.
In this example, we’ve added a business hours widget to the sidebar.
By default, this widget will appear on all posts and pages. Be sure to click Update at the top of the screen to save your changes.
2. In your header
If your theme includes widget areas in the header, you can add blocks by going to Appearance → Widgets. All you need to do is locate the widgetized section that reads “Header†then click the + sign within it to search for and select a widget.
Or, if you’re using a block theme, you can go to Appearance → Editor, open the Template Parts list, and click on Header. Then you can drag and drop blocks just like you would elsewhere on your site.
3. In your footer
If your theme includes widget areas in the footer, you can add blocks from the Appearance → Widgets section. Just click the + sign under “Footer,†then select the appropriate widget to insert.
Or, if you’re using a block theme, you can go to Appearance → Editor, open the Template Parts list, and click on Footer. Then you can drag and drop blocks just like you would elsewhere on your site.
4. On specific pages or posts
If you want to conditionally display WordPress widgets (i.e. show or hide widgets based on certain conditions), you can do so using Jetpack. Simply install and activate the plugin, then go to the Appearance → Widgets section.
Insert the widget as you would normally, then click the gear icon on the right hand side of the screen to access customization options.
From there, scroll down to the Advanced section. Click the drop down, then select the button that says Add new rule.
From here, you can choose whether you wish to show or hide this widget and choose where you’d like the rule to apply.
Here, we’ve selected to Show widget on the Services page, and only that page.
As always, be sure to click the Update button at the top of the Widgets screen to save these changes.
5. On specific categories or tags
This works similarly to the process of setting your preferences for the widget to appear on certain pages or posts.
Insert your widget where you’d like it to appear, then click the gear icon, and scroll down to Advanced. Click Add new rule and select Show this block under Visibility. Next to If select Category, then next to is, select the category pages on which you’d like the widget to appear.
If you want the widget to appear in multiple categories, you’ll need to set a new rule and repeat this process for each one. If you want it to appear for most categories with the exclusion of just a few, you’d be better served to select Hide this block, then choose the category for which you’d like to hide the widget.
The process is identical for setting visibility rules for tags, date, author, and, if you have WooCommerce installed, taxonomy.
6. Only to logged-in users
You can set visibility rules for how and when widgets appear for logged-in users as well. To do this, you’d perform the same tasks described previously: insert the widget, click the gear icon, select Advanced → Add new rule.
Then choose Show this block and, next to If, select User. Next to Is, select Logged In.
This can be especially helpful if you want to provide site maintenance and management resources for members of your team while they’re logged in or include exclusive content for members of your program.
7. Only on specific devices or screen sizes
There are certain instances where displaying widgets (especially sidebar widgets) would be intrusive and generally in the way. This mostly applies to mobile devices like smartphones and tablets.
In these instances, hiding widgets on all mobile devices — or electing to only show them on devices with a certain screen size — is a great way to avoid this issue.
To do this, you will need a plugin. Widget Options is ideal for the job.
To install it, go to Plugins → Add New, then search for “Widget Options.†Install the plugin and click Activate.
Next, go to Appearance → Widgets and select the widget for which you’d like to apply special device/screen size display rules.
In this instance, we’ve selected the Search widget. You can see how the Widget Options plugin has added numerous visibility controls.
Here, click the tab with the device icon. Select which devices you’d like the widget to be hidden on and click Save.
How to add a new widget area in WordPress
In some cases, you might want to add an entirely new widgetized area to your WordPress site. The first thing you’ll need to do is to back up your site before making any changes. And you should also work with a child theme to avoid any mishaps.
Next, you’ll need to add a new widget area to your functions.php file. You can do this by adding the following code, as detailed by Qode Magazine:
function register_custom_widget_area() {
register_sidebar(
array(
'id' => 'new-widget-area',
'name' => esc_html__( 'My new widget area', 'theme-domain' ),
'description' => esc_html__( 'A new widget area made for testing purposes', 'theme-domain' ),
'before_widget' => '<div id="%1$s" class="widget %2$s">',
'after_widget' => '</div>',
'before_title' => '<div class="widget-title-holder"><h3 class="widget-title">',
'after_title' => '</h3></div>'
)
);
}
add_action( 'widgets_init', 'register_custom_widget_area' );
Now that you have your new area registered in functions.php, you can start adding widgets to it from the Appearance → Widgets screen in your WordPress dashboard.
If you’re using the Block Editor, click the + sign below the new widget area and add widgets as you would normally.
Once you’ve done this, you’ll still need to add a bit of additional code to one of your theme’s files to make the new widgetized area appear on your site. Place the following code snippet (again from Qode Magazine) in the appropriate file, e.g. footer.php, sidebar.php, etc:
In some cases, you may need to export and import WordPress widgets. For example, you may want to move widgets from one WordPress site to another.
Exporting and importing WordPress widgets is a straightforward process. First, you need to install and activate a plugin to assist. You can use the Widget Options plugin discussed above to accomplish this task.
Go to Settings → Widget Options and click Enable next to Import & Export Widgets.
Then go to Tools → Import / Export Widgets.
The options presented are super simple. You can either export widgets to then upload to another site or import widgets that you’ve already downloaded from elsewhere.
Select the file(s) you’d like to upload if importing. Or, select where you’d like to save the exported files to on your computer. That’s all there is to it.
In some cases, you may need to disable widgets in WordPress. For example, you may want to disable the Recent Posts widget if you don’t publish content very often.
Disabling widgets in WordPress only takes a couple of steps. While logged into the WordPress dashboard, go to Appearance → Widgets and click on the one you’d like to disable. If you’d like to just get rid of the widget altogether — including any customization or settings you’ve configured — just click the widget and hit backspace or delete on your keyboard.
If you’d like to maintain the settings you’ve ascribed to this widget, however, drag it by clicking the drag icon and placing it in the Inactive Widgets section.
Frequently asked questions about WordPress widgets
Now that you’ve learned how to use WordPress widgets effectively, let’s answer some frequently asked questions.
Why are my WordPress widgets not displaying?
If your WordPress widgets aren’t displaying, the most likely reason is that you haven’t added any widgets to your sidebar. To fix this, go to Appearance → Widgets and add an element to the widgetized area that you’d like.
Another reason why your WordPress widgets may not be displaying is because your theme does not support widgets. If that’s the case, then you need to switch to a widget-ready WordPress theme or manually add a widget area to your site as described above.
Why are my WordPress widgets not updating?
If you’re adding new widgets or updating existing widgets and the changes are not reflected on your website, then the most likely cause is caching. Caching enables browsers to serve saved copies of your website to returning visitors so that it loads much faster. However, this can occasionally cause temporary delays in displaying your updates to your site.
If you’re using a caching plugin, then you need to clear the cache to see the changes on your website. If that still doesn’t work, you may need to check your hosting provider’s cache or clear your own browser cache.
Why is the widgets area not showing up in the admin dashboard?
If you don’t see the widgets area in your WordPress admin dashboard, then it is most likely because your theme doesn’t support widgets. In that case, you need to switch to a widget-ready WordPress theme.
How can I change the size of a WordPress widget?
The size of a WordPress widget is determined by the theme that you’re using. If you want to change the size of a widget, then you need to edit your theme’s stylesheet. Or, you can use a plugin like Widget Options to set the specific dimensions of each widget.
But with a block theme, instead of editing your theme’s code, you can use the WordPress Editor to make template changes. For example, if you have a Post Categories block in your footer, you can simply open the Footer template, then edit the dimensions for that specific block in just a few clicks — no code required! In fact, you can control significantly more aspects with the WordPress Editor than with widget areas. Customize everything from font and background color to button appearance.
Where are widgets stored in the WordPress database?
Widgets are stored in the wp_options table under the name widget_sidebars. If you want to view all the widgets that are currently active on your website, then you can use the following SQL query:
SELECT * FROM wp_options WHERE option_name LIKE '%widget%'
This query will show all the records from the wp_options table that have the word “widget†in their option_name.
Do WordPress widgets slow down my website?
No, WordPress widgets do not slow down your website. However, if you’re using a lot of widgets, then it can make your website look cluttered and affect the user experience. Don’t get carried away with excessive widgets.
What’s the difference between a widget and a plugin?
A WordPress plugin is a piece of software that you can install on your website to add new features and functionality. Widgets are small blocks of content that you can add to your website’s sidebars and other widget-ready areas. Unlike plugins, widgets do not need to be installed and activated. However, you can install plugins to add additional widgets and blocks to your site.
WordPress widgets vs blocks — which to use and when?
WordPress widgets and blocks are two different ways to add content and functionality to your website. Widgets are older and have been around since WordPress version 2.2. Blocks, on the other hand, were introduced in WordPress version 5.0.
Widgets are small pieces of content that you can add to your website’s sidebars and other widget-ready areas. Blocks are similar to widgets in that they add specific kinds of content to your site. The block-based widget editor was introduced to bring blocks to even more areas of WordPress, including the sidebar, header, and footer.
As long as you’re using a theme that supports the Block Editor, you can use blocks anywhere. You aren’t just limited to widgetized areas — but you can put a block in a widgetized area.
In many cases throughout this article, we use these terms interchangeably.
Get started with WordPress widgets
We hope you’ve found this tutorial helpful and that you understand what WordPress widgets are and how to add them to your site. There are lots of fun and useful widgets to explore. Have fun creating a great site for your visitors and exploring unlimited possibilities with WordPress!


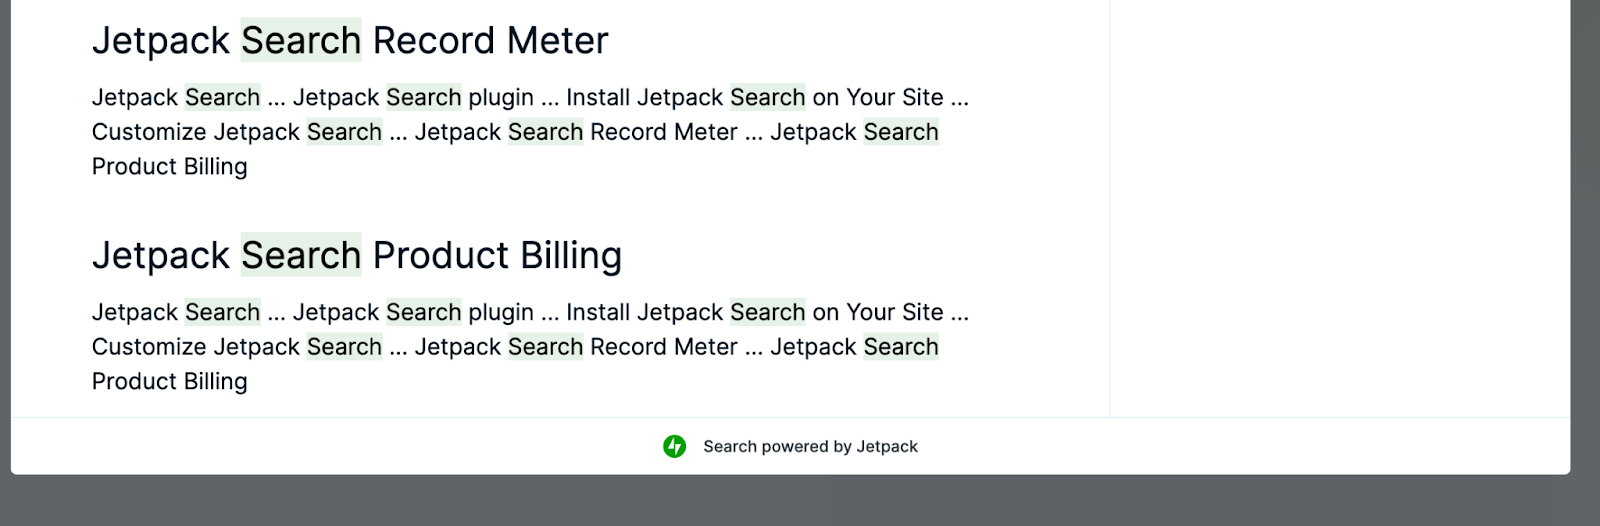


