EDITS.WS

Category: wpmudev.com

  • The Ultimate Web Developer Toolkit

    What constitutes the ultimate toolkit for web developers? To find out, we surveyed our members about what tools they use for their WordPress development business – and the results are in!

    To be clear, we’ve written previously about Must Have tools, but this list is based on what the members of our WPMU DEV community recommend. So, the results are a bit different. We won’t cover every recommendation, but we have narrowed down specifics mentioned more than others.

    We’ll break them down by the most discussed categories…

    Keep in mind, we are not affiliated with ANY of these companies (well, except for us, WPMU DEV, of course). These are strictly companies that were mentioned by our members as top choices for what they use in their WordPress development business.

    So, let’s open up this thing and get started!

    WordPress Management

    WPMU DEV

    wpmu dev header.
    You might be a bit familiar with this company.

    We asked, “What do you use for WordPress management?” And here are a few answers.

    “WPMUDEV for managed hosting, technical support, premium plugins, automated updates and backups.”

    – Keith, WPMU DEV Member

    “Definitely WPMUDEV. I don’t want to blow their horn too much but honestly, it’s just really nice having half this stuff available. That being said, I wouldn’t want to replace any of them. I like them all.”

    – G-Kodes, WPMU DEV Member

    Not to pat ourselves on the back, but WPMU DEV is key to developers’ toolkits around here. Obviously, we asked on our platform, so it’s natural that we’d rank at the top. Still, even if asked elsewhere, we have the essential tools for management, and we’re pretty confident we’d get mentioned.

    We’re used for our award-winning plugins, hosting, 24/7/365 support, the capability of managing multiple sites from our Hub dashboard, domains, client billing – and much more.

    Every aspect of running a successful WordPress development business can be obtained here – where you’re reading this!

    If you’re not a member, sign up for free and get started. You’ll find that everything you need is right at your fingertips in one place.

    ManageWP

    ManageWP header.
    ManageWP was also recommended by some users.

    Like us (WPMU DEV), ManageWP is another popular management platform where you can organize your websites from one dashboard.

    It can add unlimited sites, including team and client collaboration, incremental backups, white-label capabilities, and other features.

    Regarding plugins, it doesn’t feature any built from ManageWP (like WPMU DEV), but you can add plugins into their system – where they can be updated, monitored, and overwritten.

    In our poll, ManageWP seems to complement WPMU DEV as another system of management that works well for some developers.

    Site Development and Plugins

    Divi

    Divi header.
    Divi is no stranger to the WordPress community.

    With a seemingly endless variety, Divi is the go-to theme builder for many WordPress developers. Its visual page builder makes setting up a spectacular website quick and easy, which is why it’s the most popular theme.

    Aside from being easy to use, Divi collaborates well with our services and plugins (such as Smush and Hummingbird).

    Additionally, almost any website can be created for practically any use. It features over 200 website elements and packs for business, eCommerce, and services – you name it.

    Every aspect of Divi is highly customizable, so developers can ensure their clients get the site needed.

    Astra

    astra logo
    Trusted by over 2 million websites and many of our developers.

    Featuring pre-built websites, Astra is a page builder that’s also extremely easy to implement and popular among our developers.

    Everything is highly customizable – from layouts, headers, and colors – it all can be adjusted how you want. Plus, you can mix and match any of your favorite third-party tools, like WooCommerce integration.

    For an accessibility-ready website, Astra continues to be a popular choice.

    Elementor

    Elementor header.
    Elementor has the power to build websites in a streamlined way.

    With its live drag-and-drop editor, website designs, and hosting aspect, Elementor is a platform that many of our developers agree is worth using in their toolbox.

    With Elementor, creating landing pages, blogs, eCommerce stores – anything is easy. It’s all customizable, and additional CSS can be added.

    Their biggest attribute is having an “all under one roof” solution for editing, themes, and hosting. They keep everything updated, perform backups, and include top-notch support.

    Like with Divi, we’ve mentioned Elementor in our blog before and how to optimize it with Smush and Hummingbird.

    Domain Registration and Hosting

    WPMU DEV

    Wpmu dev header.
    Us again!

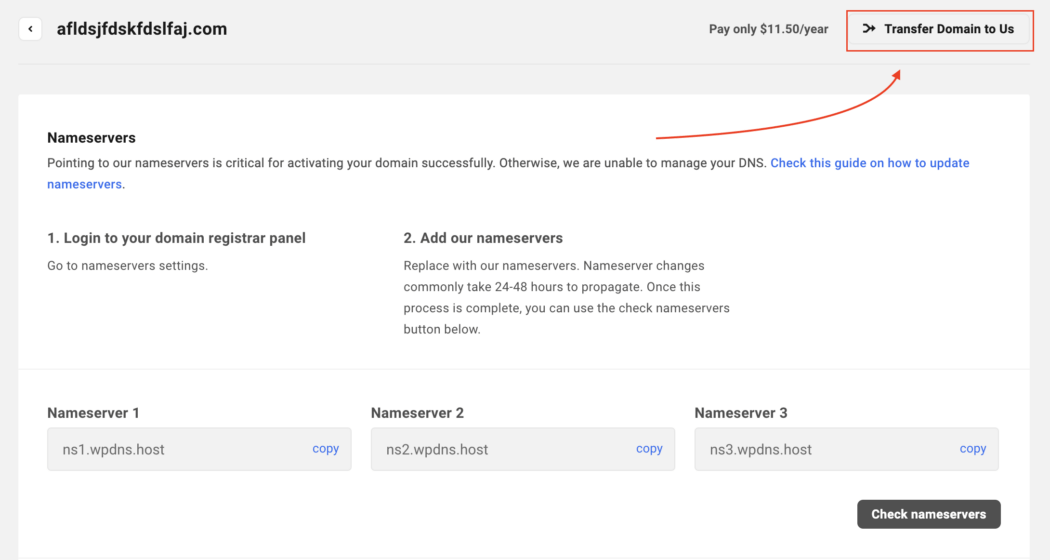
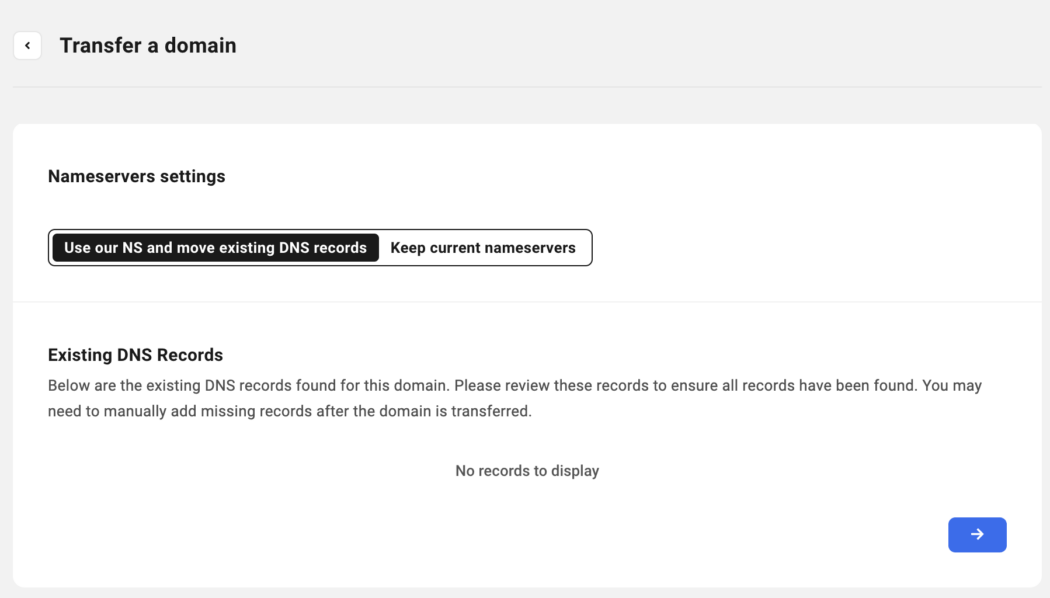
    We discussed our domains and hosting above as a reason developers use us, but it’s worth mentioning it again. That’s because it’s all easily managed in The Hub – with easy registration, domain transfers, and more.

    Plus, with domain reselling, you can purchase domains from us at wholesale prices and sell them to your clients. Additionally, you can white-label the domain service and hosting and use that as an add-on to your development business.

    Be sure to check out some of our domain registration and hosting resources. We have articles that cover it all, including:

    Transferring Your Domains to The Hub

    Registering New Domains

    Doing More with Your Hosting

    These are just several resources. More information can be found on our blog and documentation.

    Namecheap

    Namecheap header.
    Cheap domains? Namecheap strives for that.

    Namecheap has various services for domains, hosting, security, and email. It allows you to transfer domains, select various hosting options (e.g. shared, reseller, VPS, etc), and more.

    With over 2 million users, it’s a highly trusted company for domains and hosting.

    In regards to hosting, they have a walk-through that helps individuals determine what type of hosting is right for them. It’s interesting to figure out what is best for each unique situation.

    With Namecheap focused on WordPress and its discounted prices, it’s a widely used platform for developers.

    GoDaddy

    GoDaddy header.
    GoDaddy is a household name.

    With domains, email, hosting, and WordPress implementation, GoDaddy is also popular choice for many developers. After all, it’s a brand that’s been around a while (since 1997), so it’s an established go-to company for many needs.

    It’s by far the biggest company out of the others mentioned, with over 21 million customers worldwide.

    Plenty of TLDs are available, plus they have hosting, security, and support.

    Bluehost

    bluehost logo
    Bluehost was recommended by quite a few developers in our survey.

    With hosting and domain, Bluehost offers some very appealing discounts to web developers. You can get an eCommerce store, WooCommerce integration, and more at a good rate.

    Plus, they have a dashboard for developers where you can manage all of your WordPress sites in one spot. Additionally, they offer 24/7 support.

    Along with WPMU DEV, Bluehost was one of the most recommended services for hosting and domains when we surveyed our developers.

    Communication

    Google Workspace

    Google Workspace logo.
    Google has a ton of solutions for developers and their businesses.

    “Gmail’s multiple inbox feature – lifesaver!”

    – Greg, WPMU DEV Member

    Whether it be Gmail, Meet, Drive, Calendar, or Docs, Google Workspace checks a lot of the boxes in communication for developers.

    Here at WPMU DEV, we use Google Workspace for our email, calendars, and docs (in fact, the drafts of all of these posts are written on Gdocs).

    Google has a reputation for quality and efficiency. Rarely does Google Workspace stop working or have issues. It’s no wonder that it’s such a popular communication tool.

    Also, implementing everything under one system is quite beneficial (e.g. adding an appointment from Gmail to Google Calendar). It’s a streamlined process for flawless integration.

    MS Teams

    MS Teams logo.
    MS Teams is another popular collaboration tool.

    Microsoft Teams is a powerful platform that provides many benefits for developers’ businesses.

    One major highlight is having centralized communication for file sharing, messages, and other information in one place – keeping things organized and reducing the need for emails.

    Additionally, it’s a good way for developers to collaborate with other team members. For example, if you’re working with a graphic designer, you can go back and forth seamlessly.

    Like Google, it integrates with other Microsoft products, such as SharePoint, OneDrive, and Outlook. This helps with working across various platforms in the Microsoft universe.

    Slack

    Slack header.
    Slack is no stranger to us.

    Slack is another platform that we use here at WPMU DEV. It’s also used by developers worldwide as a go-to source for cloud-based communication.

    It features organized communication with channels and direct messaging. The messaging is done in real-time, eliminating the need for email.

    Plus, you can share files and documents in just a few clicks across channels and messages.

    When it comes to integration, we integrate Google Calendar and Jira. Other integrations, such as Trello and Zoom, are available, too.

    Another big benefit of Slack is the Huddles. It’s how we communicate via voice in meetings all around the world. This can be done in specific channels, where team members can hop on and participate in calls quickly and easily.

    WhatsApp

    WhatsApp header.
    WhatsApp is a good communication tool for messaging.

    With voice and video calls, chats, and private messages, WhatsApp is a communication tool for developers and clients.

    It features end-to-end encryption so that personal messages and calls are secured. Nobody, not even the app itself, can read or listen to them.

    Plus, you can create groups, so if you’re working with a team on a development project, you can all be in the loop in one spot.

    They even have a WhatsApp Business that offers business solutions for banking, eCommerce, and much more.

    Loom

    loom header
    For a quick messaging solution, Loom has you covered.

    Loom is a popular solution with over 14 million users who are used to saving time from meetings by providing a quick video.

    You can record your screen and camera from any device. They have desktop and mobile apps and a Chrome extension. When sharing with your clients or team members, paste a link to your video so recipients can view it without logging in or creating an account.

    Also, you can use emoji reactions, time-stamped comments, and interactive features for interactions. Whatever works best for the clearest lines of communication.

    Organization

    Jira

    Jira header.
    Jira is a great way to stay organized.

    Like Google WorkSpace and Slack, Jira is another software we use daily at WPMU DEV. Other developers mentioned Jira as one of the best, too.

    It breaks big ideas into smaller chunks across teams via stories, issues, and tasks. For example, for this blog, we have our individual writers and the topics they’ll be writing about. Then, as the process goes from conception to rough draft and final, its progress is moved along for the team to see.

    Great for teams of all sizes, Jira can organize and streamline workflow better than a lot of software out there. So if you’re a developer that has a team working on a specific goal, your progress will be easily monitored and can be adjusted along the way.

    TidyCal

    TidyCal header.
    A way to book meetings and more.

    TidyCal is a perfect solution for setting client availability, creating a meeting length, and much more.

    You can set up a specific date, show the number of spots available, and create your booking page. From this, you can embed on WordPress sites, set up multiple booking types, and create email reminders.

    It’s a quick and easy way to set up appointments, meetings, and everything your development business needs.

    Trello

    Trello header.
    Trello’s another way to improve workflow.

    “I use Trello for project management and to organize my worklists.”

    – Marianna, WPMU DEV Member

    With boards, lists, and cards, Trello has what it takes to get your development projects on target.

    You can keep tasks in order and assign specific members to each to meet deadlines on time. It keeps all the projects organized in one place, viewable from every angle.

    With their system, you can see the big vision and edit any upcoming projects to get a real sense of the pipeline heading your way (or your team member’s way).

    In a nutshell, Trello simplifies things and organizes your workflow. It’s a top choice for many developers surveyed.

    Figma

    Figma header.
    Figma is a good fit for designers in WordPress.

    Figma is a collaboration tool that allows designers and other team members to work together in real time. With all the remote work developers do, it’s a great platform to get design work done.

    Each design version is saved, so designers can easily make any adjustments or edits. With all the complex designs that can go into web development, this is useful in case you need to revert to the original design.

    Our designers at WPMU DEV use Figma for various illustrations and design projects (including the banners you see on our blog).

    Notion

    Notion header.
    When it comes to working with your team, consider Notion.

    “Notion. I’m in it all day, every day. I even built a client dashboard template, and want to create more for others.”

    – Keith, WPMU DEV Member

    Notion is a collaboration tool with many organizing, integration, and customization features.

    It’s great for product roadmaps, managing the execution of projects, and keeping everything in one place. You can set up brand guidelines for specific development clients, including code guidelines.

    Plus, you can customize the workflow to your team’s style to have the perfect system that works for you.

    Regarding integration, it works well with Google Docs, Dropbox, Trello, Asana, and many more third-party companies.

    Design

    Adobe

    Adobe Creative Cloud header.
    With Photoshop, Illustrator, and more, Adobe Creative Cloud is often a designer’s choice for creating images.

    The ultimate creative toolkit is Adobe Creative Cloud, which includes awesome design tools such as Photoshop, Illustrator, InDesign, and more.

    Creative Cloud is a membership-based program. It includes fonts, stock images, collaboration tools, and the capabilities to create, design, edit, and so forth.

    Plus, there are communities for Adobe users, like Behance – where designers can show off their work.

    As an established brand, Adobe products have been and will continue to be, a top choice among designers in the WordPress industry.

    Canva

    Canva header.
    Canva is another designer software company.

    “Canva for work with some client graphics.”

    – Keith, WPMU DEV Member

    Canva is another top choice for developers and designers we surveyed. One difference from Adobe products is it has ready-made templates, images, and content.

    You can invite people to edit, brainstorm ideas on whiteboards, and scale content. Once a project is ready for launch, you can easily present, download, schedule, and share designs.

    When it comes to templates, there are a lot to choose from. Everything from real estate businesses to blogs. Plus, there are infographics, backgrounds, videos, and much more.

    Payments

    Stripe

    stripe header
    Stripe is used around the world as a payment platform.

    Stripe is a payment solution for millions of companies worldwide. It’s easy to implement to accept payments and send payouts in numerous platforms.

    Not only is it used online, but it’s also implemented in-person.

    Regarding development business, its easy-to-use API can be used as a client payment method quickly and easily. We use Stripe as an option for our products (e.g. Client Billing and our Forminator plugin).

    Considering WordPress developers have clients worldwide, it’s the perfect solution for global commerce.

    PayPal

    PayPal logo
    PayPal is no stranger to eCommerce and more.

    PayPal is another payment method used by clients and customers for WordPress development businesses. Like Stripe, it can easily be implemented and used worldwide.

    Their secure platform lets you set up payment options and make payments with just a few clicks. Additionally, they have systems for invoicing, installment payments, and POS systems.

    Along with being a top choice for developers, we also use PayPal as an option with our products.

    Office Essentials

    Spotify

    Spotify logo
    Spotify is essential for music for many developers.

    Spotify features albums, singles, playlists, podcasts, and more from favorite artists and entertainers. If you’re the type that needs some background noise to be productive, or if you enjoy listening to the latest album from your favorite band while working on code, Spotify might prove to be an essential in your toolbox.

    Almost any song or album imaginable is on their platform. Plus, they automatically create a customized playlist for you, or you can create your own. If you enjoy podcasts, there are thousands of options.

    It’s no wonder Spotify became an important part of developers’ workflow. Its digital streaming of music can boost mood and productivity and makes working from home much more enjoyable.

    Pandora

    Pandora header.
    Pandora is another popular choice for background music while working.

    Pandora is another streaming platform that came out as a favorite for developers. Like Spotify, it creates uniquely personalized music and podcasts experience.

    You select what interests you, and Pandora creates stations based on songs, artists or genres you like. Then, it will play related content.

    From this, you can select songs you like or don’t like. Pandora will then tweak the preferences to what you’ve selected.

    It’s a bit more like a radio than Spotify, but that’s not bad. Pandora helps you discover new music, play what you enjoy, and gives you a nice variety. It’s used by developers worldwide to get through a busy day working on WordPress-related business.

    BONUS ESSENTIAL: Coffee

    coffee image
    Yes, this is essential for some developers.

    For some developers, coffee is the boost they need to get through the day. It awakens the senses, helps keep them alert, wakes them up, and tastes great! So, we thought this might be a nice bonus essential to add to a developer’s toolbox. Just don’t spill it on your computer.

    All the Tools are in One Place

    What does your toolbox look like? Hopefully, whatever it is, you have the essentials all in one place and easily accessible to ensure your development business runs smoothly!

    These were some top picks based on our survey from our members, so results will vary across the WordPress spectrum. However, you might find some of these tools essential to add to your toolbox today – or, more likely, are using some already.

    If WPMU DEV isn’t a part of your development, try us today. We have all the essentials in one place, including hosting, plugins, domains, site management, and more. Plus, 24/7 support, a member community, and other resources.

    And as you can see, there was no hammer in this toolbox. You won’t need it to smash your computer out of frustration since these recommended tools help your development business run smoothly. After all, if our members use them, there’s a good chance many will work for you!

  • How This Web Dev Went from 0 to 60 (Websites)

    This is the first in a series, Member Success Stories, where we ask WPMU DEV-ers who are killing it in the WordPress web dev business to share key contributors of their success with us – and you.

    Today we welcome Phil, the owner of Capital Web Design, a Canadian web services agency based in Ottawa.

    WPMU DEV: Congrats on your professional success, Phil. Please tell us straight away, how did you grow your business so fast?

    Phil: I wouldn’t say the business itself grew that fast. I’ve been building websites in some way or another since the early 2000s. Either static sites coded by hand (HTML + CSS + Javascript), using frameworks (VueJS), or with WordPress.

    I started my freelance web design company in 2014, after being approached to do a replacement build for what was a costly, difficult to maintain website – and that became my first client. From there I found small and medium businesses in my hometown that had old, unsupported and unmaintained websites, or who had no website at all.

    As I continued my efforts, my business ethos emerged: help companies, nonprofits and individuals in my city build a web presence they can be proud of. I focused on creating bespoke WordPress web design based on well-supported multipurpose themes, WPMU DEV and other dependable plugins, and fully managed white-glove web hosting.

    Since then, I’ve had the pleasure of working with 20+ clients, and have built 60 websites targeting a multitude of industries and commercial sectors.

    WPMU DEV: That’s awesome. Did you know about WPMU DEV at that time?

    Phil: I had known about WPMU DEV since around 2016-18, back when you offered dozens of plugins for all sorts of functionality. I couldn’t justify the cost of a membership then, but I popped in every so often to check and see what progress was being made.

    In 2019, Hosting was added as a WPMU DEV service – and this really caught my attention. During the Black Friday promotion that November (lifetime reduced membership cost!), I joined as a member, and I can’t see myself ever leaving.

    It was a perfect storm: high-quality plugins + managed hosting + 24/7 support + highly reduced cost.

    WPMU DEV: So as you were building your clientele, you were putting together your professional tool box. Can you give us a peek inside?

    Phil: The tools and services from WPMU DEV have been invaluable to me.

    Plugins have provided me with consistency and reliability for all of the most important aspects of WordPress websites.

    Knowing that I can count on Hummingbird and Smush for performance optimization allowed me to stop using other freemium plugins such as W3 Total Cache, Autoptimize, WP Super Cache and EWWW Image Optimization. I found these plugins were all good at some things, but had a lot of paywalled features that Hummingbird and Smush offered out of the box, for free.

    Defender has been a great peace-of-mind addition to my repertoire, as the one-click recommended fixes are super straightforward and quite effective.

    Forminator forms may be difficult at times to style with CSS, but that’s more than made up for in functionality. The drag-and-drop UI makes it much easier to build forms compared to Contact Form 7, and the amount of extras that are baked in (calculation, email routing, etc) blow other (often paid) form builders out of the water.

    WPMU DEV: Aside from plugins, you mentioned our services have made a huge impact as well. Can you expand on that?

    Phil: When it comes to services, it’s hard to put into words just how much The Hub and the associated Hosting have helped me throughout the last few years.

    I have worked with hosting providers like 1and1, DreamHost, Media Temple, Digital Ocean VPS, and Bluehost. Each had their advantages, but in the end it always became a chore to use their services. It was clear that the quality of their offerings reflected the low cost they positioned themselves at. They were in a perpetual fight to undercut their competitors on price, at the cost of quality of service and support.

    WPMU DEV Hosting came in late in the game, but out of the gate addressed two of the major concerns I experienced at other hosts: lack of support, and lack of trust in the infrastructure.

    By having dedicated resources (versus shared), the web servers were consistently fast, reliable, and offered premium features such as staging, backups and WAF.

    WPMU DEV: Walk us through a typical work day; what you reach for the most, and your usual workflow.

    Phil: I keep The Hub open in a tab at all times, refreshing it every once in a while to keep track of ongoing community discussions, website maintenance statuses, and plugin updates.

    I subscribe to key email notifications to receive alerts of technical issues on my managed sites, as well as member discussions in the WPMU DEV member forums, blogs and newsletter.

    When a technical issue occurs, I’m able to troubleshoot it quickly. If I’m unable to resolve it on my own, the LiveChat support is always there to help me right away.

    WPMU DEV has allowed me to optimize my workflows across the board, in areas like:

    • Faster site creation with one-click managed WordPress server provisioning from The Hub.
    • Easier client invoicing using Client Billing.
    • More efficient website monitoring and maintenance through The Hub.
    • Lower maintenance effort required with WPMU DEV plugins.
    • Faster technical troubleshooting with the LiveChat support.

    WPMU DEV: Outside of your own talent and determination, what would you say has contributed most significantly to your growth?

    Phil: WPMU DEV has reduced my server build-out time from 30 minutes to 3 minutes (90% reduction). Over the past few years I’ve stood up well over 75 servers, so this has saved me many hours of effort.

    At the time of joining, The Hub allowed me to manage about a dozen sites from a central location as opposed to manually logging in to each separate site. This was a reduction of biweekly maintenance effort from approximately 60 minutes to 2 minutes.

    Client billing and streamlined invoice creation allowed me to save approximately 20-30 minutes per invoice creation, which throughout the past few years I estimate has saved me over 30 hours of work.

    All of these time and effort savings have allowed me to comfortably take on more projects and clients.

    Since joining WPMU DEV, my completed projects count has grown approximately 416% – with each project being more efficient to produce than the last.

    WPMU DEV: As a self-proclaimed diehard fan, you know we’re constantly upping our game and adding new features and services to our offerings. What’s a newer release that you’re really getting into?

    Phil: Reseller focus. I look forward to adding WPMU DEV automated site provisioning via the reseller offerings, as well as domains and email reselling.

    WPMU DEV: One last question; let’s close it out with a fun one. If you could talk to yourself at the start of your career, what would you say?

    Phil: At the start of my career, I often looked up to senior staff who seemed wise beyond their years. I was afraid of making mistakes or breaking something, for fear that those-who-never-broke-anything would look down on me.

    I would try to explain to a younger me that wisdom comes with experience, and experience comes from doing things, failing, and working through the failure.

    The more things you work on, the more you get exposed to what works and what doesn’t. Failing or breaking something isn’t strictly negative, because every failure is a learning opportunity: troubleshoot what went wrong, understand how to fix it, and implement a solution.

    Do this cycle enough times and you start to pre-emptively detect patterns, plan for success, and you get faster at fixing problems. Don’t be afraid of failure because the more you fail, the more you learn and the wiser you will become.

    That wraps up this premiere episode of our Member Success Stories. Thanks to Phil for his candid, insightful answers in our interview.

    Phil is one of WPMU DEV’s Agency Partners, and usesCapital Web Design - Ottawa Web Design his 20 years of web design experience to achieve one goal: give back to his hometown by building modern websites for businesses and nonprofits in the Canadian capital.

    You can reach Phil via his agency partner listing or visit Capital Web Design.

  • 17 Time-Saving CSS Tips For WordPress Users

    WordPress offers endless possibilities for designing and customizing your website. In this article, we’ll share some practical CSS tips specifically for WordPress users, from styling your header to tweaking your fonts.

    While WordPress offers plenty of pre-made themes and templates, sometimes you need to take matters into your own hands and make customizations with CSS.

    If you have ever asked any of these questions as you work on your WordPress site:

    • “How do I remove the ‘read more’ button?”
    • “How can I change the color of this link?”
    • “How do I make this link unclickable but keep the text on the page?”

    …then read on to learn some valuable CSS tricks for your website.

    In this tutorial, we’ll cover:

    WordPress CSS Tips

    The only two things you need to know to implement these tips are:

    Note: CSS is not risky, so if you make a mistake you can just delete your code or modify it… it won’t break anything 🙂

    With that out of the way, let’s jump straight into some practical CSS tips with examples so you can try it on your own WordPress site:

    Center an element horizontally and vertically

    To center an element (such as an image, text or a div) both horizontally and vertically, use the following CSS code:

    .element {
    position: relative;
    top: 50%;
    left: 50%;
    transform: translate(-50%, -50%);
    }
    

    In this code, the position: relative property is used to position the element relative to its nearest positioned ancestor. The top: 50% and left: 50% properties move the element to the center of its container. Finally, the transform: translate(-50%, -50%) property centers the element both horizontally and vertically by moving it back 50% of its own width and height.

    .item-class{
    color : blue;
    }
    

    You can use colors like white, black, blue, red… but you might want to use specific colors.

    In this case, you can do it like this:

    .item-class{
    color : #F7F7F7;
    }
    

    If you’re looking to create a color palette for your website design, try using the Paletton tool. It’s very helpful!

    Note: If you want to combine elements, it is pretty easy.

    For example, let’s say you want to disable the click and put the link back in black.

    You can use this code:

    .item-class{
    pointer-events : none;
    color : black;
    }
    
    .item-class{
    display : none;
    }
    

    Note: Sometimes you may need to put an a after your class to make it work, like this:

    .item-class a{
    display : none;
    }
    

    Try adding the a or experimenting without it to see if your code is working or not. Just add your CSS, save, and check your frontend.

    Note: It is always better to modify HTML in order to do this, but if CSS might be easier or the only solution possible, use this code:

    .item-class{
    pointer-events: none;
    }
    

    You can make links change color when a user hovers over them by using the following CSS code:

    
    a:hover {
    color: red;
    }


    In this code, the a:hover selector targets all links on the page that the user is currently hovering over. The color: red property changes the color of the text to red.

    To style links on your website, use the following CSS code:

    
    a {
    color: #0077cc;
    text-decoration: none;
    border-bottom: 1px solid #0077cc;
    transition: all 0.2s ease-in-out;
    }
    
    a:hover {
    color: #005299;
    border-bottom: 1px solid #005299;
    }


    In this code, the a selector is used to style all links on the page. The color property sets the color of the links, and the text-decoration property removes the default underline. The border-bottom property adds a subtle underline effect. The transition property creates a smooth transition effect when the user hovers over the link. The a:hover selector is used to style the link when the user hovers over it.

    Style a button

    Use the following code to style a button:

    
    .button {
    background-color: #4CAF50; /* Green */
    border: none;
    color: white;
    padding: 15px 32px;
    text-align: center;
    text-decoration: none;
    display: inline-block;
    font-size: 16px;
    margin: 4px 2px;
    cursor: pointer;
    }


    In this code, the various properties are used to style a button, including the background-color and color properties for the button’s appearance, the padding property for the button’s size, and the cursor property to change the mouse pointer when hovering over the button.

    Change the font of a section

    Change the font of a section of your website using the following CSS code:

    
    .section {
    font-family: Arial, sans-serif;
    font-size: 16px;
    line-height: 1.5;
    }


    In this code, the font-family property sets the font to Arial or a similar sans-serif font, the font-size property sets the font size to 16 pixels, and the line-height property sets the spacing between lines of text to 1.5 times the font size.

    If you want to create a header that stays fixed to the top of the page as the user scrolls, you can use the following CSS code:

    
    .header {
    position: fixed;
    top: 0;
    left:0;
    width: 100%;
    background-color: #333;
    color: #fff;
    z-index: 9999;
    }


    In this code, the position: fixed property fixes the header to the top of the viewport, and the top: 0 property positions it at the very top of the page. The width: 100% property ensures the header spans the entire width of the viewport. The background-color, color are used to style the header, and the z-index: 9999 property ensures that the header appears on top of all other elements on the page.

    Create a sticky header with a shadow effect

    To create a sticky header with a shadow effect that stays fixed to the top of the page as the user scrolls, use this CSS code:

    
    header {
    position: fixed;
    top: 0;
    left: 0;
    width: 100%;
    background-color: #fff;
    z-index: 999;
    box-shadow: 0 2px 5px rgba(0,0,0,0.1);
    }
    
    .content {
    padding-top: 100px;
    }


    In this code, the position: fixed property is used to fix the header to the top of the page. The top: 0 and left: 0 properties position the header at the top-left corner of the page. The width: 100% property sets the width of the header to be the full width of the page. The background-color property sets the background color of the header, and the z-index property ensures that the header appears on top of other elements on the page. Finally, the box-shadow property adds a subtle shadow effect to the header. The .content selector is used to add padding to the top of the page so that the content doesn’t get covered by the fixed header.

    Add a background color to a section

    Do you want to add a background color to a section of your website? Then use the following CSS code:

    
    .section {
    background-color: #f2f2f2;
    padding: 20px;
    }


    In this code, the background-color: #f2f2f2 property sets the background color to a light gray, and the padding: 20px property adds 20 pixels of space around the content within the section.

    Change the background color of the body

    Add this code to change the background color of the body of your website:

    
    body {
    background-color: #f5f5f5;
    }


    In this code, the background-color property sets the background color to a light gray.

    Change the color of a specific word or phrase

    To change the color of a specific word or phrase within a block of text, you can use the following CSS code:

    
    p span {
    color: red;
    }


    In this code, the p span selector targets any span element that appears within a p element. You can then wrap the word or phrase you want to target with a span element in your HTML, like this:

    <p>Lorem ipsum dolor sit amet, <span>consectetur adipiscing elit</span>. Sed do eiusmod tempor incididunt ut labore et dolore magna aliqua.</p>

    This would make the phrase “consectetur adipiscing elit” appear in red.

    Create a border around an image

    Here’s how to add a border around an image:

    
    img {
    border: 2px solid #ccc;
    }


    In this code, the border property sets the width, style, and color of the border. The 2px value sets the width of the border to 2 pixels, solid sets the style to a solid line, and #ccc sets the color to a light gray.

    Create a hover effect on an image

    Use this code snippet to create a hover effect on an image:

    
    img:hover {
    opacity: 0.8;
    }


    In this code, the img:hover selector targets the image when the user hovers over it. The opacity property sets the transparency of the image. In this case, the value is set to 0.8, making the image slightly transparent when the user hovers over it.

    Style a form

    Style a form on your website with the following CSS code:

    
    form {
    background-color: #f2f2f2;
    padding: 20px;
    border-radius: 5px;
    }
    
    form label {
    display: block;
    margin-bottom: 10px;
    }
    
    form input[type="text"], form input[type="email"], form textarea {
    width: 100%;
    padding: 10px;
    margin-bottom: 20px;
    border: none;
    border-radius: 3px;
    box-shadow: 0 0 5px #ccc;
    }
    
    form input[type="submit"] {
    background-color: #4CAF50;
    border: none;
    color: #fff;
    padding: 10px 20px;
    border-radius: 3px;
    cursor: pointer;
    }
    

    In this code, the various properties are used to style a form, including the background-color, padding, and border-radius properties for the overall appearance of the form. The form label selector is used to style the labels associated with each form field. The form input[type="text"], form input[type="email"], form textarea selector is used to style the various input fields in the form. The form input[type="submit"] selector is used to style the submit button.

    Create a responsive layout

    If you want to create a responsive layout that adjusts to different screen sizes, use the following CSS code:

    
    @media (max-width: 768px) {
    /* Styles for screens smaller than 768px */
    .container {
    width: 100%;
    }
    
    .menu {
    display: none;
    }
    
    .mobile-menu {
    display: block;
    }
    }
    
    @media (min-width: 769px) {
    /* Styles for screens larger than 768px */
    .container {
    width: 768px;
    margin: 0 auto;
    }
    
    .menu {
    display: block;
    }
    
    .mobile-menu {
    display: none;
    }
    }


    In this code, the @media rule is used to specify different styles for different screen sizes. The first @media rule targets screens with a maximum width of 768px, and the second @media rule targets screens with a minimum width of 769px. The various selectors within each @media rule are used to adjust the layout and appearance of the page based on the screen size.

    One more CSS tip…

    You might find your code not working even though you did everything correctly. This might be because there is already a CSS code saying something different than your code.

    To override this, just add !important like this:

    .item-class{
    pointer-events: none !important;
    }
    

    These are just a few examples of practical ways you can use CSS to enhance your WordPress website.

    With CSS, the possibilities for customizing your website’s appearance are virtually endless. By learning and applying these tips, you can create a website that is not only visually appealing but also optimized for a better user experience.

    Take Your CSS Skills to The Next Level

    Whether you’re a beginner or a seasoned pro web developer or web designer, if you want to dive deeper into using CSS with WordPress, these additional CSS tutorials will help you expand your knowledge and skills:

    Click on the links to learn more and start improving your WordPress website today.

    Contributors

    IncensyThank you to WPMU DEV member Antoine from Incensy for contributing the idea for this post and several of the CSS examples used above.  Check out Incensy’s Agency partner profile for more details.

    ***

    Note: We do not accept articles from external sources. WPMU DEV members, however, may contribute ideas and suggestions for tutorials and articles on our blog via the Blog XChange.

  • 5 Brilliant Companion Products to Make Your WordPress Websites Compliant

    Compliance on websites isn’t a fringe component. It’s a serious, legal matter, which can seriously affect your business.

    Legal fees can be expensive, and add up quickly. Also, law is complicated, and can vary based on where you live and do business from. How does one accomplish compliance without getting their own law degree? (Or having a best friend who passed the bar exam?)

    There is a way you can dot your I’s and cross your T’s, get all your ducks in a row, check all the boxes, cover your bases (this IS a post about full compliance, so one expression didn’t seem like enough 😀) – without draining your bank account, or losing your sanity.

    Because WordPress is far and above the leading CMS, there are a good number of options when it comes to compliance regulation companion products.

    We looked into the pool of offerings, picked the ones we thought were smart, solid, and sound, and are presenting them to you here.

    Keep reading, or jump ahead to any section:

    First up, let’s examine…

    Why Compliance is of Utmost Importance

    Privacy is a major factor in today’s world, and personal information is protected by a fast-growing assortment of legal rights.

    Throughout the first three-quarters of the 20th century, collected data was relatively minimal, there were few ways to store it, and demand for its collective use wasn’t really a thing.

    However, from the ’70s through today, as the inherent value of data grew – along with improved methods to collect, store, use, and profit from it – so has the need for legislation to protect it.

    Living in the era of Big Data, where the sheer volume of data has increased to previously unimaginable amounts, a true premium has been put on an individual’s rights to protect it.

    Non-compliance with the legal safeguards comes with steep fines and other serious penalties.

    A Timeline of Enacted Privacy Protections

    While data protections may have started slowly, they will continue to pick up speed as the by-product of ethical examination and pivotal litigations surrounding privacy.

    Let’s take a peek at the landmark protections in the history of privacy legislation.

    The Privacy Act of 1974 established the Code of Fair Information Practice on the collection, maintenance, use, and dissemination of personally identifiable information from US federal agencies.

    The Data Protection Directive was adopted by The European Union in 1995. The principles set forth were aimed at the protection of fundamental rights and freedoms in the processing of personal data. This was superseded by the GDPR in 2018.

    The Health Insurance Portability and Accountability Act (HIPAA) was established in 1996 to protect Personally Identifiable Information maintained by the healthcare and health insurance industries from theft and fraud, safeguarding people’s medical information from being used without their consent.

    The Children’s Online Privacy Protection Act (COPPA) was enacted by Congress in 1998 and requires the Federal Trade Commission to issue and enforce regulations concerning children’s online privacy. The amended Rule became effective on July 1, 2013.

    The General Data Protection Regulation (GDPR) for data protection and privacy became law in 2018 in the European Union (EU).

    The GDPR applies to the transfer of personal data outside of the EU and EEA (the European Economic Area is the countries of Iceland, Norway, and Liechtenstein), and replaced the Data Protection Directive from 1995.

    Shortly thereafter, State Privacy Legislations in the US started…

    • California Consumer Privacy Act (CCPA) – signed into law 2018; effective 2020
    • California Privacy Rights Act (CPRA) – also known as CCPA 2.0, enacted in 2020
    • Virginia Consumer Data Protection Act (VCDPA) – legislated in 2021; effective January 1, 2023
    • Colorado’s Privacy Act – will be effective July 1, 2023
    • Connecticut’s Personal Data Privacy and Online Monitoring Act – will be effective July 1, 2023
    • Utah’s Consumer Privacy Act – will be effective December 31, 2023

    While the US does not have a single, comprehensive, internet privacy law, one is currently being proposed by federal privacy legislation: the American Data Privacy and Protection Act (ADPPA). If passed into law, it will supersede all state privacy laws. Until then, it’s up to individual states to pass legislation that protects customer data.

    Which Components Do You Need?

    At this point you may be wondering, with so many already existing and soon-to-be-effective legal stipulations on data, which ones are you required to adhere to as a website or app owner?

    That’s what we’ll lay out now in…

    Compliance Requirements

    To best meet overall compliance, websites should minimally have:

    • Privacy Policy
    • Cookie Policy

    … and …

    • Consent (Record of Consent)

    Let’s put a pin in Consent for a bit, and come back to it after we look at the policies.

    A Privacy Policy addresses all the different ways your website or app might collect, process, and store data from users, both online and off.

    A Cookie Policy specifically addresses how you use cookies and third-party services.

    Because of the overlap, websites sometimes include a cookie policy in their privacy policy, as part of the overall data collection.

    However, cookie policies need to be regularly updated (as cookies are dynamic and often change upon successive visits), whereas policy policies tend to be static.

    More importantly, if you fall under the scope of the GDPR, your Cookie Policy must be separate from your Privacy Policy.

    You can still incorporate a short Cookie Clause in your Privacy Policy, or cross-reference the agreements (for example, link your Cookie Policy to your Privacy Policy), but you shouldn’t combine the agreements into one.

    Even if you don’t fall under the scope of GDPR, it’s safer and smarter to create a separate Privacy Policy and Cookie Policy, instead of merging them into one.

    Let’s dive a little deeper into both of these important policies.

    Privacy Policies

    Most laws around the world require a privacy policy.

    Privacy policies are legally required agreements when collecting any personal data from users (e.g. payment details, address and phone number, cookie data), regardless of the platform used (e.g. website, mobile app, desktop app, etc).

    You may need a privacy policy to use third-party APIs and services (e.g. Instagram, Google Analytics, or Google Adsense), or to list your app in a commercial marketplace such as the Apple App or Google Play stores.

    Without a privacy policy, you risk your business getting hit with hefty fines and/or having your website taken down, especially if you’re found to be in breach of privacy laws.

    Key privacy policies or agencies, by country of origin are:

    1. Europe/European Union – GDPR (businesses in or operating with EU/EEA)
    2. United States – by state (CCPA, CPRA, CalOPPA, VCDPA)
    3. Canada – PIPEDA
    4. Australia – The Privacy Act 1988
    5. Germany – BDSG, and DSGVO (German name for the GDPR)
    6. France – CNIL (the commission overseeing privacy policies)
    7. South Africa – The POPI Act (POPIA)
    8. Brazil – LGPD (broadly aligns with the GDPR)

    Lesser-known privacy laws exist around the world as well; the above is not to be considered an exhaustive list.

    While privacy policies are generally referred to by location of origin, they can extend to any region that does business with them. Meaning, don’t assume that if you reside outside of Europe that the GDPR doesn’t apply to you.

    The EU’s GDPR and US state laws (#1 and #2) are the most broadly reaching and widely followed privacy policies. But that’s not to say that the others don’t matter; it’s important to research any that might apply to your business.

    Cookie Policies

    Cookie policies are legally binding documents that inform website or app users how a company engages in data tracking and online privacy.

    Cookie identifiers are considered to be personal data by the GDPR, so its rules apply to cookie usage as well. Also, any personal data collected by cookies falls under the GDPR’s jurisdiction.

    The ePrivacy Directive (ePD) of the EU – nicknamed the “Cookie Law” – requires security measures be put in place to protect personal data. This regulates cookie usage, email marketing, data minimization, and other aspects of data privacy, and is largely responsible for the cookie consent forms that you encounter on most websites today. (Sidebar: This doesn’t replace the Cookie Law I grew up with; “Don’t ever serve chocolate chippers without milk.”)

    The ePrivacy Regulation (ePR), the details of which are currently being hammered out by legislators, will replace the ePD once it’s passed into law.

    Consent / Record of Consent

    Taking out that pin that we placed earlier, it’s time to look at Consent.

    The important distinction between Policy and Consent is this: Policy discloses details regarding the use of cookies, while Consent informs and records the allowances from users regarding usage.

    Make sure you incorporate consent into your Privacy/Cookie policies. Full GDPR compliance means storing proof of Consent, and being able to demonstrate or retrieve details should they be requested.

    I can’t stress this enough: having Privacy/Cookie policies without consent could cause major problems for you.

    Additional Legal Protections

    While protecting user data is of paramount importance, privacy isn’t the only concern for someone managing websites.

    There are other important, legal considerations when it comes to engaging the public online.

    We’ll take a look at them now.

    Terms & Conditions

    Unlike Privacy Policies, there are no laws that require you to have a Terms & Conditions agreement, though it is highly suggested to have one.

    Without a T&C, it’s much more difficult to enforce your rules and community guidelines, copyright protection, or other issues that could arise from the misuse of your website/app content.

    The majority of the public will act courteously, but that’s not who you’re protecting yourself from. It’s the small percentage of outliers who can sometimes do the most damage. Having explicitly stated Terms & Conditions can offer basic protections for you and your business, limiting your liability and declaring your rights over the content you create, in case anyone engages in abuse, intellectual property theft, or unlawful behavior.

    The most common reasons for Terms & Conditions are to:

    1. Prevent abuses
    2. Protect your creative content
    3. Terminate accounts
    4. Limit your legal liability
    5. Set your governing law

    If you’ve ever seen a clause in a T&C stating where (geographic region) any dispute resolution must take place, that falls under governing law, and is quite useful if you don’t want to litigate legal matters in a country outside of your own.

    Disclaimers

    Disclaimers can be used to offset liability from a business to a client in ambiguous or gray legal areas, or where they are required by law.

    Without them, you are opening yourself up to legal liability or the possible endangerment of others, especially on sites that share advice, DIYs, or promote/sell products (most of which come with claims).

    Websites and eCommerce stores benefit from disclaimers in that they:

    • Let users/customers know that the content is not legally binding advice, nor should it be solely relied on
    • Limit the liability of the website/store in the event someone has an unsatisfactory result from its advice or products

    Some of the most common disclaimer types are:

    • Copyright
    • Fair Use
    • No Responsibility
    • Views Expressed
    • Offensive Content
    • Past Performance
    • Errors and Omissions
    • Affiliates / Affiliate Links

    While we’re on the subject, here’s an example in actual use:

    Disclaimer: WPMU DEV is not a legal entity, nor does it claim to be an authority on the laws of any region, country, or the internet. While this post contains well-researched content from respected sources, it is for informational purposes only and not intended as a substitute for professional legal advice. As such, we cannot be held liable for any omissions or errors contained within.

    That said, let’s get to the tools and services of the compliance trade, with…

    Our Top 5 Picks for Compliance Companions

    Some of these are actual WordPress plugins, while others are content generated directly in the company’s website.

    Regardless of how you access them, all offer plenty of bang for the buck, and value for the venue (I’m coining this phrase to mean free products and their providers 😉).

    GDPR Cookie Consent and Cookie Yes (by WebToffee)

    WebToffee has a sisterhood of plugins, with versions available on two separate websites: CookieYes and WebToffee, plus the free version on the WordPress repository.

    CookieYes is one of the most used WordPress GDPR cookie compliance plugins, with 1 million+ active installations and 5 out of 5 stars.

    Starting with the free WP.org plugin version, you get a goodly amount of features, including:

    • a cookie consent banner with Accept/Reject options
    • single click automatic scanning and categorization of cookies
    • display list of cookies on your cookie policy page by using a shortcode
    • adds a cookie banner to your WordPress website to show compliance with GDPR
    • fully customize the cookie notice so it blends with your existing website (change colors, fonts, styles, position on page; even how it behaves when you click “Accept All”)
    • has a Cookie List module so you can easily show what cookies your site uses and display them neatly in a table on your Privacy & Cookies Policy page
    • can be configured to have a CCPA/CPRA ‘Do Not Sell or Share My Personal Information’ control to the cookie notice

    The free version also includes a connection (also free) with the CookieYes web app to access advanced features (cookie scan, consent log, etc) and manage all settings from the web app account. Note: You can still use most of the features from within the WP dashboard, without connecting to the web app.

    cookie yes dashboard
    The CookieYes dashboard gives you a nice snapshot of information.

    One of the advantages here is the dashboard, which includes a Consent section. You can view or access details on user consent should you ever be audited and need to show this information. It even allows you to download this consent data in CSV format.

    From the WP plugin dashboard, there’s a lot you can do:

    • Check banner status (active, inactive), regulation type (GDPR), last cookie scan, language
    • Customize banner
    • Maintain cookie list, add new cookies
    • Change/edit default banner language
    • Generate a Privacy or Cookie policy for your site

    Add the user guide provided for setup, along with a video walkthrough, and you can see why this plugin is so well loved.

    cookie yes customize consent prefs
    CookieYes banner and consent customizations.

    If you want to go for a CookieYes paid plan, you have three tier options, payable per domain, monthly or annually. Each tier adds more pages per scan (600, 4K, 8K) and pageviews (100K, 300K, unlimited), plus a couple of additional features – like custom branding, and geo-targeted cookie banners.

    As a third option here, we have the paid, premium version of GDPR Cookie Consent Plugin (CCPA Ready) – available from WebToffee’s website.

    The final offering in the WebToffee family of compliance options, GDPR Cookie Consent remains in the territory of fastest-growing WP consent plugins, verifiable by a mass of happy users.

    webtoffee GDPR Cookie Consent display options
    GDPR Cookie Consent offers a variety of notices, all with customization.

    As far as features, most are available and common to both the GDPR Cookie Consent and the CookieYes paid plans. However, the GDPR Cookie Consent plans do not have:

    • Auto-translation
    • Global privacy control
    • Do not track
    • Monthly scheduled scan
    • Privacy policy generator

    GDPR Cookie Consent pricing has three tiers, based on the number of sites (1, 5, 25) you want to use it on. Each includes one year of updates and support, and a 30-day, money-back guarantee.

    The primary difference between The GDPR Cookie Consent and CookieYes paid plans is the technology they rely on. The CookieYes web app is a SaaS that requires huge cloud computing, storage, and security facilities. (This is also why the CookieYes paid plans are based on scans and pageviews.)

    Bonus points for their support: I reached out as a free user to clarify a few points in this section and got a detailed response in less than half a day. (High five to Mark!)

    iubenda

    Iubenda has been quickly rising in the ranks of compliance with their all-in-one solution, currently sitting at 100K+ active installs and a 5/5 star rating on WP.

    If you’re looking for that extra layer of comfort, iubenda has it, with attorney-level compliance solutions, all of which are fully WCAG Level AAA Compliant.

    The free version of iubenda compliance solutions support the GDPR, LGPD, and US State Laws (CCPA/CPRA and VCDPA).

    Content is auto-updated when laws change, so it’s always up-to-date. (Their built-in site scanner runs periodic scans on your site and alerts you if it detects something that should be added to your compliance documents.)

    The free version comes with the following features:

    • Privacy and Cookie Policy Generator
      • a single policy, on one site, in one language
      • up to 4 (non-Pro) service clauses
      • does not include Cookie Policy
    • Privacy Controls and Cookie Solution
      • up to 25K page views/month (for compliance with GDPR, LGPD & ePrivacy and US state laws)
    iubenda privacy controls and cookie solution settings
    iubenda privacy controls and cookie solution settings.

    You can get the free version of iubenda from the WordPress plugin repository.

    The majority of iubenda’s standout features are found in their paid/pro versions, trusted by over 90,000 clients in more than 100 countries. These allow for multiple policies, sites, and languages, as well as Privacy Control & Cookie Solutions, a Terms & Conditions generator, a Consent Database, and more.

    Privacy Control & Cookie Solutions helps you meet complex legal requirements at the click of a button, as well as create a fully customizable cookie banner.

    Terms & Conditions offers powerful features like plug-and-go integrations for popular platforms and legislation monitoring. It’s customizable from hundreds of combinations, available in 10 languages, and capable of handling even the most complex, individual scenarios. Optimized for eCommerce, marketplace, SaaS, apps and more.

    The Consent Database activates with one click to track, store, and manage consent and privacy preferences for each of your users all in one place, allowing you to easily upload proofs of consent and legal notices in PDF format.

    They also offer an Internal Privacy Management, which documents all the data processing activity within your organization. To comply with privacy laws (particularly the GDPR), companies must record how they store and use the data they collect from their users.

    Additional features in the paid plans are:

    • More Compliance Laws, like DSGVO, RGPD, UK-GDPR, CalOPPA, PECR
    • Cookie consent analytics provided for high-traffic sites
    • Detects bots/spiders and serves them a clean page so that your SEO efforts are never compromised
    • Built-in compatibility with WordPress comment form, Contact Form 7, and WP Forms; can also be manually integrated with any type of web-form

    Pricing is offered as bundles with 3 tiers, based on number of license slots, with paid add-ons – Terms & Conditions, and Consent Database – available as extras.

    Or, you can go with their Custom plans, with 3 tiers, broken out by options for Privacy & Cookie Policy, Privacy Controls & Cookie Solution, and Terms & Conditions.

    iubenda pricing models
    iubenda’s pricing models with inclusions listed.

    Head over to iubenda’s website for a more in-depth read about their compliance offerings, or to purchase one of their plans.

    TermsFeed

    TermsFeed doesn’t have a plugin; everything is generated directly from their website. But in no way does that detract from their fantastic functions.

    The TermsFeed website has an abundance of compliance offerings, most of which they charge nothing for.

    Since 2012, TermsFeed’s all-in-one compliance software has helped businesses get (and stay) compliant with the law, and the multitude of glowing, five-star reviews corroborates that.

    Popular free features include:

    • Privacy Policy Generator
    • Terms & Conditions Generator
    • Privacy Consent
    • Cookie Consent
    • EULA Generator – gives users the right to use a copy of your product after they acquire it, through a granted license (with or without limitations)
    • Disclaimer Generator
    • Return and Refund Policy Generator
    • Shipping Policy Template – no generator for this, but a detailed, helpful template to assist businesses in creating

    They also offer these additional, not-as-common free tools:

    • CCPA Opt-out – Free tool to manage opt-outs for CCPA
    • I Agree Checkbox – Free tool to enforce your legal agreements and policies on web forms
    • Embed Consent – Free tool to block embeds (YouTube, Twitter, Google Maps) from loading until you’ve got user consent
    termsfeed compliance toolbox infographic
    The TermsFeed site has a ton of helpful, visually appealing infographics.

    All of the generators operate in the same, simple three-step: 1) Create a free account. 2) Choose what you need. 3) Download and integrate.

    You answer a few quick questions, and your custom policy is ready in minutes, available to download in multiple file formats – which you can link to, edit, or update.

    Or, download their handy privacy policy template (available in a variety of formats: HTML, DOCX, Google Docs), and write your own.

    And the output isn’t limited to just websites; you can use it to create for mobile apps, eCommerce stores, third-party tools, SaaS, and even a Facebook page.

    The TermsFeed website is well organized and chock full of helpful information, making an easy task out of finding what you need.

    The majority of compliance agreements and policies on the TermsFeed website are essentially free. However, they do offer some optional, premium agreements with additional clauses to protect your business interests.

    Paid items are available in two ways:

    • Privacy Consent Solution, which gives you access to all features, payable month-to-month, or yearly (with a discount).
    • Per Policy/Agreement, which allows you to select any number of policies from their huge compliance toolbox, and pay a one-time fee, per item

    Both payment structures come with a 7-day refund policy, and 100% money-back guarantee.

    termsfeed privacy policy blog articles summary
    A summary recap of Privacy Policy blog articles in TermsFeed.

    As far as videos, walk-through processes, and documentation go, out of all the sites I reviewed in this article, they had the most. On YouTube alone, I counted close to 200 explainer videos (on their content specifically, and policy terminology in general), plus dozens of tutorials for using on a myriad of website types (Wix, Weebly, Squarespace, Webflow, Shopify, etc) in addition to WordPress.

    My final thoughts: the TermsFeed website is an embarrassment of riches, with compliance offerings galore, and little to no limitations on their use. Even the premium, paid-for options won’t break the bank.

    Visit the TermsFeed website for tools, tips, and custom provisions, or their YouTube channel for a ton of valuable, well-produced info.

    Complianz

    Complianz is another widely used compliance plugin, available for free on the WP repository: Cookie Consent – aka the Privacy Suite for WP. (They offer an additional one for Terms & Conditions as well.)

    Active installations are at 600K (and climbing), and rated 5/5 stars.

    Complianz is a GDPR/CCPA Cookie Consent plugin that supports GDPR, ePrivacy, and more, with a conditional Cookie Notice and customized Cookie Policy, based on the results of their built-in Cookie Scan.

    Free features include:

    • Cookie Notice configuration for your specific region (EU, UK, US, Australia, South Africa, Brazil, and Canada; or use one Cookie Notice worldwide)
    • Cookie Consent and Conditional Cookie Notice with custom CSS and customizable templates
    • Automatic configuration of your website based on wizard questions, WordPress scans, and dedicated service and plugin integrations
    • Proof of Consent for user registration (respects GDPR data minimization guideline)
    • Automatically detects if you need a Cookie Notice (aka Cookie Banner or popup)
    • Cookie policy generation through an easy wizard
    • Offers “Do Not Sell My Personal Information” (for CCPA/CPRA)

    Complianz is one of the few WordPress native solutions, integrated with a wide variety of plugins and services. Once configured through the wizard, Complianz will work with most of your plugins and embedded content – right out of the box. Including our very own Forminator, Beehive, and the WPMU DEV Dashboard plugin (where you can integrate Complianz to allow site visitors to reject dashboard analytics statistics cookies).

    Like iubenda, their policies are drafted by an IT Law Firm, and are WCAG Level AA and ADA Compliant. They closely follow the latest developments in ePrivacy regulation, the proposed Cookie Law for the EU, and other legislation worldwide, so you can be sure the content is spot-on, legally speaking.

    Complianz also has premium, paid offerings for compliance, available from their own website.

    Their website has documentation, and as a premium user, you get dedicated support from privacy professionals and developers who (and I quote) “don’t quit until a solution is reached”.

    complianz offerings screenshot
    Complianz offers a full privacy suite for WordPress.
    complianz premium vs free features chart
    Legal docs and Consent Management offerings on Complianz, free vs paid.

    Easily install the free Complianz Privacy Suite plugin from your WordPress dashboard. For the premium version, you’ll need to download from your account on Complianz.io, or use the link in your purchase confirmation, along with your license key.

    In addition to the free version, paid plans are offered as 3 tiers, priced per number of sites (25, 5, 1). All include the full shebang of required legal documents, compliant in multiple regions, along with records of consent, data request processing, A/B testing and statistics, and detailed cookie descriptions.

    Termly

    While Termly does have a plugin on the WP.org repository, it’s outdated, and I don’t recommend using it. But that doesn’t make their compliance options any less capable or appealing.

    Instead of the WP repo, head over to Termly’s website, where everything you need is easily accessible and kept fully up to date.

    Termly compliance offerings
    Compliance solution offerings from Termly.

    The Termly website comes with a host of features, ranging from a single policy to a full suite of compliance solutions.

    Here’s a breakdown of Termly’s top features:

    • Consent Management Platform
      • Manage consent on your website or app while providing a robust and flexible solution to compliment your business needs and regulatory requirements
    • Policy Generators
      • Choose from the ever-expanding list of legally vetted policies to protect your business and meet your compliance needs
    • Additional Legal Protection Generators
      • Easily create other Agreements and Notices to further protect your website (like: Terms & Conditions, Disclaimers, EULAs, Shipping Policies, Refund and Return Generators)
    Termly's all-in-one cookie consent solution
    Termly’s all-in-one cookie consent solution.

    Termly’s free plan provides you with one legal policy, four edits, and 10K/month banner visitors, as well as their basic compliance tools, which are:

    • Privacy Regulation Monitoring
    • Cookie Policy & Banner
    • Cookie Script Auto Blocker
    • HTML Embeddable Policies
    • Quarterly cookie scans

    In addition to their free/basic plan, Termly offers 3 paid tiers, priced per website. The first two go by number of policies, policy edits, and banner visits, and are payable per month or annually. The third tier is a custom “contact us” option.

    With 4.5 out of 5 star rating on Trustpilot, Termly is trusted and revered by thousands.

    Better Compliance and Reliance with WPMU DEV

    As you can see, responsible data management is not only good business practice, it’s also the law.

    In today’s landscape where massive amounts of data, along with infinitely more ways to store and use it are the norm, diligence is required in its care and handling, especially if you operate an online business (your own, or as an Agency for clients).

    Regardless of what kind of business it is, where it is located, or where your visitors reside, you are bound by certain legalities.

    Ignorance is not a defense, so compliance can be the difference between being successfully safe or professionally sunk.

    Beyond research and recommendations for meeting compliance requirements, WPMU DEV works hard to keep your websites and web development business operating at peak efficiency.

    That includes our free products and services, and our premium membership offerings – a suite of pro plugins (protection, optimization, form creation, SEO, and more), five-star always-on support, and sleek all-in-one site management tool. Plus our fast, dedicated, best-value-in-the-biz Hosting.

    If you’re not a member yet, you can start your 7-day, no obligation free trial today, and instantly catch up on what you’ve been missing.

  • How AI Will Affect the WordPress Industry

    AI is becoming more prominent every day, and there’s no question it will change the WordPress business. Many changes are already taking place. This article showcases what might be different in the near future, as well as what’s happening currently.

    You’ve probably been hearing a ton about AI (artificial intelligence), which describes human reasoning mimicked in machines – especially computer systems. Specifically, AI includes natural language processing, speech recognition, machine vision, and expert systems.

    In this article, we’ll focus on advancements that pertain to WordPress and what it looks like now that AI has its grip on the industry.

    This introductory article covers the following:

    Plus, we’ll try to answer the biggest question of them all: Will WordPress Developers Be Out of a Job?

    So, adjust those AI-created reading glasses, and let’s begin!

    How AI Will Change the WordPress Industry

    AI image.
    AI has its eye on the WordPress industry.

    Knowing that AI is here to stay, there’s bound to be speculation about how AI will change the WordPress industry. Will it be for the better? Worse? Can AI take my job as a developer?

    We’re no fortune tellers here, but we can determine a few industry changes that will more than likely take place. A lot of it has already.

    Here’s a breakdown of some of AI’s major changes to the WordPress industry.

    Website Building

    Machines that build websites? It’s not a sci-fi movie, it’s reality. There are already companies that are in the process of building algorithms that can build websites (e.g. Wix ADI, Hostinger, and Jimdo).

    ChatGPT is also a game changer for WordPress developers. It’s a chatbox developed by OpenAI that uses a language processing model to generate text based on user inputs. Its applications range from making code based on texts to generating content.

    AI models like ChatGPT give users access to an AI assistant that works with them on developing the perfect website based on a user’s criteria. It makes determinations about layout, design, branding, and more.

    All of this being said, these are pretty simplistic websites. Therefore, web designers and developers are still essential and provide a service unsurpassed by AI… for now.

    Machine-Aided Writing

    Like website building, machine-aided content creation and writing are on the horizon. AI assistants will create content writing, copywriting, social media writing – and basically all written content.

    This article you’re reading right now exemplifies how things will change. Currently, technology isn’t where you can get insightful, meaningful, and engaging content fully produced by AI. However, it’s coming.

    And it will outperform current writing tasks by analyzing the best content to include without a human manually searching.

    That’s not putting myself or any other writers down, but AI can research articles in a matter of seconds, whereas a writer like myself has to look up various resources – which can take a while.

    The good news is that humans can currently put an article like this together and (hopefully) make it engaging, and AI just doesn’t have the creative chops (patting myself on the back).

    AI is already implemented to help with writing, including software like Grammarly – which is getting better and better at understanding context, making good suggestions, and ensuring that your words are well written.

    Grammarly example.
    This Grammarly example shows how AI adds suggestions and corrections.

    There’s also software like Jasper, Hypertenuse, and Writesonic that help create unique articles, copywriting, and social media content by writing it for you. And AI journalism is also here for stock insights, business reports, sports recaps, and more.

    User Experience That’s Customized

    As AI advances, it will understand the customer more and more, providing them with a customized shopping experience.

    An example is a facial recognition plugin, such as Real ID. Beyond Real ID, there will be plugins allowing AI to suggest products. This will be based on color, size, and brand – whatever would look good on an individual consumer. This will eliminate the need for browsing and can instantly match products.

    This takes it further than “suggested items” based on browsing history by knowing what is a good match with an AI assistant. It’ll be like your best friends saying, “Oh, that looks great on you!” Or, “Eh, not your style.”

    Customer Service Automation

    You’ve probably had automated customer service already. Chatbots exist all over the WordPress community and social media. They learn from various interactions, add answers to their system, and respond automatically. Even when making calls, voice recognition answers questions via an AI assistant.

    Automation is even apparent at your grocery store. The self-checkout aisle is a good example. It is edging towards the point where humans will be out of the equation (in its current state, it’s definitely not satisfactory… yet).

    Along with answering questions, AI can find prospective customers and improve the sales process – plus much more.

    SEO Booster

    AI can give you a boost in the SEO department. It’s already here for WordPress – and getting better all the time. The days of painstakingly going through your website and optimizing SEO for WordPress are already over.

    A plugin like SmartCrawl automatically analyzes your website’s SEO, provides recommendations, and leverages your social media SEO. Additionally, for images, Smush can optimize images automatically.

    As AI advances, plugins like SmartCrawl and Smush will, too.

    Reduction of Human Error

    Humans, of course, make mistakes. We’re wired for them. And mistakes can be costly – especially with WordPress development.

    AI will be used more and more to prevent errors by developing flawless systems of coding, security, and specifications. This is another example of AI taking over WordPress development completely.

    Machine learning is here to improve efficiency. It can eliminate the need for costly meetings regarding decision-making, for example. AI will already know what’s best, and you can eliminate that hours-long Slack call with a dozen employees.

    When decisions by AI are made, it is decided on information gathered and a set of algorithms criteria. So, when programmed well, it can eliminate any errors.

    Unbiased Decisions

    Humans, driven by emotions, can sometimes make decisions based on bias. However, AI is emotionless, practical, and rational in any decision-making process.

    When eliminating biased views, it can disrupt programming by allowing agencies to make decisions on sites they want to build, what to include, and what clients to work with.

    Zero Risks

    Ever want to remove a line of code but decided it was in your best interests not to in case it would crash an entire website? When AI robots are on the job, they can take more risks without the backlash of losing a job in case of a bad decision.

    Plus, they can provide more accuracy with greater responsibility.

    So, AIs can be written-up for bad work performance, so that’s good news for developers. However, it can also take a developer’s job, so there might not be any opportunity to be written up in the first place.

    Graphics and Images

    Part of website development is images; AI can produce images with just a few words of what it is you’d like.

    This can also be used when creating websites for clients who need images for their WordPress site, social media, emails, and other marketing. AI generators like fotor, DeepAI, and craiyon are a few examples of companies that can provide this service.

    fotor example.
    An example of AI-generated artwork from fotor.

    Almost anything imaginable can be generated with these programming languages, and the art is becoming increasingly complex as time goes on.

    The Upside to AI

    We’ve gone over how AI will change the WordPress industry – and much of it is positive. Beyond streamlining web development, AI can:

    – Drive down the time it takes to perform a task and enable multi-tasking with a hands-off approach.

    – Work 24/7 with no breaks needed.

    – Increase eCommerce sales by learning the customer’s needs and catering to them (e.g. like the clothing example mentioned above).

    – Make decision-making faster and smarter.

    – Save time and energy by implementing SEO practices practically instantly.

    – Be deployed across industries.

    There are other examples, but AI has great potential in the WordPress business.

    Still, there’s also some bad with the good.

    The Downside of AI

    Of course, there can be a downside to AI as well. And when saying “downside”, that can depend on the context of individual situations and circumstances – so keep that in mind. However, there could be some unpleasant disruptions to how WordPress has operated throughout the years that might not bode well.

    Some unsavory aspects will be:

    – Unemployment could rise as AI can take over positions in WordPress development, such as with graphics, web building, copywriting, and more.

    – A personalized experience on a human level will disappear if AI performs the tasks.

    – High costs can occur when using AI software, tools, robots, etc.

    – No creativity.

    – No ethics, which we all have when it comes to our work.

    All of this also begs the question…

    Will WordPress Developers Be Out of a Job?

    As of right now, AIs are capable of churning out websites that are quite limited, basic, and lack imagination. Sure, this will improve over time. However, at the moment, AI isn’t there. WordPress developers and designers are a necessity.

    AI is on a trek to form a next-generation workplace that relies on collaboration between systems and individuals. So, humans are essential and not obsolete. If anything, human efforts are strengthened by the emergence of AI.

    Tasks will be able to be performed quicker, jobs can be done around the clock, and decisions can be made in a few moments.

    A personalized touch on web development, design, graphics, and writing is still needed (and valuable). Additionally, updating and maintaining web design is done by humans.

    So… will AI ever completely take over WordPress development?

    Fear not — it’s not likely to happen too soon.

    BUT…

    What you can do as a WordPress developer is adapt to AI. There’s no point in turning a blind eye to AI – it’s here already and will become more and more prominent.

    Be aware of AI tools, and get to know them well. Learn about what an AI web design tool does and how it works. Then, decide what tools you can use in your web development business. And finally, practice using the tools until you figure out exactly what it does.

    No amount of AI can replace human creativity. The best AI out there doesn’t know what a customer wants. There will be an increase in one-off AI-generated websites now and from here on out, but it’s unlikely that full automation will take over web development jobs soon.

    It’s a matter of combining your skills as a web developer with AI – and adapting to this new technology.

    Seeing Eye-to-Eye With AI

    With AI emerging, there’s a lot of speculation, excitement, worry — you name it — in the WordPress community. But, like everything else, it’s not the demise of WordPress developers, illustrators, writers, and every other job required for good web development.

    It’s just a matter of embracing change and working with it. And at the end of the day, if you get on top of what’s coming, you can expand and grow tremendously with the AI resources at your disposal.

    Don’t worry about a robot coming along and handing you a termination letter anytime soon. Sure, there’ll be some changes, but as much anxiety as change can bring, try to see eye-to-eye with AI.

    Be sure to check back with us soon as we dive deeper into AI with more articles about this ever-evolving technology.

  • The Dos and Don’ts of Domain Registration

    When it comes to domain registration, there are some dos and don’ts of how to go about it properly. This article shows you what you need to know to lead you to a good domain name.

    It goes without saying, choosing a domain name is a crucial decision. After all, it’s your website’s calling card that you want to be attractive, relevant, and effective. It can boost SEO, increase your brand awareness, and raise the number of site visitors when created well.

    A good domain establishes authority and credibility, reinforces brand identity, and promotes your business. On top of that, you want to ensure it’s safe!

    This article covers the Dos and Don’ts of domain registration to help ensure your domain name is top-notch and sets up your site for success.

    We’ll cover:

    After reading this article, you should know… wait for it… what to do.

    Dos

    Pick Correct Domain Extension

    Deciding upon the perfect Domain Extensions, aka TLDs (top-level domains), will affect your online presence and overall business.

    Beyond .com, there are numerous other domain extensions available. Everything from .edu, .gov, .blog – and plenty more. Each extension can be used to associate with your brand (e.g. .org is great for organizations).

    Pick a domain extension related to your business, organization, or personal site – whatever it may be. This lets readers know what your website is about from the very beginning.

    A safe bet is typically .com if you can’t decide on other extensions that might be more beneficial. It’s the most popular extension and is recognized universally.

    However, go with your niche if you want to be more specific.

    Make It Easy and Foolproof

    Don’t go crazy and make a domain that’s hard to type or not easy to remember. Be sure to make it foolproof because, well, typos happen to the best of us.

    If you choose a domain that’s different or painful to type, it will hurt your business and brand.

    Misspelled domains lead visitors to the wrong site, 404 errors, and frustration. If you’re lucky, they may try again to find your website. But, chances are, they’ll give up and you lose a visitor.

    Avoid slang (“4” instead of “for”), and don’t use words with numerous spelling options. Don’t mix numbers with words, avoid abbreviations, and don’t use homonyms (e.g. “write” and “right”).

    In a nutshell, use common vocabulary, and make it easy to spell and type – without the user having to think about it too much.

    Make Sure It’s Registered In Your Name or Business

    When registering domain names, you often don’t second guess the registration process and may overthink what name to put it under. However, it’s essential to put it under your name or business — depending on your purpose.

    This ensures that you’ll have control over it for the long term. You can keep or sell it as long as you want.

    If it’s under someone else, you may have to buy it from an individual or company. It’s best to ensure you’re in control right from the start.

    Make a Memorable Impression

    Making a good first impression is important and easy to do with a good domain. There are just a few things you should do. After all, your domain will be out there in the ether with millions of others, so it’s important to be seen amongst the competition.

    One is to make it unique – so it stands out. Whatever your domain is, having it be unique and memorable is a key factor. Something catchy is especially important (e.g. boredpanda, JoeKnowsCoffee).

    Think of one of your favorite websites. Does it have a catchy title? Chances are, it does.

    Also, it’s best to keep a domain as short as possible; however, if a longer domain makes yours stick out and “pop”, it may be worth doing.

    Use Keywords

    Like domain extensions, Keywords in your domain name help tell visitors what your website is about.

    An example might be if you run a WordPress development agency, insert ‘agency’ and ‘WordPress’ (or ‘wp’) somewhere in the name.

    If you need assistance with coming up with a domain name, there are tools like Zyro or NameStudio to help generate a name for you. They work by simply inputting keywords and then coming up with names.

    Also, a lot of domain providers offer ideas for a new domain. For example, when you enter a new domain with us, we give you some suggestions for what you might want to use.

    Domain suggestions
    These are just a few examples.

    Whatever name you choose, keep in mind that keywords can help show what type of website you are, making it more likely that a visitor will be interested in stopping by.

    Make It Long-Term

    Considering your website and domain are for the long-term, it’s important to contemplate a domain name and not rush it.

    After all, you’ll use this for your brand and SEO for years! So, choose something relevant to your business that will continue to work down the road.

    A good example of what NOT to do would be to name your company BobsFurniture2023.com or something with a specific time stamp.

    Your domain should define your business, so ensure your domain has lasting appeal.

    Know Your Market

    If you know your target market, coming up with a domain name is easier.

    This is another example of keywords – choose words that relate to your audience. For example, do you have a pet shop in Palm Springs? Maybe PalmSpringsPets.com. It’s relatable for the audience you’re after, memorable, and simple.

    And the more specific, the better.

    Be Creative

    Get creative when choosing a domain. Why? Because you’ll be more memorable and attract visitors.

    Wordplay, synonyms, and catchy combinations can do a lot to make your website stand out. Think of some of the most popular websites – like YouTube, TikTok, or DuckDuckGo. Each one has a creative edge to it that is memorable.

    So, get creative and create unique words, phrases, and ideas when deciding on your catchy domain.

    Keep It Safe

    Finally, in our Dos — when registering a domain, use a reliable domain provider, lock your domain name, and activate domain privacy. Be safe.

    You can do much to keep your domain protected from being hijacked and taken over. Read our Ultimate Guide to Domain Name Security for more information.

    Now that you know what to do, it’s time for the…

    Don’ts

    Use Certain Characters

    Using unnecessary characters, such as hyphens, symbols, and numbers is a death knell for some websites.

    These often make for a sloppy longer address that doesn’t come across as professional. Also, they’re hard to type and pronounce. So, don’t use certain characters (like the ones mentioned).

    That said, IF you need to use a special character, try to limit it (one would be best).

    If you’re using numbers, try to make them sequential (e.g. 123) or recognizable so that it’s easy on the eyes of visitors.

    Special characters, complicated numbers, and symbols can frustrate a user trying to type it in, and they may bail on getting to your website sooner rather than later.

    Be Complex, Long, Bland, or Hard to Type

    We mentioned long domain names could be okay if they’re relevant but don’t make them complex, bland, or hard to type (which we also touched on).

    A good example is if you’re, let’s say, a physicist. “Physicist” isn’t exactly an easy word to spell if you’re not used to doing so, so you’d probably want to avoid a domain name like “localphysicist.com” or something like that.

    If it’s not clear by now – the easier, the better. Long domains can work but have a good reason if going that route.

    Be Trendy

    It might be tempting to use buzzwords, but they often don’t have staying power. Things can rapidly go from the hottest trend to nothing tomorrow. Just think about viral videos, songs, shows, etc. One minute they’re hot – the next, they’re not.

    So, don’t be too trendy with your domain, even though it might seem cool and mainstream at the time.

    Try to Be Like Someone Else

    Once in a while, someone tries to make their domain similar to a popular one to ride on their success.

    This tactic is usually pretty obvious (e.g. if you name your site Bamazon.com – or something like this) and it will ultimately hurt your reputation and brand. Plus, it gets old – fast.

    This is your time to shine with your unique domain, so don’t try to ride someone else’s coattails.

    Buy All of the Extensions

    Owners of businesses want to protect their brand, and buying up almost any combination of extensions for a domain can be tempting. It helps ensure no one else will grab them.

    But don’t buy all the extensions. As enticing as that is, it’s not necessary.

    This can cost you thousands of dollars, and the benefits are few. There is practically no way you can buy up all the extensions, so you might as well not even attempt it.

    Your brand will be fine with your chosen domain, and, more than likely, no schmuck will steal your thunder by choosing another TLD with your name attached.

    If you’re buying a new domain name or one used before, you should check out the backlink history completely. The backlink history of a domain is important because it can affect how it will rank.

    If there are hesitant backlinks in the past, search engines might remember them and negatively impact rankings. The backlinks could’ve been blocklisted for spam or other bad activity.

    There are backlink checkers, like Majestic, that can ensure you have a solid domain with no unsavory history.

    Doing the Dos and Don’ts for Domains

    When it comes to domain registration, these Dos and Don’ts can help ensure you have success. Whether picking the right TLD, excluding special characters, or security, there’s a lot to consider. After all, this domain is in it for the long haul.

    Consider registering a domain with us for security, selection, and wholesale price. You have domain management in The Hub, 24/7 support, client billing options, resell capabilities, and more!

    Be aware of what to do when deciding on a domain, and you’ll be domain-ate online.

  • How to Improve the Performance of Large WordPress Sites

    If you’re running a larger WordPress site, you may be facing performance challenges that can impact user experience and search engine rankings. Fortunately, there are several steps you can take to improve your site’s speed and performance. This article covers some of the most common performance challenges for larger WordPress sites and provides tips and solutions for addressing these.

    Growing pains… some should be so lucky to have them!

    Let’s talk about how to manage a WordPress site that is growing too quickly too soon and causing you or your clients all sorts of pains and problems.

    If the issue is temporary, such as dealing with an unexpected traffic spike from a post gone viral (another thing we should be so lucky to experience!), then knowing how to scale your WordPress site when traffic soars can fix this.

    However, if problems persist, it may take more than a couple of aspirins and calling the doctor in the morning to make the headaches go away.

    In this article, we’ll cover:

    WordPress Enterprise Development Challenges

    Q: How complex can you make a WordPress site?

    A: Very.

    When it comes to building large and complex sites, WordPress’s capacity to handle it is not an issue. As WordPress enterprise developer and global SME business adviser Mario Peshev states in his excellent article on building large and complex sites using WordPress

    “WordPress is a proven CMS that handles various applications handling millions of users and tens or even 100M views a month.”

    As Mario also states…

    “Scaling from 10M to 50M is feasible, 50M to 100M is challenging, 100M–200M is quite complex and 200M+ may require some serious engineering effort.”

    So, the capacity of the WordPress CMS platform to handle large and complex sites is not a problem.

    The issue is having the skills to handle WordPress enterprise development challenges.

    As most developers know, WordPress is not only a widely popular content management system known for its flexibility, ease of use, and affordability, but it is also an excellent platform for small businesses and startups that want to establish a web presence quickly and easily.

    However, when it comes to enterprise-grade WordPress development, the amount of information available is as scarce as a developer who hasn’t resorted to cursing loudly at their code editor at least once.

    So, before we get into diagnosing the challenges and issues of dealing with large WordPress sites, let’s explore some of the challenges of finding relevant information on WordPress enterprise development.

    Here is a summary of the points Mario Peshev makes in his article…

    Scarcity of Information on Enterprise-Grade WordPress Development

    One of the main reasons why information on enterprise-grade WordPress development is scarce is that only a handful of agencies specialize in building WordPress platforms, applications, plugins, or performing migrations and integrations for the enterprise.

    Most vendors profile in small business websites, and only a small chunk of the service providers work with enterprises.

    Furthermore, those consultants and agencies often don’t have the time and resources to write tutorials and share their know-how with the industry, or they just don’t care, especially more hardcore engineers who don’t want to bother.

    Another reason why information on WordPress enterprise development is limited is that WordPress is often not the core application that enterprises use in the first place. It’s another obstacle for many, like working on the front-end interface as 1% of the main platform running behind the scenes.

    However, WordPress developers who want to bid on enterprise projects can focus on several different areas to enhance their expertise.

    Focus on Different Areas for Enhancing Expertise

    The first area that WordPress developers should focus on is studying the WordPress Core, APIs, and the surrounding ecosystem in-depth. This will give developers a deeper understanding of the platform and how it works.

    They should also make sure that they’re comfortable with WordPress coding standards and best practices. This will ensure that the code they write is maintainable and easy to read.

    The second area that WordPress developers should focus on is practicing in the main technical areas that enterprises care about, such as performance, security, scalability, and backward compatibility.

    Enterprises have high expectations, and it’s essential to demonstrate that you have the expertise to meet their requirements.

    These WordPress development resources will help you gain these valuable skills and expertise:

    Strategic Players in the Field

    Hosting vendors are strategic players in the field and occasionally work with high-scale applications. Developers can browse their resources and follow their blogs, knowledge base articles, and the like. WordPress is a platform built on top of PHP and SQL, front-end served through HTML, CSS, JavaScript. It runs on a web server like Apache or Nginx using mod_php or php-fpm, connected to a MySQL database on a Linux server.

    Most of the heavy lifting for enterprises happens on top of those layers. Therefore, it makes sense to dive deeper into their own communities and resources stressing on those topics.

    Follow WordPress Core Contributors and Employees

    It always helps to follow WordPress Core contributors, employees at enterprise-grade companies, and the blogs of the leading agencies working with enterprises. You may find some relevant case studies, interviews with clients, or other top engineers that could help you improve even further.

    Now that we’ve looked at the first challenges, which is acquiring the expertise to handle large and complex WordPress sites and meeting the expectations of enterprises, let’s turn to addressing common performance issues you may experience working with large WordPress sites.

    Common Performance Challenges for Large WordPress Sites

    WordPress is used by some of the biggest and most well-known companies, celebrities, and brands in the world, like Intel, Pepsi Cola, PlayStation, American Express, TechCrunch, Fisher-Price, Beyonce, Justin Timberlake, Usain Bolt, and many more.

    Someone has to look after these large sites… why not you?

    While browsing through WPMU DEV’s member forums (which, by the way, is a treasure trove of information for web developers), I came across this post from WPMU DEV member Charly Leetham, which I am reproducing in full below:

    ***

    I was contacted by a long term client asking for assistance with their client.

    The end customer is setting up a rather large website in WordPress and they were having no end of difficulties in keeping the site running. It was so bad, that they had to reboot their Amazon EC2 instance regularly (several times a day regularly).

    With trepidation I agreed to take a look and see if I could help. What I found has left me … saddened. For the client, mostly.

    The site:

    • Database: 4Gigabytes (after optimization)
    • Posts / Pages and other content: Over 900K entries.

    This is not a small site.

    It was built in Elementor which initially left me concerned, as I know that Elementor is resource hungry.

    The EC2 instance was provisioned with 140 Gig storage and 32 Gig memory. More than enough, right? One would think so.

    The business had been moved to EC2 by a consultant who had promised them it would improve their performance. Then they told them that the reason the instance kept hanging was because of the high number of transients that were being created.

    They created a cron job that deleted the transients every hour and with very little improvement.

    I’ve found a number of things during my investigations but the three most concerning things are:

    1. Although the server was provisioned with 32G of memory. PHP had been limited 2G and WordPress had been limited to 40M.

    It’s no wonder they were having trouble.

    Increasing these limits has stopped the hanging but we’re still experiencing memory overflows.

    2. The database was provisioned on the same server.

    Splitting the database onto a RDS (remote database server) should provide more performance increases.

    3. No optimization or performance improvement work had been done.

    By implementing Hummingbird, I’ve been able to improve the load time of the site and that’s without doing anything really hard core. That’s still to come.

    The main thing I want to highlight for others here, is that it’s the incremental knowledge you bring to the table when working with clients.

    Yes, people can build their own WordPress sites but few people can really make them hum. That takes experience and a lot of work.

    ***

    Charly’s forum post is a great example of some of the typical performance challenges you can expect when working with larger WordPress sites and provides a number of useful insights into handling these.

    To address these challenges, let’s first summarize the main technical issues Charly described when looking at this client’s site:

    1. The end customer is setting up a rather large website in WordPress with over 900k entries and a 4GB database after optimization, which is not a small site.
    2. The website was built in Elementor, which is resource-hungry and requires a lot of server resources.
    3. The EC2 instance was provisioned with 140GB storage and 32GB memory, but PHP had been limited to 2GB and WordPress had been limited to 40MB, causing performance issues and memory overflows.
    4. The database was provisioned on the same server, which caused performance issues. Splitting it onto a remote database server should provide performance improvements.
    5. No optimization or performance improvement work had been done. By implementing Hummingbird, Charly was able to improve the site’s load time.
    6. The incremental knowledge and experience brought to the table by an experienced web developer is crucial for optimizing and improving the performance of WordPress sites, which can be complex and require a lot of work to make them run smoothly.

    We’ve already addressed point #6, so let’s go through the other issues on the list above.

    Large WordPress Site Performance Issue #1 – WordPress Database

    As your WordPress site grows, so does the size of its database. Your WordPress database can become quite large and may start causing some issues.

    Managing a large WordPress database can be a daunting task, so let’s take a look at some of the challenges, best practices, strategies, and solutions for managing your WordPress database on larger sites.

    The challenges of having a large WordPress database include:

    • Slow page load times: A large database can slow down your website, making it difficult for visitors to load pages quickly.
    • Backup and restore issues: Backing up and restoring a large database can be a challenge, and it may take a long time to complete the process.
    • Database corruption: A large database can be more prone to corruption, which can cause data loss and other issues.
    • Difficulty in database maintenance: Maintaining a large database may require more resources and expertise to keep it running smoothly.

    Here are some strategies and best practices managing WordPress databases on larger sites:

    Initial Configuration

    Before you even start thinking about managing your database, it’s important to make sure that it’s set up correctly. When you install WordPress, it creates a new database for you. However, if you’re running a large site, you may want to consider using a separate database server. This will help to improve performance and reduce the load on your web server.

    When configuring your database, it’s important to choose the right settings. In particular, you’ll want to pay attention to the database character set and collation. These settings can affect how your content is displayed on your site, so it’s important to get them right from the start.

    Where to Keep the Databases

    When managing a large WordPress site, you’ll want to think carefully about where to keep your databases.

    There are a few different options to consider:

    • Local Database: You can keep your database on the same server as your website. This is the simplest and most common option, but it can lead to performance issues as your site grows, as Charly referred to in the client example above.
    • Remote Database: You can keep your database on a separate server, either within your own network or in the cloud. This can improve performance, but it can also increase costs.
    • Managed Database: You can use a managed database service, such as Amazon RDS or Google Cloud SQL. This can be a good option if you don’t have the expertise to manage your own database.

    Database Access Time with Large Numbers of Records

    As your WordPress site grows, the size of your database can have an impact on how quickly your site loads.

    When you have a large number of records in your database, queries can take longer to run, which can slow down your site.

    Caching can help speed up your website by storing frequently accessed data in memory, reducing the need to access the site’s database and PHP. This, of course, depends on the kind of caching being used, e.g. database caching (which includes object caching) or page caching (where the cache of the web pages is stored and presented when a specific page is requested later without needing to be processed by PHP and MySQL).

    To improve performance, you can use server-side caching, caching plugins that manage server-side caching solutions, or standalone caching plugins. Our performance-optimizing plugin Hummingbird, for example, has its own caching but also integrates with WPMU DEV’s server-side caching.

    Caching can have a significant impact on site performance, particularly for larger sites. However, setting up and managing caching can be complex and time-consuming.

    Also, it’s important to regularly monitor your site’s performance to ensure the caching is optimized for your specific needs.

    To learn more about caching solutions, check out our Ultimate Guide to WordPress Caching.

    Another option is to use a technique called “sharding,” which involves splitting your database into smaller pieces. This can help to improve performance by spreading the load across multiple servers.

    Techniques for Splitting the Data Up

    If you’re using a technique like sharding, you’ll need to decide how to split your data up. One option is to split your data by category or tag. For example, you could have one database for posts related to technology, and another for posts related to entertainment.

    Another option is to split your data by date. This can be particularly useful if you have a lot of older content that doesn’t change very often. You could have one database for posts from the last year, and another for older posts.

    Consider also using a plugin like HyperDB. HyperDB is maintained by Automattic, the parent company of WordPress.

    As described on the plugin page…

    HyperDB allows tables to be placed in arbitrary databases. It can use callbacks you write to compute the appropriate database for a given query. Thus you can partition your site’s data according to your own scheme and configure HyperDB accordingly.

    Basic Indexing

    Indexing your database can help to improve performance by making it faster to search for data. When you create an index, the database creates a data structure that makes it easier to search for specific values.

    To create an index, you’ll need to use the MySQL command line or a tool like phpMyAdmin.

    When you’re creating an index, it’s important to choose the right columns to index. Typically, you’ll want to index columns that are frequently used in queries.

    You can also use a plugin like Index WP MySQL for Speed. This plugin adds database keys (also called indexes) to your MySQL tables to make it easier for WordPress to find the information it needs. The plugin page also includes excellent information on database indexing in relational database management systems.

    Settings and Logs to Check

    To keep your database running smoothly, there are a few settings and logs that you’ll want to keep an eye on. These include:

    • MySQL slow query log: This log records queries that take longer than a certain amount of time to run. By analyzing this log, you can identify queries that are causing performance issues.
    • MySQL error log: This log records any errors that occur in the MySQL server. By monitoring this log, you can identify and troubleshoot issues that may be affecting your database.
    • WordPress debug log: This log records any errors or warnings that occur within WordPress. By monitoring this log, you can identify issues with your WordPress installation or plugins.
    • Database backups: Regularly backing up your database is important to ensure that you don’t lose any data in case of a server crash or other disaster and can restore your website quickly in case of a problem. You can use a plugin like Snapshot to automate this process, or if you’re hosting with WPMU DEV, you can configure automatic enterprise database backups to perform daily and even hourly. Also, consider storing all backups separately from the server hosting the site, as the backups may be lost if the server crashes.

    Other Ongoing Maintenance

    In addition to the above, there are a few other ongoing maintenance tasks that you’ll want to perform to keep your database running smoothly.

    These include:

    • Cleaning up your database: Over time, your database can become cluttered with unused data. Check our article on how to clean up your database and remove unnecessary data for more details.
    • Optimizing your database tables: Reducing the size of your database and optimizing your database tables helps to improve site performance. You can optimize your database by removing unnecessary data, such as post revisions, trashed items, spam comments, and unused plugins and themes. Check our complete WordPress database optimization guide for detailed instructions and plugins that help you do this.
    • Monitoring your site for security issues: Large sites are often a target for hackers. You can use a plugin like Defender to monitor your site for security issues and prevent attacks.

    In terms of cleaning up your database, Charly mentions a high number of transients as being a possible issue affecting the site’s performance. Although addressing this issue seemed to offer very little improvement in Charly’s client’s case, it’s worth mentioning it here as something to check if you are experiencing issues with your site.

    Transients are a type of cache that stores data in the database for a specific period of time. They are used to speed up the loading time of a website by storing the results of a complex or time-consuming query, such as an API request, so that the query doesn’t have to be run every time the page is loaded.

    Transients have a set expiration time, after which they are automatically deleted from the database. However, if the website is not properly optimized, transients can accumulate in the database and cause performance issues, such as slow page loading times or database crashes.

    To optimize WordPress and avoid issues with transients, there are several steps that can be taken. These include:

    • Use a caching plugin: A caching plugin like Hummingbird can help reduce the number of database queries and prevent unnecessary creation of transients.
    • Delete expired transients: Expired transients can accumulate in the database, so it’s important to regularly delete them to keep the database optimized. This can be done manually, or by using a plugin like Hummingbird.
    • Set a maximum lifetime for transients: By setting a maximum lifetime for transients, you can prevent them from being stored in the database for too long, which can lead to performance issues. This can be done using the set_transient() function in WordPress.
    • Use a remote database: Storing the database on a remote server can help reduce the load on the server and prevent issues with transients.
    • Increase the memory limit: Increasing the memory limit for PHP and WordPress can help prevent memory overflows and performance issues caused by transients.

    No matter what size WordPress site you are working on, using WPMU DEV’s Hummingbird caching and site optimization plugin can help to automatically take care of expired transients and eliminate this issue, leading to faster page loading times and a smoother user experience.

    Hummingbird: Advanced Tools screen with Database Cleanup and Transients options highlighted.
    Hummingbird can be configured to automatically delete expired transients from your WordPress database.

    In terms of increasing the memory limit for PHP, if you are a WPMU DEV member, it’s really easy to check a whole bunch of information about your WordPress site, include current PHP memory limits and max filesize upload settings.

    Just log into your WordPress dashboard and navigate to the WPMU DEV dashboard plugin menu. Select Support > System Information > PHP tab.

    WPMU DEV Dashboard plugin - Support tab.
    WPMU DEV’s Dashboard plugin lets you easily check information about your WordPress site.

    If you are not a WPMU DEV member, you can still check this information manually.

    To find out how much php memory is allocated, create a php and add the following:

    <?php
    phpinfo();
    ?>

    Call it something like php-test.php and upload it to your server.

    Access the file from a browser and search for memory_limit. This will give you two settings – what the local site settings are and what the server default is. It is possible to have different php memory_limits by site.

    For WordPress memory, for instance, you might see the following:

    define('WP_MEMORY_LIMIT', '64M');

    Note that if this entry is missing in the wp-config.php file, then your site is probably working between 40M and 64M.

    In addition to the above, make sure to also scan and fix corrupt or broken files and database in WordPress.

    As you can see, there are quite a number of things you can do to improve the performance of your WordPress database.

    Let’s move on, to…

    Large WordPress Site Performance Issue #2 – WordPress Core, Themes, And Plugins

    Charly mentions that another possible reason for the performance issues her client’s site was experiencing was using a resource-hungry theme.

    Rather than focusing on a particular theme, let’s look at themes and plugins in general (btw… if you use Elementor, check out our article on how to optimize Elementor themes. We’ve also written articles on ways to optimize themes like Divi, WPBakery, Astra, and other page builders.)

    Here are some of the things you can do:

    Theme and Plugin Bloat – Themes and plugins can significantly impact the performance of a WordPress site, particularly if they are not optimized or updated regularly. Some themes and plugins can also be poorly coded, leading to slow loading times and site bloat.

    Solution: Be sure to choose a lightweight and optimized theme that is regularly updated by the developer. Avoid using too many plugins and remove any unnecessary ones to reduce site bloat. Always keep your themes and plugins up-to-date to ensure optimal performance.

    • Avoid poorly coded themes and plugins, as these can lead to slow loading times, site bloat, and conflicts.
    • Choose lightweight and optimized themes and plugins that are regularly updated by their developer.
    • Check your server logs to identify heavy plugins and themes that could be slowing down your site.
    • Always keep your themes and plugins up-to-date to ensure optimal performance.
    • Deactivate and remove unnecessary and non-essential plugins and themes.

    As with all WordPress sites, regardless of size, it’s also really important to optimize your client sites.

    There are a number of tools you can use to scan your site and measure site performance, including Google PageSpeed Insights and GTmetrix. These tools provide important insights into ways to optimize your sites.

    You can also use a developer tool plugin like Query Monitor to help you identify issues, aid in the debugging of database queries, PHP errors, hooks and actions, block editor blocks, enqueued scripts and stylesheets, and HTTP API calls. The plugin also provides advanced features such as debugging of Ajax calls, REST API calls, and user capability checks.

    Query Monitor - WordPress plugin
    Use Query Monitor to quickly identify poorly performing plugins, themes, or functions in your WordPress site.

    Additional articles and tutorials that we recommend checking out include our guide on speeding up WordPress, solutions to forgotten WordPress page speed problems, WordPress troubleshooting guide, and Mario Peshev’s article on scaling mistakes when running a large WordPress site.

    Large WordPress Site Performance Issue #3 – Site Content

    Large WordPress sites typically have loads of content. In Charly’s case, for example, the client’s website had over 900k entries.

    If you’ve gone and optimized the database and you’re still experiencing issues, here are some of the things you can look at:

    • Perform a content audit: A content audit is essentially performing an inventory of your existing content and assessing and identifying content that’s outdated, obsolete, duplicated, etc, before deciding what to do with it (e.g. update, SEO optimize, trash). It’s a long-term but effective and important strategy for keeping your site’s content manageable and maintained.
    • Use lazy loading: Lazy loading can help to ensure that media files are only loaded when they are needed, which can significantly improve page load times.
    • Use a content delivery network (CDN): Consider using a content delivery network (CDN) to distribute cached media files and reduce the load on your server. A CDN can help speed up your website by caching your website’s content on servers located around the world, reducing the load on your server. Popular CDNs include Cloudflare and MaxCDN. Note that all WPMU DEV membership and hosting plans include a CDN. Our Hummingbird and Smush plugins also include a CDN (Hummingbird also offers Cloudflare integration).
    • Use content optimization plugins: Optimize images, videos, and other media files by compressing them and reducing their file size. If the site contains loads of images, consider using an image optimization plugin like Smush, which significantly reduces image file sizes without compromising on image quality to improve content delivery performance. Smush also includes WPMU DEV’s CDN.
    • Use a managed WordPress hosting service: A managed WordPress hosting service can provide you with optimized servers and database management tools to help keep your website running smoothly. As discussed in the next section below, WPMU DEV not only offers a best-of-class managed WordPress hosting service, but it is also specifically configured to deliver enterprise-level hosting for WordPress sites of all kinds and sizes.

    Large WordPress Site Performance Issue #4 – Hosting

    If you are still experiencing problems with the site after fixing issues with the WordPress database and optimizing the site’s core, plugins, themes, and content, the issue may be related to web hosting.

    Consider using a managed WordPress hosting service with a company that specializes in WordPress.

    Hosting with a reputable host not only means placing your site in the care of an experienced team who will handle areas like server optimization and database management for you, but also migrate your existing website to their servers.

    This is very important, as a large WordPress site no doubt has lots of moving parts and active traffic and transactional events taking place, and you don’t want to lose any valuable data or break anything during the migration process.

    Additional hosting considerations for a large WordPress site include the ability to handle demands with ample resources, uptime, speed, and customer support.

    WPMU DEV offers enterprise-level hosting, 24/7 expert hosting and WordPress support, and migrations by a team of experts who will handle everything for you, including troubleshooting any potential issues with your site.

    Additionally, WPMU DEV has been independently rated and reviewed by many users as one of the leading managed WordPress hosting companies, with a near-perfect rating score. G2.com, for example, rates WPMU DEV 4.8 out of 5 stars overall, and 9.8 out of 10 for quality of support.

    More importantly and on a practical level, our expert team proactively manages larger sites by regularly checking areas like “PHP error logs” for any errors in the plugins, themes or in the WordPress core and “PHP slow logs” for slow loading scripts (e.g. plugins where scripts exceed 30 seconds to execute), access logs (to see if there’s a DDoS attack or high visitors in general), and load on the server resources, including CPU, RAM, etc.

    The team also checks if WAF is enabled, caching is ON, and any non-used profiling software is turned off when not needed, and will perform conflict tests for plugins and themes and run query monitoring scans at the mysql level when required.

    We also offer integration with New Relic and Blackfire to profile the site and its pages for all sites, large and small.

    Managing Larger WordPress Sites Is A Big Job

    A large WordPress site differs from other WordPress sites mostly in the scale and complexity of its management.

    Dealing with performance issues in large, complex WordPress sites requires having the skills and the expertise to handle challenges and meet the high expectations of enterprise clients.

    Finding information on WordPress enterprise development can be challenging, but focusing on different areas like studying the WordPress Core, APIs, and the surrounding ecosystem, practicing in the main technical areas, and following leading agencies, will help you become more knowledgeable and confident in your abilities as a developer.

    Also, managing a large WordPress database can be challenging but there are solutions available to help you manage it. By optimizing your database, using caching and CDN services, using a managed WordPress hosting service, and regularly backing up your database, you can ensure that your website runs smoothly and avoid potential issues.

    By addressing common performance challenges and regularly monitoring your site’s performance to identify and address any issues as they arise, you can significantly improve the performance of your larger WordPress site.

    Finally, hosting your site on enterprise-level servers with an experienced and reliable managed WordPress hosting partner like WPMU DEV will not only improve your large site’s performance but also help to eliminate problems and issues, as your site will be expertly managed and monitored 24/7.

    If you are looking to migrate your existing site from another host or upgrade hosting for a large WordPress site, we recommend looking at our enterprise-level hosting plans (3 x Essential and 3 x Premium options), and taking advantage of our hosting buyout and free expert site migration service.

    ***

    Ask Charly Leethan

    Special thanks to WPMU DEV member Charly Leethan for her contribution to this post. AskCharlyLeethan provides ongoing support and advice to help small businesses define and refine their processes and plan and build their web presence using current and emerging technologies.

  • 6 Key Web Developer Trends to Watch in 2023

    If you’re in the field of web development, you might want to pay attention to these industry-predicted trends.

    There are a lot of design and development trends floating around the internet. Researching this topic, I came across articles that listed upwards of 50. While many of these are legitimate topics of interest, most of them weren’t headline worthy.

    So how did I land on a top 6? First and foremost, the topic had to be relevant and prevalent (after all, that is the definition of trendy). In addition, they had to strike me as important and valuable when it comes to web development specifically.

    If these aren’t already on your radar, chances are they will be soon. Getting a good grasp on these noteworthy topics can really help you elevate your web development business.

    Here’s a quick overview of what we’ll cover:

    Since AI is a common denominator in all of the burgeoning tech we’ll look at in this article, it seemed a brief history on the topic would be in order.

    A Primer on AI

    The very first notions of AI came in the form of myths and rumors; artificial beings endowed with intelligence or consciousness by some master craftsmen. You know, your typical origins story.

    Philosophers and thought leaders in other disciplines continued to discuss the essence of what would become AI, and in the 1940s the first programmable digital computer was created. However, with the ability only to execute commands (not store them), it lacked the prerequisite for intelligence: formal reasoning.

    The ’50s saw mathematician Alan Turing’s Theory of Computation, suggesting it might be possible to construct an electronic brain. He postulated that machines could use information to solve problems and make decisions, much like humans, and in 1956, the field of artificial intelligence research was founded as an academic discipline.

    Through the ’60s and ’70s, AI thrived, with computers able to store more information while simultaneously becoming faster, cheaper, and more accessible.

    AI continued to pick up speed in the ’80s and ’90s. Learning techniques and expert systems were introduced and popularized, while governments and industries poured billions of dollars into revolutionizing AI. Alas, the loftiest goals didn’t come to fruition, and investors withdrew funding.

    During the ’90s and 2000s, many of AI’s landmark achievements were met, despite government funding and public interest taking a backseat. In 1997, IBM’s chess playing computer program, Deep Blue, defeated the reigning world chess champion grandmaster. Later that same year, Windows implemented speech recognition software.

    Since the turn of the century, AI has continued to prosper. By 2016, AI-related hardware and software surpassed the $8 billion mark, and the New York Times deemed the interest in AI “a frenzy”.

    In today’s era of “Big Data” (characterized by volume, velocity, variety, value, and veracity), AI continues to propel forward, at times its capabilities not only reaching but surpassing computational power. (See Moore’s Law.)

    With AI at the forefront of almost any tech you can think of, the possibilities seem endless, and the opportunities exciting.

    So, without further ado…

    The Top 6 Trends in Web Development

    Let’s get straight to the heart of the matter. Here are the top 6 trends in web development for 2023, starting with…

    AI Chatbots

    AI Chatbots, or AI Assistants, are extremely prevalent in today’s world, and expected to grow substantially. In fact, SEMRush predicts a 33.2% year-on-year growth rate from 2020 to 2027.

    chatbot stats
    Revealing AI Chatbot stats. Image Source.

    AI chatbots help millions of people and businesses perform operations faster by using text or voice prompts. They also offer 24/7/365 availability, which is crucial to providing ready access to customers around the world in every time zone.

    Considered to be one of the most influential technologies that will shape the future of web development, AI chatbots are smarter than regular chatbots. Due to use of natural language processing (NLP) and machine learning (ML) technologies, they better understand what the user wants, then tailor that experience to the individual.

    AI chatbots can engage in complex conversations easily without the human intervention quotient. Because they analyze behavior and solve problems, their AI learning algorithms become smarter with every query they handle.

    The impact of AI chatbots is substantial. Simply put: Chatbots enhance and streamline the customer experience. More specifically, they’ve been shown to lower customer complaints (i.e., improve satisfaction), improve lead capture and contact flow, and increase sales. And it goes with saying that the more customers enjoy an online experience, the more likely they are to purchase from the company providing it.

    Web developers can benefit from AI-powered chatbots in a couple of ways, like replacing navigational elements on websites to make development easier, or integrating chatbots with messengers, so fewer applications need to be developed.

    With customer engagement being a key indicator of business success, you really can’t afford to ignore the benefits of AI chatbots, especially as they become even more sophisticated in the near future.

    Voice Assistant

    We are currently in the midst of the voice search era. Every smartphone is equipped with digital voice assistants, while their home-bound counterparts (smart speakers) are skyrocketing in popularity.

    The most common ways to interact with voice assistants is through smartphones, smart cars, and smart speakers – in that order. The four biggest providers of voice assistants are Apple’s Siri, the eponymous Google Assistant, Amazon’s Alexa, and Microsoft’s Cortana.

    Though there are a vast number of reasons that people use voice assistants, top tasks include making calls (or sending texts), getting directions, playing music, and finding nearby businesses.

    Recent data in The Global State of Digital 2022 reveals that 22.5% of users worldwide use voice assistants each week on the internet, spanning a vast range of ages (16-64 years).

    percentage worldwide use voice assistants
    Key voice assistant stats from The Global State of Digital report.

    Additionally, the voice assistant application market size is projected to grow from 2.8 billion in 2021 to 11.2 billion USD by 2026, at a Compound Annual Growth Rate (CAGR) of 32.4%.

    How did voice assistants become so popular? Partly due to ease of use; basic communication skills are already present in humans, so both kids and seniors can adapt to voice interfaces with a minimal learning curve. Secondly, digital voice assistants are commonplace on smartphones, so the tech is within easy reach at no additional cost.

    Voice Assistant technology is also being implemented to make sites more accessible for those who are hearing and sight-impaired.

    Because of their massive use, voice search results will start to rank higher and more prominently on search engine result pages. Which means companies will place emphasis on optimizing their products and services with voice search at the forefront.

    This provides a good deal of opportunity for web developers when it comes to voice assistant technology and incorporating it into the development process.

    A good place to start taking advantage of this trend is by optimizing structured data for voice search in WordPress.

    Progressive Web Applications (PWAs)

    Progressive Web Applications (aka PWAs) are web applications that run independently of a browser and interact with the customer as a native app. Some prime examples are Google Maps, Starbucks, and Spotify.

    pwa dev preferable
    Indications that PWA is preferrable. Image Source.

    PWAs are currently among the top trends in web development, and expected to fully replace traditional web apps in the near future.

    Using a single codebase, developers can code Progressive Web Apps to work with modern APIs, delivering enhanced capabilities and reliability that can reach anyone – regardless of their location or what device they’re on.

    PWAs improve the overall user experience because of these key benefits:

    • fast
    • relatively low cost
    • quick to launch/distribute on the market
    • install quickly and automatically update
    • save on device power and storage
    • work well offline (or with bad connections)
    • boost website engagement/conversion
    • maintenance and updating is seamless
    • fully immersive experience

    Another plus for PWAs is that Google prioritizes web apps that load quickly on mobile devices. Because they reduce page load time, PWAs dramatically improve search result rankings.

    According to Statista, mobile sales in the global market are projected to reach $8.1 billion in 2026. That means people will likely choose their mobile devices over their non-mobile counterparts for most of their purchasing needs, leaning directly into what PWAs provide.

    PWAs are responsive, secure, easy to install, scalable, and reliably connected, making them a perfect fit for many B2B and B2C uses.

    Tip: Do you use the Avada theme on client sites? Then check out our article on how to speed up and optimize Avada using our Smush and Hummingbird plugins with Avada’s own PWA plugin.

    Single-page Applications (SPA)

    Single-page applications (or SPAs) are one of the most critical technology trends in web development today.

    SPA architecture
    Architecture of an SPA. Image source.

    An SPA is a JavaScript-based web application. Instead of loading separate HTML pages from a server, it loads a single, specific page to visitors, dynamically updating its content without refreshing the page.

    Social media sites (think Facebook and Twitter), as well as Gmail and Google Drive, are among the most well-known SPAs.

    Since most devices support it, SPA technology is cross-platform in nature. They even perform well with a slow internet connection or when offline, loading cached content when users launch the site. SPAs are also better equipped to work without server-side codes infused with API technology.

    All of this means that SPAs operate fast and keep users attention, leading to greater engagement and reduced bounce rates.

    SPAs are easy to create, cost-effective, and consume less server space, making them practical for both end users and developers.

    Tip: Feel like getting into SPA and reading some relaxing articles to get you in the mood? Then check out these bubbly tutorials:

    Internet of Things (IoT)

    Long foreshadowed as the wave of the future, the Internet of Things (or IoT) is a movement where objects are given network connectivity that didn’t historically have it, in order to send and receive data.

    IoT is one of the most rapidly emerging technologies in web development, with Statista indicating the number of IoT-connected devices will reach more than 29 billion by 2030.

    IoT connected devices chart
    IoT-connected devices worldwide by year. Image source.

    IoT objects can range from home devices, to appliances, and wearable technology, as well as cameras, sensors, and signaling equipment – all helping to meet user needs more quickly.

    Furthermore, IoT can make many otherwise non-connected devices accessible from your phone.

    A popular example would be the Google Nest package of products, which provides users with features like media, alarms, lights, and more, simply by using their voice.

    IoT-connected devices have constant data transfers, allowing companies to engage users with their services at incredible speeds, while creating a personalized experience.

    IoT is scalable, as it distributes and collects data but isn’t dependent on the volume of data. It is also reliable, providing accurate results in an expedited fashion. Additionally, it employs powerful security tech to protect business and user data.

    IoT’s smart ecosystem provides a wide range of benefits that can be incorporated into websites and mobile apps, analyzing customer behavior to improve the user experience while providing developers with insights.

    Motion UI

    Motion UI, under the umbrella of motion design, is expected to be a major web design trend in the coming year. The principle is minimalistic design coupled with sophisticated interactions that look amazing and draw the user’s attention.

    Motion UI in its glory. Source: Taras Migulko for emote_agency on Dribbble.

    Motion UI is a powerful front-end technology that can create customizable, animated UI elements and CSS transitions using SASS libraries.

    Popular motions include background animations, animated charts, and modular scrolling, and transition actions like sliding, spinning, bouncing, etc. All of these can cater to individual styles, and aim to catch and keep users’ attention.

    Motion UI is generally compatible with all web technologies, and allows flexibility in placement on websites. You can apply these transitions to overlays, off-canvas menus, modals, and more.

    Humans are instinctively compelled to follow motion and look for visual clues. It’s also been proven that motion makes a greater impact than static images, meaning we’re much more likely to remember content displayed through movement.

    Motion UI is best used to tell a story and invoke emotion, making it a powerful tool in driving user engagement.

    Tip: Looking for Motion design in UI inspiration? Check out these websites with great examples. Also, see this moving article for a Motion UI plugin you can use to make your WordPress sites jump.

    Trends or Tools of the Trade?

    We’ve been following trends like AI chatbots, voice assistants, PWAs, SPAs, IoT, and Motion UI for years; see how they’ve picked up steam since 2018, 2019,  and 2020.

    2023 will witness a lot of advancements in the field of web development, and will transform the way the world does business – including the way you interact with your clients.

    Adopting the latest web dev trends will allow you to stay competitive, by offering the most popular and cutting-edge designs and services.

    If you are looking to build your WordPress sites on the sturdiest foundation, sign up for our newsletter to hear about the latest and greatest developments in the world of WordPress, and consider membership and hosting with WPMU DEV. With our suite of pro plugins, 5-star support, and a money-back guarantee, you’re sure to stay ahead of the curve.

  • The Ultimate WordPress Local Development Cheatsheet

    Want to set up a local WordPress development environment without thumbing through pages and pages of documentation? Our WordPress local development cheatsheet will help you get up and running quick smart!

    In this ‘no-fluff’ practical guide, we’ll cover briefly what WordPress local development is and some of the key benefits of using it, and we’ll then get straight into how to set up a local environment, install WordPress on your computer, and test your website before going live.

    This guide covers the following:

    What Is WordPress Local Development?

    WordPress local development allows you to create a development environment for building, working, and testing WordPress sites on your computer without affecting your live site.

    The local development environment replicates the production server, making it possible to test different scenarios and resolve issues before pushing changes to the live site.

    Benefits of Local Development

    Some of the key benefits of WordPress local development include:

    • Safe Testing Environment: The local development environment provides a safe space to test new features, plugins, and themes without affecting your live site.
    • Speed, Performance, and Efficiency: A local development environment is faster and more responsive than a remote server. This is because it runs on your computer, so your computer can access and process data much faster than a server, and there is no latency in communication between your machine and the server.
    • Cost-Effective: Setting up a local development environment eliminates the need for expensive hosting services and reduces the costs associated with deploying changes to a live site. You only need a computer and a text editor to get started.
    • Improved Collaboration: Multiple developers can work on a single project simultaneously without interfering with each other’s work.
    • Offline Development: With a local development environment, you can develop your site even when you’re offline.
    • Improved Security: Got a “top secret” project you want to work on? Since a local development environment runs on your machine, it is more secure than a remote server, so you can build and work on your site away from prying eyes. There is no risk of unauthorized access or hacking.

    If you’re just getting started as a WordPress developer, see our introduction to WordPress local development article. If you’re already a little more experienced, check out our article on ways to improve your WordPress development workflow in a local environment.

    Setting Up Your Local Development Environment

    Before you can set up a local WordPress development environment, there are some things you’ll need.

    What You’ll Need

    In addition to a computer with enough storage space and processing power to support your development work, here’s all you need to set up a local development environment:

    Local Server Software

    You will need to install a local server software to run your local development environment.

    XAMPP, MAMP, and WAMP are three popular options. Each of these local server software packages provide a complete development environment for web developers with all the necessary components (such as Apache web server, MySQL database, and PHP scripting language, in a single package), a control panel to manage these components and a tool to manage the database.

    Each software package, however, also has its own unique features with key differences, so it’s important to choose one that meets your specific needs.

    Let’s take a brief look at each:

    XAMPP

    XAMPP
    XAMPP

    XAMPP is a free, open-source, and easy-to-install web server software that provides a local development environment for web developers. It stands for Apache, MariaDB, PHP, and Perl, the four main components of XAMPP.

    Some key features (and pros) of XAMPP:

    • Includes Apache web server, MariaDB database, and PHP and Perl scripting languages.
    • Supports multiple operating systems, including Windows, Mac, and Linux.
    • Easy-to-use control panel for managing web server and database components.
    • Option to install additional components such as phpMyAdmin for database management.

    Cons:

    • Not as popular as MAMP or WAMP, so the community support may not be as strong.
    • More complex set-up compared to MAMP or WAMP, requiring more technical knowledge to install and configure components.

    XAMPP is best for web developers who require a complete development environment with multiple components and are familiar with configuring and managing these components. It is also best for developers who work on multiple operating systems and need a cross-platform solution.

    MAMP

    MAMP
    MAMP

    MAMP is a local server software that provides a development environment for web developers. It stands for Macintosh, Apache, MySQL, and PHP, the four main components of MAMP.

    Some key features (and pros) of MAMP:

    • Includes Apache web server, MySQL database, and PHP scripting language.
    • Supported by macOS operating system, but can also be used for Windows-based OS.
    • Easy-to-use control panel for managing web server and database components.
    • Option to install additional components such as phpMyAdmin for database management.

    Cons:

    • Can only use PHP scripting language.
    • Fewer components compared to XAMPP, which may limit some developers’ needs.

    MAMP is best for web developers who work on the macOS operating system.

    For more information on using this option, check out our tutorial on how to develop WordPress locally using MAMP.

    WampServer

    WampServer
    WampServer

    WAMP is a local server software that provides a development environment for web developers. It stands for Windows, Apache, MySQL, and PHP, the four main components of WAMP.

    Some key features (and pros) of WAMP:

    • Includes Apache web server, MySQL database, and PHP scripting language.
    • Supports Windows operating system.
    • Easy-to-use control panel for managing web server and database components.
    • Option to install additional components such as phpMyAdmin for database management.

    Cons:

    • Only supports Windows, so developers using macOS or Linux may need to look elsewhere.
    • Fewer components compared to XAMPP, which may limit some developers’ needs.

    WAMP is best for web developers who work on the Windows operating system and who require a complete development environment with basic components.

    For more information about this option, check out our tutorial on how to develop WordPress locally using WAMP.

    While XAMPP, MAMP, and WAMP are all excellent choices for web developers looking for a local development environment, there are other options available, including Local by Flywheel, DesktopServer, and (if you need to work on WordPress locally on more than one machine) even installing and running WordPress from a USB.

    Text Editor

    The other component you’ll need is a text editor for WordPress development specifically designed for working with programming languages such as PHP. A text editor is essential for editing code and making changes to your website.

    Let’s look at a couple of popular options for text editors:

    Sublime Text

    Sublime Text
    Sublime Text

    Sublime Text is a popular text editor that is widely used by developers for coding and scripting purposes. It offers a clean, fast and intuitive interface, making it easy to work with large codebases.

    Some key features of Sublime Text:

    • Syntax highlighting and code completion for over 80 programming languages
    • Customizable color schemes, key bindings, and macros
    • Advanced searching and editing tools such as multiple selections, split editing, and column editing
    • Instantly switch between projects with a project-specific settings system

    Sublime Text is a great tool for developers who work on projects that require writing code in HTML, CSS, and JavaScript. It offers easy-to-use syntax highlighting, code completion, and editing tools that make the coding process fast and efficient.

    Visual Studio Code

    Visual Studio Code
    Visual Studio Code

    Visual Studio Code is a free, open-source code editor developed by Microsoft. It offers a range of features and tools to help developers create and manage large-scale projects.

    Some key features of Visual Studio Code:

    • IntelliSense, a smart and advanced code completion and debugging tool
    • Built-in Git support and debugging
    • Supports multiple programming languages and has a large library of extensions
    • Customizable interface and workspace

    For additional text editors, see our list of the best text editors for WordPress development.

    Have you ticked all of the above requirements?

    Computer meets required specs
    Selected local server software
    Selected text editor

    Great! Then let’s move on to the next step…

    Installing Local Server Software

    For this example, we’ll install XAMPP on a Windows operating system. Use the same process described below to install your chosen local server software on your computer and follow the software package’s specific instructions:

    1. Download XAMPP: Go to the XAMPP official website and download the latest version of XAMPP for Windows.
    2. Install XAMPP: Double-click the downloaded file to start the installation process. Run the downloaded installer file and follow the on-screen instructions to install XAMPP. By default, XAMPP will be installed in the C:\xampp directory.
    3. Start XAMPP: After installation, open the XAMPP Control Panel from the Start menu or desktop shortcut. Start the Apache and MySQL modules by clicking on the “Start” buttons next to each module.
    4. Verify installation: To verify that XAMPP is working correctly, open a web browser and navigate to http://localhost. This should display the XAMPP welcome page.
    5. Create a virtual host: To create a virtual host, follow the steps outlined below.

    XAMPP should now be installed and configured on your machine. You’re ready to start developing and testing your websites locally.

    Note: The process of installing XAMPP or other local server software, such as MAMP or WAMP, may vary slightly depending on the operating system being used. For Mac and Linux operating systems, you can follow the installation instructions provided on the XAMPP website.

    See our other XAMPP-related tutorials for additional information on setting up XAMPP, upgrading XAMPP, troubleshooting XAMPP, and migrating WordPress from a XAMPP localhost to the web.

    Setting Up a Virtual Host

    Setting up a virtual host in a local development environment allows developers to run multiple websites on their local machine, each with its own unique URL. This provides a more realistic testing environment and makes it easier to switch between different projects.

    For the step-by-step guide below to set up a virtual host in your local development environment and start testing your websites:

    1. Open the Apache configuration file: Open the configuration file for your local server software. For this example, we’re using XAMPP, so open the Apache configuration file, typically located at /etc/httpd/conf/httpd.conf or C:\xampp\apache\conf\httpd.conf.

    2. Enable virtual hosting: Locate the section labeled “# Virtual Hosts” and uncomment the following line by removing the hash symbol (#) at the beginning of the line: #Include conf/extra/httpd-vhosts.conf.

    3. Configure the virtual host: Open the virtual host configuration file, typically located at /etc/httpd/conf/extra/httpd-vhosts.conf or C:\xampp\apache\conf\extra\httpd-vhosts.conf.

    4. Add a new virtual host: Add a new virtual host by creating a new block of code with the following format:

    ServerName example.local
    DocumentRoot "/path/to/document/root"
    <Directory "/path/to/document/root">
    AllowOverride All
    Require all granted

    Do this:

    • Replace “example.local” with the desired URL for the virtual host.
    • Replace “/path/to/document/root” with the full path to the document root directory for the virtual host.

    5. Update the hosts file: The hosts file maps domain names to IP addresses. To make the virtual host accessible via the URL you specified, you’ll need to add an entry to the hosts file. The hosts file is typically located at /etc/hosts or C:\Windows\System32\drivers\etc\hosts. Add a new line with the following format: 127.0.0.1 example.local. Replace “example.local” with the URL specified in the virtual host configuration. Save the changes to the configuration file.

    6. Restart Apache: Restart the Apache local web server to apply the changes.

    7. Test the virtual host: Test your virtual host by visiting the URL in a web browser. The browser should display the content of the document root directory for the virtual host.

    Creating a Database for Your Local WordPress Installation

    The next step before setting up a WordPress project locally is to create a database for your local development environment.

    Follow these step-by-step instructions to create a database in XAMPP:

    1. Open the XAMPP Control Panel: Open the XAMPP Control Panel from the Start menu or desktop shortcut. Make sure the Apache and MySQL modules are running.

    2. Access phpMyAdmin: To access phpMyAdmin, open a web browser and navigate to http://localhost/phpmyadmin. This will open the phpMyAdmin interface in your browser.

    3. Create a new database: In the phpMyAdmin interface, click on the “Databases” tab. In the “Create database” section, enter a name for your new database and select the “utf8mb4_general_ci” collation. Then, click on the “Create” button.

    4. Create a new user: To create a new user for the database, click on the “Users” tab and then the “Add user” button. In the “Add user” form, enter a username and password for the new user, and select “Local” as the host. Make sure to grant all privileges to the user by checking the “Grant all privileges on database” checkbox. Finally, click on the “Go” button.

    5. Save your details: Write down or save your database name, username and password. You will need these to connect the database to WordPress later.

    After completing the above steps, you will have successfully created a database for your local WordPress installation and local development environment.

    You can now use this database to store and manage your data as you develop and test your WordPress site locally.

    Have you completed all of the above steps?

    Installed local server software
    Set up virtual host
    Created database

    Great! Then let’s move on to the next step…

    Installing WordPress Locally

    Now that we have prepared our local environment, the next step is to download, install, and configure WordPress.

    Downloading and Installing WordPress on Local Server

    Follow the steps below to complete this process:

    1. Visit the WordPress website: Go to the official WordPress.org website and click on the “Download WordPress” button to download the latest version of WordPress.
    2. Extract the archive: The WordPress download will be a compressed ZIP file. Extract the contents of the archive to a directory on your computer.
    3. Move the extracted files to your local server: Move the contents of the extracted directory to the root directory of your local server. If you’re using XAMPP, for example, this is typically C:\xampp\htdocs on Windows or /Applications/XAMPP/htdocs on macOS.
    4. Create a database: (Note: if you have been following along, this step should already be done.) Before installing WordPress, you’ll need to create a database. You can do this using a tool like phpMyAdmin, which is included with most local server software like XAMPP and MAMP.
    5. Start the installation: Open your web browser and navigate to http://localhost/wordpress (or the equivalent URL for your local server). This will start the WordPress installation process.
    6. Choose the language: On the first screen, select your preferred language and click the “Continue” button.
    7. Fill in the database information: On the next screen, fill in the database information that you created in step 4. This includes the database name, database username, and database password.
    8. Fill in the site information: On the next screen, fill in the information for your local WordPress site. This includes the site title, username, password, and email address.
    9. Run the installation: Once you’ve filled in all the information, click the “Install WordPress” button to run the installation.
    10. Log in to your site: After the installation is complete, log in to your local WordPress site using the username and password you created in step 8 to start customizing and developing your local site.

    You have now successfully downloaded and installed WordPress.

    You can now start customizing and developing your site locally, with all the benefits of a local development environment, before deploying your site to a live server.

    Configuring wp-config.php File

    The wp-config.php file is a crucial component in the setup of a local WordPress installation and local development environment. This file contains configuration settings that control how WordPress interacts with your database and other important settings.

    If you have followed the installation instructions above, your database credentials will be automatically added to the wp-config.php file.

    If, for any reason, you need to manually configure the wp-config.php file, follow the instructions below:

    1. Create a wp-config.php file: If your local WordPress installation doesn’t already have a wp-config.php file, you can create one by copying the wp-config-sample.php file and renaming it to wp-config.php.

    2. Update database credentials: Open the wp-config.php file and update the following lines with the appropriate information:

    define( 'DB_NAME', 'database_name' );
    define( 'DB_USER', 'database_user' );
    define( 'DB_PASSWORD', 'database_password' );
    define( 'DB_HOST', 'localhost' );

    Replace database_name, database_user, and database_password with the values you used when creating the database and user in a previous step.

    3. Set the WordPress security keys: WordPress security keys add an extra layer of security to your site by encrypting information stored in cookies. You can generate a set of security keys at the official WordPress site. Copy the generated keys and paste them into your wp-config.php file, replacing the placeholder keys that are already there.

    4. Enable debugging: For local development, it’s useful to enable debugging in WordPress. This will provide more detailed error messages and warnings that can help you troubleshoot issues with your site. To enable debugging, add the following line to your wp-config.php file:

    define( 'WP_DEBUG', true );

    5. Save the changes: Once you have made the changes to the wp-config.php file, save the file and close it.

    Successfully configuring the wp-config.php file will ensure that your locally installed WordPress site is able to connect to the database, is secure, and provides helpful debugging information as you develop and test your site locally.

    Importing a Live WordPress Site to Local Environment

    Follow the steps below if you need to import a live WordPress site into your local environment:

    Exporting the Live Site’s Database

    To export the live site’s database, you’ll need to have access to the live site’s server.

    Here are the steps to export the live site’s database (note: different server environments will perform this differently, but most should follow a similar process):

    1. Log into your live server’s control panel.
    2. Access the database: The first step is to access the database of the live site. You can do this using a tool like phpMyAdmin, which is often provided by your web hosting provider. Look for a section called “Databases” and click on “phpMyAdmin.”
    3. Select the database: Once you’ve logged into phpMyAdmin, select the database for your live site from the left-side panel.
    4. Export the database: Click on the “Export” button to start the export process.
    5. Choose the export format: On the export screen, choose the “Quick” export method, select the “SQL” format and make sure that the “Structure” and “Data” options are selected.
    6. Download the export file: Click the “Go” button to download the export file to your computer.

    Importing the Database to the Local Server

    To import the live site’s database to your local server, make sure your chosen local server software is already installed on your computer.

    Here are the steps to import the live site’s database to your local server:

    1. Open phpMyAdmin in your local server software: Log into phpMyAdmin for your local server and select the database you created for your local WordPress installation.
    2. Import the database: Click on the “Import” button to import the data from the export file you just downloaded.
    3. Select the import file: On the import screen, click on the “Choose File” button, select the export file you just downloaded, and click the “Go” button to start the import process.

    Replacing URLs in the Database

    After importing the live site’s database, you will need to replace the URLs in the database to match your local development environment.

    Here are the steps to replace URLs in the database:

    1. Open phpMyAdmin in your local server software.
    2. Select the imported database from the left-side panel.
    3. Click on the “SQL” tab.
    4. Enter the following query in the text area:

    UPDATE wp_options SET option_value = replace(option_value, 'http://www.livesite.com', 'http://local.livesite.com') WHERE option_name = 'home' OR option_name = 'siteurl';
    UPDATE wp_posts SET guid = replace(guid, 'http://www.livesite.com','http://local.livesite.com');
    UPDATE wp_posts SET post_content = replace(post_content, 'http://www.livesite.com', 'http://local.livesite.com');

    5. Replace “http://www.livesite.com” with the URL of your live site, and replace “http://local.livesite.com” with the URL of your local development environment.

    6. Click on the “Go” button to execute the query.

    Uploading the Live Site’s Files to the Local Environment

    To upload the live site’s files to the local environment, you will need to have FTP access to your live site’s server.

    Follow the steps below to upload the live site’s files to your local environment:

    1. Connect to your live site’s server using an FTP client such as FileZilla.
    2. Navigate to the root directory of your live site on the server.
    3. Download all the files to your local computer.
    4. Place the downloaded files in the root directory of your local development environment, which is usually located in the “htdocs” or “www” folder in XAMPP or other local server software.

    Notes:

    1. If you already have a WordPress installation, the above folder won’t be empty and you will be prompted to replace existing files and directories, so replace all files except for the wp-config.php file to keep the same configurations, including the connected databases which have been populated with the live site’s data.
    2. Before uploading the live site’s files to the local environment, you may need to change the file permissions to make the files writable by your local server software.
    3. Also, make sure to test your local WordPress backup before making any changes.

    That’s it! You have now successfully imported your live site into your local WordPress installation and local development environment.

    Developing and Testing on Local WordPress Site

    You’re finally ready to develop and test your site locally using the same data as your live site, giving you a true-to-life environment for testing and development.

    Let’s go through the process:

    Making Changes and Testing

    1. Log into the local WordPress site: Open your local WordPress site in your web browser and log in to the WordPress dashboard using your administrator credentials.
    2. Make changes to the site: You can make changes to your local WordPress site by editing themes, plugins, or custom code. Simply access these elements from the WordPress dashboard.
    3. Test changes: After making changes to your local WordPress site, it’s important to test the changes to make sure they work as expected. You can test changes by visiting the front-end of your site and checking that the changes have taken effect.

    Debugging

    1. Use the Debugging mode: WordPress has a built-in debugging mode that makes it easier to identify and resolve issues on your site. To enable the debugging mode, you need to add the following code to your wp-config.php file: define( 'WP_DEBUG', true );.
    2. Check the error logs: If you’re having issues with your local WordPress site, you can check the error logs to see if there are any error messages or warning messages that can help you identify the issue. The error logs can be found in the WordPress debug log file, which is located in the wp-content directory.
    3. Use debugging tools: There are a number of debugging tools and plugins available for WordPress that can help you identify and resolve issues on your site. For example, the Query Monitor plugin provides detailed information about database queries, plugin usage, and more. See this tutorial for help with debugging WordPress: Debugging WordPress: How To Use WP_Debug

    Testing Different Plugins and Themes

    Installing, activating, and testing plugins and themes on a local WordPress site works in exactly the same way as it does on any other regular WordPress site. So, make sure to do the following while in testing mode:

    1. Install plugins: Install plugins on your local WordPress site to add new features or functionality to your site. To install a plugin, log in to the WordPress dashboard, go to the Plugins section, and click on the Add New button.
    2. Activate plugins: Activate the plugin you’re testing after installing it to use it on your site. To activate a plugin, go to the Plugins section of the WordPress dashboard and click on the Activate button next to the plugin you want to use.
    3. Test plugins: After activating a plugin, it’s important to test the plugin to make sure it’s working as expected. Test plugins by visiting the front-end of your site and checking that the plugin has taken effect.
    4. Install themes: Install themes on your local WordPress site to change the appearance of your site. To install a theme, log in to the WordPress dashboard, go to the Appearance section, and click on the Themes button.
    5. Activate themes: Activate the theme after installing it to change your site’s appearance. To activate a theme, go to the Appearance section of the WordPress dashboard and click on the Activate button next to the theme you want to use.
    6. Test themes: After activating a theme, it’s important to test the theme to make sure it’s working as expected. Test themes by visiting the front-end of your site and checking that the theme has taken effect.

    Have you make all the changes you need, debugged issues, and tested different plugins and themes on your local site?

    Great! Now you’re ready to make your local WordPress site live.

    Deploying Local WordPress Site to Live Server

    The final step in this process is to export all of your local WordPress files and database to your live hosting environment and make sure that all of your site’s changes, configurations, and URLs are working on your live site.

    Exporting the Local Site’s Database

    Follow the steps below to export your local WordPress site to your live server:

    1. Log in to the local site’s database using PHPMyAdmin.
    2. Select the database you want to export.
    3. Go to the “Export” tab.
    4. Choose the “Quick” export method.
    5. Select the “SQL” format.
    6. Click “Go” to download the SQL file to your computer.

    Importing the Database to the Live Server

    Follow the steps below to import your local WordPress database’s export file into your live site:

    1. Log in to the live server’s database using PHPMyAdmin.
    2. Create a new database for the live site.
    3. Go to the new database and select the “Import” tab.
    4. Choose the exported SQL file from your local site.
    5. Click “Go” to import the database.

    Now that you have migrated the database over from your local site to your live site, let’s do the same for your site’s files.

    Uploading the Local Site’s Files to the Live Server

    Follow the steps below to upload your local WordPress site’s files into your live site:

    1. Prepare the files: Before uploading the local site’s files to the server, it’s a good idea to review and clean up the files. This may include removing any unnecessary files, such as backups or test files, to minimize the amount of data being uploaded.
    2. Connect to the server: You can connect to the server using a variety of methods, such as FTP or SFTP. You will need to use a client software, such as FileZilla, to connect to the server. You will need to provide your server host, username, and password to connect.
    3. Upload the files: Once you are connected to the server, you can upload the local site’s files to the server. You can upload the files in a number of ways, including uploading individual files or uploading the entire local site folder. Navigate to the root directory of the live site on the server. Upload all the local site’s files to the live site’s directory on the server, and replace the existing files if prompted.
    4. Update the database information: After uploading the files to the server, you will need to update the database information in the wp-config.php file to reflect the live site’s database information. Open the wp-config.php file in a text editor and update the database name, username, and password to match the live database.
    5. Update URLs in the database:  See the section below.
    6. Test the site: After uploading the local site’s files to the server, it’s a good idea to test the site to make sure everything is working correctly. This may involve testing the site’s functionality, links, and images to make sure they are working as expected.

    Updating URLs in the database

    You can update the URLs in your database using a text editor or by working directly in your database (make sure your database is fully backed up before making changes).

    Updating URLs Using a Text Editor

    Follow the steps below to update the URLs in your database using a text editor.

    1. Export the database: Before updating the URLs in the database, you will need to export the database. Use your database management tool (e.g. phpMyAdmin).
    2. Find and Replace the URLs: Once you have exported the database, you will need to find and replace the URLs in the database. You can do this using a text editor such as Sublime or Visual Studio Code. Search and replace the URLs, and make sure to replace the URLs carefully and thoroughly, including URLs in serialized data.
    3. Import the database: After updating the URLs in the database, you will need to import the database back into your local development environment. You can import the database using a database management tool, such as phpMyAdmin.
    4. Test the site: After importing the updated database, it’s a good idea to test the site to make sure everything is working correctly. This may involve testing the site’s functionality, links, and images to make sure they are working as expected.

    Updating URLs in the Database

    Follow the steps below to update the URLs directly in your database:

    1. Log in to the live site’s database using PHPMyAdmin.
    2. Select the live site’s database.
    3. Go to the “SQL” tab.
    4. Run the following SQL query to update the URLs:

    UPDATE wp_options SET option_value = replace(option_value, 'http://old-url', 'http://new-url') WHERE option_name = 'home' OR option_name = 'siteurl';
    UPDATE wp_posts SET guid = replace(guid, 'http://old-url','http://new-url');
    UPDATE wp_posts SET post_content = replace(post_content, 'http://old-url', 'http://new-url');

    Replace “old-url” with the URL of the local site and “new-url” with the URL of the live site.

    5. Click “Go” to run the query.
    6. This will update all references to the local site’s URL with the live site’s URL in the database, ensuring that all links and images on the live site work correctly.

    If you have followed the above steps correctly, the URLs in your database should have successfully updated. After these steps, your local WordPress site should now be fully functional on the live server. Make sure to thoroughly test the live site to ensure that all features are working correctly, and make any necessary adjustments to ensure a seamless transition from the local development environment to the live server.

    Local Development vs Webhost Staging Environment

    While WordPress local development provides a safe and efficient environment to build, edit, and test WordPress websites, you may decide to work in a webhost staging environment instead (here are some good reasons why you may not want to develop WordPress locally).

    Both local development environments and webhost staging environments, however, have their pros and cons.

    Here is a brief overview of the pros and cons of using a WordPress local development versus a webhost staging environment:

    Pros of Local Development Environment

    • Easy to Use: Local development environments are easy to use, even for beginner developers.
    • Flexibility: You have complete control over your local development environment, so you can configure it however you like.
    • Test Any Changes: With a local development environment, you can test any changes you make to your site without affecting the live version.

    Cons of Local Development Environment

    • Not a Live Environment: A local development environment is not a live environment, so you cannot test your site with live data.
    • Limited Resources: Your local machine may have limited resources, such as memory and processing power, which can affect your site’s performance.
    • Not a True Representation: A local development environment may not accurately represent a live server environment, so testing may not be 100% accurate.

    Pros of Webhost Staging Environment

    • Live Environment: A webhost staging environment is a live environment, so you can test your site with live data.
    • More Accurate Testing: A webhost staging environment is a more accurate representation of a live server environment, so testing is more reliable.
    • More Resources: A webhost staging environment typically has more resources available than a local development environment, so your site’s performance will be better.

    Cons of Webhost Staging Environment

    • Cost: Setting up a webhost staging environment can be expensive, as you have to pay for hosting and a domain name.
    • Not as Fast: A webhost staging environment is not as fast as a local development environment because it runs on a remote server.

    For smaller projects, a local development environment is a great option because it is free and easy to use. For larger projects, however, a webhost staging environment may be a better option because it is a live environment and provides more accurate testing.

    Ultimately, the choice between these two methods will depend on your individual needs, preferences, and hosting options.

    Note: We recommend avoiding shared hosting, and hosting on our Quantum plan instead for basic WordPress sites, but if you have reasons for choosing shared hosting, then check out our article on how to run WordPress local development on shared hosting.

    All WMU DEV hosting plans (except for Quantum) include a staging environment. Refer to our staging documentation for more details on the benefits of using a staging environment to develop and test WordPress sites.

  • Say Goodbye to Multiple Registrars: Transfer Your Domains to The Hub

    Have a domain purchased from somewhere else besides WPMU DEV? It’s now easier than ever to transfer them to our platform in The Hub with our domain transfer-in feature.

    As you’ll see, it only takes three steps to quickly establish a domain into a new home at WPMU DEV – so you can manage everything under one roof!

    Plus, you’re in control regarding nameservers, autorenewal, associating a domain with a client, and more.

    In this article, we’ll look at:

    After reading this, you’ll immediately be able to implement transferring domains into one easy-to-manage system – cheaply and effectively.

    But first…

    Before we get into the steps to transfer a domain, here are some general guidelines to get you in good shape:

    transfer tips
    These tips will set you on the right course to domain transfer!

    Now, if you’re ready — let’s begin!

    Triggering Domain Transfers

    There are several ways to transfer a domain over. Whether it’s an established domain with us or you have a third-party domain service, it’s a breeze.

    There are just a few differences…

    New User

    If you’re a new user with no registered or connected domains, you’ll get started in The Hub by clicking the Domains tab and Transfer a Domain.

    New user view for domains.
    No domains in our system? This area will get you started.

    Already have domains registered or connected? Under Registered Domains, you’ll start by clicking Transfer Domain.

    Transfer domain tab
    This gets you started right away.

    Another route is if you have connected any domain(s), click on the ellipsis icon on any domain’s row to show the available management options for that domain. From that, click on the Transfer Domain to Us button.

    Use us for domain
    You have other options under the ellipsis as well, such as managing and rechecking DNS.

    Additionally, you can click on any connected domain’s row, which will open up Nameserver details for that specific domain. Clicking the Transfer Domain to Us button is another way to get the process going.

    transfer domain to us.
    As you can see, the price per year is also mentioned here.

    Whatever option you choose will lead to an area where you can start the 3-step process.

    Step 1: Domain Eligibility Check

    In this first step, we check whether the domain is transferable.

    To start, you’ll specifically enter the domain you want to transfer. Enter it completely with its TLD (e.g. .com).

    Transfer existing domain
    Once entered, hit ‘Transfer’ to continue.

    If a domain is ineligible, you’ll get an error message. The messages will vary, depending on the issue.

    error message.
    In this example, it’s an invalid TLD.

    Almost any domain TLD is okay to transfer. We have over 260 TLDs that are available for use and transfers. For any questions or issues about this, please contact support or see our documentation for rules and reasons a domain doesn’t transfer.

    That being said, if all is good and the domain is eligible, once you hit Transfer, it will take you to the nameserver step.

    Step 2: Nameserver Settings

    This step is where you can choose to use our nameservers and DNS records, or keep current nameservers. If existing DNS records are available, they will be shown here. If not, it will be blank and state that there are no records to display.

    Nameservers options.
    Choose where you’d like to manage your DNS in one click.

    If you choose to Keep Current Nameservers, it will keep the current nameserver records for the domain.

    Current nameservers.
    The type of nameserver and TTL is listed.

    Once you decide on what’s best for you, you can continue on…

    And for help pointing a domain to our nameservers, check out our complete guide on how to do so.

    Step 3: Transfer Registration

    Registering a domain is all done in one area.

    You can start by viewing the Registration Terms. You’ll notice the transfer price, renewal price, auto-renew option, and whether domain privacy is active or not.

    Want auto-renew? It’s a click away.

    Next, the domain will need an Authorization Code from your current registrar. This is a normal process that is universal amongst domains. You’ll get this from the losing domain register you’re transferring from.

    Authorization code area.
    You’ll need this code from the domain provider you’re transferring from.

    Additionally, you’ll also add the Registrant Information. You can associate the domain with a client or add personal details.

    Registrant information area.
    You can always go back and edit this information at any time.

    Then, checkout in the Summary. This has the Domain Name, Registration Period, and Price. Plus, it shows whether Auto-Renew is activated or not.

    The price summary for the domain.
    Read the Terms of Service and Privacy Policy for more information.

    After hitting Pay Now, you’re all set!

    By default, the Registration Period of all the transfer-in domains is set to One year. Pay the transfer fee on our pricing page to transfer a domain to WPMU DEV. Upon successful transfer, the domain’s expiration date will be extended by one year.

    It’s also important to note that if the Authorization code is invalid, the domain transfer will fail, and the transfer amount will be refunded to your account.

    The Domain Transfer Process

    Once the new domain transfer-in payment is complete, the Domain Registration process begins. You’ll be able to see the status under Domain Overview.

    The transferring status.
    The transferring part is always highlighted in orange.

    The system will verify three registrant contact data pieces: First Name, Last Name, and Email Address. For more information about registrant verification, please read our documentation.

    When complete, you’ll see that it’s Active OR Verifying. Also, additional information will be displayed (e.g. Registration Date, Expiration date, Costs, etc).


    Sign indicating that a domain is active.
    All other information is displayed, too.

    Be aware that the domain transfer can take up to five days – and that’s out of our control. It depends on how quickly the verification can take place from the losing register (e.g. GoDaddy).

    Once completed, your domain will then be available in the Domains area in The Hub – along with any others you have.

    Bulk Domain Transfer

    Last but not least, if you need to do a Bulk Domain Transfer, contact our 24/7/365 support to help assist with this. It’s the easiest and quickest way to get any bulk domains transferred over to our system.

    The Main Way to Manage Your Domain

    As you can see, bringing in domains from third-party providers is quick and easy, with only three steps. And once done, you can manage all your domains in one place with The Hub!

    Adding domains to a client’s site, setting up auto-renewal, connecting nameservers – the process couldn’t be more streamlined. So, try bringing a new domain in today. Good luck, and enjoy!

    Oh, and if you’re not on our Agency Plan yet, give it a go. Not only do you get domain management like bringing in third-party domains, you’ll also have access to unlimited site licences, 500GB CDN, $144 hosting credits, and more.