EDITS.WS

Tag: Divi Resources

  • Get a Free Handmade Soap Layout Pack for Divi

    Hey Divi Nation! Thanks for joining us for the next installment of our weekly Divi Design Initiative; where each week, we give away a brand new Layout Pack for Divi.

    This time around, the design team has created a beautiful Handmade Soap Layout Pack that’ll help you get your next Handmade Soap website up and running in no time!

    This layout pack includes:

    7 Premade page layouts strategically designed for any Handmade Soap website (including a footer design)
    – Original, royalty-free photos and graphics + customizable source file (see below)
    – Plus, a large collection of pre-designed website elements that are customizable and reusable anywhere.

    This layout pack is available right inside Divi for all Divi customers for FREE as the latest addition to our growing Divi library of hundreds of premade layout packs, thousands of page designs, and countless web design elements and resources.

    divi layout

    Check Out The Divi Handmade Soap
    Layout Pack Below

    Get it for free today!

    Handmade Soap layout pack for Divi

    Landing Page Design

    Handmade Soap Layout Pack for Divi

    View The Live Layout Demo

    Home Page Design

    Handmade Soap Layout Pack for Divi

    View The Live Layout Demo

    Shop Page Design

    Handmade Soap Layout Pack for Divi

    View The Live Layout Demo

    Product Page Design

    Handmade Soap Layout Pack for Divi

    View The Live Layout Demo

    Blog Page Design

    Handmade Soap Layout Pack for Divi

    View The Live Layout Demo

    About Page Design

    Handmade Soap Layout Pack for Divi

    View The Live Layout Demo

    Contact Page Design

    Handmade Soap Layout Pack for Divi

    View The Live Layout Demo

    Key Features

    If you’re looking to get a new Handmade Soap website, you don’t want to miss out on the Handmade Soap Layout Pack for Divi! Each page layout is built to impress your visitors with world-class web design. And it has everything you need to promote Handmade Soap services, and much more. Use it to get your next Handmade Soap website up and running today!

    Live Demos

    Click the links below to see a live demo for each of the layouts included in the pack.

    1. Handmade Soap Landing Page (live demo)
    2. Handmade Soap Homepage (live demo)
    3. Handmade Soap Shop Page (live demo)
    4. Handmade Soap Product Page (live demo)
    5. Handmade Soap Blog Page (live demo)
    6. Handmade Soap About Page (live demo)
    7. Handmade Soap Contact Page (live demo)

    Access This Layout Right Now
    Directly from Your Divi Builder

    Since Version 3.0.99 of Divi, you can find and import any of the layouts included in this pack (along with ALL of Divi’s Premade Layout packs) directly from the Divi Builder. They are already waiting for you.

    To access your new layout, simply activate the Visual Builder when editing a page and look for the “Load From Library” icon in the page settings bar (it looks like a plus symbol). Click this icon to launch the Load From Library popup. Under the Premade Layouts tab, you can easily find the new layout by scrolling through the list of layout packs. Once you find the Handmade Soap Layout Pack, click on it. You will see all the individual layouts included in the pack. Select the layout you want to use and then click the “Use This Layout” button.

    Handmade Soap Layout Pack for Divi

    For more, check out this video to learn how you can get this layout pack up and running today.

    Subscribe To Our Youtube Channel

    Authentication Required

    Before you can download Premade Layouts from the Divi Library you must authenticate your Elegant Themes Subscription. You can do this by navigating to Divi > Theme Options > Updates. There you can enter your username and API key and save changes.

    Handmade Soap Layout Pack for Divi

    You can find your API Key under your members area on the Elegant Themes site. After you enter the Username and API Key, you will gain immediate access to our library of hundreds of free layouts (including this one). If you haven’t done this, when you click to import a layout to your page, you will be prompted to enter your Elegant Themes Membership Username and API Key.

    Use Layout Images for FREE with No Licensing Restrictions

    Divi Handmade Soap Layout Pack for Divi

    The image assets included with these layouts (icons, illustrations, photos, etc.) have no licensing restrictions. This means you can use them in all of your commercial projects without having to worry about paying licensing fees or attributing the photographer. Use them in your commercial websites, sell them within your Divi child themes, include them in your own Divi layout packs or just use them on your blog. We know how challenging it can be to find good photos and how confusing and scary the licensing that governs those photos can be. We want to fix that problem for our users.

    Download the Full Res Image Assets

    New Layout Pack Every Week!

    We hope you enjoy this layout pack. We look forward to hearing your opinions in the comment section below. Make sure you check out next week’s layout pack as well!

    The post Get a Free Handmade Soap Layout Pack for Divi appeared first on Elegant Themes Blog.

  • Divi Product Highlight: Ultimate Divi Modules UI Bundle

    Ultimate Divi Modules UI Bundle is a third-party layout bundle for Divi. This bundle includes lots of pre-styled layouts, modules, and extras. This bundle is always growing and currently includes over 3600 styles and 35 layout packs. They’re Divi Library layouts, so they can be customized and used the same as any Divi layout — including being added to your Divi Cloud! In this post, we’ll look at some of the new additions to the Ultimate Divi Modules UI Bundle to help you decide if this Divi product is right for you.

    Let’s get started.

    Uploading Ultimate Divi Modules UI Bundle Layouts

    Ultimate Divi Modules UI Bundle Layouts are provided as JSON files with 10 layouts per file. Upload them to your Divi Library as normal by going to Divi > Divi Library in the WordPress dashboard. Select Import & Export, choose the Import tab of the modal that opens, navigate to and select your JSON file, and click Import Divi Builder Layouts. You can then use the layouts the same way as any Divi layout including the Divi Theme Builder and Divi Cloud.

    Uploading Ultimate Divi Modules UI Bundle Layouts

    Ultimate Divi Modules UI Bundle Page Layouts

    Ultimate Divi Modules UI Bundle now has over 82 modules, 3600 styles, and 35 complete website layout packs. The bundle has added over 1600 styles and 24 layouts since last October. In the following sections, we’ll look at some of the new additions.

    Blog Layouts

    Ultimate Divi Modules UI Bundle has 50 blog layouts. They include the blog and code modules for CSS and JS code. The example below shows layouts 41 and 42. Both add the publish date over the blog image. Layout 41 places the title and author name over the image while layout 42 places them under the image. A line separates the title and author name.

    Ultimate Divi Modules UI Bundle Page Layouts

    Blog layout 47 includes an interesting design with the meta and content overlapping the image.

    Ultimate Divi Modules UI Bundle Page Layouts

    Blog layout 50 places the blog posts in a single column. The date sits over the featured image and the content includes a dark blue background.

    Ultimate Divi Modules UI Bundle Page Layouts

    Content Ticker

    The bundle includes 15 content tickers created with text modules, content sliders, and styled with CSS. The example below shows styles 11 through 13. The title sits on one side and includes a darker background. The sliders create the tickers and include a lighter background and navigation styled to match the title.

    Ultimate Divi Modules UI Bundle Page Layouts

    Portfolio Modules

    The bundle includes 50 portfolio modules. They add interesting overlays with animations to the featured images. This example shows Portfolio Module 41. Its overlay has a dark blue background with white text and a light blue divider line.

    Ultimate Divi Modules UI Bundle Page Layouts

    This example shows style 43. Its overlay includes a white background with a parallelogram shape. The text is dark and light blue.

    Ultimate Divi Modules UI Bundle Page Layouts

    Ultimate Divi Modules UI Bundle WooCommerce

    The bundle adds lots of WooCommerce layouts including footers, widgets, tickers, and more. This is the Woo Category Block style 8. It includes multiple Woo Product Modules in a unique layout. It has a gray overlay that changes the text to white.

    Ultimate Divi Modules UI Bundle Page Layouts

    Style 10 adds text to the product’s image. An overlay with a blue background and white text.

    Ultimate Divi Modules UI Bundle Page Layouts

    Ultimate Divi Modules UI Bundle Layout Packs

    Ultimate Divi Modules UI Bundle also includes layout packs to build complete websites. Import a single page or the enter layout pack at once. Most have between 13-15 page layouts. We’ll look at the home page for a few of the new layouts as this will show many of the styled modules.

    Content Writer Layout Pack

    The Content Writer Layout Pack includes 13 pages. The layouts include lots of styled modules, icons, animations, and more. It includes all the standard pages and adds a History page for information about the company and how they work.

    Ultimate Divi Modules UI Bundle Layout Packs

    This example shows the design of the Content Writer home page layout. It includes red highlights throughout. The unique Person Modules reveal the social icons on hover. The style of the Blog Module includes text that overlaps the featured image.

    Ultimate Divi Modules UI Bundle Layout Packs

    Divi Agency Layout Pack

    The Divi Agency Layout Pack also includes 13-page layouts. It includes the standard pages and adds a Careers page.

    Ultimate Divi Modules UI Bundle Layout Packs

    The home page includes lots of styled modules with animations for the buttons, sliding backgrounds for the services, social media icons and image color changes for the Person Modules, and overlays for the Portfolio Module.

    Ultimate Divi Modules UI Bundle Layout Packs

    Music Concert Layout Pack

    The Music Concert bundle was designed to create a website where bands can showcase their concerts. The layout pack includes 15 layouts. Several of the layouts are designed specifically for bands including a page to apply to be an artist. This also includes a blog layout page and a page with code.

    Ultimate Divi Modules UI Bundle Layout Packs

    The home page includes a slider for the latest events. The Person Modules display social icons on hover. Top events show in another slider. Blurbs display a faint number in the background.

    Ultimate Divi Modules UI Bundle Layout Packs

    Fashion Shop Layout Pack

    The Ultimate Divi Modules UI Bundle Fashion Shop layout bundle is one of several that was designed for use with WooCommerce. It comes with 44 layouts with a combination of pages and modules. They include sliders, shop grids, carousels, widgets, etc. Many of them include multiple module designs, making them ideal for creating unique shop and product pages.

    Layout Packs

    The home page displays a slider to several shop pages, numbered blurbs, shop CTAs with custom overlays, multiple product grids, a styled newsletter form, and lots more.

    Layout Packs

    Promotion Block Style V1 to V3

    Here’s a look at the promotion blocks. It includes three different designs. The first design places images in a grid with text and buttons over the images. It includes a styled overlay animation.

    Layout Packs

    The second design has a grid without space between the images. It doesn’t include an overlay, but it does add a CTA.

    Layout Packs

    The third layout adds another column to the grid with taller images on the outside and wider images in the middle.

    Ultimate Divi Modules UI Bundle Layout Packs

    Promotion Banner V1 to V3

    The layout pack also includes three full-width banners to promote sales and work as CTAs that point to the shop. The image below shows all three banners.

    Layout Packs

    Product Showcase

    The product showcase displays the WooCommerce product element on one side and a custom product element on the other in an alternating layout.

    Layout Packs

    Purchase Ultimate Divi Modules UI Bundle

    Ultimate Divi Modules UI Bundle is available in the Divi Marketplace. The regular price is $149 but might be discounted. It includes unlimited usage and lifetime updates.

    Purchase Ultimate Divi Modules UI Bundle

    Ending Thoughts

    That’s our look at the Ultimate Divi Modules UI Bundle. This bundle has lots of layouts and modules to help you get started on any type of website. This bundle includes many layouts, modules, and elements to give you a head start on your Divi website. We’ve only scratched the surface of what’s included in this layout bundle. There is a lot here for the money.

    We want to hear from you. Have you tried the Ultimate Divi Modules UI Bundle? Let us know what you think about it in the comments.

    The post Divi Product Highlight: Ultimate Divi Modules UI Bundle appeared first on Elegant Themes Blog.

  • Download a FREE Blog Post Template for Divi’s Conference Layout Pack

    Hey Divi Creators! Thanks for joining us for the next installment of our weekly Divi Design Initiative where each week, we give away brand new freebies. This time around we’re building upon the Divi Conference Layout Pack with a brand new blog post template that matches the rest of the pack perfectly. Hope you enjoy it!

    divi layout

    Check Out The Divi Conference Blog Post Template Below

    Get it for free today!

    Divi Conference Blog Post Template for Desktop

    Tablet and mobile view for the Divi Conference Blog layout

    Download The Blog Post Template For The Divi Conference Layout Pack

    To lay your hands on the free Divi Conference Blog Post Template, you will first need to download it using the button below. To gain access to the download you will need to subscribe to our newsletter by using the form below. As a new subscriber, you will receive even more Divi goodness and a free Divi Layout pack every Monday! If you’re already on the list, simply enter your email address below and click download. You will not be “resubscribed” or receive extra emails.

    How to Upload The Template

    Go to Divi Theme Builder

    To upload the template, navigate to the Divi Theme Builder in the backend of your WordPress website.

    Navigating to the Divi Theme Builder

    Upload Website Template

    Then, in the top right corner, you’ll see an icon with two arrows. Click on the icon.

    Opening the import export functionality of the Divi Theme Builder

    Navigate to the import tab, upload the JSON file that you could download in this post, and click on ‘Import Divi Theme Builder Templates’.

    Save Divi Theme Builder Changes

    Save the imported Divi Conference Blog Post Template within the Divi Builder

    Once you’ve uploaded the file, you’ll notice a new template with a new body area that has been assigned to All Posts. Save the Divi Theme Builder changes as soon as you want the template to be activated.

    How to Modify The Divi Conference Blog Layout

    Open Post Template

    To modify the template’s elements, start by opening the template.

    Edit the newly imported Divi Conference Blog Post Template

    Inside the Body Layout Editor, you can edit the design on the front end using the Divi Builder just like you would with a normal Divi page. Since this is a template that has been assigned to all posts for the site, there is a post content module that is necessary for displaying the post content. You will need to keep that module in place, but you can adjust the post content module’s design elements, which will design the post content that is displayed dynamically.

    Editing the post content module to match your site within the Blog Template

    About the Divi Conference Blog Layout

    This blog post template has a lot of dynamic elements that will work with your blog posts immediately. For example, the entire post header is made up of dynamic elements including a featured image as the background, the post title, and the post metadata (date, categories, author, and comment count). This content won’t need updating, but you can tweak the design of each of those elements if needed. Other dynamic elements include the following:

    • Related Posts Module(s) – displays the most recent posts that share the same category.
    • Post Content Module – displays the post content added when editing the post on the backend of WordPress.
    • Comments – a functional comment area for the post.
    • Post Navigation – provides previous and next buttons to the post.

    Here is a quick illustration that identifies the elements of the Divi Conference blog post template.

    Divi Conference Blog Post Layout element breakdown

    However, some elements on a post template will need your immediate attention before using it live on your own website. For this post template, you will need to update the icon module that acts as a back to blog button on top of the comments module.

    The back to blog page Icon Module

    Add Link to Icon Module

    The Icon Module can link back to your main blog page. To do this, you’ll need to add it’s link into the link section of the Icon Module.

    Setting up the link back to the main blog page within the Icon Module of the Divi Conference Blog Post Layout

    New Freebies Every Week!

    We hope you’ve enjoyed the Divi Conference Layout Pack and the blog post template freebie that goes along with it. We look forward to hearing your opinions in the comment section below. Make sure you check back next week for more freebies!

    The post Download a FREE Blog Post Template for Divi’s Conference Layout Pack appeared first on Elegant Themes Blog.

  • How to Combine Inline & Fullwidth Fields in Divi’s Contact Form Module

    The contact form is an important element to include on your website if you want to capture emails and convert your visitors into customers. The Divi Contact Form Module can be easily customized to create attractive and captivating contact forms for all types of websites. The module comes with two width options that can be applied to each field in the form: inline or full-width. In this tutorial, we will present four unique layout possibilities for your Divi contact form using inline and full-width fields.

    Let’s get started!

    Sneak Peek

    Here is a preview of what we will design.

    First Layout

    Divi Contact Form Layouts With Inline and Fullwidth Fields Layout 1 Final Design

    Divi Contact Form Layouts With Inline and Fullwidth Fields Layout 1 Final Design Mobile

    Second Layout

    Divi Contact Form Layouts With Inline and Fullwidth Fields Layout 2 Final Design

    Divi Contact Form Layouts With Inline and Fullwidth Fields Layout 2 Final Design Mobile

    Third Layout

    Divi Contact Form Layouts With Inline and Fullwidth Fields Layout 3 Final Design

    Divi Contact Form Layouts With Inline and Fullwidth Fields Layout 3 Final Design Mobile

    Fourth Layout

    Divi Contact Form Layouts With Inline and Fullwidth Fields Layout 4 Final Design

    Divi Contact Form Layouts With Inline and Fullwidth Fields Layout 4 Final Design Mobile

    What You Need to Get Started

    Before we begin, install and activate the Divi Theme and make sure you have the latest version of Divi on your website.

    Now, you are ready to start!

    4 Layout Possibilities for Your Divi Contact Form Using Inline & Fullwidth Fields

    Select the Premade Layout

    Each of the 4 designs are modified from the Shoe Repair Contact Page layout from the Shoe Repair Layout Pack, which you can find in the Divi library.

    Add a new page to your website and give it a title, then select the option to Use Divi Builder.

    Divi Contact Form Layouts With Inline and Fullwidth Fields Layout Use Builder

    We will use a premade layout from the Divi library for this example, so select Browse Layouts.

    Divi Contact Form Layouts With Inline and Fullwidth Fields Layout Browse Layout

    Search for and select the Shoe Repair Contact Page layout.

    Divi Contact Form Layouts With Inline and Fullwidth Fields Layout Find Layout

    Select Use This Layout to add the layout to your page.

    Divi Contact Form Layouts With Inline and Fullwidth Fields Layout Use Layout

    Now we are ready to build our designs.

    First Layout

    First, move the row containing the contact form module to the section above, right below the row with the blurb modules. Then you can delete the remaining empty section.

    Divi Contact Form Layouts With Inline and Fullwidth Fields Layout 1 Move Row

    Open the row settings and add padding to the left and right,

    • Padding-left: 15%
    • Padding-right: 15%

    Divi Contact Form Layouts With Inline and Fullwidth Fields Layout 1 Padding

    Select the responsive options and set the mobile padding.

    • Padding-left: 5%
    • Padding-right: 5%

    Divi Contact Form Layouts With Inline and Fullwidth Fields Layout 1 Responsive Spacing

    Modifying the Contact Form Layout with Inline and Fullwidth Fields

    For this layout, we will create two separate fields for first name and last name. Open the contact form module settings and change the field ID and Title for the Name field to First Name.

    Divi Contact Form Layouts With Inline and Fullwidth Fields Layout 1 Rename Field

    Add a new field below the First Name field. Set the field ID and Title to Last Name.

    Divi Contact Form Layouts With Inline and Fullwidth Fields Layout 1 Add Field

    In the last name field settings, open the Layout settings and set Make Fullwidth to No.

    • Fullwidth: No

    Divi Contact Form Layouts With Inline and Fullwidth Fields Layout 1 Make Inline

    Next, under the contact form settings switch the order of Subject and Phone so that Phone is listed before Subject.

    Divi Contact Form Layouts With Inline and Fullwidth Fields Layout 1 Field Order

    Open the subject field layout settings and make the field fullwidth.

    • Make Fullwidth: Yes

    Divi Contact Form Layouts With Inline and Fullwidth Fields Layout 1 Make Fullwidth

    Customizing the Contact Form Design

    Now let’s modify a few settings to complete the design. Navigate to the design tab of the contact form settings.

    First, change the button background color.

    • Button Background: #DBC2B3

    Divi Contact Form Layouts With Inline and Fullwidth Fields Layout 1 Button Background

    Add a top margin to the button.

    • Button margin- top: 10px

    Divi Contact Form Layouts With Inline and Fullwidth Fields Layout 1 Button Margin

    Finally, navigate to the Border settings and add rounded corners to the inputs.

    • Inputs rounded corners: 30px

    Divi Contact Form Layouts With Inline and Fullwidth Fields Layout 1 Rounded Corners

    Final Design

    Here is the final design on desktop and mobile.

    Divi Contact Form Layouts With Inline and Fullwidth Fields Layout 1 Final Design

    Divi Contact Form Layouts With Inline and Fullwidth Fields Layout 1 Final Design Mobile

    Second Layout

    For our second design, we will move the blurb modules to the left side of the page and have the contact form on the right side of the page. Move the blurb modules to one column.

    Divi Contact Form Layouts With Inline and Fullwidth Fields Layout 2

    Change the row layout.

    Divi Contact Form Layouts With Inline and Fullwidth Fields Layout 2 Row Layout

    Open the row design settings and turn off Use Custom Gutter Width.

    • Use Custom Gutter Width: No

    Divi Contact Form Layouts With Inline and Fullwidth Fields Layout 2 Custom Gutter Width

    Add some code to the Main Element Custom CSS in order to vertically align the blurb modules and the contact form.

    align-items:center;

    Divi Contact Form Layouts With Inline and Fullwidth Fields Layout 2 Main Element CSS

    Now we need to remove the thin border between the columns. Open the row settings, then open the settings for column 1. Under the Design tab, navigate to the border settings and remove the border.

    • Right border width: 0px

    Divi Contact Form Layouts With Inline and Fullwidth Fields Layout 2 Right Border

    Next, open the settings for column 2 and repeat the steps to remove the border.

    • Right border width: 0px

    Divi Contact Form Layouts With Inline and Fullwidth Fields Layout 2 Right Border Width

    Set the “Contact Us” text to be centered.

    Divi Contact Form Layouts With Inline and Fullwidth Fields Layout 2 Text Alignment

    Move the contact form to the right column. Delete the empty remaining section.

    Divi Contact Form Layouts With Inline and Fullwidth Fields Layout 2 Move Contact Form

    Modifying the Contact Form Layout with Inline and Fullwidth Fields

    This layout will also have two separate fields for first name and last name. Open the contact form module settings and change the field ID and Title for the Name field to First Name.

    Divi Contact Form Layouts With Inline and Fullwidth Fields Layout 2 Field ID and Title

    Add a new field below the First Name field. Set the field ID and Title to Last Name.

    Divi Contact Form Layouts With Inline and Fullwidth Fields Layout 2 Field ID

    In the last name field settings, open the Layout settings and set Make Fullwidth to No.

    • Fullwidth: No

    Divi Contact Form Layouts With Inline and Fullwidth Fields Layout 2 No Fullwidth

    Change the order of the phone and subject fields so that phone comes before subject.

    Divi Contact Form Layouts With Inline and Fullwidth Fields Layout 2 Reorder Fields

    Open the field settings for Email, Phone, and Subject, and set the layout to fullwidth.

    • Make Fullwidth: Yes

    Divi Contact Form Layouts With Inline and Fullwidth Fields Layout 2 Make Fullwidth

    Customizing the Contact Form Design

    Open the row settings, then open the column 2 settings. Set the background color.

    • Background: #DBC2B3

    Divi Contact Form Layouts With Inline and Fullwidth Fields Layout 2 Add Background

    Within the column 2 settings, navigate to the design tab and add some padding.

    • Padding-top: 50px
    • Padding-bottom: 50px
    • Padding-left: 50px
    • Padding-right: 50px

    Divi Contact Form Layouts With Inline and Fullwidth Fields Layout 2 Add Padding

    Select the mobile icon to modify the responsive settings. Set the padding for mobile.

    • Padding-top: 30px
    • Padding-bottom: 30px
    • Padding-left: 30px
    • Padding-right: 30px

    Divi Contact Form Layouts With Inline and Fullwidth Fields Layout 2 Add Responsive Padding

    Then add a box shadow to the column.

    Divi Contact Form Layouts With Inline and Fullwidth Fields Layout 2 Box Shadow

    Finally, open the contact form settings and change the field text color.

    • Fields text color: #000000

    Divi Contact Form Layouts With Inline and Fullwidth Fields Layout 2 Field Text Color

    Final Design

    Here is the final design for the second layout.

    Divi Contact Form Layouts With Inline and Fullwidth Fields Layout 2 Final Design

    Divi Contact Form Layouts With Inline and Fullwidth Fields Layout 2 Final Design Mobile

    Third Layout

    For the third layout, we will have the contact form on the left and the blurb modules on the right. Let’s get started by changing the column structure of the row containing the blurb modules.

    Divi Contact Form Layouts With Inline and Fullwidth Fields Layout 3 Choose Layout

    Move the address module to the right column.

    Divi Contact Form Layouts With Inline and Fullwidth Fields Layout 3 Move Address

    Next, move the Contact Us text module to the left column, then delete the remaining empty row.

    Divi Contact Form Layouts With Inline and Fullwidth Fields Layout 3 Move Text

    Move the contact form to the left column, below the Contact Us text module. Delete the remaining empty section.

    Divi Contact Form Layouts With Inline and Fullwidth Fields Layout 3 Move Module

    Open the row design settings and turn off Use Custom Gutter Width.

    • Use Custom Gutter Width: No

    Divi Contact Form Layouts With Inline and Fullwidth Fields Layout 3 No Custom Gutter Width

    Add some code to the Main Element Custom CSS in order to vertically align the blurb modules and the contact form.

    align-items:center;

    Divi Contact Form Layouts With Inline and Fullwidth Fields Layout 3 Custom CSS

    Open the row settings, then open the settings for column 1. Under the Design tab, navigate to the border settings and remove the border. Repeat the steps to remove the border from column 2.

    • Right border width: 0px

    Divi Contact Form Layouts With Inline and Fullwidth Fields Layout 3 Border Width

    Modifying the Contact Form Layout

    We will leave the field widths as-is for the third design, however, open the contact form settings and switch the order of the phone number and subject field so that the phone comes first.

    Divi Contact Form Layouts With Inline and Fullwidth Fields Layout 3 Reorder Fields

    Final Design

    Here is the final design for the third layout.

    Divi Contact Form Layouts With Inline and Fullwidth Fields Layout 3 Final Design

    Divi Contact Form Layouts With Inline and Fullwidth Fields Layout 3 Final Design Mobile

    Fourth Layout

    For the fourth and final layout, the contact form will be on the left and the blurb modules on the right. Once again, we will start by changing the column structure of the row containing the blurb modules.

    Divi Contact Form Layouts With Inline and Fullwidth Fields Layout 4 Choose Layout

    Move the address module to the right column.

    Divi Contact Form Layouts With Inline and Fullwidth Fields Layout 4 Move Module

    Move the contact form to the left column. Delete the remaining empty section.

    Divi Contact Form Layouts With Inline and Fullwidth Fields Layout 4 Move Form

    Open the row design settings and turn off Use Custom Gutter Width.

    • Use Custom Gutter Width: No

    Divi Contact Form Layouts With Inline and Fullwidth Fields Layout 4 Custom Gutter

    Add some code to the Main Element Custom CSS in order to vertically align the blurb modules and the contact form.

    align-items:center;

    Open the row settings, then open the settings for column 1. Under the Design tab, navigate to the border settings and remove the border.

    • Right border width: 0px

    Divi Contact Form Layouts With Inline and Fullwidth Fields Layout 4 Border Width

    Next, open the settings for column 2 and repeat the steps to remove the border.

    • Right border width: 0px

    Divi Contact Form Layouts With Inline and Fullwidth Fields Layout 4 Border Width 2

    Open the text module settings for the Contact Us text and center the text.

    • Text Alignment: Center

    Divi Contact Form Layouts With Inline and Fullwidth Fields Layout 4 Text Alignment

    Modifying the Contact Form Layout with Inline and Fullwidth Fields

    For this design, all of our fields will be fullwidth. Open the contact form settings, then open the settings for each field. Under the design tab, select Layout and set Make Fullwidth to Yes.

    Divi Contact Form Layouts With Inline and Fullwidth Fields Layout 4 Make Fullwidth

    Once you make each field fullwidth, the form should look something like this.

    Divi Contact Form Layouts With Inline and Fullwidth Fields Layout 4 Fullwidth

    Now, change the field ID and Title for the Name field to First Name.

    Divi Contact Form Layouts With Inline and Fullwidth Fields Layout 4 Field ID

    Add a new field below the First Name field. Set the field ID and Title to Last Name.

    Divi Contact Form Layouts With Inline and Fullwidth Fields Layout 4 Last Name Field

    Change the order of the phone and subject fields so that phone comes before the subject.

    Divi Contact Form Layouts With Inline and Fullwidth Fields Layout 4 Field Order

    Customizing the Contact Form Design

    In the contact form design settings, set the Fields Text Color to black.

    • Fields Text Color: #000000

    Divi Contact Form Layouts With Inline and Fullwidth Fields Layout 4 Text Color

    Open the section settings and add a background color.

    • Background: #DBC2B3

    Divi Contact Form Layouts With Inline and Fullwidth Fields Layout 4 Add Background

    Finally, add a background mask.

    • Background Mask: Arch
    • Mask Transform: Horizontal

    Divi Contact Form Layouts With Inline and Fullwidth Fields Layout 4 Add Background Mask

    To make the background mask work better on mobile, let’s use the responsive settings.

    Divi Contact Form Layouts With Inline and Fullwidth Fields Layout 4 Responsive Background Mask

    • Mask Transform on Mobile: Horizontal and Rotate

    Divi Contact Form Layouts With Inline and Fullwidth Fields Layout 4 Responsive Mask Transform

    Final Design

    Here is the final design for the fourth layout.

    Divi Contact Form Layouts With Inline and Fullwidth Fields Layout 4 Final Design

    Divi Contact Form Layouts With Inline and Fullwidth Fields Layout 4 Final Design Mobile

    Final Result

    Let’s take a look at all of our final designs once again.

    First Layout

    Divi Contact Form Layouts With Inline and Fullwidth Fields Layout 1 Final Design

    Divi Contact Form Layouts With Inline and Fullwidth Fields Layout 1 Final Design Mobile

    Second Layout

    Divi Contact Form Layouts With Inline and Fullwidth Fields Layout 2 Final Design

    Divi Contact Form Layouts With Inline and Fullwidth Fields Layout 2 Final Design Mobile

    Third Layout

    Divi Contact Form Layouts With Inline and Fullwidth Fields Layout 3 Final Design

    Divi Contact Form Layouts With Inline and Fullwidth Fields Layout 3 Final Design Mobile

    Fourth Layout

    Divi Contact Form Layouts With Inline and Fullwidth Fields Layout 4 Final Design

    Divi Contact Form Layouts With Inline and Fullwidth Fields Layout 4 Final Design Mobile

    Final Thoughts

    Having a great-looking contact form can increase your conversions and allows your visitors to connect directly with you. As we have demonstrated through this article, you can use the inline and fullwidth field options to create different looks and layouts for your form, and Divi’s built-in design options allow you to create unique and attractive designs to help the form stand out. To learn more about the different ways you can style the contact form module, check out this tutorial for creating a full-screen responsive form with zoom-in scroll animation, and this tutorial for 5 more unique styling options. How have you styled your contact form module? We would love to hear from you in the comments!

    The post How to Combine Inline & Fullwidth Fields in Divi’s Contact Form Module appeared first on Elegant Themes Blog.

  • Get a Free Web Developer Layout Pack for Divi

    Hey Divi Nation! Thanks for joining us for the next installment of our weekly Divi Design Initiative; where each week, we give away a brand new Layout Pack for Divi.

    This time around, the design team has created a beautiful Web Developer Layout Pack that’ll help you get your next Web Developer website up and running in no time!

    This layout pack includes:

    7 Premade page layouts strategically designed for any Web Developer website (including a footer design)
    – Original, royalty-free photos and graphics + customizable source file (see below)
    – Plus, a large collection of pre-designed website elements that are customizable and reusable anywhere.

    This layout pack is available right inside Divi for all Divi customers for FREE as the latest addition to our growing Divi library of hundreds of premade layout packs, thousands of page designs, and countless web design elements and resources.

    divi layout

    Check Out The Divi Web Developer
    Layout Pack Below

    Get it for free today!

    Web Developer layout pack for Divi

    Landing Page Design

    Web Developer Layout Pack for Divi

    View The Live Layout Demo

    Home Page Design

    Web Developer Layout Pack for Divi

    View The Live Layout Demo

    Portfolio Page Design

    Web Developer Layout Pack for Divi

    View The Live Layout Demo

    Project Page Design

    Web Developer Layout Pack for Divi

    View The Live Layout Demo

    About Page Design

    Web Developer Layout Pack for Divi

    View The Live Layout Demo

    Blog Page Design

    Web Developer Layout Pack for Divi

    View The Live Layout Demo

    Contact Page Design

    Web Developer Layout Pack for Divi

    View The Live Layout Demo

    Key Features

    If you’re looking to get a new Web Developer website, you don’t want to miss out on the Web Developer Layout Pack for Divi! Each page layout is built to impress your visitors with world-class web design. And it has everything you need to promote Web Developer services, and much more. Use it to get your next Web Developer website up and running today!

    Live Demos

    Click the links below to see a live demo for each of the layouts included in the pack.

    1. Web Developer Landing Page (live demo)
    2. Web Developer Homepage (live demo)
    3. Web Developer Portfolio Page (live demo)
    4. Web Developer Project Page (live demo)
    5. Web Developer About Page (live demo)
    6. Web Developer Blog Page (live demo)
    7. Web Developer Contact Page (live demo)

    Access This Layout Right Now
    Directly from Your Divi Builder

    Since Version 3.0.99 of Divi, you can find and import any of the layouts included in this pack (along with ALL of Divi’s Premade Layout packs) directly from the Divi Builder. They are already waiting for you.

    To access your new layout, simply activate the Visual Builder when editing a page and look for the “Load From Library” icon in the page settings bar (it looks like a plus symbol). Click this icon to launch the Load From Library popup. Under the Premade Layouts tab, you can easily find the new layout by scrolling through the list of layout packs. Once you find the Web Developer Layout Pack, click on it. You will see all the individual layouts included in the pack. Select the layout you want to use and then click the “Use This Layout” button.

    Web Developer Layout Pack for Divi

    For more, check out this video to learn how you can get this layout pack up and running today.

    Subscribe To Our Youtube Channel

    Authentication Required

    Before you can download Premade Layouts from the Divi Library you must authenticate your Elegant Themes Subscription. You can do this by navigating to Divi > Theme Options > Updates. There you can enter your username and API key and save changes.

    Web Developer Layout Pack for Divi

    You can find your API Key under your members area on the Elegant Themes site. After you enter the Username and API Key, you will gain immediate access to our library of hundreds of free layouts (including this one). If you haven’t done this, when you click to import a layout to your page, you will be prompted to enter your Elegant Themes Membership Username and API Key.

    Use Layout Images for FREE with No Licensing Restrictions

    The image assets included with these layouts (icons, illustrations, photos, etc.) have no licensing restrictions. This means you can use them in all of your commercial projects without having to worry about paying licensing fees or attributing the photographer. Use them in your commercial websites, sell them within your Divi child themes, include them in your own Divi layout packs or just use them on your blog. We know how challenging it can be to find good photos and how confusing and scary the licensing that governs those photos can be. We want to fix that problem for our users.

    Download the Full Res Image Assets

    New Layout Pack Every Week!

    We hope you enjoy this layout pack. We look forward to hearing your opinions in the comment section below. Make sure you check out next week’s layout pack as well!

    The post Get a Free Web Developer Layout Pack for Divi appeared first on Elegant Themes Blog.

  • Divi Plugin Highlight: Divi ConKit Pro

    Divi ConKit Pro is a plugin that brings 36 new modules to the Divi Builder and 4 other extensions that add new functionality and customizability to your website. If you’re looking for a feature-packed plugin that completely integrates with Divi and brings you modules such as Instagram feed, timeline, animated text, and flipbox, and gives you design control over popups, your login page, and much more, this might be the plugin for you. In this plugin highlight, we’ll take a look at all of the features that come with Divi ConKit Pro and help you decide if this plugin is right for you.

    Let’s get started!

    Installing Divi ConKit Pro

    Install Divi ConKit Pro just like you would any other plugin. Go to the plugins page and click Add Plugins, then select Upload Plugin and choose the plugin file. Click Install Now to install the plugin, then Activate the plugin once it has loaded.

    Divi Plugin Highlight Divi ConKit Pro Install

    Once the plugin is activated you will see a DiviConKit tab in your WordPress dashboard menu, where you can control what features are enabled for your site.

    Divi Plugin Highlight Divi ConKit Pro Settings

    Divi ConKit Pro

    Divi ConKit Pro Modules

    First, let’s take a look at each of the modules that come with Divi ConKit Pro. These modules all integrate with the Divi Builder and you add them to your website just like you would any other Divi module.

    DP Advanced Heading

    This module allows you to add a heading to your page and offers some advanced options beyond what Divi’s default module has. You can add prefix text, center text, suffix text, and background text, and the design of each text type can be completely customized as well. With this module, you can create more complex headers with different styles of text.

    Divi Plugin Highlight Divi ConKit Pro Header

    DP Animated Text

    This module allows you to add animated text to your page. You can add multiple sections of animated text to each module, and you can also add prefix and suffix text that doesn’t move. There are three animation modes, text typing, text tilt, and animated slide. The animation can be customized with various animation settings such as speed and timing, and the animated text can be customized with the default design options.

    Divi Plugin Highlight Divi ConKit Pro Animated Text

    DP Blog Plus

    The blog plus module displays recent posts from your blog. It has four different skin styles, I am using the Creative style in this example. Like the other modules in this kit, you can use the design options to completely customize the styling of the module to fit your website design.

    Divi Plugin Highlight Divi ConKit Pro Blog Plus

    DP Business Hour

    The business hour module allows you to easily add your business hours to the website. Just input each date and the business hours for that day, and you can customize the design options to change any of the fonts or colors to go with your design.

    Divi Plugin Highlight Divi ConKit Pro Business Hours

    DP Card

    This module is a card module, which creates a simple card containing an image or icon and some text. You can choose to add a badge or a button to the card, and again the design of the card is completely customizable.

    Divi Plugin Highlight Divi ConKit Pro Card

    DP CF7 Styler

    This next module is a styler module for Contact Form 7. You can use this module to edit your contact form styling within the visual builder.

    Divi Plugin Highlight Divi ConKit Pro CF7 Styler

    DP Content Toggle

    The content toggle module adds a toggle icon that allows you to switch between two sets of body content. The body content can be custom content that is set up within the content editor in the module, or you can import a layout from your library.

    Divi Plugin Highlight Divi ConKit Pro Content Toggle

    DP Divider

    The divider module allows you to add an icon, image, or text in between the divider line and also comes with some bottom divider shape layouts (Shape 3 is selected in this example) to divide the text on your page.

    Divi Plugin Highlight Divi ConKit Pro Divider

    DP Dual Button

    The dual button option adds two buttons as a single module. You can even add a connector (text or icon) between the two buttons, as I did in the example above. By using the various design options available in this module, you can create unique two-button layouts for your site.

    Divi Plugin Highlight Divi ConKit Pro Dual Button

    DP Flip Box

    This module creates a box with content on the front and on the back. When you hover over the box, the back content is revealed with flip animation. This could be useful to demonstrate before and after effects or to reveal content in an engaging way.

    Divi Plugin Highlight Divi ConKit Pro Flip Box

    DP Floating Image

    The floating image module allows you to add an image that floats up and down on the page. It adds some subtle movement to the design of the page to elevate the design.

    Divi Plugin Highlight Divi ConKit Pro Floating Image

    DP Horizontal Timeline

    With the horizontal timeline module, you can create a timeline containing text, images, and an icon for each step. It also has looping and automatic scroll options so that you can have the timeline scrolling through the page automatically. Again the design options can be used to totally customize the appearance.

    Divi Plugin Highlight Divi ConKit Pro Horizontal Timeline

    DP Hotspots

    With this module, you can add tooltips to any image that contain text, images, or icons. You can specify exactly where you want the tooltips to appear over the image, and of course, can customize the design of all of the elements with the design settings.

    Divi Plugin Highlight Divi ConKit Pro Hotspots

    DP Hover Box

    The hover box allows you to reveal text and other elements like a border as you hover over the image. As you can see in the example above, the box on the left is being hovered over and you can see that the subtitle and description have been revealed, as well as the border. On the right is the box that is not being hovered on, and it only displays the title. There are many different hover settings for this module as well.

    Divi Plugin Highlight Divi ConKit Pro Hover Box

    DP Icon Box

    This module is a simple module that allows you to display an icon and optional text in a box.

    Divi Plugin Highlight Divi ConKit Pro Icon Box

    DP Image Accordion

    The image accordion module displays multiple images next to each other. When you hover over one of the images it enlarges and minimizes the others so that you can see the whole photo. In the example above, I am hovering over the photo on the right.

    Divi Plugin Highlight Divi ConKit Pro Image Accordion

    DP Image Compare

    With the image compare module, you can compare two images with a slider you can drag to see each side. You can also add a label to each side, such as “before” and “after”.

    Divi Plugin Highlight Divi ConKit Pro Image Compare

    DP Image Magnifier

    The image magnifier module asks you to upload a large and small version of an image. When you hover over the image a magnifier appears and you can see a larger version of the hovered area.
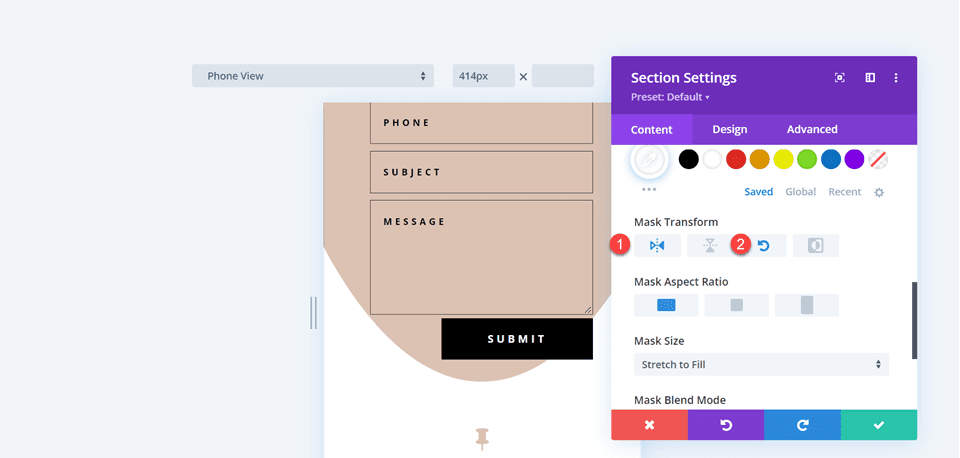
    Divi Plugin Highlight Divi ConKit Pro Image Magnifier

    DP Image Masking

    In this module, you can add an image with a mask shape. There are many different shapes for you to choose from within the module, and you can further customize the design by adding colors to the mask or the image.

    Divi Plugin Highlight Divi ConKit Pro Image Masking

    DP Info Box

    This module simply allows you to add a box with text content and an optional image or icon.

    Divi Plugin Highlight Divi ConKit Pro Info Box

    DP Inline SVG

    This module allows you to directly upload SVG files and view them within the Divi Builder.

    Divi Plugin Highlight Divi ConKit Pro Inline SVG

    DP Instagram Feed

    With the Instagram feed module, you can display your recent Instagram posts elegantly on your website. There are 3 layouts to choose from: grid, highlight (used in the example above), and masonry. You can use the design options to customize the spacing, the overlay, the caption, and much more.

    Divi Plugin Highlight Divi ConKit Pro Instagram

    DP List

    This module can be used to organize information in a list with an icon or image.

    Divi Plugin Highlight Divi ConKit Pro List Group

    DP Logo Grid

    The logo grid module could be useful for displaying client logos or “featured in…” logos. You can also add hover effects to the logo. In this example, I am using a zoom-out hover effect, which you can see applied on the second logo in the screenshot.

    Divi Plugin Highlight Divi ConKit Pro Logo

    DP Lottie

    With this module, you can add a Lottie animation directly to your page in the Divi Builder. You can add the Lottie Animation by uploading the Lottie JSON file or by URL.

    Divi Plugin Highlight Divi ConKit Pro Lottie

    DP Number

    The number module simply displays a number. You can enable the counter option and the number will count up as it is revealed. Again, you can use the design settings to fully customize the appearance.

    Divi Plugin Highlight Divi ConKit Pro Number

    DP Price Menu

    With the price menu module, you can easily create a menu on your website with prices, a title and description, and many options to customize the appearance.

    Divi Plugin Highlight Divi ConKit Pro Price Menu

    DP Review

    This module allows you to add reviews to your site with star ratings, an image, and of course the review text content.

    Divi Plugin Highlight Divi ConKit Pro Review

    DP Scroll Image

    With the scroll image module, your image is only partially displayed at a set height. When you hover over the image (or scroll, depending on the option you pick), the image scrolls so you can see the rest of the image.

    Divi Plugin Highlight Divi ConKit Pro Scroll Image

    DP Skill Bars

    This module can be used to demonstrate skill levels or anything else that can be represented by progress bars. You can choose what labels are displayed, and of course, all of the design elements can be customized.

    Divi Plugin Highlight Divi ConKit Pro Skill Bars

    DP Social Share

    This module has many social media platforms to choose from and you can easily change the button text, styles, layout, placement, and many other settings.

    Divi Plugin Highlight Divi ConKit Pro Social Share

    DP Team

    The team module makes it easy to display your team members on your website. You can add a photo, the name, job title, and bio, and even links to a personal website, email address, and social media sites. There are a couple of different options where the content is displayed over the image on hover as well.

    Divi Plugin Highlight Divi ConKit Pro Team

    DP Testimonial

    The testimonial module allows you to add customer testimonials to your site. It gives you the option to include a star rating, and you can choose to use a quote icon or upload your own. There are several positioning and layout options to choose from as well, allowing you to create a fully custom design.

    Divi Plugin Highlight Divi ConKit Pro Testimonial

    DP Twitter Feed

    This module allows you to display a Twitter feed on your website. This module has many options for you to choose exactly what is displayed, and of course, the design is completely customizable with Divi’s many design options.

    Divi Plugin Highlight Divi ConKit Pro Twitter Feed

    DP Vertical Timeline

    The vertical timeline module allows you to create a timeline with text and image content. There are several layout options available, and you can choose to add a scrolling line that adds some dynamic movement to the timeline. Additionally, you can fully customize the styling of the timeline and even add different colors for the active and inactive states.

    Divi Plugin Highlight Divi ConKit Pro Vertical Timeline

    DP Video Popup

    With this module, you can add a video that pops up in the same page on a dark overlay background. You can upload a cover image and customize the overall design, overlay icon, and other design elements. You can link a video from YouTube or Vimeo, or upload your own.

    Divi Plugin Highlight Divi ConKit Pro Video

    Divi ConKit Pro Extensions

    In addition to the modules that come with DiviConKit, there are a few extensions that come with the plugin that adds additional functionality to your website. Let’s take a look at each one.

    Blog Designer

    The blog designer gives you additional options to customize the way your blog and post pages are designed. You can find the blog designer settings within the Customize menu under Appearance, or by clicking the link in the Divi ConKit settings.

    Divi Plugin Highlight Divi ConKit Pro Blog Designer SEttings

    Within the blog/archive settings you can change the layout, the background, the post items that are displayed, the featured image sizing, and other sizing and spacing options.

    Divi Plugin Highlight Divi ConKit Pro Blog Archive Settings

    Next, in the single post settings, you can customize the sizing and spacing of the content, change the background, choose what elements are displayed, add a post author box, post navigation, related posts, and more.

    Divi Plugin Highlight Divi ConKit Pro Blog Post Settings

    Popup Maker

    The popup maker allows you to design a custom popup using the Divi visual builder. You can find the popups setting under the DiviConKit settings section in the WordPress dashboard. You can designate specific pages where you want each popup to appear.

    Divi Plugin Highlight Divi ConKit Pro Popup Builder

    Within the settings for the popup, you can designate the open event and animation style, change the background and overlay, adjust the positioning and sizing, and more.

    Divi Plugin Highlight Divi ConKit Pro Popup Settings

    And here is the popup in action.

    Divi Plugin Highlight Divi ConKit Pro Popup

    Login Designer

    The login designer allows you to customize the WordPress login page for your website. You can find the login designer settings within the Customize menu under Appearance, or by clicking the link in the Divi ConKit settings. You can customize the background, the logo, the login form and the fields, all of the text and labels, and the button.

    Divi Plugin Highlight Divi ConKit Pro Login Designer Settings

    Unfortunately, you can’t see the login page as you make these changes because you need to be signed out to see the login page. To get around this, I opened the login page using an incognito window in my browser so I could see both at the same time and see the changes I was making.

    Divi Plugin Highlight Divi ConKit Pro Login Designer

    Here is a customized version of the login page, with a new background, logo, field background, and text color.

    Divi Plugin Highlight Divi ConKit Pro Login Page

    Divi Library Shortcodes

    DiviConKit Pro also enables you to use shortcodes to display any Divi library template inside a Divi module or inside a .php file. When you access the Divi Library you will see the shortcode for each library item listed. Simply copy the shortcode and use it in the code module within the Divi builder or add it to a .php file, then the Divi Library item will appear. In this example, I added a pricing table from my Divi Library to my page using the shortcode.

    Divi Plugin Highlight Divi ConKit Pro Shortcode

    Purchase Divi ConKit Pro

    Divi ConKit Pro is available in the Divi Marketplace. It costs $59 for unlimited website usage and 1 year of support and updates. The price also includes a 30-day money-back guarantee.

    Final Thoughts

    Divi ConKit Pro is a feature-packed plugin that adds a lot of great modules to extend the functionality of the Divi Builder. Every module is packed with options and fully customizable, making it easy to create beautiful modules for your website. Finally, we would love to hear from you! Have you tried Divi ConKit Pro? Let us know what you think about it in the comments!

    The post Divi Plugin Highlight: Divi ConKit Pro appeared first on Elegant Themes Blog.

  • Download a FREE Header & Footer for Divi’s Jewelry Designer Layout Pack

    Hey Divi Nation! Thanks for joining us for the next installment of our weekly Divi Design Initiative where each week, we give away brand new freebies. We recently shared a brand new Jewelry Designer Layout Pack. To help you get your website up and running as soon as possible, we’re sharing a global header & footer template that matches this layout pack perfectly as well! Hope you enjoy it.

    divi layout

    Check Out The Jewelry Designer
    Global Header & Footer Template Below

    Get it for free today!

    Header Design

    Desktop View

    Divi Jewelry Header Design for Desktop

    Tablet and Mobile View

    Divi Jewelry Header Design for Tablet and Mobile

    Footer Design

    Desktop View

    Divi Jewelry footer design for desktop

    Tablet and Mobile View

    Divi Jewelry footer design for tablet and mobile

    Download The Global Header & Footer Template For The Jewelry Designer Layout Pack

    To lay your hands on the free global header & footer template, you will first need to download it using the button below. To gain access to the download you will need to subscribe to our newsletter by using the form below. As a new subscriber, you will receive even more Divi goodness and a free Divi Layout pack every Monday! If you’re already on the list, simply enter your email address below and click download. You will not be “resubscribed” or receive extra emails.

    How to Upload The Jewelry Designer Layout Template

    Go to Divi Theme Builder

    To upload the template, navigate to the Divi Theme Builder in the backend of your WordPress website.

    Getting started with the Divi Conference Layout Pack

    Upload Global Default Website Template

    Then, in the top right corner, you’ll see an icon with two arrows. Click on the icon.

    Importing the Header and Footer Layout into the Divi Theme Buidler

    Navigate to the import tab, upload the JSON file which you were able to download in this post, and click on ‘Import Divi Theme Builder Templates’.

    Import settings for the header and footer layout pack

    Save Divi Theme Builder Changes

    Once you’ve uploaded the file, you’ll notice a new global header and footer in your default website template. Save the Divi Theme Builder changes as soon as you want the template to be activated.

    Save global header theme builder

    How to Modify The Template

    Open Jewelry Designer Layout Header Template

    To modify the global header template’s elements, start by opening the template.

    Editing the global header within the Divi Theme Builder

    Select Menu of Choice for Desktop, Tablet and Mobile

    Select a menu of your choice in the Menu Module.

    Selecting your menu for desktop

    We use two menu modules: one for desktop, and one for tablet/mobile. Ensure that the menus for both are the same as to not confuse your website users.

    Select your menu for use on tablet and mobile

    Update Logo with Menus

    You will need to upload your own logo into the Menu Modules within this header. Logos that are horizontal/landscape work best.

    Update header logo within the header Menu Module

    Update Text Call-to-Actions

    This header has three text areas that can be used as call-to-actions. Edit the text to match your brand. You can even go as far as to add links to them if you’d like, get creative!

    Update the text CTAs to match your brand and business goals

    Open Footer Template

    Continue by opening the global footer inside the default website template.

    Editing the footer template within the Divi Theme Builder

    Select Menu of Choice for Desktop, Tablet and Mobile

    Similar to the Header Template, you will need to add your menu to the footer menu.

    Select menu for footer menu module

    This will need to be done for both desktop and tablet/mobile view.

    Select menu for footer Menu Module for use in tablet and mobile

    Update Footer Menu Logo

    Just like the header’s Menu Module, you will need to update the logo included with our template with your own logo.

    Update footer Menu Module's logo

    Connect Your Email Marketing Solution

    Our footer has an Email Optin Module that needs to be activated. Connect your email marketing solution of choice to the module so that you can gather email addresses for your business.

    Connect your email marketing solution

    Update Static Footer Content

    You will need to go through and update the static content of the footer. This can include adding your own text, updating link URLs, and connecting your social media networks. Don’t forget about the copyright text at the bottom of the footer as well.

    Update static footer modules

    New Freebies Every Week!

    We hope you’ve enjoyed the Jewelry Designer Layout Pack and the Header & Footer freebie that goes along with it. We look forward to hearing your opinions in the comment section below. Make sure you check back next week for more freebies!

    The post Download a FREE Header & Footer for Divi’s Jewelry Designer Layout Pack appeared first on Elegant Themes Blog.

  • How to Style Your Fullwidth Header Module’s Background

    Divi’s Fullwidth Header module makes it easy to design a stunning hero section for your website in just minutes. A hero section is the very first section of your website that your visitors will see, so you’ll want it to be branded, informative, and compelling. Thankfully, the Divi Fullwidth Header comes packed with content options: header text, subtitle text, body text, two images, and two buttons. We’ll be utilizing all of these elements in our fullwidth headers today.

    In this post, we’re going to demonstrate 3 ways to design your fullwidth header’s background with eye-catching designs. Ready to get started? Let’s dive in!

    Design Preview

    Let’s take a look at the 3 fullwidth headers we’ll be designing today.

    Divi Bushcraft Community

    The first design uses Divi’s background image options to create a textured background that is unique and on-brand for the Bushcraft Community.

    Mrs. Nicole’s 2nd Grade

    This second design uses a background image and background gradient to create a clean, modern, and fresh welcome header for Mrs. Nicole’s 2nd-grade class.

    Realtor Header

    The third design utilizes a background image, background gradient, and background pattern, all combined to create an elevated yet subtle design for a realtor’s home page.

    Download the Layouts for FREE

    To lay your hands on the designs from this tutorial, you will first need to download it using the button below. To gain access to the download you will need to subscribe to our newsletter by using the form below. As a new subscriber, you will receive even more Divi goodness and a free Divi Layout pack every Monday! If you’re already on the list, simply enter your email address below and click download. You will not be “resubscribed” or receive extra emails.

    To import the header template to your Divi Library, do the following:

    1. Navigate to the Divi Theme Builder.
    2. Click the Import button at the top right of the page.
    3. In the portability popup, select the import tab
    4. Choose the download file from your computer (make sure to unzip the file first and use the JSON file).
    5. Then click the import button.

    Once done, the section layout will be available in the Divi Builder.

    Let’s get to the tutorial, shall we?

    What You Need to Get Started

    To get started, you will need to do the following:

    1. Install Divi on your WordPress website.
    2. Add a Page, give it a title, and publish it.
    3. Enable the Visual Builder.

    Setting Up Our Page

    Once you click the “Use Divi Builder” button the page will reload using Divi’s drag and drop builder interface. Three options will pop up and for today’s purposes select “Build From Scratch” so that we have a blank slate where we can build our fullwidth headers.

    How to Design the Divi Bushcraft Community Fullwidth Header

    Add a Fulldwith Section and Fullwidth Header

    First, we’ll need to add a fullwidth section to our page. Click on the “+” icon to bring up the section options and then click “Fullwidth”. This will load the fullwidth module library where you can select “Fullwidth Header” from the options. This will load the fullwidth header module to your page.

    Add The Content

    Now we’re going to add our module content in the Text tab. Configure the following settings:

    1. Header Text: Divi Bushcraft Community
    2. Subtitle Text: Divi Bushcraft
    3. Button #1: Join Today
    4. Button #2: Learn More
    5. Body Text: At vero eos et accusamus et iusto odio dignissimos ducimus qui blanditiis praesentium voluptatum deleniti atque corrupti quos dolores et quas molestias excepturi sint occaecati cupiditate non provident.

    Style the Background

    This design utilizes a background image from the free Divi Bushcraft pre-made layout pack. You can get all of the images from that layout pack in this post. Simply scroll all the way to the bottom of the post and click to download the high-res images.

    Add Background Image

    Once you have the photos, add a background image.

    1. Click the third icon, the image icon.
    2. Click “Add Background Image”. This will bring up the media library where you can upload a new photo or select a photo from your media library.
    3. The set the Background Image Blend Mode to Overlay.
    4. Click the first icon, the paint bucket icon, and set a background color of: rgba(10,10,10,0.3)

    Choose the Layout

    Underneath the Design settings, in the Layout tab, select center alignment. Toggle the “Make Fullscreen” option to “yes”.

    Style Title Text

    Style the Title Text by configuring these settings:

    1. Title Heading Level: H1
    2. Title Font: Josefin Sans
    3. Title Font Weight: Bold
    4. Title Font Style: Uppercase
    5. Title Text Size: 7rem

    Style Body Text

    Style the body text by configuring these settings:

    1. Body Font: Josefin Sans
    2. Body Text Size: 20px

    Style Subtitle Text

    Style the subtitle text by configuring these settings:

    1. Subtitle Font: Josefin Sans
    2. Subtitle Font Weight: Semi Bold
    3. Subtitle Font Style: Uppercase
    4. Subtitle Letter Spacing: 3px
    5. Subtitle Line Height: 5em

    Style Button #1

    Now let’s style the buttons! For button one, configure these settings:

    1. Use Custom Styles For Button One: Yes
    2. Button One Text Size: 14px
    3. Button One Text Color: #666b4a
    4. Button One Background: #ead5a4
    5. Button One Border Width: 0px
    6. Button One Border Radius: 0px
    7. Button One Letter Spacing: 3px
    8. Button One Font Style: Uppercase
    9. Button One Padding: 15px top and bottom; 25px left and right.

    Style Button #2

    To style button #2, configure the following settings:

    1. Use Custom Styles For Button One: Yes
    2. Button One Text Size: 14px
    3. Button One Text Color: #ead5a4
    4. Button One Background: #666b4a
    5. Button One Border Width: 0px
    6. Button One Border Radius: 0px
    7. Button One Letter Spacing: 3px
    8. Button One Font Style: Uppercase
    9. Button One Padding: 15px top and bottom; 25px left and right.

    And, voila!  You have a beautifully styled fullwidth header with a textured background image with an overlay for the Divi Bushcraft Community.

    How to Design Mrs. Nicole’s Fullwidth Header

    Now let’s design a fullwidth header for Mrs. Nicole’s 2nd-grade class! This header uses a background image and gradient to create a fun and fresh design. Let’s get started!

    Add a new page, then add a Fullwidth Section and Fullwidth Header

    First, we’ll need to add a fullwidth section to our page. Click on the “+” icon to bring up the section options and then click “Fullwidth”. This will load the fullwidth module library where you can select “Fullwidth Header” from the options. This will load the fullwidth header module to your page.

    Add The Content

    Now we’re going to add our module content in the Text tab. Configure the following settings:

    1. Header Text: Welcome To Mrs. Nicole’s 2nd Grade Class
    2. Subtitle Text: Welcome
    3. Button #1: View Assignments
    4. Button #2: Contact Mrs. Nicole
    5. Body Text: Donec sollicitudin molestie malesuada. Nulla quis lorem ut libero malesuada feugiat.

    Style the Background

    This design uses images from the free Classroom pre-made layout pack. You can download the full-res images by scrolling to the bottom of this post.

    Style the background by configuring these settings:

    1. Click the second tab, the gradient icon.
    2. Set the gradient stops to: #ffffff at 40%, and transparent at 18%.
    3. Set the gradient direction to 219 degrees.
    4. Toggle “yes” for the Place Gradient Above Background Image.
    5. Click on the third icon, the image icon, and click “Add Background Image”.

    Choose the Layout

    Here is where we’re going to align the module content to the center and make it fullscreen.

    1. Text & Logo Alignment: Center
    2. Make Fullscreen: Yes

    Style the Title Text

    Style the title text by configuring these settings:

    1. Title Font: Candal
    2. Title Text Size: 4rem

    Style the Body Text

    Style the body text by configuring these settings:

    1. Body Font: Montserrat
    2. Body Text Color: #6d6d6d
    3. Body Text Size: 20px

    Style the Subtitle Text

    Style the subtitle text by configuring these settings:

    1. Subtitle Font Weight: Ultra Bold
    2. Subtitle font Style: Uppercase
    3. Subtitle Text Color: rgba(28,10,10,0.6)
    4. Subtitle Letter Spacing: 3px
    5. Subtitle Line Height: 3em

    Style Button #1

    Style button #1 by configuring these settings:

    1. Use Custom Styles For Button One: Yes
    2. Button One Text Size: 15px
    3. Button One Text Color: #ffffff
    4. Button One Background: #000000
    5. Button One Border Width: 0px
    6. Button One Border Radius: 0px
    7. Button One Letter Spacing: 3px
    8. Button One Font Weight: Ultra Bold
    9. Button One Font Style: Uppercase
    10. Button One Padding: 15px top and bottom; 25px left and right.

    Style Button #2

    Style button #2 by configuring these settings:

    1. Use Custom Styles For Button Two: Yes
    2. Button Two Text Size: 15px
    3. Button Two Text Color: #ffd078
    4. Button Two Background: transparent
    5. Button Two Border Width: 0px
    6. Button Two Border Radius: 0px
    7. Button Two Letter Spacing: 3px
    8. Button Two Font Weight: Ultra Bold
    9. Button Two Font Style: Uppercase
    10. Button Two Icon Color: #ffd078
    11. Only Show Icon On Hover For Button Two: No
    12. Button Two Padding: 15px top and bottom; 25px left and right.

    Sizing

    Set the content width to 70%.

    Voila! You now have a fully designed fullwidth header for Mrs. Nicole’s 2nd grade class.

    How to Design a Realtor’s Fullwidth Header

    Let’s design this elegant and modern fullwidth header for a realtor’s website. This section utilizes a background image, background gradient, AND a background pattern. Let’s get to work!

    Add a new page, then add a Fullwidth Section and Fullwidth Header

    First, we’ll need to add a fullwidth section to our page. Click on the “+” icon to bring up the section options and then click “Fullwidth”. This will load the fullwidth module library where you can select “Fullwidth Header” from the options. This will load the fullwidth header module to your page.

    Add Content

    First, let’s add the content needed for this module in the Text tab:

    1. Title: Let’s Find Your Dream Home
    2. Subtitle: Dave Merrit – Realtor
    3. Button #1 – Book A Free Consult
    4. Button #2 – Email Me
    5. Body Text: Sed ut perspiciatis unde omnis iste natus error sit voluptatem accusantium doloremque laudantium, totam rem aperiam, eaque ipsa quae ab illo inventore veritatis et quasi architecto.

    Style the Background

    Add a Gradient

    In the background tab, click the second icon, the gradient icon, and configure these settings:

    1. Gradient Stops: rgba(56,65,58,0.74) at 100% and #38413a at 70%
    2. Gradient Direction: 88deg
    3. Place Gradient Above Background Image: Yes

    Add Image

    Click the third icon, the image icon, and then click “Add Background Image” to upload your image. This demonstration uses images from the free Realtor pre-made layout pack. You can download the full-resolution images by scrolling to the bottom of this post.

    Add a Background Pattern

    Add a background pattern by configuring these settings:

    1. Select Tufted from the dropdown.
    2. Pattern Color: rgba(0,0,0,0.2)

    Choose the Layout

    Here is where we’re going to align the module content to the center and make it fullscreen.

    1. Text & Logo Alignment: Center
    2. Make Fullscreen: Yes

    Style the Title Text

    Style the title text by configuring these settings:

    1. Title Font: Merriweather
    2. title Text Size: 5rem

    Style the Body Text

    Style the body text by configuring these settings:

    1. Body Font: Open Sans
    2. Body Text Size: 16px
    3. Body Line Height: 2em

    Style the Subtitle Text

    Style the subtitle text by configuring these settings:

    1. Subtitle Font: Open Sans
    2. Subtitle Font Weight: Bold
    3. Subtitle Font Style: Uppercase
    4. Subtitle Text Color: #b4926b
    5. Subtitle Letter Spacing: 3px

    Style Button #1

    Style button #1 by configuring these settings:

    1. Use Custom Styles For Button One: Yes
    2. Button One Text Size: 18px
    3. Button One Background: #b4926b
    4. Button One Border Width: 0px
    5. Button One Border Radius: 0px
    6. Button One Padding: 10px top and bottom; 25px left and right.

    Style Button #2

    Style button #2 by configuring these settings:

    1. Use Custom Styles For Button Two: Yes
    2. Button Two Text Size: 18px
    3. Button Two Border Width: 1px
    4. Button Two Border Color: rgba(255,255,255,0.19)
    5. Button Two Border Radius: 0x
    6. Button Two Padding: 10px top and bottom; 25px left and right

    Voila! Now you have a beautiful fullwidth header for a realtor website.

    Final Thoughts

    The Divi Fullwidth Header is a fast and easy way to build a stunning website hero section for your website. Since website hero sections are so essential in making a great first impression, it’s important that your design is branded, eye-catching, and informative. With the Fullwidth Header, it’s easy to build a header that hits all of those goals within one module. Now that you’ve seen what’s possible with the Fullwidth Header, how will you design yours?

    The post How to Style Your Fullwidth Header Module’s Background appeared first on Elegant Themes Blog.

  • Get a Free Whiskey Distillery Layout Pack for Divi

    Hey Divi Nation! Thanks for joining us for the next installment of our weekly Divi Design Initiative; where each week, we give away a brand new Layout Pack for Divi.

    This time around, the design team has created a beautiful Whiskey Distillery Layout Pack that’ll help you get your next Whiskey Distillery website up and running in no time!

    This layout pack includes:

    8 Premade page layouts strategically designed for any Whiskey Distillery website (including a footer design)
    – Original, royalty-free photos and graphics + customizable source file (see below)
    – Plus, a large collection of pre-designed website elements that are customizable and reusable anywhere.

    This layout pack is available right inside Divi for all Divi customers for FREE as the latest addition to our growing Divi library of hundreds of premade layout packs, thousands of page designs, and countless web design elements and resources.

    divi layout

    Check Out The Divi Whiskey Distillery
    Layout Pack Below

    Get it for free today!

    Landing Page Design

    Whiskey Distillery Layout Pack for Divi

    View The Live Layout Demo

    Home Page Design

    Whiskey Distillery Layout Pack for Divi

    View The Live Layout Demo

    Shop Page Design

    Whiskey Distillery Layout Pack for Divi

    View The Live Layout Demo

    Product Page Design

    Whiskey Distillery Layout Pack for Divi

    View The Live Layout Demo

    About Page Design

    Whiskey Distillery Layout Pack for Divi

    View The Live Layout Demo

    Visit Page Design

    Whiskey Distillery Layout Pack for Divi

    View The Live Layout Demo

    Blog Page Design

    Whiskey Distillery Layout Pack for Divi

    View The Live Layout Demo

    Contact Page Design

    Whiskey Distillery Layout Pack for Divi

    View The Live Layout Demo

    Key Features

    If you’re looking to get a new Whiskey Distillery website, you don’t want to miss out on the Whiskey Distillery Layout Pack for Divi! Each page layout is built to impress your visitors with world-class web design. And it has everything you need to promote Whiskey Distillery services, and much more. Use it to get your next Whiskey Distillery website up and running today!

    Live Demos

    Click the links below to see a live demo for each of the layouts included in the pack.

    1. Whiskey Distillery Landing Page (live demo)
    2. Whiskey Distillery Homepage (live demo)
    3. Whiskey Distillery Shop Page (live demo)
    4. Whiskey Distillery Product Page (live demo)
    5. Whiskey Distillery About Page (live demo)
    6. Whiskey Distillery Visit Page (live demo)
    7. Whiskey Distillery Blog Page (live demo)
    8. Whiskey Distillery Contact Page (live demo)

    Access This Layout Right Now
    Directly from Your Divi Builder

    Since Version 3.0.99 of Divi, you can find and import any of the layouts included in this pack (along with ALL of Divi’s Premade Layout packs) directly from the Divi Builder. They are already waiting for you.

    To access your new layout, simply activate the Visual Builder when editing a page and look for the “Load From Library” icon in the page settings bar (it looks like a plus symbol). Click this icon to launch the Load From Library popup. Under the Premade Layouts tab, you can easily find the new layout by scrolling through the list of layout packs. Once you find the Whiskey Distillery Layout Pack, click on it. You will see all the individual layouts included in the pack. Select the layout you want to use and then click the “Use This Layout” button.

    Whiskey Distillery Layout Pack for Divi

    For more, check out this video to learn how you can get this layout pack up and running today.

    Subscribe To Our Youtube Channel

    Authentication Required

    Before you can download Premade Layouts from the Divi Library you must authenticate your Elegant Themes Subscription. You can do this by navigating to Divi > Theme Options > Updates. There you can enter your username and API key and save changes.

    Whiskey Distillery Layout Pack for Divi

    You can find your API Key under your members area on the Elegant Themes site. After you enter the Username and API Key, you will gain immediate access to our library of hundreds of free layouts (including this one). If you haven’t done this, when you click to import a layout to your page, you will be prompted to enter your Elegant Themes Membership Username and API Key.

    Use Layout Images for FREE with No Licensing Restrictions

    Whiskey Distillery Layout Pack for Divi

    The image assets included with these layouts (icons, illustrations, photos, etc.) have no licensing restrictions. This means you can use them in all of your commercial projects without having to worry about paying licensing fees or attributing the photographer. Use them in your commercial websites, sell them within your Divi child themes, include them in your own Divi layout packs or just use them on your blog. We know how challenging it can be to find good photos and how confusing and scary the licensing that governs those photos can be. We want to fix that problem for our users.

    Download the Full Res Image Assets

    New Layout Pack Every Week!

    We hope you enjoy this layout pack. We look forward to hearing your opinions in the comment section below. Make sure you check out next week’s layout pack as well!

    The post Get a Free Whiskey Distillery Layout Pack for Divi appeared first on Elegant Themes Blog.

  • How to Use a Dynamic Logo in Divi’s Fullwidth Menu Module

    Changing website logos can be a time-consuming process. This is especially true if the website uses different headers for different templates. If you use an image for each one of those headers, you’ll have to manually get in there and change each one of them. Fortunately, Divi can display your website’s logo dynamically, saving you time! In this post, we’ll see how to use a dynamic logo inside Divi’s Fullwidth Menu Module.

    Let’s get started!

    Why Use a Dynamic Logo?

    The dynamic logo option lets Divi users change their website logos in a single location. That change is then reflected in every module that uses the dynamic logo. This simplifies the process.

    It’s especially helpful in headers, and even more helpful when there are several menu modules in use since it reduces the time it takes to make the changes. It also keeps the Divi user from making a mistake by forgetting to change one of the headers.

    Why would Divi users need more than one menu module? The Divi Theme Builder allows Divi users to create multiple headers to use on various pages across their websites. This opens up lots of design possibilities for headers across the Divi website.

    It’s not uncommon to have a header for the homepage, one for the blog, one for a services page, one for a CTA landing page, and lots more. It’s also not uncommon for these headers to use the same logo. This would require the Divi user to open every header template and change the logo in every menu module. Even using the copy and paste features requires the Divi user to open each template.

    Theme Builder Example

    In my example below, I’ve built 10 custom headers and assigned them to various pages on my website. Each header has a custom design, with different colors, CTAs, and layouts, but they all use the same logo. If I want to change the logo for my website, and I wasn’t using a dynamic logo, I’d have to open each Divi Fullwidth Menu Module and make the change manually.

    Theme Builder Example

    If I had the dynamic logo option set up in each module, the logo would change in every module automatically. Let’s see how to select the logo dynamically.

    How to Use a Dynamic Logo in the Fullwidth Menu Module

    To get started, open the Fullwidth Menu Module that you want to use a dynamic logo. I’m adjusting the header template in the Divi Theme Builder. For this example, I’ll assume you have a Fullwidth Menu Module already set up with a logo selected.

    Open the Divi Theme Builder

    To use a dynamic logo, go to Divi > Theme Builder in the WordPress dashboard.

    • Divi
    • Theme Builder

    Open the Divi Theme Builder

    Select the edit icon for the header you want to modify. Wait for the editor to open.

    • Edit

    Open the Divi Theme Builder

    Change the Logo to Dynamic Content

    Next, open the settings for the Fullwidth Menu Module by selecting its gear icon.

    • Fullwidth Menu Module settings

    Change the Logo to Dynamic Content

    In the Content tab, scroll down to the section called Logo. Hover over the logo image and click the trash can icon. You can also click the circular reset icon if you prefer.

    • Trash can

    Change the Logo to Dynamic Content

    Next, hover over the image area to reveal the Dynamic Content icon. Click the icon to open the Dynamic Content choices.

    • Dynamic Content

    Change the Logo to Dynamic Content

    A modal opens with lots of options to choose from. Select Site Logo in the top section.

    • Site Logo

    Change the Logo to Dynamic Content

    You’ll see the new logo appear in your header’s menu that’s specified in the Divi Theme Options (more on that in a minute). Under the logo in the Logo selection settings, you’ll see the message “Site Logo”. This indicates that the module is now displaying the dynamic logo. Click the green button to close the module.

    • Close

    Change the Logo to Dynamic Content

    Next, save the layout by clicking the green Save button in the lower right corner and clicking the X in the upper right corner to close the editor.

    • Save
    • Exit

    Change the Logo to Dynamic Content

    Finally, click Save Changes in the upper left corner of the Theme Builder screen.

    • Save Changes

    Change the Logo to Dynamic Content

    The new logo automatically changes on the front end for every Fullwidth Menu Module that you’ve set up to use a dynamic logo. We don’t have to change it on this page because it’s pulling the logo dynamically. For more information about using dynamic content with Divi, search the Elegant Themes blog for “dynamic content“.  

    Perform this set of steps for every Fullwidth Menu Module you want to use the dynamic logo. We recommend performing this task as you copy or create the headers.

    Now, let’s see how to edit the Divi logo so that it changes in the Fullwidth Menu Module.

    How to Change the Logo in Divi

    Next, let’s see how to tell Divi which logo to use. Every time you want to change the logo, perform the following set of steps. The logo changes dynamically, so Divi users never need to open the Fullwidth Menu Module to change the logo.

    Divi Logo Before

    To help understand what’s happening, let’s look at the logo on the front end of the site before and after the change. First, here’s a look at the current logo on my test site. This is set up in the Divi Theme Options.

    Divi Logo Before

    Change the Divi Logo

    To change the Divi logo, go to Divi > Theme Options in the WordPress dashboard. The first tab, General, has a field called Logo. It includes a field with the logo’s URL, a button to reset the logo to the default, and a button to upload a logo to the Media Library. I currently have a logo set, which is the logo seen in the Before image above. Upload or select the image you want to use. Select the Upload button.

    • Divi
    • Theme Options
    • 1st General tab
    • 2nd General tab
    • Upload

    Change the Divi Logo

    This opens the media folder where you can choose an image from the Media Library or upload a new image. Choose your logo and click Set As Logo in the lower right corner of the Media Library screen.

    • Select image
    • Set As Logo

    Change the Divi Logo

    Click Save Changes in the upper left corner of the screen above the Divi Theme Options. Now, every template that includes the Fullwidth Menu Module with the dynamic logo setting has automatically changed the logo to show your new logo.

    • Save Changes

    Change the Divi Logo

    Divi Logo After

    The front end of my site now shows the new logo, even though I didn’t open the Theme Builder and make changes there. This change was automatically reflected in every Fullwidth Menu Module that uses the dynamic logo.

    Divi Logo After

    As another example, when we open any of the templates in the Theme Builder, we’ll see the new logo. This example shows the Homepage Header Layout with the logo already updated with no further input from me.

    Divi Logo After

    Ending Thoughts

    That’s our look at how to use a dynamic logo in Divi’s Fullwidth Menu Module. The dynamic logo is easy to set up in the module. Using a dynamic logo can save a lot of time when changing the logo on a Divi website. Even if you only use one Fullwidth Menu Module, the dynamic logo simplifies the process. When using multiple modules, dynamic logos make an even larger impact on time savings and reduce mistakes.

    We want to hear from you. Do you use dynamic logos with your Fullwidth Menu Module? Let us know in the comments.

    The post How to Use a Dynamic Logo in Divi’s Fullwidth Menu Module appeared first on Elegant Themes Blog.