EDITS.WS

Tag: Divi Tutorial

  • 8 Creative Divi AI Use Cases You Haven’t Considered

    An AI experience built into Divi is here to make life a bit easier for agencies and freelancers. Divi AI is a web design assistant speeding up website builds by directly bringing you a full generative AI experience in the editor. Its flexible feature set means you can use Divi AI in ways that may not have been considered. This article will show you creative Divi AI use cases that you’ll love adding to your workflow.

    By the way, to celebrate the launch of Divi AI we are offering a 40% off introductory discount for one week. Now’s the time to lock in those savings forever!

    What is Divi AI?

    Divi AI Use Cases

    Divi AI is a powerful AI website builder and assistant designed explicitly for the Divi Theme. It is an AI assistant that uses multiple AI models to help write contextual website content and generate picture-perfect images.

    Using the power of AI, Divi has developed a new way for web designers to generate ideas at a rate never experienced before. With Divi AI, you can harness the power of generative AI to create, adjust, and improve websites like never before.

    No more tab-switching between disparate AI services to get what you need. Divi AI gives contextually rich AI outputs directly inside your preferred website development tool—Divi.

    ✨ Learn more about Divi AI’s current capabilities and future feature launches.

    Creative Use-Cases to Try with Divi AI


    Subscribe To Our Youtube Channel

    AI is expansive enough in what it can do. Plug that directly into your website creation and editing flow, and you have an unparalleled opportunity.

    Here are a few lesser-known use cases for generative AI inside Divi. We’ll start with Divi AI’s translation capabilities.

    1. Translate Pages Using AI

    With Divi AI, you can harness the power of artificial intelligence to translate your website pages effortlessly. No more struggling with manual translation or relying on third-party services. Divi AI’s language capabilities make it a perfect tool for creating multilingual websites.

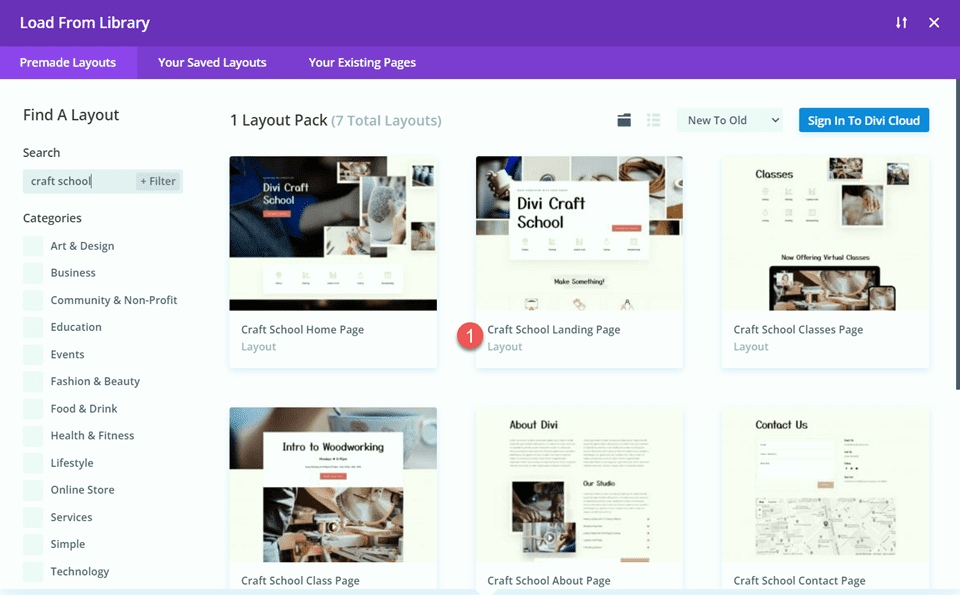
    To test how translation might serve your business, duplicate your most important page. Give the duplicate page a URL structure specific to that language—in our case, we are doing “/es/services/rebranding” to translate a rebranding service page from English into Spanish. Combining a translation plugin and Divi AI will make it easier to translate a whole website and keep a clean site/URL structure.

    Now that we have a page to translate, we will start with the page title and excerpt. Click on page settings. In the Title field, find the Divi AI button. From there, select “Translate” and then choose your language.

    Divi AI Translate Webpage - Steps 1-4

    Divi AI will take a couple of seconds to translate your content. Click “Use This Text” to swap out the English text for the newly translated text.

    Divi AI Translate Webpage - Steps 5

    The steps will be the same for translating the rest of the page. Select each module, click the Divi AI icon, “Translate,” then continue selecting the same language.

    Divi AI Translate Webpage - Steps 6-9

    This feature opens up endless possibilities for businesses looking to expand their reach and cater to a global audience.

    Divi AI Translation Example Page

    While translating with any AI tool is fantastic, we still recommend using humans to edit translated content. The internet and its users deserve access to quality content. Check your pages and make sure they were translated well. Divi AI makes this process much quicker to deliver a multilingual experience at scale.

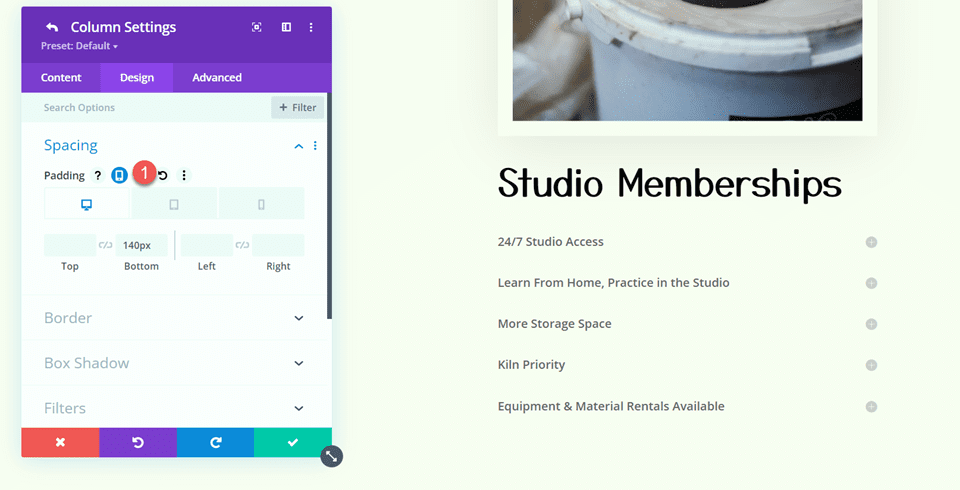
    2. Change the Style of Existing Images with AI

    With Divi AI, you can upgrade your site’s visuals in a new and easier way. Utilizing the power of artificial intelligence, you can now update and enhance images that are already on your site while bypassing graphic design software. Generate alternate versions of any image by adjusting it directly in the Divi builder.

    Start by selecting an existing image inside a module. Select “Improve with AI” or choose the quick actions to “Reimagine” or “Change Style” to reinvent the image with simplified parameters.

    Divi AI Edit Image - Steps 1-4

    Using “Improve with AI,” you can control all the variables that go into editing your image. Choose an image style, image alteration description, reference image (it is preloaded), and the reference image influence percentage. Once you’ve got something you think will work, click “Generate.”

    Divi AI Edit Image - Steps 5-8

    Divi AI will work on the image for a few seconds, generating four image options based on your prompt and seed/reference image. See something that you like? Select any generated image and click “Use This Image” to load it into your Divi module. If you like the direction Divi AI is taking but want more options, select an image and use the “Generate More Like This One” button to generate four more options.

    Divi AI Edit Image - Steps 9-10

    In our example, we created used the existing image plus a simple prompt to get something that was closer to what we wanted. In this case, it’s a similar image with different colors to match the other image in the section a little better.

    Divi AI Image Editing Example Picture

    Whether you need to optimize existing product images or retouch eye-catching visuals for your pages and posts, Divi AI’s image editing capabilities make it easier than ever to get what you want.

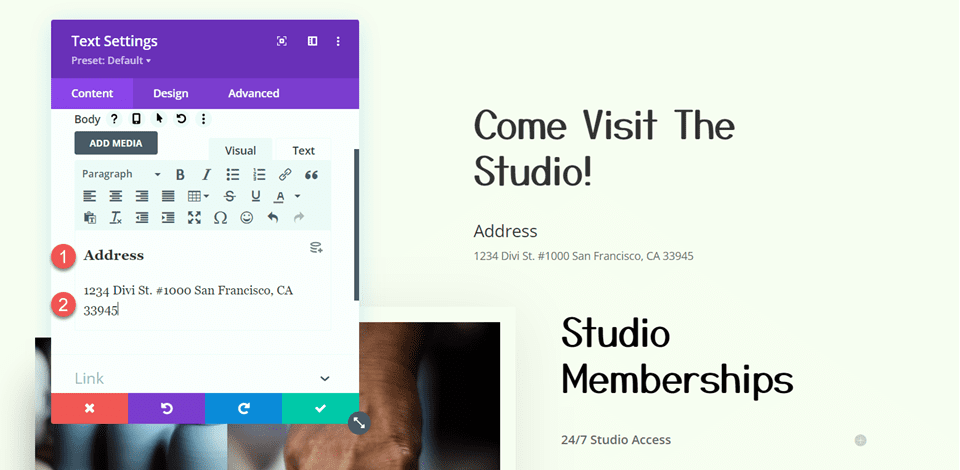
    3. Use Divi AI for Writer’s Block

    Divi AI is contextually aware of every connected site’s general information and the current page’s content. This awareness allows it to create content without using typed-out prompts.

    If you have a page that’s short on content and are unsure what to do next, use Divi AI for suggestions.

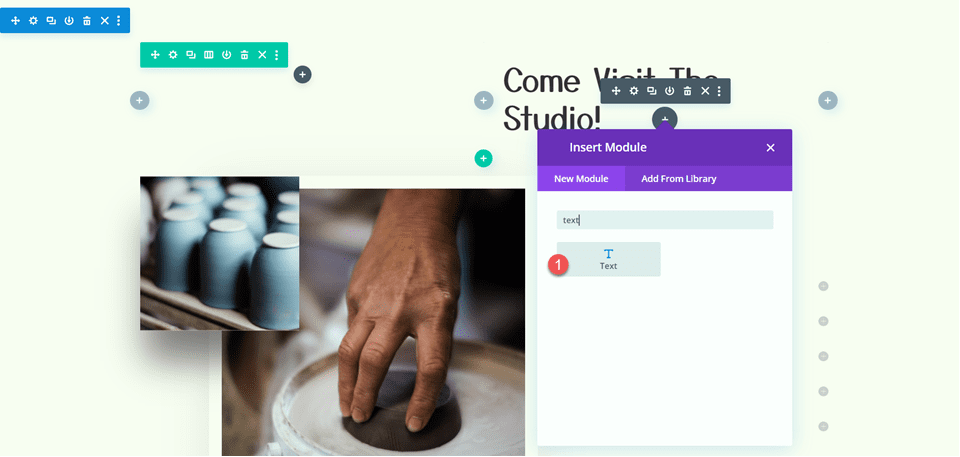
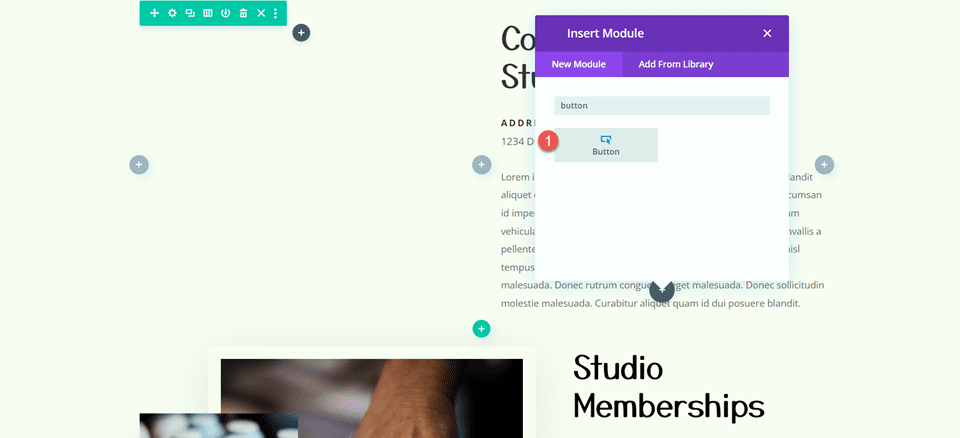
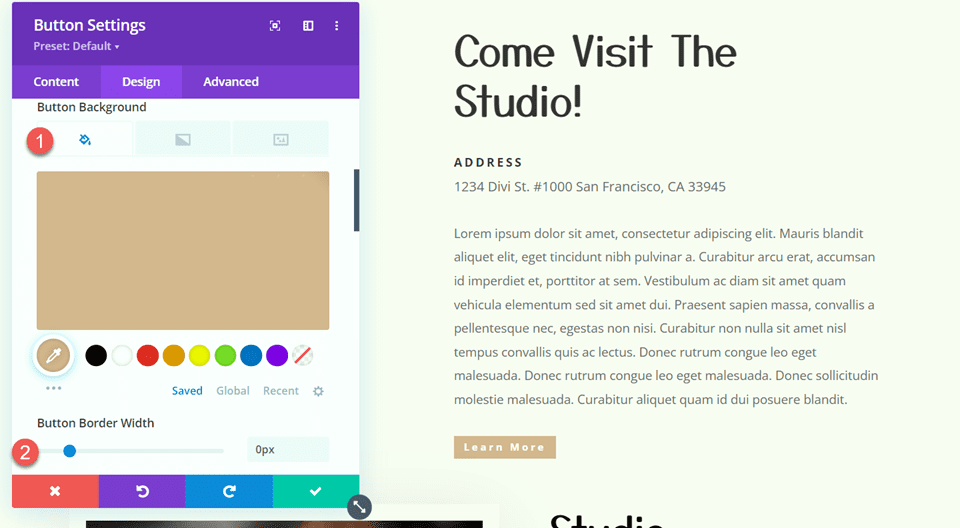
    All you have to do is add a module to your page (even if you don’t have a complete idea for it yet). In this case, we added a “CTA Module” that has room for a title, body, and button text. Clicking “Auto Generate Text With AI” will get the gears turning where Divi AI will consider the available context to create content in the module.

    Divi AI Quick Content Suggestion - Steps 1-2

    Divi AI will show you the title, button, and body text it came up with. If you like what it came up with, click “Use This Text,” or use the retry/refine options to get closer to your new direction. Without any extra input, Divi AI can come up with something for you to consider.

    Divi AI Quick Content Suggestion - Steps 3

    Once you have something close enough, using the text lets you edit the text yourself in the module’s text settings.

    Divi AI Quick Content Suggestion - Steps 4

    Divi AI’s auto text generation will help you brainstorm even when you think you’ve hit a wall.

    4. Create Unique AI Content with Advanced Editing Quick Actions

    Sometimes we make mistakes in our writing. Maybe we’re writing in our second language, hurriedly publishing an important update, or have old, bad habits (like me not being able to spell “ambulance” without using spell check).

    For just these reasons, the next creative Divi AI use case is for AI text correction and editing. Open any Divi module that has existing text, click the AI icon, and select “Fix Spelling & Grammar.” This will run that content through the mind of a meticulous AI copy editor and fix all the major issues.

    Fix Spelling and Grammar Divi AI - Steps 1-3

    With a fine-toothed comb, Divi AI will correct any mishaps and mistypes in your content. Common and uncommon spelling and grammar mistakes alike are a thing of the past.

    What’s more, Divi AI has dozens of quick editing presets that can keep the main idea of your content but transform it into something more than it is now.

    Shorten, lengthen, rephrase, simplify, and paraphrase are all quick actions you can perform to your content with AI, along with changing tone. Having these quick actions just a click away, you can make multiple adjustments to your content to make it unique to your brand.

    5. Generate Fast FAQ Content

    AI is especially useful and quick at generating FAQs for web pages. Divi AI handles this with ease.

    The simplest way to get this done is to add an accordion module. Use Divi AI to generate a good question in the first accordion element. Even better if you are pulling questions from an SEO tool like Semrush. Add your parameters and click “Generate Text.”

    Divi AI for Generating FAQs - Steps 1-3

    If you used Divi AI to come up with or rephrase a question, you can click “Use This Text” to insert the AI-generated question into the module.

    Divi AI for Generating FAQs - Steps 4 Once the Accordion element has a title, you can move on to the body text to answer the question. Click the “AI” button and then select “Write & Replace” (or your preferred Divi AI writing shortcut). This will bring up the Divi AI modal.

    Divi AI for Generating FAQs - Steps 5-6

    You can see what it came up with in the Divi AI modal. If you like it as-is, then select “Use This Text.” No worries if it still needs work—you have unlimited AI word generation. You can use the “Refine Result” by adding a specific prompt or command. You can also use a quick action with the “Retry” option and select what you want Divi AI to do to the text by using the drop-down.

    Divi AI for Generating FAQs - Steps 7-9

    This is a fast way to create FAQs which are so important for modern SEO. Divi AI can rapidly answer tons of questions for your customers and help them find what they need to know.

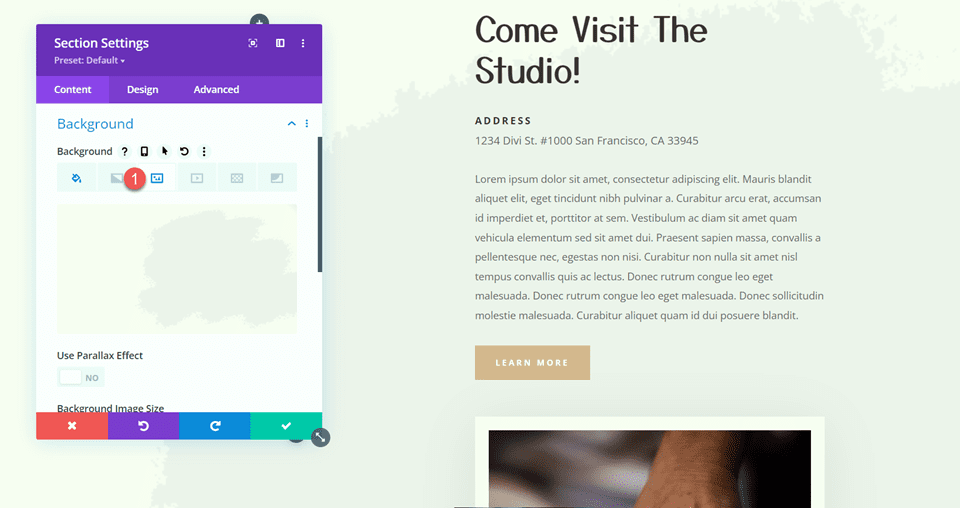
    6. Create Perfectly Sized Images

    Divi AI is full of surprises. Instead of restricting you to 512×512 images, you get full control of the aspect ratios of your generated images. This helps you generate images that aren’t too small to use or the wrong size (like a portrait-oriented image for a background).

    To generate a custom-sized image, hover over the image box and click the Divi AI icon. Then, select Generate Image.

    Build a Homepage Divi AI

    Describe the image you want to create (also setting any image styles to use) and choose the aspect ratio of your image. Here’s our example.

    Build a Homepage Divi AI

    As you can see, we created an image that fits perfectly into our premade layout. It is 800px by 1200px and will work perfectly in its intended spot.

    Build a Homepage Divi AI

    Divi AI completely gets rid of creative mental blocks and puts all the generative power of AI at your fingertips. Traditional AI image generation sizes need not be a worry for you.

    7. Enrich Any Content with Relevant Keywords

    Adding keywords to your copy sometimes comes naturally, but sometimes it does not. When inspiration strikes, you just have to write it all down, no matter if what you are writing is perfectly optimized for SEO. That’s where Divi AI can come in and help you enrich previously written content with your ideal keywords.

    To do this, open up a Divi module with some text. Click the “AI” icon and then select “Improve With AI.”

    Divi AI for Rewriting with Keyword - Steps 1-2

    Choose your content type, a quick instruction for the keywords (not always necessary for simple rewriting), narrow the context to this single module and enter your keyword(s). After that, click “Generate Text” to see how Divi AI adds the keyword to your selected text.

    Divi AI for Rewriting with Keyword - Steps 3-7

    In our case, the content was nearly identical to what it was before—with the pleasant difference of our keyword being tactfully added.

    Divi AI for Rewriting with Keyword - Steps 8

    Adding keywords to content sections with Divi AI is one of the quickest ways to enrich your previously written content with the needed keywords. If you are using Divi AI to generate new content, adding the keywords up front makes sure all your written text is up to the task and ready to help you rank.

    8. Upscale Small or Pixelated Images

    Even though we’re in the Twenty-first century, it’s not uncommon to have images in our possession that are either tiny or ultra-low quality. It’s just a fact of life and makes what would be the “perfect photo” unusable. But AI is changing that.

    There are plenty of AI image enhancers on the market, but none are directly connected to your WordPress media library, like Divi AI. Plus, as we’ve seen, Divi AI has plenty of other AI tricks up its sleeve, making it a one-stop shop for creative web design.

    To upscale any image with Divi AI, open up any Divi module that supports an image or background image. Load your image into the image field, select the “AI” icon, and select “Upscale.”

    Divi AI Upscale Image - Steps 1-3

    And just like that, our example 150 by 150px image was upscaled into a 576 by 576px image that is much better suited to be used on our page.

    Divi AI Upscale Image - Steps 4

    Upscaling with Divi AI can make images 2 times or 4 times bigger than the original. This makes all those client photos a lot easier to work with. Best of all, you don’t even need a separate AI service for this. Divi AI, with one low cost, does this for you (and more) from directly in the page editor so you can stay on task, building websites.

    Bonus Tip: Give Advanced AI to All Team Members & Websites in Your Account

    Divi AI is one of the most generous AI services on the market. Not only is its AI output on par with the top services (for text and images), but your whole team can make use of its outstanding benefits.

    Most leading all-in-one AI platforms charge per user, making it hard to use across a team. Either a company needs to invest heavily in the software or leave it up to individuals. But people using their own AI tools could bring about inconsistent results and create an unequal work product from one team member to the next. Divi AI allows agencies and freelancers to give all their contractors and employees access to the best technology.

    Divi AI Beats Jasper and Writesonic on Cost Effectiveness

    Divi AI Writesonic Jasper
    Starting Price $24/mo $19/mo per user $49/mo per user
    # of Users Unlimited 1 1
    Text Output Unlimited 200,000 (less with GPT4) Unlimited
    Image Output Unlimited Potentially Unlimited Unlimited
    Website Context ✔️ ❌ ❌
    Get Divi AI

    Why would you spend $250/mo to give a team of five the ability to work with generative AI when you could add Divi AI to your whole Divi Teams account for an additional $24/mo? The best part? If your team gets bigger, your price doesn’t!

    Get Divi AI Now

    Get 40% Off Divi AI During Our Introductory Sale!

    For the next week, we are offering 40% off Divi AI. Anyone who purchases Divi AI before the sale sends will save $115 per year and lock in those savings for life! Plus, all of your team members can use Divi AI at no additional cost. Get the discount here 👇

    The post 8 Creative Divi AI Use Cases You Haven’t Considered appeared first on Elegant Themes Blog.

  • How to Transform A Divi Layout Using Divi AI

    Divi AI is a powerful new feature right within the Divi Builder that helps create fresh content for your website in seconds. From generating professional copywriting to one-of-a-kind images, this new tool will speed up your design process and give you the extra boost of productivity you’ve been looking for.

    In this post, we’re going to explore the ways you can transform any premade Divi Layout using Divi AI. Let’s get started!

    What is Divi AI?

    Divi AI is a powerful and intuitive web design assistant that understands Divi. It can write content, revise content, and generate unique images for your website. You can create custom content from prompts or even ask Divi AI to generate content based on the context of the page, section, or module you’re working in.

    What’s Possible with Divi AI

    The options are endless with Divi AI! For a complete look at all that Divi AI can do, check out this list of features.

    Auto-Generate Contextual Content

    Not sure what to design next? Use Divi AI to generate context-specific website copy and images. Divi AI analyzes existing content and website details to recommend the content you should add next.

    Auto-generate content with Divi AI

    Create Unique Images

    Divi AI also has the power to create unique images for your page design. You can generate images with prompts or by having Divi AI learn from your page and the context around your image to generate something highly relevant with just the click of a button.

    Create Unique Images with Divi AI

    Create Fresh Copywriting

    Bid farewell to writer’s block! Whenever you face uncertainty about your next writing topic, turn to Divi AI. It evaluates your page’s content and provides fresh ideas to keep your creativity flowing.

    Create fresh copywriting with Divi AI

    Edit and Revise Existing Copywriting

    Divi AI is like having your own Copy Editor on call, 24/7. Improve your existing content by using Divi AI to adjust the tone, modify the length, improve clarity, or add creativity to your copy. Navigate through variations, experiment with styles, and tailor your content to engage your audience.

    Revise and rewrite existing copywriting with Divi AI

    How to Transform a Divi Layout Using Divi AI


    Subscribe To Our Youtube Channel

    Now it’s time to get into the fun stuff! Today we’re going to transform a premade Divi layout using Divi AI. First, we’ll need to select our layout.

    Add a Divi Layout to Your Page

    A great way to use the power of Divi AI is by transforming premade layout packs. Every week the designers here at Elegant Themes release custom-designed pre-made layout packs that are completely free to use. Layout packs are a great way to get started designing your website, and Divi AI can help you quickly customize the content so that it’s unique to you or your business. For more, here is a step-by-step tutorial on how to add a premade layout to your page.

    Divi Premade Layout

    For our purposes, we’ll be using the Coaching Layout Pack. To add a premade layout to your page, expand the Divi toolbar and click the purple + icon to load the Divi Library.

    Premade Divi Layout

    Type “coaching” into the search bar and select the Services page layout.

    Type coaching into search bar

    Select “Use This Layout” to load it to your page.

    Select use this layout

    Now that we have a premade layout added to our page let’s explore the ways you can transform it using Divi AI!

    How to Add Copy to Your Divi Layouts with Divi AI

    Divi premade layout packs come with placeholder content. Using Divi AI, you can add text modules and ask Divi AI to generate fresh copywriting based on the context of the content on the rest of your page. Since layout packs are each based on a specific theme, Divi AI will then generate unique copy based on that theme’s page content.

    How to Generate New Copy Automatically

    Let’s generate some short descriptions for the services section of this page. We’ll start with the One on One service.

    How to Generate New Copy Using Divi AI

    Access the module settings by hovering over the module and clicking the gear icon.

    Open module settings

    To auto-generate text, click the “Auto Generate Text With AI” blue button. Because this is a Blurb module, Divi AI will also automatically generate an image to go with it in case you decide to use an image instead of an icon.

    Click the button to auto-generate AI text

    Next, the AI-generated results will pop up. Since we’re editing a blurb module, Divi AI will generate a piece of content for each section in the blurb module. If you like the generated text, then click the blue “Use This Text” button. Or, you can choose to modify the text further by clicking the dropdown and selecting the action you want AI to take. You can also refine your result by writing further instructions in the Refine Result input field.

    Click the blue Use This Text button

    And here is the final result! Divi AI was able to automatically generate contextual content based on the rest of the page content. Pretty neat, right?!

    Final result

    How to Create New Copy Using the Divi AI Text Generator

    There’s also another way to generate copy with Divi AI: by providing prompts. Let’s try this method with the Couple Therapy blurb module.

    Open up the module settings and hover over the body text area. You’ll see an AI icon popup in the textarea box.

    AI Icon in textarea

    Next, click “Write With AI”.

    Write with AI

    Up will pop the prompt window where you can select the Content Type, write your prompt, tell Divi AI what context to consider, and further customization options like the tone of voice, keywords, content length, and language.

    Type in your AI prompt

    Content Type

    Tell Divi AI what type of content you want it to write: Paragraph, Title, Button, Blog Post, or Social Media Post. For our example, we’ll select Paragraph.

    Content type options

    What are you writing about?

    Here you can type in the topic you are writing about and what you want Divi AI to create content for.

    Content prompt

    Added Context

    Tell Divi AI what context (or no context) it should write in: This Page Content, This Section Content, This Module Content, No Context. By specifying what content you want Divi to reference, you’ll have more control over your contextual content. Let’s select “This Page Content.”

    Add contextTone of Voice

    Choose the tone of voice you want Divi AI to use. Options include, Creative, Informative or Funny.

    Tone of Voice

    Must Use Keywords

    For SEO purposes, here you can tell Divi AI what keywords you want to be included in the text.

    Must-use keywords

    Content Length

    Here you can tell Divi AI how long or short you want the content to be.

    Content length options

    Language

    By default, Divi AI will write content in the same language as the prompt it’s given. However, if you’d like Divi AI to write in another language, you can select one from the dropdown here.

    Divi AI language options

    Click “Generate Text”

    Once your settings are configured how you like, click the “Generate Text” button at the bottom to put Divi AI to work!

    Generate Text

    If you are happy with the generated text, you can click the “Use This Text” button to insert the text into the module. However, you can further customize the AI-generated text in the “Modify With AI” section. You shorten or length the text, check the spelling and grammar, rewrite it for experts or beginners, and so much more. You can also give more direction to the AI generator by typing in the “Refine Result” section and then clicking the “Regenerate” button.

    Use this text button

    In addition to all these options for customizing and refining the AI-generated text, you can go back to your initial prompt by clicking the white back arrow at the top left of the window that says “Content Results”. There, you can refine your settings and generate new text.

    Go back to results

    Once you generate another result, you’ll see an option to toggle between those results right underneath the AI-generated text. That way, you can compare and contrast your results and select the text you like the best and assemble it together for your own unique paragraph.

    Rewrite and Revise Copy

    Rewriting and revising copy with Divi AI is very similar. To do so, we’ll navigate to a text module that has existing content. Open up the module’s settings to edit the content.

    Rewrite and Revise Copy

    There are two ways you can access the AI options. First, by clicking the blue “Auto Generate Text With AI” blue button at the top, or second, by clicking the AI icon within the text editor.

    Auto Generate Text With AI

    If you’d like Divi AI to auto-generate revised text, then click the blue button. You can further customize the results in the Content Results window using the options and settings explained above.

    Adjust AI content settings

    To use the Improve With AI feature, copy the existing text, click the Divi AI icon, and then select “Improve With AI.”

    Improve With AI

    Paste the text into the editor, configure the style and settings you want to use, and then click “Generate Text.”

    Generate Text

    Generate Custom Images

    No more spending hours on stock image sites to find the perfect image for your design. With Divi AI, you can generate custom images unique to your website! Here’s how you can generate a custom image using Divi AI and the Image Module.

    First, open up the image module settings and hover over the image to see the AI icon. Click it to load the AI options: Generate With AI, Improve With AI, or choose from Quick Options like Generate & Replace, Reimagine, or Change Style. Let’s select “Generate With AI.”

    How to Generate Custom Images with Divi AI

    The first option is to select the style of image you want to generate.

    Select image style

    There are a variety of styles to choose from. You can create an image that is photographic, like a digital painting, concept art, a vector graphic, 3D renders, drawings, abstract art, comic book, watercolor, painting, anime, or cartoon.

    Image style options

    Next, write a descriptive prompt of the image you want to generate. You can even use AI to help generate a prompt by clicking the AI Icon in the text area.

    Write your prompt

    You can even upload a reference image to provide more context; however, this is optional. If you do use a reference photo, you can set the influence of the image by percentage. The less influence you assign the photo, the more influence your written prompt will have.

    Upload a reference photo

    If you don’t upload a reference photo, you’ll have the option to choose the aspect ratio of the generated image: Square, Landscape, Portrait, or Custom Size.

    Choose image aspect ratio

    You can even set the size (width and height) of the image.

    Choose image width and height

    Once the fields are filled out, click the “Generate Image” button and let the AI magic do its work!

    Generate Image Button

    On the next screen, you’ll see four generated images. If there is an image you like and want to use in your page design, click on the image and select “Use This Image.” You can also save the image to your media library by hovering over the image and clicking the downward arrow icon in the top right corner of the image. That way, you can save alternate image versions for future use!

    AI Generated Images

    If you’d like to continue refining your images, you can do so in several ways. First, you can select a generated image and ask AI to generate more images like that one.

    Generate more images

    In the Modify Selected Image area, you can even change the image type to another format, like a painting or vector image.

    Change image type

    If you want to refine your prompt, you can do so in the New Description area. Type in your new prompt and hit regenerate to generate new images.

    Regenerate

    Once you have the image you want, click the “Use This Image” button to insert the image into your content!

    Use This Image

    Pro Tip: How to Create New Images that Match the Style of Your Premade Layout

    If you like the current style and feel of your current layout, adding new images might throw off the entire design. With Divi AI, you can replace the existing images on your premade layout and keep the original style and feel of the original image.

    For example, here is a screenshot of our Bake Shop premade layout.

    Let’s say we wanted to use this layout to create a website for a coffee shop. We could replace these pretzel images with coffee-related images that have a similar style and color.

    To do this, simply select and use one of the existing images as a reference image. Then add a short description, like “cup of coffee,” and bring the reference image influence dial down to 20%. Then generate a new image.

    Repeat the process for the rest of the images on the page. Adjust the copy using AI as needed. And you have a new website with a similar style as the premade layout.

    Final Thoughts

    Divi AI is a powerful new tool for enhancing your efficiency and creativity while designing Divi websites. The best part is the more you use it, the better it gets to know your website and produces even more amazing results. Stay tuned for more Divi AI how-to’s this week, as we’re just getting started showing you how to harness the power of Divi AI!

    Get 40% Off Divi AI During Our Introductory Sale!

    For the next week, we are offering 40% off Divi AI. Anyone who purchases Divi AI before the sale sends will save $115 per year and lock in those savings for life! Plus, all of your team members can use Divi AI at no additional cost. Get the discount here 👇

    Divi AI Launch Discount Sale

    The post How to Transform A Divi Layout Using Divi AI appeared first on Elegant Themes Blog.

  • How to Use Divi AI to Improve Your Copy Automatically

    With artificial intelligence taking the world by storm, we thought it was time to bring that technology to Divi users. Whether you want to generate images or text, Divi AI is the perfect companion to build your new website. In this post, we’ll explain what Divi AI is and what it can be used for and provide an in-depth tutorial on how to improve copy with Divi AI.

    By the way, to celebrate the launch of Divi AI we are offering a 40% off introductory discount for one week. Now’s the time to lock in those savings forever!

    What is Divi AI?

    Divi AI

    Divi AI is a web-based design assistant built specifically for Divi. It can write, improve existing content, and generate images inside Divi’s Visual Builder. Since it’s packaged within Divi, it understands each Divi module, making generating text and images for your Divi website a breeze. With Divi AI, you’ll be empowered to write beautiful content and create gorgeous images like a professional.

    What Can Divi AI Do?


    Subscribe To Our Youtube Channel

    The exciting thing about Divi AI is all of the features it encompasses. Unlike other AI software that typically provide one type of generative AI, Divi can do quite a few things.

    Auto-Generate Content

    Divi AI auto generate

    Divi’s powerful AI algorithm can generate text, images, or entire modules with just one click. It works by analyzing the existing content on your website, then making recommendations based on what’s already there. Divi AI learns from your website, allowing it to provide high-quality and relevant, on-brand results.

    Generate Images

    Divi AI text-to-image

    Another incredible aspect of Divi AI is its ability to generate beautiful AI images with one click. Based on Stable Diffusion, Divi’s text-to-image technology scans the content and images on your site and generates images based on it. That said, you can also create any image you like with a simple text prompt and a button click.

    Refine Existing Images

    AI improve image

    Divi AI also can enhance existing images on your sites. Simply supply a reference image and watch the magic unfold. You can vary the level of enhancement by specifying the weight of the original image, much like other text-to-image software, but it takes that incredible technology a step further. For example, you can completely change the image’s subject while retaining its composition, style, and coloring.

    AI-Suggested Content

    AI suggested content

    As writers, we know that writer’s block is a very real issue. Thanks to Divi AI, you’ll never have to worry about that. As previously mentioned, Divi AI analyzes your content, then makes suggestions to improve it. This ensures your content will be fresh, creative, and on-brand. With Divi AI, you can refine your content, expand it, shorten it, change the tone, and more.

    How To Use Divi AI to Improve Your Copy

    To demonstrate how powerful Divi AI is, we will show you all that Divi can do to improve your website’s copy. The process is simple, so building a new website or modifying an existing one is a snap.

    Step 1: Enable Visual Builder

    The best way to utilize Divi’s powerful AI features is through Divi’s no-code Visual Builder. This way, you can work on your page’s design in real time. To make things easier, we’re going to use the Horse Riding Layout Pack for Divi to improve copy with Divi AI. That said, you can follow along with your own content.

    Start by clicking the Enable Visual Builder button at the top middle of your screen.

    Enable Visual Builder

    If you’re new to Divi, we offer an extensive yet easy-to-follow tutorial that will get you up to speed with Divi’s Visual Builder.

    Step 2: Edit Existing Text Module

    With the Visual Builder active, scroll down to the text module in the hero section that contains lorem ipsum text. Hover over the module with your mouse until the settings appear.

    select text module

    Alternatively, you can right-click anywhere on the page to bring up the layers view by clicking go to layer. It easily allows you to select sections, rows, or modules to edit them.

    go to layer

    To edit a text module, click the grey settings icon while hovering over it.

    text module settings

    Step 3: Auto Generating Text with Divi AI

    With your text module active, you’ll notice a new button: Auto Generate Text with AI. Go ahead and click that to generate some new copy for your text module.

    auto generate text Divi AI

    Divi AI will generate new copy for the text module based on your layout. In our case, Divi recognized that our page is related to horses and correctly generated copy to support the layout:

    Divi AI text

    Once the copy is generated, you can choose to use the text by clicking the corresponding button in the Visual Builder.

    use this text

    Divi AI will replace the placeholder text with the newly generated copy.

    Step 4: Improving Copy with Divi AI

    With new text generated, you can take steps to improve it. With your text module still active, hover inside the text area and click the Divi AI Options icon to reveal the text options available.

    Divi AI options

    Next, click Improve with AI.

    Improve with AI

    A new dialog box will appear with a few settings to be aware of:

    1. Content type: Choose between a paragraph, title, button, blog post, or social media post.
    2. What are you writing about: Give Divi AI information about the type of content you want to generate.
    3. Added Context: Choose from this page content, this section content, this module content, or no context.
    4. Guide me: This dropdown allows you to add more specifics, such as tone of voice, keywords, and content length, and lets you choose from over 130 languages.
    5. Generate text: Press to improve the content in your text module.

    Improve AI text settings

    We’ll add the following settings:

    1. Content Settings: paragraph
    2. What are you writing about: Explain the Divi Equestrian Center
    3. Added context: This page content
    4. Tone of Voice: Informative
    5. Must use Keywords: equestrian center
    6. Content length: about 150 words
    7. Language: language of website

    With these settings in place, click the Generate Text button.

    Generate text

    Divi AI will work its magic and create a new paragraph based on those settings. Once text generation is complete, you can view both the original and newly generated text. If you are happy with the results, click the use this text button (1). However, if you want to run the prompt again, click the retry button (2). If you like the new copy but want to make improvements to it, click the improve with AI dropdown menu (3). This setting allows you to:

    • make it better
    • rephrase
    • lengthen
    • shorten
    • simplify
    • paraphrase
    • fix spelling and grammar
    • rewrite for experts or beginners
    • Translate to one of more than 130 languages
    • change the tone
    • Make it more detailed, descriptive, engaging, actionable, or generic

    Furthermore, you can add a text prompt to refine your results (4). Once all of your chosen settings are in place, click the regenerate button (5) to refine your text.

    content results

    Divi AI Before and After Results

    Now that you’re comfortable with the settings used to improve copy with Divi AI, we will show you a few real-world examples of Divi AI in action using various prompts.

    Divi AI Example 1: Paragraphs

    Divi AI example 1

    Before:

    Welcome to the Equestrian Center! Whether you’re a beginner or an experienced rider, our full-service center offers everything you need for an unforgettable horse riding experience. From horse stalls to horse training, we have it all. Our team of expert coaches is dedicated to providing pure elegance and perfect training, making riding accessible to all. Join our club and learn more about our private lessons, beginner to advanced programs, and coach training. Book your spot today and embark on an amazing equestrian journey with us!

    Prompt:

    • Content type: paragraph
    • Writing about: Explain the equestrian center
    • Added content: this page content
    • Tone of voice: creative
    • Must use keywords: equestrian center
    • Content length: exactly 150 words
    • Language: language of prompt

    Improved copy using Divi AI:

    Welcome to the Equestrian Center. Our equestrian center is dedicated to providing a truly exceptional horse riding experience for riders of all levels. Whether you’re a beginner or an experienced rider, we have everything you need to embark on an unforgettable equestrian journey. From our state-of-the-art horse stalls to our expert horse training programs, we offer a full range of services to cater to your every need. Our talented and experienced coaches are committed to delivering pure elegance and perfect training, ensuring that riding is accessible and enjoyable for all. Join our club today to discover our private lessons, beginner to advanced programs, and coach training opportunities. Book your spot now and get ready to experience the thrill of horse riding with us.

    Refined results:

    Welcome to our equestrian center, where your passion for horse riding meets the highest standards of excellence. Immerse yourself in the enchanting world of equestrian sports, guided by our skilled coaches amidst top-notch facilities. Our utmost commitment lies in nurturing your love for horse riding and creating unforgettable experiences. From our state-of-the-art horse stalls to comprehensive training programs, every element is tailored to ensure your riding journey surpasses all expectations. Explore the joy of private lessons, beginner to advanced programs, and coach training opportunities. Join our esteemed club today and embark on an extraordinary adventure at the equestrian center. Secure your spot now and unlock the thrilling experience of horse riding.

    Divi AI Example 2: Headlines

    Divi AI example 2

    Before:

    Pure Elegance & Perfect Training

    Prompt:

    • Content type: title
    • What are you writing about horse training
    • Added context: this section content
    • Tone of voice: creative
    • Must use keywords: horse training
    • Content length: exactly 10 words
    • Language: language of prompt

    Improved copy using Divi AI:

    Unleash Your Potential: Master the Art of Horse Training!

    Divi AI is the Perfect Writing Assistant

    If you’re a Divi user, you already know how simple it is to create a gorgeous website in just a few clicks. Now, thanks to the power of Divi AI, you can generate text and images to easily complete your site. Whether you’re a beginner or a seasoned professional, improving copy with Divi AI is a breeze. You can generate, revise, and improve your copy based on a simple text prompt in just a few clicks.

    If you’re new to Divi, there’s never been a better time to join. For a mere $89 per year for an Elegant Themes license, you’ll have access to the most robust WordPress website-building experience on the market. For an additional $24 per month, you can generate unlimited text and images on every Divi website you own, thanks to Divi AI.

    How do you plan to incorporate Divi AI into your workflow? Let us know by sounding off in the comments below.

    Get 40% Off Divi AI During Our Introductory Sale!

    For the next week, we are offering 40% off Divi AI. Anyone who purchases Divi AI before the sale sends will save $115 per year and lock in those savings for life! Plus, all of your team members can use Divi AI at no additional cost. Get the discount here 👇

    The post How to Use Divi AI to Improve Your Copy Automatically appeared first on Elegant Themes Blog.

  • Top Tips For Divi AI Image Prompting

    Unless you’ve been living under a rock, you’ve heard that artificial intelligence is taking the creative world by storm. Here at Elegant Themes, we’ve been working hard to bring you the latest advancements with everything Divi, which includes our exciting new generative AI product, Divi AI. In this post, we’ll explain what it is and provide some tips to help you learn the basics of Divi AI image prompting.

    By the way, to celebrate the launch of Divi AI we are offering a 40% off introductory discount for one week. Now’s the time to lock in those savings forever!

    What is Divi AI?

    Divi AI

    Think of Divi AI as your personal creative assistant. With it, you can generate text and images from a text prompt right inside Divi’s no-code Visual Builder. Unlike other generative AI software, Divi AI is built specifically for Divi. It’s been trained to understand each of Divi’s design elements and can understand the context of your website. It identifies the images and text content on your page and makes relevant suggestions for text and images. Divi AI is based on Stable Diffusion and OpenAI’s ChatGPT, with enhancements by our professional developers. So, you can build a beautiful design with Divi, and now you can create content for it, too.

    Divi AI Image Generation

    Divi Image AI

    One of the most impressive features of Divi AI is how easily you can generate images. There are several ways to create images, including refining and modifying existing images and automatic image generation. Let’s briefly walk through the steps to create an image with Divi AI. To make things easier, we’ll start with the Bake Shop Layout Pack for Divi, but you can follow along with the layout of your choice.


    Subscribe To Our Youtube Channel

    Getting Started with Divi AI

    As previously mentioned, Divi AI works within the Visual Builder. Click the Enable Visual Builder button to get started.

    Enable Divi Visual Builder

    To generate a new image, click on an existing image module, or add another one. To edit an image, hover over an image module and click the grey settings icon to edit it.

    Edit image module

    With the image module open, hover over the image until the AI icon appears.

    Divi AI image creation

    Click on it, then select Generate with AI.

    Generate with AI

    Divi AI Image Settings

    You’ll need to familiarize yourself with a few settings to get the most out of Divi AI image generation. They are as follows:

    1. Image style: Allows you to set a style for your image. Settings include photo, digital painting, concept art, vector graphic, 3D render, drawing, abstract art, comic book, watercolor, painting, anime, cartoon, or none.
    2. Image description: Here, you can input a text prompt to create your image or allow Divi AI to create a prompt for you.
    3. Reference image: If you’d like your image to be based on a particular look or style, you can upload a reference image here.
    4. Aspect ratio: Choose from square (1:1), landscape (8:5), portrait (3:4), or add a custom size.
    5. Size: Set a custom size for your image.
    6. Generate: Creates a generated image with artificial intelligence.

    image generation settings

    Using a Reference Image

    In addition to generating an image from scratch, you can use a reference image to steer Divi AI in the right direction. To do this, click the upload a reference image button.

    reference image

    This will open the WordPress media gallery so you can upload an image for Divi AI to analyze. Once uploaded, the image generation settings change slightly. You can still choose an image style and enter a prompt. Along with that, a new setting for reference image influence will appear. You can adjust the sliding scale from 0-100%, with higher values resulting in images closely related to the referenced image.

    image influence

    Using the image example from the photo above, we’ll add the following prompt: soft baked pretzel, set in a busy bakery shop display case. Set the image style to photo and the reference image influence to 50%. Here’s the result:

    pretzel images

    If you are satisfied with the results, click the image you prefer, then click the use this image button (1) to insert it into the image module. If you’d like to generate more results, click the generate more like this one button (2).

    select generated image

    Improving an Existing Image with Divi AI

    Another excellent feature of Divi AI image generation is the ability to improve on existing images. Most freelancers and web agency owners know the challenge of obtaining suitable client images. Thanks to Divi AI, there is no longer a need to worry about that. To improve an existing image, click inside the image module and hover over the AI icon like before. However, you’ll select the improve with AI option this time.

    improve with AI

    When the dialog box appears, you’ll notice that the current image is set as a reference image. You can choose your image style, add a description, and set the reference image influence.

    improve with AI settings

    Top Tips for Divi AI Image Prompting

    Now that you understand the basics of image generation with Divi AI, let’s review some tips and best practices to improve your images through good prompts.

    Form the Perfect Prompt

    One thing to keep in mind is that the order matters. Words placed at the beginning of a prompt are weighed more heavily than ones used towards the end, so be sure to put your most important descriptors first. The best way to craft the perfect prompt is to follow this rule: Image style > description > details > composition.

    • Image Style: What type of artwork do you want to achieve? Is it a photograph, drawing, drawing, 3D render, etc.?
    • Description: State the subject, its attributes, environment, and scene. The more descriptive you are, the better the output.
    • Details: Think lighting, photography style, artist, etc.
    • Composition: Camera angle, resolution, etc.

    For example, using the prompt a dog will produce good results but will likely be devoid of other elements in the photo. Alternatively, using the prompt golden retriever, sitting on a boat dock looking out at the water, mountain backdrop, blue sky, cinematic lighting, award-winning photography, full depth of field, 4k resolution gives Divi AI plenty of information to create a complete scene.

    Divi AI prompt

    Choose an Art Style

    Divi AI styles

    One of the most basic steps for successfully creating images is to choose a style for your image. As previously mentioned, multiple styles allow you to create any image you want. We used the same prompt to demonstrate the different styles and only changed the image style. Here are the results:

    Divi AI styles

    Use a Reference Image

    If you have an image in mind that needs to be corrected, try using a reference image to guide Divi AI. When using this feature, be sure to upload a high-quality image. Uploading small pixelated photos won’t work as well, often resulting in lower quality results. That said, remember that the larger the picture, the longer it takes to generate one with Divi AI. Try to keep your reference images under 200kb for the best results. Using large images on your web pages can slow them down, potentially hurting your site in the search engine ranking pages (SERPs).

    Using this example, we took a reference image of dogs running on a beach. We left the image influence at its default setting of 30%, which resulted in the following image:

    reference image

    Specify an Aspect Ratio

    By default, Divi AI will create images 512 x 512 pixels. However, additional aspect ratio settings exist for landscape, portrait, or custom dimensions. By providing an option for aspect ratios, Divi AI makes filling your web pages with images of any size easy. It allows you to create images with custom dimensions, which is perfect for hero image backgrounds, adding images into awkward spaces, and lets you avoid using photo editing software to crop them.

    aspect ratio

    For the best results, it’s recommended to use 768×768 images instead of 512, which is the default. It helps avoid distorted faces. This is due to how Stable Diffusion works. Basically, if SD tries to render something complex at a small size, it gets distorted. If you make your images bigger, it helps.

    Use Descriptive Words

    Another tip is to use descriptive words, such as subject, characteristics, camera angles, lighting, and the surrounding environment. The trick with prompting is to give Divi AI enough information on the type of image you want without overwhelming it with too many words. Unlike blog posts or other content, generative AI doesn’t need you to write a book to create a gorgeous image. Be concise yet descriptive for the best results.

    For example, we provided Divi AI with two different prompts for a pirate ship so you can see the difference a few descriptive words make:

    Divi AI descriptive prompt

    To help you navigate using descriptive words with Divi AI, we’ve created a handy table that contains different words to consider using to boost Divi’s AI image generation output.

    PHOTOS/CAMERA ANGLES CONCEPT ART DIGITAL PAINTING LIGHTING DESCRIPTORS
    headshot warrior hyper-realistic sun light
    low angle cyborg still-life soft light
    candid cyber punk textured golden hour
    photorealistic villain pastel colors twilight
    soft focus movie concept art bokeh moon light
    closeup cinematic composition brushstrokes midday
    sideview Illustration style visible brushstrokes dusk
    4k, 8k resolution 2D note a famous artist (Picasso, Ansel Adams, etc) glowing
    full depth of field expansive Digital art style sunset
    shallow depth of field cinema style tranquil atmosphere cinematic lighting
    sharp focus bioluminescence detailed face studio lighting
    award winning photography epic intricate details accent lighting
    studio photography moody, gloomy unreal engine 5 volumetric fog
    highly detailed video game art backlit dramatic lighting

    Be Specific

    Some AI art generators, such as Midjourney, don’t require as many specifics as others. This isn’t the case with Divi AI. You can be as specific as you want. In fact, the more specifics you add, the better your image will be. Just remember to avoid being repetitive and follow the perfect prompt rule: Image style > description > details > composition.

    Context (and Content) Matter

    When using Divi AI to generate images, it’s important to remember one key aspect. It can be hard to get a subject that is out of place to assume a given style. For example, it’s hard to get a cat to be drawn in the style of a comic book because there aren’t really any cat comic books out there. On the other hand, two might fighting in space in the comic book style works quite well.

    Divi AI combic book style

    Similarly, the prompt a wooden hut in mystical fairy mushroom land works great when using Divi AI’s digital painting style.

    digital painting style

    Divi AI Image Prompt Examples

    To demonstrate the power of Divi AI’s image generation, we’ve added some examples and their prompts.

    Divi AI examples

    Image 1 Prompt: Modern interior design, chalet, living room, wide windows with a view, mountains, wood floor, modern furniture.
    Image 2 Prompt: Rustic backyard, fire pit, wicker patio furniture, wood ceiling, large oak trees, 8k resolution.

    Divi AI astronaut

    Prompt: Female astronaut, wearing helmet and visor, Earth in the background, reflection, stars, sharp focus, full depth of field.

    Divi AI beach scenes

    Image 1 Prompt: Bioluminescence, set at midnight on a beach, moonlight, blue glowing light.
    Image 2 Prompt: Realistic beach landscape, high tide, teal water, colorful pebbles on the sand, Canon EOS R6.

    Divi AI watercolor

    Prompt: watercolor painting of an owl sitting on a branch, mid-day lighting, wide angle.

    Divi AI animals

    Image 1 Prompt: Red fox in nature, National Geographic, highly detailed fur, hyper-realistic photography, cinematic lighting, full depth of field.
    Image 2 Prompt: 3D dog, sunglasses, thick black collar, in the style of Pixar, black background, 3D animated character.

    Final Thoughts on Divi AI Image Generation

    Experience the next level of image generation with Divi AI. Our powerful AI technology allows you to create stunning images in seconds. Divi AI has got you covered whether you want to enhance your existing photos or generate new ones. Already an Elegant Themes member? Unlock its full potential with Divi AI and enjoy unlimited text and image generation for $24 monthly. Not a member? No worries. Sign up to experience the most powerful WordPress theme on the market.

    Which feature of Divi AI are you most excited about? Let us know by dropping a comment below.

    Get 40% Off Divi AI During Our Introductory Sale!

    For the next week, we are offering 40% off Divi AI. Anyone who purchases Divi AI before the sale sends will save $115 per year and lock in those savings for life! Plus, all of your team members can use Divi AI at no additional cost. Get the discount here 👇

    The post Top Tips For Divi AI Image Prompting appeared first on Elegant Themes Blog.

  • Building a Homepage With Divi AI From Start to Finish

    Are you as excited about Divi AI as we are, but don’t exactly know how to get the best out of it? This tutorial will help you in the right direction. We’ll put Divi AI to the test and show you how you can build your homepage using Divi AI! We’re starting with a premade layout, to speed up the process, and then we’ll use Divi Text AI and Divi Image AI to tweak the layout to match our needs.

    By the way, to celebrate the launch of Divi AI we are offering a 40% off introductory discount for one week. Now’s the time to lock in those savings forever!

    Introducing Divi AI – Your Personal Web Design Assistant

    Divi AI

    Divi AI is your new personal web design assistant! It can write content and generate images for you right inside the builder, making it incredibly accessible and helpful. Divi AI understands the context of your website and the page you’re working on, which allows it to generate contextually-relevant content. Divi AI allows you to:

    • Auto-Generate Content with One Click — Divi analyzes your existing website content and makes suggestions on what content to add next!
    • Let Divi Learn From Your Website — You can provide Divi AI with your website’s content to improve the relevancy of the content output it gives!
    • Generate Image Automatically — With just one click, you can generate entire new images from scratch!
    • Refine & Modify Existing Images — You can also give Divi AI an image reference to refine it or completely change the style!
    • & More!

    Get Divi AI

    Building A Homepage with Divi AI

    Now that you’ve gained an understanding of what you can expect from Divi AI, let’s start building our homepage! If you’re not yet signed up for Divi AI, you can use your Divi AI trial to experiment throughout this tutorial.

    Build a Homepage Divi AI

    What You Need to Get Started

    In this tutorial, we’ll specifically focus on building a homepage, but if you’re new to Divi, you’ll have to make sure the following things are in place:

    Options: Build From Scratch or Use a Premade Layout

    When wanting to create a homepage with Divi, there are generally two ways to go about it.

    1. Use a premade layout as a base, and modify it as you go
    2. Build the homepage layout from scratch

    Depending on your needs, you might go for either one of these options, but with more than 300 free layout packs available, chances are very high you’ll find something to your liking. Using a premade layout doesn’t mean you have to stick with that design entirely. Rather, it’s a great opportunity to save time while tweaking existing elements until you get to your desired outcome.

    You can use Divi AI to create your page from scratch, or modify existing content. In this tutorial, we’ll pick the latter. We want to go from nothing to the end result as quickly as possible!

    Subscribe To Our Youtube Channel

    Step 1: Create a New Page

    Start by going to the backend of your WordPress website. Once there, navigate to your pages, and create a new page.

    Build a Homepage Divi AI

    Give your page a title and switch over to Divi’s Visual Builder.

    Build a Homepage Divi AI

    Step 2: Upload a Layout to Your Page

    As mentioned before, we’re going to create a new page using a premade layout, so click on Browse Layouts.

    Build a Homepage Divi AI

    For this tutorial, I’ve picked out the homepage from the Coaching Layout Pack. Once you’ve selected the layout, click on the Upload This Layout button.

    Build a Homepage Divi AI

    There is a lot of lorum ipsum text on the page, that we’ll replace. We’ll also create some new variations of the images used throughout this layout. All of this is made possible with Divi AI! Previously, you had to hire a copywriter and purchase stock images, but you can now use Divi AI to fulfill those needs.

    Step 3: Generating Copy Using Divi AI

    Now that we’ve uploaded the layout to our page, we can start focusing on the copy! We’ll use Divi Text AI to generate our copy, which makes it really easy to get your website up and running as quickly as possible. Let’s explore some of the features that come with Divi Text AI and how you can use them.

    Rework Existing Copy or Create New Copy Altogether

    There are two key ways to generate copy in Divi AI:

    1. Reworking existing copy
    2. Creating new copy

    Depending on how much influence you want to have on the copy, you can pick either one of these options.

    Understanding the Divi Text AI Interface

    Divi Text AI is very straightforward. Let’s take a look at some things you can do with it.

    Write with AI

    If you want to write with Divi, you can choose to automatically generate copy. This option takes into account your website’s and page’s information.

    Build a Homepage Divi AI Build a Homepage Divi AI

    You can also get more precise with Divi AI. If you hover over the content box, you’ll see a Divi AI icon appear. Click on this icon.

    Build a Homepage Divi AI

    Continue by clicking on Write With AI.

    Build a Homepage Divi AI

    Writing With AI allows you to choose the content type and gives you the option to select the context. If you click on the Guide Me option, you’ll see many more options appear.

    Build a Homepage Divi AI

    You can tweak these options however you see fit.

    Build a Homepage Divi AI

    If you don’t like the outcome, you can always click the Retry button to give it another shot!

    Build a Homepage Divi AI

    Build a Homepage Divi AI

    Improve with AI

    If you already have some copy on your page, and you’re simply looking to improve it, that’s an option as well! Divi Text AI provides you with quite some options to improve your copy:

    • Write & replace
    • Make it better
    • Rephrase
    • Lengthen
    • Shorten
    • Simplify
    • & More

    Build a Homepage Divi AI

    H1 Title Prompt Example

    Now that we’ve gone through some of the main settings in Divi Text AI, let’s generate a new H1 title for our homepage. Using the auto-generate option, we get the following result:

    Build a Homepage Divi AI

    Repeat Steps for All Copy Throughout the Page

    You can generate copy for every text field on your page, so go ahead and either write the remaining titles and paragraphs on your page. Here’s how we approached changing the paragraph content right below the title, for instance:

    Build a Homepage Divi AI

    Build a Homepage Divi AI

    This gave us the following result, great! But now we want it shorter.

    Build a Homepage Divi AI

    And just like that, we have new copy throughout our hero section! You can repeat the same steps throughout your page to replace all the copy.

    Build a Homepage Divi AI

    Build a Homepage Divi AI

    Step 4: Generating Images Using Divi AI

    Divi AI doesn’t only focus on copy, it allows you to generate images as well! This allows you to create a unique-looking page without having to hire a photographer or spend money on stock images.

    Rework Existing Image or Create New Image Altogether

    Similar to Divi Text AI, you get two options to create images with AI in Divi:

    1. Improving an existing image
    2. Generating a new image

    You can also use an existing image as inspiration for a new prompt. This will inform the AI algorithm about the image look and feel you want to achieve.

    Understanding the Divi Image AI Interface

    Divi Image AI is very intuitive, but to help make things easier, we’ll quickly go over some of the most noticeable settings this feature has.

    Image Styles

    Divi Image AI comes with a handful of different image styles. Photo is the most obvious one, but there are other interesting image styles such as Digital Painting, Drawing, Vector, and more. You can turn an existing image or a new prompt into these styles.

    Build a Homepage Divi AI

    Generate Image with AI

    To generate an image, hover the image box and click the Divi AI icon. Then, select Generate Image.

    Build a Homepage Divi AI

    Here, you can add an image description and choose the aspect ratio of your image. Let’s try something out.

    Build a Homepage Divi AI

    Build a Homepage Divi AI

    Build a Homepage Divi AI

    Improve Image with AI

    To improve an image, click on the Divi AI icon again. Then, click on Improve Image.

    Build a Homepage Divi AI

    We’ll use our previous image as a reference image, but we’ll ask Divi AI to make a variation of it during winter.

    Build a Homepage Divi AI

    Just what we wanted!

    Hero Image Prompt Example

    Let’s go through some other prompts and the outcomes.

    A woman running in a field of white flowers with her hair in the wind, photo from the back

    Build a Homepage Divi AI

    Build a Homepage Divi AI

    A flower blooming during a sunny day

    Build a Homepage Divi AI

    Let’s generate more variations of the image in the bottom-right corner!

    Build a Homepage Divi AI

    Build a Homepage Divi AI

    A hot air balloon on a sunny day

    Build a Homepage Divi AI

    Build a Homepage Divi AI

    Repeat Steps for Images Throughout the Page

    You don’t have to change everything on the page to make it unique, but you’re free to use Divi AI as many times as you want. You can get really creative, and mastering the prompts you give is really key!

    Step 5: Publish Page!

    Once you’ve polished your homepage, the only thing left to do is publish your homepage! Once you get the hang of Divi AI, you’ll find that it’s really easy to build out the rest of your website’s pages too.

    Build a Homepage Divi AI

    Divi AI Makes Your Workflow Way Faster!

    Divi AI is the web design assistant you need! Not only does it help you work faster, it also helps provide multiple variations of the same design, making it easier to find your ideal outcome. If you’re signed up for Divi AI yet, take the opportunity to sign up today and enjoy the unlimited prompts you can enter! We hope you’ve enjoyed this tutorial, let us know if you have any questions in the comments and we’ll see you tomorrow for another Divi AI tutorial!

    Get 40% Off Divi AI During Our Introductory Sale!

    For the next week, we are offering 40% off Divi AI. Anyone who purchases Divi AI before the sale sends will save $115 per year and lock in those savings for life! Plus, all of your team members can use Divi AI at no additional cost. Get the discount here 👇

    The post Building a Homepage With Divi AI From Start to Finish appeared first on Elegant Themes Blog.

  • How to Use Divi AI: Everything You Need to Know

    With the exciting new release of Divi AI, many users are already testing out the powerful features and exploring the possibilities. More accurately, they are probably having a blast generating stunning works of art and giving their website a fresh makeover with new images and professional copy. But as you get started with Divi AI, you will no doubt have tons of questions about what it is and how to use it. In this post, we’ll cover what you need to know about Divi AI and how to start using Divi AI on your own website.

    By the way, to celebrate the launch of Divi AI we are offering a 40% off introductory discount for one week. Now’s the time to lock in those savings forever!

    What Divi AI Can Do: A Brief Overview

    If you haven’t already heard about Divi AI, here is a quick sneak peek at just a few of the things you can do with Divi AI:

    • Generate Content On-Brand and In-Context with Your Current Website. Divi learns about your website content so that it can continually improve. This allows it to produce content relevant to your brand and voice.
    • Generate Images Automatically in Seconds based on what it already knows about your website and page content.
    • Refine Your Images with Prompts and Quick Actions. Tweak and modify images with Divi AI as needed using additional prompts and quick action buttons.
    • Generate Text Content Automatically and Edit it Like a Pro. Divi AI can help you write website copy and entire blog posts like a professional
    • And so much more

    Get Divi AI

    What Makes Divi AI Unique?

    Using external third-party AI tools like Jasper, Chat-GPT, or Midjourney to generate content for your site can be difficult. It requires complex prompts and guesswork to ensure your content is specific to your website brand. Divi AI bridges the gap by giving you access to a powerful AI assistant that understands your existing content already. With Divi AI as your assistant, you can get the results you need quickly and easily. Some of its most unique features allow users to do the following:

    • Generate content for your website in the appropriate context. Divi AI analyzes and understands your existing website data so you can auto-generate content specific to your website brand. If your website is an interior design company, Divi will be able to generate images and text specific to your interior design company.
    • Make Suggestions for New Content. If you’re not sure what to write next or what image to add to a section of your page, Divi AI can help. Because Divi understands the content of your page, it can prompt itself and give you suggestions!
    • Accessible within the Visual Builder and Divi Modules. With Divi AI, you can generate AI content right inside Divi’s Visual Builder in real time. This allows you to generate AI text and images on the fly when designing your page, making it a more convenient solution than having to jump back and forth using other third-party AI tools.
    • Easy-to-use prompts and Quick Actions. Divi takes the grunt work out of prompting AI to generate content that actually fits your website. You can write detailed prompts or have Divi AI generate suggested prompts for you.
    • One-Click AI Content Generation for Divi websites. You don’t even need to prompt Divi AI to generate content for your website. You can choose to generate text or images automatically. You can even generate entire modules filled with content in one click.

    For more, check out all the amazing features of Divi AI

    Getting Started With Divi AI

    How to Get a Divi AI Subscription

    If you are new to Divi, you will first need to purchase a Divi membership before you can get access to Divi AI. Once a member, you can sign up for unlimited access to Divi AI. To sign up, go to the Divi AI landing page and click the green sign up button inside the Get Divi AI box.

    If you are already a Divi user, simply visit the Divi AI landing page to sign up for unlimited access to Divi AI.

    Every Divi user has access to Divi AI with a limited free trial. All you need to do is make sure you are using the most recent version of Divi. The free trial allows you to use Divi AI 100~ times. After that, you will need to upgrade to a paid version to have unlimited usage of Divi AI. You can upgrade at anytime using the button at the top the Divi AI Generator modal.

    For more, check out Divi AI pricing.

    Subscribe To Our Youtube Channel

    How to Access Divi AI in the Divi Builder

    Divi AI is already built-in to the Divi Builder. Once you are signed up for Divi AI, there is nothing for you to install or activate in order to enjoy the benefits of Divi AI. Currently, Divi AI can be accessed everywhere you can add text or images in the Divi Builder. That means Divi AI can be used on any Divi element (section, row, column, etc.) or Divi Module (text, image, blurb, etc.) that supports text input or image uploads. You can deploy the Divi AI generator by hovering over an input box and clicking on the Divi AI button that pops up in the top right of the input box.


    Some modules will include an “Auto Generate Text with AI” button at the top of the module’s content options. This allows you to auto-generate all the text input areas available for a certain module (text, body, button, etc.).

    For example, if you are using a blurb module, you can click “Auto Generate Text with AI” to generate content for the Title and Body area of the module with a single click.

    Or you can choose to deploy the Divi AI text generator for each one by clicking the Divi AI button within each of the input areas individually.

    Since this is a blurb module, you also have the ability to generate an image with Divi AI. Under the Image & Icon option group, hover over the image input box, and click the Divi AI options button. You will have the option to generate the image automatically or by using the Divi Image Generator Options modal.

    Because Divi Builder structural elements (sections, rows, and columns) allow you to add background images, you can access the Divi AI image generator under the background image option tab.

    What Divi AI Learns About Your Website to Generate Contextual Content

    As mentioned already, Divi AI understands your website automatically. This allows it to generate on-brand results in context based on the existing data and content of your website. So, it is important to understand what information is needed to allow Divi AI to work its magic. In general, you can expect Divi AI to account for your website or company information (Website Title, Tagline) as well as page content and the content within modules.

    Divi AI Evaluates Your Website Information from the Start

    So let’s say you have a website with the title “Divi Interior Design,” and the tagline reads “Elegant Interior Design for Your Home or Business.” This information can be found by going to the WordPress Dashboard under Settings > General.

    Then you can create a new page and deploy the Divi Builder.

    To get an idea of what Divi AI already knows, all I have to do is create a text module and click the “Auto Generate Text with AI” button. This will create content specific to the context of your website information on the page. The content will likely include the title of your website and additional content based on the tagline (what your company does). This is perfect for kickstarting the copy of a home page.

    And, if we use an image module to generate an image with Divi AI automatically, we get results of interior design photos that are consistent with my website info.

    Of course, that is just the tip of the iceberg. As you build your website, Divi AI will have more information available to generate more contextual content in more specific instances.

    Divi Evaluates Page Content to Generate Content for Entire Modules

    Not only will Divi AI evaluate your basic website information, it will also analyze the content (and context) of your page, allowing you to generate even more on-brand results as you as you build. The more content you have and the more you use Divi AI on your pages, the better Divi AI will be able to generate accurate results.

    For example, by the time you reach the end of your building your page, you will be able to generate the content for an entire Email Opt-in Module in a single click!

    Now that we have a good idea of what Divi AI knows and what it can do, let’s go into a more detail on how you can use it on your website.

    How to Use Divi AI for Images

    Divi Image AI is based off of the Stable Diffusion model for generating AI images based on prompts. But what makes Divi AI special is that it is specifically built for Divi, giving you access to a powerful Divi AI assistant for generating image specifically for your website. The options for generating AI images are seamlessly integrated into the Divi builder, making it easier than ever to get the results you need.

    How to Generate a New Image with Divi AI

    You can generate new images with Divi AI using any Divi element or module that supports image content. For this example, we are going to use an image module. Once you add the image module to the page, hover over the image upload input box and click the Divi AI Options button. Once clicked, you can choose “Generate with AI” or “Generate Automatically.”

    If you choose “Generate Automatically,” Divi AI will generate an image based on the context of your website information. For example, if your website is titled “Divi Family Dentistry,” Divi AI will generate images related to dentistry, like a picture of a dentist’s office.

    For more targeted results, you’ll want to choose “Generate with AI.” This brings up the Divi AI image generator modal, where you can tell Divi AI exactly the kind of image you want. For starters, you can provide a simple text prompt in the Image Description like “a portrait of a female hygienist, blue scrubs, portrait lens.”

    This should give you some great options to choose from. You can then select and use and image that you like. Plus, you can generate more images to find the one you want. Or, you can modify the image with built-in options to generate new results.

    Understanding The Divi AI Image Generator Options

    The Divi AI Image Generator Options include the following:

    • Image Style
    • Image Description
    • Reference Image (optional)
    • Aspect Ratio
    • Size

    Using these options, you can create pretty much any image you can imagine with the power of Divi AI.

    Here is a brief overview of each of the options at your disposal.

    Image Style

    You can choose from 12 different image styles when generating your AI image. These include:

    • Photo (default)
    • Digital Painting
    • Concept Art
    • Vector Graphic
    • 3D Render
    • Drawing
    • Abstract Art
    • Comic Book
    • Water Color
    • Painting
    • Anime
    • Cartoon

    This gives you a wide range of creative style options to create images for any type of design or website.

    Image Description

    The image description is where you can add a text prompt that describes the image you want to create. The trick here is to be both concise and descriptive. Finding the right prompts may take a few tries to get the results you are looking for, but it can be fun to experiment with different prompts to achieve magical results.

    Reference Image

    The reference image option allows you to upload an image that Divi AI can use as a style reference. So, if you like the overall feel and style of a certain image, you can upload the image as a reference and then use the image description to make a completely new image based on that reference image.

    Furthermore, you can adjust how much you want the reference image to impact your description (and vice versa) by adjusting the Reference Image Influence dial.

    The new results can be quite magical.

    Aspect Ratio

    You can adjust the aspect ratio of your image by selecting one of the following options:

    • Square (1:1)
    • Landscape (8:5)
    • Portrait (3:4)
    • Custom Size

    This is a convenient way to make sure your image will align with common dimensions used for web design and other custom layouts on your page. For example, if you are looking for a fullwidth image to use for a background, you may want to use “Landscape”, but if you are looking for an image for blurb module, you may want to use “square.” Choosing to use a custom size will allow you to designate the exact dimensions you want for an image. This is a powerful tool for web designers who want to find unique images with the exact dimensions and resolution they need.

    Size

    Once you select an aspect ratio for your Divi AI image, you can use the size option to adjust or scale the image size while keeping the aspect ratio in place. Of course, if you choose Custom Size, you can adjust both the width and height options independently.

    NOTE: If you are using a reference image, the dimensions of that image will be used when generating a new image with Divi AI.

    Improving AI Images and Using Quick Actions

    You can improve any existing image in Divi using Divi AI. In fact, some of the best results can come from improving images that you already generated by Divi AI. To improve an existing image with Divi AI, click the Divi AI options button when hovering over an image already loaded inside the Image Upload input box. This will bring up a drop down menu with additional options and quick actions including:

    • Generate with AI
    • Improve with AI
    • Generate and Replace (quick action)
    • Reimagine (quick action)
    • Change Style (quick action)

    Choosing the Generate with AI option will allow you to start the AI image generation from scratch. But choosing the “Improve with AI” option will load the AI image generator module with the current image used as the reference image. This will allow you to make adjustments using the current image as a reference (as discussed previously). The “Generate and Replace” quick action option is basically another way to generate a new image automatically without using the current image as a reference.

    Example Use Case: Using the Reimagine Quick Action to Improve an Image

    One of the most useful quick action options for an existing image is the “Reimagine” option. This can transform regular images into magical works of art in a single click.

    Here is an example use case of of combining the “Reimagine” quick option on an existing image and then improving it with a simple prompt with Divi AI.

    First, choose the “Reimagine” option for the existing image Divi AI Options.

    Then choose the best image from the suggestions given by Divi AI.

    After that, choose “Improve With AI” for the new image.

    And add a short description to add a minor change to the image. In this case, I’m using the description “with dark orange pillows”. Then click the generate button and choose your favorite result from the suggested images.

    Now look at the new image that matches the color theme of current layout.

    The result is quite magical!

    How to Use Divi AI for Text

    With Divi Text AI, you can generate any type of text content you need for your website. It truly is a powerful AI writer for your Divi website. Because Divi AI understands your existing content, you can generate content in the context of your website or page. This allows you to keep your copy on brand and write like a professional so you don’t have to hire one.

    Let’s jump into the basics of how to get started with Divi Text AI.

    How to Generate Text for Your Website Automatically

    To generate text for you site with Divi AI, you can use any module that supports text input. For this example, we are going to use a blurb module. This module allows you to add text for a Title and a Body paragraph. You’ll notice a large button at the top of the content options that allows you to “Auto-Generate Text With AI.”

    Clicking this will allow Divi AI to automatically fill the Title and Body text input boxes. Since my current website is an interior design company, Divi AI will suggest content related to my website information. And since the blurb module also includes an image, it will generate an image automatically as well!

    You can always hover over any individual text input field and click on the Divi AI Option button. Once clicked, you can choose “Write with AI ” or “Write Automatically.”

    If you choose “Write Automatically,” Divi AI will generate an text based on the context of your website information the current field type. For example, if it is a Title input field, Divi AI will automatically generate a suggest title.

    The results will be similar to using the one-click Auto-generate button for the entire module, only this option auto-generates content for text fields individually.

    Using The Divi AI Text Generator to Write Content

    If you want more control over the content that is generated, you’ll want to choose “Write with AI.” This brings up the Divi AI Text generator modal, where you can tell Divi AI exactly the kind of content you want.

    Divi AI Text Generator Options

    Inside the Divi AI Text generator modal, you’ll find helpful options that allow you to prompt Divi AI for more specific results. The main top 3 options include the following:

    • Content Type:  You can select the type of content you are writing to give Divi AI a better idea of what to generate. The content types supported include Paragraph, Title, Button, Blog Post, Social Media Post, and more.
    • What are you Writing About?: This is the main text prompt area where you can describe the content you want Divi AI to generate. Also, if you are not sure what prompt to use. Let Divi AI make a suggestion! Simply click the Divi AI button inside the field to see a suggested prompt to use.
    • Added Context: Because Divi AI can evaluate your existing page content when generating new text, you can choose the level of additional context you want Divi AI use to create relevant content. If you want to supply Divi AI with the entire page content as context when generating text, you can select “This Page Content” for the Added Context option. You can also choose to supply Divi AI with context limited to the section content, the module content, or you can choose to supply Divi AI with no context.


    Additional “Guide Me” Options

    Under the Guide Me toggle options, you’ll find even more granular options for generating text with AI. This options allow you to select the following prompts:

    • Tone of Voice  – This is great for branding. Tell Divi AI what tone of voice to use when writing the content.
    • Must Use Keywords – This allows you to add all the keywords you want to be included in the content that is generated. This is great for SEO, giving you a jumpstart on optimizing content with keywords that help you rank higher in search results.
    • Content Length – This specifies how long or short you want the content to be.
    • Language – Here you can the language you want Divi AI to write in. Divi can write in over 26 languages.

    Example Use Case: Writing a Blog Post

    For a example, let’s say we want to write content for a blog post. Using the Divi AI text generator, I could add the following options:

    • Content Type: Blog Post
    • What are you Writing About?: “Write a blog post on the most popular interior design styles”
    • Added Context: no context
    • Tone of Voice: Informative
    • Must Use Keywords: “interior design, minimalist design, interior design styles, contemporary”
    • Content Length: about 1000 words

    Then simply click “Generate Text” to have a huge jumpstart on a brand new blog post in seconds.

    Once the content is generated, you can generate another version by clicking “Retry” or you can select the “Improve With AI” toggle to make adjustments with ease.

    Revising and Editing Your Text with AI Quick Actions

    Divi AI has a ton of handy built-in options for improving your content. To do this, hover over the text input field with the text you want to revise, and click the Divi AI button.

    This will bring up a list of options and quick actions to choose from.

    With a click of a button, you can fix grammatical mistakes and make content shorter, more engaging, targeted to experts, and more. This will allow you to edit and improve your copy like a pro!

    Wrapping Up

    Divi AI is a beast of an AI assistant for design Divi websites. And the more you use Divi AI for your website, the better it gets. We hope this guide has helped you understand the true potential of Divi AI. And we hope it will help you creating amazing content for your own website.

    We know you probably still have tons of questions about Divi AI that wasn’t able to make it in this post. But don’t worry. We have plenty more tutorials on Divi AI coming your way. So stay tuned for more!

    Get 40% Off Divi AI During Our Introductory Sale!

    For the next week, we are offering 40% off Divi AI. Anyone who purchases Divi AI before the sale sends will save $115 per year and lock in those savings for life! Plus, all of your team members can use Divi AI at no additional cost. Get the discount here 👇

    The post How to Use Divi AI: Everything You Need to Know appeared first on Elegant Themes Blog.

  • How to Add Labels Above the Fields in Divi’s Contact Form Module

    The Divi Contact Form Module makes it easy for website visitors to get in touch with you and for you to collect information from your visitors.

    By default, the Divi Contact Form Module field labels are displayed inside the input fields. However, sometimes, you might want to display the labels above the contact form fields. In this tutorial, we’ll show you how to accomplish that with a little bit of CSS.

    What We’ll Accomplish

    Our goal today is to go from this:

    To this:

    Let’s get to work!

    How to Add Labels Above the Fields in Divi’s Contact Form Module

    For this demonstration, we will use the Contact page design from the Free Whiskey Distillery Layout Pack. If you’re unfamiliar with how to load premade layout packs, check out this blog post: How to Use a Premade Layout Pack on Your Divi Website.

    There are two ways we can input custom CSS on your Divi website: via the Theme Customizer, which will affect all contact forms across your website, or per page in the page’s settings which will affect individual contact forms. First, we’ll try the per-page method, and then I’ll show you how to add the CSS globally.

    Navigate to Your Page

    First, navigate to your contact form page and enable the Visual Builder.

    Expand the Divi toolbar at the bottom of the page and click the gear icon to bring up the page’s settings. Then navigate to Advanced > Custom CSS and copy and paste the CSS code.

    This is the CSS code you’ll have to copy and paste into the Custom CSS box:

    /* Displays titles above the fields */
    .et_pb_contact_form_label {
        display: block;
    }
    
    /* Hides placeholder text */
    .et_pb_contact_form_container .input::placeholder {
        color: transparent;
    }
    
    /* Hides duplicate titles on checkboxes and radios */
    .et_pb_contact_field_options_title {
        display: none;
    }

    Here’s what we got so far. You’ll notice that our font styling doesn’t carry over, and there is now a duplicate title above the dropdown field.

    So to fix that, we’ll add some font styling CSS to the code and a few more lines of code to remove the duplicate title above the dropdown field.

    Here’s the updated final code:

    /* Displays titles above the fields */
    .et_pb_contact_form_label {
        display: block;
        font-family: 'Playfair Display';
        color: #E7E2BC;
        font-size: 15pt;
        font-style: italic;
        margin-bottom: 15px;
    }
    
    /* Hides placeholder text */
    .et_pb_contact_form_container .input::placeholder {
        color: transparent;
    }
    
    /* Hides duplicate titles on checkboxes and radios */
    .et_pb_contact_field_options_title {
        display: none;
    }
    
    
    /* Remove title above dropdown */
    .et_pb_contact_field[data-type=select] .et_pb_contact_form_label {
        display: none;
    }

    And here is the final result!

    Doing This Globally

    Adding the code globally will affect all contact forms on your website. If you want the changes to apply to a specific contact form only, you’ll need to add a CSS ID to the module in the advanced tab. After doing so, place the “#” + your CSS ID in front of every CSS class you’re targeting in the code.

    There are three places you can add the CSS code to take effect globally. To your child theme’s style.css stylesheet:

    Or the Custom CSS block in Divi > Theme Options:

    Or to the Theme Customizer:

    And that’s it!

    More Resources

    There are so many ways you can style the contact form module to make it all your own. Check out these other tutorials on the contact form to get started!

    The post How to Add Labels Above the Fields in Divi’s Contact Form Module appeared first on Elegant Themes Blog.

  • How to Add a Sticky Map Module to Your Divi Page

    Divi’s built-in sticky settings allow you to keep an element “sticky” or fixed on the screen while you scroll down the page. When combined with other non-sticky elements, you can achieve an eye-catching and engaging layout to bring your website design to the next level. In this tutorial, we will show you how to add a sticky map module to your Divi page. We’ll keep the map module sticky and add relevant information to scroll alongside the map.

    Without further ado, let’s get started!

    Sneak Peek

    Here is a preview of what we will design

    Divi Add Sticky Map Module Final Result Mobile

    What You Need to Get Started

    Before we begin, install and activate the Divi Theme and make sure you have the latest version of Divi on your website.

    Now, you are ready to start!

    How to Add a Sticky Map Module to Your Divi Page

    Create a New Page with a Premade Layout

    Let’s start by using a premade layout from the Divi library. For this design, we will use the Craft School Landing Page from the Craft School Layout Pack.

    Add a new page to your website and give it a title, then select the option to Use Divi Builder.

    Divi Add Sticky Map Module Use Builder

    We will use a premade layout from the Divi library for this example, so select Browse Layouts.

    Divi Add Sticky Map Module Browse Layouts

    Search for and select the Craft School Landing Page.

    Divi Add Sticky Map Module Find Layout

    Select Use This Layout to add the layout to your page.

    Divi Add Sticky Map Module Use Layout

    Now we are ready to build our design.

    Modifying the Layout for the Sticky Map Module

    Sign Up CTA

    Scroll to the “Studio Memberships” section of the page. Then, add a new section below.

    Divi Add Sticky Map Module Insert Section

    Open the section settings and add a background color.

    • Background: #fcf8f3

    Divi Add Sticky Map Module Background

    Next, move the “Call or Join Online” row to this new section.

    Divi Add Sticky Map Module Move Row

    Open the row settings and navigate to the Advanced tab. Under the Position settings, change the position from Absolute to Default.

    • Position: Default

    Divi Add Sticky Map Module Position

    “Come Visit the Studio” Section

    Add a new row with two columns below the Studio Memberships section.

    Divi Add Sticky Map Module Insert Row

    Then, move that row above the Studio Memberships section.

    Divi Add Sticky Map Module Move Row

    Heading Settings

    Add a text module to the right column.

    Divi Add Sticky Map Module Insert Text

    Add the text.

    • H2: Come Visit The Studio!

    Divi Add Sticky Map Module Add Text

    Next, navigate to the Design tab and open the heading text settings. Customize the font as follows:

    • Heading 2 Font: Yusei Magic

    Divi Add Sticky Map Module Font

    Then, customize the font size and line height. Use the built-in responsive options to add different text sizes for tablet and mobile devices.

    • Heading 2 Text Size Desktop: 50px
    • Heading 2 Text Size Tablet: 30px
    • Heading 2 Text Size Mobile: 24px
    • Heading 2 Line Height: 1.2 em

    Divi Add Sticky Map Module Heading Size

    Text Settings

    Add another text module below the “Come Visit The Studio” text.

    Divi Add Sticky Map Module Add Text

    Insert the following text.

    • H3: Address
    • Paragraph: 1234 Divi St. #1000 San Francisco, CA 33945

    Divi Add Sticky Map Module Address Text

    Under the Design tab, modify the text styles.

    • Text Font: Open Sans
    • Text Size Desktop: 16px
    • Text Size Tablet: 15px
    • Text Size Mobile: 13px

    Divi Add Sticky Map Module Text Font

    Then, modify the heading styles.

    • Heading 3 Font: Open Sans
    • Heading 3 Font Weight: Bold
    • Heading 3 Font Style: Capitalized (TT)

    Divi Add Sticky Map Module H3 Font

    Next, modify the text size and letter spacing. Once again, use the responsive settings to set different text sizes for different screen sizes.

    • Heading 3 Text Size Desktop: 14px
    • Heading 3 Text Size Tablet: 13px
    • Heading 3 Text Size Mobile: 12px
    • Heading 3 Letter Spacing: 3px

    Divi Add Sticky Map Module H3 Size

    Add another text module below the address module.

    Then, add the following content to the body:

    • Body: Lorem ipsum dolor sit amet, consectetur adipiscing elit. Mauris blandit aliquet elit, eget tincidunt nibh pulvinar a. Curabitur arcu erat, accumsan id imperdiet et, porttitor at sem. Vestibulum ac diam sit amet quam vehicula elementum sed sit amet dui. Praesent sapien massa, convallis a pellentesque nec, egestas non nisi. Curabitur non nulla sit amet nisl tempus convallis quis ac lectus. Donec rutrum congue leo eget malesuada. Donec rutrum congue leo eget malesuada. Donec sollicitudin molestie malesuada. Curabitur aliquet quam id dui posuere blandit.

    Divi Add Sticky Map Module Add Text

    Move over to the design tab and customize the font.

    • Text Font: Open Sans

    Divi Add Sticky Map Module Font Settings

    Then, customize the text size and line height.

    • Text Size Desktop: 15px
    • Text Size Mobile: 13px
    • Text Line Height: 1.9em

    Divi Add Sticky Map Module Text Size

    Button Settings

    Add a button module to the section, below the text we added.

    Divi Add Sticky Map Module Add Button

    Set the button text to “learn more”.

    • Button: Learn More

    Divi Add Sticky Map Module Buttons Text

    Next, move to the design tab and open the button settings. Enable custom styles.

    • Use Custom Styles For Button: Yes
    • Button Text Size: 12px
    • Button Text Color: #FFFFFF

    Divi Add Sticky Map Module Custom Styles

    Customize the button background and border width.

    • Button Background: #d5b38e
    • Button Border Width: 0px

    Divi Add Sticky Map Module Button Background

    Modify the button border radius, letter spacing, and font.

    • Button Border Radius: 0px
    • Button Letter Spacing: 3px
    • Button Font: Open Sans
    • Button Font Weight: Bold
    • Button Font Style: Capitalized (TT)

    Divi Add Sticky Map Module Button Font

    Finally, add padding to the button.

    • Padding-Top: 15px
    • Padding-Bottom: 15px
    • Padding-Left: 30px
    • Padding-Right: 30px

    Divi Add Sticky Map Module Button Padding

    Studio Memberships Section

    Now we are going to modify the Studio Memberships section. First, change the row layout to two equal columns.

    Divi Add Sticky Map Module Row Layout

    Then, move the large image to the right column, above the “Studio Memberships” text module.

    Divi Add Sticky Map Module Move Image

    Scrolling Image Settings

    Move the small scrolling image of the pottery to the right column, above the large image we moved.

    Divi Add Sticky Map Module Move Image

    Open the module settings for the small image. Under the Sizing settings, use the responsive settings to set a different width for mobile devices.

    • Width-Mobile: 35%

    Under the Advanced tab, open the Position settings and add some horizontal offset. This allows the small image to hang over the side of the larger image, adding dimension and creating a more unique layout.

    • Horizontal Offset: -30px

    Divi Add Sticky Map Module Horizontal Offset

    Finally, open the scroll effects and adjust the ending offset for the vertical motion.

    • Ending Offset: -1

    Divi Add Sticky Map Module Ending Offset

    Studio Memberships Text

    Open the Studio Memberships text module settings. Remove the background from the module.

    Divi Add Sticky Map Module Remove Background

    Then, open the row settings and open the column 2 settings.

    Divi Add Sticky Map Module Column 2 Settings

    Under the Spacing settings in the Design tab, remove the existing bottom padding.

    Divi Add Sticky Map Module Remove Padding

    Section Background

    Open the section settings. Under the background settings, add a background image. Select craft-school-24.png from your media library.

    Divi Add Sticky Map Module Add Background Image

    Add the Sticky Map Module

    Now that our layout has been modified, we can add the sticky map module. The map module will be in the left column and stay in place as you scroll through the content on the right. Let’s get started.

    First, add a map module to the left column of the “Come Visit The Studio” row.

    Divi Add Sticky Map Module Add Map Module

    Open the map settings and add a map center address. For this tutorial, we will center the map on San Fransisco, CA.

    Divi Add Sticky Map Module Map Center Address

    Then, add a pin to the map. We will also set this to San Fransisco, CA.

    Divi Add Sticky Map Module Map Pin

    Map Design

    Under the design tab, open the map settings. You can use these settings to completely customize the way your map appears. For this tutorial, we want the map to match the muted colors of this page, so we will modify the map saturation.

    • Map Saturation: 56%

    Divi Add Sticky Map Module Map Saturation

    Next, open the border settings and customize the border as follows:

    • Border Width: 20px
    • Border Color: #fcf8f3

    Divi Add Sticky Map Module Border Settings


    Open the Box Shadow settings and add a shadow to the map module.

    • Box Shadow: Below

    Divi Add Sticky Map Module Box Shadow

    Sticky Settings

    Now let’s add the sticky settings so the map sticks in place while you scroll. Move over to the Advanced tab and open the Scroll Effects Settings. Use responsive options to modify the sticky position settings, as the map will not be sticky on mobile devices.

    • Sticky Position Desktop: Stick to Top
    • Sticky Position Tablet and Mobile: Do Not Stick
    • Sticky Top Offset: 20px
    • Bottom Sticky Limit: Section

    Divi Add Sticky Map Module Scroll Effects

    Now go back to the Design tab and open the sizing settings. We want the map height to increase when it is in the sticky state. Use the sticky settings to set a different height.

    • Height when Sticky: 600px

    Divi Add Sticky Map Module Height

    Finally, use the responsive settings to change the map size on tablet and mobile.

    • Height Tablet and Mobile: 350px

    Divi Add Sticky Map Module Mobile Height

    Final Result

    Now let’s take a look at our sticky map module in action.

    Divi Add Sticky Map Module Final Result Mobile

    Final Thoughts

    Divi’s sticky settings allow you to create dynamic website layouts that draw your eye with the movement. With all of the customization options available, you can make any element on your website sticky and modify the design exactly to your liking. By making the map module sticky in this design, we highlight the location information for the website and add a unique design element to the page. For more tutorials on Divi’s sticky settings, check out this article on adding a sticky contact form to your page. Do you use sticky elements on your website? We would love to hear from you in the comments!

    The post How to Add a Sticky Map Module to Your Divi Page appeared first on Elegant Themes Blog.

  • How to Create Gradient Dividers with Divi’s Divider Module

    Divi’s Divider Module provides several methods to create interesting dividers. One of the most interesting and unique is the ability to create gradient dividers. In this post, we’ll discuss how to create gradient dividers with the Divi Divider Module. We’ll look at how the gradient dividers work and see three examples to help you create your own.

    Let’s get started!

    Preview

    Desktop Gradient Divider Example One

    Desktop Gradient Divider Example One

    Phone Gradient Divider Example One

    Phone Gradient Divider Example One

    Desktop Gradient Divider Example Two

    Desktop Gradient Divider Example Two

    Phone Gradient Divider Example Two

    Phone Gradient Divider Example Two

    Desktop Gradient Divider Example Three

    Desktop Gradient Divider Example Three

    Phone Gradient Divider Example Three

    Phone Gradient Divider Example Three

    How to Create Gradient Dividers with Divi’s Divider Module

    There are several ways to create a divider with Divi’s Divider Module. By default, the module displays a divider line. We can disable this and use the module’s Background settings to create a divider that we can style with the module’s Background options. This includes colors, gradients, images, etc. Rather than showing the divider, we’ll style the divider’s container and create a styled divider.

    Hide Divider

    The process is simple. First, add a Divider Module to your layout and then hide the divider in the content tab.

    How to Create Gradient Dividers with Divi’s Divider Module

    Divider Background

    Next, select the type of background you’d like to display in the Background settings in the Content tab. For this post, we’ll focus on the Background Gradient settings.

    How to Create Gradient Dividers with Divi’s Divider Module

    Add Sizing and Spacing

    Use the Sizing and Spacing options in the Design tab to control the height and width of the divider’s container to create a styled divider in just about any size or shape. Utilize width and height, max width and max height, module alignment, and top and bottom padding to create the size you want.

    How to Create Gradient Dividers with Divi’s Divider Module

    Add Border Radius

    Add Border options, such as Border Radius, to further style the shape. You can adjust the corners together or independently to create interesting shapes. You can also add Border Width, Styles, etc., to create a unique design.

    How to Create Gradient Dividers with Divi’s Divider Module

    Gradient Divider Examples

    Now, let’s create three gradient dividers using the concepts we just discussed.

    Gradient Divider Example One

    For our first gradient divider, we’ll use the landing page from the free Home Baker Layout Pack that’s available within Divi. The artwork in this layout pack has strong dark outlines with sharp gradients, all in shades of brown. We’ll mimic this with our gradient using colors from the layout pack.

    For our first example, we’ll use the Divider Module that is already in place in the hero section. This one is simple, but it adds a lot visually.

    For reference, here’s the layout before we add the Divider Module.

    Gradient Divider Example One

    Visibility

    In the Divider Module’s Visibility settings, select No for Show Divider.

    • Show Divider: No

    Gradient Divider Example One

    Gradient

    Scroll down to Background and select the Background Gradient tab. For this one, we’ll add five Gradient Stops. We’ll leave the rest of the gradient settings at their defaults. Here are the settings for each Gradient Stop.

    Set the first Gradient Stop to 0px and its Color to #dcc087.

    • First Gradient Stop: 0px, #dcc087

    Gradient Divider Example One

    Place the second Gradient Stop at 16px and its Color to #e6b060.

    • Second Gradient Stop: 16px, #e6b060

    Gradient Divider Example One

    Place the third Gradient Stop at 22px and its Color to #f19d33.

    • Third Gradient Stop: 22px, #f19d33

    Gradient Divider Example One

    The fourth Gradient Stop almost sits on top of the third Gradient Stop. Place it at 31px and set its Color to #f49826.

    • Fourth Gradient Stop: 31px, #f49826

    Gradient Divider Example One

    Set the last Gradient Stop at 48px and its Color to #3b261e.

    • Fifth Gradient Stop: 48px, #3b261e

    Gradient Divider Example One

    Change the Gradient Unit to Pixels. We now have the colors we’re looking for. Now, we just need to optimize the size.

    • Gradient Unit: Pixels

    Gradient Divider Example One

    Sizing

    Next, go to the Design tab. Under Sizing, set the Width to 100%. Set the Height to 40px for all three device sizes. Close the module and save your settings.

    • Width: 100%
    • Height: 40px

    Gradient Divider Example One

    Gradient Divider Example Two

    For our second gradient divider, we’ll use the landing page from the free Online Course Layout Pack that’s available within Divi. This one includes lots of rounded edges and even has a circle with a gradient that overlaps an image.

    We’ll use this as our starting point for the design and create a new gradient divider. We’ll add a new Divider Module to the Chapter 1 section just to add a graphic.

    For reference, here’s the layout before we add the Divider Module.

    Gradient Divider Example Two

    Right Column Spacing

    First, open the Column settings that contain a description of the first chapter. This is the Right Column in the Row. Go to the Design settings and scroll down to Spacing. Change the Top Padding from 100px to 50px.

    • Top Padding: 50px

    Gradient Divider Example Two

    Add a Divider Module

    Next, add a new Divider Module under the Button Module for the chapter description.

    Gradient Divider Example Two

    Visibility

    Open the Divider Module’s Visibility settings and select No for Show Divider.

    • Show Divider: No

    Gradient Divider Example Two

    Gradient

    Next, scroll down to Background and select the Background Gradient tab. This one has two Gradient Stops. Change the Gradient Direction to 145deg.

    • First Gradient Stop: 0px, #26ff5c
    • Second Gradient Stop: 100px, #2981b6
    • Gradient Direction: 145deg

    Gradient Divider Example Two

    Sizing

    Next, select the Design tab. Under Sizing, change the Width for desktops to 45%. Change tablets to 24vw and phones to 40vw. Change Module Alignment to Center. Set Height to 200px for all devices.

    • Width: 45% desktop, 24vw tablet, 40vw phone
    • Module Alignment: Center
    • Height: 200px

    Gradient Divider Example Two

    Border

    Next, scroll down to Border. We’ll create an arched shape that mimics the images in the layout. Change the Rounded Corners to 400px for the Left and Right Top and 0px for the Left and Right Bottom. Close the module and save your settings.

    • Rounded Corners top left, top right: 400px
    • Rounded Corners bottom left, bottom right: 0px

    Gradient Divider Example Two

    Gradient Divider Example Three

    For our third gradient divider, we’ll use the landing page from the free Podcaster Layout Pack that’s available within Divi. This one has lots of gradient shapes throughout the layout that are made with images and dividers.

    We’ll create a gradient divider with the design cues from those images and other elements. It will combine multiple gradients into one. Our divider will separate the featured episodes from the recent episodes.

    For reference, here’s the layout before we add the Divider Module.

    Gradient Divider Example Three

    New Row

    First, add a new Row above the title. This is where we’ll add the Divider Module.

    Gradient Divider Example Three

    Add Divider Module

    Next, add a Divider Module to the Row.

    Gradient Divider Example Three

    Visibility

    In the Visibility settings, select No for Show Divider.

    • Show Divider: No

    Gradient Divider Example Three

    Gradient

    Scroll down to Background and select the Background Gradient tab. For this one, we’ll use four Gradient Stops. Set the Direction to 90deg.

    • First Gradient Stop: 0px, #f52791
    • Second Gradient Stop: 38px, #3742fb
    • Third Gradient Stop: 70px, f7d043
    • Fourth Gradient Stop: 100px, #fe386f
    • Direction: 90deg

    Gradient Divider Example Three

    Sizing

    Next, go to the Design tab. Under Sizing, set the Height to 60px for desktops, 50px for tablets, and 40px for phones.

    • Height: 60px desktop, 50px tablet, 40px phone

    Gradient Divider Example Three

    Border

    Next, scroll down to Border. Set the Rounded Corners to 0px Top Left, 30px Top Right, 30px Bottom Left, and 0px Top Right. This creates a style that matches the email optin section. Close the module and save your settings.

    • Top Left: 0px
    • Top Right: 40px
    • Bottom Left: 40px
    • Bottom Right: 0px

    Gradient Divider Example Three

    Results

    Desktop Gradient Divider Example One

    Desktop Gradient Divider Example One

    Phone Gradient Divider Example One

    Phone Gradient Divider Example One

    Desktop Gradient Divider Example Two

    Desktop Gradient Divider Example Two

    Phone Gradient Divider Example Two

    Phone Gradient Divider Example Two

    Desktop Gradient Divider Example Three

    Desktop Gradient Divider Example Three

    Phone Gradient Divider Example Three

    Phone Gradient Divider Example Three

    Ending Thoughts

    That’s our look at how to create gradient dividers with Divi’s Divider Module. The gradient option in the Divider Module works great for creating unique gradient dividers. Utilizing the sizing, spacing, and border corner options provides us with the tools to create gradient dividers in many sizes and shapes. With just a few simple settings, we can create unique gradient dividers that are sure to stand out from the crowd.

    We want to hear from you. Do you create gradient dividers with Divi’s Divider Module? Let us know about your experience in the comments.

    The post How to Create Gradient Dividers with Divi’s Divider Module appeared first on Elegant Themes Blog.

  • An Overview of Line Styles in Divi’s Divider Module & How to Style Them

    The divider line in Divi’s Divider Module is a great way to separate elements or add some visual flair to your Divi layouts. The module is easy to use and surprisingly versatile. In this post, we’ll see an overview of the line styles in Divi’s Divider Module and see how to style them. We’ll create six examples to help spark your imagination to style your Divi Divider Module.

    Let’s get started.

    Preview

    Desktop Divider Module Line Style Example One

    Desktop Divider Module Line Style Example One

    Phone Divider Module Line Style Example One

    Phone Divider Module Line Style Example One

    Desktop Divider Module Line Example Two

    Desktop Divider Module Line Example Two

    Phone Divider Module Line Example Two

    Phone Divider Module Line Example Two

    Desktop Divider Module Line Example Three

    Desktop Divider Module Line Example Three

    Phone Divider Module Line Example Three

    Phone Divider Module Line Example Three

    Desktop Divider Module Line Example Four

    Desktop Divider Module Line Example Four

    Phone Divider Module Line Example Four

    Phone Divider Module Line Example Four

    Desktop Divider Module Line Example Five

    Desktop Divider Module Line Example Five

    Phone Divider Module Line Example Five

    Phone Divider Module Line Example Five

    Desktop Divider Module Line Example Six

    Desktop Divider Module Line Example Six

    Phone Divider Module Line Example Six

    Phone Divider Module Line Example Six

    Divider Module Features

    To give the screenshots some color and reference, I’ve added the Text Modules and a colored background from the Portfolio page of the free Photography Studio Layout Pack that’s available within Divi.

    Divi Module Content Tab

    The Divider Module’s Content tab includes the option to display the divider line or not and to give the divider a background color.

    Divi Module Content Tab

    The Background options are the standard options for other Divi modules. It includes a background color, gradient, image, video, pattern, or mask. For this example, I’ve added a pink background color to make it easy to see the space the divider uses. The divider is placed at the top of this space by default.

    Divi Module Content Tab

    Divider Module Design Tab

    The Divider Module Design tab options include Line Color which also includes the Line Style options. Other options include Sizing, Spacing, Border, Box Shadow, Filters, Transform, and Animation.

    Divider Module Design Tab

    Line Color

    The Line Color setting includes the standard color picker, allowing Divi users to fully customize the color of the divider line.

    Divider Module Design Tab

    Line Style

    The Line Style setting determines the shape of the line. It has 9 options.

    Divider Module Design Tab

    Line Position

    Line Position places the line at the top, middle, or bottom of the divider’s space.

    Divider Module Design Tab

    Divider Module Line Style Options

    The Line Style options work with Sizing (Weight, Width, etc.) to create some interesting dividers. Here’s a look at each Style with a Weight of 20px so they stand out in my images.  After this, we’ll style the divider with various Color, Style, and Size combinations.

    Solid

    Solid displays the divider as a solid line.

    Divider Module Line Style Options

    Dashed

    Dashed cuts the divider line into small dashes.

    Divider Module Line Style Options

    Dotted

    Dotted displays the divider line as dots.

    Divider Module Line Style Options

    Double

    Double displays two divider lines in parallel.

    Divider Module Line Style Options

    Groove

    Groove cuts into the top of the line and makes the top a darker shade of the color we selected.

    Divider Module Line Style Options

    Ridge

    Ridge cuts into the bottom of the line and makes the bottom a darker shade of the color we selected.

    Divider Module Line Style Options

    Inset

    Inset cuts into the top and bottom of the line, making the entire line a darker shade of the color we selected.

    Divider Module Line Style Options

    Outset

    Outset doesn’t cut into the line, essentially giving the same look as Solid.

    Divider Module Line Style Options

    None

    None makes the divider line invisible, showing only its background color.

    Divider Module Line Style Options

    Divider Module Line Sizing Settings

    The Sizing options determine the divider’s weight, height, width, and alignment. Here’s a look at the main settings.

    Divider Weight

    Divider Weight specifies the thickness of the divider line.

    Divider Module Line Sizing Settings

    Width

    Width specifies the width of the divider line. It can be used in combination with Module Alignment to place the line on the left, center, or right of its area.

    Divider Module Line Sizing Settings

    Module Alignment

    Module Alignment places the line on the left, in the center, or on the right of the module’s area.

    Divider Module Line Sizing Settings

    Height

    Height determines the height of the module’s area. The line remains the same size, but the background fills in to take up the space.

    Divider Module Line Sizing Settings

    Divider Module Line Style Examples

    Now, let’s see some examples of these settings working together. For our examples, I’ve added the Divider Module to various locations within the Portfolio page and the Landing page of the free Photography Studio Layout Pack. I’ll use the colors from the layout pack and style the module to fit the area.

    Divider Module Line Style Example One

    For our first example, we’ll place a solid divider line under the page title of the portfolio page. Add the Divider Module under the Text Module.

    Change the Line Color to #ff5a17 and leave the Line Style at the default setting (Solid). Set the Divider Weight to 4px for desktops and tablets and change it to 2px for phones. Set the Width to 30% and the Module Alignment to Center.

    • Line Color: #ff5a17
    • Line Style: Solid
    • Divider Weight: 4px desktop, 2px phone
    • Width: 30%
    • Module Alignment: Center

    Divider Module Line Style Example One

    Divider Module Line Style Example Two

    We’ll place the second divider between portfolio projects under Featured Work. This requires adding a new Row for the Divider Module. The divider will be offset, just to make it look different.

    Change the Line Color to #ff5a17 and the Line Style to Ridge. Set the Divider Weight to 24px for desktops and tablets and to 20px for phones. Change the Width to 76%.

    • Line Color: #ff5a17
    • Line Style: Ridge
    • Divider Weight: 24px desktop and tablet, 20px phone
    • Width: 76%

    Divider Module Line Style Example Two

    Set the Height to 40px to add more space between the next Row.

    • Height: 40px

    Divider Module Line Style Example Two

    Divider Module Line Style Example Three

    We’ll place the third divider line next to the Call-to-Action button for a section labeled Let’s Work Together. This one changes the Row to three columns with a ½ column on the left and two ¼ columns on the right. The Divider Module is placed between the Text Modules and the Button Module. The divider line connects to the button, following design cues from other sections of this layout.

    This one uses the Solid Line Style. Change the Line Color to black and set the Divider Weight to 2px. Set the Width to 128% for desktops, 112% for tablets, and Auto for phones.

    • Line Color: #000000
    • Line Style: Solid
    • Divider Weight: 2px
    • Width: 128% desktop, 112% tablet, Auto phone

    Divider Module Line Style Example Three

    Divider Module Line Style Example Four

    The next three examples use the Photography Studio Landing Page. Our fourth example places a Divider Module under the Button Module in a CTA called Turning Moments Into Art. This one will use the module’s settings to add dots to the area to draw attention.

    Change the Line Color to #ff5a17 and choose Dotted for the Line Style. Set the Divider Weight to 30px. Change the Width to 45% for desktops, 30% for tablets, and 28% for phones.

    • Line Color: #ff5a17
    • Line Style: Dotted
    • Divider Weight: 30px
    • Width: 45% desktop, 30% tablet, 28% phone

    Divider Module Line Style Example Four

    Scroll down to Spacing and add 42px of Left Padding for phones. Leave the Padding for desktops and tablets at the default.

    • Left Padding: 42px phone

    Divider Module Line Style Example Four

    Divider Module Line Style Example Five

    Our fifth example will add a dashed line to a section called Recent Work. Add the Divider Module to the empty column in the top Row.

    Change the Line Color to black and the Line Style to Dashed. Set the Divider Weight to 24px.

    • Line Color: #000000
    • Line Style: Dashed
    • Divider Weight: 24px

    Divider Module Line Style Example Five

    Change the Height to 45px for tablets and phones. Alternatively, you can set the Height to 45px for all devices. Desktops will look the same either way.

    • Height: 45px

    Divider Module Line Style Example Five

    Divider Module Line Style Example Six

    For our last example, we’ll add a Divider Module with a double line under the description in a section called Case Study.

    Change the Line Color to white and the Line Style to Double.

    • Line Color: #ffffff
    • Line Style: Double

    Divider Module Line Style Example Six

    Set the Divider Weight to 6px. Change the Width to 48% for desktops, 22% for tablets, and 36% for phones. Change the Module Alignment to Center.

    • Divider Weight: 6px
    • Width: 48% desktop, 22% tablet, 36% phone
    • Module Alignment: Center

    Divider Module Line Style Example Six

    Results

    Desktop Divider Module Line Style Example One

    Desktop Divider Module Line Style Example One

    Phone Divider Module Line Style Example One

    Phone Divider Module Line Style Example One

    Desktop Divider Module Line Example Two

    Desktop Divider Module Line Example Two

    Phone Divider Module Line Example Two

    Phone Divider Module Line Example Two

    Desktop Divider Module Line Example Three

    Desktop Divider Module Line Example Three

    Phone Divider Module Line Example Three

    Phone Divider Module Line Example Three

    Desktop Divider Module Line Example Four

    Desktop Divider Module Line Example Four

    Phone Divider Module Line Example Four

    Phone Divider Module Line Example Four

    Desktop Divider Module Line Example Five

    Desktop Divider Module Line Example Five

    Phone Divider Module Line Example Five

    Phone Divider Module Line Example Five

    Desktop Divider Module Line Example Six

    Desktop Divider Module Line Example Six

    Phone Divider Module Line Example Six

    Phone Divider Module Line Example Six

    Ending Thoughts

    That’s our overview of line styles in Divi’s Divider Module and how to style them. The various line styles and options provide lots of design possibilities. With just a few settings, Divi users can create small or large dividing lines, add shapes, and lots more. Divi’s Divider Module is a great way to add some visual flair to any Divi website.

    We want to hear from you. Do you style the divider line in your Divi Divider Module? Let us know in the comments.

    The post An Overview of Line Styles in Divi’s Divider Module & How to Style Them appeared first on Elegant Themes Blog.