EDITS.WS

Tag: ecommerce

  • How to Edit & Customize Your WooCommerce Checkout Page

    The default WooCommerce checkout page is streamlined for the average store and audience. However, there’s a good chance your store is anything but average and your audience has unique needs and preferences that challenge a basic checkout flow.

    If this sounds like your store, you probably want to customize the default WooCommerce Checkout page to make it more user-friendly for your specific customers and encourage them to complete purchases. 

    Fortunately, there are many ways to edit the WooCommerce Checkout page. You can use WooCommerce extensions or blocks, or edit the page manually using code. By optimizing this page, you can create a more seamless checkout experience. 

    Before you make changes, however, make sure you have a WordPress backup plugin installed and active, so you can quickly restore your site in case something goes wrong, or you simply want to undo your work. 

    In this post, we’ll take a closer look at why you might want to edit the Checkout page in WooCommerce. Then, we’ll guide you through three simple methods.

    Why build a custom WooCommerce Checkout page?

    Last year, almost half of U.S. consumers abandoned their online purchases during checkout. Some of the reasons for this include a long or complicated checkout procedure, and the customer not being able to calculate the total order cost upfront.

    Therefore, it’s important to remove all the barriers at checkout and provide an easy process. One way you can do this is by simplifying the checkout flow so that shoppers can complete their orders much faster.

    Additionally, WooCommerce Checkout page customization can be used as a marketing strategy. For instance, you could gather details from your customers so that you can improve your products.

    Alternatively, you can upsell and cross-sell items to increase the average order size. You might suggest related products, or offer add-ons like insurance and gift wrap. 

    Another reason to build a custom WooCommerce checkout page is to ensure that it fits in with the rest of your website. You might apply custom colors and fonts, or upload your logo. This can help you reinforce your branding and deliver a memorable checkout experience. 

    How to edit your WooCommerce checkout fields

    An effective way to customize your Checkout page is to edit the WooCommerce checkout fields. This way, you can provide a streamlined process for shoppers, making it easier for them to complete an order.

    By default, WooCommerce offers a set of useful fields for your Checkout page. These include First name, Last name, Email address, Phone, Company name, Town/City, and more.

    If you mainly sell to individuals, you’re unlikely to need the Company name field. Meanwhile, if you offer gifts or discounts to customers on their birthdays, it makes sense to add a Date of Birth field.

    There are other ways to customize the WooCommerce fields. You can apply new colors, adjust the size of fields, or change the placeholder text.

    It’s also a good idea to remove unnecessary fields and configure required fields that need to be completed before the customer can proceed with the order. You can go one step further and allow customers to verify a delivery preference, request a specific delivery date, or set up a preferred contact method. 

    Extensions for editing your WooCommerce checkout fields

    The simplest way to edit your WooCommerce checkout fields is to use an extension. Fortunately, there are many tools to choose from. 

    Checkout Field Editor is a premium WooCommerce extension that lets you optimize your checkout page by adding, removing, or editing fields.

    Checkout Field Editor is a premium WooCommerce extension that lets you optimize your checkout page by adding, removing, or editing fields.

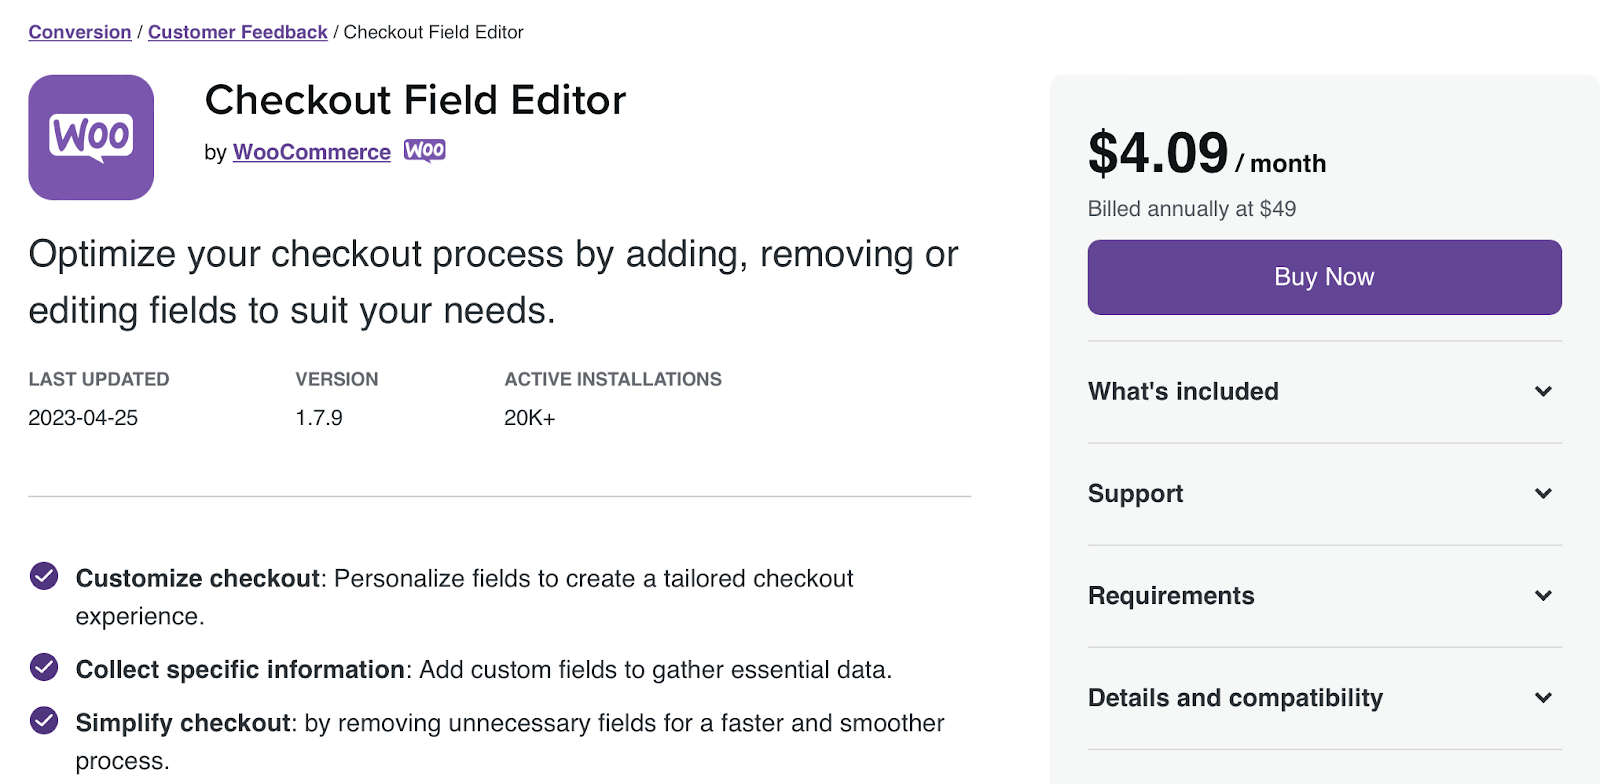
    Although you can’t take away the core fields, you can move them around. This gives you greater control over the flow of the checkout process. 

    If you run a large store, you might require a more sophisticated tool, like WooCommerce Checkout Add-Ons.

    If you run a large store, you might require a more sophisticated tool, like WooCommerce Checkout Add-Ons.

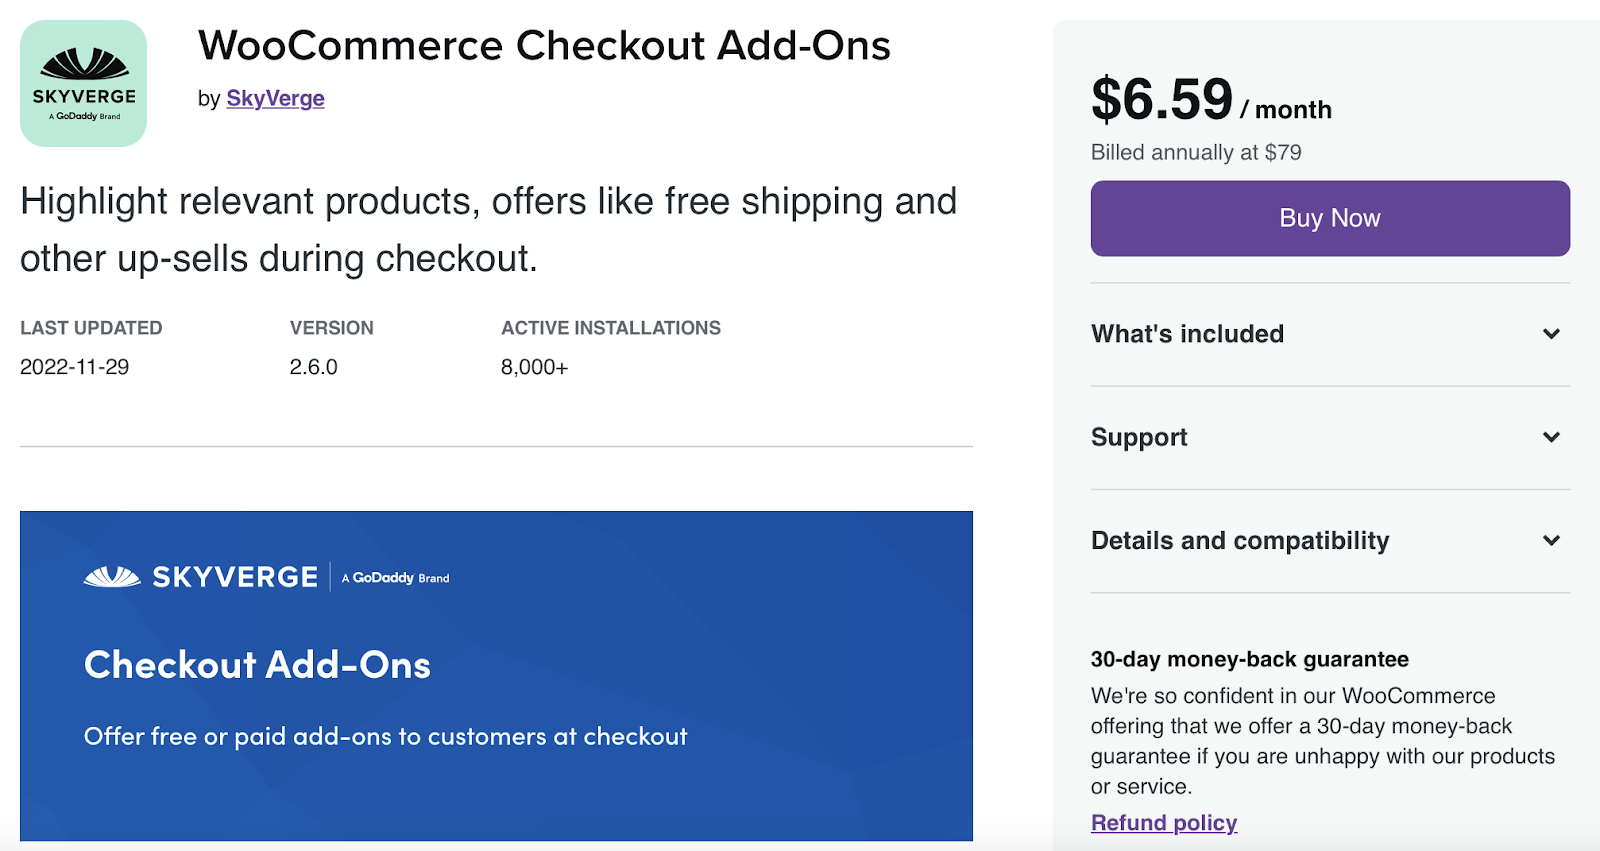
    With this tool, you can insert free (and paid) add-ons at the checkout stage. For instance, if you sell personalized products or gifts, you can allow customers to add a message to the order.

    It also enables you to offer gift wrapping services and insurance. You can even give customers the option to leave a tip. 

    The plugin gives you full flexibility over your WooCommerce fields. You can create conditional add-ons, add fixed or percentage-based costs, and dynamically update order totals. Plus, the tool supports WooCommerce Subscriptions and renewal orders. 

    How to customize your WooCommerce Checkout page

    Now that you know a bit more about WooCommerce checkout fields, let’s take a look at three ways to customize your Checkout page. 

    1. Use the WooCommerce Cart and Checkout blocks

    The first way to customize your WooCommerce Checkout page is to use the Woo Cart and Checkout Blocks extension. This tool is completely free.

    Find the WooCommerce Blocks page and click on Free Download.

    The first way to customize your WooCommerce Checkout page is to use the Woo Cart and Checkout Blocks free extension.

    You’ll then be guided through the checkout process (although you won’t be expected to pay anything). 

    There are different ways to customize your checkout experience with these blocks. You can configure product add-ons, accept multiple payment methods, offer express payment options, and more.

    Note that the Cart and Checkout blocks are only available on sites with WordPress 6.9 or higher. Additionally, you’ll need to replace the existing shortcodes on your Cart and Checkout pages. 

    First, navigate to Pages in your dashboard and open your Checkout page. Here, you can delete the checkout shortcode [woocommerce_checkout].

    Delete the checkout shortcode [woocommerce_checkout] in the page editor.

    Then, search for the Checkout Block and add it to your page. Now, you should see a preview of your block-based cart which you can customize using the settings in the sidebar.

    Search for the Checkout Block and add it to your page.

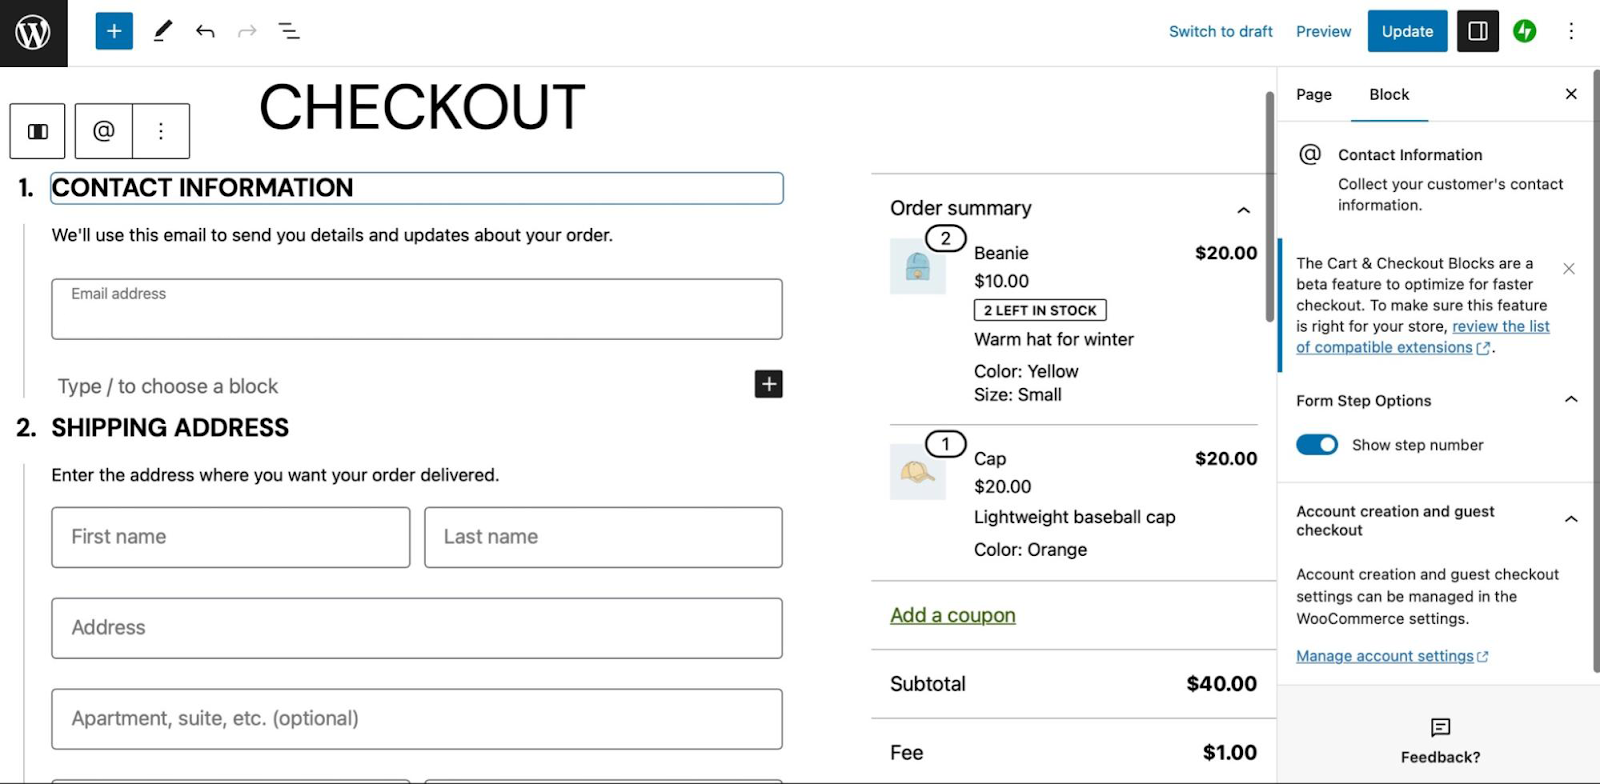
    Now you’re all set to customize your Checkout page. You can show/hide the checkout step numbers, show/hide certain fields, and make the Phone field a required field using the block settings.

    You can show/hide the checkout step numbers, show/hide certain fields, and make the Phone field a required field using the block settings.

    Additionally, you can configure paid add-ons, allow shoppers to apply coupons or notes to their orders, enable multiple shipping options, and more. 

    2. Customize your Checkout page using WooCommerce extensions

    While WooCommerce Blocks offers an easy way to customize your checkout page, you can also get started with various WooCommerce extensions. Let’s look at a few options. 

    Make product recommendations

    One of the best ways to increase your average order size is to make product recommendations on the checkout page. Fortunately, the Product Recommendations extension makes this super simple.

    Increase your average order size with product recommendations on the checkout page with Recommendations extension.

    You can present cross-sells under eye-catching titles like “Frequently bought together” or “You might also like”.

    Present cross-sells under eye-catching titles like “Frequently bought together” or “You might also like”.

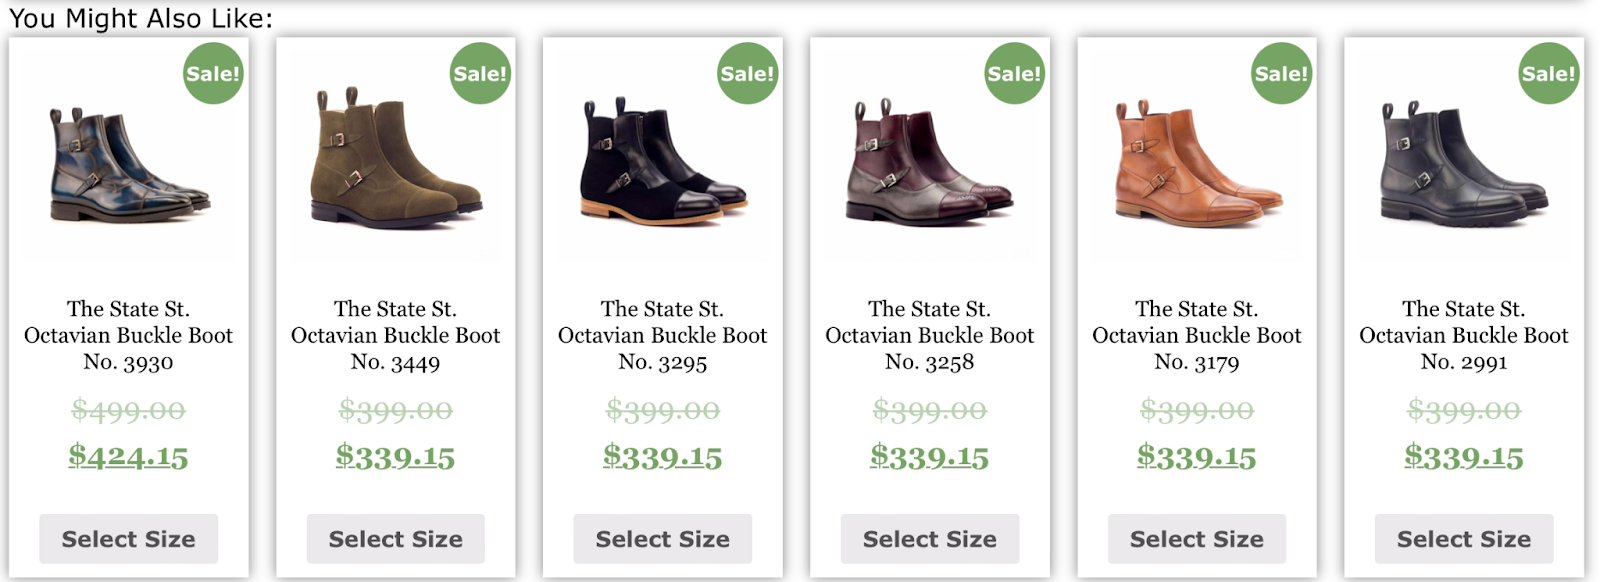
    Alternatively, you can upsell products to increase order value. Plus, you can present your product recommendations across your entire store, including individual product pages and your order confirmation page. 

    Enable multiple shipping addresses

    Another way to customize your WooCommerce Checkout page is to enable multiple shipping addresses. Sometimes, customers make orders that consist of multiple products that need to be sent to different addresses (like home and work addresses).

    Additionally, some customers like to buy gifts and ship them straight to their friends and family. Without this option, customers are forced to make separate orders for each shipping address, which can be quite time-consuming.

    You can use the Shipping Multiple Addresses extension to offer this feature.

    Allow customers to buy gifts and ship them straight to their friends and family with the Shipping Multiple Addresses extension.

    Customers can request any quantity of products to be sent to any number of addresses. Plus, they can save all of these shipping addresses within their accounts. 

    Once you purchase this extension, all you need to do is install it on your WordPress site and enable multiple shipping methods. 

    Let customers choose a delivery date

    A great way to give your store a competitive edge is to allow customers to choose a delivery date to receive their orders. This can improve your overall customer satisfaction since it shows that you’re willing to go the extra mile.

    With the Order Delivery for WooCommerce extension, you can limit the number of orders per day to make sure you can process all orders within the specified timeframe.

    With the Order Delivery for WooCommerce extension, you can limit the number of orders per day.

    Plus, you can provide customers with a list of options for delivery dates based on bank holidays, shipping methods, and other factors. 

    Once you purchase and install the extension in WooCommerce, you can display a delivery date picker in your checkout form. Here, you can determine time slots, define a delivery range, and charge additional costs when customers choose a specific date/time. 

    Offer add-ons at checkout

    Another way to optimize the WooCommerce Checkout page is to add upsell options. For instance, you might offer shipping insurance, rush handling, company swag, or gift wrapping.

    You could also let customers choose from a range of paid add-ons at checkout, like gift messages or gift receipts. WooCommerce Checkout Add-Ons offers an easy way to do this.

    Let customers choose from a range of paid add-ons at checkout with WooCommerce Checkout Add-Ons.

    With this extension, you can add several types of fields to your checkout form, based on your add-on type. So, you might include additional text fields, radio buttons, checkboxes, or file uploads.

    You can configure fixed-amount or percentage-based costs. Meanwhile, you’re able to include conditional add-ons that change based on factors like the number of products in the cart and the cart subtotal. 

    Display messages to customers at checkout

    Your WooCommerce Checkout page customization can simply involve displaying a message. You can do this to engage customers, promote offers in your store, or point them toward related items.

    You can use the Cart Notices WooCommerce extension to do this.

    Engage customers, promote offers in your store, or point them toward related items with Cart Notices WooCommerce extension.

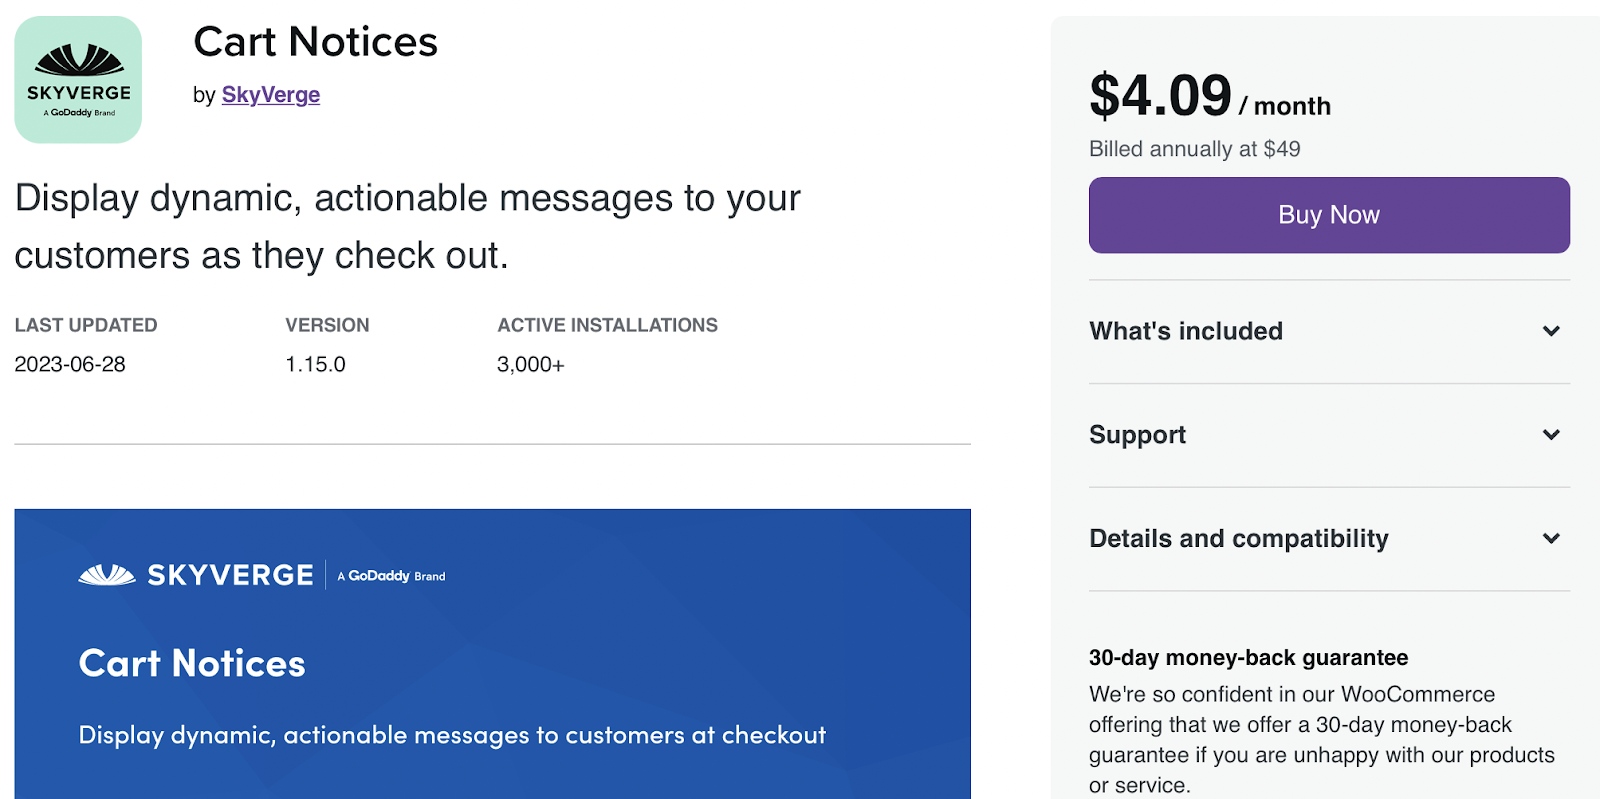
    Once you’ve purchased and installed the extension, you’re able to display dynamic messages at checkout to encourage customers to buy more products. For example, you might want to present a notice that says, “Add one more item to qualify for free shipping.” 

    If you offer express shipping, you might motivate customers to place an order by displaying a message that says, “Order in the next ten minutes for next-day delivery.” 

    Provide a gift wrap option

    Although many of your customers are shopping for themselves, some are buying gifts for their loved ones. Therefore, it’s a great idea to offer a gift wrapping option on your WooCommerce Checkout page.

    The Gift Wrapper for WooCommerce extension lets you add this option to your store.

    Offer a gift wrapping option on your WooCommerce Checkout page with The Gift Wrapper for WooCommerce extension.

    This way, you can customize your Shop page by allowing customers to add gift wrapping to individual items. Shoppers can also apply gift wrapping to their entire order at checkout. Plus, you’re able to configure different pricing options for this service.

    This plugin supports both simple and variable WooCommerce products, and you can offer an unlimited number of gift wrap designs. Shoppers can even add a personalized message to their orders. 

    3. Customize your Checkout page manually

    You can also make changes to the Checkout page manually. This option is best if you’re comfortable working with code. 

    If you’re editing your site files directly, it’s best to create a child theme. Otherwise, when you switch themes or even update your current parent theme, you’ll lose any of the changes you’ve made. 

    Plus, it’s a good idea to make a fresh backup of your WooCommerce store since a single error can break your site. There are many high-quality backup plugins to choose from, but Jetpack VaultPress Backup is a powerful and reliable tool.

    There are many high-quality backup plugins to choose from, but Jetpack VaultPress Backup is a powerful and reliable option.

    The plugin works automatically, creating real-time backups that are stored securely in the Jetpack Cloud. Better yet, VaultPress Backup is designed specifically for WordPress and WooCommerce sites, which means it backs up your files, database, and customer data. 

    Edit the visual design of your WooCommerce Checkout page using CSS

    To edit your WooCommerce fields manually, you’ll first want to use the inspector tool in your browser to identify the exact area that you want to customize. Then, you’re ready to apply the changes to your theme.

    Here’s a list of primary tags (including classes and IDs) that enable you to edit the design of your Checkout page:

    <body class="woocommerce-checkout">
    <div class="woocommerce">
    <form class="woocommerce-checkout">
    <div id="customer_details" class="col2-set">
    <div class="woocommerce-billing-fields">
    <p class="form-row">
    <div class="woocommerce-shipping-fields">
    <p class="form-row">
    <div class="woocommerce-additional-fields">
    <div id="order_review" class="woocommerce-checkout-review-order">
    <table class="woocommerce-checkout-review-order-table">
    <div id="payment">
    <ul class="wc_payment_methods payment_methods methods">
    <div class="form-row place-order">

    To give you an example, you might want to change the background color of an input box. In this case, you can use the following code snippet:

    .woocommerce-checkout input[type="text"] {
         background-color: #222;
    }

    Alternatively, you might wish to remove a field from your Checkout page, like the Company name field in the Billing section. In this scenario, you’ll need to add the following code snippet to your functions.php file.

    function wc_remove_checkout_fields( $fields ) {
        unset( $fields['billing']['billing_company'] );
        return $fields;
    }
    
    add_filter( 'woocommerce_checkout_fields', 'wc_remove_checkout_fields' );

    Make sure to save your changes when you’re ready.

    How to create a one-page WooCommerce checkout 

    If you want to simplify the shopping experience, you might want to create a one-page checkout experience, using a plugin like WooCommerce One-Page Checkout. With this tool, you can add checkout fields to any of your landing pages.

    Simplify the shopping experience with a one-page checkout experience, using a plugin like WooCommerce One-Page Checkout.

    This extension offers three ways to create a one-page checkout. First, you can enable it on a product-by-product basis.

    Alternatively, you can configure a one-page checkout with a shortcode. All you need to do is add the following shortcode to any page or post on your site:

    [woocommerce_one_page_checkout]

    How to boost the speed of your Checkout page

    While it’s a good idea to customize your WooCommerce Checkout page, you’ll also want to make sure that it’s optimized for performance. Bounce rates increase by an average of 32 percent as page load time goes from one to three seconds. 

    To maximize conversions and sales, it’s important to improve your website speed. There are different ways to optimize your WooCommerce Checkout page, but Jetpack Boost offers an easy and convenient solution.

    There are different ways to optimize your WooCommerce Checkout page, but Jetpack Boost offers an easy and convenient solution.

    There’s a free version of the plugin, which is simple to set up. Go to Plugins → Add New and search for “Jetpack Boost”. Then, click on Install Now → Activate. 

    Now, you can head to Jetpack → Boost in your dashboard.

    There’s a free version of the plugin, which is simple to set up in the Plugin Repository.

    Here, you can enable any of the optimization settings that you want to apply to your website. For example, you might want to lazy load images to improve your loading times.

    It’s also a good idea to optimize critical CSS loading. This feature moves your styling information to the start of the page so that your content loads much faster. As such, it’s a great way to improve your overall user experience. 

    You can also upgrade to a premium Jetpack plan to access additional features. For instance, the plugin will automatically regenerate your site’s critical CSS (and performance scores) every time you make a change on your site.

    Frequently asked questions about customizing the Checkout page 

    This post has covered the basics of WooCommerce Checkout page customization, but you might still have some questions. Let’s answer some of them. 

    What is the WooCommerce Checkout page?

    When you install WooCommerce in WordPress, you’ll get a default Checkout page. This contains fields for customers to enter their name, address, email address, payment information, and more. Once they’ve entered these details, they can complete their order. 

    What is the best way to customize a WooCommerce Checkout page?

    There’s no best way to customize the WooCommerce Checkout page since it depends on your preferences, skill level, and experience. For beginners, it can be easiest to use WooCommerce Blocks or a WooCommerce extension since you won’t need to use code.

    More experienced users may like to edit the WooCommerce Checkout fields using code snippets. This involves adding CSS snippets in the WordPress Customizer or your child theme. 

    Should I back up my site before editing the checkout page template?

    The WooCommerce checkout page is one of the most important pages on your website. Therefore, it’s important to back up your WordPress site before you make any edits.

    This way, if you make a mistake or a change that you don’t like, it’s easy to restore your website to an earlier version. You won’t need to troubleshoot your site for errors or go through the hassle of undoing the change.

    The easiest way to back up your site is to use a plugin like Jetpack VaultPress Backup. Once installed, this handy tool makes real-time backups that are stored securely in the Jetpack Cloud. 

    Plus, you’ll get access to an activity log to tighten up security on your site. Meanwhile, the restoration process is super simple, enabling you to get your site up and running again in just a few clicks. 

    What else can I do to enhance my WooCommerce Checkout page?

    It’s a great idea to customize your WooCommerce Checkout page to increase sales and improve the customer experience, but there are other ways that you can enhance your Checkout page.

    It’s important to prioritize your site’s speed as this can reduce bounce rate and improve the shopping experience. You can install a plugin like Jetpack Boost to speed up your loading times. 

    Once activated, Jetpack Boost provides you with access to a clean interface where you can keep an eye on your performance score. Plus, the tool makes it easy to enable optimization features like lazy loading, critical CSS, and non-essential JavaScript deferral. 

    Optimize your WooCommerce checkout experience

    While WooCommerce provides a built-in Checkout page, there are tons of ways to enhance the page to boost sales and configure useful checkout options. For instance, you might enable multiple shipping addresses, make certain fields required, or offer gift wrapping.

    To recap, here are three ways to edit and customize your WooCommerce Checkout page:

    1. Use the WooCommerce Cart and Checkout blocks.
    2. Use WooCommerce extensions like Cart Notices and Product Recommendations.
    3. Use code to manually customize the Checkout page.

    You’ll also want to optimize your Checkout page for performance, using a beginner-friendly tool like Jetpack Boost. This way, you can speed up your site and improve the user experience, which can lead to more conversions.

  • Shopify and WordPress Integration Made Easy with ShopWP Layout Builder

    Discover the seamless integration of Shopify and WordPress with the ShopWP Layout Builder. This comprehensive guide introduces the innovative drag-and-drop tool that effortlessly showcases Shopify products on WordPress. Dive into its features, pricing, and step-by-step setup to elevate your website design and stand out in the digital world.

    The post “Shopify and WordPress Integration Made Easy with ShopWP Layout Builder” first appeared on WP Mayor.

  • Shopify vs Weebly Compared: Which One Comes on Top in 2023

    Shopify vs Weebly.Not too long ago, comparing Shopify vs Weebly was a straightforward affair. Shopify was the undisputed choice for serious ecommerce merchants, while Weebly served as a website builder for creating basic professional sites.

  • WP Engine: WooCommerce Hosting Meets Performance

    Discover the importance of specialized WooCommerce hosting and dive deep into WP Engine’s managed WooCommerce hosting features. From high-performing live cart functionalities to Stripe Connect integration and advanced caching, WP Engine offers a comprehensive solution for eCommerce stores. Learn about its unique features, the benefits of managed hosting, and get an inside look at the user-friendly dashboard. Whether you’re starting a new store or looking to optimize an existing one, WP Engine provides the tools and support needed for a successful online business.

    The post “WP Engine: WooCommerce Hosting Meets Performance” first appeared on WP Mayor.

  • How to Make a WordPress Ecommerce Website (2023 Easy Guide)

    You already know that WordPress is a powerful platform for content, but were you aware that it’s also one of the best eCommerce solutions? This guide will walk you through each step to create a successful eCommerce website with WordPress. From domain selection to hosting, installation, and essential plugins, we’ve got you covered.

    Why Use WordPress to Make an eCommerce Website?

    WordPress shines as the premier content management system (CMS) used to build websites of all kinds.

    The software is open-source and free to use, developed by and supported by a large community of volunteers. This makes the platform extremely flexible, giving you more control over your website functionality and allowing you to build an online store using countless eCommerce plugins and themes available. Although WordPress is free, there are common website expenses outside WordPress, including hosting, domain registration, premium plugins, and themes. But these prices are the same or better than other major eCommerce platforms, all things considered.

    WooCommerce: A Powerful eCommerce Solution for WordPress

    What makes WordPress equipped to handle your next eCommerce website? WooCommerce.

    WooCommerce Logo Mark
    WooCommerce is the go-to WordPress solution for eCommerce. The WordPress editor is seamlessly integrated with WooCommerce and includes all the WooCommerce Blocks needed to build your store with a drag-and-drop interface. And it is simple enough for novice web admins to learn how to use it. It also has a plethora of add-ons available to help you achieve anything you need from it. It also gives users detailed dashboards and a convenient mobile app that allows you to keep tabs on your store’s performance from anywhere at any time.

    Other benefits of using WooCommerce include:

    • WordPress Hosting providers like Siteground are tailored to WooCommerce sites for easy setup and optimal performance.
    • More customization and control with a variety of plugins to add the functionality you need.
    • More cost-effective than other solutions that require recurring monthly payments and additional fees.
    • More control over security than other solutions that have built-in security that cannot be optimized.

    WooCommerce Alternatives to Compare

    Selecting the ideal eCommerce platform is a pivotal decision. In fact, there are some that may benefit from using other website builder platforms (outside of WordPress) like Shopify, Squarespace, or Wix. And there are WordPress membership plugins like MemberPress that offer standalone options for eCommerce. To help you decide, we’ve created comparison guides between WooCommerce and other leading website builders for eCommerce for you to dig deeper into.

    But, we’ll assume that you’ll see the exceptional value in WordPress + WooCommerce and continue to the next step of how to build an eCommerce site with WordPress.

    How to Setup Shop with WordPress (5 Steps)

    1. Choose a WordPress eCommerce Hosting Provider + Registrar

    Selecting a hosting provider specializing in WordPress is pivotal for your eCommerce website’s performance and security. SiteGround is a top choice, finely tuned for WordPress and WooCommerce platforms.

    Dive into our in-depth SiteGround analysis to explore its myriad features. SiteGround offers complimentary CDN, no-cost SSL, and email account governance in its hosting packages.

    Siteground Logo Mark - White on Dark BG

    For alternative hosting solutions, consider our roundup of the fastest WordPress hosts or the best all-around hosting services. Quality hosting becomes doubly important when running a WordPress eCommerce site since it needs to be fast with around-the-clock uptime.

    Install WordPress

    Navigate to SiteGround’s Site Tools dashboard. For other ways to install WordPress, read our definitive WordPress installation guide.

    After signing into your SiteGround account, start the installation by clicking the “Set Up Site” button on your dashboard.

    install WordPress

    Choose the domain type for your WordPress eCommerce site. Opt for “Temporary Domain” if you wish to build before buying your domain.

    For those eager to secure a domain upfront, follow this guide to register a domain. Click “New Domain,” find your ideal domain name, and proceed with the WordPress setup.

    choose temporary domain

    Click “Continue” to advance with the domain option that you’ve chosen.

    temporary domain

    Then, select “Start New Website” to continue.

    start new website

    Choose “WooCommerce” to ensure WordPress comes pre-installed with WooCommerce to make setup a bit quicker.

    Choose-WooCommerce

    Configure your admin login credentials. Keep this information secure by following our password management tips. Click “Continue” to move forward.

    WordPress for beginners

    Finally, hit the “Finish” button to set up WordPress + WooCommerce for your new WordPress eCommerce website.

    finish setup

    Access your new WordPress dashboard by clicking “Log in Admin.”

    2. Configure WordPress

    You’ve got your hosting and maybe even a domain. Now, let’s set up your WordPress site for eCommerce.

    Adjust WordPress Settings

    You’ll find the settings you need under Settings in the sidebar of your admin dashboard.

    WordPress settings

    Need more help? Check out these guides for each settings page to configure your eCommerce website the way you need it:

    3. Pick a WordPress eCommerce Theme

    Now, let’s choose a WordPress theme that’s great for eCommerce. We recommend using our Divi Theme. Divi is a top pick because it is a powerful page builder that works seamlessly with WooCommerce. It’s easy to use and makes your store look good.

    Why Divi is a good choice:

    For other options, you can check out these top WooCommerce WordPress Themes.

    How to Add Divi to Your WordPress Store

    First, get Divi from your Elegant Themes membership account after buying a membership. Log in and go to “Themes & Plugins” to download Divi.

    How to Install Divi - Steps 1

    In your WordPress dashboard, go to Appearance > Themes. Click “Upload Theme” and pick the Divi file you downloaded. Then c”Install Now.”

    How to Install Divi - Steps 2-5

    Click “Activate” to make Divi your theme.

    How to Install Divi - Steps 6

    Last step: add your Elegant Themes API Key. This keeps Divi updated with new features and security fixes. Grab the Username from your account in the “API Key” section.

    How to Install Divi - Steps 7-10

    Generate New API Key” for your site. Give it a label so you know which site it belongs to. Copy the Key.

    How to Install Divi - Steps 11-13

    To add the API Key, go to Divi > Theme Options > Updates. Put in your Elegant Themes API Key (generate a new key for each site you create) and Username, then click “Save Changes.”

    How to Install Divi - Steps 14-18

    If you want to learn more about adding themes, check out this theme installation guide. But we think you’ll like using Divi for your WordPress eCommerce website.

    4. Make Your WordPress eCommerce Store

    You’ve done the basic setup. Now, let’s dig into creating your WordPress eCommerce website. This means setting up WooCommerce, adding products, and choosing how people will pay you.

    This is where the fun starts!

    WooCommerce Setup Wizard

    The WooCommerce setup wizard makes getting your WordPress eCommerce site ready easy. If your host didn’t install WooCommerce for you (Step 1), check out our WooCommerce setup guide to get it added to your website.

    Click “Home” under WooCommerce to start the wizard.

    Woo Onboarding Flow - Steps 1-2

    The wizard will ask for your store info, like your address and email.

    Woo Onboarding Flow - Steps 3-4

    Select the industry and product types that best describe your store.

    Woo Onboarding Flow - Steps 5-6

    Choose what your store needs. Checking certain boxes might add extra plugins to your site.

    Note: Some plugins cost money. There are also free ones available. Check out our list of the best membership, booking, and free WooCommerce plugins to see how plugins can extend your eCommerce site.

    Woo Onboarding Flow - Steps 7-9

    The wizard will ask a few more questions about your store.

    Woo Onboarding Flow - Steps 10-11

    Last step: pick any extra plugins you may want. See our Jetpack and MailPoet reviews to see if those tools are worth it for you at this point. But if you anticipate needing to collect taxes, take credit card info, and handle shipping, those free plugins are worth it.

    Woo Onboarding Flow - Steps 12-13

    Now, you can tweak more settings in WooCommerce.

    WooCommerce Settings

    Ecommerce settings can be tricky. But WooCommerce makes it easier. You can control:

    • General Settings for money, products, and checkout
    • Product Settings for how items look and stock levels
    • Shipping Settings for delivery choices and costs
    • Payment Settings for how customers pay
    • Account Settings for signups and privacy
    • Email Settings for messages from your store
    • Advanced Settings for special tweaks

    For more help, see our WooCommerce settings guide, which will walk you through each of these important pages.

    Add Product Categories

    Categories help people find what they want in your store. For example, if you sell clothes, you could have categories like “Men,” “Women,” and “Kids.” We suggest you make these before adding products.

    To add categories, go to WooCommerce > Products in your dashboard. Then click “Categories.” These work just like categories and tags for WordPress posts.

    How to Make WordPress eCommerce Categories - Steps 1

    If placeholder categories exist, you can edit or delete them. When choosing categories and tags, keep your customers in mind. Use intuitive and easy-to-understand terms.

    Add Products to Your WordPress eCommerce Store

    You can add products individually or all at once with a CSV file.

    To add them individually, go to Products > “Add New.”

    Add Products - Steps 1

    Enter the product name.

    Add Products - Steps 2

    Add a product description and upload your product image.

    Add Products - Steps 3-4

    Next, select a product type. Then, set your item’s price and set your inventory levels. You can also set individual product shipping options. On the right-hand sidebar, set product categories and tags.

    Add Products - Steps 5-6

    When you’re happy, click “Publish.” Add as many products as you want to your store.

    Track your product stock with WooCommerce inventory management, and visit our detailed guide about setting up shipping in WooCommerce.

    4. Design Your WordPress eCommerce Website

    Since you’ve got Divi installed, let’s dive into designing your WordPress eCommerce site. With Divi, one of the best page builders for WordPress, you can design your site without touching code. This includes your product pages, cart, checkout, homepage, and blog. Divi’s WooCommerce modules are your go-to tools for building your WordPress store pages.

    Add Product Modules to a Page with Divi

    Divi has 2000+ pre-made layouts and 300+ website layout packs you can use, making setting up your WordPress eCommerce site quicker.

    Open your homepage in Divi and click “Browse Layouts” to see your options.

    Product to Page with Divi - Steps 1

    You’ve got thousands of layouts to pick from. To make it easy, look for ones that say “Shop Page.” Click “Use this Layout” to add it to your page.

    Product to Page with Divi - Steps 2-4

    The layout will show your products immediately (inside the Woo Products module). You can change how many show up, how they’re sorted, and much more.

    Product to Page with Divi - Steps 5

    What if you want to show only one product? Add a new row and pick “Woo Products” from the WooCommerce modules list.

    Product to Page with Divi - Steps 6-7

    Design WooCommerce Pages

    WooCommerce sets up some basic pages for you that Divi can help you customize:

    1. Shop page (where all your products show up)
    2. Cart page (shows what’s in your cart)
    3. Checkout page (where you pay)
    4. My Account page (to manage your account)
    5. And more, like pages for product categories and tags

    Divi lets you edit each of these page templates on each page using the Divi Builder, or you can create a custom template for these pages using the Theme Builder.

    Woo Shop Pages in Theme Builder - Steps 1-2

    Using the Divi Theme Builder is particularly useful for designing templates for your product pages, product category pages, and other site-wide design elements.

    For example, you could download one of our free product page templates from our blog (like this Clothing Store Product Page Template) and add it to the theme builder to have a stunning global template for all your products. Or you can easily create your own product page template from scratch

    For more help, check out our guides on making a cart page, setting up a checkout page, and using Divi for WooCommerce pages.

    5. Boost Your WordPress eCommerce Site with Plugins and Integrations

    Want to know the beauty of WordPress and WooCommerce? You can add hundreds of features with thousands of possible plugins. Free and paid plugins can make your WordPress eCommerce site even better. Let’s look at some must-know categories of WooCommerce plugins.

    SEO Plugins

    Getting people to your WordPress eCommerce site is obviously important. That’s where SEO plugins like Rank Math SEO come in. They help you make your site more search-engine friendly by adding schema markup, XML sitemaps, and other SEO best practices. There are even WooCommerce SEO plugins that ensure ideal compatibility and functionality.

    Analytics Rank Math Demo WordPress

    For a deep dive, check out our WooCommerce SEO guide. If you’re feeling adventurous, explore these AI-driven SEO tools.

    Email Marketing Plugins

    Email marketing remains an essential tool for growing an eCommerce store. External services like Mailchimp for WordPress and plugins like MailPoet help you build and manage your email lists.

    Mailchimp Email Reporting

    Use Mailchimp’s WooCommerce Integration to Increase Sales

    You can then send general emails as well as eCommerce-specific emails with coupons or abandoned cart emails.

    CRO Tools

    Conversion is king in eCommerce. Tools like OptinMonster and Bloom can help you get the most from your site by allowing alternate conversion for email signups.

    Split testing and Divi Leads

    You can also use Divi’s marketing tools to create A/B campaigns on your website and strengthen each landing page over time.

    Advertising Plugins

    Advertising plugins can integrate seamlessly with platforms like Google Ads and Facebook to drive more traffic. Check out Advanced Ads for more control over your advertising campaigns.

    For more WooCommerce plugins, Barn2 and Yith make lots of good options. And don’t forget to check the Divi Marketplace for solutions that work well with Divi.

    Conclusion

    You’ve gone through the ins and outs of setting up a WordPress eCommerce website. From selecting a hosting provider to configuring WooCommerce and optimizing your site for search engines, you’ve laid the groundwork for a successful online store.

    WordPress and WooCommerce together offer a powerful, flexible platform for eCommerce. They allow you to customize every aspect of your store, from product listings to payment options. And with a wide array of plugins, your store’s functionality can expand as your business grows.

    As your business scales, our extensive library of guides and reviews is here to support you every step of the way. Dive into our essential guides on how to sell online and master the best website marketing strategies. For tech-savvy insights, explore our reviews of top hosting companies, prime business tools, and standout WordPress plugins.

    Featured Image by Julia Tim / shutterstock.com

    The post How to Make a WordPress Ecommerce Website (2023 Easy Guide) appeared first on Elegant Themes Blog.

  • Discovering the Power of WooCommerce Shortcodes

    Master WooCommerce shortcodes to customize your e-commerce site effectively. Understand their types, usage, and benefits. Turn complexity into simplicity.

    The post “Discovering the Power of WooCommerce Shortcodes” first appeared on WP Mayor.

  • Wix eCommerce Review: An Easy Platform for Niche Sellers?

    Wix Ecommerce review.So, we completed an in-depth Wix eCommerce review to explore its features, pricing, design options, user interface, and customer support. This way, online merchants, physical retailers, and sellers of all types can see if Wix eCommerce makes sense for them (or if they should opt for a different platform, like WordPress).

  • Shopify vs WooCommerce (WordPress) – Which Is Best For eCommerce In 2023

    Choosing between Shopify and WooCommerce for your eCommerce store in 2023? Dive into our detailed comparison covering costs, ease of use, payment options, and integrations. Discover which platform aligns best with your business needs and budget. Start your online venture with the right tools!

    The post “Shopify vs WooCommerce (WordPress) – Which Is Best For eCommerce In 2023” first appeared on WP Mayor.

  • ChatGPT & WooCommerce: 5 Ways to Use AI in Your Online Store

    Chatgpt woocommerce.There are a lot of ways to leverage ChatGPT for WooCommerce. However, if you aren’t well-versed in using AI tools – in particular ChatGPT – it can be hard to get a grip on how things work. For example, you might still be in the dark about some cool plugins and integrations that are possible between ChatGPT and WooCommerce. In this article, we’ll go over some interesting ways you can use ChatGPT in WooCommerce to optimize and improve your store. Let’s get to it!

  • Shopify vs WooCommerce: Who Comes Out on Top in 2023?

    There are a lot of decisions to make when you’re opening an online store. One of the most important is the platform you’ll use to create it. In this guide to Shopify vs WooCommerce, I’ll explore key aspects of these two popular ecommerce platforms to help you make the right choice.

    The post Shopify vs WooCommerce: Who Comes Out on Top in 2023? appeared first on Themeisle Blog.