EDITS.WS

Tag: Jetpack News

  • Deploy Pre-Configured WordPress Sites with Jetpack and InstaWP

    Does your agency handle multiple clients, and as a result, multiple websites? Managing plenty of sites can be time-consuming. For example, setting up Jetpack alone — an essential step in making a website more functional and secure — isn’t exactly simple.

    Thankfully, there’s now a way to streamline the process of configuring a site for each client you serve. You can just do the initial setup for one website and just deploy the same configuration across all the other sites you will make, thanks to InstaWP. This not only makes the repetitive task faster but also ensures consistency in all your projects.

    In this post, we’ll show you how to do exactly just that.

    Why install Jetpack?

    Top banner from the Jetpack plugin listing.

    You might be wondering why you should install Jetpack in the first place when setting up a site. Well, Jetpack provides a variety of features for WordPress sites, such as better site security and site performance, as well as backups. You don’t have to turn on everything — Jetpack offers plugins that allow you to install only what you want and need.

    Ultimately, it really depends on you and/or your client. But it is highly recommended if you want to improve your site’s security, performance, and speed. Jetpack can help you attract more traffic.

    The question is, how do you make sure that you only set up Jetpack once and just copy your settings to every website you make? This is where InstaWP comes in with its test site/sandbox feature.

    What is InstaWP, and why use it?

    InstaWP dashboard with a listing of sites.

    InstaWP is a tool to create a WordPress Sandbox Environment. It lets you spin a test environment for your website in a few seconds. You can use it to make a completely new test website or a clone of your current website and test out plugins and configurations. You’ll get to do this all without affecting your original website’s settings and without fear of breaking your site!

    Plus, you don’t have to worry about things like your local storage, setting up DB, or even using a third party paid cloud hosting service. InstaWP handles all that, even with their free plan. And you can also use InstaWP in various ways, like building sites for your clients or developing and testing WordPress sites and products. 

    But one of the best features of InstaWP is the ability to create a website template with your preferred themes, plugins, and settings. That means you no longer have to do time-consuming setups for each new website you make. Instead, you can make one website as a base and start from there.

    How do you use InstaWP to generate a test WordPress site?

    Go to InstaWP and sign up for an account. Alternatively, use this link for quick onboarding.

    Once you sign in, you will see this screen:

    To create a new site from scratch, click New site.

    Click Add New + or + New Site to make this pop-up menu appear:

    Click Create Site to create your new site directly from the InstaWP dashboard.

    You can customize your WP version, PHP version, and site configuration, whether you want your website to be a default WordPress site, a WooCommerce site, or a multisite. When you’re done, press the Create Site button.

    This screen will appear:

    Click the Magic Login button to login to your new WordPress site.

    Click on the Magic Login button. It will take you to your WordPress test site instantly.

    How do you install the Jetpack Plugin on your InstaWP test site?

    When you have a test site ready, install the Jetpack plugin by following any of these procedures.

    Via the test website dashboard

    From your Dashboard, hove over Plugins and click Add New. On the next screen, type Jetpack in the search bar.

    Search for the Jetpack plugin from the add new screen in the WP Admin.

    When you see Jetpack, press Install Now.

    Click Install Now to install the Jetpack plugin.

    After installation, don’t forget to press the Activate button.

    Click Activate to activate the Jetpack plugin.

    Once you activate the plugin, the Jetpack button will appear on your dashboard menu. Set it up according to your preferences.

    Set up Jetpack.

    Via InstaWP’s Chrome Extension

    If you have the InstaWP Chrome Extension, an InstaWP account, and a ready test site, follow these steps.
    On WordPress, hover your cursor over the Download & Extend section then click Plugins.

    Hover your cursor over Download & Extend and then click on plugins.

    Input Jetpack in the white section next to the magnifying glass, then click on it when it appears.

    Search for Jetpack in the search bar on the plugin repository.

    You’ll see this appear on the next screen:

    To install Jetpack on one of your InstaWP sites, click Launch.

    Click Launch to install it on your current test website on InstaWP. 

    If you have two or more test websites on your InstaWP account, click the arrow on the right of the button. That will make a dropdown menu appear. You can then choose the site for plugin installation.

    From the dropdown, select the site that you want to install Jetpack on.

    A check will appear if you have installed Jetpack successfully.

    When Jetpack has been installed on your selected site, a checkmark will appear.

    And when you go to your test site, the Jetpack button will be on the left-hand menu:

    Set up Jetpack.

    What features of Jetpack should you activate?

    As mentioned earlier, Jetpack has plenty of features that will benefit your website and keep it safe, but you don’t have to turn them all on. If you feel confused about what to activate, here are some of our recommendations:

    • Brute Force Attack Protection – This feature will protect your site from brute force attacks when a hacker tries to guess your login credentials by repeatedly using diverse username-password pairs until they succeed. If a hacker ever attacks your site, Brute Force Attack Protection will limit the number of login attempts from the hacker’s IP address. And if the hacker keeps trying, the feature will temporarily block that IP address so that no new attempts can be made.
    • Downtime Monitoring – With this feature, Jetpack will continuously monitor your site and let you know if any downtime is detected. You’ll get notified via email.
    • Jetpack Scan – Anything that involves security, you can now view it in one location. You can also fix problems and restore backups. You’ll be notified via email.
    • VaultPress Backup – Whatever changes you make on your website, you can save them. And if your site gets broken for whatever reason, you can restore the original site in one click, even if you’re offline. 
    • Activity Log – Get a complete record of everything that happens on your website. This is especially important if you have a team with multiple people working on it. This is a clear way to monitor changes and remove the guesswork from the equation.

    What if you prefer using Jetpack CLI?

    Jetpack CLI is a command-line interface (CLI) tool for managing and deploying WordPress sites when you use Jetpack. It is used to make WP-CLI feature-rich and powerful. 

    You can configure Jetpack offline to your preference from the command line, making it easier to automate tasks and streamline your workflow.

    The question is, what if you want to edit Jetpack using this option? Is it possible with InstaWP? Yes – you can access InstaWP using SSH, and from there, access Jetpack CLI. 

    You first need to go to the rightmost part of your test website and press the three-dot menu.

    Click on the actions menu for the site that you want to turn on SFTP/SSH for.

    A drop-down menu will appear. Scroll down and click on the SFTP/SSH option.

    Click on SFTP/SSH in the dropdown.

    On the next screen, make sure to enable SSH and follow the instructions.

    Enable SFTP and SSH to be able to use Jetpack CLI.

    Once this is set up, you can run Jetpack CLI commands like the example below.

    Sample Jetpack CLI output.

    Whatever changes you make here will be carried out on the InstaWP test site, such as:

    • wp jetpack disconnect – Disconnect Jetpack from WordPress.com, or unlink any user’s account from their WordPress.com connection.
      • Use wp jetpack disconnect blog to disconnect Jetpack from WordPress
      • Use wp jetpack disconnect user <id|email|username> to unlink a user account from WordPress
    • wp jetpack reset – This command resets the Jetpack environment and brings it back to the starting default states. You can either reset all current options or simply revert to default active module settings.
      • Use wp jetpack reset modules to return modules to their default active state
      • Use wp jetpack reset options to go to the very initial Jetpack settings that you find upon getting started with it. This also resets all modules to default. 
    • wp jetpack options  – This command is for you to manage various available options. List them, their values, fetch separate option values, and update or delete them. 
      • Use wp jetpack options list to get all your options and their values related to the Jetpack configuration
      • Use wp jetpack options get <option_name> to fetch a specific option’s value.
      • Use wp jetpack options update <option_name> <option_value> to update an option’s current value to a new value. Take note that it only works for strings.
      • Use wp jetpack options delete <option_name> to delete any option – but only ones that are not important for keeping you connected with WordPress.com.

    Template Creation With Pre-Configured Jetpack Settings

    When you’re done setting up your Jetpack on the test site, here’s what you do next. At InstaWP, click on Templates.

    To make a template, you must first go to the templates page in the InstaWP dashboard.

    Click Add New + or the + Add Template.

    To create a template, click Add Template.

    When this popup appears, click on your created site, then Next.

    Click next on the popup.

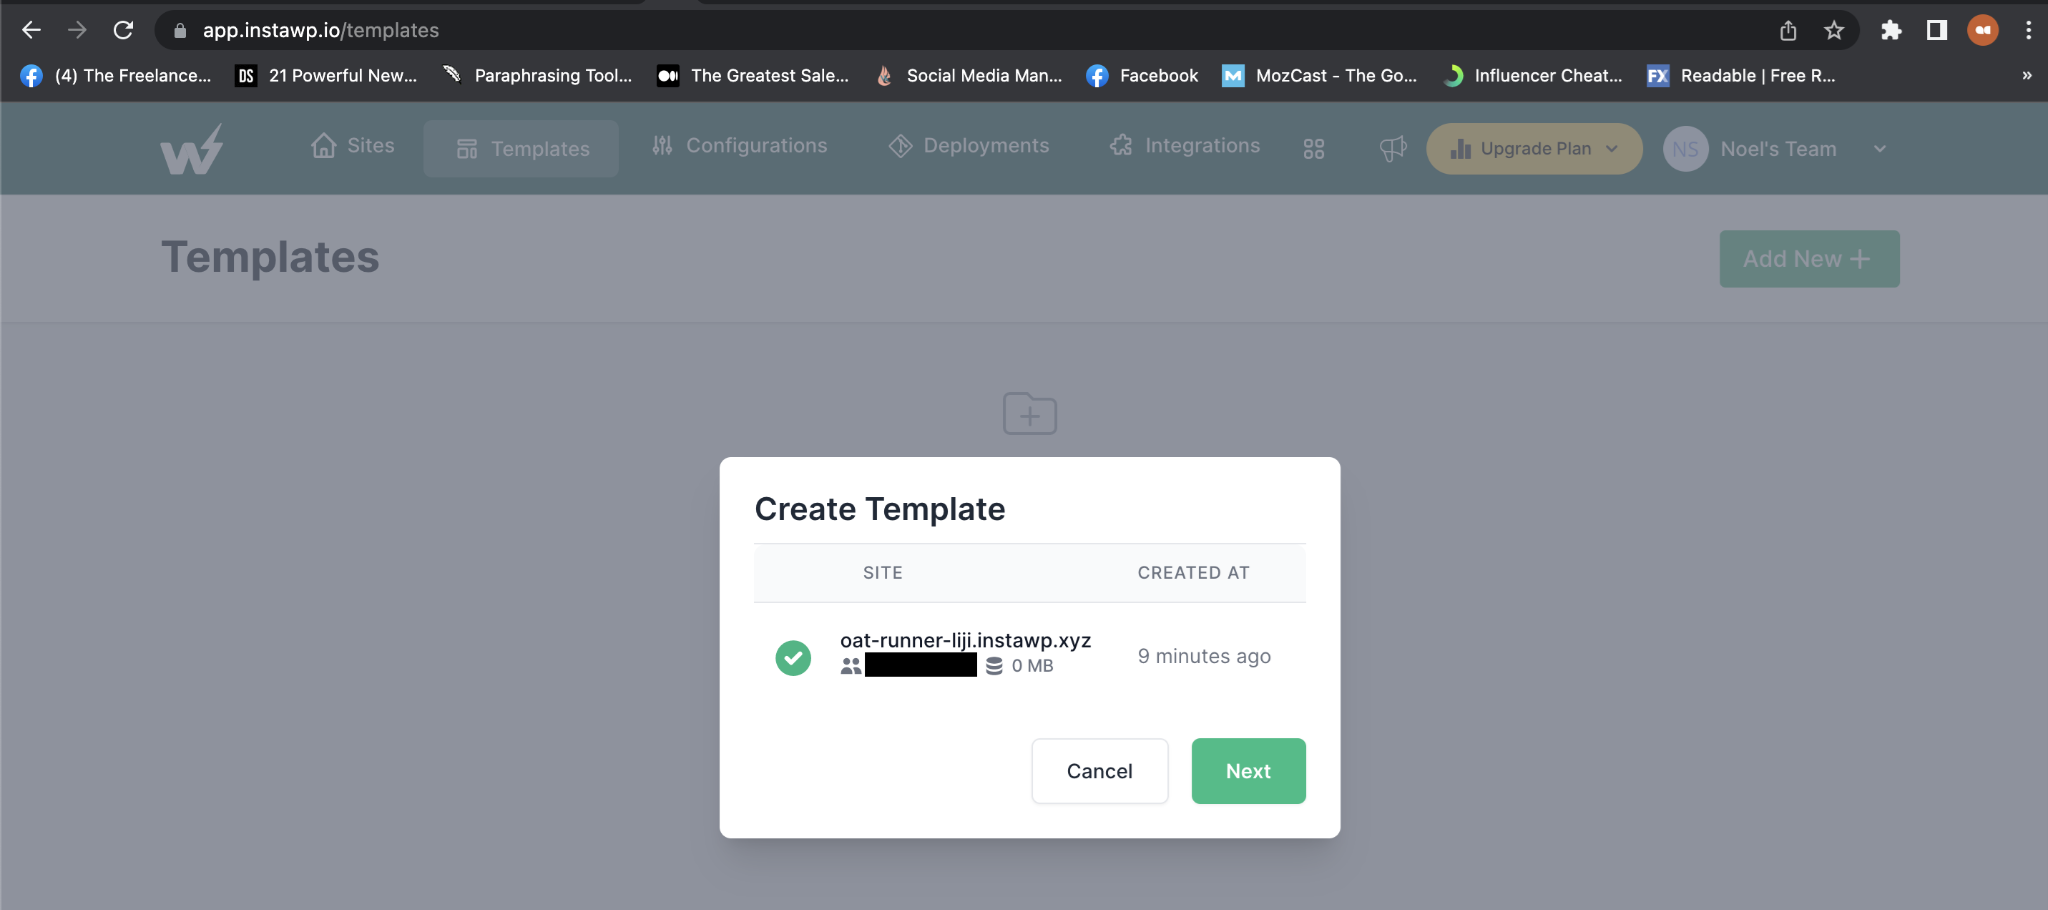
    You’ll see this next:

    Name and save your template.

    Name your template, describe it, and set it as a shared or private template. Since you’ll be doing this template for your agency, making it a shared one might be better.

    Using this template to make an entirely new site

    Return to the Sites page and hit the Add New + button.

    Click Add New to create a new site from your template.

    Instead of making a blank website and starting over, click From Template. You’ll see your freshly-made template.

    Click Create Site to make your site from a template.

    Select it, then press Create Site. InstaWP will make a site based on the template. The settings you configured on Jetpack earlier will be there. Do this whenever you need to create different websites with the same settings for your convenience.

    Take The Website Live

    The great thing about InstaWP is that you can make many different websites from a template and take all those websites live if you want to. Go to your Sites page, look for the site you want to make live, click the three vertical dots adjacent to this site’s name. Select Migrate:

    From the dropdown menu, click on Migrate.

    Choose the hosting server you prefer. InstaWP can migrate to the following hosts:

    Migrate your site to your preferred hosting provider.

    Enter the important details and sit back, as InstaWP will handle the entire process. Read this comprehensive checklist before you go live, though, to have a launch, as smooth as possible.

    Conclusion

    To sum things up, installing Jetpack on any WordPress site you plan to make is recommended because of its many benefits. And by using InstaWP, you only need to configure Jetpack once and deploy it across all your sites, and you’ll save valuable time and resources.

    By doing so, you’ll not only have more protected and more efficient websites, you’ll have a better workflow and get to focus on delivering top-quality sites for your clients.
    Sign up at InstaWP today to get started.

  • Changes to Jetpack Stats for Commercial Sites

    Following the release of the all-new Jetpack Stats, we’re continuing to build new paths to get you all the data you need to strengthen your business and site. To support the sustainability of our new product team, we’re introducing some changes to how commercial sites are charged.

    Going forward, commercial sites will pay for Jetpack Stats based on the amount of traffic they receive. This has been established as the standard for Stats products, and we think it is the most equitable, ensuring that you only pay more if your site grows. Personal sites will remain free.

    Introductory rate for 2023

    To smooth the transition, we are offering the lowest tier of $10 per month for all commercial sites throughout 2023. We hope this will allow ample time to adjust to the changes.

    What is a commercial site?

    In its simplest terms, a commercial site is one that you try to make money from. This most commonly includes selling a product or service or showing ads or affiliate links. For more detail, check out our support page.

    Personal sites are still free

    We’re excited to share that personal sites are staying free. If you don’t attempt to make money from your site, continue using Jetpack Stats for free as you do today.

    Collection of UI images from Jetpack Stats

    If you get value from Jetpack Stats, feel free to pay any amount to unlock upcoming advanced features and priority support. We’ve used this pricing structure with Akismet, and based on our experience, we believe this is the fairest way to provide our products to the world while limiting paid plans to those with more ability to pay.

    Thank you for your continued support and trust in Jetpack Stats. We believe that these changes will enable us to provide a better Stats experience while preserving the values that make the open web so exceptional.

  • Jetpack 12.3 – Introducing AI-Assisted Content Editing and More

    Since the launch of the Jetpack AI Assistant, we’ve been listening closely to your feedback, and we’re excited to announce that now, in addition to creating fresh content, you can use the AI Assistant to revise and enhance your existing blocks in the WordPress Editor. This release also introduces the new Tock Block for easy on-site bookings, alongside numerous enhancements and bug fixes.

    Enhance your editing experience with the Jetpack AI Assistant

    The AI Assistant is designed to make your content editing process more efficient and tailored to your needs. Let’s say you have a paragraph or a block of content that you think could be more engaging or could better represent your ideas. Now, with a simple click, Jetpack AI Assistant can step in and help you to enhance that content, all within the familiar environment of the WordPress Editor.

    The introduction of this new feature comes with several benefits:

    • Efficient Content Refinement: Instead of starting from scratch, let the AI Assistant help you improve your existing content, saving you both time and effort.
    • Quality Enhancement: AI-assisted editing can help fine-tune the language and tone of your content, making it more engaging for your readers.
    • Multiple Block Editing: The updated Jetpack AI is designed to work when you select more than one paragraph, making it much more convenient to edit larger sections of your content in one go.

    Are you ready to explore the AI-powered content editing feature? Here’s what you need to do:

    1. Update your Jetpack to the latest version.
    2. Head to the WordPress Editor within your wp-admin.
    3. Select the paragraph or block you want to edit and find the AI Assistant logo in the “tools” group.

    Seamless bookings now a click away: Introducing the new Tock Block

    Introducing the all-new Tock Block powered by Jetpack! Redefine the way your customers book reservations with your business. Utilizing the lightweight and efficient Tock, this block provides an intuitive, in-line booking experience directly from your website. With a simple click, your customers can access a neatly organized calendar and booking form.

    And More

    This release also includes several new features and improvements:

    A big thank you to everyone who contributed to this release:

    Adnan Haque, André Kallehauge, Andrei Demian, Andrés Blanco, Anna McPhee, Brad Jorsch, Brandon Kraft, Carlos Garcia, Caroline Moore, Clemen, Damián Suárez, Dognose, Donncha Ó Caoimh, Douglas Henri, Dylan Munson, Gergely Márk Juhász, Greg Fogelberg, Igor Zinovyev, Ivan Ottinger, Jason Moon, Jasper Kang, Jeremy Herve, John Caruso, Jonny Harris, Karen Attfield, Luiz Kowalski, MILLER/F, Manzoor Wani, Mark Biek, Miguel Lezama, Miguel Torres, Nate Weller, Osk, Panos Kountanis, Paul Bunkham, Paulo Marcos Trentin, Peter Petrov, Renato Augusto Gama dos Santos, Richard Ortiz, Romario Raffington, Samiff, Sean Fisher, Sergey Mitroshin, Sérgio Gomes, Tim Broddin, bindlegirl, gogdzl, nunyvega, ouikhuan, tbradsha, thingalon, valterlorran

  • Create custom visuals for your social media with the Jetpack Social Image Generator

    Traditionally, creating unique and engaging imagery for social media platforms often required a basic understanding of image editing tools. Adding text to images, changing photo orientation, and tinkering with different visual styles for each social network was tedious and frustrating. But not anymore.

    With Jetpack Social Advanced, you can overlay custom text onto your images and choose from a variety of styles to increase engagement on your social posts. Most importantly, you’ll save time by doing it all within the WordPress editor.

    Choose your image & add custom text

    Jetpack Social Advanced gives you the freedom to create social images with custom text applied to them. This is handy if you often have long blog post titles for SEO purposes, but prefer to use specific calls-to-action with your social media post images.

    A screenshot of the new Jetpack Social Image Generator working within the new WordPress Editor

    Sometimes the featured image of your blog post may not be the best fit to share on social platforms. With the Jetpack Social Image Generator, you can choose to share your featured image, select a different image from your media library, upload a new image, or select “no image” if you just want to create a text-based image for your socials.

    Pick a template to make it your own

    A screenshot of a user choosing a visual template to share on their social media accounts

    Tie everything together by exploring creative templates with various fonts and text placement around your image. Choose from full width images with text overlays or images with text aligned to either side.

    Preview before you share

    A screenshot of the social preview tool within Jetpack Social

    Finally, use the built-in Jetpack social preview tool to see exactly how your image will look on each of your connected social media platforms. Publish right away or schedule your posts to be shared when your audience is most active on social media.

    With Jetpack Social, it’s never been easier to share your WordPress content to social media.

  • MainWP Partners with Jetpack for WordPress Security

    Managing multiple WordPress sites can be stressful. With the average WordPress site running 22 plugins, it’s crucial that every vulnerability is accounted for. That’s why we’re thrilled to announce our partnership with MainWP, bringing you two new Jetpack extensions in the MainWP marketplace. With this new agreement in place, managing multiple WordPress sites has never been easier.

    Jetpack has a full suite of single-purpose plugins designed to protect websites. MainWP has now integrated two Jetpack extensions into their marketplace:

    • Jetpack Protect – a free plugin for malware prevention.
    • Jetpack Scan – a premium plugin that includes automated daily scanning, one-click fixes for most issues, and a WAF (web application firewall).

    Jetpack Scan will review all the files on your site, looking for any plugin or theme that our research team has flagged for vulnerabilities, so you can take action immediately. Jetpack Scan will further fix issues for you with your one-click approval.

    Jetpack Scan image for MainWP partnership.

    Why MainWP?

    The MainWP WordPress Manager Dashboard plugin allows you to control multiple WordPress websites (including sites on different hosting platforms) from your own private, self-hosted WordPress website. MainWP is free with the option to upgrade to a premium version.

    Privacy is what differentiates MainWP from other options on the market. The MainWP plugins come with their own privacy policies to ensure that any personally identifiable information (PII) is not collected.

    MainWP Customers Can Access a Jetpack Scan Discount with a Coupon

    To make it even more affordable for agencies to protect their sites, MainWP has enabled couponing, which allows clients to enable Jetpack Scan at a discount. 

    Button to get Jetpack Coupon on MainWP extension

    They can then claim and apply the coupon:

    Claim Coupon at MainWP for Jetpack extensions

    Why MainWP + Jetpack?

    MainWP provides a WordPress management dashboard that is self-hosted, open source and used by more than 10,000 agencies and builders to manage over 600,000 WordPress sites. 

    For agencies and builders, there is nothing more mission-critical than steering your sites to safety past WordPress vulnerabilities. Jetpack’s Protect and Scan plugins are built on WPScan, the most trusted WordPress vulnerability service. The MainWP team is thrilled to partner with Automattic’s Jetpack to make it simple for MainWP clients to protect their sites.

    Dennis Dornon, Co-Founder of MainWP

    We hear from agency clients over and again that MainWP is critical for their business. This is an exciting launch for us as we are confident that almost every MainWP client can benefit from protecting their sites with Jetpack Protect or Jetpack Scan.

    Mike Bray, Head of Partnerships and Business Development at Jetpack

    Check out the two new Jetpack extensions in the MainWP marketplace for yourself!

  • Jetpack 11.9 – Improvements for Social Sharing Buttons and Form Block

    This month we have worked on several improvements to enhance your Jetpack experience, including further enhancements to the Social Sharing Buttons and Form Block.

    Share your blog posts on Mastodon with improved Jetpack Social Sharing Buttons

    We made some design and performance updates on our Social Sharing Buttons for a better user experience, including a new sharing button for Mastodon.

    You can customize your Social Sharing Buttons by following these steps:

    • Go to the Jetpack dashboard in WP Admin.
    • View the Settings menu and click on Sharing page.
    • Enable Add sharing buttons to your posts and page option.
    • Click on Configure your sharing buttons.

    Once you’ve activated the Sharing feature, you can also go to  Settings > Sharing to enable a sharing button:

    As you can see in the video above, the button does a few things:

    1. You can pick between just the icon, icon + text, text only, or a button with a colorful logo and the text.
    2. When sharing, your visitors will first have to enter the Mastodon instance where they’d like to share the post.
    3. You can edit the message, but by default, the message will include the post title and URL, and tags will be added as hashtags at the end.

    Field style syncing for the Form Block

    We introduced a new Sync Fields Style option for the Form Block to provide you greater flexibility in customizing your forms’ designs. You can enable this option from the block settings in your editor:

    Updated Stats dashboard design

    We are now defaulting to an updated modern design for the Jetpack Stats dashboard to help provide valuable insights and grow your site.

    If you have feedback on the updated design, please share your thoughts on this survey. And if you prefer to continue using the traditional stats for now, there is a toggle in the Traffic section of the Jetpack settings.

    Automattic Certified as a Most Loved Workplace

    Our parent company Automattic has been certified as a Most Loved Workplace by Best Practice Institute research and analysis. The Most Loved Workplace validation provides the most comprehensive look at workplace sentiment for organizations today. To learn more about Automattic’s certification and read why folks love working here, visit our page on Most Loved Workplace.  

    We continue to grow and have some exciting open positions at Automattic, including in Engineering, Product, Marketing, Business Development, HR, Customer Support, and more. Work for us, from anywhere: https://automattic.com/work-with-us/.

    A big thank you to everyone who contributed to this release:

    Adnan Haque, Adrian Moldovan, André Kallehauge, Antony Agrios, Artur Piszek, Bogdan Nikolic, Brad Jorsch, Brandon Kraft, Christian Gastrell, Clemen, Damián Suárez, Daniel Bachhuber, Daniel Post, Dave Martin, Douglas Henri, Dylan Munson, Fernando Fernandes, Francesco Bigiarini, Gergely Márk Juhász, Grant Kinney, Ian Ramos, Igor Zinovyev, Jason Johnston, Jason Moon, Jasper Kang, Jeremy Herve, Jeremy Yip, John Caruso, Karen Attfield, Kevin L, Kosta, Kuba Birecki, Linas Valiukas, MILLER/F, Matias Ventura, Matthew Reishus, Miguel Torres, Nate Weller, Nauris Pūķis, Osk, Peter Petrov, Piotr Stankowski, Rafael Agostini, Renato Augusto Gama dos Santos, Robert Felty, Rustam Shaikh, Samiff, Sergey Mitroshin, Sérgio Gomes, Siobhan Bamber, Steve D, Tom Rhodes, Vishnu Gopal, bindlegirl, dkmyta, gogdzl, jcheringer, nunyvega, ouikhuan, simonktnga8c, thingalon, vikneshwar

  • Restore your site from anywhere with the Jetpack mobile app

    Did you know that you can view and restore your site from anywhere with the Jetpack mobile app

    The app is the perfect companion to Jetpack Security. With it, you can be reassured that your site is humming along nicely, even while you’re far away from your laptop. Real-time security alerts will empower you to restore your site right from the palm of your hand if ever needed.

    What’s more, with the Jetpack app, you get access to a wide range of features, all designed to help you effectively manage your site while on the go:

    • Gain further peace of mind with security scanning and malware detection. An instant notification will be sent to your app if any action is ever needed from you.
    • Understand how your content is performing and know what’s resonating with your audience using Stats and Insights.
    • Auto-share new blog posts to Facebook, Twitter, LinkedIn, and Tumblr. Write once, post everywhere.
    • Reply to comments on the go, see when your traffic is booming, and keep engaged with your audience with Notifications.
    • Tweak, create, or publish your site’s content from anywhere in the world.
    • Discover new bloggers and catch up with your favorite sites using the Reader.

    We’re constantly working on new ways to improve the Jetpack app and make it the best possible way to put your site in your pocket and make updates on the go. Inspiration can strike anywhere, after all!


    FAQ

    What’s the difference between the WordPress and the Jetpack apps?

    Your favorite Jetpack-powered features from the WordPress app – including Stats, Notifications, and the Reader – have a new home: the Jetpack app! These features will soon be removed from the WordPress app so that its focus will be on essential user and publishing tools. With the Jetpack app, you can expect the same attention to core features like managing and editing content, as well as next-level tools to grow your audience on a trusted platform.

    Why are there two apps, and which should I use?

    WordPress comes in more than one flavor and serves a diverse range of site administration needs. After listening to a lot of feedback around varying expectations, we settled on creating two options for you to WordPress on the go:

    1. The WordPress app will focus on WordPress’ core functionality. If you’re looking for the essential tools you need to publish on the go, with support for offline editing and the ability to upload media straight from your phone’s camera roll, then this may be the app for you.
    1. The Jetpack app is the premium mobile publishing experience for our super-connected world. With it, you’ll get all the essential tools that come with the WordPress app, plus a suite of features for growing your site. Track the performance of your content with Stats, get notified about comments and reactions with Notifications, and discover content and join communities with the Reader. Whether you’re new to publishing on the Internet or a seasoned veteran, have a WordPress site already or want to start a new one — download the Jetpack app today for a great set of tools to start or grow!

    Either app is available for you to use. Once you’ve decided which app is best for you, please delete the other. Managing your site across both apps is currently unsupported and may lead to issues like data conflicts.

    We’re excited to offer different apps to suit different needs and will be sharing further details over the coming weeks. In the meantime, we want to hear from you! Please feel welcome to comment on this post with any questions or feedback you may have.

  • Introducing Blaze — Find new customers by promoting your best content

    Building a strong following of readers and customers is hard work. And getting eyes on your content can feel like rubbing two sticks together. 

    You know there are people out there who are interested in what you’re building — but how to find them? That’s why we’ve created Blaze. Advertise your posts and pages across millions of sites in the WordPress.com and Tumblr ad network. All it takes is a few clicks and $5 per day.

    Blaze has incredible reach: more than 13.5 billion impressions per month from millions of active daily visitors is the spark you need to get noticed. It’s like lighter fluid for your best content.

    More than 13.5 billion impressions per month from millions of active daily visitors in your neighborhood and across the world

    How Blaze works

    Once you have Jetpack installed, then head to wordpress.com/advertising and select your website — you’ll see a list of recent posts and pages you can promote.

    Alternatively, when viewing the post or page list in your WordPress.com dashboard, click the ellipses (three dots) next to any individual post or page to bring up a new menu, then click “Promote with Blaze.”

    If you’re having trouble, make sure your language is set to English and Jetpack’s JSON API module is enabled. This module is enabled by default, but if you’ve manually disabled it, you can refer to these instructions to activate it.

    Now you’ll be in the Blaze Campaign Wizard.

    1. Design your ad. Our wizard automatically formats your content into a beautiful ad, but you can adjust it however you like.
    2. Select your audience. Show off your ad to people in certain areas, or people who are reading about topics like movies or sports. You’ll see an estimate of how many people you’ll reach.
    3. Set your dates and budget. Run an ad for 6 months or just a few days — it’s up to you.
    4. Publish your ad. Get some of the lowest ad prices while protecting your brand with a system backed by Verity and Grapeshot. Rest easy that your ads will only show up where you’d like them to.
    5. See your reach. Once your ad is running, you can check how it’s doing in the “Campaigns” tab of the advertising page where you started your campaign. Quickly see how many impressions and clicks you got from your new fans.

    Our campaigns are billed weekly based on how many times your ad is shown, so you’ll only ever pay for what you signed up for.

    Currently, Blaze is only available in English. We’re working on rolling it out for additional languages. As always, you can find even more details about this tool on our support page.

    Go on, add some fuel to your fire with Blaze.

  • WP Super Cache Joins the Jetpack Family

    Over the last 15 years, WP Super Cache has become one of the most popular WordPress plugins, helping improve performance for more than two million sites for free. It was created in 2007 by Automattic developer Donncha Ó Caoimh.

    “WP Super Cache is a great plugin for handling caching needs, but there is an opportunity to make it more useful for a wider variety of sites. I have been working on the plugin for 15 years, and it’s time to hand it over to a new team. Jetpack will be able to put much more effort and time into the plugin than I ever could, and I’m excited to see what becomes of it,” said Donncha.

    Jetpack will move development to its Performance team, which works on related features like Jetpack Boost and the CDN. “We’re excited to start working on WP Super Cache,” Jetpack Performance Lead Mark George says. “Our goal is to create an experience where anyone can make their site extremely fast without being an expert. We want to help make sure that WP Super Cache remains a reliable and easy option for that.”

    More of the same

    We’re happy to say that WP Super Cache will continue to be a great way to speed up your site for free. You can enjoy its core features without a new plugin or a connection to Jetpack.

    What will be changing

    While we research new features to help make WordPress sites cache faster, we will begin updating the WP Super Cache UI to bring it in line with modern standards, so it is easier to use. In addition, we’ll be working behind the scenes to ensure it’s compatible with our other performance features like Jetpack Boost.

    Speed up your site

    For those that aren’t familiar, WP Super Cache is a static caching plugin for WordPress. It generates HTML files served directly by Apache without processing comparatively heavy PHP scripts. This simple step should speed up your WordPress site significantly.

    Haven’t tried WP Super Cache yet? Speed up your site today.