EDITS.WS

Tag: social media

  • A Comprehensive Guide to Social Media Marketing for Businesses

    These days, social media is an essential part of any successful business strategy. It’s not a luxury, but a necessity. With over 3.6 billion people using social media worldwide, it’s a digital playground for businesses to showcase their products and services, build brand awareness, and connect with customers.

    But it’s not just all fun and games. It takes a well-planned strategy to succeed on social media. That’s where this guide comes in. It’s a complete playbook to help you navigate the world of social media marketing and advance your goals.

    1. Identify and understand your audience

    Before you start creating content and posting it on social media, it’s important to understand who your target audience is. This will help you tailor your content so that it’s engaging and effective, and determine the best platforms to invest your time and budget.  

    How do you find your ideal audience? 

    Talk to your current followers and customers or, if you’re just starting, seek out people who respond enthusiastically when you approach them with your idea. 

    You’re looking for shared traits beyond a common interest in the category of products you sell (fitness, pet, culinary, etc.). What kinds of pain points, passions, and core values do you hear over and over again?

    Spend some time digging through your analytics. What do your existing visitors have in common? Where are they from? What content are they reading on your site? Are they primarily in a certain age range?

    You can also send out surveys to your email list or add polls to your social media accounts. But the absolute best option is to talk to people in your audience face-to-face or over the phone. This allows you to ask open-ended questions that get more to the root of their motivations. You may end up finding out things you never even thought to ask about!

    Then, create buyer personas to help you better imagine your audience and how to relate to them. For example, if you sell hiking gear, you might have a persona named Jenny, who’s 35 years old, lives in the Pacific Northwest, has two kids, and is constantly looking for new ways to streamline her hikes. When you’re writing content in the future, you can think about ways that it can specifically help Jenny.

    Learn more about finding your audience. 

    2. Set clear goals and objectives

    Once you have a clear understanding of your audience and competition, it’s time to set your goals and objectives. Your overall marketing goal may be to increase brand awareness or drive more sales, but it’s important to break that down into specific, measurable, attainable, relevant, and time-bound (SMART) objectives.

    For example, your objective may be to increase your social media following by 20% in the next quarter, or to achieve a certain amount of engagement on your posts. With clear goals and objectives in place, you can create a plan to achieve them.

    3. Choose the right social media platform(s)

    There are countless social media platforms available, but not all of them will work for your business. It’s important to identify the most popular and relevant ones for  your audience. Once you know which platforms to focus on, spend time learning the features and capabilities of each one. This will help you determine the kinds of content you’ll need to create.

    For example, if your business specializes in products that are creative, artistic, or otherwise best represented by imagery, platforms like Instagram and Pinterest would be a great fit for you. Think food, home decor, artwork, and fashion! 

    Pinterest feed on a laptop screen

    On the other hand, if you’re a B2B firm, LinkedIn would be a better fit. Understanding the features and capabilities of each platform will also help you make the most of its features.

    Ecommerce store? Learn how to choose the right social media platforms. 

    4. Create and curate engaging content

    The key to a successful social media effort is creating and curating engaging content. Decide on the types of content you want to create, like blog posts, videos, infographics, or memes. A content calendar can help you stay organized and on schedule. 

    But don’t just focus on creating your own content. Curating and sharing relevant posts from other sources can also be a great way to engage with your audience and alleviate the pressure for continuous development of original content.

    It’s not always easy, but don’t get discouraged. It’s like trying to come up with a good joke — it’s hard but when it’s done right, it’s a hit.

    How to determine the kind of social media to create

    Start by researching your competitors. Which ones have the best engagement on their social profiles and what’s unique about their approach? You can pick up cues for the kinds of content to produce, when to post, and how to interact with followers. 

    And you can do the same with competitors who aren’t having as much success — by learning from their mistakes, you can avoid making the same ones.

    Get familiar with the successful influencers in your target genre. What kind of content do they post? On YouTube, for example, you can quickly scan popular creators from a variety of genres and look at the views for each video. What do the most popular ones have in common? In other words, what topics and style of content is really drawing attention? 

    5. Leverage automation to streamline social media posts

    Automation is a must for businesses looking to stay competitive on social media. It’s a powerful way to streamline your social media efforts and ensure that you’re reaching your audience at the right time.

    Jetpack Social is the ideal social media tool for WordPress site owners. Instead of having to log in and out of social media accounts, you can post to multiple platforms at the same time, or automatically push new WordPress posts out as soon as they’re published on your site. 

    Jetpack Social settings in WordPress

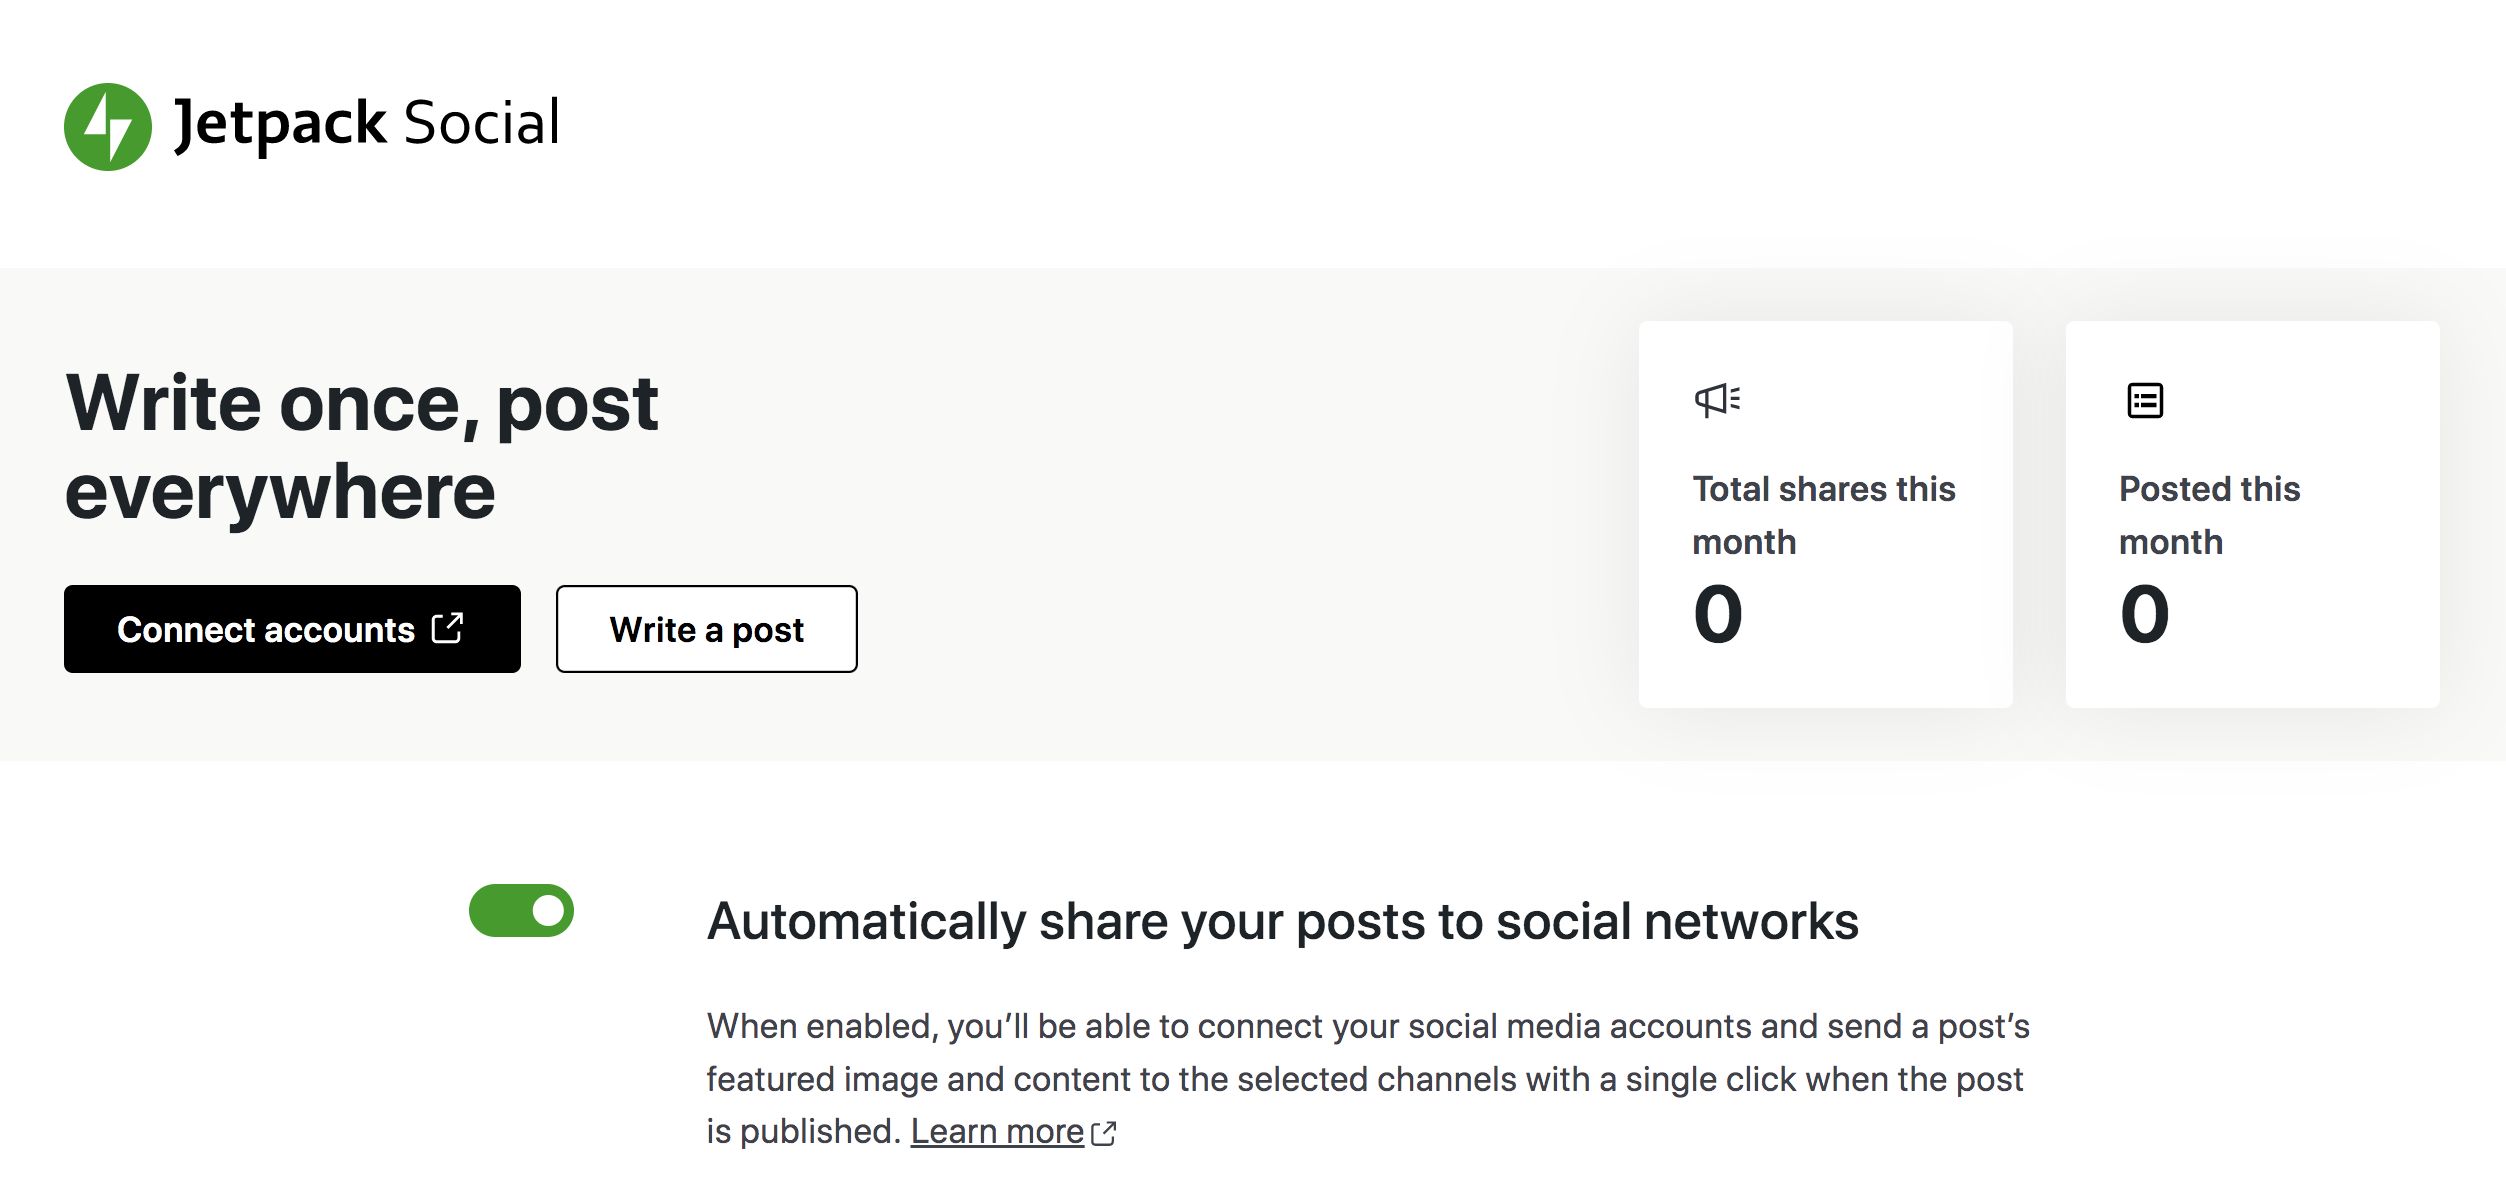
    It also allows you to work more efficiently. Schedule posts in advance so you can plan once a week and then spend the rest of your time working on other tasks. And you can rest easy, knowing that they’ll go out at the perfect time to reach your audience when they’re most engaged. 

    Imagine you’re a business owner who just opened a new store, and you’re too busy to post on social media, but you know the importance of it. By using Jetpack Social, you can schedule your posts in advance and not have to worry about missing out on potential customers. It’s like having a personal assistant who knows how to use social media.

    6. Build a community of followers and keep them engaged

    Once you have a strong following on social media, it’s important to keep them engaged. So, be sure to make interacting with followers a regular part of your social media plan. This can include responding to comments, hosting giveaways, and creating polls. Measure and analyze community engagement to see what’s working and what’s not.

    Think of your followers as a group of friends. You don’t want to only talk about yourself, or even the same topic over and over. Instead, switch things up to keep people interested, and take the time to let your followers do the talking.  Hosting giveaways and creating polls can feel like throwing a party — it’s fun and interactive. And just like a party, you want to make sure everyone’s having a good time. So keep tabs on engagement levels and if they start to drop, adjust your approach!

    7. Advertise on social media

    Advertising on social media is a great way to reach a targeted audience and drive more sales. There are a variety of options available, including sponsored posts, carousel ads, stories, messages, videos, and more. It’s important to understand the different types of advertising and how they can benefit your business. Create ad campaigns and target specific audiences, then measure and analyze the performance of your ads to see what’s working and what’s not.

    Advertising on social media is like dating, you want to make sure you’re reaching the right person, and you want to make sure the relationship is worth it. By understanding the different types of advertising and targeting specific audiences, you’ll increase your chances of finding the perfect match. 

    8. Consider influencer marketing

    Influencer marketing has become an increasingly popular strategy for businesses looking to promote their products or services on social media. By collaborating with influencers in your industry, you can reach a wider audience and gain credibility with potential customers.

    Influencer marketing can help you promote your products or services in a more authentic and relatable way. Influencers have built a following based on trust and credibility, and their endorsement can be a powerful tool for promoting your business.

    When it comes to influencer marketing, it’s important to identify and reach out to the right influencers. Look for partners who align with your brand and target audience, and who have a strong engagement with their followers.

    Once you’ve identified the right influencers, it’s important to establish clear and mutually beneficial objectives. This can help ensure that the collaboration is successful and beneficial for both parties.

    The size of each influencer’s audience can vary dramatically, but even those with only a few thousand followers can provide a boost if their audience fits perfectly with your business’s target niche. Some influencers will post in exchange for free products, while others might command a high fee. You can get pretty creative with this kind of marketing, so give it a try. Learn more about influencer marketing for ecommerce

    9. Measure and analyze the results

    Measuring the success of your social media efforts is crucial. Identify key performance indicators (KPIs) to track, such as reach, engagement, and conversions. Analyze and interpret the data to see what’s working and what’s not, and make adjustments as needed.

    Jetpack Stats dashboard

    Jetpack Stats is a great way to dive into the world of analytics. It provides essential information about your website’s performance, and allows you to easily sync your Google Analytics account for even more in-depth information about marketing campaigns and conversions.

    10. Know how to manage and respond to negative feedback

    No matter how well you plan and execute your social media strategy, it’s inevitable that you’ll receive negative feedback at some point. Whether it’s a snarky comment on a post or a bad review, it’s important to know how to handle it.

    First and foremost, stay calm and professional when responding. Don’t take it personally, and avoid getting defensive or argumentative. Instead, take the time to understand the customer’s concern and address it in a thoughtful and respectful manner.

    One effective way to handle negative feedback is to respond with humor or laugh at your own mistakes. If you did something wrong, acknowledge it. If it’s something you personally wrote or created, consider taking yourself out of the situation and having an employee or trusted friend respond. 

    And, remember, not everything requires a response. It’s okay to remain silent sometimes. People have bad days and say mean things. Sometimes, they misspeak or misunderstand. It doesn’t change the value of what you’re building. Focus on the followers who love what you’re doing! 

    Finally, if a legitimate issue is raised, be sure to make note of it and use it as an opportunity for improvement. Show your customers that you value their input.

    Frequently asked questions about social media marketing

    How can Jetpack Social help businesses with their social media efforts?

    Jetpack Social is a powerful social media plugin for WordPress that can help businesses automate their social media, post to multiple profiles at once, and schedule posts in advance. It’s a great way to streamline social media efforts and make the most of your time.

    Why is it important for a business to have a social media presence?

    Having a social media presence allows businesses to reach a new audience, engage with customers, and drive more sales. It’s also a great way to build brand awareness and establish a relationship with customers.

    What are the benefits of social media marketing for businesses?

    The benefits of social media marketing for businesses include increased brand awareness, more sales, improved customer engagement, and more.

    What are some common mistakes businesses make on social media?

    Some common mistakes businesses make on social media include not understanding their audience, not setting clear goals and objectives, not choosing the right platforms, and not measuring and analyzing their results.

    Jetpack Social: Social media automation for businesses using WordPress

    As we’ve mentioned in this guide, automation is a crucial aspect of a successful social media marketing strategy. And for businesses using WordPress, Jetpack Social is the perfect solution.

    This plugin offers a wide range of features to help you streamline your social media efforts, including automating your social media posts and scheduling posts in advance.

    Visit the following page to learn more about Jetpack Social: https://jetpack.com/social/

  • How to Create a Social Media Content Strategy from A to Z

    When it comes to creating a successful social media content strategy, it can feel like there’s an endless amount of options and platforms to choose from. But don’t let that overwhelm you, because with a little bit of planning and a lot of creativity, you can build a strategy that will help boost your brand awareness, increase customer engagement, and drive sales.

    Eight steps to define your social media recipe

    Think of your social media content strategy like a recipe for success. Just like a recipe, if you don’t have all the right ingredients and a clear understanding of what you’re trying to achieve, your dish (or in this case, your content) will fall flat.

    But with the right components in place, you’ll be able to whip up something that’s not only delicious, but will also leave your customers craving more.

    1. Understand your audience’s platform & content preferences

    The first step in this journey is to understand your audience’s platform and content preferences. Think about it: you wouldn’t serve a steak to a vegetarian, so why would you create content that’s not relevant to your audience?

    By identifying your target audience demographics, researching their interests and behaviors, and creating buyer personas, you’ll be able to create content that resonates with your audience.

    So how do you do this? You may already have an idea of who your target audience is. Perhaps it’s busy professionals who are looking for a way to save time. Maybe it’s families within a 50-mile radius of Boston who are looking for outdoor activities. Or it could be coffee lovers who want the highest-quality beans to brew in their French press.

    If you don’t know who makes up your audience, dive into your analytics. See who resonates with your content, products, or services. Or think about who might have the problems that your business solves.

    Then, get to know that audience. Talk to them in person. Send out surveys via email. Conduct social media polls. Find out information about where they spend their time online, what types of content they like to consume on social media — livestreams, image-based posts, audio, links to long-form blog content, etc. — and what piques their interest.

    Finally, turn that information into buyer personas, which are essentially made-up characters who are similar to the average member of your target audience. For example, you could have a persona named Josh, who is a 35-year-old father of two, makes a middle-class income, lives in the Boston area, and goes on hikes every weekend.

    In the future, when you make decisions about social media, you can reference these personas to ensure that every move you make meets their needs.

    Learn more: this article is specifically tailored to ecommerce, but can help any business choose which social media platforms are right for them. 

    2. Define your success metrics and goals

    Once you have a clear understanding of your audience, it’s time to define your success metrics and goals. Just like cooking, having a clear finished product in mind will help you navigate the recipe.

    Identifying overall business goals and setting specific, measurable, achievable, relevant, and time-bound (SMART) steps along the way is crucial for success on social media. Key performance indicators (KPIs) are metrics you can use to objectively measure results. These can help you understand if your efforts are truly working or if you need to make adjustments.

    Common KPIs for social media include: 

    • Impressions
    • Likes
    • Comments
    • Audience growth
    • Engagement rate
    • Conversion rate
    • Click-through-rate 
    • Return on ad spend (ROAS)
    • Add to carts

    3. Develop a content theme that sets you apart

    In today’s crowded social media landscape, it’s essential to have a content theme that sets you apart. Think of it like a fashion statement — to work, it has to be unique and memorable.

    To be successful, your company needs a unique selling proposition like a new material, service style, or ingredient that competitors don’t have. Maybe you have several. You can lean into this key difference to form the basis of the subject matter for your posts. Just like creating buyer personas, you may want to map our personas for competitors that also serve your target audience. Include your own company and see what makes you different. 

    Regular brainstorming sessions — where anything goes — can help get ideas flowing. Then simply pick the best and leave the rest. 

    Finally, don’t forget to listen to your followers. Ask them for their ideas and award prizes for the top ones. Explore trending ideas that other companies are using and see if you can adapt them to your unique selling proposition and target audience.

    4. Establish a publishing frequency and content calendar

    Establishing a publishing frequency and content calendar is crucial for keeping your content strategy on track. 

    Your frequency might be dictated, in large part, by the platforms you choose to use. For example, Twitter lends itself to multiple updates every day. On Facebook, you might not want to post more than once every day or two. 

    This guide breaks down how often to post per platform. 

    You also want to vary the kinds of posts you make (quotes vs stats vs photos, etc.) and you don’t want to just start thinking of ideas 15 minutes before you’re supposed to post. This is where having a three-month content calendar planned in advance can help you stay organized and ahead of the game. Then you can create similar posts in bulk and spread them out on your calendar for efficiency.

    Jetpack Social can help you schedule social media posts from WordPress in advance so that, once you know what you want to post and when, you can automate publishing. This is how professional social media managers consistently release new content — even while they’re on vacation. 

    automated sharing settings for a post in WordPress

    5. Create content that resonates and connects with your audience

    Remember that audience research you did earlier? Here’s where it will really come in handy! Create social media content around the topics that your audience will find helpful and interesting.

    This, of course, will look different for each individual business or blog. But here are just a few ideas to get you started:

    • Answers to questions commonly asked by your customers or followers
    • Behind-the-scenes glimpses into your life, business, or processes
    • Tips and tricks for using your products
    • A live Q&A with your audience members
    • Gift ideas that incorporate your products alongside related items from other companies
    • Giveaways and contests that reward loyal followers
    • Fun ways to celebrate quirky holidays
    • User-generated content that showcases how your audience uses your products and services in their everyday lives
    • Articles from similar websites that relate to your business or industry

    Interesting, eye-catching graphics can go a long way toward improving engagement. You should set aside some of your social media budget with the help of a professional designer. For efficiency, they might be able to create unique templates you can modify yourself. These are great for quotes, stats, and quick text-based statements. Choose your professionally-designed background, add your text, and go! 

    You can also use tools like Canva to help you make your own designs without expensive software. 

    6. Leverage automation to save time and increase efficiency

    Automation is crucial to making the most of your social media content efforts. Think of it as a personal assistant — it can help you save time and increase efficiency, allowing you to focus on the most important tasks.

    Jetpack Social is a convenient and powerful way to automate your social media posting on WordPress, enabling you to automatically post your site’s content on social media and schedule posts in advance, all with just a few clicks.

    With Jetpack Social, you can write once, and post everywhere, making it easier than ever to increase efficiency and save time.

    options to automate social media publishing within Jetpack Social

    7. Promote and distribute your content

    Promoting and distributing content is an essential step in a successful social media strategy. 

    Utilizing paid promotion for maximum reach, partnering with influencers and other brands, using the appropriate hashtags and keywords, reposting and repurposing content on different platforms, and measuring and analyzing the success of your content promotion efforts for adjustments are all key parts of this process.

    8. Measure success and make data-driven decisions

    Measuring success and making data-driven decisions is crucial to any successful social media content strategy. It’s like a report card — it helps you understand what’s working and what’s not, and allows you to make adjustments and improvements accordingly.

    Utilizing analytics tools set up to track your KPIs so you can make data-driven decisions for future content is all part of this process. 

    Before you add your next set of posts to the social media content calendar, analyze your KPIs by type of post and don’t be afraid to mix things up, re-evaluate results, and continue to make changes.

    Common social media content mistakes to avoid

    • Not having a clear content strategy. Establishing a direction for your strategy maximizes the effectiveness of your posts.
    • Not understanding your audience. The more you tailor your social media content to the needs of your audience, the more effective it will be.
    • Not being consistent. Post regularly so your followers know what to expect, and so you stay on top of the social media algorithms.
    • Not using visuals. Images, graphics, and videos help your content stand out in followers’ social media feeds and often help present information better than words alone.
    • Not measuring and analyzing performance. Learn what’s working and what isn’t so you can make the most of your time and money.

    Nine tips to elevate your social media content strategy

    1. Bulk create your content 

    Creating content in batches can save you time and ensure consistency in your messaging and branding. Set aside specific time slots to brainstorm and create content — this way you can focus on the creative process without the pressure of a deadline looming. It also helps you mix up different types of content — images, videos, Q&As, promotions, etc. — to keep things interesting.

    2. Prepare and schedule social media posts in advance

    By scheduling your social media posts in advance, you can ensure that your content is being published at optimal times and avoid the scramble of trying to come up with something at the last minute.

    3. Use automation tools

    Utilize tools like Jetpack Social to automate your social media posting and schedule posts in advance. 

    connecting social media networks to Jetpack Social

    4. Build personas 

    Creating personas allows you to gain a deeper understanding of your audience and create content that resonates with them on a personal level. 

    Instead of seeing your followers as numbers, you can imagine them as friends and community members. This can help you create more empathetic, memorable, and effective posts.

    5. Take note of your best-performing social media posts

    If it ain’t broke, don’t fix it! By identifying your best-performing social media posts, you can replicate the approach and format for future content, leading to increased engagement and performance.

    6. Use A/B testing

    A/B testing allows you to compare different variations of headlines, images, and other aspects of your posts to see which ones resonate best with your audience. By doing so, you can amplify the most effective version for more efficient ad spend. Plus, you’ll have empirical data to inform your future post creation.

    7. Use hashtags strategically

    Hashtags help increase discoverability and reach. Use them strategically to increase the visibility of your content and reach new audiences. For example, Instagram will provide several uses next to hashtag suggestions as you start to type. This gives you an idea of what people are already searching for. Including branded hashtags that your audience never uses might look cute in the post, but it won’t help anyone discover your content.

    Learn more: How to use hashtags on social media

    8. Prioritize engaging content formats

    Polls, quizzes, and live streams are particularly engaging because they require participation and allow people to contribute — often anonymously — in real-time and see results. 

    Videos are still as powerful as ever. Though they’re usually more expensive to produce, they’ve become the go-to for the masses over things like radio and books for a reason. The same goes for social media.  

    9. Be consistent with your brand’s voice and visual identity

    Consistency is like a signature — it increases recognition and trust. You can create a list of phrases and words that your brand should both try to use often or never use at all. You can also create a brand book with example voices or compare your preferred brand voice to well-known characters in pop culture. If there’s more than one person on your team, these things can help your team speak with one consistent tone. 

    By implementing these tips and utilizing the right tools, such as Jetpack Social, you can make the most of your social media content strategy and achieve your business goals. 

    Frequently asked questions

    What are the benefits of having a clear social media strategy?

    A clear social media strategy can help you work with consistency and more effectively boost brand awareness, increase customer engagement, and drive sales.

    How can you determine which social media channels to use?

    Determining which social media channels to use can be done by researching your target audience’s demographics and platform preferences, as well as identifying which channels align best with your overall business goals.

    Learn more: Choosing social media platforms for ecommerce marketing

    What makes good social media content?

    Good social media content is engaging, visually appealing, relatable, and relevant to your target audience. It should also contribute to your overall business goals and align with your brand’s tone of voice.

    Jetpack Social: The #1 social media automation plugin for WordPress

    Jetpack Social is a WordPress social media plugin that makes it easy to plan, schedule, and automatically publish your posts. With Jetpack Social, you can write once and post everywhere, saving you time and increasing efficiency.

    It’s a simple yet powerful tool that can help you automate your social media content strategy and take your content to the next level. With over one million posts shared every day, Jetpack Social is a tried and tested tool that can help you make the most of your social media efforts.

    To learn more about Jetpack Social and start using it today, visit https://jetpack.com/social/

  • 8 Best WordPress Instagram Plugins in 2023

    Instagram has become one of the most popular social media platforms in the world, garnering over 140 million Instagram users in the United States and over a billion users worldwide. With this in mind, it’s likely that savvy website builders will want to leverage some of that popularity for their own purposes. This article will give you the eight best options available for WordPress Instagram plugins in 2023. Whether you’re trying to gain more followers or show off your photography skills, this list will have something for you.

    Let’s get into it!

    Subscribe To Our Youtube Channel

    What is a WordPress Instagram Plugin?

    A WordPress Instagram plugin is a plugin that helps integrate your Instagram feed into your website. If you’re looking to gain followers or leverage your Instagram’s success on your website, these plugins can help.

    They can also serve the aesthetic of your website as they can organize your Instagram images into brilliant displays while reducing load times since the images are hosted off-site. Essentially, these plugins help you take your social media presence to your website.

    7 Great Instagram Plugins for Sharing Your Feed

    There are plenty of fantastic options when it comes to Instagram plugins, and they all have their own take on how to integrate Instagram with your site. Hopefully, you find a solution that has what you’re looking for on the list below!

    1.  10Web Instagram Feed

    10Web logo

    10Web Instagram Feed is a fantastic Instagram plugin if you have a huge backlog of posts. You can use it to set up a feed where users can browse through your photos using a category system based on hashtags.

    This approach works perfectly if you want to use your Instagram feed to show off your portfolio or as a replacement for a full-blown image gallery. 10web also enables you to choose from two different styles for your display and includes lightbox functionality.

    On the other hand, if you prefer a more selective approach to which images you display, this plugin includes a conditional filtering system. Using it, you can choose precisely which photos will show up on your website.

    Additional features include transition effects for your feed images, social sharing buttons, and the option to show Instagram comments within your lightbox displays.

    10WebSocial example

    Key Features:

    • Add multiple categories to enable users to sort images.
    • Choose between two unique themes for your Instagram feed.
    • Restrict which images appear on your website.
    • Add transition and lightbox effects for your images.
    • Show up-to-date comments with your Instagram posts.

    Price: Free with a premium version available starting at $85 (one-time fee)

    Get 10web Instagram Feed

    2. Spotlight – Social Photo Feeds

    Spotlight Logo

    Out of all the Instagram plugins we’ve talked about so far, Spotlight is the only one that lets you forget you’re looking at a feed. You can use it to display posts in a way that makes them look like any other image gallery on your site.

    This approach is perfect if you want to use Instagram to display images instead of uploading them to your site. As we mentioned earlier, this can help you cut down on your loading times and free up resources.

    If that’s not your cup of tea, you can also add an account header to your feed and a separate Follow button. On top of those options, Spotlight lets you customize every aspect of your feed, including post order, the number of columns, width, height, padding, and even text size.

    Using this plugin, you can connect multiple accounts to your site and display feeds either using shortcodes or through widgets.

    An example of spotlight Instagram gallery.

    Key Features:

    • Publish minimalist feeds without Instagram branding elements.
    • Customize your feed’s appearance.
    • Connect multiple accounts to your website.
    • Display feeds using shortcodes or widgets.

    Price: Free and premium versions available starting at $39/year

    Get Spotlight

    3. WPZOOM Social Feed Widget

    WPzoom banner logo

    If you’re looking for a no-fuss WordPress Instagram plugin, WPZOOM Social Feed Widget is an excellent option. As its name implies, it relies entirely on widgets to enable you to share your Instagram posts.

    You gain access to multiple feed styles and you can place the widget in any location your theme provides. This plugin also comes with some basic customization options, including how many columns you want to include, how many images to show, and more.

    WPZoom example

    Key Features:

    • Use widgets to share your Instagram feed.
    • Customize your feed’s appearance.

    Price: Free with premium versions starting at $49/year

    Get WPZOOM

    4. Social Feed Gallery

    Social feed Gallery logo

    Social Feed Gallery is an Instagram plugin that offers a lot of options when it comes to customization. You can use it to link multiple profiles and set up unique feeds for each of them.

    Each feed receives its own shortcode, and you can choose from four different styles to showcase your photos. Regardless of which type of gallery you use, you get to choose how many posts to display and the number of columns.

    Moreover, Social Feed Gallery enables you to limit your feed in WordPress to posts that use specific hashtags. This is a handy feature if you only want to share some of your content on WordPress and not your entire Instagram backlog.

    Finally, Social Feed Gallery doesn’t force you to go through a complex authentication process. Linking an account only requires you to confirm that you give the plugin access to it.

    example of gallery

    Key Features:

    • Connect multiple Instagram accounts.
    • Receive unique shortcodes for each account’s feed.
    • Choose from four gallery styles for your feeds and customize the number of pictures they display.
    • Use hashtags to specify which posts to include in your feed.

    Price: Free with a premium version available starting at $49/year

    Get Social Feed Gallery

    5. Smash Balloon Social Photo Feed

    Smash Balloon Social Photo Feed logo

    Smash Balloon Social Photo Feed is one of the only plugins that enables you to combine posts from multiple Instagram accounts in a single feed. This feature is perfect for news or niche sites where you want to show your visitors the latest happenings.

    On top of that, Smash Balloon also gives you full control over your feed’s appearance. You can choose from multiple preset image sizes and manually configure the width, height, and number of photos in your feed. This plugin even lets you add a background image, which is another rather unique feature.

    Using Smash Balloon lets you add a Load More button to the bottom of your feed so visitors can keep browsing as far back as they like. Plus, it also enables you to add custom CSS and JavaScript to each feed.

    example of Smash Balloon

    Key Features:

    • Combine multiple accounts within a single feed.
    • Customize every aspect of your feed’s style, from width and height to its background.
    • Add custom CSS and JavaScript to your feeds.
    • Add a Load More button to the bottom of your feed.

    Price: Free with a premium version available starting at $49/year

    Get Smash Balloon

    6. Feed Them Social

    The Feed Them Social plugin.

    Feed Them Social isn’t just an Instagram feed plugin. With this tool, you can share content from multiple social media platforms, including Facebook, Twitter, Pinterest, YouTube, and of course, Instagram.

    If you’re looking for a one-size-fits-all plugin to integrate your social media profiles with your WordPress site, this is it. The only downside is that Feed Them Social doesn’t offer many customization options for your feeds. In fact, you can only change font colors.

    That said, its Instagram feeds use a simple gallery design that should mesh well with most themes. You can also include a Load More button, which lets visitors keep browsing through your images without leaving your site.

    Feed them social example

    Key Features:

    • Share feeds from multiple social media platforms.
    • Customize your feed’s font colors.
    • Use shortcodes to embed feeds anywhere you want.
    • Include a Load More button for your Instagram feed.

    Price: Free with a premium version available starting at $50/year

    Get Feed Them Social

    7. Social Slider Widget

    The Social Slider Widget plugin.

    Social Slider Widget is another Instagram plugin that knocks it out of the park when it comes to customization. Using this plugin, you can connect as many accounts as you want and display feeds using both widgets and shortcodes.

    With Social Slider Widget, you can choose from seven different layouts to display your feeds, including sliding galleries. Plus, every style enables you to customize options such as how many posts to display and in which order. You can sort images by date, popularity, or randomly.

    Social Slider widget settings

    Key Features:

    • Connect multiple Instagram accounts.
    • Display feeds using widgets and shortcodes.
    • Choose from seven fully-customizable feed styles.
    • Sort feed images by date, popularity, or randomly.

    Price: Free with a premium version available

    Get Social Slider Widget

    8. Instagram Theatre

    Instagram theatre

    Instagram Theatre is another great choice for a WordPress plugin, and it comes relatively cheap. Among its numerous capabilities, the plugin gives customers a variety of layout options and three fully responsive designs. Using the hashtag Instagram Feed function of Instagram Theatre, you can also define a tag to search for on the Instagram API.

    Along with this comes CSS customization and mobile responsive design, all for the low price of $16.

    Intagram theatre example

    This plugin was created to make it simple for you to render images from your Instagram account on your website. You can use a variety of layouts, such as grids, lists, and full-screen displays.

    Key Features of Instagram Theatre:

    • Hashtag feed mode
    • List, Gallery, and Thumbnail layout options.
    • Responsive site templates.

    Instagram Theatre Pricing: $16

    Get Instagram Theatre

    Which WordPress Instagram Plugin Is The Best?

    First, let’s recap all of the plugins we covered in this post. We ranked them in order of our favorites, with the top three Instagram plugins at the top of the list. Of course, you might also want to consider the price associated with each. The price has been added to the following table for easy comparison. 👇

    Plugin Price Free Option
    🥇 10Web Instagram Feed $85 one-time ✔️ Visit
    🥈 Spotlight – Social Photo Feeds $39/year ✔️ Visit
    🥉 WPZOOM Social Feed Widget $49/year ✔️ Visit
    4 Social Feed Gallery $49 one-time ✔️ Visit
    5 Smash Balloon Social Photo Feed $49/year ✔️ Visit
    6 Feed Them Social $50/year ✔️ Visit
    7 Social Slider Widget $55 one-time ✔️ Visit
    8 Instagram Theatre $16 one-time ❌ Visit

    If you’re looking to increase engagement with your Instagram or website, combining the two audiences with a plugin is an excellent route to take. Plus, hosting your images outside your website will speed up load times and help optimize your website for your audience. Hopefully, you found a solution on this list that can help you promote and integrate your Instagram in your ideal way.

    Our top recommendation for customization is 10Web Instagram Feed, while we give the nod to Spotlight for large accounts with a lot of pictures.

    Did we miss any Instagram plugins? Leave a comment telling us below!

    Do you have any questions about how to share your Instagram feed in WordPress? Let’s talk about them in the comments section below!

    Article thumbnail illustration by Bibbit Unggul / shutterstock.com

    The post 8 Best WordPress Instagram Plugins in 2023 appeared first on Elegant Themes Blog.

  • Instagram Feeds & Divi: A Step-by-Step Guide

    Create an engaging Instagram Feed using Divi with this step-by-step guide. Learn how to connect your Instagram account to the module, customize the feed, and add extra features like a follow button and lightbox.

    The post “Instagram Feeds & Divi: A Step-by-Step Guide” first appeared on WP Mayor.

  • User-Generated Content for ECommerce and How To Leverage It?

    Customer trust is one of the highest drivers of closing a sale. You can gain it using user-generated content. What is it, why do you need it, and how to use it?

    The post “User-Generated Content for ECommerce and How To Leverage It?” first appeared on WP Mayor.

  • How to Embed Facebook Status Posts in WordPress

    Are you looking for a way to embed Facebook status posts in WordPress?

    Facebook statuses are an easy way to share important updates and time-sensitive information with your audience. By embedding your Facebook timeline in WordPress, you can get more engagement, let people know what’s happening on your Facebook page or group, and grow your followers.

    In this article, we will show you how to embed Facebook status posts in WordPress.

    How to embed Facebook status posts in WordPress

    Why Embed Facebook Status in WordPress?

    Facebook is the most popular social media platform in the world and has billions of active users. For website owners, Facebook is a powerful way to connect with a new audience and engage with the people who already know about your brand.

    Facebook is also perfect for sharing time-sensitive information in real time. In this way, you can use FOMO to create a sense of urgency.

    For example, you might post a status about how visitors are running out of time to enter your giveaway in WordPress, or take advantage of your flash sale.

    However, people won’t see your Facebook status if they just visit your website. This makes it difficult to grow your Facebook following and build a relationship with your audience.

    By embedding your Facebook status posts in WordPress, you can promote your social media page and encourage more people to follow you on Facebook.

    As you post new statuses, they’ll appear on your site automatically, so it’s also a great way to keep your website fresh, even for regular visitors.

    That being said, let’s see how to embed Facebook status posts in WordPress.

    Adding a Facebook Status Plugin to WordPress

    The easiest way to embed your Facebook status feed in WordPress is by using the free Smash Balloon Social Post Feed.

    This plugin lets you display text and links from your Facebook page or group.

    A Facebook post timeline, embedded on a WordPress website.

    In this guide, we’ll be using the free version of Smash Balloon as it allows you to embed Facebook statuses no matter what your budget. However, there’s Smash Balloon Facebook Feed that lets you embed different kinds of content. For example, you can embed a Facebook video in WordPress, and show images and videos in a lightbox popup on your site.

    The first thing you need to do is install and activate the Smash Balloon Social Post Feed plugin. For more details, see our guide on how to install a WordPress plugin.

    After that, you’ll need to connect Smash Balloon to your Facebook page or group, by going to Facebook Feed » All Feeds. Here, click on ‘Add New.’

    How to create a custom Facebook feed

    Smash Balloon pro lets you show posts from your photo albums, timeline, events, and more.

    However, the free version only allows you to embed your Facebook statuses so click on ‘Timeline’ and then select ‘Next.’

    The free Smash Balloon WordPress plugin

    Now, you need to select the page or group which you’ll get the Facebook statuses from.

    To get started, click on ‘Add New.’

    Adding a Facebook page or group to your WordPress website

    On the next screen, choose whether you want to embed the feed from a Facebook group or Facebook page.

    After that, go ahead and click on ‘Connect to Facebook.’

    How to connect a Facebook page or group to a WordPress website

    This opens a popup where you can log into your Facebook account and choose the pages or groups which you want to get the status updates from.

    As soon as you’ve done that, click on ‘Next.’

    Giving Smash Balloon access to your Facebook posts

    Facebook will then show all the information that Smash Balloon will have access to and the actions it can perform.

    To restrict Smash Balloon’s access to your Facebook account, just click any of the switches to turn it from ‘Yes’ to ‘No.’ Just be aware that this may affect the content that you can embed on your WordPress blog or website.

    With that in mind, it’s a good idea to leave all the switches enabled.

    Connecting Facebook and WordPress using a free plugin

    When you’re happy with how your Facebook permissions are set up, click on ‘Done.’

    After a few moments, you should see a message confirming that you’ve connected your WordPress website to Facebook. With that done, click on the ‘OK’ button.

    Connecting Smash Balloon and Facebook successfully

    Smash Balloon will now take you back to the WordPress dashboard automatically.

    How to Embed Facebook Status Posts in WordPress

    You will now see a popup with the source you just linked to your website. Simply select the radio button next to your Facebook page or group and then click on the ‘Add’ button.

    Selecting a page or group as your Facebook source

    If you accidentally closed the popup, then don’t worry. You can simply refresh the tab to reopen the popup.

    After that, Smash Balloon will take you back to the Facebook Feed » All Feeds page automatically. Just like before, click on the ‘Add New’ button, select ‘Timeline,’ and then click on the ‘Next’ button.

    Now, select your Facebook page or group, and click on ‘Next.’

    Embedding Facebook status posts in WordPress

    Smash Balloon will now go ahead and create a timeline feed from the Facebook page or group you’ve chosen.

    This is a good start, but Smash Balloon has lots of settings that you can use to customize your embedded timeline.

    How to Customize Your Embedded Facebook Status Posts

    To fine-tune your timeline, go to Facebook Feed » All Feeds in the WordPress dashboard.

    Here, find the timeline feed you just created and click on the ‘Edit’ button next to it.

    Customizing the Facebook status timeline feed

    This opens the Smash Balloon feed editor, which shows a preview of your timeline to the right.

    On the left-hand side, you’ll see all the different settings you can use to customize how the timeline looks on your site. Most of these settings are self-explanatory, but we’ll quickly cover all the main areas.

    Customizing Facebook status posts in WordPress

    To start, you can change how the statuses are displayed by clicking on ‘Feed Layout.’

    On this screen, you can switch between list and masonry layouts, as well as change the feed height. As you make changes, the preview will update automatically so you can try different settings to see what looks the best for your website.

    Smash Balloon's Feed Layout settings

    You can preview how your status feed will look on desktop computers, tablets, and smartphones using the row of buttons in the upper-right corner.

    Mobile devices usually have smaller screens and less processing power, so if you’re not happy with how the feed looks then it’s smart to show fewer statuses on tablets and smartphones.

    Testing your Facebook post status on mobile devices

    To make this change, just type a different number into the ‘Mobile’ field in the ‘Number of Posts’ section.

    By trying out different layouts you can create a Facebook status feed that looks great across all devices.

    How to create a responsive social media layout for mobile

    By default, Smash Balloon feed shows fewer columns on smartphones and tablets, compared to desktop computers. This helps your Facebook statuses fit comfortably on smaller screens.

    After testing the mobile version of your WordPress website, you may want to show fewer columns on smartphones and tablets.

    To do this, simply change the numbers under ‘Columns.’

    Adding and removing columns in a Facebook status feed

    When you’re happy with how the feed looks, click on the ‘Customize’ link.

    This will take you back to the main Smash Balloon editor, ready for you to explore the next settings screen, which is ‘Color Scheme.’

    Changing the color scheme in your Facebook status feed

    Smash Balloon uses a color scheme inherited from your WordPress theme by default, but on this screen, you can switch to a ‘Light’ or ‘Dark’ look.

    You can also create your own color scheme by selecting ‘Custom’ and then using the controls to change the text color in WordPress, change the background color, and more.

    Creating a custom color scheme using Smash Balloon

    By default, Smash Balloon adds a header to your feed, which is your Facebook profile picture and the name of the group or page.

    To customize this section, click on ‘Header’ in the left-hand menu.

    Changing the Facebook custom feed header

    Here, you can change the header size and color, hide your Facebook profile picture, and more.

    If you would prefer to remove the header entirely, then click to turn off the ‘Enable’ toggle.

    Adding a header to the Facebook status feed

    Next, you can change how the individual posts look inside your feed by selecting ‘Post Style’ from the left-hand menu.

    After that, click on ‘Post Style’ again.

    Customizing a Facebook status feed with Smash Balloon

    On this screen, you can choose between a regular and boxed layout.

    If you select ‘Boxed’ then you can create a colored background for each Facebook post.

    Adding colored box backgrounds to your embedded Facebook post statuses

    If you choose ‘Regular’ then you can change the thickness and color of the line that separates your different social media posts.

    In the following image, we’ve added a thicker line to our Facebook status feed.

    Adding borders to a Smash Balloon Facebook feed

    You can also customize the individual parts within each status by going back to the main settings screen.

    Once again, select ‘Post Style’ but this time choose ‘Edit Individual Elements’ instead.

    Customizing the posts inside a Facebook status feed

    You will now see a list of all the different content that Smash Balloon includes in each post, such as the date, post author, and event title.

    To remove a piece of content from your feed, simply click to uncheck its box.

    How to remove content from a live Facebook feed

    You can also customize how each type of content looks by clicking on it.

    For example, in the following image, you can see settings to change the size and color of the author text.

    Customizing how the post author is displayed in WordPress

    By default, Smash Balloon doesn’t include the Facebook ‘like’ button in your feed.

    This button makes it easier for visitors to follow you on Facebook, so you may want to add it to your status feed by selecting the ‘Like Box’ settings.

    Adding a like button to the Facebook status feed

    After that, simply click on the ‘Enable’ button so that it turns blue.

    You can now use the settings to change where the link box appears and the kind of content included in the box, such as your Facebook cover photo and total number of followers.

    Adding a like button to an embedded Facebook status page

    If you upgrade to Smash Balloon premium, then there are some more settings to explore. This includes a lightbox feature that allows visitors to explore your content in a popup.

    Since you’re using the free version of Smash Balloon for now, you can go ahead and click on ‘Save’ to store your changes.

    The next step is adding the Facebook status feed to your WordPress website.

    How to Embed Facebook Status Posts in WordPress

    You can add your Facebook status feed to WordPress using a block, widget, or shortcode.

    If you’ve created more than one feed using Smash Balloon, then you’ll need to know the feed’s code if you’re going to add it using a block or widget.

    To get this information, simply go to Facebook Feed » All Feeds and then look at the feed="" part of the shortcode. You’ll need to add this code to the block or widget, so make a note of it.

    In the following example, we’ll need to use feed="8".

    Adding Facebook content to WordPress using a shortcode

    If you want to embed your Facebook statuses in a page or post, then we recommend using the ‘Custom Facebook Feed’ block.

    Simply open the page or post where you want to embed the status feed. Then, click on the ‘+’ icon to add a new block and start typing ‘Custom Facebook Feed.’

    When the right block appears, click to add it to the post or page.

    Adding a Facebook timeline to your website using a WordPress block

    The block will show one of your Smash Balloon feeds by default. If you want to use a different feed instead, then simply find ‘Shortcode Settings’ in the right-hand menu.

    You can now add the feed="" code to this box. Once you’ve done that, click on the ‘Apply Changes’ button.

    Showing different Facebook feeds using shortcode

    The block will now show all the status updates from your Facebook page or group. Just publish or update the page to make the feed live.

    Another option is to add the feed to any widget-ready area, such as the sidebar or similar section. This allows visitors to see your latest Facebook updates across your entire website.

    Simply go to Appearance » Widgets in the WordPress dashboard and then click on the blue ‘+’ button.

    The Smash Balloon Custom Facebook Feed widget

    Now, start typing ‘Custom Facebook Feed’ into the search bar to find the right widget.

    You can now drag it onto the area where you want to show your Facebook status updates. By default, the widget will show one of the feeds you created using Smash Balloon.

    Adding a social media widget to your WordPress website

    To show a different feed instead, type the feed’s code into the ‘Shortcode Settings’ box and then click on ‘Apply Changes.’

    You can now click on the ‘Update’ button to make the widget live.

    How to publish a Facebook feed to your website

    For more information, please see our step-by-step guide on how to add and use widgets.

    Finally, you can embed your status on any page, post, or widget-ready area using a shortcode. To get the shortcode, simply go to Facebook Feed » All Feeds and copy the value in the ‘Shortcode’ column.

    You can now add this code to your site. For more information, please see our detailed guide on how to add a shortcode in WordPress.

    We hope this article helped you learn how to embed Facebook status posts in WordPress. You may also want to see our guide on how to create an email newsletter and the best WordPress Facebook plugins to grow your blog.

    If you liked this article, then please subscribe to our YouTube Channel for WordPress video tutorials. You can also find us on Twitter and Facebook.

    The post How to Embed Facebook Status Posts in WordPress first appeared on WPBeginner.

  • 6 Ways to Establish and Protect Your Brand Reputation

    A great brand reputation is something that every business strives for, but it can mean different things to different businesses. There are many factors that contribute to a positive brand reputation, and what makes one company’s reputation stand out may not be the same for another.

    The post “6 Ways to Establish and Protect Your Brand Reputation” first appeared on WP Mayor.

  • How to Create an Instagram Link in Bio Page

    Your Instagram bio is how you can define yourself or your brand for your audience. The link to your Instagram link in bio page is displayed under your profile picture and name on your Instagram account.

    The post “How to Create an Instagram Link in Bio Page” first appeared on WP Mayor.

  • Jetpack Social, the newest and easiest way to share your WordPress content to Facebook, Twitter, LinkedIn, and Tumblr

    Social media has changed a lot in the last ten years since Jetpack launched its social sharing tools. Remember 2012? Pinterest exploded onto the scene, MySpace relaunched, Facebook went public, and also bought a little photo-sharing network called Instagram.

    Today, social networks have long been established as a pillar of any marketing or communication plan. In fact, Generation Z may be more likely to find answers through social media instead of Googling. You already know you need to get your message on social media to reach your audience where they hang out. But who has the time to manage that, along with everything else? That’s why we created Jetpack Social.

    Write once, post everywhere

    You’re already sharing posts, pages, and products on your website. Jetpack Social goes one step further and shares your content directly from the WordPress Editor to your social media channels. Whether your fans are on Facebook, Twitter, LinkedIn, or Tumblr, you can easily reach them with a few clicks.

    Manage your social connections and automatically share your posts to social networks

    You can set a featured image and update the message for your social channels through the simple interface. You’ll get a preview to see what it looks like, so you can be confident before you publish.

    Finish writing your posts on your time. Schedule them to go live when it’s convenient for you and we’ll take care of the rest. And coming in November, you can re-share your content, which is excellent for those evergreen posts you want to remind your readers about.

    Over 1 million posts are shared every day with Jetpack Social. If you haven’t tried it yet, find out what you’ve been missing.

    Free for casual users

    All of Jetpack Social’s features are free for up to 30 shares per month. If you share a post on Twitter, that’s one share. Share it on Twitter and Facebook, that’s two shares. That’s one post per day, for free!

    If you’re a power user, our basic plan is best for you. Get up to 1,000 shares and hit that re-share button until your heart’s content. To celebrate the launch of Jetpack Social, we have a $1 introductory offer for the first month, and after that, it’s $10 per month.

    If you’re already using Jetpack social media tools

    Thanks for using Jetpack! We’re happy that our sharing feature saved people so much time over the last ten years. And now we’re excited to give Jetpack Social the time it deserves. We have a new team focusing on how to make the product even better so we can help you get your message out and grow your business.

    All the features you’re used to are still free, and we moved social previews and re-sharing out from the paid plans to the free plan. Be sure to give those a try!

    If you want to share your content more than 30 times per month, you’ll need to upgrade to the Social Basic plan. The first month is just $1, and will be $10 monthly after that.

    Try Jetpack Social today.

  • Spotlight Review: Instagram Feeds Made Easy

    Combining your Instagram feed with your website allows you to widen your audience. In this Spotlight Instagram feeds review, I will show you how this plugin works and some of the key features.

    The post “Spotlight Review: Instagram Feeds Made Easy” first appeared on WP Mayor.