EDITS.WS

Tag: woocommerce

  • How to Automatically Add WordPress Products in Google Shopping

    Do you want to add your WordPress products to Google Shopping?

    Adding your online store products to Google Shopping can help you increase traffic, reach more customers, and generate greater revenue.

    In this article, we’ll show you how to easily add WordPress products to Google Shopping.

    How to Add WordPress Products in Google Shopping

    Why Should You Add WordPress Products to Google Shopping

    Google Shopping is a virtual marketplace like Amazon and Etsy, where users can search, view, and compare products from different online stores that have paid to advertise their products.

    If you have a WooCommerce store, then adding your products to Google Shopping can prove to be extremely beneficial for your business.

    Your products will be shown to all users browsing through Google shopping which will increase traffic on your WordPress website, generate more revenue and bring in more customers.

    Google Shopping

    That being said, let’s see how you can add WordPress products to Google Shopping.

    How to Add WordPress Products in Google Shopping

    Step 1: Creating a Google Merchant Account

    To add your products to Google Shopping, you have to start by creating an account in the Google Merchant Center. This is the place where your product information will be stored for viewing by Google Shopping.

    First, go to the Google Merchant Center page and click the ‘Sign up for free’ button.

    Sign up for the Google Merchant account

    After that, Google will ask you about your online business.

    Just check the answers that apply to you, and then provide your website’s URL.

    Provide the URL of your online store

    After you’ve provided the details, you’ll be redirected to another page.

    Here, you simply have to click the ‘Create a Google Merchant Account’ button at the bottom of the page.

    Click the Create Google Merchant Account button

    Now, you will be asked to provide your business details. You can start by writing your business name.

    Next, select the country where your business is based from the dropdown menu below the ‘Registered Country’ option.

    After that, click the ‘Continue to Merchant Center’ button.

    Provide business details

    You’ve successfully created your Google Merchant Account. Now all you have to do is provide your business info and shipping details.

    Once you’ve filled in those details, simply click the ‘Save’ button at the bottom to store your settings.

    Provide shipping and business details once a GMC account is created
    Step 2: Linking Your Google AdWords Account

    Now you’ll have to link your Google AdWords account to your Google Merchant Center account so that you can show your products via Google Shopping.

    To link your account, simply go to the Google Merchant Center dashboard and click the gear icon at the top of the page.

    Clicking it will open up a ‘Tools and Settings’ prompt. Here you simply have to choose the ‘Linked Account’ option present.

    Click the Linked Accounts option from the Settings

    This will take you to the ‘Linked Accounts’ page.

    Now you simply have to click the ‘+’ button to create your Google Ads account.

    Click the Plus button to create a Google Ads account

    This will open up a ‘Create Your Google Ads Account’ prompt.

    Simply choose your preferred time zone and currency and then click the ‘Create’ button.

    Create a Google Ads account

    You have now successfully created your Google Ads account.

    This is how it will look once your account has been created.

    GMC account has now been linked to the Google Ads account
    Step 3: Adding WordPress Products to Google Shopping

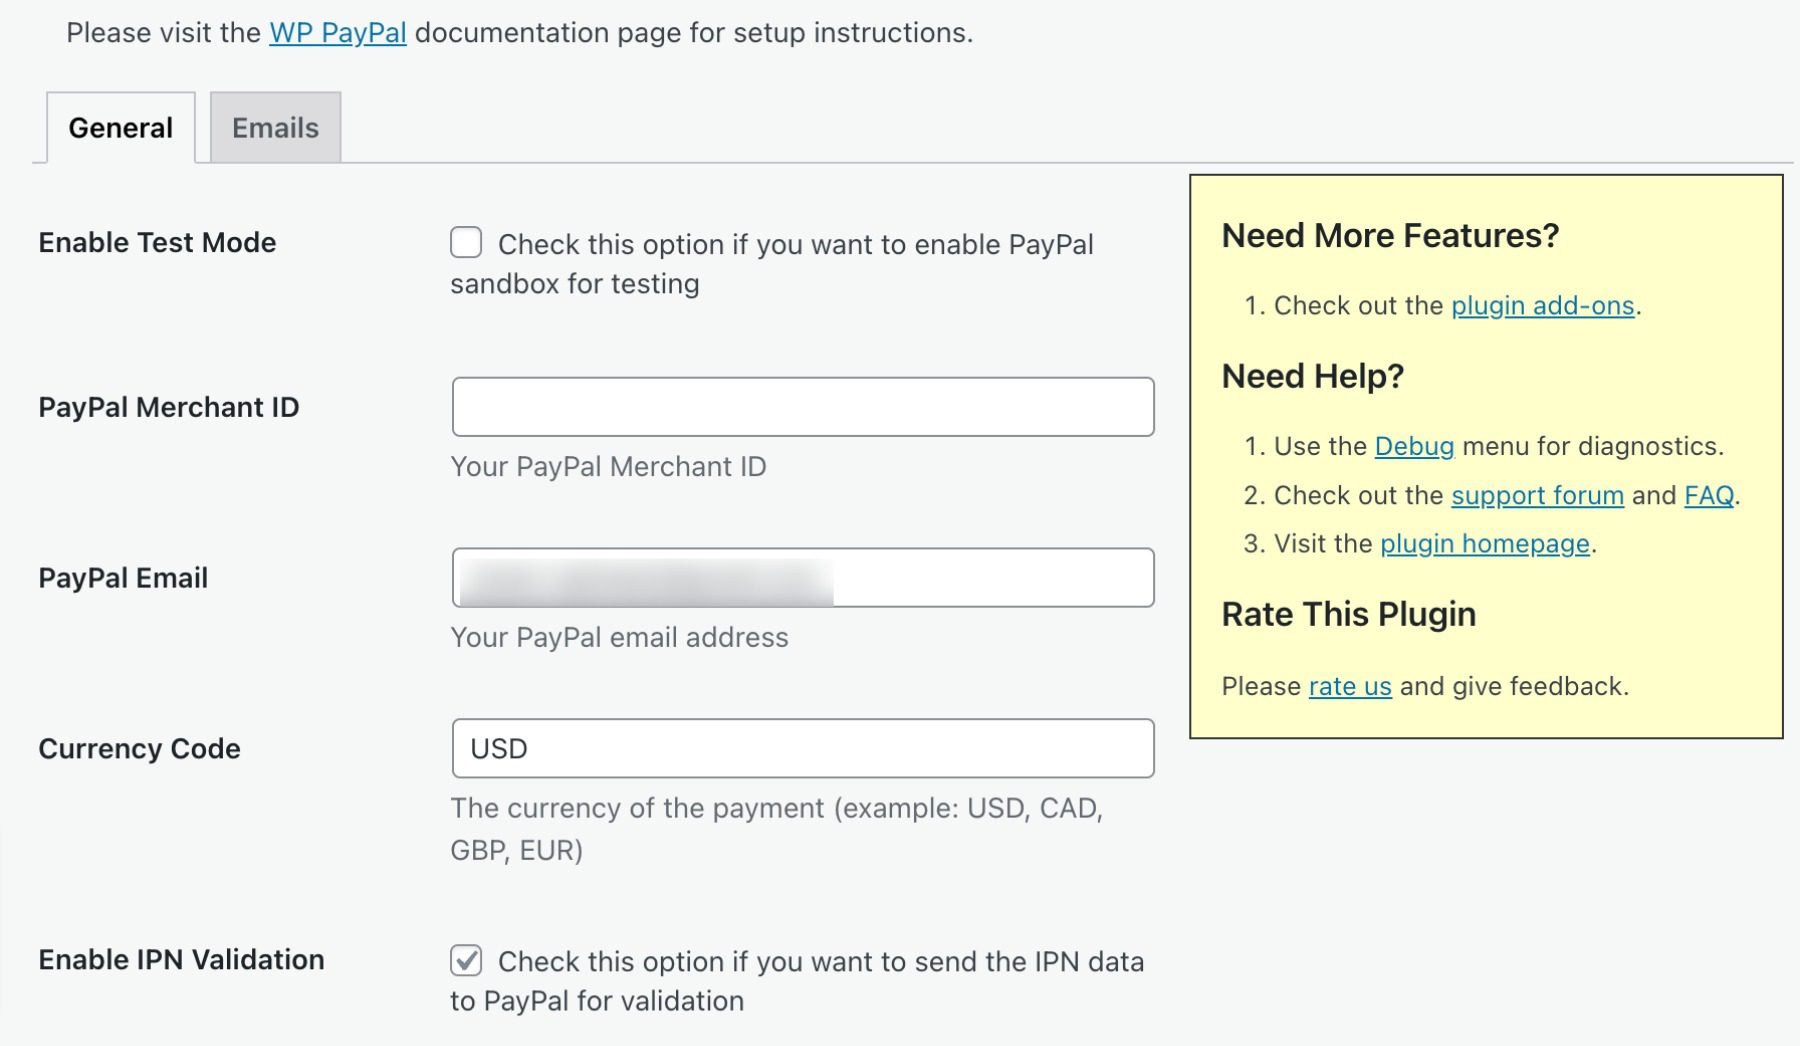
    To add your WordPress products to Google Shopping, we will be using the ELEX Google Shopping plugin to display your WooCommerce products in Google Shopping.

    First, you need to do is install and activate the ELEX Google Shopping plugin. For more instructions, check our guide on how to install a WordPress plugin.

    Upon activation, head over to the Google Shopping Feed » Create Feeds page from the WordPress admin sidebar.

    From here, simply fill in your business details and click the ‘Continue’ button at the bottom.

    Fill basic info on the Google Shopping Feed page

    Next, you’ll be taken to the ‘Map Category’ page. Here you simply have to select your product categories.

    Simply type your product categories in the ‘Google Categories’ tab and click ‘Continue’

    Select Map Category

    After that, you’ll be directed to the ‘Map Attributes’ page.

    This is where you’ll have to fill in your product details including product id, product description, product link, pricing, image, and more.

    Here select and fill in as many attributes as possible for more visibility in Google Shopping and click the ‘Continue’ button.

    Map attributes

    Now that you’re on the ‘Filtering Options’ page, simply fill in the details as required for your online store.

    For example, you can include how many items you have in stock or note how many have sold already.

    Next, simply click the ‘Generate Feed’ button at the bottom.

    Click the Generate Feed button

    After you’ve created your Google Shopping feed, go to the Google Shopping Feed » Manage Feeds page from the admin sidebar.

    Here you will be able to view your Google Shopping Feed. Now you have to simply click the ‘Download’ button beside it.

    Click the Download button

    Once you’ve downloaded your feed as an XML file, go back to the ‘Google Merchant Center’ dashboard and click the Products » Feeds option from the sidebar.

    This will open up the ‘Primary Feeds’ page where you have to click the ‘+’ button to add a new feed.

    Click the plus button to create a feed

    This will take you to the ‘New Primary Feed’ page where you can start by filling in basic details. First, start by adding all your target countries.

    Next, select your preferred language and then click the ‘Continue’ button.

    Fill in basic details

    Then, you have to choose a name for your feed and select a method to connect your data to the Merchant center.

    For this tutorial, we will be uploading the feed XML from WordPress.

    After that, just click on the ‘Continue’ button.

    Choose a name and method for uploading the feed

    Now that you’re on the ‘Setup’ page, simply type the name for your Google Shopping Feed.

    Next, just upload the Feed file you got from WordPress and click the ‘Create Feed’ button.

    Upload file and click the Create Feed button

    You have now successfully added your WordPress products to Google Shopping.

    Bonus: How to Add Google Merchant Center Schema in WordPress

    To improve your product search visibility in Google Shopping and increase conversion rates, you should add a Google Merchant schema in WordPress.

    Schema markup is an HTML code that provides more details about your products to search engines.

    A GMC listing schema will make your search snippets more prominent and will allow your products to be featured as popular products for the relevant search terms.

    The easiest way to add a Google Merchant Center listing schema to WordPress is by using the All in One SEO for WordPress.

    It is the best SEO plugin for WordPress that is used by over 3 million websites.

    First, you need to install and activate the All in One SEO for WordPress. For more instructions, please see our guide on how to install a WordPress plugin.

    Upon activation, a setup wizard will open up. Simply go ahead and click the ‘Get Started’ button.

    All in One SEO setup

    After that, you need to follow the onscreen instructions in the setup wizard to configure the plugin. If you need help, please see our guide on how to properly set up AIOSEO in WordPress.

    After the AIOSEO plugin has been set up, you need to visit the Products » All Products page from the admin sidebar.

    From here, simply click on the ‘Edit’ link below a product to open up the ‘Edit Product’ page.

    Click the Edit link below the product name

    Once there, you need to scroll down to the ‘AIOSEO Settings’ section and click on the ‘Schema’ tab.

    Now, you need to make sure that the schema type is set to ‘Product’ by default.

    If that is not the case, then simply click on the ‘Generate Schema’ button.

    Click the Generate Schema button to add another schema

    It will open up the Schema Catalog which will list all the available schema templates.

    From here, you need to click the ‘Add Schema’ (+) button beside the Product option to set it as your primary schema.

    Note: You may see the ‘Article’ schema already applied. If so, you can remove it as you add the new one because this particular page isn’t an article or blog post in Google’s eyes.

    Click the Add Schema button next to the Product option

    Next, you will need to fill in the product information to add the GMC listing schema.

    For that, you need to click the ‘Edit Schema’ button next to the ‘Schema in Use’ option.

    Click the Edit button next to the Schema in use option

    This will open up the ‘Edit Product’ modal where you will need to fill in the product details.

    If you’re using WooCommerce, then AIOSEO will automatically pull most of the product data from your product information.

    However, if you want to fill in the information manually, you need to simply toggle the ‘Autogenerate Fields’ switch to ‘No.’

    Toggle the Autogenerate fields switch to No

    The product attributes that you will need to add include the product name, description, image, ISBN, price, material, color, shipping details, and more.

    We recommend that you provide all the details so that the schema markup can make your product snippets more engaging.

    Once you’re done, simply click the ‘Update Schema’ or ‘Add Schema’ button to store your settings.

    Click the Update Schema button

    You have now successfully added the Google Merchant Center listing schema to WordPress, and your products can now be featured on the platform and hopefully earn you more sales.

    We hope you learned how to add WordPress products to Google Shopping. You may also want to check out our best WooCommerce reporting and analytics plugins and our article on how to speed up your eCommerce website.

    If you liked this article, then please subscribe to our YouTube Channel for WordPress video tutorials. You can also find us on Twitter and Facebook.

    The post How to Automatically Add WordPress Products in Google Shopping first appeared on WPBeginner.

  • 9 Best Payment Plugins for WordPress in 2023

    In today’s digital age, having a website is crucial for any business or individual looking to establish a strong online presence. However, having a website alone is not enough. If you want to monetize your website, you need to have a payment system in place. Fortunately, WordPress offers a variety of payment plugins that can help you easily process transactions and make the checkout process a breeze for your customers.

    In this article, we’ll take a look at the top payment plugins for WordPress in 2023, so you can choose the one that’s best suited for your website and business needs.

    What are Payment Plugins for WordPress?

    A payment plugin for WordPress is a software add-on that enables website owners to accept payments from customers directly on their WordPress website. It integrates with payment processors and gateways like PayPal, Authorize.net, or Stripe to securely process payments and provides a seamless and easy payment experience for customers.

    WordPress payment plugins can come with a variety of features and functionalities that allow site owners to accept payments for different types of products and services, such as physical goods, digital downloads, subscriptions, bookings, or donations.

    Using a payment plugin on a WordPress site can benefit both site owners and customers. Site owners can accept payments directly on their site without requiring customers to leave the site to complete their transactions, improving the overall user experience. It also makes payment processing more efficient and provides better tracking and reporting capabilities.

    Customers, on the other hand, want a seamless payment experience with a variety of payment options to choose from. Payment plugins also offer greater confidence in the security of their payment information, as a good plugin will ensure that sensitive data is encrypted and protected during the payment process.

    9 Best Payment Plugins for WordPress in 2023

    If you’re running an e-commerce site on WordPress, you’ll need a reliable payment plugin to process transactions. The good news is that there are many great options out there. In this article, we’ll highlight the 9 best payment plugins for WordPress in 2023, each with its unique features and benefits.

    1. WPForms

    WP Form donation plugin

    WPForms isn’t just a powerful drag-and-drop form builder. It can also make it easy for website owners to create payment forms that integrate with payment gateways like PayPal and Stripe.

    WPForms integrates seamlessly with Divi, one of the most advanced WordPress page builders. The integration enables users to add WPForms to their Divi layouts quickly and easily using a dedicated WPForms module.

    Key Features for WPForms:

    • Drag and drop form builder
    • Pre-built form templates
    • Payment gateway integrations (PayPal, Stripe, Square)
    • Conditional logic
    • Smart CAPTCHA and spam protection

    Connect Square to WPForms

    One of the coolest features of WPForms is the ability to add conditional logic, which allows users to create dynamic payment forms that change based on customers’ previous selections, providing a more personalized payment experience.

    Best For:

    WPForms is best for WordPress users who want to create customized forms, including payment forms, with ease. It is also an excellent choice for businesses that offer subscription-based products or services, as it supports recurring payments. However, you’ll need to upgrade to the premium version to access the payment forms ability.

    Pricing: Free, with premium licenses starting at $39.50/yr ($199.50/yr for the tier that offers Stripe integration)

    Get WPForms

    2. MemberPress

    MemberPress

    MemberPress is a popular membership plugin for WordPress that enables users to create sites that require memberships, restrict access to content, and accept payments. It offers a variety of membership features, including drip content, content access rules, membership levels, and more.

    Users can create and sell digital products, physical products, and subscription-based services with ease. It offers a range of payment options, including one-time payments, recurring payments, and free trials. Users can also customize their checkout pages with their branding and logos, making it easy to provide a seamless user experience for their customers.

    Key Features for MemberPress:

    • Easy membership setup and management
    • Content access rules and drip content
    • Payment gateway integrations (PayPal, Stripe, and Authorize.net)
    • Automated email notifications and reminders

    MemberPress

    One of MemberPress’ key features is its easy membership setup and management. Users can quickly create and customize membership levels and restrict access to content based on a paywall system.

    MemberPress integrates with popular payment gateways such as PayPal, Stripe, and Authorize.net, enabling users to accept payments online securely. It also provides automated email notifications and reminders, making it easy for users to communicate with their members and keep them engaged.

    Best For:

    MemberPress is best for WordPress users who want to create a membership site and restrict access to content and accept payments for paywalled pages.

    Other payment plugins for WordPress include:

    • Restrict Content Pro: A plugin that offers similar features to MemberPress, including content restriction and payment processing.
    • Paid Memberships Pro: A plugin that enables users to create membership sites and restrict access to content, with a focus on integration with other plugins and services.

    Pricing: MemberPress pricing starts at $179.50 per year for the Basic plan

    Get MemberPress

    3. Stripe Pro Payment Gateway- Easy Digital Downloads

    Stripe Pro Payment Gatewat

    Looking to maximize your Stripe integration while selling digital downloads? Look no further than the Stripe Pro Payment Gateway for Easy Digital Downloads. It allows users to accept payments with a Credit Card, Bank Card, Google Pay, Apple Pay, or Stripe and supports over 100 currencies, making it a great option for businesses operating internationally.

    Key Features for Stripe Pro Payment Gateway- Easy Digital Downloads:

    • Support for multiple payment methods, including credit cards and Apple Pay
    • Easy setup and integration with Easy Digital Downloads
    • Customizable checkout page to match your brand and website design
    • Supports subscriptions
    • Supports pre-orders

    Easy Digital Downloads Settings

    A great feature of this plugin is the way they handle refunds. Although refunds are generally unpleasant, Stripe makes the process easier. You no longer need to spend time logging into your Stripe account to initiate refunds for your customers. Instead, you can simply access your site’s dashboard, edit the relevant payment record, and change its status to “refunded”. Easy Digital Downloads will take care of the rest with just one click.

    Best For:

    Stripe Pro Payment Gateway- Easy Digital Downloads is best for businesses that are looking for an easy and secure way to accept payments through their Easy Digital Downloads platform. It is ideal for businesses selling digital products or services such as software, e-books, and online courses. For businesses selling physical products or services, WPForms may be a better fit.

    Pricing: $99.50/yr

    Get Easy Digital Downloads

    4. GiveWP

    GiveWP donation plugin

    GiveWP is a widely-used WordPress plugin with over 100,000 active users. The plugin enables you to collect one-time and recurring donations using PayPal and Stripe payment gateways.

    With GiveWP, you can also monitor donor information and track analytics from the donor database. This helps you to stay informed about your revenue and identify your most valuable donors. In addition to donor management and payment history tools, GiveWP provides custom templates and supports plugins like Mailchimp for email marketing.

    Key Features for GiveWP:

    • Custom goals and templates.
    • Donation subscription services.
    • Full analytics reporting system.
    • Recurring Donations

    A example of a form from GiveWP

    GiveWP allows you to set up recurring donations, which can help increase your donor retention rates and predict your revenue better. Plus, it has seamless integration with Divi; you can use Divi’s drag-and-drop builder to create beautiful donation forms and embed them on your website effortlessly.

    Best For:

    GiveWP is perfect for non-profits, charities, and organizations looking to raise funds and donations on their WordPress websites. If you’re looking for a payment plugin for eCommerce, you may want to consider other plugins like Easy Digital Downloads.

    Pricing:  Free. The Basic Package starts at $149/yr

    Get GiveWP

    5. WP Simple Pay

    WP Simple Pay

    WP Simple Pay is a great payment plugin for WordPress due to its ease of use, security, and support for various payment methods. It comes with payment form templates that can be set up without any technical skills.

    With WP Simple Pay, website owners can easily accept payments on their website without the need for a third-party payment gateway, reducing cart abandonment and increasing conversion rates.

    Key Features for WP Simple Pay:

    • Online payments and donations
    • One-time or recurring payments
    • Option to add coupon codes
    • Multi-language compatible
    • Extensive support documentation

    WP Easy Pay settings

    WP Simple Pay supports payments through credit and debit cards, Apple Pay, Google Pay, Stripe, and more. With this plugin, you can create payment forms with whatever custom fields you need without needing a shopping cart plugin for your website.

    Best For:

    WP Simple Pay is best for small to medium-sized businesses and website owners who want to accept payments directly on their website without the need for a third-party payment gateway. For those looking for more advanced features, consider Easy Digital Downloads.

    Pricing: $99 per year

    Get WP Simple Pay

    6. Quick Paypal Payments

    Quick Paypal Payments

    Quick Paypal Payments is a simple and lightweight plugin that allows you to accept payments through PayPal. With this plugin, you can create a single PayPal payment form and showcase it on any part of your website by utilizing the [qpp] shortcode. It’s a much more barebones solution than other plugins, but it can suffice for smaller businesses.

    Key Features for Quick Paypal Payments:

    • Create custom payment buttons
    • Add payment buttons to posts, pages, or widgets
    • Choose from multiple button styles and sizes

    Quick Paypal Statments

    Quick Paypal Payments allows you to easily add PayPal payment buttons to your WordPress website. With its user-friendly interface, you can create and customize payment buttons and embed them in posts, pages, or widgets. You can also choose from multiple button styles and sizes to match your website’s design.

    Best For:

    Quick Paypal Payments is best for individuals or small businesses who want to accept payments quickly and easily through PayPal without having to go through a complicated setup process. However, if you need more advanced payment options such as recurring payments or the ability to accept credit cards, you may want to consider other plugins like WPForms.

    Pricing:  Free, with premium licenses starting at $14.99 per year.

    Get Quick Paypal Payments

    7. WordPress Simple Shopping Cart

    Simple Shopping Cart

    There are situations where an e-commerce plugin with extensive capabilities for managing numerous products may not be necessary. In such cases, a more suitable alternative would be a solution that allows customers to add specific products or services to their carts and make payments via PayPal. This is exactly what the WordPress Simple Shopping Cart brings to the table.

    Using shortcodes, you can create personalized “add to cart” buttons that can be added to any page on your site. You can generate multiple buttons, each with a unique price, and set up a cart and checkout section to complete the purchase process.

    Key Features for Simple Shopping Cart:

    • Create custom “add to cart” buttons
    • Add cart and checkout sections to any part of your site
    • Configure shipping and payment settings for your cart
    • Offer coupons to your customers
    • Sell media files like ebooks and mp3s

    WordPress Simple Shopping Cart settings

    WordPress Simple Shopping Cart offers a simple and effective way to sell products or services on your website. With this plugin, you can easily accept payments through PayPal, customize your Add to Cart button, and sell media files. It’s a simple, lightweight solution for e-commerce.

    Best For:

    WordPress Simple Shopping Cart is ideal for small businesses or individuals who want to sell products or services online but don’t need a complex e-commerce solution. If you’re looking for more advanced features or need to sell digital products, you may want to consider Easy Digital Downloads.

    Pricing: Free

    Get WordPress Simple Shopping Cart

    8. Payment Plugins for Stripe WooCommerce

    Payment PLugins for Strupe WooCommerce

    The Stripe Payments Plugin for WooCommerce allows you to accept payments from customers using credit cards, debit cards, and other payment methods. It’s created by and maintained by Payment Plugins, who are a verified partner of Stripe. This plugin is designed to integrate seamlessly with WooCommerce and Stripe, so you can be sure that it’s secure

    Stripe WooCommerce payment plugins offer advanced fraud protection and compliance with industry standards such as PCI DSS.

    Key Features for Payment Plugins for Stripe WooCommerce:

    • Accept payments via Stripe
    • Seamless integration with WooCommerce
    • Secure and reliable payment processing
    • Supports WooCommerce Subscriptions

    The Stripe Payments Plugin for WooCommerce offers a secure and reliable way to accept payments on your website. It’s relatively lightweight and only takes minutes to set up; however, it only supports payments made through Stripe, so if you want to offer other payment methods, such as PayPal or Amazon Pay, you will need to use additional plugins or extensions.

    Best For:

    The Stripe Payments Plugin for WooCommerce is ideal for businesses that are familiar with Stripe. If you need additional features, such as recurring billing, you may want to consider WP Simple Pay.

    Pricing: Free

    Get Stripe Payments Plugin for WooCommerce

    9. Payment Button for PayPal

    Buy Now

    Payment Button for PayPal is a WordPress plugin that connects your website to PayPal and allows you to create various types of buttons to accept payments from your users. With simple shortcodes, you can create buttons for Add to Cart, Buy Now, Donation, or Subscriptions. This plugin allows for both one-time and recurring subscription payments, making it easy to run your online store.

    Key Features for Payment Button for PayPal:

    • Easy integration with PayPal Payments Standard API
    • Various types of buttons, including Add to Cart, Buy Now, Donation, or Subscription
    • Supports one-time and recurring subscription payments

    PayPal Button Settings

    With the Payment Button for PayPal, you can add a secure payment button to your website with one simple shortcode. This button lets you accept credit card, debit card, and PayPal payments from any mobile device, tablet, or PC. The plugin also includes a built-in IPN (Instant Payment Notification) system that notifies you when payments are made and allow you to track your sales.

    Best For:

    Payment Button for PayPal is an ideal solution for individuals looking for a hassle-free way to accept payments on their website without the need to set up a complicated e-commerce platform. However, if you require more advanced e-commerce features, we suggest WPForms.

    Pricing: Free, with premium add-ons.

    Get Payment Button for PayPal

    What is the Best Payment Plugin For WordPress?

    Plugin Price Free Option
    🥇 WPForms $199.50 per year ✔️ Visit
    🥈 MemberPress $179.00 per year ❌ Visit
    🥉 Easy Digital Forms $99.50 per year ❌ Visit
    4 GiveWP $149.00 per year ✔️ Visit
    5 WP Simple Pay $99.00 per year ❌ Visit
    6 Quick Paypal Payments $14.99 per year ✔️ Visit
    7 WordPress Simple Shopping Cart Free ✔️ Visit
    8 Stripe Payments Plugin for WooCommerce Free ✔️ Visit
    9 Payment Button for PayPal Free ✔️ Visit

    When it comes to choosing the best payment plugin for your WordPress site, there are a lot of options available. However, two plugins that stand out from the rest are WPForms and MemberPress.

    WPForms offers a user-friendly interface, customizable payment forms, and integration with popular payment gateways such as PayPal and Stripe. On the other hand,

    MemberPress offers robust membership features, content access control, and seamless integration with payment gateways.

    Both plugins provide excellent support and have a strong track record of positive user reviews. Ultimately, the best payment plugin for your needs will depend on your specific requirements and budget, so be sure to think about what your needs are before making a choice.

    Need more plugins? Check out our article featuring the best WordPress schema plugins.

    Featured Image via tanahairstudio / shutterstock.com

    The post 9 Best Payment Plugins for WordPress in 2023 appeared first on Elegant Themes Blog.

  • 7 Best Multi Currency WordPress Plugins (Free + Paid)

    Do you want users to easily change the currency on your WordPress website?

    A multi-currency WordPress plugin lets you show different currencies on your website and automatically apply the exchange rate. This way, customers can switch their local currency when purchasing a product.

    In this article, we’ll share the best multi-currency WordPress plugins that you can use on your site.

    Best multi currency WordPress plugins

    Why Use a Multi Currency WordPress Plugin?

    A multi currency plugin allows you to offer multiple currencies on your WordPress website. Your customers can switch currencies from the US dollar to their native currency with a click of a button.

    If you’re running an online store, then having a currency switcher plugin can come in handy.

    You can reach a wider audience and target users from around the world. Customers from other countries can easily convert the product prices into their local currency without leaving your website.

    It also improves the overall shopping experience for customers. The plugin removes any pricing confusion that people may have. As a result, you get to keep customers on your website and boost sales.

    That said, let’s look at the best multi-currency plugins for WordPress.

    1. Easy Digital Downloads

    The Easy Digital Downloads WordPress plugin

    Easy Digital Downloads is the best eCommerce plugin for WordPress that lets you sell digital products like ebooks, digital art, music files, software, and more.

    It offers multi-currency support and lets you show prices in different currencies. You can select from over 200 currencies and have complete control over the exchange rate.

    There is an automatic option where the plugin will auto-update the exchange rate and convert the price from USD to the customer’s local currency. On the other hand, you can also manually set the exchange rate.

    Multi currency settings in EDD

    Besides that, Easy Digital Downloads lets you sell digital downloads with ease. It offers unlimited file downloads, full data reporting, a shopping cart, and more. It also easily integrates with payment gateways like Stripe, PayPal and third-party tools like AWeber, ConvertKit and Slack.

    Pricing: Easy Digital Downloads is a premium plugin with prices starting from $99.50 per year.

    2. YITH Multi Currency Switcher for WooCommerce

    YITH multi currency switcher for WooCommerce

    YITH Multi Currency Switcher for WooCommerce is the next multi-currency WordPress plugin on our list.

    It is super easy to use and lets you add unlimited currencies to your WooCommerce store. You can show a currency switcher anywhere on your website and let customers choose their local currency.

    Besides that, the plugin also automatically detects users’ geolocation and displays prices in their native currency. It integrates with APIs of the European Central Bank, Google Finance, and other providers to automatically update exchange rates.

    You can also control the frequency of exchange rate updates. For example, the plugin can check it daily, twice daily, weekly, monthly, or every 15 days.

    Other than that, you get options to customize the currency switcher, display different payment methods for specific countries, and more.

    Pricing: YITH Multi Currency Switcher for WooCommerce is a premium plugin that will cost you $99.99 annually.

    3. WP Simple Pay

    WP Simple Pay

    WP Simple Pay is the best Stripe plugin for WordPress that lets you accept one-time or recurring payments on your website. The best part, you don’t have to set up a shopping cart to collect payments.

    WP Simple Pay lets you select from 135+ different currencies supported by Stripe. It also lets you choose your site’s region’s default currency, format, and tax rate. This way, you can charge customers in their native currency and receive funds in your preferred currency.

    With WP Simple Pay, you get a drag-and-drop payment form builder and over 10 different payment methods. For example, you can collect payments through credit and debit cards, Apple Pay, Google Pay, ACH direct debit, and more.

    Pricing: WP Simple Pay prices start from $49.50 per year. There is also a free version you can use to get started.

    4. CURCY – Multi Currency for WooCommerce

    CURCY

    CURCY is a free WooCommerce multi currency plugin. It lets you accept payments in different currencies and helps customers to switch to their preferred currency.

    The plugin is easy to use and set up. It automatically detects users’ location on your WooCommerce store and displays products in the native currency.

    You can also allow the plugin to set the exchange rate automatically. However, there are different options for controlling the exchange rate. For example, you can manually set the rate, keep the product prices fixed in other currencies, and manage the exchange rate fee.

    Pricing: CURCY is a free WordPress plugin.

    5. WooCommerce Multi-Currency

    WooCommerce multi currency

    WooCommerce Multi-Currency is a premium WooCommerce extension that allows you to show product prices in the customer’s country’s currency.

    Like many other plugins on our list, you can choose between automatic or manual exchange rate settings. The plugin supports different exchange rate providers’ APIs, such as Open Exchange Rate, Abstract, Exchange Rate API, and more.

    Using a shortcode, you can display the currency switcher anywhere on your WooCommerce store. It also has a sidebar widget and helps customers quickly convert prices into their local currency.

    Pricing: WooCommerce Multi-Currency prices start from $99 per year.

    6. Currency Switcher for WordPress

    Currency switcher plugin

    Currency Switcher for WordPress is another free and beginner-friendly plugin you can use to show different currencies on your website.

    It works with Open Exchange Rate API and allows you to automatically convert the prices into different currencies depending on the exchange rate. There is also an option to manually control the exchange rate.

    Currency Switcher for WordPress supports currency conversion for visitors from the United States, Australia, Europe, and India.

    You can easily add the currency switcher to any page using shortcodes. Plus, the plugin easily integrates with WordPress page builders like Elementor and Beaver Builder.

    Pricing: Currency Switcher for WordPress is free to use plugin.

    7. Currency Converter Widget

    Currency convertor widget

    Currency Converter Widget is a premium WooCommerce plugin that you can use on your store. The multi-currency plugin offers a dynamic widget that converts product prices in real-time.

    It automatically grabs the latest exchange rate and applies it to the products. You can add and convert as many currencies as you want.

    The best part is that the plugin saves the converted total at checkout. This way, you can see the prices customers saw on your WooCommerce store.

    Pricing: Currency Converter Widget will cost you $49 per year.

    Which is the Best Multi Currency WordPress Plugin?

    Based on our research, the best WordPress multi-currency plugin are Easy Digital Downloads, YITH multi currency switcher for WooCommerce, and WP Simple Pay.

    The choice of picking the best multi-currency plugin depends on the type of website you’re running.

    For instance, if you’re selling digital products, then Easy Digital Downloads is the best choice. It is super easy to use and lets you select from over 200 different currencies. You get full control over the exchange rate and can add as many currencies as you want.

    On the other hand, YITH Multi Currency Switcher for WooCommerce is the best multi-currency plugin to use if you have a WooCommerce store. It automatically detects the user’s location and converts product prices. Plus, you can choose from different providers to set the exchange rate.

    Lastly, you can also use WP Simple Pay to collect online payments without setting up a shopping cart. It is the best Stripe plugin and supports over 135 currencies.

    We hope this article helped you pick the best multi-currency WordPress plugin. You may also want to see our comparison of the best live chat software and best business phone services for small business.

    If you liked this article, then please subscribe to our YouTube Channel for WordPress video tutorials. You can also find us on Twitter and Facebook.

    The post 7 Best Multi Currency WordPress Plugins (Free + Paid) first appeared on WPBeginner.

  • 8 Ways to Meet and Exceed Customer Expectations

    Learn how to meet and exceed customer expectations with these 8 strategies. From exceptional service to innovation, improve your customer experience now.

    The post “8 Ways to Meet and Exceed Customer Expectations” first appeared on WP Mayor.

  • How to Create a Loyalty Program in WooCommerce

    Do you want to create a loyalty program in WooCommerce?

    A loyalty program can keep customers coming back to your online store, and keep them away from your competitors. It can also be a great way to reward your best customers and make them feel valued.

    In this guide, we’ll show you how to create a loyalty program for your WooCommerce store.

    Creating a loyalty program in WooCommerce

    Why Create a Loyalty Program in WooCommerce?

    Creating a loyalty program can be a great way to get more sales on your online store.

    A loyalty program encourages customers to keep coming back to your WordPress website, which is the key to running a successful business over the long term. It can even boost average spend per customer by giving shoppers a reason to add more items to their basket.

    Most stores give customers points for buying products and services. However, you can also reward customers for other actions like creating an account, placing their first order, signing up to your email newsletter, or spending over a certain account.

    You might even give customer extra points for returning to an abandoned shopping cart and completing their purchase. In this way, a loyalty program can help you recover WooCommerce abandoned cart sales.

    With that said, let’s take a look at how to add a loyalty program in WooCommerce.

    Setting Up Your WooCommerce Loyalty Program

    The easiest way to create a loyalty program is by using Advanced Coupons. It is the best WordPress coupons plugin and lets you create all kinds of coupons, programs, buy one get one free offers, and other rewards.

    After creating a loyalty program, Advanced Coupons will show the customer how many points they’ll get for each action, including buying a specific product.

    The customer will see a message in their shopping cart to let them know how many points they'll earn

    First, you’ll need to install and activate both the free Advanced Coupons plugin and the premium Advanced Coupons Loyalty Program addon. For more information, please see our step-by-step guide on how to install a WordPress plugin.

    Note: You can purchase the Advanced Coupons and Loyalty Program plugins together by getting the ‘All-In-One Bundle’.

    After that, simply go to Coupons » Loyalty Program in your WordPress admin dashboard and click on the ‘License’ tab.

    Adding a license to the Loyalty Program WordPress plugin

    You can now enter your license key and the email address you used to purchase Advanced Coupons. You can find this information by logging into your account on the Advanced Coupons website.

    After that, go ahead and click on the ‘Settings’ tab. This brings you to a screen where you can build the loyalty program.

    To start, let’s reward members with points when they take certain actions on your website, like leaving a product review, posting a comment, or buying a product.

    In the ‘Price to points earned ratio,’ we can see that the Loyalty Program plugin gives customers 1 point for every $1 spent.

    The points earned ratio

    If you want your WooCommerce loyalty program to look more impressive, then you give customers more points. For example, members might earn 2 points or 10 points for every $1 they spend.

    ‘Points to price redeemed ratio’ is how many points it takes to earn a dollar as part of your loyalty program.

    By default, customers earn $1 for every 10 points. That means the customer needs to redeem 10 points to get a $1 discount coupon. You can change these values to anything you want.

    You can also change the name of your loyalty scheme by typing into the ‘Points name’ field. We’ve gone with ‘Awesome Points’ for our loyalty program, but you might want to use something more branded, like Starbucks does with their ‘Stars’.

    Changing the name of your WooCommerce loyalty program

    Next, you’ll need to decide how your points are calculated. For instance, you may want to give a customer less points if they use a coupon code, compared to a customer who didn’t use a coupon. In this way, you can give the best rewards to your best customers.

    To do this, click on the ‘Points Earning’ tab. Here, you can check the boxes to take any discounts, tax, shipping costs, and any fee amounts into account when awarding points.

    Calculating points in a WooCommerce loyalty program

    Many online marketplaces and digital stores only reward customers for spending money. However, there may be other actions that benefit you, so it’s a good idea to reward customers for taking these actions.

    For example, you might want to reward visitors for registering with your membership site, posting a product review, or even commenting on a blog post.

    Simply scroll to the ‘Point Amounts’ section and then click the switch for any action that will earn the customer points.

    Point amounts toggle

    After activating these toggles, check whether there are any new settings to configure.

    For example, you’ll need to type in how many points customers will get for registering as a new user.

    Awarding points for registering as a new customer

    You can also encourage shoppers to spend more by awarding extra points for orders over a certain amount.

    To do this, enable the ‘Spending over a certain amount’ switch and then type a value into the ‘Spending over a threshold’ field.

    How to create a threshold for your WooCommerce loyalty program

    During busy shopping periods you may want to give customers an extra reason to buy from your store. For example you might award extra points during Black Friday, so customers aren’t tempted to shop with a competitor.

    You can give customers extra points during a specific period by enabling the ‘Extra Points To Earn During Period’ slider. Then, enter a date and time range into the ‘Extra points to earn during period’ section and type in how many points customers will earn.

    Awarding extra points for members of your eCommerce loyalty program

    There are some more settings you may want to look at, but this is enough to create a loyalty program in WooCommerce. When you’re happy with how the program is set up, scroll to the bottom of the page and click the ‘Save changes’ button.

    Your new WooCommerce loyalty program is now live.

    Automatically Creating Accounts for Your Customers

    Your customers will need to create an account in order to collect loyalty points.

    Already, this encourages people to sign up to your online store. However, you can also create an account automatically when a visitor makes their first purchase. This can improve the shopping experience, and may get you some extra members.

    To automatically create an account for a new customer, go to WooCommerce » Settings. Then, click on the ‘Accounts and Privacy’ tab.

    Changing your WooCommerce account settings

    To start, you may want to uncheck ‘Allow customers to place orders without an account’, so that customers can’t checkout as a guest. This will encourage more people to register with your site, but it may cause more shoppers to give up on a purchase and abandon their shopping carts.

    With that being said, it’a a good idea to set up WooCommerce conversion tracking and track visitors to your WordPress website. You can then see whether this change hurts your conversion rates.

    Next, check the ‘Allow customers to log into an existing account during checkout’ box.

    Once you’ve done that, you’ll want to make it as easy as possible for customers to create an account. With that in mind, we recommend checking all the boxes in the ‘Account creation’ section, as you can see in the following image.

    Disallowing the option to checkout as a guest in WooCommerce

    Now, WooCommerce will automatically send an email to first-time customers with information on how to access their new account.

    The WooCommerce Loyalty Program in Action

    Your loyalty program is up and running! Once a customer has earned loyalty points, they can turn them into coupons by going to My Account » My Reward Points.

    The customer can then simply type in how many points they want to use, and your WordPress blog or website will show how much the coupon is worth.

    The customer can go ahead and click ‘Redeem’ to create that coupon.

    In the following image, the customer has created a $5 coupon by converting 500 of their points. They still have 550 points left to redeem.

    The customer can turn their earned points into coupons in their account

    We hope this tutorial helped you learn how to create a loyalty program in WooCommerce. You may also want to check out our guide on how to create a WooCommerce popup and the best virtual business phone number apps.

    If you liked this article, then please subscribe to our YouTube Channel for WordPress video tutorials. You can also find us on Twitter and Facebook.

    The post How to Create a Loyalty Program in WooCommerce first appeared on WPBeginner.

  • 6 Ways to Optimize Your WooCommerce Variations

    For the majority of WooCommerce store owners, product variations are vital. So here’s how you can optimize them to increase your overall sales.

    The post “6 Ways to Optimize Your WooCommerce Variations” first appeared on WP Mayor.

  • How to Add Product Questions And Answers in WooCommerce

    Are you looking to add a product question and answer section in WooCommerce?

    Adding a Q&A section enables customers to ask questions about the product before buying it, and see the questions and answers of other customers. This helps recover abandoned cart sales and improve customer engagement in your store, and reduce support requests.

    In this article, we’ll show you how to easily add product questions and answers in WooCommerce.

    How to add product questions and answers in WooCommerce

    Why Should You Add Product Q&A in WooCommerce

    You may have noticed the product question-and-answer section on popular eCommerce websites like Amazon, Target, Best Buy, and more.

    Target Q&A example

    Adding a product questions and answers section allows customers to ask questions about a product right there on the product page.

    You or your customers can then answer that question and it becomes visible to all other new customers who may have the same question in mind.

    Over a period of time, your product page will have its own frequently asked questions section, which will help increase sales and reduce abandoned cart rates.

    Adding a question and answers section to your online store also allows you to curate user-generated content which improves your WooCommerce product search rankings.

    That being said, let’s see how you can easily add product questions and answers to WooCommerce.

    1. Adding a Product Q&A Section Using a Premium Plugin

    For this method, we will be using the YITH WooCommerce Questions and Answers plugin.

    It is a premium plugin and comes with more features to easily add an engaging Q&A section with a better user experience.

    First, you need to install and activate the YITH WooCommerce Questions and Answers plugin. For more instructions, please see our step-by-step guide on how to install a WordPress plugin.

    Upon activation, go to the YITH » License Activation page and enter your license key. You can find this information under your account on the plugin website.

    Activate your YITH plugin with the license key

    Don’t forget to click on the Activate button after entering your license key.

    Next, you need to go to the YITH » Questions and Answers page to configure plugin settings.

    YITH Quiestions and Answers settings

    From here you need to scroll down to the ‘Question Approval’ option and simply toggle the switch to ‘Yes’.

    Once you do that, the questions on the product pages will have to be approved by an administrator before they are displayed on your WooCommerce store.

    Toggle the switch next to the Question Approval field

    Next, you need to scroll to the ‘Show on Product Tabs’ option.

    Here, you need to toggle the switch to ‘Yes’ so that the plugin will automatically add a ‘Questions and Answers’ section to product pages.

    Toggle the switch next to the Product on tab field

    After that, don’t forget to click the ‘Save Options’ button to store your changes.

    Now, you need to switch to the ‘Advanced Settings’ tab.

    From here, simply toggle the ‘Vote Question’ switch to ‘Yes’ if you want to allow users to vote on product questions.

    Go to the advanced settings tab

    Next, you can choose if you want to get an email notification once a question is submitted on your website.

    Simply select the ‘Notification in HTML Email’ option from the dropdown menu next to the ‘New question notification’ field.

    Tip: To ensure email deliverability you need to use an SMTP server. See our guide on how to fix WooCommerce not sending emails issue.

    Similarly, you can also choose the ‘Notification in HTML Email’ option in the ‘New answer notification’ field if you want to receive an email once a question is answered on your site.

    Configure the New question notification field settings

    Your user can also receive a notification once the question submitted by them is answered.

    To enable this, you need to toggle the switch next to the ‘User Notification’ option to ‘Yes’.

    Toggle the user notification

    After that, you can review other settings. The default options would work for most websites but you can change them if needed.

    Finally, don’t forget to click on the ‘Save Options’ button to save your changes.

    You can now visit your website to see the Questions & Answers section appear on your product pages.

    Questions form below product pages

    From here, your customers can submit their questions.

    Moderating Questions and Adding Answers

    You will receive an email notification for new questions submitted by the users. You can also view them by visiting the Questions & Answers » All discussion page.

    Moderate question and answers

    You can sort entries here by ‘Content not approved’ or ‘Unanswered Questions’.

    You can also take your mouse over a question and click ‘Approve’ to make it live.

    To add an answer to a question, you can simply click on the ‘Edit’ link below that question. On the edit screen, scroll down to the ‘Your Answer’ section to answer the question.

    Add your answer

    Repeat the process if you have more unanswered questions.

    This is how the product questions and answers section looked on our demo store.

    Question and answers preview

    2. Adding a Product Q&A Section Using a Free Plugin

    If you want to use a free plugin to add a product Q&A section to your WooCommerce store, then this method is for you.

    First, you need to do is install and activate the Product Questions & Answers for WooCommerce plugin. For more instructions, see our guide on how to install a WordPress plugin.

    Upon activation, click the Product Q&A menu from the WordPress admin sidebar which will direct you to the ‘Product Q&A Settings’ page.

    From here, simply check the ‘Load More’ option if you want to add a ‘load More’ button to your product Q&A section.

    Adding this button will allow customers to load older questions and reduces the page load time if a product gets a ton of questions.

    Simply check the Load more box

    Next, you need to choose a page size.

    This means that you need to select a default number of questions that are shown in your Q&A section.

    All the other questions will be hidden from view. Users will be able to access those questions after clicking the ‘Load More’ button.

    You can also change the text used for the ‘Load More’ button to anything you like. For instance, you can call it ‘Load more questions’.

    Choose a paging button name

    Next, you need to choose a layout for your product Q&A section from the dropdown menu next to the ‘Layout’ option.

    You can choose the ‘Normal’ option if you want to display the Q&A section in paragraphs.

    Select layout and save your changes

    On the other hand, you can also display your questions as an Accordion menu. This means users will need to click on a question to view the answer.

    Once finished, don’t forget to click the Submit button at the bottom to save your settings.

    Managing Product Question and Answers

    After plugin configuration, simply visit any product page on your store. You’ll notice a new Q&A tab added there.

    Click Q and A tab on the product page

    Clicking on it will display the ‘Q&A’ section where customers can submit their questions.

    You will receive an email notification when a user submits a question.

    Type a Q&A question and submit it

    Now, to answer customer questions, you need to go to the Products » All Products page from the WordPress admin dashboard.

    From here, simply click the ‘Edit’ button under a product to open up its’ ‘Edit Product’ page.

    Click the Edit button

    Next, you need to scroll down to the ‘Product Data’ section and click the ‘Q&A’ tab from the left column.

    Here, all the questions submitted on that specific product’s page will be displayed.

    Click the Q&A tab

    Now, you need to simply type the answer to a customer query in the ‘Answer’ field.

    If you want to delete a question because it’s inappropriate or irrelevant to your product, then you can also do that by clicking the Delete icon on the right corner of each question.

    You can also uncheck the ‘Approve’ option if you don’t want to display the question on the product page.

    Answer or delete the question

    After you have answered the product questions, go to the top of the page and click the ‘Update’ button to save your changes.

    Now, you can visit the product page to see the Questions and Answer section in action.

    Visit site

    We hope this article helped you learn how to add product questions and answers in WooCommerce. You can also check out our top picks for the best WooCommerce plugins to grow your store, and our beginner’s guide on how to add web push notification to boost sales.

    If you liked this article, then please subscribe to our YouTube Channel for WordPress video tutorials. You can also find us on Twitter and Facebook.

    The post How to Add Product Questions And Answers in WooCommerce first appeared on WPBeginner.

  • Welcome WP101 to the WPBeginner Family of Products

    Today, I’m extremely excited to share that WP101 is joining Awesome Motive, and they’re now part of the WPBeginner family of products.

    WP101 is one of the most trusted premium WordPress video training providers in the market. Over 3 million users have learned WordPress from their WordPress video tutorials. The WP101 Plugin allows WordPress agencies and service providers an easy way to offer white-labeled professional WordPress training videos to their clients.

    WP101 is joining the WPBeginner Family

    Introduction to WP101 – Quick Overview

    WP101 offers professionally-produced WordPress training videos to help you learn WordPress, fast. It’s a perfect solution for small businesses owners, large corporations, and government agencies who want to offer professional WordPress training videos in their employee onboarding process.

    With WP101, you get access to over 200+ WordPress training videos that cover everything you need to learn the WordPress user interface in a university style format.

    In addition to the popular WordPress 101 series for both Gutenberg and the Classic Editor, the current library also includes video tutorials for top WordPress plugins including WooCommerce, WPForms, Elementor, Beaver Builder, and more.

    WP101 Course Library

    The WP101 Plugin makes it easy for WordPress developers and agencies to offer white-label training videos to their clients, right inside the WordPress dashboard.

    It gives you the ability to add your own custom videos as well as selective show / hide videos based on client’s needs.

    WP101 WordPress Training Videos inside WordPress Dashboard

    Whether you’re a small business owner or large corporation, I highly recommend adding WP101 training to your employee onboarding process.

    If you’re a WordPress freelancer or agency, then you should consider adding the WP101 Plugin to your client and build a recurring revenue stream.

    Background Story – Why WP101? 

    Both WPBeginner and WP101 started around the same time with a similar mission: making it easy for people to learn WordPress.

    At WPBeginner, we did it with our easy to understand written tutorials, while Shawn at WP101 offered premium video training.

    I have been friends with Shawn Hesketh, founder of WP101 for a long time, and we have enjoyed over a decade of coopetition. I have a lot of admiration and respect for the massive impact he’s had in the growth of the WordPress community.

    Syed Balkhi and Shawn Hesketh at Pressnomics

    After 14+ years of creating WordPress training videos, when Shawn was ready to move on to the next chapter of his life, we started talking about the future of WP101 and carrying his legacy forward.

    Given my experience running the largest WordPress resource site, it made perfect sense for us to be the future custodian of the WP101 brand. 

    It gives me great joy to be there for a friend and offer him the exit that he deserves as he pursues the next chapter of his career. At the same time, it’s an honor and a privilege that Shawn trusted us to carry the mission forward.

    Note: Want to join our remote team to work on something awesome & make an impact? We’re hiring. Come work alongside me and help shape the future of the web.

    What’s Coming Next? 

    Our work is just starting.

    My goal is to create the best class-room style WordPress training videos to help WordPress grow in enterprise, government agencies, as well as at the school and collegiate level. 

    I’m really excited about the latter because I believe that education helps level the playing field, and that’s the mission of my Balkhi Foundation.

    WordPress is an open source platform, and open source is one of the greatest ideas of our generation. It has the power to transform the lives of so many people across the world, like it did for me when I first immigrated to the US.

    While talent is everywhere, opportunities are not. I want to use the WP101 training platform to bring opportunities everywhere, so we can help shape the future of the web for billions worldwide.

    This is a big mission, and I need your help. If you have experience with instructional design or higher-ed, I would love to chat with you to see how we can work together to bring WordPress to classrooms and universities. Please send me a message via WPBeginner contact form.

    If you’re passionate about teaching WordPress and want to be a part of our mission, we’re hiring content creators and trainers. While the listings for these roles aren’t public, just send me a brief message via our contact form with your resume, and I’ll get in touch with you.

    As always, I want to thank you for your continued support of WPBeginner. 

    Every time I share an announcement like this, I realize that I’m only able to do what I love every day because of you, our amazing readers, and I’m extremely grateful for your support throughout the years.

    WPBeginner and Awesome Motive would not be here without YOU, and I just want to say how much I appreciate all of you.

    I look forward to continuing serving you, and the larger WordPress / web ecosystem for years to come.

    Yours Truly,

    Syed Balkhi
    Founder of WPBeginner

    P.S. Want us to acquire or invest in your WordPress business? Learn more about the WPBeginner Growth Fund.

    The post Welcome WP101 to the WPBeginner Family of Products first appeared on WPBeginner.

  • WooCommerce vs Adobe Commerce (2023) — Let’s Compare

    WooCommerce and Adobe Commerce are two popular e-commerce platforms available today. They both have their unique strengths and are suitable for different needs. While WooCommerce is a plugin for WordPress, Adobe Commerce is a standalone product, formerly known as Magento. They are supported by their strong communities, with WordPress users favoring WooCommerce and Adobe advocates supporting Magento. In this post, we’ll compare WooCommerce vs Adobe Commerce to help you decide which platform is best for your business.

    Similarities of WooCommerce vs Adobe Commerce

    WooCommerce and Adobe Commerce are both open-source products, meaning that the original code is freely available for anyone to modify or build on to create a customized product. The vast communities that support these products are due in part to the culture of sharing that open-source software fosters.

    One of the reasons WooCommerce and Adobe Commerce have such large communities is that open-source software creates an appreciation of sharing. Developers go on to share their versions of the open-source software to carry on this aspect of giving.

    WooCommerce community

    As a new business owner, using open-source products like WooCommerce or Adobe Commerce means that you can take advantage of a free initial product and the support of a large community. However, it’s worth noting that with Adobe Commerce, unless you’re willing to pay a high price or use a hosting provider with one-click installs, you’ll need a good understanding of command-line installation and coding to get the platform up and running. This is not the case with WooCommerce, which is a plugin for WordPress and can be easily installed with a few clicks.

    How Easy is Set Up and Use?

    Starting an e-commerce business can come with its own set of challenges, but you don’t want the platform you choose to be one of them. If you’re already using WordPress and want to add e-commerce functionality to your site, it makes sense to choose the WooCommerce plugin. This way, you won’t have to get used to a new interface or migrate your site to another platform.

    However, when comparing WooCommerce vs Adobe Commerce, one important factor to consider is the ease of use. While WooCommerce is easy to install and set up, Adobe Commerce may require more technical knowledge and experience, particularly when it comes to customization and advanced functionality. It’s important to evaluate your skill level and the needs of your business to determine which platform is the right fit for you.

    WooCommerce Set Up

    WooCommerce documentation

    WooCommerce is a great option for beginners, even if you don’t have a WordPress site yet. This is because WordPress is very user-friendly and WooCommerce is an extension of it. There are numerous plugins available for customization through WordPress, including options from Yith and other providers. In addition, WooCommerce provides extensive documentation to help with the setup process.

    Adobe Commerce Set Up

    Adobe Commerce e-commerce platform

    Adobe Commerce, being built on Magento, requires web development knowledge to get started. Like WordPress, it requires a hosting environment built on Apache or Nginx, as well as PHP and MySql. However, to install Magento, you’ll need to either use the command line interface, which may be overwhelming and frustrating for beginners, or research hosting providers that simplify the process.

    Once set up, Magento’s interface is user-friendly and supported by tutorial videos and documentation. It also includes a full installation wizard. However, adding extensions to your site can be challenging, and may require the expertise of a Magento-specialist developer or personal effort.

    Therefore, when it comes to ease of use, WooCommerce vs Adobe Commerce is the clear winner.

    WordPress Adobe Commerce
    Ease of Use 🥇 Winner

    WooCommerce is as simple to set up as WordPress, with a simple walk though set up wizard.

    Unless you have strong dev skills or a host that offers set up, Adobe Commerce is difficult to install, requiring command line interface.
    Choose WordPress Choose Adobe Commerce

    What are the Associated Costs of WooCommerce vs Adobe Commerce?

    Both e-commerce platforms are free to download and start building your shop but to grow your business, you may need more payment options beyond PayPal and bank transfers, which can cost additional fees.

    WooCommerce

    WooCommerce extensions

    WooCommerce has limited basic options, so you need to buy plugins and extensions, which can add up. There are many options available, including some free ones, but if you want a unique shop, you’ll need to spend money or do some coding.

    Divi by Elegant Themes

    Thanks to themes like Divi, creating a beautiful online store is easy using the Visual Builder to customize colors, fonts, and more. You can find some great child themes through the Divi Marketplace, such as Divi Ecommerce, which provides everything you need for a stunning online shop that can be set up in a matter of minutes.

    Adobe Commerce

    With Adobe Commerce, you’ll find it necessary to add extensions to both e-commerce platforms, which will require additional costs as your business grows. While WooCommerce offers a wide selection of free and paid plugins, Adobe Commerce’s extensions are pricier, and you’ll need a Magento specialist to install them correctly. Additionally, finding a Magento developer is harder than finding WordPress developers.

    Overall, WordPress is more user-friendly and easier for individuals with varying levels of experience, while Magento would require more time and expertise to set up and manage.

    Hosting Considerations

    When it comes to hosting, it’s important to consider that while WooCommerce can run on WordPress hosting, Adobe Commerce requires more advanced hosting options like dedicated servers or cloud plans. Cloudways is a recommended provider for Magento users, and their one-click install makes it easy to set up your website. If your product portfolio grows, you may need to upgrade your hosting to ensure your website runs smoothly.

    When deciding between WooCommerce vs Adobe Commerce, it’s important to consider your long-term goals and budget. While the initial costs of setting up both platforms are low, it’s important to think about your future needs. Do you require the advanced features of Adobe Commerce, or will WooCommerce suffice? If you anticipate needing those features, it may be worth investing more money upfront rather than having to migrate your site to Adobe Commerce later on. Keep in mind that Adobe Commerce hosting plans are expensive, costing over $1000 per month. However, if you’re a large company with the budget to invest in it, it could be a wise choice.

    WordPress Adobe Commerce
    Associated Costs 🏳 Draw

    WooCommerce can get pricey depending on how customized you want your online shop to be.

    🏳 Draw

    Adobe Commerce (Magento) is free, but installing extensions is expensive and may required developer assistance.

    Choose WordPress Choose Adobe Commerce

    Which is Better for Customization?

    Both WooCommerce and Adobe Commerce offer various customization options, but the level of customization needed will depend on your specific needs and preferences. For instance, to customize your website’s branding, you’ll need to unlock this ability through plugins or a developer’s time. It’s worth noting that being able to customize your site is only possible because both WooCommerce and Adobe Commerce are self-hosted.

    On the other hand, hosted solutions like Shopify allow you to quickly build an online store, but customization options are limited. Therefore, WooCommerce and Adobe Commerce are excellent options if you want to make your e-commerce shop truly unique.

    Additionally, when comparing WooCommerce vs Adobe Commerce, both platforms offer extensive customization options that allow you to tailor your online store to your specific needs. The level of customization required, however, may differ depending on which platform you choose.

    WooCommerce

    WooCommerce vs Adobe Commerce themes

    WooCommerce has many themes, both free and paid, that let you customize your site’s appearance. You can also find themes made by third-party developers, like Elegant Themes and Elementor, that are compatible with WooCommerce.

    WooCommerce supports various custom plugins, including payment and shipping provider plugins like Printify, to enhance its functionality. Developers can also use custom code and APIs to build custom integrations with third-party applications.

    Adobe Commerce

    Magento Marketplace

    Like WooCommerce, Adobe Commerce offers a variety of free and premium themes to customize your online store’s appearance. However, unlike WordPress, most of these themes are created by third-party vendors rather than Adobe itself. Additionally, the Magento Marketplace provides access to over 5,000 extensions that can enhance the functionality and appearance of your store. It’s worth noting that customization on Adobe Commerce may require more technical skill than it does on WooCommerce.

    Furthermore, with code customization, you can achieve incredible things on Adobe Commerce. Creating custom modules, extensions, and themes can add a unique flair to your online store.

    WordPress Adobe Commerce
    Customization 🥇 Winner

    With so many third-party plugins and child themes available, there are no limits to customization with WooCommerce.

    While there are extensions and themes available, they are expensive and time-consuming. Therefore, most will opt for the simple look and feel of a basic Adobe Commerce site.
    Choose WordPress Choose Adobe Commerce

    Comparing Features

    With any e-commerce platform, you’ll need a shopping cart and the ability to upload and categorize products. You get these basic features with WooCommerce and Adobe Commerce. When comparing WooCommerce vs Adobe Commerce, which has more features to offer?

    WooCommerce

    WooCommerce is user-friendly and has basic built-in features like ratings and widgets, but advanced features need add-ons. It can also work with other WordPress plugins. The navigation is not as advanced as Adobe Commerce’s as it only allows filtering by one attribute.

    WooCommerce features

    WooCommerce offers easy-to-manage extensions through WordPress plugins, some of which are free. Popular examples include Rank Math for search engine optimization, Askimet for spam filtering, and Gravity forms for creating forms.

    Adobe Commerce

    Adobe Commerce offers cross-selling, up-selling, product comparison, discount codes, and advanced filters, making it a winner in this area. It also allows you to view multiple stores on the same account, which is useful for creating localized versions of your store.

    Google Analytics Integration

    Adobe Commerce and WooCommerce provide Google Analytics for business success assessment and product portfolio strategy. However, when it comes to features, Adobe Commerce has the better basic features, but you’ll need to invest more to improve your site.

    WordPress Adobe Commerce
    Features 🏳 Draw

    WooCommerce offers plugins, custom code capabilities, and Google Analytics integration.

    🏳 Draw

    Adobe Commerce has advanced features for cross-selling, product comparisons, and discount codes right out of the box.

    Choose WordPress Choose Adobe Commerce

    WooCommerce and Adobe Commerce Alternatives

    Consider Shopify if you want an easy-to-use online store without many customization options. However, if you want more control over the looks of your store, you should check out our WordPress vs Squarespace comparison.

    WooCommerce vs Adobe Commerce: The Verdict

    Adobe Commerce is a preferred choice for larger businesses or agencies that manage e-commerce sites for their clients. It’s scalable, making it perfect for those with grand plans or an already successful online store. Adobe Commerce offers a few more basic features, and the extensions are excellent once they are installed by a developer. However, it’s worth noting that setting up this kind of store requires a significant budget.

    Final Comparison

    WooCommerce is a great choice for small businesses and those with limited development experience. As your business grows, add plugins like Rank Math and Yith to enhance customer experience on this platform with basic e-commerce functionality. WooCommerce is a simple way to sell products on your website if you’re familiar with WordPress or have an existing domain.

    WordPress Adobe Commerce
    Ease of Use 🥇 Winner

    WooCommerce is as simple to set up as WordPress, with a simple walk though set up wizard.

    Unless you have strong dev skills or a host that offers set up, Adobe Commerce is difficult to install, requiring command line interface.
    Associated Costs 🏳 Draw

    WooCommerce can get pricey depending on how customized you want your online shop to be.

    🏳 Draw

    Adobe Commerce (Magento) is free, but installing extension is expensive and may required developer assistance.

    Customization 🥇 Winner

    With so many third-party plugins and child themes available, there are no limits to customization with WooCommerce.

    While there are extensions and themes available, they are expensive and time-consuming. Therefore, most will opt for the simple look and feel of a basic Adobe Commerce site.
    Features 🏳 Draw

    WooCommerce offers plugins, custom code capabilities, and Google Analytics integration.

    🏳 Draw

    Adobe Commerce has advanced features for cross-selling, product comparisons, and discount codes right out of the box.

    Choose WordPress Choose Adobe Commerce

    WooCommerce’s integration with WordPress can benefit those familiar with the platform. Ultimately, the choice between WooCommerce vs Adobe Commerce comes down to the specific needs of your business and your budget.

    Article thumbnail image by IdeaGU / shutterstock.com 

    The post WooCommerce vs Adobe Commerce (2023) — Let’s Compare appeared first on Elegant Themes Blog.

  • 9 Best Age Verification Plugins for WordPress (Compared)

    Are you looking for a plugin to set up age verification on your WordPress site?

    Setting up age restrictions allows you to limit users from seeing content due to legal requirements or the nature of the content. You can set up age verification with the right WordPress plugin without editing any code.

    In this article, our expert team have researched and picked the best age verification plugins for WordPress.

    Best age verification plugins for WordPress

    Why Do You Need an Age Verification Plugin?

    If you’re selling products or promoting goods that are age sensitive, then it is important to verify the user’s age before allowing them access.

    For example, many countries have laws and regulations that require websites to verify users’ age. This is common if you’re in the business of selling alcohol, tobacco, cannabis, vape, tattoos, and other similar goods.

    Similarly, different videos and games are not appropriate for minors and require an age gate. You can also add age verification on your membership website if it contains sensitive content.

    A simple way of adding age verification to a WordPress site is by using a plugin. You don’t have to edit any code or hire a developer.

    Plus by using a plugin, you can show a confirmation form or a popup where users can enter their age before accessing the content or buying a product.

    That being said, let’s look at the best age-verification WordPress plugins for different business needs.

    1. WPForms

    The WPForms form builder plugin for WordPress

    WPForms is the best WordPress contact form plugin that is beginner friendly and lets you create all types of forms. It offers a drag-and-drop form builder and comes with over 500+ pre-built form templates.

    WPForms offers a Form Locker addon that allows you to set up age restrictions on your online forms. You can pick age as the verification type for your form and define the age limit. Users will then have to enter their date of birth before they can submit a form on your site.

    Enable age verification in WPForms

    Using WPForms, you can create forms for all kinds of situations. For instance, the plugin lets you create a login form or a registration form and only allows logged-in users to view the content.

    If you’re looking for feedback about your company from a specific age group, then you can create a survey form and add an age restriction. Similarly, you can add an order form on your website with age verification to sell concert tickets or alcohol.

    Besides that, WPForms also offers other features and addons. You can integrate payment services like Stripe and PayPal to accept online payments, allow file uploads, connect email marketing services, and more.

    Pricing: You will need the WPForms Pro version to access the Form Locker addon and set up age verification in WordPress. This will cost you $199.50 per year. There is also a WPForms Lite version you can use for free.

    2. OptinMonster

    OptinMonster

    OptinMonster is the best lead generation and popup plugin for WordPress. It helps you get more leads, grow your email list, and boost conversions.

    You can create stunning campaigns for your site, including age verification popups. The plugin offers a drag-and-drop campaign builder, pre-built templates, and lots of customization options. You can add different elements like images, buttons, videos, and more to your popup.

    For instance, you can create a simple age verification lightbox popup with Yes/No options or show a popup where visitors need to enter their date of birth.

    Create age verification popup

    OptinMonsters also offers fullscreen campaigns, which are great for restricting access to your website or a page until users confirm their age.

    The plugin provides powerful display rules that let you choose when and where to show your campaigns. For instance, you can show your age verification campaigns on selected pages or hide the popup for users that have already verified their age on your website.

    Besides that, OptinMonster easily integrates with different email marketing services and works with eCommerce platforms like WooCommerce and Shopify.

    Pricing: OptinMonster prices start from $9 per month (billed annually). There is also a free version of OptinMonster that you can use to get started.

    3. Age Gate

    Age gate

    Age Gate is a free age verification WordPress plugin that is very easy to use. Using the plugin, you can easily restrict content based on the user’s age.

    It offers 3 input options to add age verification in WordPress. You can show a dropdown menu and let visitors select an age, allow users to enter their date of birth, or simply offer a Yes/No option to verify age.

    Other than that, you can choose whether to restrict the entire website or select pages based on age. Plus, there is also an option to set different age restrictions for individual content using the plugin.

    With Age Gate, you get multiple customization options to edit the appearance of your age restriction message. For instance, you can add a logo, change the background color, add blur, add a background image, and more.

    Pricing: Age Gate is a free WordPress plugin.

    4. MemberPress

    MemberPress

    MemberPress is the best membership plugin for WordPress. It lets you create a membership site and sell subscription-based products and services.

    With MemberPress, you can add age restrictions to your WordPress site. Let’s say you don’t want members under 18 signing up for a particular membership or course. By setting up an age limit, you can prevent access to content.

    Besides that, MemberPress offers other powerful features. It gives you full control over who can access content, release paid content over time, add payment gateways, and more. You can also create and sell online courses using MemberPress’s course builder.

    If you want to learn more about setting up a subscription-based website, then please see our ultimate guide to creating a WordPress membership site.

    Pricing: MemberPress is a premium plugin with prices starting from $179.50 per year.

    5. WooCommerce Age Verification Popup

    WooCommerce age verification popup

    WooCommerce Age Verification Popup is the next plugin on our list. It is a paid extension for WooCommerce stores. If you have a WooCommerce store and you’re selling products like tobacco, vaping, medicines, fireworks, or items that require age verification, then this plugin is for you.

    The plugin offers 4 verification methods where users can simply enter their age, select their date of birth, click a checkbox, or simply select from a Yes/No option.

    Besides that, you can choose which pages the popup should appear on. For instance, you can enable it on your entire website or specific pages like cart, checkout, my account, and shopping page.

    There are also different customization options you can use to edit your popup. These include adding a background image, selecting a color, adjusting the border height, and text size, and more.

    However, if you want more options like prebuilt templates and the ability to add different elements to the popup, then you can use OptinMonster. It also works seamlessly with WooCommerce and offers more powerful display rules.

    Pricing: WooCommerce Age Verification Popup is available for $29 per year.

    6. Age Verification for WordPress

    Age Verification

    Age Verification for WordPress is a free WordPress plugin that you can use to add an age limit to your WordPress site. The plugin is beginner friendly and offers basic features.

    It adds an age verification popup to your site and restricts access to content for visitors that don’t meet the age requirements. Once a user verifies their age, a cookie is saved for 30 days, so they don’t have to verify their age again.

    The plugin offers limited options to edit your age verification box. For instance, you can only add a background image, logo, title text, message text, and edit the yes/no button text using the Age Verification plugin.

    However, there are other plugins on our list, like WPForms and OptinMonster, that offer more customization options. Plus, you get to choose from pre-built templates and drag-and-drop builders.

    Pricing: The Age Verification plugin is free to use.

    7. AgeChecker.Net 

    AgeChecker.net

    AgeChecker.Net is a third-party age verification platform for eCommerce websites. It uses identity networks and a proprietary database to verify customer’s age at checkout.

    The plugin is compatible with different eCommerce platforms, including WooCommerce, Shopify, Magento, BigCommerce, and more.

    It adds age verification on checkout pages and instantly verifies 90% of the user’s age in the United States.

    If the data isn’t available in the data sources, then it will ask for the customer’s ID verification. Once a customer submits the required documents, AgeChecker.Net’s 24/7 live team manually verifies it for you. If the customer is underage, they will disable their access to the product or service.

    Other than that, you can customize the minimum age, digital signature requirements, and order blocking based on the customer’s location. Plus, the plugin is compliant with Food and Drug Administration (FDA) and other federal and state regulations in the US.

    Pricing: AgeChecker.Net has a free WordPress plugin that connects with WooCommerce. However, you will need to signup for their premium plan, which will cost you $25 per month + 50¢ per accepted verification.

    8. AgeVerify

    AgeVerify

    AgeVerify is another WordPress age verification plugin that is free to use. The plugin is super simple to use and lets you create an age-verification message for your website.

    It comes with prebuilt templates that you can use for different types of businesses. Plus, you can edit the age verification text, change the text and color of the button, and more.

    What makes this plugin different from others on our list is that it lets you edit the cookie duration (in hours) for the age verification message. This way, your visitors won’t have to verify their age each time they visit your website.

    Pricing: AgeVerify is a free WordPress plugin.

    9. Easy Age Verify

    Easy Age verify

    Easy Age Verify is an age verification plugin for WordPress that comes with pre-built verification settings and messages for alcohol, vape, and adult businesses.

    The plugin is super easy to use and doesn’t require complex configuration. All you need to do is enable age verification, select your industry, and the plugin will take care of the rest. It also gives you the option to exclude age verification for logged-in users.

    On the downside, you cannot customize the appearance of your age verification message in the free version. However, you can use WPForms as an alternative. It helps display a custom age verification form anywhere on your website.

    Pricing: Easy Age Verify is free to use. There is also a premium version that unlocks customization features, and it costs $8.25 per month (billed annually).

    Which is the Best Age Verification WordPress Plugin?

    Our top picks for the best age verification plugin for WordPress are WPForms and OptinMonster.

    WPForms offers a Form Locker addon that allows you to add an age gate on any type of form and display it anywhere on your site. It offers a drag-and-drop form builder, prebuilt templates, and lots of customization options.

    On the other hand, if you’re looking to add an age verification popup on your WordPress site, then OptinMonster is the best option. It lets you create age verification popups, offers powerful targeting rules to show and track that campaign, and easily integrates with eCommerce platforms.

    We hope this article helped you find the best age verification plugin for WordPress. You may also want to see our post on the best live chat software for small businesses and proven ways to make money online blogging with WordPress.

    If you liked this article, then please subscribe to our YouTube Channel for WordPress video tutorials. You can also find us on Twitter and Facebook.

    The post 9 Best Age Verification Plugins for WordPress (Compared) first appeared on WPBeginner.