Full site editing (FSE) is the newest buzz in WordPress. Although there have been premium themes utilizing this up-and-coming technology for several years now, it’s finally made it’s way into the mainstream thanks to the adoption of Gutenberg back in 2018. In this post, we’ll give you the low down on what WordPress full site editing is, what it’s built on, and how to use it. Let’s get to it.
What is WordPress Full Site Editing?

In years past, WordPress has had a very distinct structure. You would use the WordPress Editor to add content to posts and pages, then install plugins for extra functionality. WordPress core files were responsible for headers, footers, content areas, sidebars, and other elements. In recent years, WordPress full site editing has changed all of that. Based on blocks, full site editing makes it much more possible to edit every aspect of your WordPress site. You can create custom headers, footers, and build custom content just about anywhere. Full site editing also extends beyond the core of WordPress with page builders like Divi that take it to a whole new level of design capabilities.
Benefits of Full Site Editing in WordPress?
One of the greatest benefits of full site editing is the ability to customize your site any way you want from top to bottom. For example, you can now create and edit post and page templates, headers, and footers all on the front end. Plus you can add global styles to your site and blocks and create your own color palettes, fonts, spacing, and more. It allows WordPress users to create custom sites easier than in the past because of minimal coding requirements. As previously mentioned, full site editing themes use blocks, so you can utilize them throughout all areas of your site to create a custom site tailered specifically to you.
Easy to Use
Another benefit of full site editing in WordPress is the ease of use for your clients. If you’re a freelancer or web agency professional who wants to be able to hand off a website after completion, FSE themes are the way to go. There’s no need for them to dig down into the theme’s code to make design changes. You see, full site editing themes utilize a theme.json file which allows developers to add styles and functionalities easily. Creating a global color palette, assigning fonts, and other styles can be set globally, making it easy for end users to add and edit content.
Optimized For Speed
Lastly, FSE’s are typically faster. They generally have less bloat, are optimally configured, and process requests much faster than traditional WordPress themes. That being said, hosting is a factor, so you should choose a reputable hosting provider that utilizes caching, is compatible with the latest version of PHP, and preferably provides cloud hosting options. For more, check out how to optimize page speed for SEO.
WordPress Full Site Editing Is Only Available on Block Themes
It’s important to note that not every theme supports full site editing. Built on Gutenberg blocks, which launched back in 2018, is the foundation for FSE. When first introduced, blocks were only supported in the content area of websites – such as posts and pages. With FSE themes, that functionality expands to literally every aspect of the theme. As previously mentioned, the theme.json file controls all of the site’s global settings and styles. In previuos generations, the theme customizer controlled site settings. Now the WordPress Site Editor controls all global styles and settings, plus give users the ability to add blocks throughout the theme.

That being said, there still aren’t a ton of options for full site editing themes out there. There are thousands of WordPress themes out there, with only a smidge over 160 FSE themes currently available. While full-site editing is growing in popularity, the technology is just now starting to take hold.
What is a Block Theme?
To put it plainly, a block theme is a WordPress theme that contains templates completely built on blocks. This not only includes posts and pages, but literally everything else. Sidebars, footers, headers, post templates, and every other aspect of the content on the theme.
In the past, WordPress websites consisted of a series of traditional PHP files. Now, block themes are all built on block templates. As previously mentioned, all block themes have a theme.json file that allows for developers and users to add additional functionalities, set global styles, and more.
Default themes such as Twenty Twenty-Two are considered block themes. Instead of using the old WordPress customizer to add your site’s taglines, choose colors, or select fonts, you use the WordPress Site Editor to control those things. Additionally, you use blocks to add content to templates to personalize it.
What is the Difference Between Static and Dynamic(Theme) Blocks
Before we start showing you how to use full site editing in WordPress, there are a couple of basics to understand in regards to WordPress blocks. There are two types of blocks in WordPress FSE – static blocks and dynamic Theme Blocks. Static blocks are made up of content that is known at the time you create and publish a post. Some examples of static blocks are paragraph, heading, image (although those can be dynamic too), quote, page breaks, buttons, and more.
On the other hand, the new FSE dynamic blocks (called Theme Blocks or Site Blocks) are designed to be used when building templates and can pull content from the backend of your site dynamically to display it on your site. These dynamic Theme Blocks can generate for blog post feeds (with a query loop block), post titles, post content, featured images, and many more. The post content block is a great example because any changes to the post content on the backend will automatically update each instance of that post content block throughout your site.

Getting Started with Full Site Editing in WordPress
Now that you have a basic understanding of what full site editing is, let’s talk about how to use it. In this section, we’ll help you understand how to choose a block theme, how to customize templates contained within the theme, set global styles, use dynamic theme blocks, and introduce you to block patterns.
Choosing a Theme that Supports Full Site Editing

Currently, there are 150+ full site editing themes available in the WordPress repository. There are two ways to choose a FSE theme. You can choose a free one from the WordPress repository, or purchase one from a premium vendor. For this post, we’ll choose a FSE in the WordPress repository.
First, log in to your WordPress dashboard and click Appearance > Themes. Next, click the Add New button.

Next, click the Feature Filter link to set filtering options.

There are three options to sort by including subject, features, and layout. You can choose the subject of the theme if you desire, otherwise you only need to tick the Site Editor box. Once you make your selections, click Apply Filters.

Your screen will refresh and reveal the choices available to you. You can choose a theme to follow along with this tutorial, or simply choose the Twenty Twenty-Two theme, which is what we’ll be using for this post. Once you make your choice, activate your theme to get started.
Customizing a Template
With your new theme active, the next step is to start customizing. For this tutorial, we won’t go into editing theme.json. We’re going to stick to the basics of Twenty Twenty-Two to get you acclimated to how full site editing themes work. That being said, head over to Appearance > Editor.

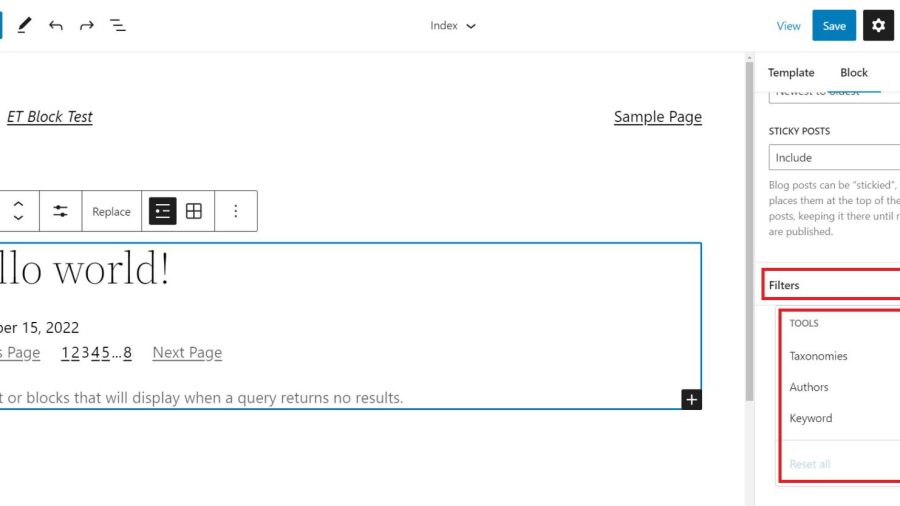
Once the site editor loads, you’ll be defaulted to the home page template.

To edit other templates within your theme, simply click the WordPress logo in the upper left corner of the site editor, then click Templates. In Twenty Twenty-Two, there are a number of templates you can edit including single post, page, 404, blank, search arhive, and more. To select a different template to edit, click on it to activate the site editor for that page. Additionally, you can create a new template for your site by clicking the Add New button on the top right hand corner in the dashboard.

There are several options for new templates in Twenty Twenty-Two including front page, author, category, date, tag, and taxonomy pages. That being said, these options will differ depending on which theme you chose in the previous section.

Template Parts
The next area you can edit in a page template are template parts. In Twenty Twenty-Two, you can edit the header and footer template parts on each template. However, each template has different template parts that are editable. For example, the home page template offers a blog template part as well.

For this example, let’s edit the header template part. Here you can edit the existing blocks or add new ones to the template. To add more blocks, toggle the block inserter by clicking the blue + button in the top left corner of the editor.

This will reveal all of the blocks available to you. You can add a block in one of two ways. Either click and drag your chosen block into the template part, or click the + icon to add one.

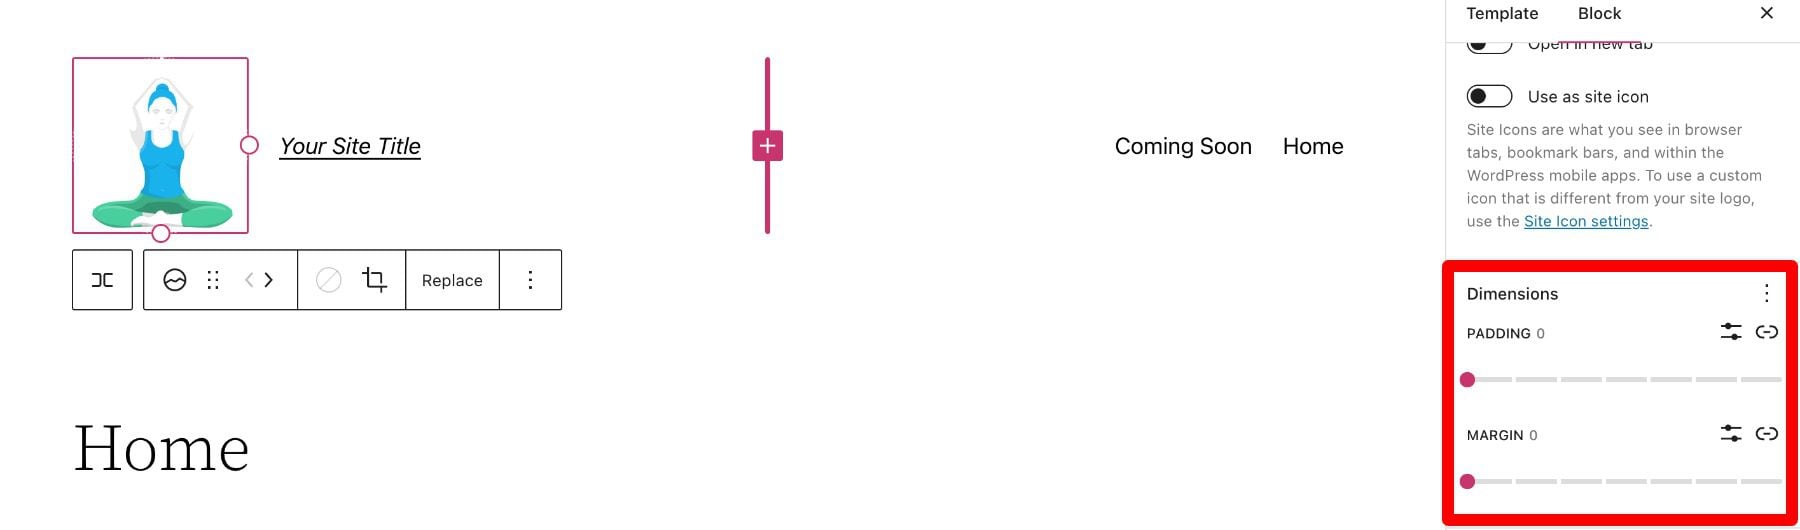
Additionally, you can edit existing blocks within a template. Simply click on the block you wish to edit to bring up its options. For example, if you want to edit the site logo, click on it to add a new image.

How to Set Global Styles
Another great feature of a full site editing theme is the ability to set global styles. You can choose fonts, colors, color themes, and adjust spacing. You can opt to set styles across your entire site, or only on certain blocks. This is a huge timesaver compared to themes of the past.
To access the styles for your site, click the styles icon at the top right of the site editor.

Once activated, you can browse the available styles in the Twenty Twenty-Two theme by clicking the browse styles link to choose a color scheme for your site.

The next option, typography, allows you to choose the font options for your text and links. This includes font family, size, line height, and font weight (appearance).

Under colors, you can edit the colors used in your global color palette. You can assign colors to the background, text, and links. In Twenty Twenty-Two there are 17 solid colors and 20 gradients. Additionally, you can add custom colors and gradients to your site, which is great for branding purposes.

Lastly, you can adjust the padding to your layout. Padding can be set for top, left, right, and bottom as a whole, or set individually.

Using Dynamic Theme Blocks
The block editor contains more than 90 blocks that can be utilized to build page templates in the site editor. Among those, there are some dynamic theme blocks that will populate dynamic content shown on the front end of your site. For example, when clicking into the single post template, you’ll see a few that are used including the post title, post featured image, and post content blocks. These are useful for building a dynamic template to display your blog posts dynamically.

When editing themes, you can utilize theme blocks to build headers, footers, and more. In all, there are 27 theme blocks. We won’t go through all of them here, but we’ll go over a few so that you get a good understanding of what you can do.

Building a New Header for Your Templates
Let’s demonstrate how to use a few theme blocks to build a new header template part for your site. Start by navigating to the Templates menu. Next, click Blank template to start.

If you want to be able to see which blocks are utilized in your page, you can use the layers view. It’s accessbile by clicking the layers icon in the top left part of your site edtior screen.

Click the blue + icon to reveal the blocks, then scroll down to the theme block options. The first theme block we’ll select is the template part block. This is very useful for creating global sections for your site. We’re going to use a template part to create a custom header for your site that can be assigned to certain pages.
Drag the template part block into your site editor’s blank page. Select start blank to build a new template part.

Assign a name for your template part, then click create.

First, bring up the blocks and search for spacer, then add it to your pasteboard. Give it a height of 20px. This will add 20px of space at the very top of your template.
Next, find the columns block. Drag it into the pasteboard. Select the 33/33/33 column variation. This will put three columns in your row. The each column will occupy 33% of the available site space.
Your template part should now look like this:

Add Blocks to Your Header Template
Bring up the blocks menu by clicking the blue + icon. Scroll down to the theme blocks and drag the site logo block into the first column. Upload an image or assign one from your media gallery.

Next, drag the navigation block into the second column. For the navigation block, you can add pages from your website to the menu, or create custom links. Adding menus in full site editing themes is a bit different than in other themes. You no longer use Appearance > Menus to add them. Now, all menus are created and added in the site editor. Click start empty to create links for your site or select pages. To add them, hit the enter key on your keyboard.

Finally, add the social links block to your third column. Add the social media icons you wish to feature by clicking the + at the right site of the social icons block.

NOTE: You are not limited to adding Theme Blocks to your templates. You can use any WordPress Block. In this example, the social links block isn’t a dynamic theme block but is still a useful element to add to a header.
With your blocks all added, your header should now look like this.

Adjusting the Layout of the Template
Now that you have all of the blocks in your new header, you’ll notice that the spacing seems a bit off. No worries, as is with every aspect of full site editing, you can adjust that too. First, click on the first column in the layers view. In the settings panel under Column Settings > Width, click the dropdown to reveal the different sizing options. Choose %. Type in 20 for the width of the first column.

Repeat the steps to adjust the second column to 60%, then the third column to 20%. You header should now have better spacing. Save your template by clicking the Publish button in the top right hand corner.
Your template should now look like this.

Using Block Patterns to Jumpstart Your Designs
When building templates, there is an easy way to drop in a series of blocks to make the design process easier. These groups of blocks are called block patterns. WordPress comes standard with a few block patterns you can use, or you can build your own to reuse them throughout your site. To access block patterns, click the blue + icon at the top left in the site editor, then click the patterns tab. There are several categories of block patterns to choose from including footers, headers, buttons, galleries, columns, and more.

Each block pattern can be edited to suit your design choices. Color, font, and padding styles can be adjusted within individual blocks in the pattern. If you want to save a block pattern you’ve created, simply click the ellipsis menu in the list view, then click Add to Reusable Blocks. Alternatively, you can also save it as a Template Part.

Divi: The Ultimate Full Site Editing Theme for WordPress

If you are looking for a versatile, feature-packed full site editing theme for WordPress, look no further than Divi. Take full site editing to a completely different level by utilizing the most advanced Visual Builder in the world. Users can apply hover effects, add shape dividers, apply animations, edit elements in bulk, and apply global styles and color palettes, to name a few features. Plus, Divi has over 200 elements in its arsenal to help you create a stunning, highly functional website. With elements such as blogs, sliders, call to actions, pricing, testimonials, and more, users can create a truly unique website.

Divi Theme Builder

In addition to the unlimited design capabilities of Divi, users can also expand customizations to their entire website. You can design headers, footers, product templates, category and archive pages, 404 templates, post templates and more. Plus, you can do all of this with Divi’s proprietary Visual Builder, which allows you to see design changes in real time. There’s no limit to the number of templates you can create. Additionally, Theme Builder templates can be assigned as global elements, or to individual pages if desired.
Divi Dynamic Content

Divi also has the built-in capability to create dynamic content for your website. Using the Template Builder and/or Visual Builder, users can assign dynamic content to posts, pages, products, and templates. You can use dynamic content in all Divi elements, which allows you to build dynamic modules to display information pulled directly from your database.
Dynamic Modules in Divi
Dynamic modules are great for use in all types of websites. They can be used to build modules for travel websites, recipes, rental services, and more. Using Divi’s Visual Builder, you can assign dynamic content based on the type of template you wish to build. For example, when building post or category templates, the dynamic content available for a text module has options that differ from those of an image module. For modules with text, you can choose things like post/archive title, post excerpt, publish date, comment count, tags, category description, and more. On the other hand, image modules are used to set dynamic content such as featured image, author profile picture, and site logo image.
Dynamic WooCommerce Modules

Ecommerce website owners get an added bonus with Divi. When WooCommerce is installed, Divi adds a series of dynamic WooCommerce modules that offer the ability to add dynamic content when building product, cart, and checkout page templates. It’s no longer necessary to utilize CSS when using WooCommerce in order to make your site’s product and cart pages match your branding. Plus, WooCommerce modules can be used anywhere within Divi to highlight products, create product galleries, and much more.
FAQs About WordPress Full Site Editing
After all of the information that we’ve handed you, we’re sure you have some questions. Not to worry, we have answers for you.
If I Swap To a Full Site Editing Theme, What Will Happen To My Website?
Thankfully, full site editing themes are built on blocks. So, if you are swapping from another theme based on blocks, you should only have to do a few things to get your site looking good. The first thing is to set a site logo and navigation by creating a header template part. Chances are, your old theme used the Customizer. With FSE themes, the site editor is used to create your site’s header.
Where Can I Find a Full Site Editing Theme?
There are two ways to find a full site editing theme. The first way is to conduct a filtered search in the WordPress theme section of your admin dashboard. There are more than 160 themes to choose from. The second way is to purchase a premium full site editing theme such as Divi.
My Old Site Uses Widgets. Will They Stay in Place if I Swap to a Full Site Editing Theme?
Since a FSE theme is built entirely on blocks, it doesn’t utilize widgets the same as in the past. However, there are widget blocks that are available. You’ll probably need to replace old widgets with new widget blocks or add new block patterns to help speed up the process.
What Version of WordPress Do I Need to Use a Full Site Editing Theme?
Full site editing is compatible with versions of WordPress since the release of 5.8 and more Theme blocks have been added in recent versions. If your install doesn’t have 5.8, you’ll need to upgrade it in order to use a FSE theme. The good news is that you need to upgrade anyway, as using outdated versions of WordPress leaves your site vulnerable to security hacks and all sorts of other nasty issues.
I’m Not Very Tech Savvy. Can I Use a FSE?
Yes! It’s easy for nearly everyone to learn how to build a website using Full site editing. Because FSE themes utilize drag-and-drop visual editing, it’s easy to build beautiful layouts with ease.
Will Using a Full Site Editing Theme Speed Up My Site?
Yes, it can, but there’s more to it than that. First, full site editing themes can give you a performance boost because they are built in a way that requires fewer plugins for added functionality. So, you shouldn’t need to install many to get the site where you want it. That being said, FSE themes aren’t automatically designed to be faster out of the box. There are other considerations such as hosting providers. A good hosting provider such as SiteGround, will run the latest version of PHP, and provide a CDN and other speed enhancements that will make websites run faster.
Full Site Editing is the Future of WordPress
Full Site Editing is gaining ground in the WordPress community. With the ability to edit every aspect of websites, developers and creatives are beginning to see the value in it. Premium themes such as Divi have been using this technology since 2021, and have stayed ahead of the curve. That being said, with the release of WordPress Twenty Twenty-Two theme at the beginning of this year, we can expect full site editing themes to become the norm shortly. Knowing how to utilize full site editing in WordPress development is an essential step to keep you set up for the future.
Do you use full site editing in WordPress? Give us your thoughts on it below.
The post WordPress Full Site Editing: A Beginner’s Guide appeared first on Elegant Themes Blog.


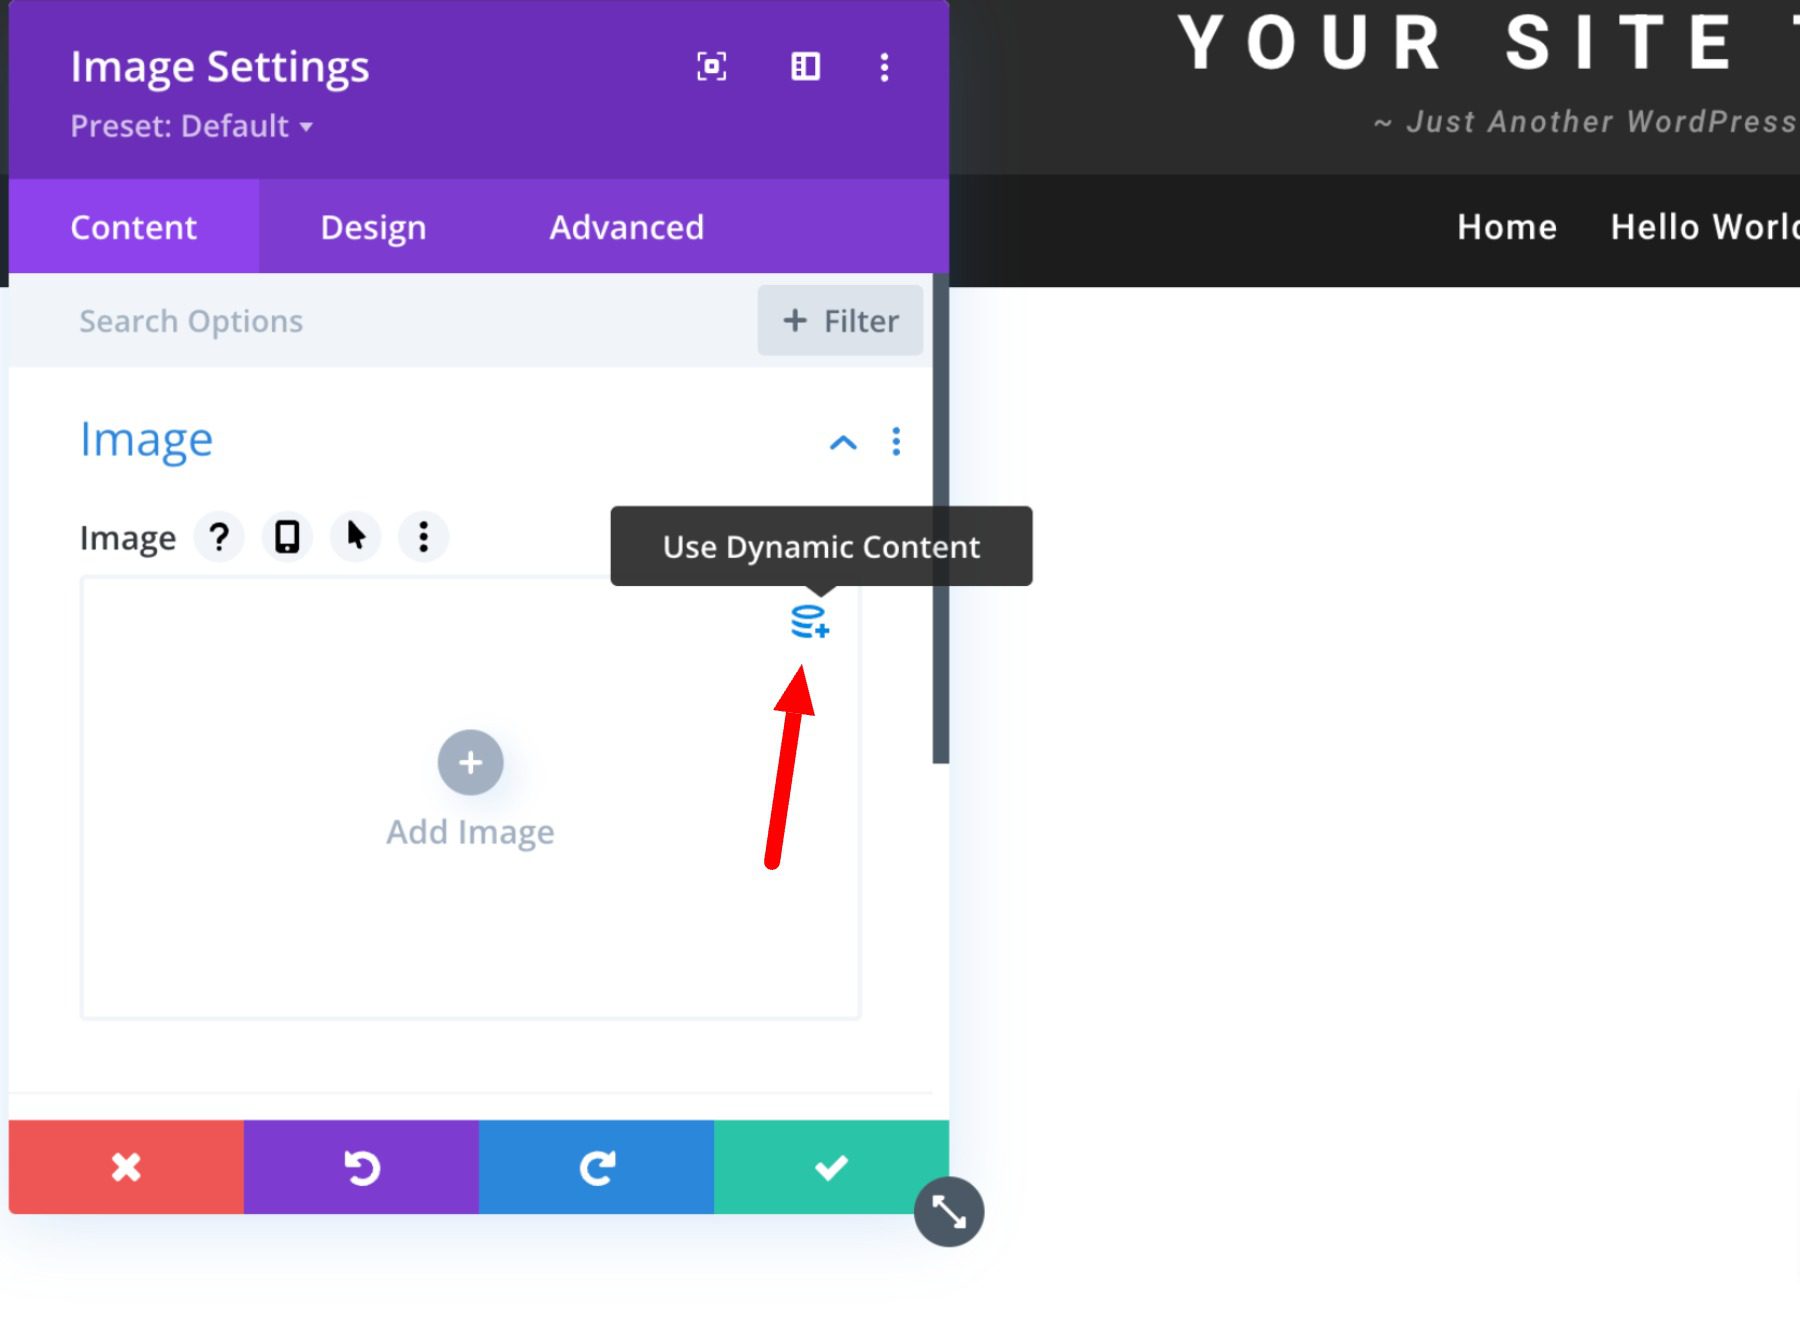
 Under the content settings, hover over the title input box and click the “Use Dynamic Content” icon. Then select “Site Title” from the list.