Elevate your website with the top WordPress Banner Plugins of 2023. Click to explore free and premium options.
The post 7 Best WordPress Banner Plugins 📣 2023 (Free & Premium) appeared first on BetterStudio.
Elevate your website with the top WordPress Banner Plugins of 2023. Click to explore free and premium options.
The post 7 Best WordPress Banner Plugins 📣 2023 (Free & Premium) appeared first on BetterStudio.
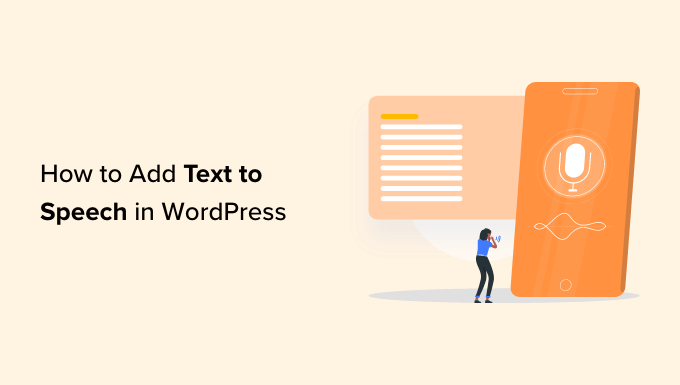
Are you looking to add a text to speech feature in WordPress?
Text to speech feature allows you to add an audio version of your articles using artificial intelligence. This is particularly useful for long reads and helps users who prefer audio content while exercising or traveling.
In this article, we’ll show you how to easily add text to speech in WordPress.
Text to speech is a technology that uses artificial intelligence to convert any text into natural-sounding speech. It is provided as a cloud-based service by several companies including Google Cloud and Amazon AWS.
Adding text to speech to your WordPress website allows users to listen to your articles while going through their daily activities like exercising, cooking, and traveling.
Text to speech can also help grow your audience by making content more accessible for the visually impaired and for people with reading difficulties.
This is where BeyondWords comes in. It is a popular AI-based audio publishing platform that allows you to easily add a text to speech feature to your website using a WordPress plugin.
It is a freemium service that comes with different pricing plans. There is also a free plan, which allows you to convert up to 30,000 characters into audio every month.
That being said, let’s see how you can add text to speech in WordPress using BeyondWords.
First, you need to visit the BeyondWords website and click on the ‘Sign Up Free’ button.

This will open up a ‘Sign Up’ page.
Now, you need to type your email address and password and then click the ‘Create My Free Account’ Button.

After you have created an account, you will be taken to your BeyondWords dashboard.
Here, simply click the ‘Create New Project’ button to create an audio workspace for your WordPress blog.

After that, a prompt will open up asking you to choose a title for your project.
Below that, you’ll have to select a language from the dropdown menu. Your articles will be narrated in the language that you choose here.

You can choose from about 143 languages that BeyondWords offers.
Once you’re satisfied with your choice, simply click the ‘Create’ button to save your project.

Next, you will be directed to the ‘Content’ page of your project dashboard.
Here, simply click the ‘WordPress’ tab under the ‘Connect your CMS’ column.

You will now be directed to the ‘WordPress Settings’ page. Here, you need to configure the voice settings.
Simply go to the ‘Voice Settings’ section and select voices for reading the title and the content body of your article from the dropdown menus.
After that, don’t forget to click the ‘Save Changes’ button to store your settings.

Your BeyondWords account has now been set up. Now it’s time to connect your WordPress website with BeyondWords.
The first thing you need to do is install and activate the BeyondWords plugin. For more instructions, please see our guide on how to install a WordPress plugin.
Upon activation, go to the Settings » BeyondWords page from the admin dashboard.

To fully integrate your account with WordPress, you’d need to give your BeyondWords API key and project ID.
For that, head over to your BeyondWords project dashboard and go to Settings » General from the sidebar.
Now, scroll down to the ‘Credentials’ section and simply copy the API key and project ID.

After that, you need to head over to the WordPress dashboard and then paste your credential details.
Now, scroll down to the ‘Content Settings’ section.
If you want to include excerpts in the audio version of your content, simply check the ‘Process excerpts’ option.

After that, scroll down to the ‘Generate Audio Settings’ section and check the boxes for ‘Posts’ and ‘Pages’ if you want to generate audio for both of them.
You can also uncheck either of the boxes if you don’t want to generate audio for posts or pages.
Don’t forget to click the ‘Save Changes’ button to store your settings.

First, you need to edit the post or page where you want to display the text to speech audio player.
In the block editor, simply click the BeyondWords tab under the Post Settings panel.

Now, you need to check the ‘Generate Audio’ box and then click the ‘Update’ or ‘Publish’ button to save your changes.
You can now visit that post or page to view the text to speech audio player in action.

We hope this article helped you learn how to easily add text to speech to your WordPress site. You may also want to see our guide how to create an email newsletter to grow your traffic, and our expert pick of the best WordPress plugins.
If you liked this article, then please subscribe to our YouTube Channel for WordPress video tutorials. You can also find us on Twitter and Facebook.
The post How to Add Text to Speech in WordPress (Step by Step) first appeared on WPBeginner.
Do you want to create a digital product marketplace in WordPress?
A digital marketplace is a website where other people can sell their photos, artwork, music, ebooks, spreadsheets, online courses, or other digital downloads. Luckily, WordPress makes it easy to create a secure online marketplace for multiple vendors.
In this article, we will show you how to easily create a digital product marketplace using WordPress without hiring a developer.

A digital product marketplace is a website where users can sign up to sell ebooks, images, videos, and other downloadable content.
If you want to create a digital marketplace, you will first need to choose your eCommerce platform. Some platforms are better suited for selling physical goods than digital ones.
Plus, some don’t have the features you need for a multi-vendor marketplace. Moving to a different platform in the future can be hard and time-consuming.
That means you want to be sure you are choosing a solution with features that protect your digital downloads, including proper licensing and subscriptions.
We recommend using WordPress + Easy Digital Downloads.

WordPress is the best website builder on the market, used by over 43% of all websites on the internet.
Now, it’s important to know that there are two types of WordPress software, and you don’t want to choose the wrong one.
First, there is WordPress.com, which is a blog hosting platform. Then, there is WordPress.org, which is also known as self-hosted WordPress. For a detailed comparison, you can see our guide on the difference between WordPress.com and WordPress.org.
You need to use the self-hosted WordPress.org platform because it gives you full control over your website. It provides complete freedom to sell any type of digital product by using a plugin like Easy Digital Downloads.
Easy Digital Downloads (EDD) is the best WordPress eCommerce plugin for selling digital products, and it has all the features you need to set up a multi-vendor marketplace.
In fact, we use this plugin ourselves to sell many of our premium WordPress plugins, which are downloadable files restricted to members only. Easy Digital Downloads also comes with license keys built-in.
If you just want an online store where you can sell digital products yourself, then please see our guide on how to sell digital downloads on WordPress.
However, in this article, we will show you how to set up a multi-vendor marketplace where other people can sell digital goods on your WordPress website.
That being said, let’s look at how to easily set up your WordPress digital marketplace site with Easy Digital Downloads.
To start selling digital downloads with WordPress, you will need a domain name, web hosting, and an SSL certificate.
One of our top recommended hosting providers, SiteGround, offers managed WordPress hosting for Easy Digital Downloads. It comes with a free SSL certificate, EDD preinstalled, and optimization features. Plus, you get a huge 73% off!
Basically, you can create and run your website for less than $5 per month.
Let’s walk through how to purchase your domain, web hosting, and SSL certificate.
Go ahead and open the SiteGround website in a new tab so that you can follow along. The first thing you need to do is click on the ‘Get Plan’ button.

After that, SiteGround will ask you to enter a domain name for your website. If you don’t already have a name in mind, then you can see our guide on how to choose the best domain name.
Lastly, you will need to add your account information.
You will also be able to purchase some optional extras. You can always add these at a later date if you need them. If you are unsure, then we recommend skipping this step.
After entering your payment details, SiteGround will send you an email with instructions on how to log in to your hosting account. This is a web hosting control panel where you can manage your new website.
Simply log in to your SiteGround account, and you will see that SiteGround has already installed WordPress for you. It has also preinstalled Easy Digital Downloads.

You can then click on the ‘WordPress Admin’ button. This will take you to your WordPress site’s dashboard.
If, for some reason, you don’t want to use SiteGround, then you can also install WordPress on other hosting companies like Bluehost, Hostinger, and WP Engine by following a similar process.
By default, WordPress doesn’t include eCommerce functionality out of the box, so you will need a plugin to sell digital downloads.
Plugins for WordPress sites are like apps for your phone. They add all kinds of different features and functionality to your website.
We will be using the Easy Digital Downloads plugin to add the multi-vendor eCommerce features we need.
If you claimed our SiteGround EDD Hosting deal in the previous step, then Easy Digital Downloads is already installed on your website. You can move on to the ‘Entering Your Business and Location Information’ section below.
But if you are using another hosting provider, then you first need to install and activate the Easy Digital Downloads plugin. For more details, see our step-by-step guide on how to install a WordPress plugin.
Note: Although you can use the free Easy Digital Downloads plugin for selling digital products online, you will also need a Professional Pass or higher to turn your website into a digital product marketplace. Later in this tutorial, we will show you how to set this up.
Entering Your Business and Location Information
Upon activation, you need to visit the Downloads » Settings page in your WordPress admin area. This will start the Easy Digital Downloads setup wizard.
On the setup wizard’s first page, you will be asked to enter your business name and location.
You might wonder why your location is needed if you are not selling physical products. This is because when a customer makes a purchase, Easy Digital Downloads will use the country and state information to auto-fill some fields.
Also, your location may be used to calculate sales tax.
To add your location, open the ‘Business Country’ dropdown menu. You can now choose the country where your business is based.

Next, find the ‘Business Region’ field. Here you can type the state or province where your store operates from.
Depending on your location, you may also want to customize the currency used on your website. By default, Easy Digital Downloads shows all of your prices in US dollars. It also places the dollar sign before the price, so five dollars is shown as ‘$5.’
To change the default currency settings, scroll down to the Currency section and open the ‘Currency’ dropdown. You can now choose a new currency.

Just be aware that some payment gateways may not accept every currency. If you are not sure, then it’s a good idea to check the website for your chosen payment gateway. Most payment gateways have a list of the currencies that they support.
Once you are finished, you will need to click on the ‘Save & Continue’ button. This will bring you to the next page, where you can set up your payment methods.
Setting Up Your Payment Methods
If you want to sell digital products, then you will need a way to collect online payments.
Stripe is one of the top payment companies that does not require going through a long process to sign up for a merchant account. They allow anyone with a legitimate business to accept credit card payments online.
To quickly get started with Stripe, simply click on the ‘Connect with Stripe’ button.

This opens a setup wizard, which will help you connect your website to Stripe.
If you need, you can add more payment gateways later. Just take a look at the options on the Easy Digital Download extensions page, such as PayPal, Braintree, Authorize.net, and more.
When you are done, just click the ‘Save & Continue’ button at the bottom of the screen.
Configuring Your Receipts
Every time someone buys a digital download, Easy Digital Downloads will send them an email.
This email has a link that the customer can use to download the file they just purchased.

You can configure that email by adding your own text and branding. Strong branding can make your business look more professional and inspire loyalty.
To add a logo to your emails, click on the ‘Attach File’ button and upload or choose an existing image from your WordPress media library.

You can also add a ‘From Name.’ This name will be shown in the customer’s inbox. You will want to use something that immediately lets customers know who you are, such as your website’s name.
You will also need to add a ‘From Email.’ This email will act as the ‘from’ and ‘reply-to’ address. Since customers may reply to your messages, you will want to use a professional email address that you check frequently.
Once you are happy with your email branding, you might like to edit the content of the email receipt. Keep in mind that the default message will work well for most marketplaces.
Once you are happy with your changes, make sure to click the ‘Save & Continue’ button.
Selecting Conversion and Optimization Tools
The setup wizard will now offer to install some free tools to help boost conversions and optimize your digital store.

These tools include:
We recommend keeping all of the boxes checked. However, you can uncheck the boxes of any tools you don’t want to install.
You will also find a toggle button where you can help improve Easy Digital Downloads by sharing anonymous usage data with the developers. You can learn more in our guide on giving permission for WordPress plugins to collect data.

Once you have made your selections, just click the ‘Save & Continue’ button at the bottom of the page.
Adding Your First Product
You are now on the last page of the Easy Digital Downloads setup wizard. Here you can add your first product to your website.

If you are ready to add a new product now, then you can enter its details into the form and then click the ‘Save & Continue button.
Otherwise, feel free to click the ‘Skip this step’ button to finish the Easy Digital Downloads setup wizard.
Congratulations, you have now completed the initial setup of your online store. The next step will be to turn it into a multi-vendor marketplace.
Now that you have created an online store using Easy Digital Downloads, you will need to add extra features to turn it into a multi-vendor marketplace.
This includes allowing others to add digital products to your site, plus the ability to split the payments between your store and the vendor. If software will be sold on your site, then you will also need to manage license keys.
Purchasing a Professional Pass
To do all of these things, you will need to purchase a Professional Pass or higher and install the extensions you need. You can buy the pass from the Easy Digital Downloads website.

Once your purchase has been completed, you will be taken to a confirmation page that displays your license key.
You must copy this key so you can paste it into the Easy Digital Downloads plugin on your WordPress website.

Now, simply return to your website and navigate to the Downloads » Settings page in the WordPress admin area.

You must paste the key into the ‘Paste license key’ field. After that, you will need to click the ‘Verify License Key’ button.
On the next page, simply click the ‘Connect and Install Easy Digital Downloads (Pro)’ button to continue.

The plugin’s Pro features will be unlocked, and a’ Success’ message will be displayed.
Once you click the ‘OK’ button, you will be redirected back to the Easy Digital Downloads Settings page.

Now you are ready to configure the Pro extensions to allow multiple vendors to sell digital products on your website.
Configuring the Frontend Submissions Extension
The first Easy Digital Downloads extension you need to install is Frontend Submissions. This will allow multiple vendors to add their digital products to your site. It also lets you approve their products before they become available for sale.
Just navigate to Downloads » Extensions and search for Frontend Submissions.

Once you find it, simply click the ‘Install’ button. Once the extension is installed, it will be automatically activated.
Now you need to navigate back to the Downloads » Settings page and then click on the ‘FES’ tab that has been added. Here, you can configure the Frontend Submissions extension.
The terms’ vendor’ and ‘product’ will work for most digital product marketplaces. However, if you wish to use different terms, then you can type them into the first two fields on this page.

Next, you can scroll down to the Vendor Announcement field. This will be the message your vendors see when they log in to your site and land on the Vendor Dashboard page.
Simply type the message you wish them to see into the text box.

Make sure you click the ‘Save Changes’ button at the bottom when you are finished.
Configuring the Commissions Extension
Next, you need to install a second Easy Digital Downloads extension. The Commissions extension will allow you to configure what percentage of each sale goes to the vendor and what percentage goes to your store.
You need to navigate to Downloads » Extensions and install the Commissions extension. Once the extension is installed, it will be automatically activated.

Now, you need to head back to the Downloads » Settings page and click on the Extensions tab. In the ‘Commissions Settings’ section, you will find options for the default percentage your vendors will be paid and more.
The first option is the ‘Default rate’ that your vendors will make from a sale. The default is 60%, but you can change this to any number you like.

The default settings for the other options will work for most digital marketplaces, so you only need to change them if you have a specific need.
Once you have finished setting up the extension, don’t forget to click the ‘Save Changes’ button at the bottom of the screen.
Tip: Make sure to add all the information potential vendors need to know to your website. Don’t forget to include the commission rate the vendors will be earning.
Optional: Configuring the Software Licensing Extension
If you are planning to allow users to sell license keys for software and other digital products in your marketplace, then you will also need the Software Licensing extension.
This can be installed from the Downloads » Extensions page.

You can set up this extension by going to Downloads » Settings » Extensions.
Then, open the the Software Licensing tab.

The options you choose will depend on the needs of your marketplace and the types of downloads being sold.
You can learn more on the Software Licensing page of the Easy Digital Downloads website.
Easy Digital Downloads includes default emails for when your users sign up to become a vendor, make a sale, and more.
While the default messages will work well for most marketplaces, you might like to customize them to match your style and branding.
To do this, you will need to navigate to the Download » Settings page and click on the ‘Emails’ tab. You will find links along the top for different types of emails, including emails for ‘Commission Notifications’ and ‘Frontend Submissions’.

When you click on the ‘Frontend Submissions’ link, you will see a list of emails.
These include ‘Vendor Application’, ‘New Product’, ‘Edited Product’, ‘Application Received’, and more.

You can customize each email by clicking on its title.
For example, if you click on ‘Vendor Application’, then you can customize the notification email you will receive whenever someone applies to become a vendor.

If you would rather check for new vendor applications manually, then you can select ‘Disabled’ from the Status dropdown.
Note: By default, all vendor applications are automatically approved, and the Vendor Application email will not be sent. You can change this setting by navigating to Downloads » Settings » FES » Permissions and unchecking the ‘Automatically Approve Vendors?’ box.
Alternatively, you might like the email to tell you more information about the person who is applying to become a vendor. You can do this by editing the ‘Email Body’ field.
To add personal information about the applicant, you must insert markers for their name, email address, site name, and more. Simply click the ‘Insert Marker’ button, and choose the tags from the popup.

Once you have finished customizing the email, don’t forget to click the ‘Save’ button to store your settings.
You can also customize the email your vendors will receive when they have made a sale by clicking on the ‘Commission Notifications’ link at the top of the page.

The email body is blank by default, meaning the vendor will receive the default notification email.
The default commission notification email looks like this.

If you wish to change the wording of the email, then simply type your content into the ‘Email Body’ field.
You can customize the email using the template tags listed at the bottom.

Make sure you click the ‘Save Changes’ button at the bottom of the screen to store any changes you have made.
A WordPress theme controls the appearance of your online marketplace site, including its layout, typography, color, and other design elements.
You might like to use the Vendd theme for your digital goods marketplace because it is designed for digital downloads. This free theme works together with Easy Digital Downloads to give you a lot of options and features for your online marketplace.

If you purchased SiteGround EDD hosting as we recommended earlier, then Vendd was installed and activated automatically when you installed WordPress.
Otherwise, you will need to install and customize the theme yourself. For more information, see our beginner’s guide on how to install a WordPress theme.
However, there are thousands of other WordPress themes available. For example, both the Astra theme and the Coaching Pro theme are fully compatible with EDD.
Another option is to create your own custom theme from scratch.
To create a custom theme, you will need SeedProd.
It is the best website builder plugin in the market and is used by over 1 million websites. You can use SeedProd to create beautiful layouts that are professionally designed and optimized for conversions and sales.
SeedProd also comes with lots of ready-made templates. These include designs that are perfect for promoting your digital downloads.

For more details, check out our guide on how to create a custom WordPress theme (no coding needed).
When you installed the Frontend Submissions extension, a new page was created on your website called the Vendor Dashboard. This is an important page that you want vendors and potential vendors to find easily.
When the user has not signed in to your website, this page will display a registration page where they can apply to become a vendor on your website. It will also show a login form where your vendors can sign in.
Once a vendor has signed in, this page will be the dashboard where they can add new products, view their earnings and orders, and more.

You can make sure that the Vendor Dashboard is easy to find by adding the page to your navigation menu.
Head over to Appearance » Menus and make sure the right menu is selected at the top of the screen. After that, you should look for the ‘Vendor Dashboard’ page under Pages.

Now all you need to do is click the ‘Add to Menu’ button, and the Vendor Dashboard will be added to the menu. You can drag the menu item up and down to place it where you want in the list.
If you can’t find Appearance » Menus in the admin sidebar, then you are probably using a block theme.
To learn how to add the Vendor Dashboard page to a block theme’s menu, see the ‘Adding Navigation Menus in Full Site Editor’ section of our beginner’s guide on how to add a navigation menu in WordPress.
We hope this tutorial helped you learn how to create a digital product marketplace in WordPress. You may also want to see our guide on how to track website visitors on your WordPress site and our expert picks for the best WordPress popup plugins.
If you liked this article, then please subscribe to our YouTube Channel for WordPress video tutorials. You can also find us on Twitter and Facebook.
The post How to Create a Digital Product Marketplace in WordPress first appeared on WPBeginner.
Are you looking to create a presentation in WordPress, but you are not sure where to start?
By creating a presentation using a WordPress plugin, you can be confident that the finished slideshow will look great on your WordPress website. It can also save you time, effort, and money compared to using specialist software like PowerPoint.
In this article, we will show you how to create PowerPoint-style presentations in WordPress.

Adding a presentation to your website can make it more interesting and engaging, which will keep visitors on your site for longer. This sends positive signals to search engines, which may improve your WordPress SEO.
It is possible to create a presentation using software like Google Slides or PowerPoint. You can then add the presentation to your website using either a plugin or embed code.
However, creating presentations in a standalone program can take a lot of time and effort, and you may even need to buy specialist software. If you use an external program, then there’s also no guarantee the finished presentation will look good on your WordPress website.
The good news is that you can easily create beautiful, SEO-optimized presentations inside the WordPress dashboard. By using a WordPress plugin, you can be confident that the presentation will look great on your WordPress site, no matter what device the visitor is using.
That said, let’s see how you can create PowerPoint-style presentations in WordPress.
The easiest way to create presentations in WordPress is by using Smart Slider 3. This free plugin works with any WordPress theme and is optimized for SEO. It also comes with pre-made slides, animations, and templates, so you can create beautiful presentations, fast.
First, you will need to install and activate Smart Slider 3. If you need help, then please see our guide on how to install a WordPress plugin.
Upon activation, go to Smart Slider » Dashboard and then click on ‘Go To Dashboard.’

After that, simply click on ‘New Project.’
At this point, you can decide whether to start with a blank slate or use one of Smart Slider’s ready-made presentation templates.
If you want to create a professionally-designed presentation fast, then we recommend selecting ‘Start with a Template.’

Smart Slider will now show all the available templates.
To take a closer look at a design, hover your mouse over it and then click on the eye icon when it appears. This opens the presentation template in a new tab.

When you find a template you want to use, just hover over it and then click on the ‘Import’ button.
This will open your chosen template in the Smart Slider editor.

After choosing a template, it’s a good idea to configure the presentation’s settings. The options you see may vary depending on your template, but we will cover all the major settings.
Configure General and Size Settings
In the ‘General’ tab, you can give the presentation a name by typing it into the ‘Name’ field.

You can also add a thumbnail, which may be visible to visitors depending on how you configure the presentation.
Simply click on the ‘+’ icon next to ‘Thumbnail’ and then either choose an image from the WordPress media library or upload a new file from your computer.

With that done, you need to scroll to the ‘Slider Design’ section.
Here, you can change the slider’s alignment and add a margin to create more space around your slides.

Next, you may want to make the slides bigger or smaller by selecting the ‘Size’ tab.
Here, you can set different maximum sizes for tablet, mobile, and desktop users. By doing so, you can be confident that the presentation will look great across all devices.
To set these maximum sizes, simply click to activate the Desktop, Mobile, and Tablet sliders and then type a number into the ‘Max’ field.

Under ‘Layouts’, you can choose whether the presentation should fill the entire width of the browser (‘Full width’) or fit the container it’s put in (‘Boxed’).
By default, the presentation will scale up and down automatically to fit the visitor’s screen. You will typically want to leave these settings enabled, but you may want to set a minimum height by typing it into the ‘Min Height’ box.

Configure Controls and Animation Settings
After that, click on the ‘Controls’ tab. Here, you can change how visitors move between the different slides.
The default settings should be a good fit for most WordPress blogs and websites, but you may want to change how the arrows look.
For example, you can change the color of the arrows and the inset, which controls where the arrows appear on the slide.
As you make changes, you may want to preview how the arrows will look in your presentation.
To do that, just click on the eye icon in the toolbar.

With that done, simply scroll to ‘Bullets.’ Here, you can customize the dotted icons that allow visitors to move between the different slides. You can try different bullet styles, add a box shadow, change the corner radius, and more.
If you want to show each slide’s title, then just click to enable the ‘Text Bar’ toggle.

Another option is to show each slide’s thumbnail, which gives visitors another way to move between slides.
To do this, you need to enable the ‘Thumbnail’ toggle. You will now get access to some additional settings to fine-tune how the thumbnails look.

Finally, you may want to add a shadow to the bottom of your slideshow by clicking on the ‘Shadow’ toggle.
After that, you can open the dropdown and choose between the different shadow styles.

CSS animations are a great way to catch the visitor’s attention and encourage them to engage with your presentation. Smart Slider comes with built-in animations, so make sure you click on the ‘Animations’ tab to configure them.
Here, open the ‘Main Animation’ dropdown and choose the effect that Smart Slider will play when it switches between slides. You can also change how long the animations will play by typing a number into the ‘Duration’ field.

Depending on the template you are using, you may also see a ‘Background Animation’ option. This allows you to animate the slide’s background image and colors.
Just be aware that background animations don’t work on videos or any presentations that use parallax scrolling.
To take a closer look at Smart Slider’s background animations, click on the ‘+’ icon. This opens an editor where you can try different animations to see what effects you can create.

Configure Autoplay Settings
The next tab is ‘Autoplay.’
By default, visitors will need to move between your slides manually. If you want the presentation to play automatically instead, then simply click to enable the ‘Autoplay’ slider.

If you enable this option, then you will get access to some additional settings where you can change how long the presentation shows each slide and how visitors can stop the slideshow.
It also adds a ‘Buttons’ section, where you can customize the presentation’s ‘Play’ button.

Optimize Your Presentation
After that, select the ‘Optimize’ tab. Here, you will find the settings for Smart Slider’s lazy loading.
By default, the slider loads immediately, which is a good choice if the presentation is the first thing people see when they visit the page.
However, if you are planning to place the presentation further down the page, then we recommend opening the ‘Loading type’ dropdown and choosing ‘After page loaded.’

This can boost WordPress speed and performance, along with improving the visitor experience by loading the rest of the page first.
Another option is ‘After delay,’ which allows you to set a load delay for the slider.

Configure Slide Settings
By default, images will cover the entire slide, even if Smart Slider needs to crop the image to fit. This tends to work well for most presentations, but you change this default setting by selecting the ‘Slides’ tab.
Here, simply open the ‘Slide Background Image Fill’ dropdown and choose a different option from the list, such as stretch, center, or blur fit.

The ‘Developer’ tab has some advanced settings, including an area where you can add custom CSS to your presentations.
Most website owners won’t need to use these settings. However, if you want to learn more about any of the ‘Developer’ options, then simply hover over the little ‘i’ icon. This will show a tooltip with some more information, plus a link to the Smart Slider documentation.

When you are happy with how the presentation is configured, it’s time to start creating slides.
Simply click on the ‘Add Slide’ button to get started.

Smart Slider lets you create a few different types of slides. It even has a ‘Post’ option, which allows you to embed a WordPress post inside a slide.
You can experiment with the different options, but in this guide, we will be using the ‘Blank’ design as an example.

After choosing a slide type, you will see the slide’s thumbnail near the top of the screen.
Just hover your mouse over the thumbnail and then click on the ‘Edit’ button when it appears.

This opens the Smart Slider editor.
Along the top of the screen is a breadcrumb navigation bar where you can move between the different slides in the presentation.

Along the left-hand side of the screen are all the layers that make up the slide. You can hover your mouse over any icon to see that layer’s name, such as Image or Row.
To edit a layer, just give it a click in the left-hand menu. This opens a popup with all the settings you can use to customize that layer.

You can also select a layer by clicking on it in the live preview. For example, to replace some of the default text with your own messaging, just click to select that layer.
In the popup that appears, type your message into the ‘Text’ field.

You can also change how the text looks by clicking on the ‘Style’ tab.
Here, you can change the text color, font, size, and more.

To customize the slide, simply click on the different layers and then make your changes in the popup that appears.
If you want to delete a layer, then just hover your mouse over it and then click on the dotted icon. In the dropdown menu, you need to select ‘Delete.’

Do you want to add more layers to the slide?
Simply click on the green ‘+’ icon in the left-hand menu.

The ‘Layers’ tab shows some basic layers, such as images, buttons, and text.
You can add any of these layers to the slide using drag and drop.

Smart Slider also has a library of pre-made slides that you can add to your presentation.
To take a look at these options, click on the ‘Library’ tab.

You can now continue working on this slide by adding layers and customizing them with your own content and settings.
When you are happy with how the slide is set up, click on the ‘Save’ button.

To start working on the next slide, you need to click on ‘Slides’ in the toolbar.
Then, select ‘Add Slide.’

When you have finished working on the presentation, simply click on ‘Back’ to return to the main Smart Slider dashboard.
By default, Smart Slider publishes all your slides, but it’s still worth checking that there’s a green checkmark next to every slide you want to show on your site.

If you see an ‘x’ next to any slide, then it means the slide is unpublished. You will need to click on the ‘x’ to turn it into a green checkmark, which makes the slide live.
After that, you are ready to add the presentation to your online store, website, or blog. Simply open any post or page and then click on the ‘+’ icon.
Next, you need to type ‘Smart Slider 3’ into the popup and select the right block when it appears.

This adds a Smart Slider block to the page.
Next, go ahead and click on the ‘Select Slider’ button.

This opens a popup showing all the presentations you have created.
Simply click on the presentation you want to use and then select ‘Insert.’

This adds the presentation to your website. You can now either click on ‘Update’ or ‘Publish’ to make the presentation live.
Now, if you visit your website,e you will see the PowerPoint-style presentation in action.

We hope this article helped you learn how to create presentations in WordPress. You may also want to see our list of the best drag and drop WordPress page builders or our guide on how to choose the best web design software.
If you liked this article, then please subscribe to our YouTube Channel for WordPress video tutorials. You can also find us on Twitter and Facebook.
The post Forget PowerPoint, How to Create Presentations in WordPress first appeared on WPBeginner.
From the surface, Thrive Comments is just another WordPress comments plugin – one to replace the default comments on WordPress. It’s much more than that, however, as it offers tools for engaging site visitors, adding visuals to comments, integrating with social media sites, and other gamification elements. Continue reading our in-depth Thrive Comments review for a complete look at the product.
The post Thrive Comments Review: Is It Really the Best Comments Plugin? appeared first on Themeisle Blog.
Do you want to add a currency converter to your blog?
A currency converter allows your website visitors to quickly calculate the exchange rate of different currencies without leaving your website.
In this article, we will show you how to easily add a currency converter in WordPress.

Whether you have an online store, a small business website, or a WordPress blog, as long as you have an international audience and you’re selling something, then you can use a currency converter.
Here are a few examples of websites that may need a currency calculator for WordPress:
There can be many other WordPress websites that may need a currency converter. That being said, let’s take a look at how to easily add a currency converter in WordPress.
We will show you 2 methods, including a way for WordPress site and WooCommerce store. You can click the links below to jump ahead to your preferred section:
You easily add a currency converter in WordPress using CBX Currency Converter. It is a free WordPress plugin that calculates and displays up to 117 currencies.
The first thing you need to do is to install and activate the CBX Currency Converter plugin. For more details, see our step-by-step guide on how to install a WordPress plugin.
Upon activation, you need to go to Settings » Currency Converter page in your WordPress admin area. From here, you can manage general settings, like choosing a layout for your currency converter and selecting your API source to fetch the exchange rates.

By default, the plugin will use Exchangerate.host, which doesn’t requires an API key. However, you can click the dropdown menu and choose other sources, like Alphavantage, Openexchangerates, and Currencylayer.
After adding the API key, you can select a layout for the currency converter.
There are 4 layouts to choose from. Using these layouts, you can display a currency calculator, exchange rate list, or both. You can also define the decimal point position.

Besides that, you can further edit the settings for each currency converter layout.
For instance, in the ‘Calculator Default’ tab, you can set the default values for the currency calculator. It allows you to enable currencies, set default options for from and to currencies, and more.

After the calculator layout, you can go to the ‘List Default’ tab for currency rate list default settings.
You can select the primary currency and then add a list of other currencies to display in the rate list.

Once you are done with the settings, click the ‘Save Changes’ button. Make sure to perform this step whenever you change any settings in the above tabs.
Displaying the Currency Converter on Your Site
You can easily display the currency converter anywhere on your website using the CBX Currency Converter block.
First, you can create a new page or edit an existing one. Once you’re in the content editor, simply click the ‘+’ button and add the CBX Currency Converter block.

Alternatively, you can also display the currency converter in the sidebar of your website.
You can go to Appearance » Widgets from your WordPress dashboard. After that, you can simply add the ‘CBX Currency Converter’ widget block to the sidebar area.

After adding the widget block, you can edit the title, select a layout, change the decimal points, choose the default currency, and more.
Once you’re done, simply click the ‘Update’ button.

Simply visit your website to see the currency converter in the sidebar widget or WordPress page.
Your users will be able to enter an amount, select the currency they want to check, and then click the ‘Convert’ button to have the results displayed right there.

You can also integrate a currency converter in your WooCommerce or any other WordPress ecommerce site. For this, you will need the Currency Converter Pro plugin.
However, other multi-currency plugins will also get the job done, most of which are free. Let’s look at how you can add a currency converter in WooCommerce.
If you have a WooCommerce store that attracts customers from different parts of the world, then a currency converter can show prices in local currencies and boost conversions.
The easiest way of adding a currency converter in WooCommerce is by using the CURCY plugin. It is a free WooCommerce plugin that is easy to use and offers multi-currency support.
First, you will need to install and activate the CURCY plugin. For more details, please see our guide on how to install a WordPress plugin.
Upon activation, you can head to the Multi Currency page from the WordPress dashboard and view the General settings tab.

Here, you can click the ‘Enable’ toggle to activate currency converter options for WooCommerce. Besides that, the plugin also lets you fix the prices.
Next, you can scroll down and add different currencies. Simply click the ‘Add Currency’ button. Do remember that in the free plugin, you can only add 2 currencies at a time.

After that, you can switch to the ‘Location’ tab.
Here, you’ll find options to auto-detect currencies and show a particular currency for visitors from different locations.

Next, you can head to the ‘Design’ tab and edit your currency converter’s appearance.
The plugin lets you choose its position, add a title, change the text color, style, main and background color, and much more.

Once that’s done, you can save your changes.
You can now visit your WooCommerce store to see the currency converter in action.

We hope this article helped you learn how to add a currency converter in WordPress. You may also want to see our expert pick of the best calculator plugins for your WordPress site, and how to customize your WooCommerce cart page.
If you liked this article, then please subscribe to our YouTube Channel for WordPress video tutorials. You can also find us on Twitter and Facebook.
The post How to Add a Currency Converter in WordPress first appeared on WPBeginner.
Do you want to create a responsive slider for your WordPress website?
Sliders are commonly used on the front page of websites to showcase your most important products, services, testimonials or other content in an interactive way.
In this article, we will show you how to add a responsive slider to your WordPress website.

A slider or slideshow is a great way to highlight your most popular WooCommerce products, latest YouTube videos, customer reviews, and more.

Some sliders autoplay, so they move between slides automatically. This allows you to display lots of information in a small space, which leaves plenty of room to show other content.
For this reason, many websites use sliders on their most important pages, such as a landing page, home page, or sales pages.
Even if a slider is set to autoplay, visitors can typically move between slides manually by clicking on navigation buttons. In this way, a slider encourages visitors to interact with your site, which makes it more engaging.
You can see in the GIF below how dynamic a slider can make a page.

With that said, let’s see how you can easily create a responsive slider in WordPress. Simply use the quick links below to jump straight to the method you want to use.
If you want to create a simple slider that looks good on desktop and mobile, then we recommend using the Soliloquy plugin.
This WordPress slider plugin lets you create slides using images from your media library and can also show videos hosted on third-party platforms like YouTube.

You can also add alt text and captions to each slide, which is great for WordPress SEO.
First, you’ll need to sign up for a Soliloquy account. After that, you can install and activate the Soliloquy plugin on your website. For more details, you can follow our guide on how to install a WordPress plugin.
Upon activation, go to Soliloquy » Settings in the WordPress dashboard and enter your license key.

You can find the key by logging into your account on the Soliloquy website. After entering this information, click on the ‘Verify Key’ button.
With that done, you can add a new slider to your WordPress website by going to Soliloquy » Add New.

You can start by typing in a title. This is just for your reference so you can use anything that helps you identify the slider in your WordPress dashboard.
Next, it’s time to add images and videos to the slider. You can either drag and drop files onto the editor, or click ‘Select Files From Other Sources.’

If you want to use images, then you can add those files in exactly the same way you add images in the WordPress block editor.
If you want to include videos, then we recommend uploading them to a video hosting site like YouTube or Vimeo. Uploading videos directly to your website is not a good idea, as it can slow down your website and take up a lot of storage.
Meanwhile, platforms like YouTube are optimized for video, so you can show high-resolution videos in your sliders without negatively affecting your website.
After choosing a video hosting platform, you’ll need to upload all the videos you want to include in the WordPress slider. If you’re not sure how to upload videos, then we recommend reading the official documentation or user manual for your chosen video platform.
With that done, simply click on the ‘Select Files from Other Sources’ button and then select ‘Insert Video Slide.’

You can now go ahead and paste the video’s URL into the ‘Video URL’ field.
Soliloquy shows all the supported link formats along the right-hand side, so make sure your link uses one of these formats.

With that done, you can go ahead and type a title into the ‘Title’ field. This is just for your reference so you can use anything you want. You can also add alt text, which will help the search engines understand what this slide is all about.
After that, you can type an optional caption into the ‘Caption’ field. This will be shown in a grey bar along the bottom of the video before the visitor presses ‘Play.’

If you don’t want to show this bar, then simply leave the ‘Caption’ field empty.
When you’re happy with the information you’ve entered, you can create more slides by clicking on ‘Add Another Video Slide.’
To configure this new slide, simply follow the same process described above.

Once you’ve created all your slides, go ahead and click on ‘Insert into Slider.’
You’ll now see all your slides in the ‘Currently in Your Slider’ section.

Next, you can click on the ‘Configuration’ tab and change the slider display settings. For example, there are options to choose a new slider theme, change the image size, and change the position of the slider and captions.
You can also customize the slider arrows and the pause/play button, adjust the transition speed, change the delay time, and more.

Next, you’ll want to make sure your slider looks just as good on mobile devices, as it does on computers and laptops.
That said, click on the ‘Mobile’ tab and check the box next to ‘Create Mobile Slider Images.’

You can then type in the sizes you want to use for the images and videos on mobile devices. When making these decisions, it may help to view the mobile version of your WordPress site on desktop.
By default, Soliloquy will hide captions for mobile users. Often, this helps the slides fit more comfortably on the smaller screens typically used by smartphones and tablets.
For that reason, we recommend leaving this setting disabled, but you can check the box next to ‘Show Captions on Mobile’ if you prefer.
With that done, click on the ‘Misc’ tab. Here, you can add custom CSS to your slider, edit the slider title and slug, and export the slider.

When you’re happy with how the slider is set up, go ahead and click on the ‘Publish’ button.
Soliloquy will automatically create a shortcode that you can add to any page, post, or widget-ready area.

For more information on how to place the shortcode, please see our guide on how to add a shortcode in WordPress.
You’ll also notice some code snippets that you can add to your WordPress theme.

For step-by-step instructions, see our guide on how to easily add custom code in WordPress.
The easiest way to add the slider to your site is by using the Soliloquy block. Simply go to the page or post where you want to show the slider and then click on the ‘+’ button.
In the popup that appears, type in ‘Soliloquy.’

When the right block appears, click to add it to your WordPress blog or website.
After that, open the Soliloquy block and select the slider you just created.

You can now click on the ‘Update’ or ‘Publish’ button to make the slider live.
If you want to create a simple slider, then a plugin such as Soliloquy is a good choice. However, if you want to add an advanced slider to landing pages, custom home pages, or even your WordPress theme, then we recommend using a page builder plugin instead.
SeedProd is the best drag-and-drop WordPress page builder. It allows you to design custom landing pages and even create a custom WordPress theme without having to write a single line of code.
It also has an Image Carousel block that you can use to create stunning sliders.

You can simply drop this ready-made block anywhere on a page and then customize it using the powerful drag-and-drop editor.
First, you need to install and activate the SeedProd plugin. For more details, see our step-by-step guide on how to install a WordPress plugin.
Note: There is a free version of SeedProd that lets you create professional designs no matter what your budget. However, we’ll be using the premium SeedProd plugin since it comes with the Image Carousel block. If you’re creating a slider to promote your products or services, then the premium plugin also integrates with WooCommerce and all of the best email marketing services.
After activating the plugin, SeedProd will ask for your license key.

You can find this license key under your account on the SeedProd website. After entering the information, click on the ‘Verify Key’ button.
With that done, go to SeedProd » Landing Pages in your WordPress dashboard.

SeedProd comes with over 180 professionally designed templates that are grouped into categories. Along the top you’ll see categories that let you create beautiful coming soon pages, activate maintenance mode, create a custom login page for WordPress, and more.
All of SeedProd’s templates are easy to customize, so you can use any design you want. When you find a template you like, simply hover your mouse over it and click on the checkmark icon.

You can now type a name for your landing page into the ‘Page Name’ field. SeedProd will automatically create a ‘Page URL’ using the page name.
It’s smart to include relevant keywords in this URL wherever possible, as this will help search engines understand what the page is about. This can often improve your WordPress SEO.
To change the page’s automatically-generated URL, simply type into the ‘Page URL’ field.

When you’re happy with the information you’ve entered, click on ‘Save and Start Editing the Page.’ This will load the SeedProd page builder interface.
This simple drag-and-drop builder shows a live preview of your page design to the right. On the left is a menu with all the different blocks and sections you can add to the page.

When you find a block you want to add, simply drag and drop it onto your template.
To customize a block, just click to select that block in the SeedProd editor. The left-hand menu will now update to show all the settings you can use to customize it.

As you’re building the page, you can move blocks around your layout by dragging and dropping them. For more detailed instructions, please see our guide on how to create a landing page with WordPress.
To create a responsive slider using SeedProd, simply find the Image Carousel block in the left-hand menu and then drag it onto your layout.

Next, click to select the Image Carousel block in the page editor.
You can now go ahead and add all the images you want to show in the slider. To start, click on the ‘Image 1’ item that SeedProd creates by default.

You can now either use a photo from SeedProd’s built-in library, or click on ‘Use Your Own Image’ and choose a file from the WordPress media library.
After choosing an image, you can add a caption that will appear below that image. SeedProd doesn’t display captions by default, but we’ll show you how to enable them later in this post.

When you’re happy with how the slide is configured, click on the ‘Add Images’ button to create another slide.
To add more slides, simply follow the same process described above.

After adding all the images to your slider, it’s time to customize how that slider looks and acts.
In the left-hand menu, click to expand the ‘Carousel Settings’ section.

To start, you can switch between light and dark modes for the slider’s navigation buttons.
To try these different modes, click on the buttons next to ‘Navigation Color Mode.’ The live preview will update automatically so you can see which mode you like the best.

By default, the carousel shows a single slide, and visitors will need to use the navigation controls to see more content.
However, you may want to show multiple slides at once by opening the ‘Slide to Show’ dropdown and choosing a number from the list. This can be useful if the slider has lots of content and you’re worried visitors might not click through all the slides.

By default, visitors will need to click to see the next slide. With that in mind, you may want to enable autoplay, as this often increases how many slides a visitor sees.
To do this, click to enable the ‘Autoplay’ switch and then specify how long each slide should stay onscreen by typing a number into ‘Autoplay Speed.’

If you added captions to your images, then make sure you click on the ‘Show Caption’ slider to turn it from ‘No’ to ‘Yes.’
You can also change the caption alignment.

Depending on the background color, you may need to change the caption color before they’re visible to visitors.
To do this, click on the ‘Advanced’ tab and then use the ‘Caption Color’ settings.

You can further style the text by clicking on the ‘Edit’ button next to ‘Caption Typography.’
This adds some settings where you can change the font size, line height, spacing, and more.

When you’re happy with how the captions look, you can add different box shadows to the slides using the ‘Slider Image Styles’ dropdown.
These shadows can really make the slides stand out, so it’s worth trying different shadows to see whether they fit your page design.

In the ‘Advanced’ tab you’ll also find settings that let you add a border, change the spacing, and even create an entrance animation.
Most of these settings are self-explanatory so it’s worth looking through them to see what different kind of effects you can create.

When you’re happy with how the slider looks, you can continue working on the rest of the page. Simply drag blocks onto your design and then customize them using the settings in the left-hand menu.
If you want to delete a block, then simply hover over it and then click on the trash can icon when it appears.

When asked, go ahead and click on ‘Yes, delete it.’
When you’re happy with how the page looks, it’s time to make it live by clicking on the ‘Save’ button. Finally, select ‘Publish’ to make your slider live.

We’re more likely to try things that we see other people buying, using, or recommending. With that being said, it’s a good idea to show social proof on your website including customer reviews, testimonials, or even positive comments you’ve got on social media.
The easiest way to show social proof on your site is by using Smash Balloon. Smash Balloon has plugins that allow you to embed content from Instagram, Facebook, Twitter, and YouTube.
It also has a Reviews Feed plugin that you can use to display reviews from Facebook, Tripadvisor, Yelp, and Google.

However, showing lots of positive comments and reviews on your online store or website can take up a lot of space.
That’s why Smash Balloon comes with built-in carousel layouts and templates that you can use to create responsive sliders. This allows you to create social media and review slideshows with just a few clicks.

Even better, Smash Balloon will fetch new content automatically so the slider will always show the latest posts.
Another option is showing the content from your own social media accounts.

If visitors like what they see, they might decide to follow you on social media.
To help you get more followers, Smash Balloon comes with ready-made call to action buttons that you can add to your sliders.

For detailed step-by-step instructions, please see our guides on how to add social media feeds to WordPress, and how to show Google, Facebook, and Yelp reviews in WordPress.
We hope that this article helped you learn how to easily create a responsive WordPress slider. You may also want to check out our guide on how to choose the best design software, or see our expert pick of the best live chat software for small businesses.
If you liked this article, then please subscribe to our YouTube Channel for WordPress video tutorials. You can also find us on Twitter and Facebook.
The post How to Easily Create a Responsive Slider in WordPress first appeared on WPBeginner.
Do you want to use WordPress to manage your files and documents?
You may have spreadsheets, images, and other documents that you need to share with the rest of your team. By uploading these files to WordPress, you can easily collaborate with other people, or simply keep these documents within easy reach on the WordPress dashboard.
In this article, we’ll show you how to use WordPress as a document management or file management system.

It’s easy to lose track of documents when you use lots of different tools. For example, you might share drafts using a platform like Google Drive, track the edits with a tool like Asana, and communicate with editors and guest bloggers using Slack.
The problem is that it’s easy to lose track of a project when you’re using so many different tools. By using WordPress to manage your documents, you can keep everything in one place. This will save you time and effort, and make sure you never lose important files.
That said, let’s see how to use WordPress to manage your documents and files easily.
The easiest way to set up a document management system in WordPress is by using WP Document Revisions. This plugin allows you work on files with other people, store documents online, and see a complete revision history for each document.
First thing you need to do is install and activate the plugin. For more details, see our step-by-step guide on how to install a WordPress plugin.
Upon activation, you’ll see a new ‘Documents’ option in the left-hand menu. To upload a document to WordPress, head over to Documents » All Documents. Then, click the ‘Add Document’ button.

Next, you need to give the document a title. This should be something that helps you identify the document, especially if you share the WordPress dashboard with other people such as guest bloggers.
With that done, click the ‘Upload New Version’ button.

This opens the ‘Upload Document’ popup, which works similarly to the standard WordPress media library.
You can either drag and drop your document onto the popup, or click ‘Select File’ and then choose a file from your computer.

WP Document Revisions will now upload the file to WordPress.
With that done, you can set the document’s workflow state. If you share the dashboard with other people, then this lets everyone know that the document is an initial draft, under review, in progress, or in some other state. This can help you avoid misunderstandings and improve the editorial workflow in multi-author WordPress blogs.
Simply open the dropdown under ‘Workflow State’ and then choose an option from the list.

Next, you may want to add a description, which will help other users understand what the file is about.
To do this, simply type into the text editor. This section includes all the standard text formatting options, so you can add a link and create bullet points and numbered lists, as well as add bold and italic formatting and more.

You may also want to add a document image, which can help users understand the file or provide extra information, similar to an index or appendix.
The process is similar to adding a featured image to WordPress posts and pages. Simply select ‘Set Document Image’ and then either choose an image from the media library or upload a new file from your computer.

When you upload a file, WP Document Revisions marks you as the document’s owner.
To assign this file to someone else, just open the ‘Owner’ dropdown and choose a new user from the list. This can help keep your documents organized, especially if you’ve added lots of users and authors to your WordPress blog.

By default, WP Document Revisions will publish the file privately, so only logged-in users can see it.
Another option is to publish the document to your WordPress website, so people can access it without logging into the dashboard.
Even if you publish the document, it’s still a good idea to add a password by clicking on the ‘Edit’ link next to ‘Visibility.’

Then, select ‘Password protected’ and type a secure password into the ‘Password’ field.
With that done, click on ‘OK’ to save your changes.

Don’t want to use a password? Then you can follow the same process described above, but this time select ‘Public.’
No matter how you publish the file, WP Document Revisions will show its URL directly below the title. People can see the file by visiting this URL.
To create a custom permalink instead, click on the ‘Edit’ button.

Then, type in the new URL and click ‘OK.’
When you’re happy with the information you’ve entered, click on the ‘Update’ button to save your settings.
WP Document Revisions also has powerful version control features. This can help you collaborate with other people, by showing a document’s entire history. You can even open previous versions of the file, and restore an earlier version at any point.
Every time you upload or update a document, you can type a note into the Revision Summary.

These notes will appear in the revision log towards the bottom of the screen, next to the name of the person who made the update.
If the update included a new file upload, then you’ll also see a ‘Revert’ link.

Simply click the link to restore this version of the document. Even if you revert to an earlier version of the file, the history will remain intact so you won’t lose any information.
Customizing and Creating Your Own Workflow States
Workflow states make it easy to see whether a document is an initial draft, in progress, or some other state. Similar to how you save blog posts as drafts or published, states can improve the editorial workflow.
WP Document Revisions comes with four default workflow states: final, in progress, initial draft, and under review. You may need to change these default states, or add more states. For example, if you’re creating a client portal then you might make a ‘under client review’ state.
To change the workflow states, go to Documents » Workflow States. If you want to customize an existing state, then just hover over it and click on the ‘Edit’ button.

This opens an editor where you can change the name, slug, and description of the workflow state. This is similar to how you edit categories and tags in WordPress.
Once you’re done making changes, click the ‘Update’ button.

You can also add new workflow states.
In Documents » Workflow States, type in a new name, slug, and description. Then, click the ‘Add New Workflow State’ button.

WP Document Revisions assigns different document editing capabilities to people, based on their user role. For example, authors can’t edit documents published by other people or read privately-published documents.
The default permissions should be a good fit for most websites. However, if you want to review and change any of these settings, then the easiest way is by using Members. This plugin allows you to customize the permissions for every user role, and even create completely new roles.
The first thing you need to do is install and activate Members. For more details, see our step-by-step guide on how to install a WordPress plugin.
Upon activation, go to the Members » Roles page to see all the different user roles on your WordPress website.

Here, hover your mouse over the user role that you want to modify.
You can then go ahead and click on ‘Edit’ when it appears, which opens the user role editor.

The left column shows all the different types of content such as reusable blocks and WooCommerce products.
In the left-hand menu, click on ‘Documents.’

You’ll now see all the permissions this user role has, such as the ability to delete another person’s files or edit their own documents.
Simply click on the ‘Grant’ or ‘Deny’ checkbox for each permission.

When you’re happy with the changes you’ve made, click on ‘Update.’
For a more detailed look at the Members plugin, please see our guide on how to add or remove capabilities to user roles in WordPress.

After installing this plugin, you can even control who has access to each document. Simply head over to Documents » All Documents.
Here, hover over any file and click on the ‘Edit’ link when it appears.

Now, scroll to the new ‘Content Permissions’ box. Here, you’ll find a list of all the user roles on your WordPress blog or website.
Just check the box next to each role that needs to access this document.

In this section, you’ll also see a Paid Memberships tab. This allows you to restrict access to paying members.
For more information, please see our ultimate guide to creating a WordPress membership site.

When you’re happy with the changes, click on ‘Update’ to save your settings.
We hope this article helped you learn how to use WordPress for document management or file management. You may also want to see our guide on how to create a free business email address and our expert pick of the best live chat software for small businesses.
If you liked this article, then please subscribe to our YouTube Channel for WordPress video tutorials. You can also find us on Twitter and Facebook.
The post How to Use WordPress for Document Management or File Management first appeared on WPBeginner.
Do you want to add a ‘click to tweet’ box in your WordPress posts?
These simple boxes allow readers to share quotes from your posts with a single click. This makes them a great way to get more engagement on social media and drive extra traffic to your website.
In this article, we will show you how to add click to tweet boxes in your WordPress posts.

A ‘click to tweet’ button makes it easy for readers to share quotes from your posts and pages.
Visitors can simply click a button to create a tweet that contains the quote, plus a link to the page or post where the quote is featured.

Depending on how the box is set up, the tweet may even tag your Twitter account.
When social media users see lots of people posting your content, they’re more likely to engage with you.

In this way, click to tweet boxes can increase your blog traffic, get you more followers, and create a buzz around your brand on social media.
All of this can translate to more sales on your online store, new subscribers for your email newsletter, and much more.
With that being said, let’s see how you can easily add click to tweet boxes in your WordPress blog posts.
The easiest way to create a click to tweet box is by using Better Click To Tweet. This plugin allows you to add a quote box to any page or post using either a shortcode or a block.
The first thing you need to do is install and activate the Better Click To Tweet plugin. For more details, see our step-by-step guide on how to install a WordPress plugin.
Upon activation, head over to Settings » Better Click To Tweet to configure the plugin’s settings. In the ‘Your Twitter Handle’ field, type the account you want to tag in tweets that get shared.

There’s no authentication process, so you can add any Twitter account to the plugin’s settings, including an account that you don’t own.
You can also override this setting for individual click to tweet boxes, so it’s easy to tag lots of different accounts across your WordPress blog.
If you use custom short URLs, then make sure to check the box next to ‘Use short URL.’ This will force the plugin to show the WordPress shortlink instead of the full URL, which is important if you use tools to track link clicks in WordPress. Again, you can override this setting for individual click to tweet boxes.
With that done, click on ‘Save Changes.’
You can add a click to tweet box to any page or post using shortcode or a block. Since it’s the easiest method, let’s start with the block.
Simply open the page or post where you want to create a box and then click on the ‘+’ button.
In the popup that appears, start typing in ‘Better Click to Tweet.’ When the right block shows up, click to add it to the page.

You can now type in the quote you want to use.
By default, the plugin shows a ‘Click to Tweet’ prompt, but you can replace this with your own messaging. For example, if you’re running a giveaway or contest in WordPress then you might encourage readers to quote the tweet, in order to enter the competition.

To do this, simply click to select the block.
Then, type your custom messaging into the ‘Prompt’ field.

By default, the plugin will tag the account you added in its settings, but you can override this and tag a different account instead.
To make this change, simply type a different username into the ‘Twitter Username’ field.

Tagging your Twitter account is a great way to get more followers and engagement. However, if you simply want to get more visitors to your website then you can remove this tag, so the quoted tweet simply contains a link.
To do this, click to disable the ‘Include the username in Tweet?’ toggle.
By default, the plugin includes a link to the page or post where the quote box is featured. If you prefer, then you can use a different link instead. This can be useful if you want to get more visitors to a specific page, such as the landing page for a product or service that’s mentioned in the blog post.
To do this, simply type the URL into the ‘Custom URL’ field.
You can also mark the link as nofollow, which is useful if you’re linking to a third-party website such as a client or affiliate marketing partner.

Another option is removing the link, so the tweet just has the tagged account. This is a good option if you simply want to get more engagement on Twitter, rather than drive people to your website.
To do this, click to disable the ‘Include URL in Tweet’ toggle.

When you’re happy with how the quote box is set up, click on the ‘Publish’ or ‘Update’ button to make it live. Now if you visit your WordPress website, you’ll see the quote box in action.
If you want to show the same quote on multiple pages, then adding and configuring each box separately can take a lot of time and effort. Instead, it may be easier to paste the same shortcode into multiple locations.
You can also add a box to your WordPress theme’s sidebar or similar section, using a shortcode. For more information on how to place the shortcode, please see our guide on how to add a shortcode in WordPress.
To start, you may want to use the following shortcode:[bctt tweet="Quotable Tweet"]
This will create a tweet that tags the account linked in the plugin’s settings and includes a URL to the current page or post. Be sure to change the words “quotable tweet” in the shortcode to whatever message you want users to share.
If you don’t want to tag an account, then you can use the following instead:[bctt tweet="Quotable Tweet" via="no"]
Want to include a different URL in the tweet? Here’s the shortcode:[bctt tweet="Quotable Tweet." url="http://example.com"]
To remove the link completely, just set it to url="no.†You can also mark the link as nofollow by adding the following to the shortcode: nofollow="yes.â€
A click to tweet box is a quick and easy way to get engagement on Twitter. However, there are other ways to promote your social media accounts including adding a feed that shows your recent tweets and updates automatically as you make new posts.
The easiest way to do this is by using Smash Balloon Twitter Feed, which is the best Twitter plugin for WordPress.

This plugin allows you to embed actual tweets in WordPress blog posts, so readers can easily comment, like, and retweet the original post.
You can quote your own tweets, or even tweets from a third party. For example, you might embed posts from an industry influencer, an advertising partner, or a happy customer.
For more information, please see our guide on how to add social media feeds to WordPress.
We hope this tutorial helped you learn how to add click to tweet boxes in your WordPress posts. You may also want to learn how to create a contact form in WordPress, or see our expert picks for the best WordPress social media plugins for WordPress.
If you liked this article, then please subscribe to our YouTube Channel for WordPress video tutorials. You can also find us on Twitter and Facebook.
The post How to Add Click to Tweet Boxes in Your WordPress Posts first appeared on WPBeginner.


