Looking for an easy and effective way to conduct online exams on your WordPress site? Explore the top-rated free and pro plugins in our latest blog post.
Building a WordPress site for the first time? We’ve curated a list of the best WordPress plugins to help you create a fast, secure, and functional site. Best of all, most of the plugins on this list have a free version, so you’ll be able to set up your website even on a shoestring budget.
Looking for the best WordPress presentation plugins? Uncover the ultimate tools to enhance your website’s visual appeal and engage your visitors. Explore our top picks today!
Do you want to create and manage an ads.txt file in WordPress?
If your website gets caught up in fraudulent advertisements, then it can damage your reputation and cost you money. By adding a simple ads.txt file to your website, you can protect your site, partners, and publishers from advertising fraud, and possibly increase your ad revenue.
In this article, we will show you how to easily create and manage an ads.txt file in WordPress.
Why Create and Manage Ads.txt files in WordPress?
Selling advertising space is a great way to make money online blogging with WordPress. However, online advertising fraud is also a huge problem for both brands and website owners.
Let’s look at an example. Imagine a brand wants to place an ad on your WordPress website. They find a seller who claims they have a relationship with you, and can place advertisements on your website.
This third party might be one of your approved partners, or they might be committing online advertising fraud by selling unauthorized ads.
If your site gets caught up in advertising fraud, a third party may buy advertising space on your website and then resell it without your approval. This can lead to spammy or malicious advertisements on your WordPress blog.
Here, an ads.txt file can help keep your site safe.
Ads.txt file stands for ‘Authorized Digital Seller.’ It was developed by IAB Tech Lab to help stop fraud in online advertising. In this file, you can list all the companies that have permission to sell advertising space on your website.
An ads.txt file is publicly available, so advertisers, publishers, and resellers can use it to check that they’re dealing with an approved company.
With that being said, let’s see how you can create and manage an ads.txt file in WordPress.
How to Create and Manage Ads.txt Files in WordPress
The easiest way to create an ads.text file is by using Ads.txt Manager. This free plugin adds a simple code editor where you can type in all your authorized platforms and networks.
The first thing you need to do is install and activate the Ads.txt Manager plugin. For more details, see our step-by-step guide on how to install a WordPress plugin.
Upon activation, head over to the Settings » Ads.txt page.
This opens a simple code editor where you can add each platform or reseller on its own line. For example, here we’re adding Google AdSense as an approved advertising platform:
The first field is the domain of the company that is allowed to sell or resell your ad inventory. In the above example, that’s google.com.
After that, you’ll add the publisher ID, which is unique to your account. If you’re not sure where to find this ID, then you can check the network or platform’s online documentation for more information.
The third section declares the relationship type, which is either DIRECT or RESELLER. Direct means the publisher works directly with the AdTech vendor. Meanwhile, reseller means the publisher has authorized a third party to resell on their behalf, such as an ad network or ad management solution.
The last field is the ID of the advertising platform, which is optional.
You can now add as many platforms and resellers as you want. Simply add each organization on its own line.
When you’re happy with the information you’ve entered, click on the ‘Save Changes’ button.
Now, anyone can read your site’s ads.txt file.
To see the file in action, simply add ads.txt to the end of your domain name, such as www.example.com/adds.txt
Fixing the ‘Earnings at risk Error’ in Adsense
If you use Google AdSense, then you may see the following error in your AdSense account:
Earnings at risk – One or more of your ads.txt files doesn’t contain your AdSense publisher ID. Fix this now to avoid severe impact to your revenue.
This just means your ads.text file doesn’t have the right publisher ID.
To fix this issue, log into your AdSense page using your Google email address and password. You’ll find the ID next to the following field: ‘This email is associated with the AdSense account.’
Now, simply go to Settings » Ads.txt in your WordPress dashboard and find the line that adds Google AdSense as an authorized provider.
You can now change the text so that it uses the right ID.
After that, don’t forget to click on ‘Save Changes’ to store your settings. Now if you visit your Google AdSense account again, the error message should have disappeared.
If you liked this article, then please subscribe to our YouTube Channel for WordPress video tutorials. You can also find us on Twitter and Facebook.
Do you want to send an email to all registered users in WordPress?
Sometimes you may need to send a mass email to everyone who has an account on your website. This may include customers, members, subscribers, and even other WordPress users.
In this article, we will show you how to send an email to all registered users in WordPress.
Why and When You Need to Send Email to All Registered Users in WordPress?
If you allow user registration on your WordPress site, then there are a few different reasons why you may need to email all registered users. For example, you might want to let your site’s Authors and Editors know about a new plugin you’ve added to help them write great posts.
If you run an online store, then you may be launching a giveaway or contest in WordPress, exclusively for people who have the ‘Customer’ role.
Depending on how you’ve set up user registration, you may not add all users to your email list automatically. This can make it difficult to contact everyone who uses your site.
Thankfully, there are other ways to bulk message everyone who has an account with your WordPress website.
Now, let’s see how you can easily email all registered users on your website.
How to Make Sure Your Emails Are Delivered Safely
Before we start, you want to make sure that users will receive the emails you send.
Sometimes, your WordPress hosting server may not be properly configured or email providers such as Gmail might use filters and tools that wrongly flag your emails as spam.
With that in mind, we recommend using an SMTP service provider to improve your email deliverability and make sure all registered users receive their messages safely.
WP Mail SMTP is the best WordPress SMTP plugin on the market. It allows you to connect your WordPress site with a mailer service. This means your emails always end up in the user’s inbox, and not in the spam folder.
We recommend buying the paid version called WP Mail SMTP Pro as it allows you to send emails in WordPress using Gmail SMTP, SendLayer, Sendinblue, and more. You can also see the open and click-through rates for your emails, so you can monitor the success of your different email campaigns.
Upon activation, you need to visit the Settings » WP Mail SMTP page.
Here, enter your license into the ‘License Key’ field.
Sending Email to All Registered Users in WordPress
The best way to email all your registered users, is by using Send Users Email. This simple plugin lets you send bulk messages based on the user’s role.
Before you get started with this plugin, you may want to check your user roles. You can then make any changes so that your users are properly organized by role.
When you’re happy with how your roles are set up, the next step is installing and activating the Send Users Email plugin. For more details, please see our step-by-step guide on how to install a WordPress plugin.
Upon activation, go to Email to users » Email Roles in your WordPress dashboard.
Here, you can choose which users will receive the email based on their role on your WordPress blog.
For example, in the following image, we’re messaging everyone who has the ‘Subscriber’ role.
You can now type the email that you want to send to all registered users. The Send Users Email plugin also has a few placeholder tags that you can use to add user information to the message.
For example, you can address the user by name using the {{user_first_name}} placeholder. When Send Users Email creates each email, it will replace the placeholder with the recipient’s first name.
By using a combination of plain text and placeholders, you can send a personalized email to all registered users.
When you’re happy with the information you’ve entered, click on the ‘Send Message’ button.
WordPress will now email everyone who has the selected user role.
How to Email Specific Registered Users in WordPress
The the Send Users Email plugin also lets you send an email to a small group of registered users, or even to a specific user. For example, you may want to send a follow-up email to a particular Subscriber, after sending a bulk email.
To message individual users, simply go to Email to users »Email Users. This shows a list of all your registered users.
To message a user, simply check the box next to their username.
After selecting all the people you want to email, you can go ahead and create your message.
When you’re happy with the message, simply scroll to the bottom of the screen and then click on Send Message.
If you liked this article, then please subscribe to our YouTube Channel for WordPress video tutorials. You can also find us on Twitter and Facebook.
WordPress plugin updates enable you to maintain peak performance while keeping your site secure. However, you might not know how to manage updates on your site. In this post, we’ll take a closer look at why it’s important to update WordPress plugins. Then, we’ll share six tips to help you manage WordPress plugin updates more effectively.
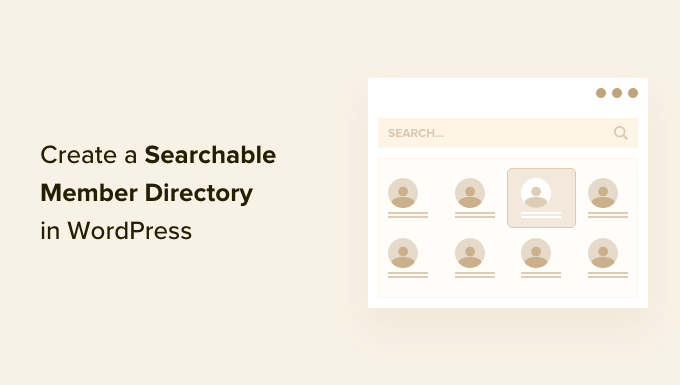
Are you looking to add a member directory to your WordPress website?
Adding a directory to your membership site can help boost your community engagement. It encourages new members to join and make it easy for them to reach out to each other.
In this article, we will show you how to create a searchable member directory in WordPress.
Why Create a Searchable Member Directory in WordPress?
A membership site often brings together users who share common interests. You can create a sense of community on your WordPress website by making it easy for your members to communicate with one another about their shared interests.
You can do this by creating a membership directory. This is a searchable list of the members on your site. It allows your members to see other members’ profiles and contact details.
This will boost your website’s credibility and make it more valuable to your members. It may even help your members feel important and recognized.
However, to protect their privacy, you may want to require each member to opt in before their personal information is displayed in the directory.
While you can use any method to create a membership site, we recommend the MemberPress plugin. It offers advanced membership features and integrates well with the Formidable Forms Directory addon used in this tutorial.
How to Create a Searchable Member Directory in WordPress
The best way to create a member directory is by using the Formidable Forms plugin. It comes with advanced features that let you format, filter, and display user-submitted data on the front end of your website, including your members’ profile information.
It is one of the best user registration plugins for WordPress on the market and can help you easily create a member directory using an addon. Plus, it integrates with MemberPress to give you complete control over your directory’s appearance and functionality.
You can use Formidable Forms to create a profile form where members can enter their information and opt in to the directory. You can also use it to display the searchable member directory itself.
Besides that, you will also be able to use Formidable Forms for all sorts of other purposes on your website, such as creating a booking form or web directory, allowing your clients to request a quote, and more.
With that in mind, let’s see how to create a searchable member directory using the Formidable Forms plugin.
1. Installing Formidable Forms on Your Membership Site
The first thing you need to do is install and activate Formidable Forms Lite, which is the free version of the plugin. Formidable Forms Lite acts as the base for the advanced features of the Pro version.
Next, you will need to visit the Formidable Directory page and click the ‘Get Formidable Directory’ button. You will then be prompted to purchase the Elite plan, which includes the Directory addon.
Before leaving the Formidable website, you will need to copy your license key. You can find it by clicking ‘Account’ at the top of the page.
Now return to your website and navigate to Formidable » Global Settings. Once there, simply click the link that says ‘Click to enter a license key manually’ to paste your license key and then click the ‘Save License’ button.
You are now ready to create a member directory in WordPress.
2. Creating the Formidable Member Directory Application
Next, you must navigate to Formidable » Applications from the WordPress admin sidebar. This page will show you the available application templates.
Once there, you need to find the Member Directory application and click the ‘+ Add’ button to install it.
This will open a popup that describes the Member Directory application.
Simply click the ‘Install Application’ button to continue.
Next, you will be asked to give the application a name.
For this tutorial, we will leave the default name, ‘Member Directory’, and then click the ‘Install Application’ button to continue.
Formidable Forms will now create the pages, forms, and views needed for your member directory. The pages are saved as drafts, so you can customize them before they go live.
Now you need to click the ‘Open Application’ button. This will open the Member Directory application page, where you can customize and publish your directory.
You have now created a ‘User Directory Profile’ form that your members can fill out on the ‘Add a Member’ page.
There is also a ‘Member Directory’ page where you can view the directory in a table view or grid view.
3. Customizing the Member Profile Form and ‘Add a Member’ Page
Next, you may wish to add or remove some fields from the ‘User Directory Profile’ form. This is the form that your members must fill in to be included in the directory.
You may also want to add some instructions to the page where the profile form is displayed before you publish it.
Customizing the ‘User Directory Profile’ Form
The ‘User Directory Profile’ form contains all of the fields needed for most member profiles. You can customize it by clicking the ‘User Directory Profile’ link or hovering your mouse over it and then clicking on ‘Edit’.
This will open the form editor. You will see a preview of the form on the right and the available fields on the left.
The form includes contact details, social links, and more. Some of the fields will be filled in automatically using information from the member’s WordPress user profile. This includes their name, email address, and bio.
To add new fields, simply drag them onto the form from the ‘Add Fields’ column on the left.
You can change the options of a field by clicking on it. This will open the ‘Field Options’ tab on the left, where you can customize the field by changing its settings.
You will find options for the field’s default value in the ‘Advanced’ section. Here you can choose the default value from a list of smart tags. This will take information that the user has already added to their WordPress profile so that it doesn’t have to be entered twice.
When you scroll to the bottom of the form, you will notice it already includes fields for social links and an option where the member can choose to be included in the directory.
Once you have finished customizing the form, simply click the ‘Save Profile’ button to store your changes.
Customizing the ‘Add a Member’ Page
Next, you will need to customize and publish the ‘Add a Member’ page that will display the profile form on your website.
You may need to navigate back to Formidable » Applications » Member Directory to see the page. Then, simply click the ‘Add a Member’ link, or hover over it and click ‘Edit.’
This will open the ‘Add a Member’ page in the WordPress content editor. It simply contains the page title and the Formidable form that you were just looking at.
If you like, you can give the page a different title, such as ‘Join Our Member Directory’.
If you would like to add some instructions before the form, then you should click on the page title and press the Enter key. This will create a new block where you can type those instructions.
When you are happy with the page, then simply click the ‘Publish’ button at the top of the screen to push the page live on your website.
4. Customizing the ‘Member Directory’ Page
Now you can customize and publish the member directory itself. You will need to choose whether to display the members in a grid or table. Then, you must also publish the page so that it is visible on your website.
Customizing the ‘Member Directory’ Page
First, just go back to Formidable » Applications and click on your member directory application.
You will need to publish the draft ‘Member Directory’ page. However, before doing that, you can decide whether that page should display the directory in a grid or table format.
Simply click on the ‘Member Directory’ page to open it in the WordPress editor.
The page contains just the title and the following shortcode that displays the directory:
[display-frm-data id=dir-two-col-grid]
By default, the shortcode will display the directory in a two-column grid.
You can preview the page to see how it will look.
Alternatively, you can display your member directory in a table format.
To do that, you will need to use this shortcode instead:
[display-frm-data id=dir-table-listing-view]
You can preview the page again to see the changes.
This time each member will be displayed on a single line with their information in columns.
Whichever shortcode you choose, clicking on ‘View Profile’ will show you more detailed information about that member.
If you like, you can add additional content to the page. Just make sure to click the ‘Publish’ button to push your member directory live on your website when you are finished.
Adding the Member Directory Pages to Your Navigation Menu
You can make it easier for your members to find or join the directory by adding the ‘Add a Member’ and ‘Member Directory’ pages to your website’s navigation menu.
Also, depending on the type of membership site you have, you may want only your logged-in members to be able to see the ‘Add a Member’ and ‘Member Directory’ pages.
If so, then you will need to create a rule so that only members get access to the pages.
We show you how to do that step by step in our ultimate guide on creating a WordPress membership site. You will just need to scroll down and read Step 6 to learn how to create a MemberPress rule and Step 7 to learn how to add members-only content.
5. Deleting the Sample Data in Your Member Directory
Your member directory contains the sample data that you can see in the screenshots used in this tutorial. This is helpful when setting up your member directory because it lets you see how the profiles will look.
But once you have finished setting up the directory, you will need to delete the sample data.
You need to navigate back to Formidable » Applications » Member Directory and click on the ‘User Directory Profile’ form.
Once the Formidable editor opens, click on the ‘Entries’ tab at the top of the screen to view the sample entries.
Most likely, the only entries listed will be the four sample members. In that case, simply click the ‘Delete All Entries’ button at the top of the screen. All members listed will be deleted.
However, if some of your real members have already created profiles, you must select the sample entries manually.
To do this, you will need to click the checkbox next to each sample member. Next, click the ‘Bulk Actions’ button at the top of the list and select ‘Delete’ from the drop-down menu.
Finally, click the ‘Apply’ button to delete the sample data. Your member directory will now only contain profiles from your real members.
If you liked this article, then please subscribe to our YouTube Channel for WordPress video tutorials. You can also find us on Twitter and Facebook.
Do you want to add interactive 360 degree images to your WordPress site?
You can use interactive 360 degree images to create virtual tours or give shoppers a way to see products from every angle. As Virtual Reality (VR) gets more popular, you can also use these images to create fun and engaging experiences for your visitors.
In this article, we’ll show you how to easily add interactive 360 degree images in WordPress.
Why Use Interactive 360 Degree Images in WordPress?
If you run an online store, then high-quality product images are an important way to get more sales.
Some large brands take this to the next level by creating an interactive 360 degree image that allows shoppers to explore a product from every angle.
This is much more engaging than asking customers to scroll through multiple photos showing the item from different angles.
If you have a real estate website, then you can use 360 images to create virtual tours, so potential buyers can explore the property. This can help convince people to book appointments and viewings.
You can also use 360 degree images to create new and engaging experiences. For example, if you have a travel blog then readers can use interactive images to explore different locations.
With that being said, let’s see how you can add an interactive 360 degree image to your WordPress blog or website.
Method 1. How to Add a 360 Degree Interactive Image in WordPress
The easiest way to add 360 degree rotating images to WordPress is by using Algori 360 Image. This free WordPress plugin simply adds a new block to the block editor, which makes the plugin very easy to use.
First, you need to install and activate the Algori 360 plugin. For more details, see our step-by-step guide on how to install a WordPress plugin.
Upon activation, there are no settings for you to configure so you can start using the plugin straight away.
However, the plugin doesn’t help you create a 360 degree image, only display it. So you’ll need to use a smartphone app or web design software to create the image.
Once you have a 360 degree image, simply go to the post or page where you want to show that interactive image.
Here, click on the ‘+’ button and start typing ‘360 Image.’ When the right block appears, give it a click to add it to the page.
You can now click on ‘Media Library.’
Next, either choose the 360 degree image from the library or upload a new file from your computer.
Depending on the size of the 360 degree image, you may need to wait for WordPress to process it. After a few moments, you’ll see the 360 degree image in the post editor.
You can then simply click the ‘Update’ or ‘Publish’ button to make the image live.
Now, if you visit your WordPress website you can drag to rotate the 360 degree image.
If you have a VR headset, then you can click on the ‘VR’ button to explore the 360 image in virtual reality.
Method 2. How to Add a 360 Degree Product Image to Your WooCommerce Store
Interactive images allow shoppers to see a product from every angle, so they’re particularly useful for online marketplaces and stores.
If you have a WooCommerce store, then SR Product 360° View allows you to create a 360 degree rotating product image for every item in your store.
Simply take a photo of the product from every angle, and then upload the pictures in the order you want to show them.
The plugin will then combine these images into a 360 degree rotating animation that shoppers can see on your WooCommerce product page.
First, you’ll need to install and activate the SR Product 360 view plugin. If you need help, then please see our guide on how to install a WordPress plugin.
Then, go to Products »All Products and open the product where you want to add a 360 degree image.
In the product editor, scroll to the new Product 360 Degree View section. Here, click on the ‘Add 360 images’ button.
You can now select all the images you want to include in the 360 degree animation.
Make sure you select the images in the order they should appear in the animation.
SR Product 360° View will now show all these files in the Product 360 Degree View section. You can change the order of the images by using drag and drop.
When you’re happy with these images, either click on the ‘Update’ or ‘Publish’ button to make the 360 degree animation live.
Bonus: Want to take your WooCommerce store to the next level? Try using FunnelKit funnel builder and automation platform that lets you add dynamic upsells, cross-sells, order bumps, and full sales funnel in WooCommerce.
If you liked this article, then please subscribe to our YouTube Channel for WordPress video tutorials. You can also find us on Twitter and Facebook.
Note: YouTube Feed also has a free version. However, it does not support the Live Stream feature.
Once the plugin has been activated, you need to visit the Youtube Feed » Settings page from the admin sidebar. Here, you need to enter the license key and click on the ‘Activate’ button.
You can get the license key from your Accounts page on the Smash Balloon website.
Next, you need to visit the YouTube Feeds » All Feeds page from the WordPress admin sidebar.
From here, simply click on the ‘Add New’ button at the top.
This will open up the ‘Select Feed Type’ prompt.
Now, you need to choose the ‘Live Streams’ option and then click on the ‘Next’ button to continue.
On the next step, you need to connect YouTube Feed Pro with your Youtube account. You will be asked to provide your YouTube API key.
If you already have an API key, simply copy and paste it into the ‘Enter API Key’ box and click on the ‘Add’ button.
Create a YouTube API Key
If you don’t have an API key yet, then you need to go to the Google Cloud Console and sign in using your Google account.
Once you are logged in, click on the ‘Select a project’ button at the top.
This will open a popup window that will display all the projects that you have created.
Next, simply click on the ‘New Project’ button at the top.
This will take you to the ‘New Project’ page, where you can start by typing in a name for your project. This can be anything that will help you easily identify it.
Next, you must also select an ‘Organization’ and its location from the dropdown menu. You can select ‘No Organization’ and click the ‘Create’ button to continue.
Once the project has been created, you will be taken to the project dashboard.
From here, you need to click on the ‘+ Enable APIs And Services’ button in the top menu.
This will take you to the API Library page. It shows the different Google services that you can create APIs for and use in your projects.
Now go ahead and search for ‘YouTube Data API v3’ in the search box.
Once the ‘YouTube Data API v3’ result shows up, just click on it.
This will take you to a new page where you need to click on the ‘Enable’ button to activate the YouTube API key.
You’ll now be taken to the ‘API/Service Details’ page.
From here, simply click on the ‘Create Credentials’ button at the top.
Next, you’ll be directed to a new page where you must check the box next to the ‘Public Data’ option.
After that, click on the ‘Next’ button to create your API.
Your API Key will now be created and displayed on the page.
Simply copy the API key and click on the ‘Done’ button.
Next, it is time to head back to the WordPress dashboard.
Go ahead and paste the API key into the API Key Required box. Then, click on the ‘Add’ button to continue.
Add the YouTube Live Stream to Your WordPress Website
Once you’ve added your YouTube API key, you will be redirected to the ‘Select Feed Type’ page.
From here, you need to click on the ‘Live Stream’ option again, followed by the ‘Next’ button.
This will open the ‘Add Channel ID For Live Stream’ page.
Now, you need to visit the YouTube channel that contains your live-stream videos.
From here, go ahead and copy the text that comes after ‘/channel/’ or ‘/user/’ in the URL at the top.
Next, switch back to the WordPress dashboard and paste the code into the ‘Add Channel ID for Livestream’ box.
After that, click on the ‘Connect’ button to connect your YouTube channel with WordPress.
Once the channel is connected, you need to click on the ‘Next’ button to continue.
Customize Your YouTube Feed
Now that your YouTube live stream feed has been created, you can customize it. Smash Balloon’s YouTube Feed Pro offers many different display options.
First, you will need to choose a template on the ‘Start with a template’ page. You can choose from Default, Carousel, Cards, List, Gallery, and Grid layouts.
Once you have made your choice, simply click on the ‘Next’ button.
After you have chosen a template, an editing screen will open up that displays a preview of your YouTube feed to the right and customization settings in the left menu column.
Here, you can start by expanding the ‘Feed Layout’ panel.
On this screen, you can switch between the layouts.
You may also be able to configure additional settings depending on your chosen layout.
Next, you need to click on the ‘Color Scheme’ panel.
By default, YouTube Feed Pro uses the same color scheme as your WordPress theme. However, you can also use a ‘Light’ or ‘Dark’ color scheme for the video feed.
You can also design your own color scheme by clicking on the ‘Custom’ option and then using controls to change the background, text, and link colors.
To add a header to your YouTube feed, you need to visit the ‘Header’ panel. From here, simply toggle the ‘Enable’ switch to activate the header.
You can also use the controls to switch between standard and text header styles. Choosing the ‘Text’ option will allow you to change the text size and color.
You can also customize the appearance of the video player by going to the ‘Videos’ panel.
Here, you will see a list of options.
To customize the video layout and individual properties, you need to visit the ‘Video Style’ settings panel.
Here, you can select the video layout, background color, and border.
After that, open the ‘Edit Individual Elements’ panel. Here, simply check the boxes next to the elements you want to display along with the YouTube live stream videos.
You can show or hide the Play icon, video title, live stream countdown, descriptions, and more.
Next, you need to head over to the ‘Hover State’ setting. Here, you can choose the individual elements that will display when the user hovers their mouse over the YouTube video.
You can pick many elements, including video title, description, date, views, and more.
After that, you need to visit the ‘Video Player Experience’ panel.
From here, you can change the video player’s aspect ratio. You can also choose whether the video will start playing automatically or wait until the visitor clicks the play button.
After customizing the individual video elements, switch to the ‘Load More Button’ panel.
Here, under the ‘Load More Button’ setting, you can switch the toggle to ‘Enable.’ This will display more video suggestions after the live stream.
You can also choose the background color, hover state, and text from the settings in the left panel.
After that, switch to the ‘Subscribe Button’ panel and toggle the switch to ‘Enable’ if you want to activate the YouTube subscribe button.
You can also change the button’s color, text, and hover state in the settings.
Once you have customized the YouTube live feed, you can preview how it will look on desktop computers, tablets, and smartphones. Simply click on the different buttons in the upper-right corner to preview the feed on different devices.
Finally, don’t forget to click the ‘Save’ button at the top to save your changes.
Embed the YouTube Live Stream on a WordPress Page
The next step is to embed your YouTube live feed on a WordPress page. To do this, you must first click on the ‘Embed’ button at the top.
This will open up the ‘Embed Feed’ prompt. Here, click on the ‘Add to a Page’ button to continue.
The popup will now show a list of all the WordPress pages on your website.
Simply choose the page where you want to embed the YouTube live stream and click the ‘Add’ button.
The page you selected will now open up in the block editor.
From here, you need to click the ‘Add Block’ (+) button in the top left corner and search for the ‘Feeds for YouTube’ block.
Once you have found it, add the block to your page by clicking on it.
Don’t forget to click on the ‘Update’ or ‘Publish’ button to save your changes or make them live.
This is how the YouTube live feed looks on our demo website.
Add a YouTube Live Feed as a Widget
You can also add a YouTube live feed to the WordPress sidebar as a widget.
First, you will need to visit the Appearance » Widgets page from the admin sidebar.
From here, click on the ‘Add Block’ (+) button in the top left corner of the screen and locate the ‘Feeds for YouTube’ block.
Next, click on the block to add it to the widget area.
Don’t forget to click on the ‘Update’ button to save your changes.
This is how the YouTube live feed looks in the sidebar on our demo website.
First, go to the Appearance » Editor page from the admin sidebar to launch the site editor.
From here, click on the ‘Add Block (+)’ button at the top and look for the ‘Feeds for YouTube’ block.
Next, you can drag and drop the block to wherever you want to display the YouTube feed on your page.
Once you are done, don’t forget to click on the ‘Save’ button to apply the changes.
Here is a preview of the live streams on our demo website.
We hope this article helped you learn how to embed YouTube live streams in WordPress. You may also want to read our ultimate WordPress SEO guide or check out our top picks for the best social media plugins to grow your site.
If you liked this article, then please subscribe to our YouTube Channel for WordPress video tutorials. You can also find us on Twitter and Facebook.
Are you looking for a way to display featured comments on your WordPress website and hide other comments?
Featuring comments that are encouraging and exciting at the top of the WordPress comments section can increase user engagement. You can also easily discourage offensive or irrelevant comments by burying them.
In this article, we will show you how to easily set up featured comments in WordPress.
Why Feature/Bury Comments in WordPress?
WordPress comments are an excellent way to increase user engagement on your website.
However, fostering a large community can be a challenge as your WordPress blog grows.
You want to make sure that you are rewarding users who are adding the most value to the discussion while at the same time politely discouraging other users from leaving unhelpful comments.
For instance, a user may have posted a self-promotional comment that contains a link to their blog. Or multiple users might have posted comments that do not add value to the discussion.
To improve comments quality on your website, you can feature the comments that add value to the topic at the top of the discussion and bury irrelevant comments at the bottom.
You can also add an upvote/downvote feature to your comments section, similar to popular social media platforms like YouTube, to increase user engagement.
That being said, let’s see how you can easily feature/bury comments in WordPress.
Method 1: Feature/Bury Comments Using the Thrive Comments Plugin (Recommended)
In this method, we will show how to bury/feature comments using the Thrive Comments plugin.
It is the best WordPress comments plugin on the market that helps you build an engaged and interactive community on your WordPress website. It also enables you to feature/bury comments in your discussion section.
To get started, you will need to visit the Thrive Comments website and sign up for an account. Then, head to your member dashboard.
From here, go ahead and click on the ‘Download and install the Thrive Product Manager plugin’ link.
Next, you have to visit your WordPress website dashboard to install and activate the Thrive Product Manager plugin. For more instructions, please see our beginner’s guide on how to install a WordPress plugin.
Upon activation, head over to the Product Manager tab from the WordPress admin dashboard. From here, simply click on the ‘Log into my account’ button.
After entering your login credentials, you will be able to see your Thrive Product Manager Dashboard.
Now, you can choose which products you want to install and license on your site. Simply click on the ‘Thrive Comments’ plugin and then click the ‘Install selected products’ button.
When the Thrive Comments plugin is ready to use, you will see a success message displayed on the screen.
To feature/bury comments, head over to the Comments » Thrive Comments Moderation page from the WordPress admin sidebar.
Once you are there, you will see a number of options under each comment. Simply hover your mouse over the ‘More’ option to open a dropdown menu.
From here, you can select the ‘Feature’ option to feature a comment at the top of your feed.
By using the ‘Feature’ setting for some comments, the irrelevant comments will automatically get buried at the bottom of the discussion section.
You can also approve, edit, or trash a comment as needed.
Now, visit your WordPress website to see the featured comments at the top of the discussion section.
You will also notice that all the featured comments have a badge in the top left corner to signify their importance.
You can also add an upvote/downvote down feature to your comments sections using Thrive Comments. This way, users will be able to vote on comments to push them up or down the discussion section.
To do this, you will have to visit the Thrive Dashboard » Thrive Comments page from the WordPress admin sidebar.
Then, click on the ‘Voting and Badges’ tab to expand it. Next, you have to simply choose the ‘Up and down’ option under the ‘Comment Voting’ section.
After that, you can also toggle the ‘Users must be registered and logged in to vote’ switch to ‘On’ if you only want logged-in users to be able to vote on comments.
Once your changes are saved automatically, visit your website to check out the upvote/downvote system in action.
This is what it looked like on our demo website.
Method 2: Feature/Bury Comments Using the Comments-wpDiscuz Plugin (Free)
If you are looking for a free solution, then this method is for you.
Note: With Comments-wpDiscuz, you can only feature or bury comments in your comments section using the upvote/downvote system. This means that users can upvote a comment that they feel adds to the discussion and downvote offensive or irrelevant comments.
Upon activation, visit the wpDiscuz » Settings page from the WordPress admin sidebar.
From here, go ahead and click on the ‘Comment Thread Features’ option.
This will direct you to a new screen, where you have to scroll down to the ‘Comment Voting Buttons’ section. Once you are there, simply toggle the switch next to the ‘Show Voting Buttons’ option.
After that, you can also choose the icons that will represent the upvote/downvote feature for your comments using the ‘Voting Button Icon’ option.
Next, simply toggle the ‘Enable down vote button (dislike)’ switch.
Finally, click on the ‘Save Changes’ button to store your settings.
Now, you can visit your WordPress website to check out the upvote/downvote system in action.
Here, you will see a dropdown menu at the top of the comments section. Users can now select the ‘Most Voted’ option from the dropdown menu to see the most-reacted comments on your website.
We hope this article helped you learn how to feature/bury comments in WordPress. You may also want to see our beginner’s guide on how to moderate comments in WordPress and our top picks for the best WordPress plugins to help grow your website.
If you liked this article, then please subscribe to our YouTube Channel for WordPress video tutorials. You can also find us on Twitter and Facebook.