Now, let’s look at our 30 picks of the best WordPress magazine themes. We’ve done plenty of research to identify the best options based on pricing, reviews, reliability, and features. We’ll include free, freemium, and premium options to accommodate every budget. 1. ColorMag ColorMag Stats: With more than 80,000 active installations, ColorMag is undoubtedly one […]
After a recent in-depth performance analysis earlier this year showed that translations can have an impact on server response times, WordPress contributors are proposing half a dozen technical solutions for consideration to improve performance for the ~56% of WordPress sites that use translations.
“Initial benchmarks showed that the median loading time for a localized site can be up to 50% slower than for non-localized sites, depending on which themes and plugins are being used,” Google-sponsored WordPress core committer Pascal Birchler said.
Based on recent discussions on GitHub, the Performance team has whittled it down to an updated list of six possible top contenders for speeding up sites with translations, including the advantages and disadvantages of each:
Solution A: Use different file format
Solution B: Native gettext extension
Solution C: Cache translations
Solution D: Lazily evaluated translation calls
Solution E: Optimize/Rewrite existing MO parser
Solution F: Splitting up translation files
Localized WordPress sites currently download .po and .mo files that contain the translations, but the first suggested solution proposes storing translations in .php files and using the .mo file as a fallback, as Birchler proposes that PHP loading and executing another PHP file would be a faster approach. He has a proof of concept on GitHub at at swissspidy/wp-php-translation-files and swissspidy/ginger-mo.
“When looking at all these factors, it appears that a revamped translations parser (solution E) could bring the most significant improvements to all localized WordPress sites,” Birchler said. “Especially when combined with a new PHP translation file format (solution A), which Ginger MO supports, the i18n overhead becomes negligible. Of course the same risks associated with introducing a new format apply.
“On top of that, a revamped i18n library like Ginger MO could also be combined with other solutions such as caching or dynamic MO loading to potentially gain further improvements. However, those routes have yet to be explored.”
The Performance team plans to test these ideas further on a wider scale through its Performance Lab feature project after gathering feedback from the broader community. August 6, 2023, is the deadline for leaving feedback on the proposal, which includes benchmarks and more details from the analysis.
WordPress has become one of the world’s most popular content management systems (CMS), with over 44% of websites built on it. As with any online platform, security should be at the top of your list of concerns. In this post, we’ll examine WordPress security concerns and provide tips on how to keep your WordPress website safe and secure.
Let’s dive in.
Is WordPress Secure?
For the most part, yes. WordPress developers work hard to maintain the security of their platform through patches and updates occurring regularly. However, since WordPress is built on an open-source framework, hackers can analyze how it’s constructed and frequently develop new ways to gain control of WordPress websites. Because of this, WordPress security is crucial. Knowing the risks associated with using WordPress is important to understand better how to secure your website.
WordPress Security Concerns
When operating a WordPress website, there are several potential risks to be aware of. One of the biggest concerns is hackers. Because WordPress is so popular, it attracts the attention of nefarious actors who attempt to exploit vulnerabilities like outdated plugins or core files to gain unauthorized access to your site. They can employ methods such as backdoors, launching brute force attacks, pharma attacks, denial of service (DoS) attacks, or cross-site scripting (XSS).
If left unresolved, there can be serious consequences, such as malware (malicious code designed to steal your site’s visitor information), forwarding your website to a completely different one, adding content you’re unaware of, Google warnings that can hurt your position in the SERPs, or worse, being unable to log in to your website.
How to Secure Your WordPress Website
The following section will explore best practices to enhance WordPress security to protect your website against potential threats.
The first step to take is partnering with a good WordPress hosting company. With so many choices available, it can be difficult to determine how to choose the right host. If you’re a beginner, it’s probably best to opt for a good managed hosting provider, such as SiteGround, that will provide all security updates for WordPress, while also maintaining the server it’s installed on. For those who are more tech-savvy, a cloud hosting provider, such as Cloudways, is an excellent choice.
Either option will give you all the tools you need to ensure your website is safe and secure, including:
Another easy thing you can do to boost your WordPress security is to lock down your login credentials. This can be done in several ways, including using a plugin to change the login URL from /wp-admin to something of your choosing. You can also add two-factor authentication (2FA) to your login and limit login attempts, which will help repel bots.
Another very useful thing you can do is to install a good security plugin, such as iThemes Security. It will allow you to add 2FA, limit login attempts, schedule backups, and hide your WordPress login.
In addition to a WordPress security plugin, consider installing a good backup plugin, like UpdraftPlus, if your host doesn’t offer backups. A backup plugin protects you from losing your site’s files, helping you to avoid rebuilding WordPress from scratch. You can easily restore your site with little effort if something goes wrong. Finally, incorporating an activity log plugin like WP Activity Log will allow you to pinpoint what went wrong and when.
Keep PHP Updated
WordPress requires three things to work correctly: PHP, MySQL, and HTTPS support. PHP, or hypertext preprocessor, is a popular open-source scripting language used in web development and is the backbone of WP. Like WordPress, being open source leaves it open for malicious actors looking to take advantage. To avoid these potential issues, it’s best to keep PHP updated. Not only does it help with WordPress security, but it also keeps your site running optimally.
Choose Strong Passwords
One of the most important aspects of WordPress security is choosing strong passwords for login. Weak or easily guessable passwords leave your site vulnerable to unauthorized access and expose your site to botnets. Botnets are a collection of computers that have been infected by malware and come under the control of a hacker. They are the leading cause of DDoS attacks on the internet, but you can prevent your site from falling victim to them by taking the correct precautions.
For example, you can protect your site by ensuring all users adhere to a password policy. One great way to do this is by installing a plugin like Password Policy Maker.
WordPress Security: Keep Software Updated
Another simple step in WordPress security is keeping your WordPress core, plugins, and themes updated. Leaving software out of date can have negative consequences on your website, including security breaches, the WordPress white screen of death, or any number of common errors.
You can either keep up with updates on your own or enable automatic updates. What is right for you depends on several factors, including time, expertise, and the type of software your WordPress install runs. Regardless of whether you handle updates or choose to update automatically, you should always make a backup before performing any updates.
Install SSL Certificate
If you partner with a good hosting provider, one of the benefits that come with it is a free SSL certificate. However, there may be situations where you’ll need to install one yourself. Most providers, like SiteGround, offer a free SSL that installs in a few minutes. As you read this, you might ask , “Why do I need an SSL certificate?”. Let’s explain.
image courtesy of Valery Brozhinsky | Shutterstock.com
SSL, or secure socket layer, expands the hypertext transfer protocol (HTTP) to hypertext transfer protocol secure (HTTPS), adding encryption and an extra layer of security. For example, a consumer who makes a purchase over HTTP risks their credit card information being exploited. On the other hand, their information would be protected if they had made the same purchase over HTTPS. Your site and its visitors are exposed and vulnerable without that secure connection. That’s why installing an SSL certificate on any new website is crucial.
Conduct a Security Audit
Once you’ve taken steps to secure your site, it’s important to conduct a WordPress security audit occasionally. Just as technology changes daily, so does a hacker’s arsenal of tools. Malware and other tactics are developed regularly, so securing your WordPress website isn’t a one-and-done deal. Schedule regular security checks, and look for signs that your site may be in trouble. If you notice your site loading slowly, your traffic drops, you discover new links you didn’t add, or you experience excessive login attempts, it may be time to run a security scan to ensure your site remains safe and secure.
Advanced WordPress Security Techniques
In addition to the steps listed above, there are a few more advanced techniques to incorporate into your site to enhance WordPress security.
Harden the wp-config.php File
One common point of entry for hackers is your WordPress website’s wp-config.php file. It houses information about your database, including the name, host, username, and password. Leaving this important file open can prove detrimental, so hiding it is always a good idea.
Move Your wp-config.php File
To move wp-config, you can drag it into your site’s root folder (public HTML), and WordPress will look for it whenever the site is pinged. However, if your site’s file structure includes a htaccess file, you can further protect it by adding a directive to deny access to it by using the following code:
<FilesMatch "wp-config/.php">
Require all denied
</FilesMatch">
Note: Before doing this, ensure your hosting provider hasn’t already taken steps to move your wp-config file for you. Some hosts, such as Kinsta, do this automatically to keep your site safe.
Change WordPress Salt Keys
Another way to protect your wp-config file is by altering your site’s salt keys. These keys add an extra layer of protection while saving passwords to your database, signing in to cookies, and other important WordPress security aspects. If hackers can obtain your salt keys, they can access your site’s database and files, including stored credit card information, passwords, and other important information. Therefore, it’s recommended to change them periodically.
Change File Permissions
By default, files in your root directory are set to 644, which means they are both readable and writable, leaving them vulnerable to bad actors. According to WordPress, these should not be left at default permissions. Rather, they should be changed to 440 or 400 to prevent others on the same server from reading them. However, it’s important to check with your hosting provider before making any changes to your file permissions. They may have a unique system in place, so changing permissions could cause disruption to your site.
Disable XML-RPC
XML-RPC is a WordPress API that allows you to connect your website to third-party apps and tools. In recent years, it has been exploited by brute force attacks, allowing access to WordPress sites. It is primarily used for making Zapier connections or accessing your site remotely through an app. You should disable XML-RPC on your server if you aren’t using any of these connections.
There are several ways to do this, including disabling it through htaccess, using a code snippet, or with a plugin. The most advanced method, htaccess, can be tricky for beginners, so the most recommended approach is to use a code snippet.
For the htaccess method, use an FTP client to access your site’s files, then add the following code to your htaccess file:
# Block WordPress xmlrpc.php requests
<Files xmlrpc.php>
order deny, allow
 deny from all
allow from 123.123.123.123
</Files>
Note: Be sure to change the IP 123.123.123.123 with your own.
Alternatively, you can use the AIOSEO plugin’s tools htaccess tab to insert the code:
If you’d rather disable XML-PRC using a code snippet, you can easily accomplish it using the WPCode plugin. It has a built-in snippet that you can use to disable the API.
Hide WordPress Version
This is an often overlooked step when it comes to WordPress security, but an important one. By default, WordPress leaves a footprint in your site’s code that shows which version is installed. This might seem harmless, but by accessing the website’s source code, hackers can determine what version of WordPress you’re running. If it’s outdated, they can use that info to hack into your site by injecting malware or malicious scripts.
So, as an extra WordPress security measure, hide your site’s WordPress version to make it harder for hackers to take control of your site. There are good ways to do this. You can either implement a code snippet plugin that will remove the line in the source code or create a child theme and place it into your functions.php file.
function elegantthemes_remove_version() {
return '';
}
add_filter('the_generator', 'elegantthemes_remove_version');
Alternatively, if you’d like to remove the WP version in the meta tag, in database query strings, and in RSS feeds, use this code:
/* Hide WP version strings from scripts and styles
* @return {string} $src
* @filter script_loader_src
* @filter style_loader_src
*/
function elegantthemes_remove_wp_version_strings( $src ) {
global $wp_version;
parse_str(parse_url($src, PHP_URL_QUERY), $query);
if ( !empty($query['ver']) && $query['ver'] === $wp_version ) {
$src = remove_query_arg('ver', $src);
}
return $src;
}
add_filter( 'script_loader_src', 'elegantthemes_remove_wp_version_strings' );
add_filter( 'style_loader_src', 'elegantthemes_remove_wp_version_strings' );

/* Hide WP version strings from generator meta tag */
function wordpress_remove_version() {
return '';
}
add_filter('the_generator', 'elegantthemes_remove_version');
What to Do if Your WordPress Website is Hacked
Even if you do everything right, you may find yourself in a situation where your website has been hacked. Thankfully, there are steps you can take, including putting your site into recovery mode, restoring from your most recent backup, or resetting your passwords. If all else fails, your hosting provider may be able to help.
Final Thoughts on WordPress Security
By taking the necessary steps to boost your WordPress security, you can ensure your site continues to operate normally while being safe for your visitors. While WordPress offers tremendous benefits and ease of use, it’s important to understand its shortcomings. Thankfully, there are a number of WordPress security plugins like iThemes that can help keep things on track.
Looking for more information on WordPress? Check out some of our in-depth articles that will transform you into a WordPress expert in no time:
Keeping your WordPress website safe and secure should be at the top of your mind. After you’ve added your favorite WordPress plugins and chosen your beautiful theme, your next step should be protecting the investment of time, resources, and money you’ve put into your site. This is where maintenance of your WordPress website comes in. There are a few things you should do to keep up with your WordPress website, and one of them is keeping a free online and offline back. In this post, we’ll learn how to back up your WordPress website in three ways, discuss backup storage solutions, best practices, and what to do if you need to use your backup after a website crash.
How to Backup Your WordPress Website Using a Plugin
There are many backup plugins that you can use to take a backup of your website. A WordPress backup plugin is a quick and straightforward way to create a website backup. For our guide, we’ll walk through using UpdraftPlus, a popular WordPress backup plugin, to create your website backup.
Install and Setup Plugin
From your WordPress dashboard, from the left-hand menu, hover over Plugins. Next, click Add New.
In the search bar in the top right, type Updraft. Click Install Now; the button will turn blue after installing the plugin. Click the blue button that now says Activate next to the first option.
Configure Settings
Once UpdraftPlus is installed, you can access the plugin by hovering over Settings from the left-hand menu. Then, click on the UpdraftPlus Settings menu option. This will show you the plugin’s dashboard, notifications regarding your backups, and your existing and scheduled backups.
Create a New Backup
Click the large, blue backup Now button to create your first backup.
Once you’ve done this, a popup will appear. You’ll be presented with four options:
You can include your database or your files in your backup. Both options have an (…) following them, allowing you to get specific about the database tables and folders you’d like to include or exclude from your backup. Once you have set up cloud storage for your plugin, you’ll have the option to. We’ll come back to this later. Lastly, you have the choice of deciding whether this download will be deleted automatically or not. Once you have made your selections, click the Backup Now button.
Once your backup has been completed successfully, you’ll notice it is added under the Existing backups table. You can select specific aspects of your backup to download, restore said download, delete it, or view the log processed as it backed up your website.
Schedule Automatic Backups
Now, let’s look at setting up scheduled, automatic backups. Click on the Settings tab from the UpdraftPlus dashboard.
The first two options on your screen allow you to set up automatic schedules for your backup process. You can set up a schedule for the files and database of your website in a frequency from a few hours to monthly. Additionally, you can decide how many backups you’d like to keep on your server.
From the same settings screen, we can set up the storage solution we’ll be using for our website. UpdraftPlus has many options for storing your backups on the cloud. Some of the options available include:
Dropbox
Google Drive
Email and
SFTP
With the free version of the UpdraftPlus, you can back up to one cloud or online service. However, the plugin’s premium version can back up to multiple places. For our guide, let’s back up to Google Drive. From the list of cloud services, select the Google Drive icon—next, login to your Google Drive account by clicking the Sign in with Google button.
Next, sign into your Google account.
After, grant UpdraftPlus access to your Google Drive account, then click Allow.
Once this is done, you’ll be presented with this final screen. Click on the Complete Setup button. This will take you back to your WordPress installation.
Once you have returned to your WordPress install, you’ll see a notification that your Google Drive has been successfully connected.
Once your account is connected, click on the Settings tab again. Then, scroll down to the cloud account you set up and click the Save Changes button.
When you make a backup, you can send the backup to your Google Drive account.
Storing Your Backup Offline
It’s always a good idea to download backups onto your computer, a USB, or any cloud storage platform that will allow you to store your website offline. To do this, click any of the folders you’d like to download to the media of your choice from the backup you’ve just made.
For a full offline website backup, download the database, plugins, themes, uploads, and other folders. Now that we know how to make a backup with a plugin online, offline, and to the cloud, let’s see how we can do this with our hosting provider.
How to Backup Your WordPress Website Using Your Hosting Provider
Backing up your website with a plugin is a simple and easy way to back up your WordPress website if you can access WordPress’ user interface. However, things can get a bit sticky for you if you don’t have access to the dashboard. This is why knowing how to back up your WordPress using your hosting provider is essential.
Visit Siteground and click the Login link in the top right-hand corner.
You’ll then need to enter your username and password.
Once in your account, you’ll be presented with your Siteground home screen, which lists all your products. Click on the Manage button under the Websites title.
Once here, you’ll see a table listing all your websites within your Siteground account. Click on the Site Tools button next to the website that you’d like to back up.
Create a New Backup
On your website, you’ll see a variety of tools and options that you can use to manage your site. To start the backup process, click on the Tool Finder, or press CTRL + K. Then, search backup in the search box that appears. Finally, click Backups from the dropdown.
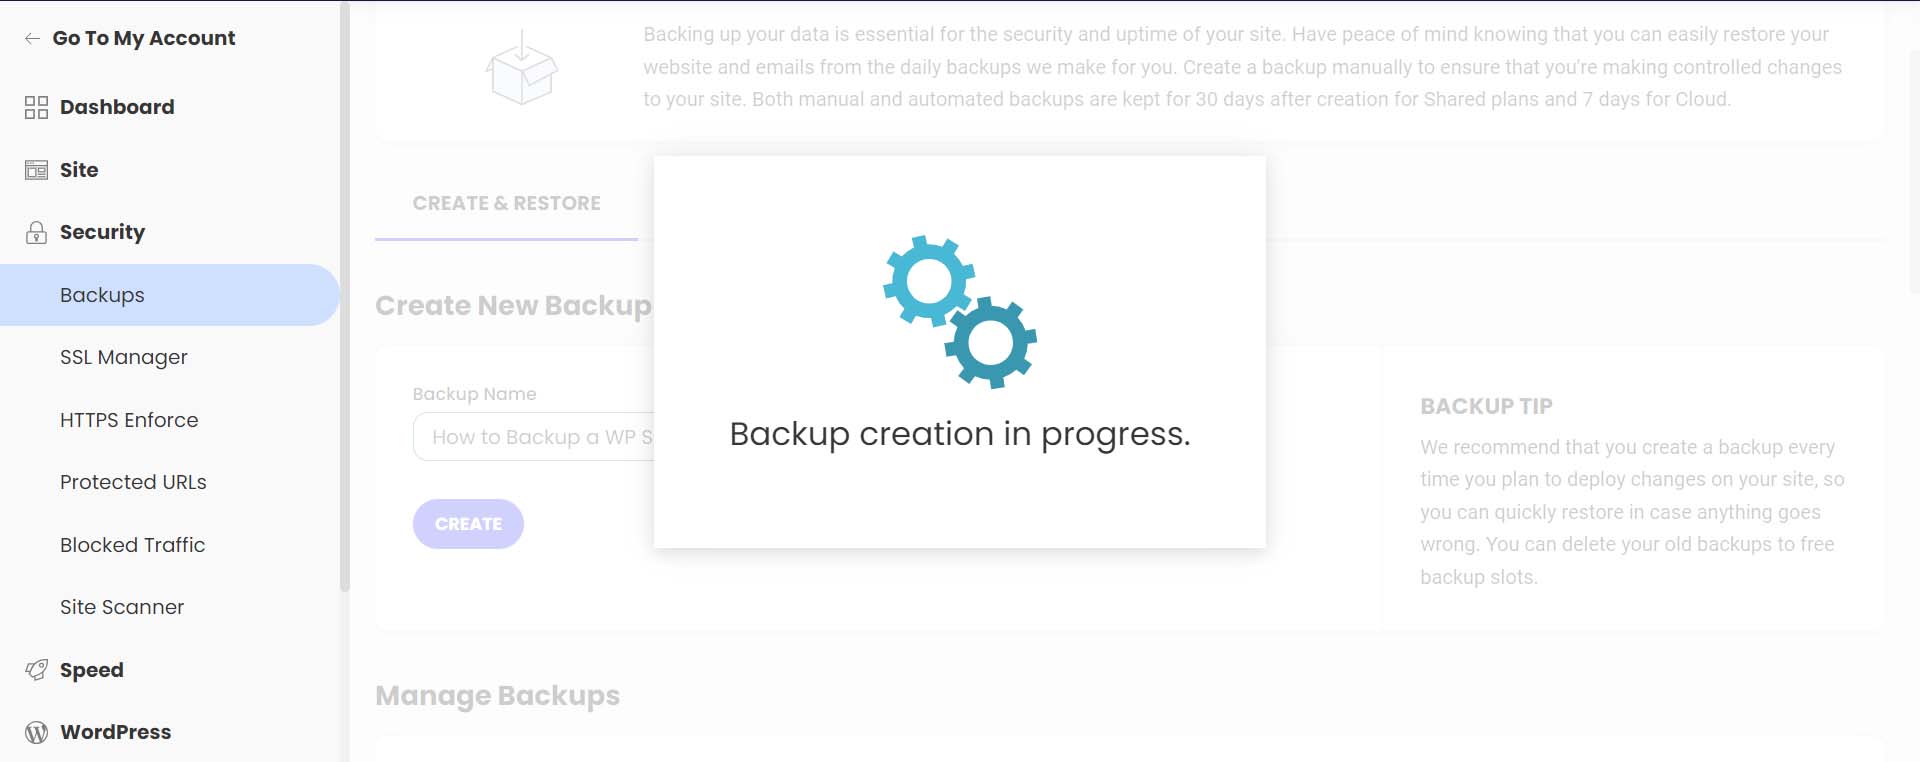
Once on the Backups page, give your backup a name you’ll remember. Then, click on the blue Create button.
You’ll be presented with this screen as your backup is being created.
You’ll get a confirmation message once your backup has finished being created.
Notice your backup now shows up in your list of backups, alongside your regular, automated backups, with your note attached.
Siteground makes it easy to restore your website in the case of file corruption, hacking, and more. To do this, select the meatball menu next to the backup you’d like to restore. Then, select which type of restoration you’d like to process.
This easy one-click method of backing up and restoring your WordPress website is an excellent benefit of using Siteground and other managed WordPress web hosts.
Next, let’s look at how to do a manual backup of your database and WordPress files.
How to Backup Your WordPress Website Manually
To manually back up your WordPress website, the easiest method is to download a backup of your site files using your hosting provider. An overwhelming majority of modern web hosts provide you with an online file manager and portal that you can use to manage your website’s files directly. The software that many hosts use is cPanel. With cPanel, you can access your databases, email accounts, and a visual file manager. For more information about cPanel, check out our cPanel guide. However, more commonly, your hosting provider may have its own propitiatory interface they provide to their clients for file management and backups.
If you don’t have access to your files on your host or through cPanel, you can back up your site via FTP. Filezilla is a popular FTP client to manage your WordPress site via FTP. You can use terminal clients like Putty and WinSCP to connect to your server and back up your site as a last resort.
This time, however, we’ll be using a file manager within our web host to back up our files and phpMyAdmin to back up our database. We’ll still be using our Siteground account for this tutorial section. However, you can still follow similar steps irrespective of your web host.
Backing Up Your Site Files
While still in your Siteground account, from the left-hand menu, click site. Then, click File Manager.
Once in the file manager, you’ll notice a folder called public_html. This is where all your WordPress files live. Right-click on this folder. Then, click on the Archive link.
Next, name your archive. Then, click Confirm to start archiving (or zipping) your WordPress files.
Once your archive has been created, you’ll be presented with this success message.
You’ll now notice that your archive is a new file within your file manager. Now, right-click on your archive. Then, click Download to safely save your file backup offline and on your hard drive or media.
Backing Up Your WordPress Database with phpMyAdmin
Now that we’ve manually backed up our WordPress files, we can move on to backing up our database. Again, your web host should offer a simple way to back up your database within its site tools or using cPanel. However, for direct access and more control, you can use phpMyAdmin for pretty much any WordPress website.
To access phpMyAdmin in Siteground, go to the Site section within the left menu. Next, we click on the MySQL link. Then, we click on the phpMyAdmin link from the right side of the screen. Finally, we scroll down slightly and click the blue Access phpMyAdmin button. This will open up the free PHP tool in a separate window.
Once you’re in phpMyAdmin, you’ll see a list of your website’s databases on the left-hand side.
Click on the database that you’d like to download. It should coincide with the database for the website files that we backed up earlier. If you’re unsure of the database you should select, you can find your database name within the wp-config.php file of your WordPress file structure within the file manager. Then, click the Export button from the top menu.
You have two options when it comes to exporting your database. To keep it simple, select the Quick Export method. Then, select Go. If you’d like to add additional outputs, select specific tables to backup and more, click the Custom button, and make your choice before selecting Go.
Save Your Database File
Finally, your. SQL file will be generated. Depending on your database size, this could take a few seconds to a few minutes. An alert box will pop up, asking you to save your database file. It is recommended to save it in the same place you saved your WordPress files zipped folder.
That’s it! Now you have an external backup of all of your site files and your database.
Where to Store Your WordPress Backups
As mentioned throughout this tutorial, there are many places where you can store your WordPress backups. The first and easiest place is directly within WordPress. This is typically the place where backup plugins save your backups. However, this can cause performance issues in the future as you make more backups and your website grows larger. We suggest storing backups outside of your WordPress site in multiple places for safekeeping. You can store them on your computer, on an external hard drive, or in the cloud using a third-party host or platform like Google Drive or Dropbox.
It should be mentioned that having an offline backup of your website is imperative. While your web host and cloud storage are great places to store your backup files, any online platform can go down or corrupt your backup files. Having an external copy of your site is the only way to make sure you have a safe copy.
How Often Should You Backup Your WordPress Website
Most web hosts today offer complimentary, daily backups of your website. However, depending on the complexity of your website and the processes occurring on your site, you may need to change this schedule. On average, having some form of automated, daily backup is good practice. This can be done either through your web host or a plugin like UpdraftPlus or BackupBuddy, to name a few.
However, if you’re in the eCommerce space, you would surely want to consider backing up your website more frequently, depending on your server load, storage limits, and the number of orders on your website. It is not uncommon for an eCommerce website to do hourly or even backups by the minute! In addition to daily backups, consider making monthly offline backups for your website for peace of mind.
What to Do If Your Site Crashes
Having your website crash is a devasting feeling. Your first port of call should be your web host. More often than not, they have daily backups of your website from which you can quickly restore it. Secondly, check your online cloud and your backup storage folder on your website to see if there is a backup there that you can restore. You’ll need to copy over your database and file structure if you manually restore your website. In the rare event that you can gain access to your WordPress dashboard during a site crash, you can try restoring one of your backups from your backup plugin if it has that feature.
Tips and Best Practices for Backing Up Your WordPress Website
Here are a few things to remember when backing up your WordPress website.
Consider Using a Backup Plugin: A backup plugin is the easiest way to manage and create backups in WordPress. Check out these best backup plugins for WordPress.
Test Your Backup: It’s important to test your back to ensure that in a time of crisis, you’ll have a backup that actually works. You can do this by restoring a backup on a local install or staging site. Additionally, this tests to see any bugs in your files or steps you may need to include or optimize as you create your backups.
Backup Both Your WordPress Files and Database:Â Some backup plugins allow you to backup only the database instead of the entire site. However, it’s always a good idea to create a full backup of your website regularly, especially after making changes to your site. Sometimes changes in your file system could cause issues with your database backup if your file structure has changed.
Keep an External Backup: Cloud backups rely on platforms that can go down or fail. If the worst-case scenario occurs, an offline backup will save you. Taking an external backup of your complete site once a month can be a good practice to adopt.
Use Automatic Backups When Possible:Â Automatic backups free headspace for you to maintain your website. Choose a backup plugin with this, or ensure this feature is included in your hosting plan.
Don’t Store Your Online Backups Within WordPress:Â As a backup is a complete snapshot of your website, storing them within your WordPress website can not only eat up your storage space but cause issues when it comes to performance. Aim to store your online backups outside your WordPress installation and, even better, on the cloud through services like Google Drive or Dropbox.
Backup Before and After Major Site Changes: Make a full site backup before adding a new design or functionality to your website. You never know if a new plugin that you add or a tweak to a theme could take your website offline.
Keep Your Backups Secure:.Whether storing them online or locally, make sure your backups are secure and safe from hackers. You can store them in password-protected folders and media devices like USBs, encrypt them, and more.
Label Your Backups Something You’ll Remember:Â Most backups have an auto-generated name which can be hard to remember when you check back on it several weeks later. Give your backup a name that’s easy to identify. For example, “Before Menu Edit” lets you know this backup was before you changed your menu.
Conclusion
Learning how to make a backup of your WordPress site is an essential step in the website building process. A backup will save your website when it’s been hacked, and it’s good practice to be able to restore your site if anything goes wrong. It’s also good insurance overall. Additionally, backups are an essential website maintenance task that should be carried out on your website frequently. With WordPress, there are a few ways to back up your website. If you’d prefer to use a plugin for your backups, our list of the best WordPress backup plugins is an excellent place to start.
Alternatively, the restoration process of a website is the other side of maintaining a website. A good migration plugin can make it easy to move your website to a new location. In closing, learning how to make a backup of your WordPress website is a necessary skill to gain as you build your next website project.
Normally, there are several steps to set up WordPress – configure a WordPress hosting account, conduct a WordPress install, set up an admin account, then customize the WordPress site. While going through these steps can take time, the WordPress core team initiated WordPress Playground to let people experience the CMS without hassle. In this article, […]
WordPress 6.3 RC2 has been released and is ready for community testing. Since RC1 landed a week ago, 15 changes have come in from the Editor and Trac, including bug fixes for footnotes, internationalization fixes, a missing command for opening the distraction free in the Site Editor, and a few other issues.Â
This release also brings in work completing the About page and adds a “Get Involved” section, closing a 10-year old ticket that suggested adding a “Contribute” tab to the About page.
The new Get Involved page features both code-based and no-code contribution opportunities with a link to WordPress’ contributor teams.
The video of the WordPress 6.3 Live Product Demo has been published so anyone who was not able to attend can get a preview of what is coming in the next release. Automattic-sponsored contributors Anne McCarthy and Rich Tabor hosted the demo, showing users how to use the new command palette to zip around the editor and manage settings views. They also guide viewers through browsing and editing pages within the Site Editor, managing synced patterns (formerly called Reusable Blocks), and showcased various new blocks and design tools.
Check out the highlights post for all the links to features referenced in the demo and the Q&A portion of the broadcast.
For those interested in performance improvements coming in 6.3, an upcoming hallway hangout is happening tomorrow Thursday, July 27, 2023 at 11:00 AM EDT. Participants can check the #core-performance Slack channel for the Zoom link before the event. Team leads will cover highlights from the 170+ performance improvements included in 6.3 and will discuss future improvements for 6.4.
WordPress’ Training team is calling for volunteers to help with updating and revising existing Learn WordPress resources ahead of the 6.3 release. The team has created a board on their GitHub repository which highlights high priority tasks.
WordPress 6.3 RC3 is expected to be released on August 1, and the general release is scheduled for August 8, less than two weeks away. There is still time to find and report some bugs. One easy way is to install the WordPress Beta Tester plugin on a local testing site or use a quick throwaway site from services like InstaWP or TasteWP. Bugs can be reported on Trac or via the Alpha/Beta section of the support forums.
Adding a gallery to your WordPress website allows you to showcase many photos. Whether you’re looking for your standard grid gallery or a unique masonry gallery experience, learning how to add a gallery to your WordPress website is always a good idea. In this tutorial, we’ll work through two ways to add a gallery to your WordPress site: with the Block Editor and one of the best gallery plugins available, the Envira Gallery Plugin.
How to Add an Image Gallery Using the WordPress Block Editor
To begin this tutorial, we’ll learn how to add a gallery using the default WordPress block editor. This process will work with most WordPress themes that have compatibility with the Block Editor.
Setup Your Gallery Page
Login to your WordPress website. Then, hover over the Pages menu item. Then, click Add New.
After giving your page a title, Click the black plus icon in the content area of the Block Editor. This will open up the available blocks. In the search bar, enter “gallery.” The Gallery Block will present itself. Click on the Gallery block to add the block to your page.
Once your Gallery Block has been added to your page, we can move on to adding photos.
Customizing and Populating Your Gallery Block
With your Gallery Block in place, you have two options for populating your gallery. You can upload new photos directly from your hard drive. Or, you can choose photos already available on your website through the Media Library. For our tutorial, we’ll choose photos from our Media Library. To do this, click on the Media Library link in blue.
This will open up your Media Library for you to select your photos.
Select your chosen photos, then click the blue Create a new gallery button. Now, you can add a caption or edit each photo in your gallery. Finally, click the blue Insert Gallery button to add your gallery to your page.
Now that your Gallery Block is populated, you can use the block settings column to make aesthetic changes to your gallery. You can change the column number, crop images, and link individual images to various places on and off your website.
Once you are happy with your gallery, you can save your page. Feel free to add more galleries or individual images using the image block for more creative layouts. To learn more about how to use the Gallery Block in your next WordPress project, check out our post, How to Use the WordPress Gallery Block.
While the Gallery Block is a simple and efficient way of adding an image gallery to your WordPress site, it does have some drawbacks. For example, you can’t use it to showcase your product photos, nor can it be customized deeply. This is where reaching out for a plugin may be more helpful. Plugins provide robust features when it comes to expanding the native capabilities of WordPress. This can be seen in how much more functionality you receive when working with a plugin for a gallery.
How to Add an Image Gallery in WordPress Using a Plugin
As with most WordPress plugin types, there is a wide selection of gallery plugins that you can choose from for your next project. We’ve even compiled a list of the most popular gallery plugins! While there are many options, we’ll work with the flexible Envira Gallery plugin for our tutorial.
Envira Gallery is a robust gallery plugin that beautifully manages videos and photos. A key feature of this plugin is its powerful drag-and-drop interface. Additionally, it integrates beautifully with WooCommerce, and social media and has a slew of templates that you can use to style your gallery. Deep linking, watermarks, and right-click protection are features you can experience with Envira Gallery. If you’re looking for a solid plugin to handle your image galleries, Envira Gallery should be your top pick.
Install & Configure Envira Gallery
After creating a new page on your WordPress website, hover over Plugins. Then, click Add New. In the search box, type in Envira Gallery. Then, activate the plugin by clicking the blue Activate button.
After having the plugin installed, you’ll now notice that there is a new menu option. This is where all your galleries will be created.
Let’s look at the Envira Gallery dashboard and create our first gallery!
Creating Your First WordPress Gallery with Envira
To create your first gallery, hover over the Envira Gallery menu option. Then, click Add New.
Next, give your gallery a title by clicking within the Add Title textbox.
Under the native Envira Gallery tab, you can upload new photos from your computer or select files from other sources like the Media Gallery. Click the green Select Files from Your Computer button to upload new photos. Click the grey Select Files from Other Sources button to add files from your Media Library.
Under the External Gallery tab, Envira Gallery allows you to use photos from your Instagram feed within your gallery. This is a premium option that you can utilize when you upgrade to the premium version of the Envira Gallery plugin.
For this example, we will select photos from within the Media Gallery. To do this, Click the grey Select Files from Other Sources button under the Envira Gallery tab. Then, scroll through your media gallery. To select multiple images, press the CTRL button while selecting the photos you want to add to your gallery.
Once you’ve added your photos, you’ll notice that they show in the Gallery tab.
Once you’ve uploaded photos to your gallery, click on the green Publish button. This will make your gallery live and generate a shortcode you can use throughout your WordPress website to showcase your gallery. You’ll also have a code snippet generated if you want to input your gallery into your template files.
Next, let’s add our gallery to our page.
Adding Your Envira WordPress Gallery to Your Page
Eniva Gallery comes with a block that we can use to add our gallery to our pages and posts. To do this, click the black plus icon. This will bring out the pop-out with your various blocks. In the search bar, enter Envira. This will bring up the Envira Gallery’s block. Click on the block to add it to your page.
Click the dropdown menu once you’ve added your block to the page. Then, select the gallery that you’d like to add to your page.
With your gallery selected, you can use the native block editor sidebar to edit your gallery’s settings. Or, you can click the edit button icon which will allow you to edit your gallery’s settings within the Envira Gallery dashboard.
Now that we’ve added our gallery to our page let’s look at some of the customizations we can make.
Customizing Your WordPress Image Gallery
These features can be edited within the free version of the Envira Gallery plugin.
The Config Tab
The Config tab allows you to control aspects of your gallery, like the number of columns, image dimensions, and lazy loading settings.
The Lightbox Tab
The Lightbox tab gives you all the settings you need to adjust the lightbox to match your needs and requirements for your gallery.
The Misc Tab
Change your gallery’s title and slug, and add custom CSS classes to have deeper control over your gallery’s appearance.
Mobile, video, social, tags, and pagination settings are all a part of the premium feature set that you can expect from Envira Gallery. For a complete list of all the features that the premium Envira Gallery plugin provides, check out this exhaustive list.
A strong gallery plugin like Envira Gallery makes adding an image gallery to your WordPress website straightforward. Using a plugin to add galleries to your WordPress site is a sound choice and leaves all the heavy lifting of managing your photo and video assets to your plugin. Now, let’s look at some other popular gallery options you can consider for your WordPress website.
Other Popular WordPress Gallery Options
There are multiple ways to add a gallery to your WordPress website. From using the Block Editor to a plugin, we’ve highlighted a few other ways that make adding an image gallery to your WordPress website easy for anyone to handle.
NextGEN Gallery (Imagely)
With more than 32 million downloads, NextGEN Gallery is one of the most downloaded WordPress image gallery plugins for a reason. Available in both a free and premium version, this gallery plugin gives you all the tools you need to make the best gallery for your site. With eCommerce integration allowing you to sell your photography, photo proofing for professional photographers, and a slew of premade templates and styles, NextGEN Gallery does it all. Automatically resize your images, add watermarks, and manage albums and galleries. For another plugin option for your WordPress website, check out NextGEN.
10Web Photo Gallery is another WordPress plugin with drag-and-drop functionality, easy gallery management, and rave reviews. A key feature of this plugin is its spotlight on image SEO, which you should look out for if search engine optimization is key to your website’s success. Of course, this plugin comes with multiple styles and layouts, mobile responsiveness, and social sharing capabilities allowing your website visitors to show your beautiful galleries to their networks.
Modula is a Gutenberg-compatible gallery plugin, meaning that it adds Filters, password protection, sliders, and more are all part and parcel of using this unique plugin for your next image gallery. While other plugins may focus on themes and styling, Module has a proprietary solution that combines image optimization with a blazing-fast CDN. Say hello to better site performance, even with a heavy library of photos!
Divi is a powerful WordPress theme that has a highly-customizable gallery module. Divi’s Gallery Module gives you two orientation options, customizable overlay styles, and much more. Creating a full-width image gallery is a simple process with the Gallery Module, as is crafting unique and eye-catching border decorations that you can use to make your gallery match perfectly with your branding. Furthermore, Divi’s gallery capabilities can be further expanded through finds on the Elegant Themes Marketplace. Plugins like DiviFilter Grid and Divi Masonry Gallery are great additions to your Divi theme to easily create beautiful, eye-catching galleries.
Conclusion
Adding an image gallery to your WordPress website has been made simple. Gone are the days of manually preparing photos in image programs before organizing them by hand online. Creating a basic image gallery with the Block Editor is an easy process that takes a few minutes. For deeper functionality, it’s possible to use a plugin like Envira Gallery or Modula to create feature-rich galleries using photos, videos, and even social media posts. If you’re still looking for a list of gallery plugins that you can test out and review, here are our top gallery plugins for you to research and try.
WordPress vs. Other CMS: The Perfect Match for Your Project! In today’s digitized world, having a user-friendly and dynamic website is crucial for businesses and individuals alike. Choosing the right content management system (CMS) is the first step towards achieving this goal. With numerous options available, it can be overwhelming to make the right choice. However, fear not! In this article, we will explore why WordPress is the perfect match for your project and also take a closer look at some alternatives.
Why Choose WordPress for Your Project?
When it comes to CMS, WordPress undoubtedly takes the lead. Its popularity speaks volumes about its effectiveness and versatility. One of the key reasons for choosing WordPress is its user-friendly interface. Even if you have little to no technical knowledge, you can easily navigate and manage your website with its intuitive dashboard. Additionally, WordPress offers a wide range of themes and plugins, allowing you to customize your website according to your unique needs and preferences. Another advantage of WordPress is its robust community support. With millions of users worldwide, you can find answers to your queries and troubleshooting tips in no time. From forums to tutorials, blogs, and even in-person meetups, the WordPress community is always ready to lend a helping hand. Moreover, regular updates and security patches ensure that your website stays protected and up to date with the latest features and functionalities. Lastly, WordPress is known for its exceptional SEO capabilities. It comes with built-in tools and plugins that make it easier for search engines to crawl and index your website, ultimately improving its visibility and ranking. This means more organic traffic and potential customers for your business.
Exploring Alternatives: Which CMS is the Perfect Match?
While WordPress is undoubtedly a fantastic CMS, it is important to explore other alternatives before making a final decision. One popular alternative is Joomla. Similar to WordPress, Joomla is an open-source CMS that offers a wide range of templates and extensions. Although it may not be as beginner-friendly as WordPress, Joomla provides more advanced functionalities and is ideal for larger-scale websites and e-commerce platforms. Another option worth considering is Drupal. Often regarded as the most powerful CMS available, Drupal is highly customizable and scalable. It offers robust security features and is perfect for complex websites that require extensive customization and integration with third-party systems. However, Drupal has a steeper learning curve and may not be suitable for beginners or smaller projects. In conclusion, choosing the right CMS is crucial for the success of your project. While there are several alternatives available, WordPress remains the top choice for its user-friendly interface, extensive customization options, and strong community support. However, it is always beneficial to explore other CMS options like Joomla and Drupal to ensure you find the perfect match for your unique project needs. So, get ready to unleash your creativity and build the website of your dreams with the ideal CMS!
WordPress is one of the world’s most popular content management systems (CMS). With over 44% of the internet built on it, WordPress allows users of any skill level to create a website quickly. There’s no intensive coding to learn; rather, it works much like old word processors. In this WordPress for beginners guide, we will explore the benefits of using WordPress, provide a step-by-step guide to its dashboard, and walk you through creating pages and taking your site live.
Let’s dive in.
What is WordPress?
WordPress got its start way back in the 90s as a blogging platform. Since then, it has evolved into a complex CMS capable of building any website, from a membership site to a forum to an online store. WordPress comes in two iterations: .com and .org. While the core platform is the same, there are quite a few differences. The main difference between the two is how they are hosted. With .org, it’s considered a self-hosted platform, which means you’ll need to purchase a separate hosting plan to use it. Alternatively, the .com version of WordPress is an all-in-one platform with built-in hosting.
In this guide, we’ll focus on .org rather than .com primarily because of its extra benefits.
The Benefits of Building a Website with WordPress
There are plenty of reasons to love WordPress. First and foremost, it’s free. Well, sort of. The platform is entirely free, but hidden costs include hosting, a domain, plugins, and a theme, which can add up quickly. However, cost concerns are overshadowed by how easy it is to learn WordPress. It’s relatively straightforward once you get past the learning curve, and if you get stuck, tons of tutorials and documentation are available from hundreds of sources.
Another benefit of WordPress is how easy it is to customize. Whether creating a blog, ecommerce site, or a huge online community, a wide range of themes and plugins are available to help you craft a unique browsing experience for your visitors. WordPress is for beginners, so you can easily change the layout, colors, fonts, and other design aspects. If you’re a seasoned developer, you can use custom code snippets and webhooks to make WordPress function any way you want.
As your website grows, WordPress can handle the additional traffic and additional content like a champ. Plus, it’s SEO-friendly, meaning it’s optimized for search engines, which helps your website rank higher in search results ranking pages (SERPs) and attract more organic traffic.
Setting Up Your Hosting Plan
Before we dive into the details of the WordPress dashboard, we’d be remiss if we didn’t explain the importance of picking a good hosting provider. Choosing the right hosting partner is essential to your website’s success. In fact, it can make or break it. You want your web host to be fast, reliable, scalable, and secure. Plus, it needs to fit within your budget. That may seem like a tall order, but plenty of amazing WordPress hosts are out there, and we recommend a perfect choice for anyone: SiteGround.
SiteGround offers three plans which appeal to WordPress beginners and experts. It’ll fit within any budget, with prices ranging from $15 – $40 monthly. SiteGround runs specials often, so there’s an excellent chance of getting a killer deal. It’s more than just affordable, though. You’ll get a lot of bang for your buck with SiteGround. With features like free emails, SSL, CDN, and migration, you’ll have all the tools to keep your website running smoothly.
They are strict on security, too. They offer one of the best security packages in the business, with a web application firewall (WAF) keeping nasty hackers away. Additionally, you won’t have to worry about malware, DDoS attacks, or other security issues.
Setting Up WordPress
In the following steps, we’ll instruct you on how to install WordPress, explore the tools within the dashboard, and walk you through the steps to create content, style your site, and push it live. Once you complete these steps, you’ll see why WordPress is perfect for beginners.
Step 1: Installing WordPress
There are a few ways to install WordPress, including using a hosting provider, manually installing it yourself, or locally using Local by Flywheel or MAMP Pro. In this tutorial, we’ll show you how to install WordPress using SiteGround’s Site Tools dashboard. If you’d like to learn other ways to install WordPress, read our definitive guide.
Install WordPress via SiteGround
After signing up for a SiteGround account, you can easily install WordPress in just a few clicks. Start by clicking the set up site button at your screen’s top center.
Next, choose whether to set up your site on a new, existing, or temporary domain. Select temporary domain, then click continue.
SiteGround will assign a temporary domain to your WordPress install. To proceed, click continue.
Next, click start new website.
Choose WordPress.
The next step allows you to create your login credentials. This is how you’ll log in to your WordPress dashboard when working on your site. Be sure to write down or save your login information for reference. Click continue to proceed to the next step.
Finally, click the finish button to install WordPress.
You have two choices in accessing the WordPress dashboard. Through SiteGround, you can click on the log in admin button.
Another way to log in to WordPress is through the CMS by navigating to www.yoursite.com/wp-admin in your browser. Be sure to replace www.yoursite.com with your unique domain.
Step 2: WordPress for Beginners – the Dashboard
Upon logging in for the first time, you’ll notice the WordPress toolbar on the left-hand side of the screen. It contains all the tools and settings you’ll need to begin building your site. The main dashboard screen contains quick links for viewing or managing pages, editing the design of your site, useful links, and WordPress-related blog posts.
The next tab, Updates, allows you to review any plugins, themes, or core files that need to be updated. You need to keep the software updated for functionality and security. Otherwise, your site could fall victim to hackers, or at the very least, break. When embarking on updating plugins, themes, or WordPress core, be sure to make a backup of your website in case you counter any issues.
Posts
The next tab is for posts. Here you can create new posts or edit existing ones. You can also set up your blog’s categories and tags, which is great for keeping your content organized, helps with SEO and makes it easy for your users to find what they are looking for.
Media
WordPress comes with its own media library, where you can add and edit images for your website.
Pages
The next set of tools allows you to add pages to your website. Although pages are created much like posts, there are some differences. These pages will appear in the main navigation, allowing visitors to browse your content easily. Another difference is that posts enable categories and tags, whereas pages do not.
Comments
The next setting for WordPress is comments. When you publish posts on your website, WordPress automatically provides a comment section to each post. Your site’s visitors can add remarks to your posts, providing interest for other readers and an opportunity for you to boost engagement. However, comments are only beneficial if you take the necessary steps to moderate them effectively.
Appearance
Some of the most beneficial tools in WordPress are contained within the Appearance tab. Here you can install themes, customize them, add widgets to display important information, create navigation menus, and more. Depending on which theme you choose to use, these tools will vary. If using a full site editing block theme like Twenty Twenty-Three, you are limited to themes and editor. Premium WordPress themes, such as Divi, generally have more options, including the ability to edit your theme’s files.
Plugins
WordPress offers extendability of its platform through the use of plugins. They allow you to add functionality, such as chatting with visitors, tracking your site’s performance, or hundreds of other tasks. The plugins tab reveals a list of plugins currently installed (1) on your website. You can view, manage, or delete plugins as needed. The Add New (2) option enables you to search for and install new plugins available in the WordPress repository or install new ones in a few clicks. Depending on the theme you have installed, a plugin editor option allows developers to make coding changes to activated plugins.
Users
The all users section of the WordPress dashboard allows you to manage your site’s users. You can add, edit, or delete users and specify their roles and permissions. The profile option lets you edit each user’s gravatar image, bio, and contact information. A quick tip: users can also be extended with membership plugins that enable you to restrict content based on membership level.
Tools
The tools section of the dashboard offer features to manage and maintain your site. You can browse available tools, import or export WP posts, pages, and media through an XML file, monitor your site’s security and performance, and export or erase users’ personal data to maintain GDPR compliance.
Settings
The WordPress settings section allows you to set your site’s title and tagline, set a home page, set default media sizes, set privacy, and more. These settings are too complex to go into here, so we’ve linked some helpful articles below to walk you through the steps.
A WordPress theme is your website’s face. When a potential customer (or reader) lands on your site, you want them to find the information they’re looking for and be engaged visually. That’s why finding the best WordPress theme for your overall needs is important. Once you find the perfect companion, there are two ways to install your new theme. You can search for and install a free theme from the WordPress directory or upload a premium theme, such as Divi.
Start by navigating to Appearance > Themes in the WordPress dashboard. Click on Add New Theme.
When using SiteGround, you’ll be offered a choice from recommended themes (1), browsing for WP directory themes (2), or uploading a theme (3). Depending on your hosting provider, those options may appear different but function similarly. If you wish to search for a theme by keyword, you can enter search terms into the search bar (4).
Once you select your choice, click the install button.
When the screen refreshes, click the activate button to make your theme live.
Step 4: WordPress for Beginners – Plugins
The next step in the process is installing some plugins. How many you need or what they will do depends on the niche you’re going for. Thousands of plugins are available through the WordPress repository and third-party vendors, such as the Divi Marketplace, so the sky is the limit.
Every website should have a few crucial plugins in place to ensure the safety and security of its customers. That’s why there is an essential list of plugins that will give you everything you need for your WordPress website on our blog.
Installing a WordPress Plugin
Similar to themes, there are two ways to install a plugin: searching within WordPress or uploading a premium theme. First, navigate to Plugins > Add New.
The steps to installing a plugin from the WP directory are similar to installing a theme. Search or browse for the plugin of your choice, then click install to download the plugin.
Click the upload plugin tab to upload a plugin, then choose file.
We’ll choose the Divi Builder plugin from our computer and upload it to WordPress. Once uploaded, click install now.
To complete the installation, activate the plugin.
Step 5: WordPress for Beginners – Adding Content
Now that our theme and plugins are installed, we can add content. We’ll need to concentrate on a few areas: posts, pages, and media.
Here’s a quick overview to show you how to create posts in WordPress:
Click the Add New button to add a new post.
Next, you’ll give your post a title. Click on it and add the text.
To add content, click the plus icon at the top left of the screen (1) or in the page editor (2).
Once you’ve added content, assign it to a category (1), add any relevant tags (2), then click the publish button to make your post live (3).
Add a Page to WordPress
To add a new page to your site, navigate to Pages > Add New.
As with posts, give your page a title (1) and add content (2).
Once all content has been added, click publish to make your page live.
Step 6: WordPress for Beginners – Customization
Before you take your site live, there are a few last-minute details that you should take care of, including adding any custom CSS, configuring SEO, adding social media, and configuring your theme’s settings. These options will vary depending on the theme installed.
Adding Custom CSS
You can add custom CSS to style different elements of your website. Depending on the theme, there are a few places to add your snippets. The first way is through the WordPress customizer. More basic themes will offer this option in Appearance > Customize. For premium themes like Divi, you can add custom CSS in Divi > Theme Options.
Auto-Update Plugins
WordPress has built-in functionality that allows you to turn on automatic plugin updates. The downside to this is encountering an issue during a plugin update. You might not know what went wrong if you aren’t handling updates yourself. Using an activity log plugin will give you more clarity into what went wrong so you can troubleshoot the issue easier.
To enable auto-updates, navigate to the WordPress dashboard’s plugins section. Click enable auto-updates on any plugin you’d like to update.
Configure Your SEO
One of the most important last steps before launching your website is configuring its SEO settings. Using an SEO plugin such as Rank Math is an excellent option. It offers a step-by-step process that guides you in achieving better SEO scores using helpful tips and suggestions.
Add a Site Title and Tagline
Your site’s title is used to help visitors identify the website they are browsing. The tagline is a short description of your website. It’s best to use a unique title and tagline rather than repeating the title, as it provides a more accurate depiction of what your website is about. To change these, navigate to Settings > General. From there, input your desired title and tagline, then save your changes.
WordPress Reading Settings
There are two important things that you should do here, including setting a home page (1) and ensuring the Discourage search engines from indexing this site checkbox is unchecked (2). You can show your latest posts on the home page or choose a static post or page. When the discourage checkbox is ticked, search engines block your site from being indexed, so you’ll want to leave that unchecked before launching. Save your changes when finished (3).
Configure Theme Settings
Before taking your site live, you want to represent your business properly. Add your logo, social media accounts, color, and fonts. Every theme is different; most allow you to complete these tasks in their theme settings. Using Divi, navigate to Divi > Theme Options. Here, you can add all necessary branding elements and make other necessary changes. Check out our documentation for tips on how to use Divi’s theme options.
Back Up Your Site
The last and most important step before pushing your site live is to back up your website. By making a backup, you’ll preserve your site’s files in case of a misstep in the launch process. Most managed hosting providers, such as SiteGround and Cloudways, offer backups in their hosting plans. However, depending on the host, you might need to install a good backup plugin.
Step 7: WordPress for Beginners – Taking Your Website Live
The last step in the process is to take your website live. Since we built our site on a temporary domain using SiteGround, you’ll need to add a domain first. If you built your site in a development environment, there are different steps to take.
Regardless of your hosting provider, there are a few items to check once your site is live:
Conduct a speed test for your website, and make any necessary speed enhancements.
Test all forms. If you are having issues, you may need to install an SMTP plugin.
Make a post-launch backup of your site to ensure the most recent iteration is secured.
WordPress is a powerful and versatile CMS that can create various websites. Although there is an initial learning curve to overcome, it’s easy for beginners to learn and master. With a vast community of third-party developers, tutorials, and plugins available, you can customize your WordPress website to make it your own. To get the most out of WordPress, opt for a quality WordPress host, such as SiteGround, so you can easily install and manage your WordPress site.
Need more tutorials? If you’d like a more comprehensive look into WordPress, check out our complete guide on how to make a website from scratch.
WordPress is a popular content management system (CMS) that allows you to create and manage websites easily. Whether you’re a blogger, freelancer, or business owner, WordPress offers a minimal learning curve, multiple ways to customize it, and create any website your heart desires. In this post, we’ll show you how to make a WordPress website, including purchasing a domain and hosting to designing and launching your site. So, let’s dive in.
What is WordPress?
Originally created as a blogging platform in the 1990s, WordPress has evolved into a versatile CMS that can be used to build various types of websites, including membership sites, forums, learning management systems (LMS), ecommerce sites, and more. With its user-friendly interface, extensive theme and plugin options, and versatility, WordPress gives users the control they need to bring their website to life. Whether you’re a beginner or a tech-savvy web developer, WordPress offers a user-friendly and scalable solution for creating and maintaining your online presence.
Why Choose WordPress?
Aside from its versatility, customization options, and user-friendly interface, WordPress has a large following. With over 44% of the internet built on it, there are hundreds of reputable developers providing tips and tricks almost daily. Plus, WordPress is free to use. That said, there are hidden costs, such as hosting, plugins, and a domain. Additionally, new WordPress users will have the support they need to learn WordPress.
What You’ll Need to Get Started
When creating a new WordPress website, you’ll need a few things to get the process going, including a domain, web hosting, and determining the site’s structure. Let’s take a deeper look into the steps needed to be successful.
Purchase a Domain Name
Image courtesy of VZ_Art | Shutterstock
Before considering where your website will live or its content, you must decide on the perfect domain name, you’ll want it to stay true to your brand, so ensure that you’re researching the best domain names for your business.
Additionally, consider which top-level domain (TLD) extension you’d like to use, whether it be .com or something else. For most people, .com makes the most sense due to its recognizability and trustworthiness. TLDs are an important part of the selection process for several reasons, including SEO.
After you’ve decided on your domain name, you’ll need to purchase it. You can do this through a hosting provider or using a good domain name registrar, such as Namecheap. The process isn’t difficult and is a crucial first step. However, it is generally advised to refrain from purchasing your domain from a hosting provider since it can complicate matters if you switch hosts for your website. Therefore, we recommend keeping the two separate to retain greater control over your domain.
Purchase Hosting
Another important step is purchasing a WordPress hosting plan for your website. You’ll want to arm yourself with information before making a final decision. First, learn about the different hosting types available to determine which is best for your unique situation.
Next, decide which host aligns best with your needs. You’ll want to choose one that fits your budget and has the most features. Good hosting providers will guarantee at least 99% uptime, take care of security patches and updates, and provide freebies such as SSL, emails, backups, staging sites, and good security.
A rock-solid option that includes all of these features is SiteGround. Their hosting plans are optimized for WordPress and include benefits such as fantastic support and affordable prices. For newcomers, SiteGround’s StartUp plan is an excellent jumping-off point. With 10 GB of storage, freebies such as an SSL, CDN, business email, migration, staging, and more, you’ll have everything you need to get started for under $15 a month. As an added bonus, based on our own testing, it’s also the fastest WordPress hosting you can get.
Planning Your WordPress Structure
Image courtesy of aliaksei kruhlenia | Shutterstock
Before setting out to build your website, it’s important to plan the structure of your site. Consider the pages you want to include, such as an about page, services or product pages, a blog, contact information, and any other relevant pages. By mapping out the pages in advance, you’ll provide visitors with a well-organized and easy-to-navigate website.
Additionally, consider the content you need for each page, including text, images, videos, or other elements such as social media feeds. By outlining your content, you can write good SEO copy, create videos, images, and other elements. Taking the time to do this the right way gives you an excellent shot at boosting your position in the search engine ranking pages (SERPs) and provides a seamless user experience for your visitors.
How to Make a WordPress Website
There are a lot of steps involved when setting out to build a WordPress website. From installing the platform to taking it live, we’re here to walk you through every step, giving you a great shot at success.
The first step to creating your masterpiece is by installing WordPress. This can be accomplished in several ways. If you opted for a VPS or dedicated hosting provider, you’ll likely need to install WordPress on your own. If you chose a managed hosting company, the steps to install WordPress are quite different. For example, using SiteGround, you can install WordPress in just a few clicks. This is the method we plan to use in this tutorial. Check out our in-depth post, How to Install WordPress, if you’re looking for tips on other installation methods.
SiteGround provides a simple way to install WordPress. Once you set up your account, you’ll be directed to your account dashboard. Click the Start New Website button to install it.
Next, choose whether to install WordPress on a new, existing, or temporary domain. We’ll build our new site on a temporary domain so we can design and perfect it before pushing it live.
When the screen refreshes, you’ll notice you’ve been assigned a temporary domain for your website. Proceed by clicking the continue button.
Next, click Start New Website.
Then choose WordPress as the application.
For the installation details, provide your email address, create a password (or generate a strong one), then click continue. Be sure to save your login information, as this is how you’ll log in to your WordPress admin dashboard.
Click the finish button to install WordPress.
When your screen refreshes, you’ll have three options: view your site in a browser, log in to the WordPress admin panel, or head to SiteGround’s site tools dashboard. Click the log in admin button to view the admin panel.
Step 2: Choose Your WordPress Theme
A WordPress theme allows you to change how your website looks to visitors. You can customize colors, the layout, fonts, and other design elements to match your branding or style. There are two types of themes available, including free and premium themes. Free themes are available through the WordPress directory. Premium themes are offered by third-party developers, like the makers of Divi, and usually provide excellent features such as no-code page builders, full site editing capabilities, and premade layouts.
To view available free themes, navigate to Appearance > Themes.
Click the Add New Theme button to add a new theme.
From here, you can search for themes (1), use one of SiteGround’s recommendations (2), browse the WordPress directory (3), or upload a premium theme (4).
If you prefer to start with a free theme, click browse the WordPress directory, peruse the available options, then click the install button once you’ve made a selection.
For this tutorial, we’ll use our favorite premium theme, Divi. Click on the upload theme tab to upload a theme, then click choose file to upload your zipped WordPress theme file.
Finally, click Install Now to install your WordPress theme.
Click the activate button to make your theme live on your site.
Step 3: Add Your Pages
Now that your theme is installed and activated, we’ll create our pages. We’ll create a home, about, services, blog, and contact page for our site. This is a basic setup for most starter sites. We won’t add any content; we’ll just set up the page structure to create our navigation in the next step.
Creating your first page is simple. Navigate to Pages > Add New in the WordPress dashboard.
Every new WordPress installation comes standard with two pages: privacy policy and sample pages. We’ll leave those alone and add a new home page to our site. To add a new page, click the Add New button on the top left of the page.
Next, give your page a title (1) and click publish (2) to create the page.
Click the WordPress logo at the top left of the page to return to the pages section in WordPress.
To add more pages, repeat the process above until all your pages are created.
Step 4: Set Up Your Navigation
The next step is to set up the navigation for our site. Let’s start by setting up our home page in WordPress settings. Navigate to Settings > Reading (1), click the static page radio and choose your home page (2), tick the checkbox to discourage search engines from indexing your site (3), and save the changes (4).
Note: It’s a good idea to discourage indexing while building your website. It keeps unwanted traffic from discovering you before your site is ready for prime time.
Now, we’ll set up our main navigation for the site. Head to Appearance > Menus (1). Give your menu a name (2), tick the Primary Menu checkbox (3), then click create menu (4).
Next, click the View All tab (1) and select the pages we just created (2), then click Add to Menu (3).
Once your pages are added, you can click and drag them to change their order (1). When satisfied with their placement, click the save menu button (2).
Step 5: Build Your First Page
Creating your home page is the next and possibly most important step when learning how to make a WordPress website. The home page serves as a window into your business’s identity. It should reflect what your business is about, along with supporting content.
As a general rule, your home page should contain all of the information a new visitor should see, including:
Your logo
Navigation
A headline
Sub-headline
Images
Calls to action (CTA)
Text content (at least 300 words)
Footer
Social proof (optional)
Video content (optional)
An eye-catching design (a must)
When building your page, there are several ways to add content. You can use WordPress’s default editor, Gutenberg, or a page builder like the Divi Builder. Since we chose Divi as our theme, we can add elements to our home page using Divi’s Visual Builder, a no-code front-end builder that allows you to view your design in real time. Divi offers more than 320 full layout packs with over 2300 individual pages, making building your WordPress website a breeze.
Building a WordPress Page Using Divi
To showcase its ease, we’ll walk you through importing a layout into your home page using Divi. Head back to Pages in the WordPress dashboard. Next, click on home within your site’s pages.
Next, click Edit With The Divi Builder.
Once the screen refreshes, you can tour the Visual Builder or start building your page. Select start building.
Finally, select use this layout to insert the design into your home page.
From there, you can hover over any module to reveal the settings. Click the gear icon to edit any module.
Once you have edited all text modules and replaced stock images and videos, you can save your page by clicking the green save button at the bottom right.
If you’d like to learn everything there is to know about Divi, check out our extensive documentation. It contains more than 70 helpful Divi tutorials to aid in building your website.
Building a WordPress Page Using Gutenberg
Using WordPress’s native Gutenberg editor is quite simple. To add content, you can choose from various blocks, such as rows, text, images, videos, social icons, and more, to construct your pages. Start by clicking the + icon to add a block to your page.
Once you’ve added all content to your page, you can publish it by clicking the update button.
Page Checklist: What To Do Before Publishing
Before you can publish your page, there are a few essential things to consider, including:
Check your page’s responsiveness: Ensure that all content on your page is optimized for all screen sizes.
Look for placeholder content: Ensure you’ve replaced all placeholder text and images.
Use alt tags: Every image on your page should contain an alt tag.
Check for misspellings: Use an integrated browser spell check or a service like Grammarly to ensure your content is spelled correctly and flows well.
Configure SEO: Ensure that SEO best practices are being used. Make sure there is a keyword assigned and fill out the meta box (title, URL, meta description)
Step 6: Modify Your Headers and Footer (if Needed)
If you use a full site editing theme, you can customize headers and footers for your site. For example, you can create any number of custom templates using Divi’s Theme Builder. Alternatively, a block theme such as GeneratePress allows you to edit permanent sections of your site through full site editing.
To create a new header or footer in Divi, navigate to Divi > Theme Builder.
Next, click Add Global Header.
Finally, select Build Global Header to launch the Visual Builder.
You can use a premade header and footer pack, or use one of Divi’s 200 modules to easily create a header (or footer) for your website.
Step 7: Install Plugins
Now that your content is in place, you must decide which plugins to use. Generally speaking, there are several essential WordPress plugins that you should include on your site to help with various aspects, including SEO, security, and caching. Other optional plugins, such as social media, affiliate marketing, or live chat, are worth consideration. Since WordPress is so popular, there are thousands of plugin choices. This can be overwhelming for newcomers, so here is a breakdown of some essential plugins you will need for your WordPress website.
SEO: Choose a good SEO plugin, like RankMath, so you can easily configure your SEO, both on and off-page, to give yourself a fighting chance at ranking high in search pages.
Security: Protecting your site from nefarious actors and malware should be one of your top priorities. Incorporate a security plugin into your site for peace of mind.
Optimization: Keeping your site speedy involves adding a speed optimization plugin to your site. You should also consider a database optimization plugin to keep the bloat out of your site’s database. Cleaning your database keeps your site running smoothly for the long haul.
Caching: If you’re using a shared, VPS, or dedicated hosting provider, you may need to install your own caching solution. These cache plugins are considered the best of the best, ensuring your site’s files are served fast, keeping your bounce rate down and customer engagement up.
Optional Plugins To Consider
In addition to must-have plugins, plenty are available to add extra functionalities, such as social media, advertising, live chat, and more. Here are a few additional plugins you might consider using. Depending on the type of website you plan to build, some of these may need to be revised. That said, it’s good to know what’s out there in case you need to add one in the future.
Chat: Incorporating a chat plugin into your website is an excellent way to stay connected to your customers. Plus, it’s a lot more personal than sending an email.
Affiliate marketing: If you have aspirations of turning your website into a money-making machine, adding an affiliate marketing plugin may be exactly what you need.
Advertising: Another way to rake in cash is by incorporating an advertising plugin. You can create banner ads, import ads from Google, and track their progress to boost your online sales.
Social media:Social proof is a key marketing strategy that every website owner should consider. You can boost SEO, increase engagement, and build trust with your audience by giving visitors a glimpse into your social platforms. A good social media plugin can give you all of those things.
Step 8: Go Live!
The last and most exciting step in creating your WordPress website is taking it live. At this point, you’ve made your navigation, configured your SEO, and added content. This last step involves tying up a few more loose ends. With that in mind, we’ve created a handy checklist for you to follow to ensure you don’t miss anything.
Conduct a content review: Make sure all content is accurate, free of misspellings, and check all links.
Optimize: Make sure all images are under 200kb, and enable caching and modification to ensure your site loads fast. Run a GTMetrix report to see how well your site is performing.
SEO and Analytics: Set up Google analytics, integrate it into your site and check all posts and pages to ensure a keyword, title, URL, and meta description are configured properly. Using an SEO plugin, generate an HTML sitemap.
Security: Update all plugins, themes, and WordPress core.
Check all forms: Test all forms to ensure email deliverability. If you encounter any issues, install and configure an SMTP plugin.
Connect your domain: Point your domain to your new website, then install an SSL.
Search engine visibility: Head back to Settings > Reading and uncheck the discourage search engines from indexing this site checkbox.
Back up your site: Before pushing your site live, make a backup of your website either with your host or a plugin such as Updraft. If disaster strikes, you want to be sure you have the most recent iteration of your site to fall back on.
Final Thoughts on How to Make a WordPress Website
Creating a WordPress website doesn’t have to be scary. You’ll bring your vision to life by following the steps outlined above. With careful planning, thoughtful content creation, partnering with the right host, and incorporating necessary plugins, your WordPress website will be optimized for search engines, safe against threats, and engaging for your visitors.
If you’re looking to create a WordPress website that caters to a specific demographic, check out some of our handy tutorials to help you create the specialized website of your dreams:
Before we wrap up, let’s answer some of your most common questions regarding WordPress website creation. Did we miss one? Leave a question below, and we will respond!
How do I make a WordPress website?
Choose a domain name, hosting provider, and a WordPress theme to create a WordPress website. Install WordPress on your hosting account, customize your theme, add content, and install plugins for added functionality. Regularly update and maintain your site for optimal performance.
Can I create a WordPress website for free?
Technically, yes, you can create a WordPress.org website for free, but it will require a domain name and hosting, which may have costs associated with them. Additionally, some themes and plugins may also have fees. Free options are available, but they may be partially free, depending on your needs.
What is WordPress?
WordPress is a free and open-source content management system (CMS) that powers millions of websites. It allows users to create and publish content, customize the appearance and functionality of their sites with themes and plugins, and manage their site’s back end through a user-friendly interface.
Why should I use WordPress to make my website?
You should use WordPress to make your website because it’s easy to set up, has a user-friendly interface, offers a wide range of customizable themes and plugins, and is SEO-friendly. It also has a large community of users, so you can get help and support quickly. Plus, it’s free to use.
Can a beginner build a website with WordPress?
Yes, a beginner can build a website with WordPress as it offers user-friendly tools and templates for designing websites without technical expertise. With its intuitive interface, drag-and-drop features, and customizable themes, beginners can easily create a professional-looking website. Additionally, numerous online resources are available, including tutorials, forums, and support communities, to assist beginners in building their WordPress website.
Does WordPress require coding experience?
No, WordPress does not require coding experience. It has a user-friendly interface and offers a variety of pre-designed templates, plugins, and widgets that you can easily customize without any coding knowledge. However, some coding skills can be helpful for advanced customization.
What kind of websites can be created using WordPress?
You can use WordPress to create various websites, including blogs, business websites, eCommerce stores, portfolios, forums, social networks, online directories, non-profit websites, and much more. Its flexibility, scalability, and user-friendly interface make it popular for website building.
Where can I learn more about WordPress?
You can learn more about WordPress on their official website, WordPress.org, where they offer documentation, guides, forums, and a community of users. You can also read blogs and tutorials on blogs like ours and WPBeginner, attend WordPress meetups and conferences, or enroll in online courses on platforms like Udemy and Coursera.
Where should I host my WordPress website?
Several options for hosting your WordPress website include shared hosting, managed WordPress hosting, cloud hosting, and VPS hosting. Factors to consider include budget, website size and traffic, technical expertise, and desired level of support. Popular hosting providers include SiteGround, Hostinger, Cloudways, and Pressable. You can read our detailed comparison of various WordPress hosts here.
Which WordPress Theme should I use for my website?
Choose a WordPress theme that aligns with your website’s goals, has a user-friendly interface, and is regularly updated for security and compatibility. A theme such as Divi can be an excellent choice for your WordPress website, as it comes with multiple pre-made templates, inbuilt integrations with numerous services like WooCommerce and Mailchimp, a full-blown theme builder, transparent and affordable pricing, support, and a lovely community!
What are the top plugins I should install?
The top plugins you should install vary depending on your website’s needs. However, some essential ones include RankMath for SEO optimizing your content, UpdraftPlus for timely backups, and EWWW Image Optimizer for compressing images. Additionally, you may consider plugins like WP Rocket for speed optimization, WPForms for form creation, and MonsterInsights for analytics and data. Look at our comprehensive list of every plugin you need here.
Which is better, Wix or WordPress?
WordPress is better than Wix because it offers greater flexibility and customization options, a wider range of plugins and themes, better SEO capabilities, and more control over website hosting and data ownership. Additionally, WordPress is open-source software, meaning it is free and community-driven, whereas Wix is a proprietary platform with limited control over its features.