EDITS.WS

Tag: wp simple pay

  • How to Set Up Installment Payments in WooCommerce – 7 Plugins

    Do you want to offer installment payments on your eCommerce store?

    Offering an installment plan encourages customers to purchase more products or services. It makes it easier for them to buy expensive items and helps boost sales on your WooCommerce store.

    In this article, we will show you how to set up installment payments in WooCommerce using different plugins.

    How to set up installment payments in WooCommerce

    Why Set Up Installment Payments in WooCommerce?

    Installment payments allow customers to break up the total amount of a product or service into smaller portions. Instead of paying the price in full, users can pay a certain amount upfront and then pay the remaining amount over a period of time.

    As a WooCommerce store owner, you can select the timeframe you’d like to offer to customers for repayments. Usually, this depends on the product and niche you’re in, but you can offer anything between 6 to 24 months.

    Setting up installment payments in WooCommerce helps provide alternative payment methods to customers. It encourages your visitors to purchase more valuable and expensive items.

    You can also reduce cart abandonment by offering an installment payment option. Customers might not purchase products if they don’t have sufficient funds and would exit your site without checking out. With an option to pay in installments, you can motivate them to buy the product and boost sales.

    That said, let’s see which plugins are the best for WooCommerce installment payments.

    1. Affirm Payments

    Affirm

    Affirm Payments is a WooCommerce extension that lets you add tailored buy now pay later programs to your eCommerce store. Affirm is a payment service that helps customers pay at their own pace.

    The plugin is beginner-friendly to use. Once you install it, you’ll see the Affirm payment option in WooCommerce. Customers can then select a payment plan that works for them.

    Affirm payments preview

    Affirm offers 4 interest-free payment features, where customers can split the initial cost into 4 installments with no interest. This makes it easier to sell high-ticket items, and customers won’t have any impact on their credit scores.

    Besides that, Affirm Payments also allows customers to choose their payment terms. The best part is that it shows the exact amount that needs to be paid every month with the annual percentage rate (APR).

    Who Should Use It: Affirm Payments plugin is a great solution for anyone looking to add just a buy now pay later payment option in WooCommerce. The provider helps create installment plans for customers and also offers 4 interest-free installments every 2 weeks.

    Pros:

    • Easily add Affirm as a payment option in WooCommerce
    • Offer ‘Pay in 4’ plans with no interest (0% APR)
    • Allow customers to choose their installment plan
    • Showcase all payment plans in a single view

    Cons:

    • Limited customization options from within the WordPress dashboard
    • High-interest rate (up to 30%) for some items
    • Sometimes Affirm may require a credit check before transaction approval

    Pricing: Affrim Payments is a free WooCommerce extension.

    2. Klarna Payments for WooCommerce

    Klarna payments

    Klarna Payments for WooCommerce is a free WordPress plugin that adds Klarna payment options to your online store. Klarna is a Swedish fintech company that offers online payment solutions for website owners.

    Using the plugin, you can offer customers to pay the full amount at checkout, first try the product and then pay later, or slice the total amount into installments.

    It provides customers the flexibility of choosing when they want to pay in the installment plan. There is also an option to provide 4 interest-free payments, so customers can save costs and pay for a product in smaller portions.

    The setup process is very easy. First, you’ll need to sign up for a Klarna account. Once that’s done, simply use the plugin to add Klarna as a payment option in WooCommerce. Klarna will then approve your store, and you can start offering installment plants to customers.

    Set up Klarna payments in WooCommerce

    The best part about using Klarna is that it easily integrates with WP Simple Pay. You can use it to offer buy now, pay later payment plans in WordPress.

    WP Simple Pay comes with a built-in Klarna (Buy Now, Pay Later) Form template. This way, you let customers choose the payback period for a product.

    Select Klarna form template

    For more details, you can follow our guide on how to add Klarna payments to WordPress.

    On the downside, Klarna will work with merchant accounts and is only available in selected countries. For instance, it’s available in Sweden, Norway, Finland, Denmark, Germany, Austria, the Netherlands, Belgium, Switzerland, France, Italy, Poland, Spain, Portugal, Great Britain, Hungary, Czech Republic, Slovakia, the USA, and Australia.

    Why Should You Use It: If you’re looking for a plugin that offers flexible installment plans for your online store, then Klarna Payments for WooCommerce is perfect. It’s easy to use and also integrates with WP Simple Pay, so you can create payment forms without editing code.

    Pros:

    • A free plugin that lets you add installment plans
    • Beginner-friendly to use
    • Offer 4 interest-free installment plans
    • Let customers choose when they want to pay (up to 24 months)
    • Easily integrates with WP Simple Pay

    Cons:

    • Only available in limited countries
    • Not many customization options

    Pricing: Klarna Payments for WooCommerce is 100% free to use.

    3. Jifiti Buy Now Pay Later

    Jifiti

    Jifiti Buy Now Pay Later is the next WooCommerce installment payments plugin on our list. It adds a Jifiti payment option to your online store and offers a white-labeled buy now pay later platform for WooCommerce.

    Jifiti is a platform that connects lenders, merchants, and customers. With a white-label program, you can use your custom branding while offering installment plans. The service lets you add zero-interest split payments, pay in 3 or 4 installments, and more.

    In the background, Jifiti will connect you with leading banks and lenders like MasterCard, Credit Agricole, and Citizens Pay. This way, customers can break large payments into smaller amounts and pay them over a period of time.

    Jifiti settings in WordPress

    What makes this plugin different is that if financing is not approved by one of the lenders, it will automatically pass your customer’s financing application to the next lender in the network. As a result, you’ll see more financing and a boost in sales.

    Who Should Use It: The Jifiti Buy Now Pay Later plugin is excellent for users who want to add a white-label installment payment program to their WooCommerce store. You can work with a lender or a bank to add a buy now pay later option on your site and then customize its appearance.

    Pros:

    • Create branded installment payment plans for your store
    • Offer interest-free installment plans
    • Work with leading banks and lenders for financing options
    • Automatically pass the customer’s financing application to the next lender

    Cons:

    • Setting up white labels can be time-consuming
    • Customers would have to wait for their financing to be approved

    Pricing: Jifiti Buy Now Pay Later is a free WooCommerce plugin.

    4. WooCommerce Deposits

    WooCommerce deposits

    WooCommerce Deposits is a premium plugin that lets you set up installment plans on your online store. The plugin offers flexible payment options and allows you to offer custom schedules based on days, weeks, or months.

    You can create multiple payment plans for your WooCommerce store. It also lets you choose variable percentages and intervals for each payment. For instance, you can decide what percentage a customer should pay initially and then over time.

    Create custom payment plan

    The plugin is straightforward to use and offers a clean interface. You can easily create and manage all your installment payment schedules from the WordPress dashboard.

    Who Should Use It: From our testing, WooCommerce Deposits is a user-friendly plugin that’s perfect for creating custom payment schedules. If you’re looking to set up multiple installment plans for your WooCommerce store, then this plugin is for you.

    Pros:

    • Easily create custom payment schedules
    • Have full control over payment amount and intervals
    • Very easy to use and setup
    • Add a description to each payment schedule to guide customers

    Cons:

    • Limited customization options for changing appearance
    • There is no free version

    Pricing: WooCommerce Deposits is a paid extension and will cost you $18.25 per month.

    5. Splitit

    Splitit

    Splitit is the next WooCommerce installment payments plugin on our list. It lets you add installment payments to your online store with ease.

    In our experience, what’s different about this plugin is that it allows customers to use their existing debit or credit card to split the total amount into smaller portions. Customers don’t have to get a loan or wait for approval to purchase a product.

    As long as a customer has available credit on their card that’s equal to the price of the purchase, they can easily use it to set up installments.

    Splitit supports different card network providers, including Visa, MasterCard, American Express, Discover Global Network, and more. The plugin is also easy to use. Simply connect your merchant account and configure the settings in your WordPress dashboard.

    Splitit settings

    Besides that, Splitit also offers a white label buy now pay later feature, supports high-value orders (up to $50,000), allows installment plans up to 24 months, lets you set up interest-free payment plans, and more.

    Who Should Use It: If you’re looking for a way to allow customers to use their own credit cards for installment payments, then Splitit is the best solution. Plus, it works with popular payment network partners and also lets you create white-label buy now pay later plans.

    Pros:

    • Allows customers to use debit or credit cards for installment plans
    • Offers customization options inside the WordPress dashboard
    • No application or credit checks are needed for customers
    • Create an interest or fee-free repayment schedule

    Cons:

    • Works with limited payment providers
    • It doesn’t improve the user’s credit score

    Pricing: Splitit is a free WordPress plugin that you can use.

    6. YITH WooCommerce Deposits / Down Payments

    YITH WooCommerce deposits down payments

    YITH WooCommerce Deposits / Down Payments is a premium that allows users to pay a deposit to book or buy a product on your WooCommerce store.

    The plugin lets your customers have the flexibility to reserve a product or service and break the total amount into 2 installments. The first installment is at the time of purchase and the second installment is the remaining balance, which customers can pay at a later time.

    YITH deposit for woocommerce

    You can set the deposit amount for all the products in your store. There is an option to choose a fixed amount or a percentage value of the total amount.

    The plugin also lets you set up rules and charge different deposit amounts based on the products a user adds to the cart.

    Who Should Use It: The plugin is perfect for online stores that require an initial deposit or down payment to book or reserve a product or service. They can then collect the remaining payment on delivery or set it up for an even later time.

    Pros:

    • Simple and clean plugin to use
    • Easily collect deposits for products and services
    • Create rules to define the deposit value
    • Easily manage remaining balances for your orders

    Cons:

    • You can only set up 2 installments
    • Limited integration options
    • No free version

    Pricing: YITH WooCommerce Deposits / Down Payments will cost you $129.99 per year.

    7. Deposit & Partial Payments for WooCommerce

    Deposit and partial payments for WooCommerce

    Deposit & Partial Payments for WooCommerce is a free plugin that also lets you collect deposits or down payments for your products.

    The best part is that it works with all the payment methods that are supported by WooCommerce. You can simply choose the deposit amount or percentage customers will have to pay at the time of purchase.

    Advanced partial plugin settings

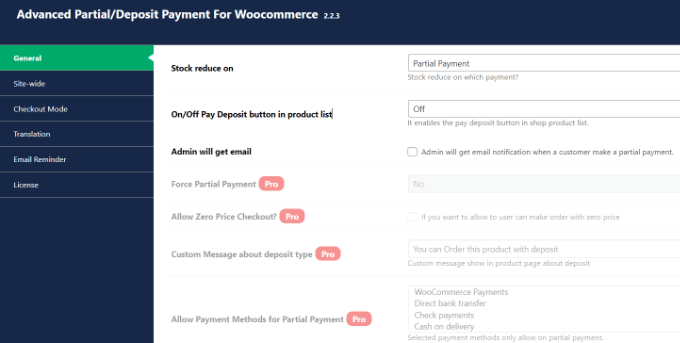
    Besides that, you’ll also see a history of all the partial payments on your WooCommerce store from the dashboard.

    While the free plugin is great for collecting deposits, you can unlock more features in its premium version. For instance, you can select the payment term, offer a zero deposit option, set up payment reminders for customers, and more.

    Who Should Use It: Deposit & Partial Payments for WooCommerce is a great plugin for anyone looking to set up down payments on their online store for free. You can also create a payment plan and set up installments in WooCommerce. It is also a great alternative to YITH WooCommerce Deposits / Down Payments.

    Pros:

    • Add a deposit or down payment option for free
    • Get multilingual support
    • Easily integrate with WooCommerce-supported payment methods
    • Set up fixed or percentage deposits

    Cons:

    • The free version of the plugin offers limited features

    Pricing: Deposit & Partial Payments for WooCommerce is a free WordPress plugin. However, it also offers a premium version with prices starting from $29 per year.

    Bonus: WP Simple Pay

    WP Simple Pay website

    WP Simple Pay is the best Stripe plugin for WordPress. It helps you collect online payments without setting up a shopping cart and is super easy to use.

    The best part, WP Simple Pay supports buy now, pay later payment plans. You can select different methods, including installment payments. Simply choose the billing time period to accept installments.

    It supports 13 payment methods in 135+ currencies from over 45 countries. You can easily add credit/debit cards, ACH debits, Klarna, Afterpay, Apply Pay, Google Pay, and other payment methods in WooCommerce.

    WP Simple Pay comes with pre-built form templates. You can simply select the Installment Plan Form template and enter your details.

    Installment plan form template

    Next, you can customize the installment plan form according to your requirements.

    WP Simple Pay lets you choose the billing period. For instance, there are options to break the actual amount into smaller portions, and you can select the billing period based on days, weeks, months, or years.

    Besides that, you can also enable recurring payment options, create customized receipts, set up purchase restrictions, automatically calculate taxes, and more.

    Why Should You Use It: WP Simple Pay is best for setting up installment plans and accepting credit card payments without setting up a shopping cart. It’s super easy to use, and you can add a purchase button anywhere on your online store without editing code.

    Pros:

    • Very easy to set up and use
    • Add a Stripe purchase button without editing code
    • No need to set up a shopping cart to collect online payments
    • Offer pre-built payment form templates, including installment plan form
    • Supports 13 payment methods
    • Easily integrates with buy now, pay later providers like Klarna

    Cons:

    • The free version offers the installment plan form but has limited features
    • 3% credit card fee per transaction when using the free version

    Pricing: WP Simple Pay offers premium plans starting from $44.55 per year. There is also a free version of WP Simple Pay you can use to get started and add installment plans to your WooCommerce store.

    Which is the Best WooCommerce Installment Payments Plugin?

    After reviewing different plugins, we believe that Affirm Payments is the best WooCommerce installment payments plugin.

    It lets you create custom installment plans for customers and also offers a 4-interest-free installment plan feature. Customers can even choose their own repayment plan and break the total amount into smaller portions.

    The best part is that you can use Affirm Payments for free.

    On the other hand, if you’re looking for a free WooCommerce plugin that lets you add a buy now pay later option, then you can also check out Klarna Payments for WooCommerce.

    FAQs about WooCommerce Installment Payments

    Here are some common questions users have about setting up WooCommerce installment payments.

    1. What is the WooCommerce plugin to pay in installments?

    Affirm Payments is the best WooCommerce plugin for setting up pay in installments. It offers multiple payment methods, allows you to add a buy now pay later option, built-in templates, and more.

    2. What are the payment options in WooCommerce?

    WooCommerce offers multiple payment options. You can allow customers to pay through their credit cards, Stripe, PayPal, Klarna, Apply Pay, and more.

    3. How do I add pay later to WooCommerce?

    You can use a plugin like WP Simple Pay to add an installment plan and pay later in WooCommerce. Other plugins like Affirm and Klarna Payments in WooCommerce are also great for setting up split payments.

    We hope this article helped you learn how to set up installment payments in WooCommerce. You may also want to see our guide to WooCommerce SEO and the best eCommerce plugins compared.

    If you liked this article, then please subscribe to our YouTube Channel for WordPress video tutorials. You can also find us on Twitter and Facebook.

    The post How to Set Up Installment Payments in WooCommerce – 7 Plugins first appeared on WPBeginner.

  • How to Add Free Trial Subscriptions in WordPress (4 Methods)

    Do you want to add free trial subscriptions in WordPress?

    Subscriptions are a great way to get consistent, recurring revenue for your business. However, it can be difficult to convince people to sign up for long-term subscriptions.

    In this guide, we’ll show you how to get more signups by adding free trial subscriptions to your WordPress website.

    How to add free trial subscriptions in WordPress

    Why Add Free Trial Subscriptions in WordPress?

    By adding subscriptions to your website, you’ll have a more consistent cash flow, fewer payment errors, and fewer payment delays. However, customers often want to try before they buy, especially if you’re selling longer-term or more expensive subscriptions.

    With that being said, it’s a good idea to offer free trials for all your subscriptions. For example, you might give customers a free month’s trial of your subscription box service or create a free one-week pass for your online yoga classes.

    An example of a subscription box with a free trial

    If customers enjoy the free trial, then they might pay for a premium subscription. Even if shoppers don’t sign up straight away, you can still use their contact information to do lead generation. For example, you might send them exclusive coupon codes or target them with web push notifications.

    With that being said, let’s see how you can add free trial subscriptions in WordPress. Simply use the quick link below to jump straight to the method you want to use.

    Method 1: Easy Digital Downloads (Free Trial For Software and Digital Products)

    Do you want to offer a free trial subscription for digital products? Maybe you’re planning to sell subscriptions for online courses, a stock photography website, a digital music store, or something else.

    The easiest way to offer free trial subscriptions for digital products is by using Easy Digital Downloads. This plugin lets you easily sell ebooks, PDF files, audio files, videos, and any other type of digital product.

    Even better, if you’re a SiteGround customer then the Easy Digital Downloads plugin comes pre-installed, so you can start selling subscriptions and digital products straight away.

    In this guide, we’ll show you how to create a free trial for an all-access pass. This pass will look just like any other digital product on your online store.

    An example of an all access pass created using Easy Digital Downloads

    After signing up for the free trial, customers will be able to view, access, and download different products on your online store.

    Customers can simply click on a link inside their account, to see all the products that are included in their free pass.

    An example of an unlimited pass created using Easy Digital Downloads

    To stop customers from abusing their trial, you can set daily download limits, limit the free pass to specific product categories, and more.

    With all that in mind, we’ll be using three extensions to create a user-friendly ‘all access’ free trial. You’ll need to buy the Extended or higher license for Easy Digital Downloads in order to download these three extensions.

    For step-by-step instructions on how to set up Easy Digital Downloads, please see our guide on how to sell digital downloads on WordPress.

    Install Easy Digital Downloads Extensions

    After setting up Easy Digital Downloads, it’s time to install the extensions by going to Downloads » Extensions.

    Installing Easy Digital Downloads extensions

    On this screen, find the All Access, Free Downloads, and Recurring Payments extensions.

    For each extension, click on the ‘Install’ button.

    Installing Easy Digital Downloads addons

    Create a Free Trial Subscription in WordPress

    With that done, you’re ready to create a free all access trial. To get started, head over to Downloads » Downloads in the WordPress dashboard.

    On this screen, click ‘Add New.’

    Adding a new digital download using WordPress

    You can now type in a name for the subscription.

    This will be visible to customers, so it’s a good idea to use something descriptive.

    Creating a free trial subscription using Easy Digital Downloads

    After that, scroll to the ‘Download Options’ section. Under ‘Pricing Options,’ type in 0.

    Next, check the box next to the following option: ‘Enable free trial for subscriptions.’

    Enabling a free trial in Easy Digital Downloads

    Now, it’s time to turn this subscription into a free all-access pass that customers can use across your entire online store.

    To do this, simply scroll to the ‘All Access’ section and check the following option: Convert this product into an “All Access” pass.

    Creating an all access pass for an online store

    Limit the Trial to Specific Product Categories (Optional)

    By default, the free trial gives customers access to all your products. However, you can restrict the free trial to specific product categories. For example, if you create and sell ebooks then you might include some books in the free trial, and keep others for paid subscribers.

    To restrict the free trial to specific categories, simply click on the ‘x’ next to ‘All Products.’

    Limiting a free trial to specific product categories

    After that, you can click on the ‘Type to search categories’ dropdown and start typing in the category you want to include in the free trial.

    When the right category appears, click to select it.

    Creating a free trial subscription for specific product categories

    Set a Time Limit

    With that done, you can choose whether to make the free trial permanent or to set a time limit.

    If you’ve restricted the free trial to specific product categories, then it may make sense to choose ‘Never Expires.’ For example, if you sell digital art and graphics then you might allow customers to download as many watermarked images as they want, forever. However, they’ll need to buy a subscription in order to remove the watermark.

    Just be aware that Easy Digital Downloads also allows you to set a download limit. This means you can use ‘Never Expires’ while also limiting how many items the customer can download.

    To create a never-ending free trial, open the ‘All Access Duration’ dropdown menu and choose ‘Never Expires.’

    How to create a permanent free trial

    Another option is to set a time limit. This works particularly well for digital products that take a while to get through or for products the customer will want to access over and over again.

    For example, if you create and sell online courses then you could offer a two-day free trial, so customers will need to buy a subscription to finish their training.

    To set a time limit, open the ‘All Access Duration’ dropdown and choose from years, months, weeks, or days. You can then type a number into the field that appears.

    Changing the duration of an all access pass in WordPress

    Add a Daily, Weekly, Monthly, or Yearly Download Limit

    You can also type in a Download Limit. This can protect your site from customers who might try to abuse the free trial. For example, if you sell Excel or Google Spreadsheets in WordPress, then you might set a download limit so customers can’t download your entire product catalog while on a free trial.

    By default, Easy Digital Downloads has a download limit of 0, which means the customer can download as many products as they want. To change this, type a number into the ‘Download Limit’ field.

    You can then make this limit per day, week, month, or per year using the dropdown that appears.

    Adding a download limit for your free trial

    Adding Variable Pricing to Your Free Trial (Optional)

    Are you using variable pricing on your online marketplace? Then you may want to include specific price variations in the free trial.

    For example, if you’ve created Standard and Deluxe price variations, then you may want to include Standard in the free trial, while keeping the Deluxe version for paying users only.

    Creating variable pricing using Easy Digital Downloads

    If you’ve enabled variable pricing, then Easy Digital Downloads includes all variations in its free trial by default.

    To change this, find ‘Total Price Variations’ and type in how many variations you want to include in the free trial. Depending on the number you use, you’ll see a list of the different variations on your online store.

    Digital products with variable pricing

    Simply check the box next to each variation you want to include in the free trial.

    Customizing the Purchase Confirmation Page and Email

    When a customer downloads a product using their free trial pass, Easy Digital Downloads will show them a Purchase Confirmation page.

    An example of a purchase confirmation screen on an online store

    It will also send a confirmation message to their email address.

    By default, both the Purchase Confirmation page and email contain the following link: Click here to use your All Access Pass. This takes the customer to a page where they can download their free products.

    To change the link text, type into the ‘Receipts: All Access Link Message’ box.

    How to customize a purchase receipt using Easy Digital Downloads

    You can also change the page where Easy Digital Downloads will send customers when they want to download their free products.

    To do this, simply create a new page in WordPress and then add the following shortcode:

    [downloads all_access_customer_downloads_only="yes"]
    

    This will show all the products the customer can download while on a free trial. You can then add other content, such as text, images, a contact form, or anything else you want to include.

    How to offer a free trial subscription using WordPress

    For more information on how to place the shortcode, please see our guide on how to add a shortcode in WordPress.

    After publishing the page, simply add its URL to the ‘Receipts: Link URL’ field.

    Customizing the purchase receipts link for a digital download

    When you’re happy with how the free trial is set up, click on the ‘Publish’ button.

    Create a Premium Subscription

    With that done, you may want to create a premium ‘all access’ subscription. When their free trial expires, customers can upgrade to this subscription and continue enjoying your content.

    To create a premium subscription go to Downloads » Add New.

    You can then type in a name for the subscription and set the price, by typing into the ‘Pricing Options’ field.

    Adding pricing options to a digital product in WordPress

    You can also make this a recurring subscription, add an optional sign-up fee, and more using the settings under ‘Download Prices.’

    With that done, scroll to the ‘All Access’ section. At this point, you can turn the subscription into an all-access pass, add a download limit, and more by following the same process described above.

    When you’re happy with how the premium all-access subscription is set up, don’t forget to click on ‘Publish’ to make it live.

    Remove the Checkout for Free Trial Users

    After creating the free trial subscription, you’ll want to get as many signups as possible. With that being said, it’s a good idea to allow customers to start the free trial without going through the checkout screen.

    Easy Digital Downloads can hide the checkout screen when a customer is claiming a free product, including your free trial subscription.

    To do this, simply go to Downloads » Settings, and then select the ‘Marketing’ tab. Next, click on ‘Free Downloads’ to hide the checkout.

    How to hide the checkout for free trial signups and free downloads

    After that, you can use ‘Button Label’ to specify the text you’ll show when products are available for free download.

    By default, this is ‘Download Now.’

    How to customize the all access download pass

    You can replace this with your own custom messaging.

    Simply go ahead and type into the ‘Button Label’ field.

    Customizing the free download and free trial subscription CTA

    There are more settings that can help you do lead generation like a pro. For example, you can collect the person’s name and email address, even when they’re signing up for a free trial or downloading a free product. However, we recommend keeping things simple, as this will often get you the most signups.

    When you’re happy with the changes you’ve made, click on ‘Save Changes.’ Now, if you visit the free trial product page, you’ll see the new button text in action.

    How to add a free trial subscription to a website

    Create Expiration Reminder Emails

    Free trials can generate leads, but the goal is to convert those people into paying customers.

    With that in mind, you may want to email people when their free trial is about to expire. This will encourage them to buy a premium subscription, so they can continue accessing your digital content.

    ​​Easy Digital Downloads integrates with all the best email marketing services. However, you can also create reminder emails using the Recurring Payments extension you installed earlier.

    To use this extension, go to Download » Settings. Then, select the ‘Emails’ tab followed by the ‘Recurring Payments’ link.

    How to set up recurring payments for online subscriptions

    On this screen, check the box next to ‘Send Expiration Reminders.’

    After that, select ‘Add Expiration Reminder.’

    How to create an expiration reminder for an online subscription

    This takes you to a screen where you can type in an email subject and a message.

    To make the email more personal, it’s a good idea to use template tags. Easy Digital Downloads will replace these tags with real values such as the customer’s name, the expiration date, and the name of their subscription.

    You can see all the available template tags underneath the small text editor.

    Create personalized emails using template tags

    Just be aware that Easy Digital Downloads will send the message to all customers, and not just the people on your free trial.

    When you’re happy with the information you’ve typed in, click on Add Reminder Notice.

    How to add a reminder notice using Easy Digital Downloads

    Now, Easy Digital Downloads should notify customers when their subscription is about to expire. However, sometimes your WordPress hosting server may not be properly configured or email providers such as Gmail might use filters that wrongly flag your emails as spam.

    To get more conversions, your emails need to arrive in the customer’s inbox and not in the spam folder. For that reason, we recommend using a WordPress SMTP plugin and provider to improve your email deliverability

    WP Mail SMTP is the best WordPress SMTP plugin on the market. It allows you to connect your WordPress site with a mailer service. This means your expiration reminder and other messages will always arrive safely in the customer’s inbox.

    Method 2. MemberPress (Free Trial For Memberships or Courses)

    A membership website allows users to pay for premium content, online courses, features, and access to a community. However, these members-only features are usually hidden behind a paywall in WordPress, so visitors can’t see what the membership includes.

    With that in mind, you may want to offer visitors a free trial so they can try before they buy. The easiest way to do this is by using MemberPress.

    MemberPress is an all-in-one membership plugin that allows you to accept payments, add unlimited membership levels, create gated content, restrict access based on different membership levels, and much more. It also lets you create as many free trials as you want, including different trials for different membership levels.

    First, you’ll need to install and activate the plugin. If you need help, then please see our guide on how to install a WordPress plugin.

    You can now add payment methods, create members-only content, design a pricing page, and more. For step-by-step instructions, please see our ultimate guide to creating a WordPress membership site.

    Once your site is set up, you’re ready to create a membership plan with a free trial.

    Create a New Membership Level

    To get started, head over to MemberPress » Memberships in the WordPress dashboard. Here, click on the ‘Add New’ button.

    Adding a new membership subscription to WordPress

    You can now type in a title for the membership plan, add an optional description, upload a featured image, and more.

    For more information, please see our ultimate guide to creating a WordPress membership site.

    Adding a membership level to a website using MemberPress

    With that done, you can set the price by typing into the ‘Price’ box.

    This is how much members will pay once the free trial expires.

    Creating a paid membership subscription using MemberPress

    You can only create a free trial for recurring memberships. However, if you want to charge members a one-time fee then there’s a workaround, which we’ll be covering shortly.

    With that being said, open the ‘Billing Type’ dropdown and choose ‘Recurring.’

    How to create a recurring membership using WordPress

    Next, you need to set the billing interval for the recurring payment. This is how often your members will be charged once the free trial expires.

    Simply open the ‘Interval’ dropdown and choose an option from the list, such as monthly or yearly billing.

    How to set a billing interval for a membership subscription

    Want to use a different interval? Then select ‘Custom’ instead.

    You’ll now see some new controls where you can set a custom interval.

    Setting a custom billing interval for your membership site

    Create a Free Trial Membership Subscription

    With that done, check the box next to ‘Free Trial.’

    You can now specify how many days the free trial will last, by typing into the ‘Trial Duration’ field. For example, if you want to offer a one-month trial then you would type in ‘30.’

    Changing the duration of a free membership trial

    After that, you’ll need to type in the ‘Trial Amount,’ which is the total cost of the subscription trial period before tax. You’ll typically want to type ‘0’ into this box.

    Finally, you can choose whether to limit customers to one free trial by checking or unchecking the ‘Allow Only One Free Trial’ box. If you check this box, then customers who cancel their subscription and then re-subscribe won’t get another free trial.

    You’ll typically want to leave the box checked, so customers can’t abuse the free trial. However, if you only offer a very short trial then you may want to allow customers to have multiple free trials.

    Choose whether to allow multiple free trials per member

    Just be aware that coupons will override this setting, so it’s still possible to offer multiple free trials to the same customer.

    Create a Lifetime Membership (Optional)

    As already mentioned, you can only offer a free trial for recurring memberships. However, it is possible to create a trial for lifetime memberships, by changing a few MemberPress settings.

    To do this, check the ‘Limit Payment Cycles’ box and set the ‘Max # of Payments’ to 1.

    Limiting the payment cycles using MemberPress

    After that, open the ‘Access After Last Cycle’ dropdown and select ‘Lifetime Access.’

    Now, once the trial expires customers will need to pay a one-time fee for lifetime membership.

    Creating a one-time payment membership

    Publish the Free Trial Membership Subscription

    With that done, you can make any other changes to the membership level.

    When you’re happy with how the membership is set up, it’s time to make it live by clicking on the ‘Publish’ button.

    Publishing a membership level with a free trial

    To see how the membership looks to potential customers, go to MemberPress » Memberships. On this screen, you’ll see the membership level you just created.

    Here, just hover your mouse over the membership level and click on the ‘View’ link.

    Previewing a membership level in WordPress

    WordPress will now show the membership signup form in a new tab.

    Do you want to add a free trial to more membership levels? Then simply follow the same process described above.

    Once you’ve added a free trial to your membership site, you’ll want to encourage visitors to sign up for the free trial. This might mean mentioning the free trial in your email newsletter, creating popups using a WordPress popup plugin, promoting it on social media, and more.

    Method 3. WooCommerce Subscriptions (Free Trial For Physical Products)

    If you want to sell digital products online, then we recommend using Easy Digital Downloads. However, if you want to sell physical products, then WooCommerce is the world’s most popular eCommerce platform.

    By default, WooCommerce doesn’t allow you to offer free trial subscriptions. However, it’s easy to add this missing feature using WooCommerce Subscriptions.

    This plugin adds a new ‘simple subscription’ product type to your WooCommerce store. You can add this product type to any existing item, or create new subscription products. For example, you might let shoppers try a product before they buy it, or maybe you will send them a sample subscription box from your online boutique shop.

    When a customer visits a subscription product, they’ll see a ‘Sign up now’ button instead of the standard ‘Add to cart’ call to action button.

    A free trial subscription, created using WooCommerce

    The WooCommerce checkout page will also show some information about the subscription.

    This includes the length of your free trial.

    An example of a free trial subscription on a WooCommerce store

    Customers can manage all their subscriptions by logging into their WooCommerce account, and then visiting the new ‘My Subscriptions’ section.

    Here, they can see when the subscription started, how much it costs, the subscription status, and more. The customer can also cancel, reactivate, and renew their subscriptions directly from this page, without having to contact you directly.

    How to manage WooCommerce subscriptions

    In this way, a customer who is enjoying a free trial can quickly and easily upgrade to a premium subscription.

    In this guide, we’re going to assume you’ve already set up a WooCommerce store. If you haven’t, then you may want to check out our complete guide to WooCommerce made simple.

    After that, you’ll need to install and activate the WooCommerce Subscriptions plugin. If you need help, then please see our guide on how to install a WordPress plugin.

    As soon as the plugin is active, you’re ready to add free trial subscriptions to WooCommerce. Simply go to Products » Add New.

    How to add a new product in WooCommerce

    You can now create this product in exactly the same way you create any WooCommerce product. For example, you can type in the product’s title, add a description, or create a WooCommerce product gallery.

    After entering all this information, scroll to the ‘Product Data’ box.

    Adding product data to WooCommerce

    Here, open the dropdown menu and choose ‘Simple subscription.’

    This adds some new settings that you can use to create a subscription and add a free trial.

    The new Simple Subscription WooCommerce product type

    To start, type in the ‘Subscription price.’

    Then, use the dropdown menus to choose how long the subscription will last. In the following image, the subscription will cost $20 per month once the free trial expires.

    Setting the WooCommerce subscription price

    You can now choose whether the subscription will last forever, or expire after a set amount of time. Just be aware that the expiration length doesn’t include the free trial. This means that if the subscription expires in 1 month and you offer a one-month free trial, then the subscription will last for 2 months.

    Another option is to give the customer lifetime access. To do this, open the ‘Expire After’ dropdown and choose ‘Never expire.’

    Setting an expiration date for a WooCommerce subscription

    Next, you may want to add a sign-up fee.

    Just be aware that WooCommerce will charge this fee no matter whether the customer is buying a subscription or signing up for a free trial. With that in mind, we don’t recommend adding a sign-up fee to products that have a free trial subscription.

    Adding an optional signup fee in WooCommerce

    With that done, you can specify how long the free trial will last by opening the dropdown that shows ‘days’ by default, and then choosing an option from the list.

    After that, just type in how many days, weeks, months, or years the free trial should last. Note that the free trial can’t last longer than 90 days, 52 weeks, 24 months, or 5 years.

    Creating a free trial in WooCommerce

    You can now make any other changes to the product. When you’re happy with how the product and subscription are set up, either click on ‘Update’ or ‘Publish’ to make the trial live.

    You can now create free trial subscriptions for other products, by following the same process described above.

    Once you’ve added one or more subscriptions to your WooCommerce website, you’ll want to get as many signups as possible. With that in mind, you should allow visitors to use their preferred payment method.

    By adding the free Stripe Payment Gateway for WooCommerce plugin to your website, you can collect payments through Visa, MasterCard, Google Pay, Apple Pay, and more.

    Simply install the plugin and the onboarding wizard will guide you through the process of adding more payment methods and enabling express checkout.

    The Stripe Payment Gateway for WooCommerce plugin

    Method 4. WP Simple Pay (Free Trial For Custom Services)

    Many freelancers, consultants, trainers, and other business owners sell their services as a subscription. For example, if you run a yoga studio then you might offer a one month free trial of your personalized training program.

    The best way to offer a free trial for custom services is by using WP Simple Pay. It’s the best Stripe payment plugin for WordPress and lets you accept payments, manage invoices, and offer free trials without having to set up a shopping cart, or add products to an online store.

    Note: There is a free version of WP Simple Pay that allows you to accept credit cards, Apple Pay, iDEAL, and other payment methods. However, in this guide we’ll be using the premium plugin as it allows you to offer free trials.

    Set Up the WP Simple Pay Plugin

    First, you’ll need to install and activate the WP Simple Pay plugin. If you need help, then please see our guide on how to install a WordPress plugin.

    Upon activation, the plugin will automatically launch the setup wizard. Go ahead and click the ‘Let’s Get Started’ button.

    The WP Simple Pay setup wizard

    After that, you’ll need to enter the license key. You can find this information under your account on the WP Simple Pay website.

    With that done, click the ‘Activate and Continue’ button.

    Adding a license to a WordPress plugin

    Connect WordPress to Your Stripe Account

    In the next step, you’ll need to connect your Stripe account to WP Simple Pay. Stripe is a popular payment gateway, and it’s the easiest way to accept credit card payments in WordPress, so it’s a great way to sell custom services online.

    To get started, simply click the ‘Connect with Stripe’ button. You can then either log into your Stripe account, or create a new account if you haven’t already registered with Stripe.

    Connecting your WordPress website to Stripe

    After connecting WP Simple Pay with Stripe, the setup wizard will ask you to configure its emails. You can choose whether to receive emails for payment receipts, upcoming invoices, and payment notifications.

    You’ll also need to enter the email address where WP Simple Pay will send the messages.

    Configuring WP Simple Pay's emails

    Simply click the ‘Save and Continue’ button when you’re done.

    Create a Subscription Form With a Free Trial

    Now, you’re ready to create a subscription form that offers a free trial. Go ahead and click on the ‘Create a Payment Form’ button.

    Completing the WP Simple Pay setup

    WP Simple Pay comes with a ton of ready-made templates that you can use to create ‘buy now pay later’ payment plans, get donations, accept Google Pay in WordPress, and more.

    To offer a free trial, hover over the ‘Recurring Services with Trial Period Form’ template. When it appears, click on the ‘Use Template’ button.

    The WP Simple Pay's subscription and free trial template

    This will take you to the payment form editor.

    To start, you can rename the form and type in an optional description. By default, the description is ‘Try our service free for 30 days,’ but you can change this to anything you want.

    Adding a title and description to a subscription form

    By default, WP Simple Pay will create an on-site payment form. However, you may want to show a payment button instead. When the visitor clicks the button, they’ll see the payment form in a popup.

    To create a popup, check the box next to ‘Open in an overlay modal’ box.

    Opening a subscription form in a popup

    Another option is to host the payment form on Stripe’s site, by opening the ‘Type’ dropdown.

    Here, select ‘Off-site Stripe Checkout form.’

    Hosting a subscription and payment form on the Stripe website

    When a customer buys a subscription, WP Simple Pay will redirect them to its built-in Payment Success Page. If you want to send visitors to a different page, then select either ‘Specific Page’ or ‘Redirect URL.’

    You can then either type in the URL or select the page you want to use instead. For example, you might send subscribers to a custom thank you page, or a page where they can manage their free trial.

    Changing the payment success page in WordPress

    Add a Price to Your Subscription Form

    When you’re ready, select the Payment tab.

    Here you can set the payment mode to either live or testing. Testing mode allows you to complete the purchasing process without getting charged, so it’s perfect for testing new subscriptions on your website.

    Creating a subscription form in testing mode

    If you do select ‘Test Mode,’ then remember to come back to this page and change the mode to ‘Live’ when you’re finished testing.

    Next, you can set the price of your subscription and the currency using the ‘Amount’ settings.

    Adding a price to a subscription form with a free trial

    With that done, you can choose how often WP Simple Pay should charge subscribers.

    Simply open the ‘Billing Period’ dropdown and choose day, week, month, or year. Then, type a number into the field next to the dropdown menu.

    Setting a billing period for a subscription form in WordPress

    By default, WP Simple Pay offers customers a 30 day free trial.

    If you want to make the free trial longer or shorter, then simply type a number into the ‘Free Trial’ field.

    Setting the free trial duration

    Sometimes, you may want to charge subscribers a set up fee. For example, if you’re a life coach then this extra fee may cover the time and effort required to add new clients to your admin system.

    To charge an additional fee, simply type an amount into the ‘Setup Fee’ field.

    Adding a set up fee to a subscription form with a free trial

    With that done, scroll to the ‘Payment Methods’ section.

    Here, you can check the box next to any additional payment methods you want to offer, such as Klarna payments or ACH payments.

    Adding more payment methods to your website

    By offering visitors a choice of payment methods, you may be able to get more subscribers. However, try not to offer too many options, as this can become confusing.

    Depending on the payment methods you select, you may see a ‘Configure’ link. In this case, click on ‘Configure’ and then follow the onscreen instructions to set up the payment gateway or method.

    Adding more payment methods to WP Simple Pay

    Customize the WP Simple Pay Subscription Form

    With that done, you’re ready to build the subscription form.

    Simply click on ‘Form Fields’ to open WP Simple Pay’s form builder.

    Customizing the WP Simple Pay subscription template

    The template already collects some basic information about the customer, such as their email address and credit card information.

    The following image shows how the default form will look on WordPress.

    An example of a subscription form, created using WP Simple Pay

    To customize any of the default fields, simply click select it.

    The section will expand to show all the settings you can customize, such as changing the field’s label or adding some placeholder text.

    Customizing the recurring payment form

    You can also remove fields from the subscription form.

    Simply click to expand the field, and then select ‘Remove.’

    Deleting fields from a subscription form

    Do you need to collect more information from your new subscribers? For example, you might need their tax ID or phone number.

    Just click on the ‘Form Fields’ dropdown and then choose a field from the list. After that, click on ‘Add Field.’

    Adding WP Simple Pay fields to a subscription form

    Finally, you can change the order the fields appear in your form using drag and drop.

    As you’re customizing the form, you can click on ‘Preview’ to see how it will look on your blog or website.

    Previewing how a subscription form and free trial will look on your WordPress website

    When you’re happy with the form, click ‘Publish’ to store your settings.

    Add the Subscription Form to Your WordPress Website

    Now, you’re ready to add the form to your WordPress blog using either a block or shortcode.

    The easiest method is to use a block, so open the page or post where you want to show the subscription form.

    Then, click on the plus (+) sign and type in ‘WP Simple Pay.’

    Adding a block using the page or post editor

    When the right block appears, click to add it to the page or post.

    With that done, open the dropdown menu in the WP Simple Pay block, and choose the form you want to display.

    Adding a WP Simple Pay form to your website using blocks

    When you’re finished, click on either ‘Update’ or ‘Publish.’

    Now, if you visit your website you’ll see the subscription form live.

    An example of a subscription form, on a WordPress website

    Another option is to add the subscription form using shortcode. To get the shortcode, head over to WP Simple Pay » Payment Forms in the WordPress dashboard.

    Here, just find the subscription form and click on its ‘Copy Shortcode’ button.

    Adding a subscription form to your website using shortcode

    Now you just need to paste the shortcode into any page, post, or widget-ready area. For step-by-step instructions on how to place the shortcode, please see our guide on how to add a shortcode in WordPress.

    We hope this article helped you learn how to add free trial subscriptions in WordPress. You may also want to check out our guide on how to run a giveaway / contest in WordPress, and the best live chat software for small businesses.

    If you liked this article, then please subscribe to our YouTube Channel for WordPress video tutorials. You can also find us on Twitter and Facebook.

    The post How to Add Free Trial Subscriptions in WordPress (4 Methods) first appeared on WPBeginner.

  • How to Validate Customer Phone Numbers (2 Ways)

    Are you looking for ways to validate your customer’s phone numbers?

    Phone number verification helps filter invalid leads before they’re added to your database. This way, you’ll save time and cost by only removing fake or inactive numbers.

    In this article, we will show you how to validate customer phone numbers using different ways.

    How to validate customer phone number

    Why Validate Customer Phone Numbers?

    If you collect customer phone numbers as part of lead generation, then it is important to validate the contact information.

    Sometimes, a user might make an error when entering the phone number, providing a fake number, or the number is no longer active. It’s important to verify this information and make sure that your efforts don’t go to waste.

    That’s because you can use a valid phone number to provide customer support through a business phone service, deliver shipping details, order information, marketing and sales-related activities, and more.

    Plus, you’ll also reduce costs by removing invalid contact information. This is really useful when you’re using marketing tools to send SMS messages, emails, and other messages, as you’ll save credits.

    That said, let’s see how to validate customer phone numbers in WordPress. We’ll cover different methods, so you can click the links below to jump ahead to any section.

    Method 1: Validate Phone Numbers using WP Simple Pay

    If you’re selling digital products online, then you can verify the customer’s phone number using WP Simple Pay. It is the best Stripe payment plugin for WordPress and allows you to accept online payments without setting up a shopping cart.

    The plugin offers a phone number validation feature that confirms if a user has entered the phone number correctly. This way, you can reduce the likelihood of typos and errors.

    For this tutorial, we will use the WP Simple Pay Pro plan because it includes the phone number validation feature. However, there is also a free version of WP Simple Pay available.

    First, you’ll need to install and activate the WP Simple Pay plugin. If you need help, then please see our guide on how to install a WordPress plugin.

    Upon activation, you’ll see the WP Simple Pay setup wizard. Simply click the ‘Let’s Get Started’ button to continue.

    WP Simple Pay

    On the next screen, you’ll need to enter the license key. You can easily find the key in your WP Simple Pay account area.

    After entering the license key, you can click the ‘Activate and Continue’ button.

    You’ll Be Asked to Enter Your WP Simple Pay License Key

    Next, you must connect your Stripe account with WP Simply Pay.

    Go ahead and click the ‘Connect with Stripe’ button to move forward.

    Connecting WP Simple Pay to Stripe

    You’ll now need to login to your Stripe account and follow the onscreen instructions to connect your account.

    Do note that Stripe only works with sites with SSL encryption. Most WordPress hosting services provide free SSL certificates. However, you may also want to see our guide on how to move a website from HTTP to HTTPS.

    Once you’ve connected your Stripe account, the setup wizard will ask you to configure the email settings. You can enable options to receive payment receipts, upcoming invoices, and payment notifications.

    Configure Your WP Simple Pay Emails

    Go ahead and click the ‘Save and Continue’ button when you’re done.

    Now, you’re ready to create a payment form in WP Simple Pay. Simply click the ‘Create a Payment Form’ button.

    WP Simple Pay Setup Is Complete

    WP Simple Pay offers multiple form templates to choose from. You can simply add a payment button, donate button, or set up all types of payment forms.

    For this tutorial, we will select the ‘Payment Form’ template. You can hover over the template and click the ‘Use Template’ button.

    Select the Payment Form Template

    Next, you can edit your payment form.

    In the General settings tab, you’ll see options to change the form title, description, form type, payment success page settings, and more.

    Edit payment form general settings

    After that, you can switch to the ‘Payment’ tab.

    Here, you will see different settings to edit the pricing options.

    Change the pricing options

    You can scroll down to add prices for your products. Plus, there are also settings to choose the subscription type. For instance, you can make it a one-time payment or a recurring subscription.

    WP Simple Pay also lets you add different payment methods. You can accept payments through credit/debit cards, ACH direct debit, Aplipay, Klarna, and more.

    Add prices and payment methods

    After that, you can switch to the Form Fields tab to add or remove different fields in your payment form.

    By default, WP Simple Pay won’t add the phone number field.

    To add the field, simply click the Form Fields dropdown menu and select the ‘Phone’ field. Once you’ve selected it, click the ‘Add Field’ button.

    Add phone number form field

    Next, you can expand the Phone field and further customize it, like editing its label and making it a required field.

    For phone number verification, make sure that you enable the ‘Offer Smart Phone Number Validation’ option and select the default country.

    Edit phone number field

    Aside from that, you can edit other form fields and rearrange their order by simply dragging them up or down.

    Once you’re done editing, go ahead and click the ‘Publish’ button.

    Publish your payment form

    Next, you can add the payment form on any page or post on your WordPress site.

    Simply edit or add a new post or page. Once you’re in the content editor, click the ‘+’ icon and add the ‘WP Simple Pay’ block.

    Add a WP Simple Pay block

    Now, click the dropdown menu in the block to select your payment form. Once that’s done, simply publish or update your page.

    You can now visit your website to see the payment form with the phone number validation option.

    Payment form with phone validation

    When a user enters an invalid phone number, they will not be able to move ahead in the form.

    Method 2: Validate Phone Numbers using Formidable Forms

    Another way to verify your customer’s phone numbers is using Formidable Forms. It is one of the best contact form plugins for WordPress. It offers powerful features and helps you create complex forms, like mortgage calculators.

    Formidable Forms lets you add a phone number field to your forms and helps validate the numbers. You can also select a format, so users enter the correct information without making any mistakes. This is really useful if you’re collecting leads or gathering user information on a WordPress blog.

    For this tutorial, we will be using the Formidable Forms Pro version because it includes advanced settings for phone validation.

    First, you’ll need to install and activate the Formidable Forms Lite plugin, which acts as a base for advanced premium features. For more details, please see our guide on how to install a WordPress plugin.

    Upon activation, you can head to the Formidable » Global Settings. Here, you will need to click the ‘Click to enter a license key manually’ link.

    Formidable Forms license key

    After that, simply enter the license key in the box and click the ‘Save License’ button.

    You can find the license key in your Formidable Forms account area.

    Enter Formidable Forms license key

    Now, you’re ready to create a new WordPress form.

    Next, you can go to Formidable » Forms from the WordPress dashboard and click the ‘+ Add New’ button.

    Creating a new form sing Formidable Forms

    After that, Formidable Forms will ask you to select a form template. There are multiple templates to choose from.

    For this tutorial, we will use the ‘Contact Us’ form template.

    Select formidable forms template

    Next, you’ll see the drag-and-drop form builder, where you can edit your contact form.

    From the panel on your left, simply drag the ‘Phone’ field and drop it onto the template.

    Add the phone form field

    You can now select the Phone form field and further customize it.

    For instance, there are options to change its label, make it a required field, and enter CSS classes.

    Edit the phone form field

    Next, you can open the ‘Advanced’ tab from the panel on your left.

    Here, you can set the format for your phone number. This will help users to fill in the contact information correctly. Besides that, there are other options to add placeholder text, edit the field size, add max characters, and more.

    Edit advanced form settings

    Lastly, you’ll need to switch to the ‘Validation Messages’ tab from the left panel.

    In this section, you can enter the message that customers will see when they enter an invalid format.

    Enter validation message

    Other than that, Formidable Forms also offers different settings for your WordPress form.

    You can switch to the ‘Setting’ tab from the top to view them. For instance, there are options to edit the actions and notifications for your form.

    By default, Formidable Forms will send a confirmation message when a user submits a form. Plus, your website admin will also receive an email that a new form has been submitted.

    Edit formidable form settings

    After making changes to the form settings, you can embed in any page or post.

    Simply click the ‘Embed’ button at the top. A new window will now open where you’ll need to select an existing page, create a new page, or manually insert the form on your website.

    Embed your form

    For this tutorial, we will select the ‘Create new page’ option.

    Next, you’ll need to enter a name for the new page. Once that’s done, click the ‘Create page’ button.

    Enter a name for your form page

    You should now see a preview of your form in the WordPress block editor.

    Go ahead and publish your page. You can visit your website to see the contact form with the phone number validation field.

    View contact form with phone number

    Now, if someone enters the phone number with an invalid format, they won’t be able to submit the form and will see the validation message.

    We hope this article helped you learn how to validate customer phone numbers. You may also want to see our guide on the best live chat software for small businesses and our ultimate guide to WordPress SEO.

    If you liked this article, then please subscribe to our YouTube Channel for WordPress video tutorials. You can also find us on Twitter and Facebook.

    The post How to Validate Customer Phone Numbers (2 Ways) first appeared on WPBeginner.

  • 7 Best Multi Currency WordPress Plugins (Free + Paid)

    Do you want users to easily change the currency on your WordPress website?

    A multi-currency WordPress plugin lets you show different currencies on your website and automatically apply the exchange rate. This way, customers can switch their local currency when purchasing a product.

    In this article, we’ll share the best multi-currency WordPress plugins that you can use on your site.

    Best multi currency WordPress plugins

    Why Use a Multi Currency WordPress Plugin?

    A multi currency plugin allows you to offer multiple currencies on your WordPress website. Your customers can switch currencies from the US dollar to their native currency with a click of a button.

    If you’re running an online store, then having a currency switcher plugin can come in handy.

    You can reach a wider audience and target users from around the world. Customers from other countries can easily convert the product prices into their local currency without leaving your website.

    It also improves the overall shopping experience for customers. The plugin removes any pricing confusion that people may have. As a result, you get to keep customers on your website and boost sales.

    That said, let’s look at the best multi-currency plugins for WordPress.

    1. Easy Digital Downloads

    The Easy Digital Downloads WordPress plugin

    Easy Digital Downloads is the best eCommerce plugin for WordPress that lets you sell digital products like ebooks, digital art, music files, software, and more.

    It offers multi-currency support and lets you show prices in different currencies. You can select from over 200 currencies and have complete control over the exchange rate.

    There is an automatic option where the plugin will auto-update the exchange rate and convert the price from USD to the customer’s local currency. On the other hand, you can also manually set the exchange rate.

    Multi currency settings in EDD

    Besides that, Easy Digital Downloads lets you sell digital downloads with ease. It offers unlimited file downloads, full data reporting, a shopping cart, and more. It also easily integrates with payment gateways like Stripe, PayPal and third-party tools like AWeber, ConvertKit and Slack.

    Pricing: Easy Digital Downloads is a premium plugin with prices starting from $99.50 per year.

    2. YITH Multi Currency Switcher for WooCommerce

    YITH multi currency switcher for WooCommerce

    YITH Multi Currency Switcher for WooCommerce is the next multi-currency WordPress plugin on our list.

    It is super easy to use and lets you add unlimited currencies to your WooCommerce store. You can show a currency switcher anywhere on your website and let customers choose their local currency.

    Besides that, the plugin also automatically detects users’ geolocation and displays prices in their native currency. It integrates with APIs of the European Central Bank, Google Finance, and other providers to automatically update exchange rates.

    You can also control the frequency of exchange rate updates. For example, the plugin can check it daily, twice daily, weekly, monthly, or every 15 days.

    Other than that, you get options to customize the currency switcher, display different payment methods for specific countries, and more.

    Pricing: YITH Multi Currency Switcher for WooCommerce is a premium plugin that will cost you $99.99 annually.

    3. WP Simple Pay

    WP Simple Pay

    WP Simple Pay is the best Stripe plugin for WordPress that lets you accept one-time or recurring payments on your website. The best part, you don’t have to set up a shopping cart to collect payments.

    WP Simple Pay lets you select from 135+ different currencies supported by Stripe. It also lets you choose your site’s region’s default currency, format, and tax rate. This way, you can charge customers in their native currency and receive funds in your preferred currency.

    With WP Simple Pay, you get a drag-and-drop payment form builder and over 10 different payment methods. For example, you can collect payments through credit and debit cards, Apple Pay, Google Pay, ACH direct debit, and more.

    Pricing: WP Simple Pay prices start from $49.50 per year. There is also a free version you can use to get started.

    4. CURCY – Multi Currency for WooCommerce

    CURCY

    CURCY is a free WooCommerce multi currency plugin. It lets you accept payments in different currencies and helps customers to switch to their preferred currency.

    The plugin is easy to use and set up. It automatically detects users’ location on your WooCommerce store and displays products in the native currency.

    You can also allow the plugin to set the exchange rate automatically. However, there are different options for controlling the exchange rate. For example, you can manually set the rate, keep the product prices fixed in other currencies, and manage the exchange rate fee.

    Pricing: CURCY is a free WordPress plugin.

    5. WooCommerce Multi-Currency

    WooCommerce multi currency

    WooCommerce Multi-Currency is a premium WooCommerce extension that allows you to show product prices in the customer’s country’s currency.

    Like many other plugins on our list, you can choose between automatic or manual exchange rate settings. The plugin supports different exchange rate providers’ APIs, such as Open Exchange Rate, Abstract, Exchange Rate API, and more.

    Using a shortcode, you can display the currency switcher anywhere on your WooCommerce store. It also has a sidebar widget and helps customers quickly convert prices into their local currency.

    Pricing: WooCommerce Multi-Currency prices start from $99 per year.

    6. Currency Switcher for WordPress

    Currency switcher plugin

    Currency Switcher for WordPress is another free and beginner-friendly plugin you can use to show different currencies on your website.

    It works with Open Exchange Rate API and allows you to automatically convert the prices into different currencies depending on the exchange rate. There is also an option to manually control the exchange rate.

    Currency Switcher for WordPress supports currency conversion for visitors from the United States, Australia, Europe, and India.

    You can easily add the currency switcher to any page using shortcodes. Plus, the plugin easily integrates with WordPress page builders like Elementor and Beaver Builder.

    Pricing: Currency Switcher for WordPress is free to use plugin.

    7. Currency Converter Widget

    Currency convertor widget

    Currency Converter Widget is a premium WooCommerce plugin that you can use on your store. The multi-currency plugin offers a dynamic widget that converts product prices in real-time.

    It automatically grabs the latest exchange rate and applies it to the products. You can add and convert as many currencies as you want.

    The best part is that the plugin saves the converted total at checkout. This way, you can see the prices customers saw on your WooCommerce store.

    Pricing: Currency Converter Widget will cost you $49 per year.

    Which is the Best Multi Currency WordPress Plugin?

    Based on our research, the best WordPress multi-currency plugin are Easy Digital Downloads, YITH multi currency switcher for WooCommerce, and WP Simple Pay.

    The choice of picking the best multi-currency plugin depends on the type of website you’re running.

    For instance, if you’re selling digital products, then Easy Digital Downloads is the best choice. It is super easy to use and lets you select from over 200 different currencies. You get full control over the exchange rate and can add as many currencies as you want.

    On the other hand, YITH Multi Currency Switcher for WooCommerce is the best multi-currency plugin to use if you have a WooCommerce store. It automatically detects the user’s location and converts product prices. Plus, you can choose from different providers to set the exchange rate.

    Lastly, you can also use WP Simple Pay to collect online payments without setting up a shopping cart. It is the best Stripe plugin and supports over 135 currencies.

    We hope this article helped you pick the best multi-currency WordPress plugin. You may also want to see our comparison of the best live chat software and best business phone services for small business.

    If you liked this article, then please subscribe to our YouTube Channel for WordPress video tutorials. You can also find us on Twitter and Facebook.

    The post 7 Best Multi Currency WordPress Plugins (Free + Paid) first appeared on WPBeginner.

  • 13 Best Gumroad Alternatives (Cheaper + More Powerful)

    Are you looking for a Gumroad alternative to create an online store?

    Gumroad is a popular eCommerce platform that lets you sell digital products, online courses, and membership-only content. However, their service isn’t flexible, and they recently increased their fees by quite a lot.

    In this article, we’ll share the best Gumroad alternatives and competitors that you can use to sell digital products and make money online without the high costs.

    Best Gumroad Alternatives - Cheaper and More Powerful

    Why Do You Need an Alternative to Gumroad?

    Gumroad is a self-hosted eCommerce platform where you can upload your products and start selling. You don’t need a hosting service, a payment service, or an online store to sell digital goods.

    While it is beginner-friendly, there are several drawbacks to using Gumroad.

    For starters, the platform now charges a flat 10% fee for every sale. These charges are in addition to the transaction fee.

    Previously, the percentage would decrease as your revenue grew. However, the new pricing change takes a significant amount of your income.

    For creators, this means aside from your local government taxes, now you’re going to be paying a Gumroad tax which simply isn’t acceptable.

    Gumroad pricing

    Besides that, Gumroad doesn’t offer much flexibility compared to other eCommerce solutions.

    For instance, you don’t get features for cross-sell or upsell products to boost sales. If you’re selling online courses, then Gumroad is at a disadvantage as it doesn’t include a learning management system (LMS).

    Other alternatives to Gumroad provide more features for personalizing your online store and providing a better customer experience.

    That said, let’s look at some of the best Gumroad alternatives.

    1. MemberPress

    MemberPress

    MemberPress is the best WordPress membership plugin that lets you sell subscription-based digital products and online courses.

    It’s a great alternative to Gumroad, as the plugin is user-friendly. You can easily create a membership site, set up multiple subscription levels, and control who can access content and products.

    MemberPress also offers a built-in drag-and-drop course builder functionality to create and sell online courses. Besides that, it includes a virtual classroom feature, which produces an immersive learning experience.

    Another feature offered by MemberPress that you won’t find in Gumroad is automatic drip content. The plugin allows you to release paid content to subscribers over time or once they’ve cleared a particular module.

    MemberPress also integrates with other popular WordPress plugins. For instance, you can track your site’s performance by combining it with MonsterInsights or create your affiliate marketing program by connecting it with AffiliateWP.

    Pricing: MemberPress pricing starts from $179.50 per year with their Basic plan. If you want more features like quizzes and premium integrations, then you can go for the Pro plan.

    2. Easy Digital Downloads

    We recommend using EDD and WordPress

    Easy Digital Downloads (EDD) is another Gumroad alternative you can use for selling digital products like ebooks, plugins, software, PDF files, and more.

    The plugin is best for bloggers, developers, marketers, artists, designers, and other creators to sell products online. It offers powerful features and allows you to create beautiful digital goods stores.

    You can start with EDD for free with SiteGround EDD hosting or just try the free version from their website.

    We use Easy Digital Downloads ourselves to sell our MonsterInsights and WPForms software, which shows just how powerful the plugin is. Plus, there are managed hosting services that come with EDD pre-installed.

    Other than that, Easy Digital Downloads offers multiple extensions. You can easily integrate different payment services, email marketing tools, messaging services, and more.

    The best part about using EDD is that it has a software licensing feature. It allows you to sell SaaS products, apps, and other tools with proper digital rights.

    Pricing: Easy Digital Downloads premium pricing plans start from $99.50 per year. However, you can also use a free version of EDD to get started and start selling online.

    3. WP Simple Pay

    WP Simple Pay

    WP Simple Pay is the best Stripe payment plugin for WordPress, and you can use it to accept online payments without setting up a shopping cart.

    It’s a great alternative to Gumroad, as you can sell digital products by simply adding a payment form using the plugin. The best part, WP Simple Pay offers a free version. You can accept one-time or recurring payments directly from your WordPress site.

    With WP Simple Pay, you get 13 payment methods in 135+ currencies spread across 45+ countries. Some popular methods include credit card payments, ACH debit payments, Google Pay and Apple Pay services, and more.

    You can also offer to buy now, pay later payment plans using WP Simple Pay. The plugin supports Klarna and Afterpay/Clearpay, which allow customers to pay in installments. This is great if you’re selling high-value or luxury products.

    Pricing: WP Simple Pay premium plan starts from $49.50 per year with the Personal plan. If you want to add recurring payments or buy now, pay later options, then you’ll need the Pro license. To get started, you can also use a WP Simple Pay Lite version for free.

    4. WooCommerce

    WooCommerce website

    WooCommerce is the most popular eCommerce plugin for WordPress. It is an open-source platform that you can use to create any kind of digital store.

    For instance, it lets you sell physical products online, set up membership plans, offer digital downloads and affiliate products, create dropshipping stores, and more.

    The best part is that there are many themes designed for WooCommerce. This allows you to fully customize and control the design of your eCommerce store.

    Another advantage of using WooCommerce over Gumroad is that you can use built-in options or third-party plugins to upsell and cross-sell products, recover cart abandonments, offer discount codes, free shipping, and more by using powerful tools like FunnelKit.

    Plus, it easily integrates with different payment services and third-party plugins. WooCommerce also offers premium extensions. You can easily optimize your store for SEO and boost search engine rankings to attract more visitors.

    To create a WooCommerce store, you’ll need WordPress hosting and a domain name. However, many hosting companies like Bluehost come with WooCommerce pre-installed.

    Pricing: WooCommerce is a free eCommerce platform you can use as a Gumroad alternative. While the plugin is free, you’ll still need to pay for website hosting. Please see our guide on how much does an eCommerce store cost for more details.

    5. WPForms

    WPForms

    WPForms is the best drag & drop online form builder, and it can be an excellent alternative to Gumroad if you want a simple way to accept credit card payments.

    It lets you easily build payment forms, so you can accept credit card payments using Stripe, PayPal, Authorize.net, and Square payment gateway.

    Aside from that, WPForms also integrates with hundreds of email marketing services, so you can automatically add your customers to your marketing automation drip campaigns.

    You can use WPForms to accept both one-time as well as recurring payments, and the best part is that it doesn’t charge any additional transactional fees.

    Pricing: While WPForms has a free version, you will need the WPForms Pro plan which costs $199.50 to accept payments.

    6. LearnDash

    The LearnDash LMS WordPress plugin

    LearnDash is one of the best LMS plugin for WordPress and allows you to run online courses. The plugin offers powerful features to manage your courses, add quizzes, run surveys, and easily accept online payments.

    Since Gumroad doesn’t offer a learning management system, LearnDash is an excellent alternative for anyone looking to sell online courses.

    With LearnDash, you get a drag-and-drop course builder and multimedia support to run webinars, videos, and tutorials. The plugin also lets you add badges and rewards using different gamification tools. This helps make your lessons engaging.

    Pricing: LearnDash premium plans start from $199 per year for 1 website.

    7. ConvertKit

    ConvertKit Email Marketing Service

    ConvertKit is a popular email marketing and eCommerce platform built specifically for creators. They allow you to easily sell digital products, run paid newsletters, sell recurring subscriptions, and even set up tip jars.

    The best part is that you get an integrated eCommerce and marketing platform, so when someone becomes a customer, you can send them automated email sequences, targeted marketing, and other subscriber engaging content.

    ConvertKit is a hosted platform so it comes with a landing page builder, custom form templates, and it allows you to get unlimited traffic.

    Pricing: ConvertKit is free to use for up to 300 subscribers, but your pricing will increase based on the number of subscribers you have. To access the CreatorPro tools, you will need to upgrade to the $25 per month plan.

    8. Teachable

    Teachable

    Teachable is another popular course-building platform that lets you create and sell online courses. You can use it as an alternative to Gumroad to market and promote your online courses.

    It is similar to LearnDash and provides a complete solution for creating courses. What makes Teachable different is that it is a hosted platform, so you don’t have to worry about managing any additional software or installing updates.

    Teachable is beginner friendly to use and offers a drag-and-drop course builder. It also takes care of online payments and offers multiple payment options. Other features provided by the service include integration with third-party marketing and analytics tools.

    Pricing: You can get started on Teachable for free, but it will charge a $1 to 10% transaction fee. There are also premium pricing plans starting from $29 per month.

    9. Thinkific

    Thinkific

    Thinkific is similar to Teachable and also a self-hosted platform to sell online courses. It is easy to use and is a fitting Gumroad alternative to creating courses.

    It offers a drag-and-drop course builder that is very easy to use. Plus, you get different themes and templates to get started quickly. Thinkific also allows you to create subscription-based programs, landing pages, and a membership community.

    Besides that, it also easily integrates with 40+ different tools and platforms like MailChimp, Shopify, Google Analytics, and Salesforce.

    Pricing: Thinkific offers a 6-month premium plan for $196.

    10. Payhip

    Payhip

    Payhip is another Gumroad alternative that you can use as an eCommerce platform. It lets you sell digital downloads, online courses, memberships, coaching, and physical products.

    Besides that, it offers a lot of customization, which isn’t available in Gumroad. For instance, you can use the store builder to create a beautiful and professional online business site within minutes.

    If your customers are from Europe or the United Kingdom, then the platform will take full responsibility for complying with the value-added tax (VAT) laws. It will automatically detect their location and apply the correct sales tax or VAT amount to their transaction.

    Other features offered by Payhip include different marketing tools to boost conversion rates. For example, it lets you add coupons, cross-sell or upsell products, order bumps, add referrals and affiliates, and show customer reviews to add social proof.

    Pricing: Payhip offers a free plan that you can use to get started. However, Stripe and PayPal will charge a 5% transaction fee in the free plan. There are also premium plans starting from $29 per month.

    11. Sellfy

    Sellfy

    Sellfy is the next Gumroad alternative on our list, and it helps you create a storefront for selling digital and physical products. It lets you promote your products anywhere online. Simply embed the Sellfy checkout process on your own website and market your digital goods.

    You can also launch a print-on-demand merchandise store using Sellfy. Simply design, create, and sell using different storefront themes. Other than that, you can use it to sell digital downloads and subscriptions.

    What makes Sellfy different from Gumroad is that it includes built-in marketing features like upselling, email marketing, and discount codes. Plus, it offers more customization features compared to Gumroad.

    Pricing: Sellfy offers premium pricing plans starting from $22 per month (billed annually), and you get a 14-day free trial.

    12. BigCommerce

    BigCommerce

    BigCommerce is a popular eCommerce platform, and you can use it as a Gumroad alternative.

    It is a fully hosted eCommerce service that easily integrates with WordPress. You can use it to sell all kinds of digital and physical products.

    The service automatically creates different pages for your store, including a shopping cart, sign-in page, account area, sales page, and more.

    What makes BigCommerce different is that it lets you sell products across various channels like Amazon and social media platforms like Instagram. Plus, the eCommerce solution doesn’t charge any transaction fees and lets you choose from multiple payment gateways.

    Pricing: BigCommerce pricing plans start from $29.99 per month, and you get a 15-day free trial.

    13. Shopify

    Shopify website

    Shopify is the last Gumroad alternative on our list. It is an all-in-one eCommerce solution that you can use to create an online store. It offers more customization options and third-party integrations compared to Gumroad.

    With Shopify, you don’t have to worry about web hosting, security, backups, updates, and caching. It does this for you, so you can focus on uploading products to the site and promoting them.

    Shopify offers pre-built themes that you can use to set up a store. Plus, it makes it easy to manage inventory and accept online payments from a single platform. You can even use Shopify with WordPress to sell products online.

    Pricing: Shopify pricing starts from $1 per month with the Basic plan. However, if you want low transaction costs and advanced features, then there is an Advanced plan costing you $299 per month.

    Which Gumroad Alternative Should You Use?

    After comparing different eCommerce solutions, we believe MemberPress is the best Gumroad alternative. It is a paid WordPress plugin that helps create subscriptions, sell digital products to premium members, and set up online courses without any extra fees.

    If you’re looking for a free alternative to Gumroad, then we highly recommend Easy Digital Downloads. You can use its free version to get started and start selling digital products like ebooks, PDFs, spreadsheets, videos, digital art, apps, plugins, and more.

    If you’re looking for a simple solution that lets you accept online payments without the complexity of creating a shopping cart, then WP Simple Pay is your best option.

    On the other hand, if you’re looking to create an online store from scratch and have full control over it, then WooCommerce is the best option. You get more customization options, online store management features, and integrations compared to Gumroad.

    We hope this article helped you find the best Gumroad alternative. You may also want to read our guide on how much does it cost to build a WordPress website and must have WordPress plugins for business sites.

    If you liked this article, then please subscribe to our YouTube Channel for WordPress video tutorials. You can also find us on Twitter and Facebook.

    The post 13 Best Gumroad Alternatives (Cheaper + More Powerful) first appeared on WPBeginner.